Chocolate chip Cookies:

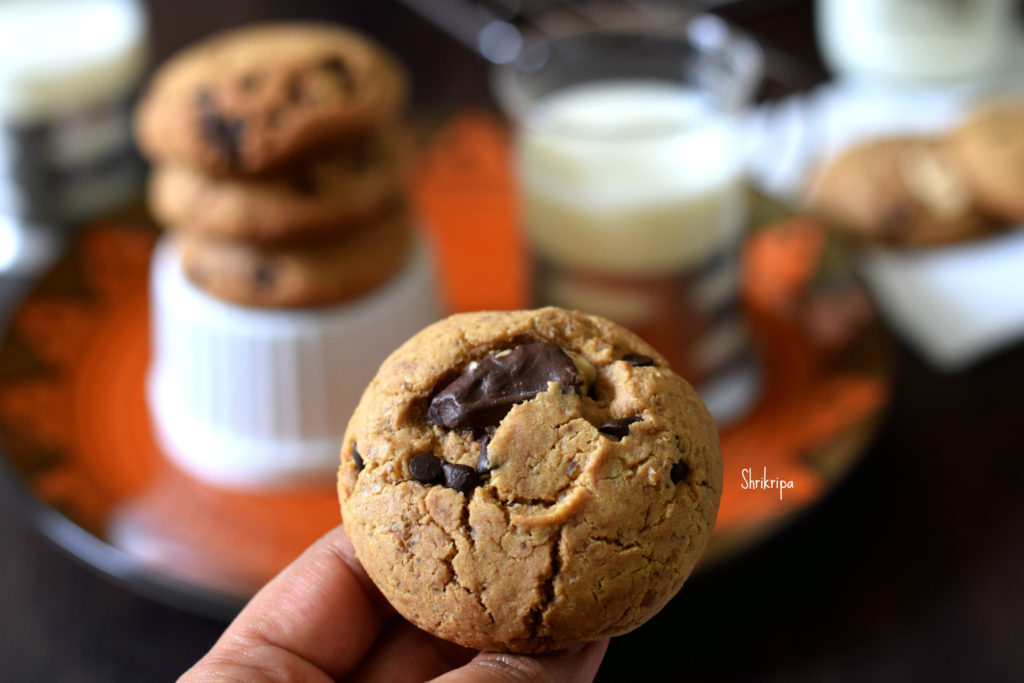
Who doesn’t like Choco chip cookie? Let alone like, it is very difficult to resist. If it is guilt free, it is an added boon to relish these beauties. I usually don’t encourage my kids to have non-healthy stuff. It is the main reason I developed this recipe with lot of care.

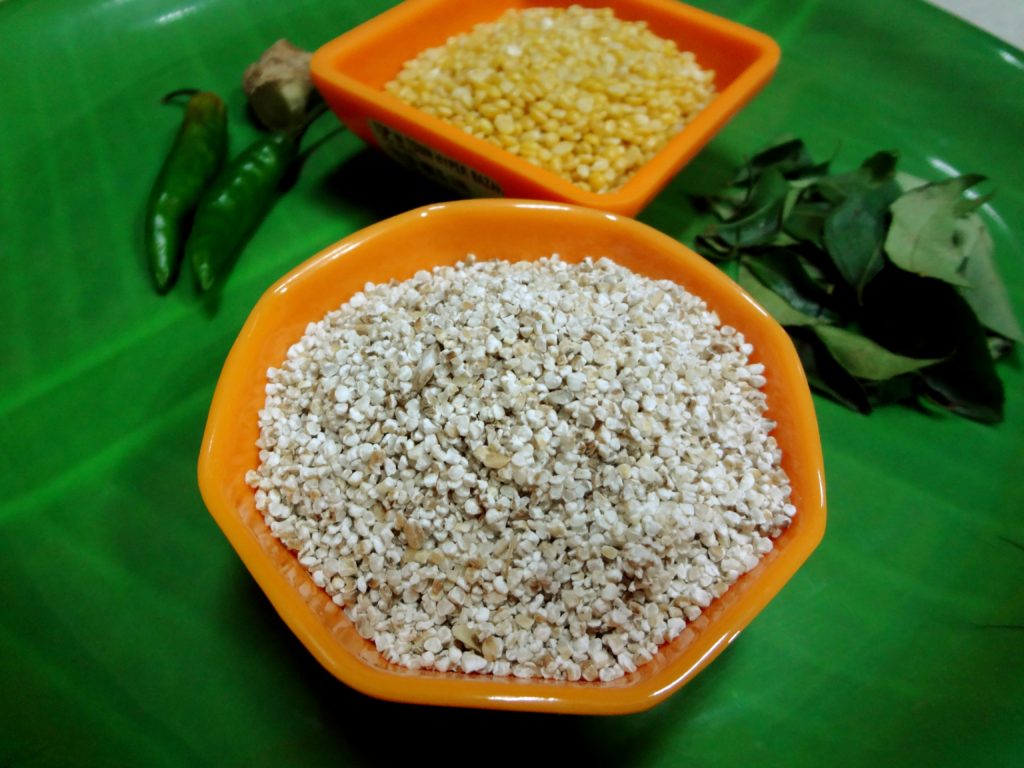
It is a crunchy from the outside and soft from the inside kind of cookie. It has a whole wheat as well as protein rich Roasted gram powder, which is very nutritious and known as Sattu in India. Sattu is a powder form of roasted gram or Bengal gram or hurigadale in kannada. Added to this, I have added clarified butter/ ghee and ghee residue as well. To give more chocolatey appearance, added Choco chunks as well as chopped cooking chocolate.

How I proceeded is –

Ingredients:

Whole wheat flour – 1 cup

Roasted gram flour/ Sattu – ½ cup

Baking soda –  1 tea spoon

Sea salt – ½ tea spoon

Choco chip – ½ cup

Chopped chocolates – ½ cup

Ghee – ½ cup

Ghee residue – 2 table spoon (optional)

White sugar – ½ cup

Brown sugar – ½ cup

Eggs – 2

Vanilla extract – 1 tea spoon

Instant coffee powder – 1tea spoon

Method:

-Pre heat Oven at 180 °C, Line the baking tray with the butter paper.

-Take one bowl, dry whisk all the dry ingredients starting from Whole wheat flour, Sattu flour, Baking soda, sea salt, and Choco chips and chunks.

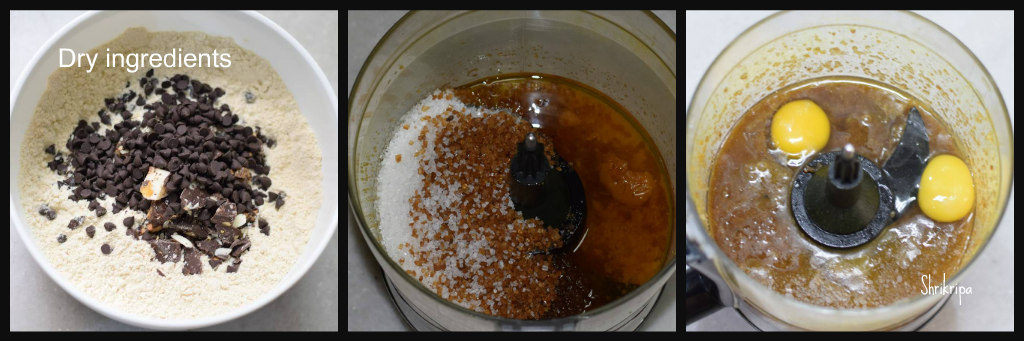
-In a Food processor or in another bowl, beat sugar, ghee and ghee residue first.

– Add in egg, vanilla, coffee and beat until it is frothy.

-Now pour this liquid over dry ingredient and mix by using spatula or clean hand.

– Scoop out the dough and place over the lined cookie sheet.

-Bake this in a pre-heated oven for 15 minutes or until done.

-When it is done, take out, cool a little and then store this in an air tight container.

-This yielded 18 big size cookies for me.

NOTE:

-Alternatively you can use only All purpose flour or whole wheat flour as well.

-Ghee residue is a moist, brown coloured by-product formed after preparing ghee from white butter.


Kashaya / Herbal drink:

Kashaya is a herbal drink; unlike tea or Coffee, it is a decoction of a group of herbs used in our day-to-day cooking. This recipe is my dad’s favourite one, and we have followed this recipe for ages. Kashaya is an alternative drink for people who don’t want to consume Coffee or tea due to various reasons like acidity etc. It has multiple health benefits too.   


I usually prepare this powder and keep it as an alternative drink to tea or Coffee and usually prefer this in monsoon season.

To prepare Kashaya powder:

Ingredients:

Coriander seed – 200 grams.

Cumin – 100 grams

Fenugreek seeds – 2 tsp.

Fennel seed /saunf – 2 tbl sp

Whole wheat /broken wheat – 3 tbl sp

Finger millet /Ragi  OR Whole Moong – 2 tbl sp

Black pepper – 2 tsp.

Cardamom – 5

Method:

-Measure everything and keep it ready.

-Slowly dry roast everything one by one till it emits an aroma.

-Spread these roasted items on paper and cool.  

-Now take one dry mixer grinder jar and powder this.                 

-Cool completely and store this powder in an airtight container.             

To prepare Kashaya:

Ingredients:

Water – ¾ cup

Kashaya powder – 1 tsp

Sugar or jaggery – as required

Milk – ¼  to ½ cup

Method:

-Boil water by adding Kashaya powder and sugar or jaggery.

-After boiling it for 2 to 3 minutes, add milk and remove it from the flame.

-Sieve the mixture and enjoy your herbal drink or Kashaya.

NOTE: You can omit whole wheat and replace it with the Whole moong or add moong as an additional ingredient. 

Paddu:

Paddu or Guliyappa is a very popular South Indian breakfast item. Which is nothing but Dosa batter or idli batter which is seasoned with some onion and poured and cooked in an appe pan, which normally has 7 or 9 small round molds. Traditionally, people use left over batter to make this delicacy to finish off the batter. But, personally I prefer to make fresh batter to make only this, because my family just loves this, and we enjoy our dose of guliyappa in any given point of time.

These super tasty roundels have many names in south Indian kitchens. In coastal region we call this as Guliyappa, In Bangalore, it is known as Paddu. In Tamilian house hold it is Kuzhi paniyaram, Telugu it is Gunta ponganalu, Malayalm it is Paniyaram. All the above which means that, a dish which is cooked in an appe pan.

My procedure goes like this-

Ingredients:

Dosa rice – 2cups

Urad dal – ½ cup

Poha – one fist full

Salt

Spring onion – as needed (onion and greens)

Coriander leaves – as needed

Ghee/ oil – for cooking

Method:

-Wash and soak rice, urad dal and poha. Soak for 2 to 3 hours.

-Grind this into smooth batter by adding salt.

-Consistency should be a little thicker than Dosa batter.

-Ferment this over night or according to your climatic conditions.

-Next day, add chopped coriander and spring onion and mix in.

-Heat appe or Paddu pan. When it is hot, pour ¼ tsp of ghee or oil.

-Pour the batter in each mold and close the lid and cook for a couple of minutes.

-Flip the side and cook upper side as well.

-Serve with chutney. We normally prefer Zucchini chutney as a side dish for Paddu.

-Repeat the process and enjoy your breakfast or brunch or dinner.

Note: If you want to make it vegan, use any vegetable oil and skip ghee.

Mango Trifle:

Trifle, name itself brings a smile on my face. I started my non-Indian dessert preparation journey from this recipe and it has come a long long way. It has been almost 20 years now. When I was in my native, exposure to the outside world was minimal and our day to day preparations were all traditional and prepared with locally available ingredients or seasonal vegetables. After my wedding, my opportunities got widened as well as the encouragement. It was not an internet era. My sources were library books and my notebook and pen. I used to read about the different cuisines, uses and ingredients. In the meantime, I tried to implicate all of that knowledge in my cooking.

Trifle is an English dessert, which is cold and creamy, that contains 3 layers. Here I usually use Sponge cake at the base, then vanilla milk custard which is topped with any seasonal fruits. Mostly Mango or strawberries. Here sponge cake will be soaked with hot custard and will swell like a thick foam. It is cooled under refrigeration and while serving, last layer will be added. It is a party pleaser and a very good idea for a large gathering and usually is loved by all. Prepared this easy dessert to celebrate 6th Anniversary of our Foodie group in  Facebook.

Ingredients:

Sponge cake – ½ kg

Custard powder – 4 table spoons

Milk – 1 litre

Sugar – ½ to ¾ cup (I usually prefer light sweet)

Mango fruits – 3 to 4

Method:

-Take one flat, rectangular or square glass dish or baking dish.

-Place the first layer.  Slice the sponge cake and place flat at the bottom of the dish.

-Prepare custard first:

-Pour milk to the vessel, remove half cup of milk from this vessel, mix in custard powder and make a paste and keep it ready.

-When milk starts boiling, add the custard paste and boil for some more time (2 to 3 minutes)

-Mix in sugar and stir nicely.

-Pour this hot custard over the first layer (over the sponge cake)

-Sometimes sponge cake pops up, while pouring the custard. It is ok. After some time, you will be able to press it back.

-Now cool it completely, cover with the cling wrap and keep it under refrigeration to cool.

-It takes almost 4 to 6 hours or overnight is also fine.

-Next is Fruit layer: Chop the fruits into small chunks. Remove all the pulps which is attached to the inner seed as well.

-Mix in couple of spoons of sugar and keep it in the fridge.

-Before serving, remove cling wrap and spread the fruit all over the custard.

-Take one serving spoon, dig it up to the bottom, take out all three layers, while serving and enjoy.

-If you are making this for a larger crowd, you can prepare this in advance and serve.

Totapuri Mango Pickle:

Totapuri is a speciality of southern states of India. These mangoes are large in size, slender, oblong and has a prominent beak like pointed tip. The skin of the mango also tastes really good  and sweetish.

Totapuri pickle is unusual. Unlike other mangoes Totapuri is not that sour, usually used in salads, mango rice or raw mango jams. It is also known as Ginimoothi because of its pointed end. This pickle is not that hot and goes very well with curd rice or roti’s. I used to enjoy this pickle from my childhood and now my daughters also like this as much as I do. I learnt this recipe from one of my cousin sisters, who used to gift me a bottle of this pickle every year and hence has fond memories attached to it too.

Ingredient:

Raw Mango –  3 kgs (Totapuri variety works out well)

Sea Salt – 1 to 1 ¼ cup

For pickle Masala:

Dried red chillies – 50 (Byadagi variety)

Black pepper corns – 2 tea spoons

Mustard – ½ cup

Hing – peanut size

Sesame seed – 2 tea spoons

Turmeric – 3 tea spoons

Seasoning:

Sesame oil – 2 table spoons

Refined oil – 2 table spoons

Mustard – 1 table spoon

Curry leaves – 2 to 3 springs

Method:

-Wash and remove upper stalk, chop the mangos into small bite size pieces. Discard inner seed.

-In small tawa, dry roast crystal/sea salt until it becomes crisp and white in colour. Cool.

-Take one thick bottomed tawa, get it ready for seasoning. If you are accustomed with the taste of sesame oil, go ahead and use only sesame oil. Otherwise take how I have listed.

-Heat oil, splutter mustard, add curry leaves, fry for 2 minutes. Add Mango pieces and cook by mixing in between until skin becomes pale.

-Switch off and mix in dry roasted salt and keep aside for 3 to 4 hours or until it is cool.

-In the meantime, prepare for the pickle masala.

-Take the tawa, in which you have roasted the salt at the beginning.

-Dry roast one by one like this. First mustard, then sesame seed, next pepper corns, hing.

-Now take one tea spoon of oil and fry red chillies in a low flame until it is crisp. Cool it.

-When it is cool, add turmeric with these ingredients and make powder.

-At this time, mangoes will be ready, and water will be oozed out.

-Mix the powder with mango pieces. Fill the pickle into sterilized bottle and seal.

-After couple of days, you can start using this pickle.


-Store this in a refrigerator for longer shelf life.

-Enjoy with Curd rice, Roti or with any breakfast.


Hog Plum/Ambatekayi Gojju:

We call hog plum as “Amtekai” in Kannada and as “ambate” in our local language. In our region you will find 2 varieties of hog plums. One is Wild variety which is also known as Indian sour hog plum and the other one is known as grafted or Kashi Amtekai/ hog plum.  Grafted variety is nothing but Hog plums which we normally find in South America or South East Asia. Also known as Ambarella or Golden apple which belongs to the specie – spondias dulcis.

Wild variety is normally used in pickle making or as a souring agent in some of the traditional curries because of its sour taste. When it matures, seed becomes hard and skin becomes thin. Here I have used normal hog plum, which has a fibrous core and when it matures, skin will turn green to yellow and sweetish in taste. People use this as a fruit as well.

Gojju/ Gojji is an essential side dish of our community. Which is a semi solid, tamarind based, sweet and sour curry, which can be relished as it is with hot rice, or as an accompaniment with curd rice as well. Some of the gojjus taste good with Dosa or Idli as well.

Ingredients:

Hog plums – 7 to 8

Jaggery – 2 to 4 table spoons

Salt

Red chilli powder – 1 tea spoon

Seasoning:

Coconut Oil – 1 table spoon

Mustard – 1 tea spoon

Garlic cloves – 8 to 10 (sliced)

Curry leaves – 1 spring

Method:

-Wash and cook hog plums in sufficient water by adding salt, jaggery, red chilli powder in a pressure cooker.

-One whistle is more than enough for this veggie to cook.

-When it is cooked, outer skin layer will separate, inner flesh will become soft.

-Mash a little by using back of the serving spoon, to give a texture to the curry.

-Mix everything and check for salt, hot and sweet. Add whatever is needed.

-Curry should taste tangy, hot and sweet.

-Boil this and add seasoning.

-Heat oil, splutter mustard, add sliced garlic. When garlic becomes brown, add curry leaves and pour this over curry.

-Serve as a side dish with rice or curd rice.

Note:

-Usage of garlic is purely optional.


How to preserve Jack fruit Seed:

Yes!! You heard it right. I am using jackfruit seeds in my cooking all year round by preserving it in frozen form. It is rich in anti-oxidants, vitamins, minerals, calcium, potassium, carbohydrate and starch. So, when we eat the fruit and then throw away the seeds, you are discarding this power house of goodness.

In our region, people have been using jackfruit seeds in their traditional cooking for ages. After consuming the fruit, our elders used to apply some mud paste and used to pile it up in one corner of the veranda. In rainy season, they used to use these seeds as needed for cooking, by making Rasam, palya, sambar by mixing with some other vegetables or greens. They used to prepare some desserts as well.

I never used to like this when I was young, and never realised the importance of it’s goodness. After marriage, I started using these seeds in my cooking, because of my husband, who likes jack seed in some of our traditional recipes. I will post our favourite recipes in the coming days one by one.

Method:

-After consuming or using the fruit bulbs, Collect all the seeds.

-Remove outer slimy cover and discard.

-Wash the seeds and keep aside (to air dry) for 3 to 4 days.

-After 3 to 4 days, seed jacket will become brittle and it will be easier to peel now.

-Take one rough kitchen cloth and one stone pastel or pressing stone.

-Keep individual seed and hit hard. Outer jacket will break, and inner seed will crush.

-Collect all the crushed seeds and throw away all the outer jacket.

-Store the seeds in zip lock for future use and freeze it in a freezer compartment.

-This way, frozen seed will be ready and available to cook throughout the year, until next season.

Jackfruit kottige:

Halasina hannu is Jack fruit and Kottige is nothing but idly or kadubu,also known as Halasina Hannina kottige Or Gatti in local language. In which mixture is wrapped in pre-wilted banana leaves like pockets and steam cooked. Like bottle gourd kottige, which I have posted earlier, it is not a savoury kind, it is sweetish and bustling with jackfruit flavour which is enhanced even more with the usage of banana leaves wrap.

Jackfruit season is considered as a feast time in our region. Usage starts from tiny raw fruit form to ripened stage. You will find couple of curry recipes in my blog which I have posted earlier as well as Ripe jack fruit Dosa.

Now we will see how to make kottige, in our traditional method.

Ingredients:

Dosa rice – 2 cups

Jackfruit – 2 cups (cleaned)

Fresh coconut gratings – 1 cup

Grated jaggery – ¼ to ½ cup (according to your taste)

Ghee – 1 table spoon

Salt

Method:

-Wash Dosa rice (white raw rice) and soak for 2 to 3 hours.

-If you are using banana leaves, wilt the leaves on gas flame, wipe with a wet cloth and keep it ready.

-If you are using idli mould, grease the moulds with little ghee and keep aside.

-Chop jack fruit, separate fruit pods, remove outer thin white fibres as well as inner seed and take only yellow fruit part.

-Mix grated coconut and jaggery as well as ghee and keep aside.

-Grind rice into fine paste by adding very little water and salt.

-Now take jack fruit little by little and whip a little to chop roughly by using same mixer jar in which rice batter is ground.

-Take one wide bowl, mix in ground batter, roughly whipped fruit pulp, coconut-jaggery mixture.

-Mix nicely, spread the wilted banana leaves and pour one spoon and fold it like a sealed pocket. (refer the below pictures)

-Assemble all these packets in a water filled idli steamer or Momo steamer and cook this for half an hour to 40 minutes in medium to slow heat.

-If you are using idli mould, pour required amount of batter and steam cook like an idli.

-Relish this jackfruit idli or kottige with ghee or coconut and ginger chutney.

-We usually steam cook this on the previous night and keep it ready for the next day’s breakfast. In this way, It will be easy in the morning as now you just have to prepare chutney and serve.


Barley Pongal:

Come Summer, our ancestors used to drink Barley water to keep their body cool. Otherwise Barley gruel or water is used mainly during illness- diarrhoea, urinary tract infection. As it is a natural diuretic, it increases urination and helps to flush out any toxins or infection causing bacteria from the body. Here I have used this super cool grain in making Pongal, south Indian breakfast dish.

Barley has two varieties, one is with outer cover which is called hulled barley and other one is more processed, without outer cover and is called De hulled or pearl barley. Compared to hulled, pearl is little less in fibre but cooks faster and is ideal for our day to day cooking.

Barley is known for its low glycaemic index, which makes it an excellent option for diabetics. Over all it is good for all and we can include it in our day to day cooking in one form or the other and take a benefit from this age-old grain for sure.

Although Barley is very good for health, it contains gluten and people who have sensitive digestive system or are allergic to gluten should avoid this grain.

Recipe is like this-

Ingredients:

Barley Rawa/ grits – 2 cups

Green gram/moong dal – 1 cup

Green chillies – 2

Ginger – ½ inch

Grated coconut – 3 table spoons

Ghee – (to serve)

Seasoning:

Ghee – 1 table spoon

Mustard – 1 tea spoon

Cumin – ½ tea spoon

Hing – ¼ tea spoon

Curry leaves – 1 spring

Method:

-Dry roast moong dal for 2 to 3 minutes.

-Wash moong and barley grits together and keep aside for a while.

-In the meantime, prepare for the seasoning.

-Take one cooker vessel, do seasoning, heat ghee, splutter mustard, add cumin, hing, curry leaves, chopped green chillies, chopped ginger (slivered) and fry for two min.

-Add water (around 8 to 9 cups) and boil. Add salt, coconut gratings and keep it for boiling.

-Add soaked dal and barley mixture and close the cooker lid.

-Cook for 3 whistles and switch off the gas.

-When pressure releases, open the cooker lid, give a stir and adjust the consistency.

-Pour a couple of spoons of ghee to enhance the taste or you can completely skip the ghee if you are into low calorie diet.

-Serve with coconut-ginger flavoured chutney.


Simple Bele saaru /Rasam:

This Rasam is a very good option, if one has to cook no onion and no garlic meal. Usually it is an option for us during any festivity or “No mood to cook” meal. Olden days usage of onion or garlic was a taboo in our community and our grand moms used to prepare this kind of Rasam, which we call as saaru in local language. My hubby has fond memories attached to this Rasam, which he used to relish as a small child in his grand mom’s place and he usually asks for it and calls this Rasam as Doddajji saaru (grandma’s saaru) to signify. It is a plain Rasam, with ginger and hing flavour. In our region, we see this Rasam in some of the temple meals as well. If it is ginger flavoured one, no Rasam powder will be used and Rasam will be yellow in colour, due to the addition of turmeric and dhal.

DSC_0002_Fotor

Ingredients:

Toor dal – 1 cup

Tomatoes – 3 to 4

Green chillies – 4 to 6

Hing – peanut sized

Ginger – ½ inch (slivered)

Curry leaves – 2 springs

Salt

Jaggery – ½ to 1 tea spoon

Turmeric – ½ tea spoon

Tamarind – 1 tea spoon

Coriander leaves – little (optional)

Seasoning:

Coconut oil or ghee – 1 table spoon

Mustard – 1 tea spoon

Red chilli – 1

Curry leaves – 1 spring

Method:

-Wash and cook toor dal in a pressure cooker, mash a little and keep aside.

-Soak tamarind, chop tomatoes, green chillies and ginger.

Ribbet collage

-Take one Rasam pot (I normally use clay pot) and take 3 to 4 cups of water, tomato, green chillies, ginger, hing, curry leaves, turmeric, salt and jaggery.

-Cook this until everything cooks properly.

-Now add toor dal and mashed soaked tamarind.

-Boil this and adjust the consistency and check for salt, ginger and green chilli. If needed adjust by adding extra.

-When it is boiled, add chopped coriander leaves.

Ribbet collage 1

-Season with oil or ghee by spluttering mustard, red chilli and curry leaves.

-Serve with hot rice .