How to Chop Fresh Bamboo Shoot/Kanile:

Kanile or Bamboo shoots are a seasonal, hollow grass which is a young shoot of Bamboo and it is available in a very short period of rainy season. It has very distinct subtle, earthy flavour with crunchy texture while eating. It is considered as one of the health foods because of its high contents of dietary fibres,minerals and low in fat.

pic 2

Preparing Bamboo shoot for cooking is little bit of a work.

Traditionally We follow 2 methods:

 One is Chopping and soaking in fresh water for 3 days by changing the water regularly every day and using.

I personally don’t prefer this method, because it emits little odour of bamboo shoot and prepared curry will also contain that odour.

  I usually follow this second method, which I learnt from my father in law, who was super knowledgeable in all these traditional cooking procedures.
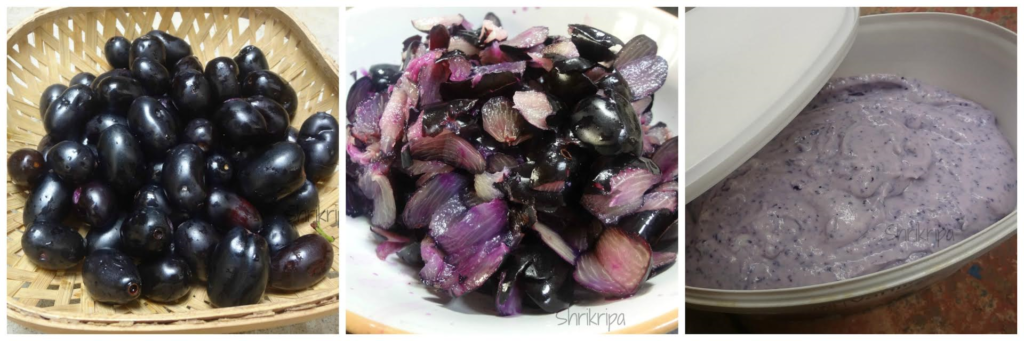
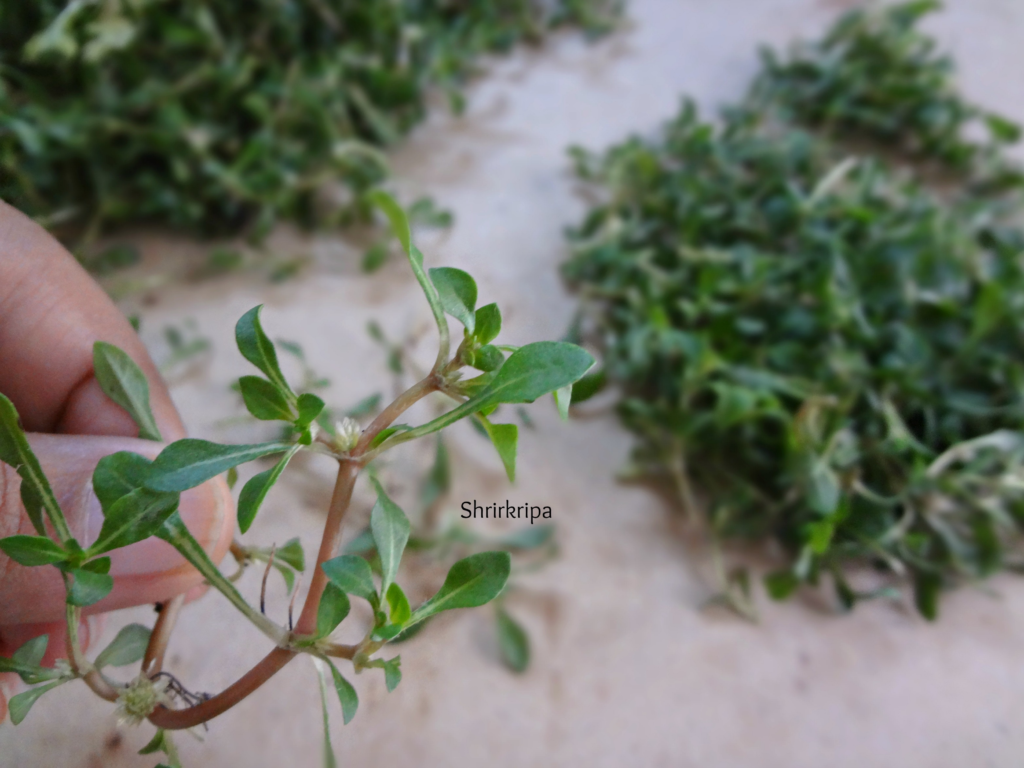
  At first take harvested Bamboo shoots which we get in hilly sides, some shops or in all Mangalore stores of Bangalore in this season.

I usually buy my stock from the Mangalore store. After buying, remove outer tough layer, which is brown in colour by peeling one by one starting from the bottom.

 You can use your hand to peel the outer shell.
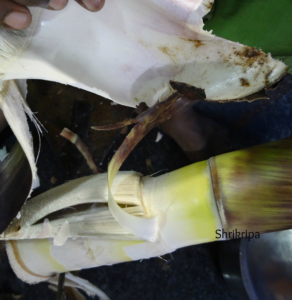
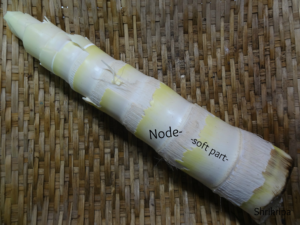
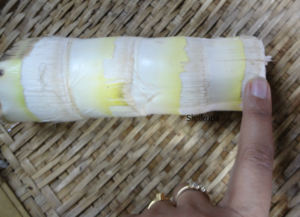
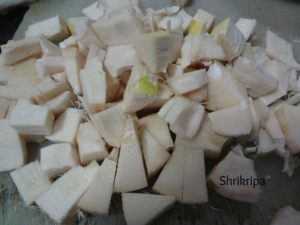
pic 3    pic 4

  After removing this outer woody shell, you will see only inner core which will be white in colour.

This white inner layer will have 2 parts. One is soft edible part and in between nodes.

Nodes will be thick, little sturdy and can be used in pickle making by adding lemons or mangoes.
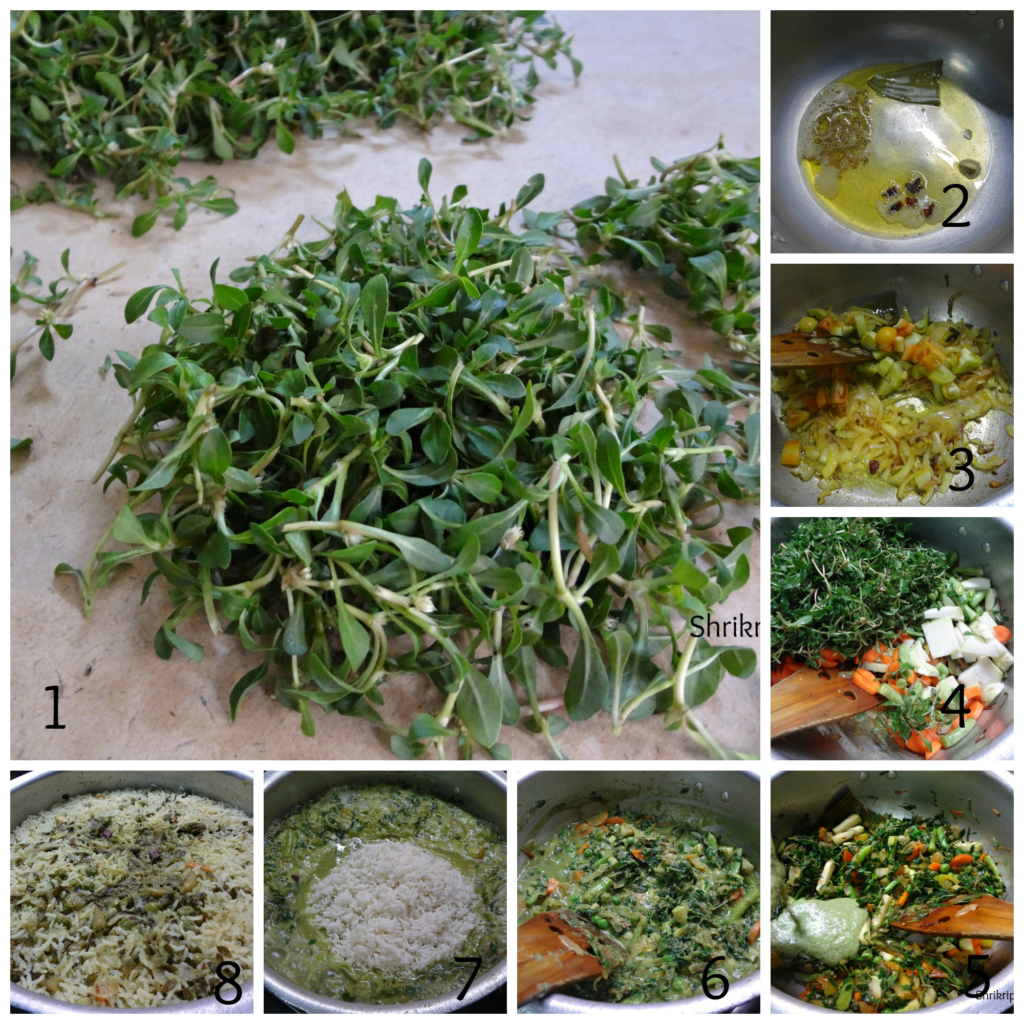
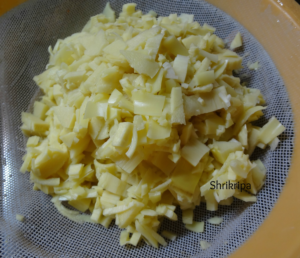
Now this is ready to chop. Take one vessel, which is filled with water and chop and immerse it in a water.

 You can either chop circular fashion or bit size pieces. It is up to one’s choice.
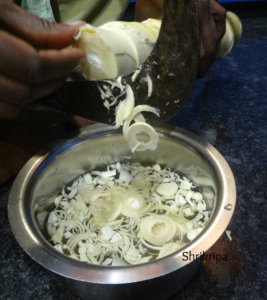
pic 1     pic 5

 Start to chop from top of the conical area, proceed until you find a hard node. When you feel the node (here nodes were thick from 5th onwards) discard the node by cutting that part and proceed the chopping.
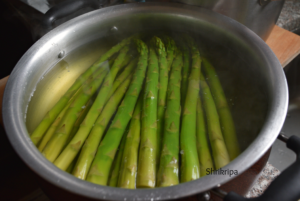
pic 6   pic 8

Now Take all the chopped bamboo, sieve the immersed water and put fresh water and cook this in a cooker for one whistle.
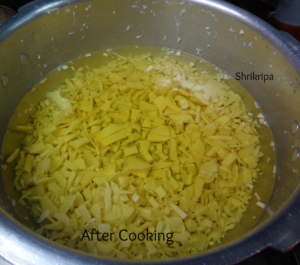
pic 12   pic 13

 When you open the cooker lid, you will see the water in yellow shade, discard this water by draining.

pic 14

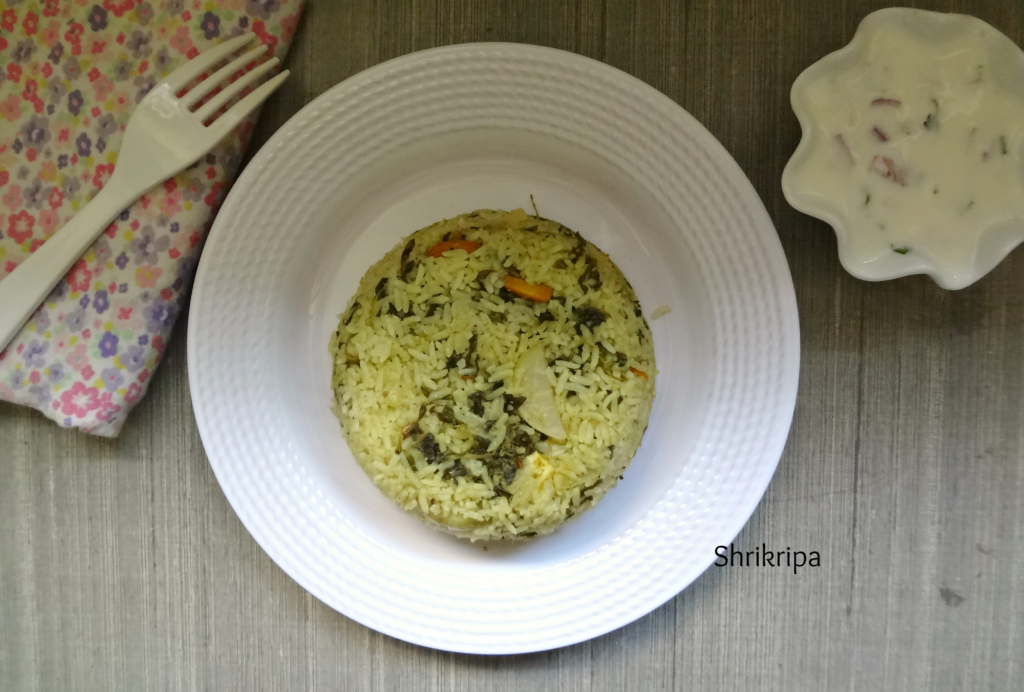
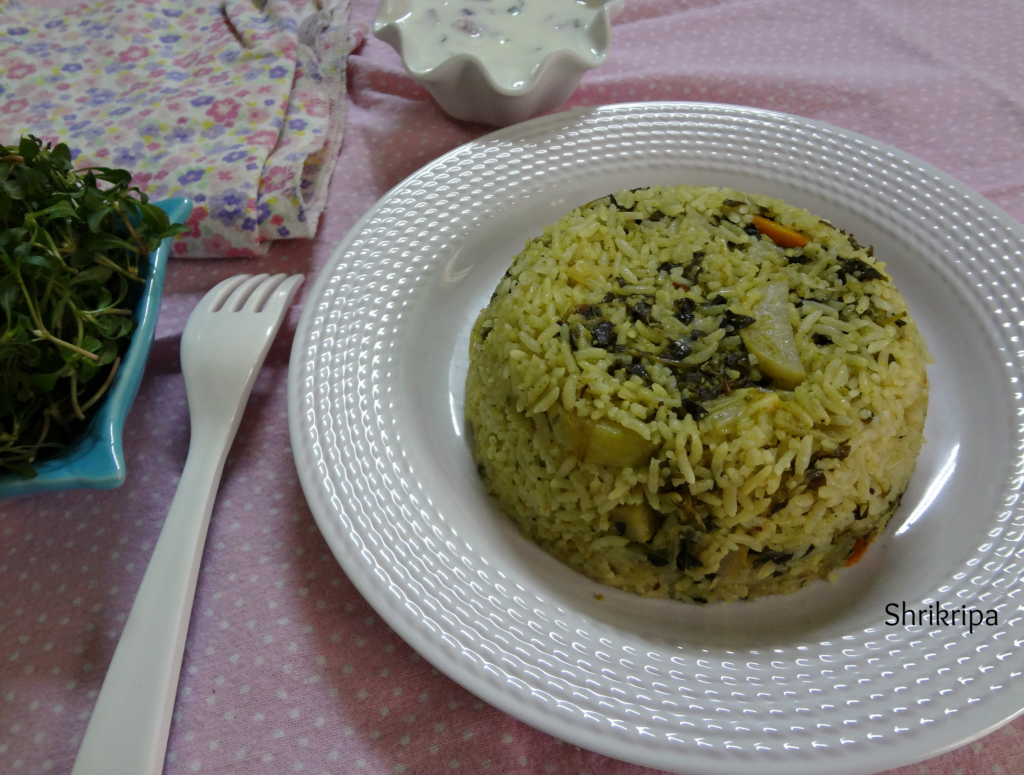
Now collect the cooked Bamboo shoot and it is ready to cook by removing its impurities and natural bitterness.Use it in whatever dish you want to make.

How to Use nodes in Pickle making –

pic 9  pic 10

-Collect nodes, chop however you want and proceed with the above procedure as bamboo shoot. Cook in a pressure cooker with water and strain the yellow water, cool completely and use in pickle making.


Zucchini Chutney:

Zucchini, a member of gourd family is a popular summer squash, also known as courgette. Personally I like this spongy veggie and include this in so many Indian recipes.

Zucchini chutney is one of them and it is an excellent side dish for any Indian flat breads, Dosa, idly or Paddu.

pic 2.1

Ingredients:

Zucchini – 1

Garlic – 8 – 10 cloves

Green chilies – 3 -4

Salt

Oil – 1 tbl spoon.

Coconut – 1 small cup

Raw mango or tamarind –If mango (2 “small piece) If tamarind (½ tsp).

Seasoning: Oil – 1 tsp, mustard – ½ tsp and curry leaves.

Method:

  • Wash, chop zucchini into pieces.

pic 1

  • Take one small kadai; fry these pieces, garlic and green chillies by putting little oil until it wilts.
  • Switch off the gas, leave this for cooling.

pic 3  pic 2.1

  • When it cools down, add coconut, salt, either mango pieces or tamarind. Grind all this into a smooth paste by putting required amount of water.
  • If you want, add seasoning with mustard and curry leaves.


Jack Fruit Dosa:

Jackfruit Dosa is known as “Halasina hannina dose”. It is a traditional recipe of Mangalore. Here we use Soaked Raw Dosa rice and ripe jackfruit to make the batter. we can call this as a Jack pancake and serve with honey or with ginger chutney.

pic 5

Ingredients:

Dosa rice – 2 cups

Cleaned jack fruit – 1 big bowl

Salt

Method:

-Wash and soak Dosa rice in sufficient water for 3 to 4 hours.

– Chop the jack fruit, remove bulbs and separate outer cover and inner seed.

pic 1

– Collect only the outer yellow shell and put it in a mixer grinder, give couple of whipping sessions and remove.

-So that while grinding it will be easy to handle.

– Now take soaked rice, ground or crushed fruit, put little water and grind this in to a smooth paste by adding sufficient salt. Batter should be a little thicker than normal Dosa.

pic 2

-If you want to use this batter for the next morning, please refrigerate the same and use for the next day.

pic 3

– make Dosa’s by using hot iron griddle. No need to ferment this batter. Use ghee while roasting this Dosa. It should be a little thicker than normal Dosa. (thinner than set Dosa). When it is cooked, flip it and cook on the other side.

pic 4

-serve this with honey or with ginger chutney.

Note:

For ginger chutney: Fry red chillies with little oil and grind it with coconut, salt, little tamarind and piece of ginger.


Homemade Gelato:

Gelato is a super-rich, creamy, intensely flavoured natural ice cream. ”Gelato “is the Italian word for an ice-cream, is defined in English as a “Soft ice cream”.

It contains milk cream, sugar and puree of fresh fruit or nut.

Over ripe fruits or Unused fruits are a very good option to prepare this intense fruit flavoured gelato. Here I have used Indian black plum or Jamoon/Jamun fruit and locally we call this as “Nerale hannu” in Kannada.

pic 1

Ingredients:

Jamoon/Jamun fruit – 250 gms

Condense milk /Milk maid – 400 gms

Fresh cream – 200 ml. (Used Amul brand)

Method:

          Wash Jamoon fruit remove seeds and keep aside.

          Take one mixer jar, churn this fruit only for small interval .Here you should use “Pulse” option in mixer grinder, so that fruit will be like small chunks and will not become puree.

pic 2

          After this, mix in cream, condensed milk. Whip until you get nice homogenous mixture.

          Store this in an ice cream container and freeze for 5 to 6 hours and enjoy your melt in a mouth flavourful treat.


Mango Jam:

Who doesn’t love Mango? Unfortunately, all good things only last a while, but no worries, one can preserve mango by making some homemade jams to savour even after its season ends.!

I started making this Jam almost 3 years back and want to share my recipe before it vanishes from the market for this year. So, yesterday I made this and I’m sharing it with you all-

Thanks to my dear friend Poornima, who provides me with a whole lot of home grown organic Mango’s from their garden.

collage

Now I will proceed towards the procedure-

Ingredients:

Mango’s – 500 Grams

Sugar- 500 grams

Saffron – 8 to 10 strands

Red chilli flakes – 1 teaspoon

Method:

 Wash, Peel the mangoes and chop.

pic 1   pic 2

  Make puree by putting it in a mixer/ juice jar without adding any water.

pic 3   pic 4

  Sieve this pulp to remove fibres (Here I have taken little fibrous home-grown variety)

  Collect the smooth pulp and heat it in a low fire, until it starts boiling.

pic 5   pic 6

 Add sugar, saffron and red chilli flakes and cook until it is done.

pic 7  pic 8

  To check the doneness, take some water in a small bowl, drop the cooked mixture in it, immediately it should form a thick mass. If it dissolves, then you should proceed cooking.

 When it is done, remove from the fire and cool completely.

pic 10

 Store this in a clean, dry bottle and refrigerate.

NOTE:

-If you use very sweet mango, adjust the quantity of sugar.

-If you use Alphonso variety, no need of sieving and you can directly proceed towards cooking after making pulp.

– If Mango is very sweet, then add 1 teaspoon of lemon juice at the end to give little tangy taste.

Chocolate cake from Ghee Residue:

Ghee residue is a moist, brown coloured by-product formed after preparing ghee from white butter.

Ghee residue is a rich source of essential fatty acids, natural anti-oxidants and proteins.

In olden days, people used this as a natural body scrub. When I was a child, my mum used to rub this on me, before bath and I now feel nostalgic while seeing this brown sediment and so I make it a point to use this without throwing by using either in Atta kneading or in baking.

This time, I had a couple of Pea protein powder packs in my hand, which was given by my lovely co-sister who is a Ayurvedic doctor. So, I included that as well in this brownie kind of chocolatey cake.

pic main

Ingredients:

All-purpose flour – 1 cup

Whole wheat flour – ½ cup

Mixed millet flour – ½ cup

Choco chip – ¼ cup

Protein powder – ½ cup

Milk powder – ¼ cup

Cocoa powder – ¼ cup

Sugar – 1 cup

Ghee Residue – 2 table spoons

Milk – 1 ¼ cups

Vanilla essence- 1 tea spoon

Baking soda – 1 teaspoon

Method:

  • Measure everything and keep it ready. Pre-heat oven at 180 C.
  • Mix all the dry ingredients like, flours, protein powder, milk powder, cocoa powder and sieve couple of times and mix in Choco chip and stir nicely. Keep it aside.
  • If you coat Choco chips with dry flours, it will not sink in the bottom while baking.
  • Now take ghee residue, put milk and heat it. When ghee residue is mixed nicely with milk, switch off the gas.

pic 2      pic 1

  • Add sugar, vanilla essence and baking soda and keep aside for 5 minutes.
  • After 5 minutes, beat this wet mixture thoroughly until mixture forms a bubble at the upper layer.
  • Fold in dry ingredient and make a batter. (don’t beat or over mix in this step)

pic 3     pic 4

  • Bake this in a lined baking dish in a pre-heated oven at 180 C for 30 to 40 minutes or until done (when you insert a tooth pick or knife in the centre of cake, it should come out clean)

pic 5     pic main 1

NOTE:

-You can use only All-purpose flour or mixture of any flour.

-If you don’t have any protein powder in hand, instead of protein powder, use milk powder.

Sautéed Asparagus:

Asparagus is thin, pencil like green shoot. It is high in fibre and one of the most nutritious, food. Which is low in fat and calorie too.

Snap them at a natural breaking point and peel the outer tough fibre from the hard part and one can use this in any dish by slicing or as it is.

Asparagus is very delicious when it is sautéed or baked. It can be served as a “crunchy” side dish or salad.

Here in India, we don’t get plump variety and this time when I went to USA, in my sister’s house I tried this and it is much tastier than what we get it in Bangalore.

pic 9

Ingredients:

Asparagus – 1 bundle

Olive oil – 1 table spoon

Red chilli flakes – 1 tsp

Garlic salt – to taste.

Method:

pic 2

  • Wash Asparagus, snap them by hand at a natural breaking point.
  • If you want to use bottom woody part, remove outer fibre by peeling, either chop them or use inner core as it is in this salad or any other dish.

pic 4   pic 5

  • Bring a large pot of water to a boil, add asparagus, cook until it blanches. It hardly takes 2 to 3 minutes.
  • Drain and proceed to sauté.
  • Take one tawa, put oil and heat.

pic 6   pic 7

  • Drop Asparagus, sprinkle garlic salt and red chilli flakes and toss until you see a charred look.
  • Serve hot.


Paneer Tikka Biryani:

I wanted to try Paneer Tikka Biryani at home from so long. Both my daughters love the Paneer tikka biriyani from Konark Restaurant, Commercial Street.  I tried my own method and it turned out to be a hit with my folks and I want to share it with my readers as well.

Let us see how I proceeded –

First thing I did was Marination of paneer. I always prefer 2 hrs or more Marination in the fridge.

Ingredients:

For Marination:

plain curd – 2 to 3 cups (250 grams)

Ginger garlic paste – 1 to 1 ½ table spoon

salt

Red chilli powder – 1 to 1 ½ tsp

Turmeric – 1 tsp

Coriander powder – 2 table spoons

Cumin powder – 1 table spoon

Garam masala powder – 1 ½ tsp

Paneer – 200 grams

Capsicum – 3 ( Red, yellow and green) 

Onion – 2 (medium)

For Biryani:

Basmati rice – 3 cups

Onion – 1 

Tomato – 2

Ghee – 2 table spoons

Bay leaf – 2

Cardamom – 2

Cinnamon – 1 inch piece

Star anise – 2

Shahi jeera – 1 tsp

Green chilli -2

Chopped Pudina – half cup

Chopped Coriander leaves – half cup

Any Biryani Masala – 1 table spoon

Coconut milk – 1 cup or 1 pack of coconut milk powder.

Method:

For Paneer and veggie Tikka:

-Take one  bowl , put curd and all the masalas, salt etc and prepare for marination .

-Chop Capsicum ,onion and paneer into cubes and Drop in . Mix thoroughly and store this in a fridge to marinate at least for 2 hours.

-Take one non stick tawa, place marinated onion, capsicum and paneer chunks and roast both the sides and keep it ready. You can opt an oven or grill as well.

-Retain marinated masala ( with curd) for further use.

Now we would see the Biryani Preperation:

-Wash and Soak rice for 10 minutes, drain.

-Puree 2 tomatoes , by cooking in a little water , cool and grind.

-Slice onion , slit green chillies.Chop pudina and coriander leaves.

-Take one tawa/ rice cooker or pressure cooker. I normally prepare  in tawa and pour it into rice cooker for final cooking.

-Put ghee, add whole masalas ( cinnamon, cardamom, shahi jeera, star anise and bay leaves.

-Add onion, green chilli and fry for a while, then tomato puree, left over marinated masala  and fry until it leaves oil at sides.

-Now, add pudina and coriander, biryani masala and fry for 2 minutes.

-Next add coconut milk powder, water (4 cups) , adjust salt, add drained rice , tawa roasted veggies, paneer tikka and cook in a simmer or pour into rice cooker and cook further.

-When it is ready, serve with your choice of raita.

Note: Adjust water accordingly , by calculating marinated curd, tomato puree, if you are adding coconut milk, include that as well.

-Normally, how i take is: if i am using Basmati rice : for 1 cup of rice: 2 cups of water + 1 cups extra for veggies to cook. ( Here: 3 cups of Rice: 6 cups of water + 1 cup for veggies)


Honagone soppu Pulav:

Honagone, Ponnangani, Sessile Joy weed or Alternanthera sessilis is a vegetable which is filled with many nutrients. It is a wild plant, spreads very well during or after the first rain. Tender leaves and stems are consumed as vegetable especially in South India.

pic 1

It has so many medicinal properties and is known for its diuretic, laxative properties. The plant is also used as an ingredient in the making of medicinal hair oils, and believed to be very good for eyes as well.

Usually I make use of these greens in various dhal preparation and this time I tried to make Pulav and it turned out well.

pic 10

Here is the recipe –

Ingredients:

Rice – 3 cups (took sona masuri variety)

Onion – 2

Tomato – 2 (small)

Turmeric – ½ tsp.

Veggies of your choice – 1 bowl

To make masala paste:

Coconut- 2 table spoon

Green chillies -4

Ginger – 1 inch piece

Garlic -7 cloves

Pudina – 2 table spoons

Coriander leaves – 2 table spoons

Whole Coriander – 1 tsp

Cinnamon – 1 inch

Pepper – 4

Clove – 2

Curd – 1 serving spoon

Seasoning:

Ghee – 2 table spoons

Bay leaf – 1

Mace -1

Cumin – 1 tsp

Method:

-Wash rice, drain and keep aside.

-Grind masala by adding all the ingredients under “To make masala paste”

– Slice onion and tomatoes.

– Take one cooker, add Ghee /clarified butter. When it is hot, put all the ingredients under “Seasoning”.

– Put sliced onion and fry until it becomes light brown. Add turmeric and fry.

-Add sliced tomatoes, sprinkle some salt. When it is done, add chopped veggies.

-Here I have taken beans, carrot, knol kohl, green peas and Honagone greens.

collage

-Fry all these until it becomes transparent. Add ground masala and fry for a while.

-Add salt and 6 cups of water (1:2 cups)

-When water starts boiling, add drained rice and cook this for 2 whistles.

pic 11

– Serve this with onion raita.