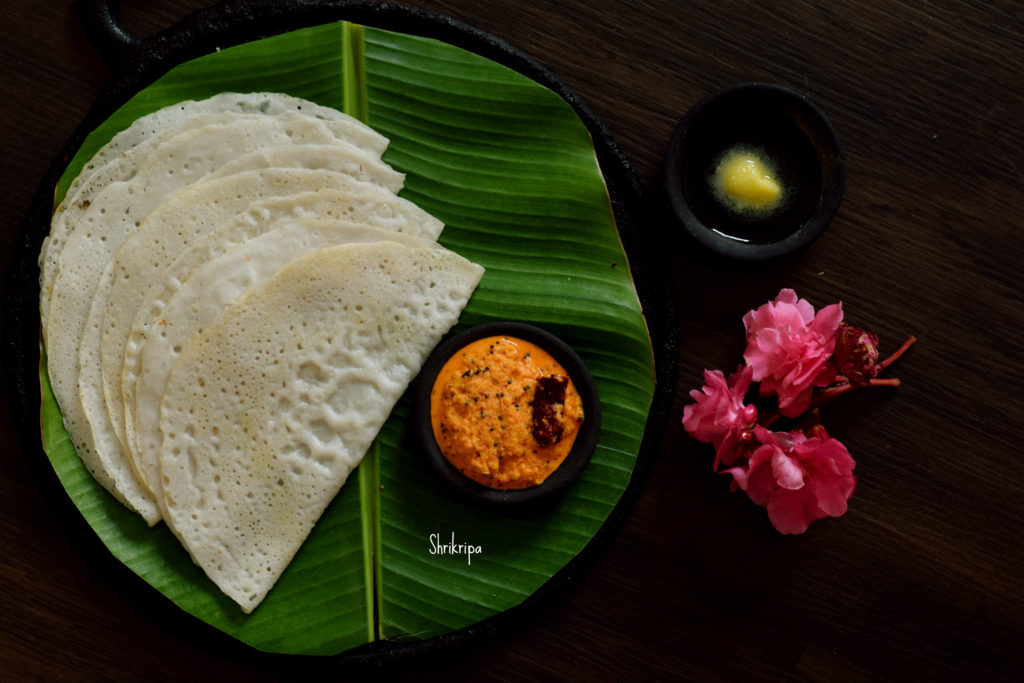
Bannangayi Dosey /tender (young) coconut Dosa:

When I was a little girl, my mom used to work, and I used to spend the summer vacation at my grandparents’ house. I used to enjoy at the farm house by having an unlimited supply of Mangoes, tender coconut, pineapples etc.

There used to be abundant supply of fallen young coconuts, also called ‘bannangayi’ which have much harder flesh than what we get in the normal tender coconut carts over.

My aunt used to make a very tasty Dosa out of this and we used to relish this along with chutney and Jaggery syrup topped with homemade ghee.

Yesterday, when we had tender coconuts here in Bangalore, inner pulp was very thick and couldn’t eat. So, I thought about Dosa and prepared this after ages. It was such a nostalgic moment for me. Let us see how to make this tasty Dosa.
Ingredients:

Tender coconut – 1

Dosa rice – 2 cups

Salt

Method:

-wash and soak Dosa rice for 3 to 4 hours.

-Grate or chop tender /young coconut and keep aside.        


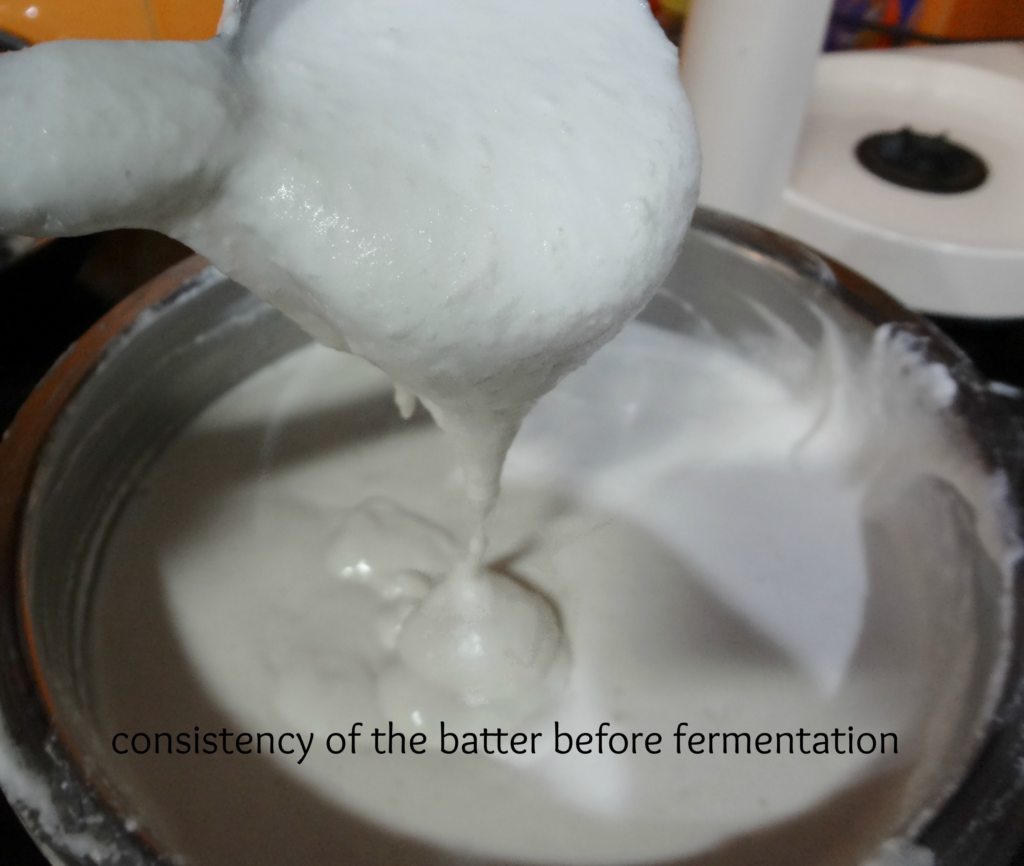
-Grind soaked rice with grated young coconut by adding little water and salt and make smooth paste. This batter must be like our regular Dosa batter and there is no need of fermentation.                           

-You can make use of this batter straight away. Usually we prepare this batter in the morning itself.

-If you want to prepare this batter in the evening, to make the Dosa in the morning, you can store the batter in the refrigerator.

-To prepare Dosa, heat iron Dosa tawa. When it is hot, don’t apply any oil. You can pour one serving spoon of batter and make Dosa like our regular Dosa. Pour ½ tsp of ghee and Close the lid.     
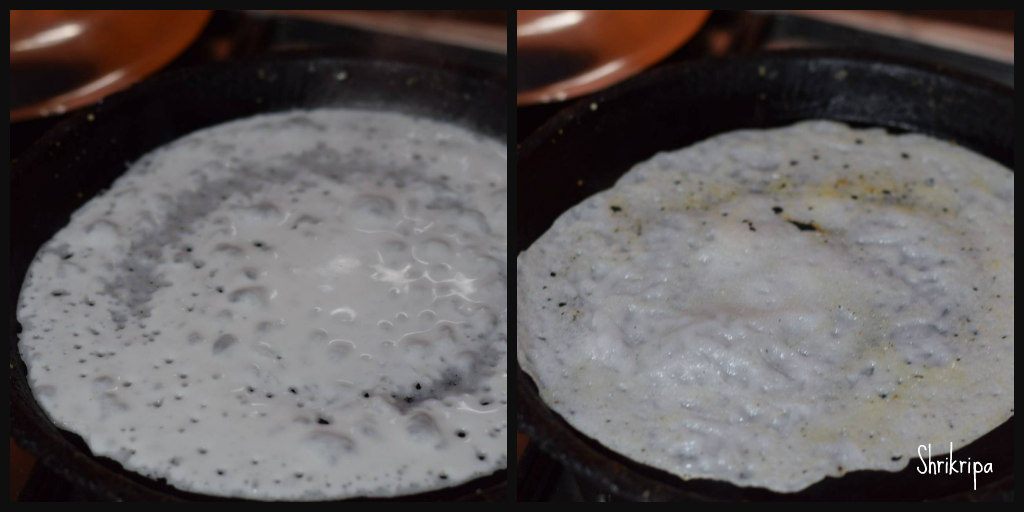
             

When it shows little brownish spots here and there, flip the side, cook upper side and serve with Coconut and onion chutney , jaggery syrup which is topped with ghee or honey.


Mixed millet Masala Cookies:

Millets are a very good alternative to normal All-purpose flour or whole wheat flour in gluten free baking. You can’t even recognize the core ingredient. It is gluten free as well as high in nutritional value too.

When I was trying out some recipes for the 2017 Millet calendar, I dished out a couple of recipes, which had turned out super tasty, and at the same time, healthy, filling and as an alternate snack for kid’s tiffin boxes as well.

I tried pizza based seasoning in this cookie recipe and it tasted super delicious.

pic main

Ingredients:

Mixed Millet flour – 1 cup

Butter – 50 grams

Sugar – 2 table spoons

Salt – ½ teaspoon

Baking powder – ½ teaspoon

Baking soda – ½ teaspoon

Curd – 2 table spoons

Pizza seasoning or Oregano – 1 tea spoon

Chilli flakes – 1 tea spoon

Cumin – 1 tea spoon

Grated cheese – to decorate.

Method:

  • Mix flour, salt, baking powder, baking soda, pizza seasoning, chilli flakes and cumin and keep aside.
  • Now beat butter and sugar until it becomes fluffy and creamy. Add in curd and beat once again.
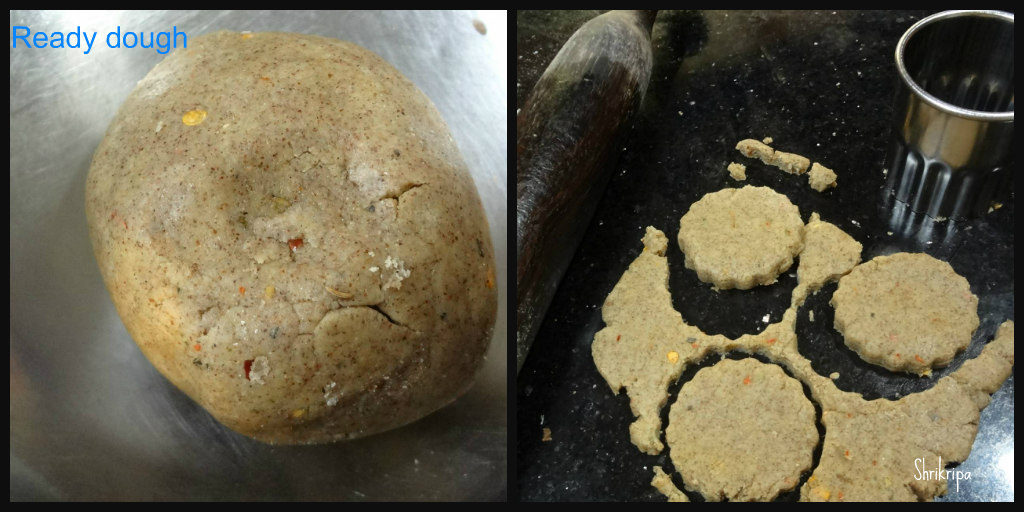
  • Mix in flour mixture and bind all the ingredients together, the resultant dough will be like Chapati dough.

Ribbet collage 1

  • Take dough little by little, roll it into half inch thickness and take a cookie cutter and cut.
  • Arrange this in a lined baking tray.
  • Sprinkle grated cheese on top.
  • Bake this in a pre-heated oven at 170 ºC for 10 to 12 minutes.

pic 2

Note:

  • Here mixed millet flour is store bought pre- mixed flour.
  • Alternately one can mix two to three millet flours and make their own flour or use all purpose flour as well.


Gluten free Masala Bread:

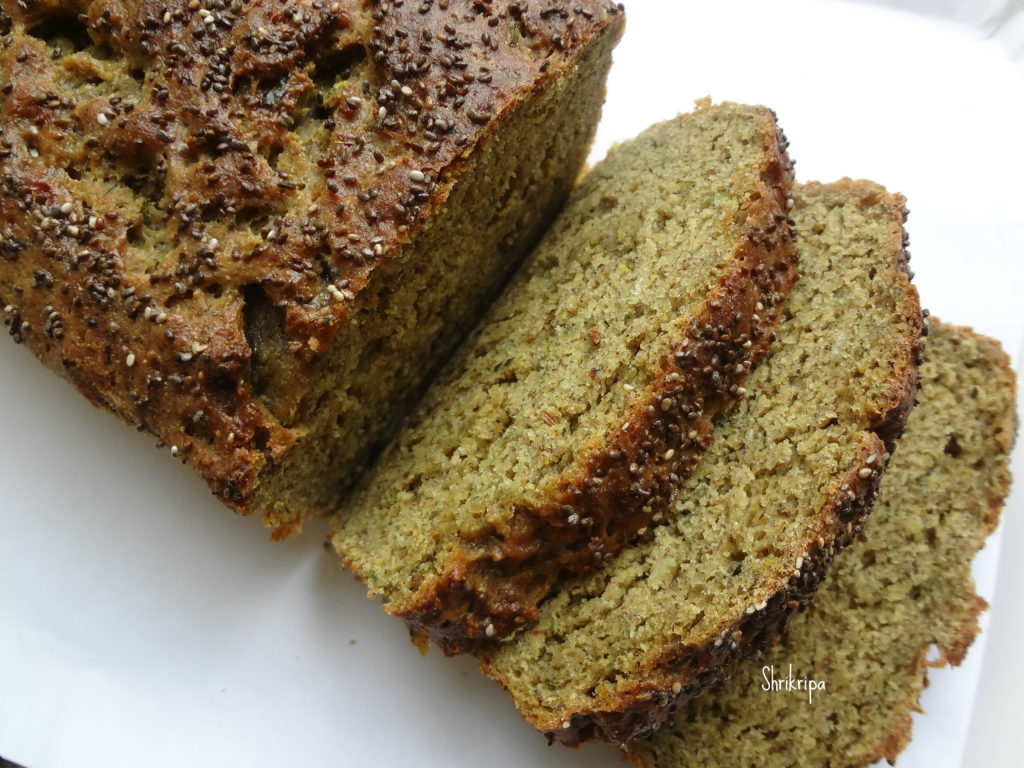
Wanted to experiment with banana flour which I had made at home, in baking bread. So, I tried my hand at this recipe. In the end, I got soft, dill flavoured bread. Which had nutritionally rich dill leaves, seasoned onion, Amaranth flour, homemade banana flour and fine rawa. People who want to try this, can replace the flour and try. One can use only All-purpose flour or whole wheat flour but handle your dough carefully.

bread main

Now we will see how I proceeded –

Ingredient:

Amaranth / Rajgira flour – 1 cup

Banana flour – 1 cup

Fine rawa / semolina – 1 cup (used millet rawa)

Milk – 1 cup (vegans can use any other form of milk)

Water – ¼ cup

Active dry yeast – 2 tea spoons

Sugar – 2 table spoons

Oil – 2 table spoons

For masala:

Dill leaves – 1 small thin bunch

Curry leaves – 1 table spoon

Onion – 1

Green chillies – 2

Cumin – 1 tea spoon

Oil – 1 table spoon

Salt – 1 tea spoon

Turmeric – ½ tea spoon

For Garnishing and other:

Chia seed – 1 tea spoon

Butter – 1 table spoon

Milk – 1 table spoon

Oil – 2 table spoons

Method:

-First, we will arrange for yeast proofing: take Luke warm milk and water, dissolve sugar and add yeast, mix nicely by using spoon and keep aside by closing a lid for 10 minutes.

Ribbet collage 1

– If this has not shown any bubbles even after 10 minutes, discard the solution and prepare once again with fresh yeast.

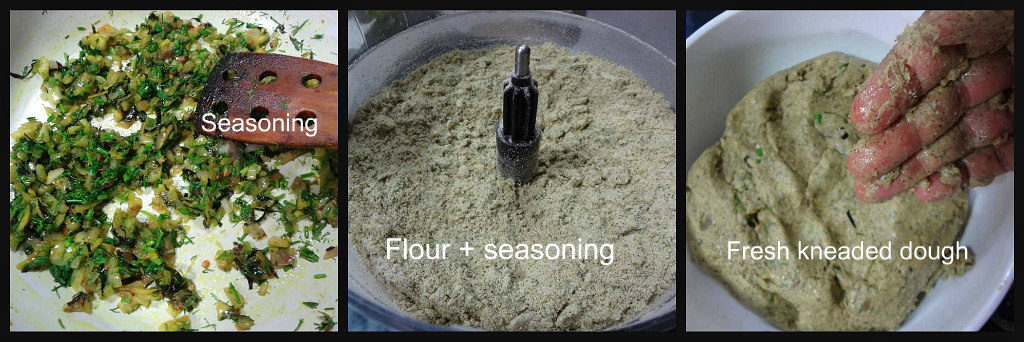
-At the meantime, prepare for seasoning:

Ribbet collage 2

-Chop onions, green chillies. Heat oil, put cumin, onion and fry for a while. When onion becomes transparent, add curry leaves, dill, turmeric, salt.

-Switch off the gas, when greens wilts.

-Now put all the dry flours in food processor, dry run and mix thoroughly. Add in seasoning, oil and once more mix everything.

-Now pour yeast mixture and knead with the help of kneader. If it is very sticky, adjust the consistency by sprinkling extra flour.

-Ready dough should be little sticky, but not watery.

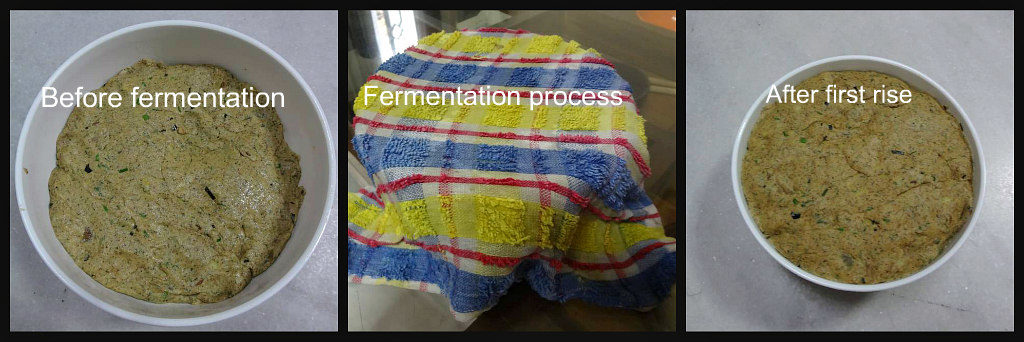
-Remove this dough from the processor, apply 2 table spoons of oil on this dough all over from the outside and keep it in a bowl covered with wet towel to rise (First rise)

Ribbet collage 3

-It will take anywhere between 1 ½ to 2 hours. (Dough should be doubled)

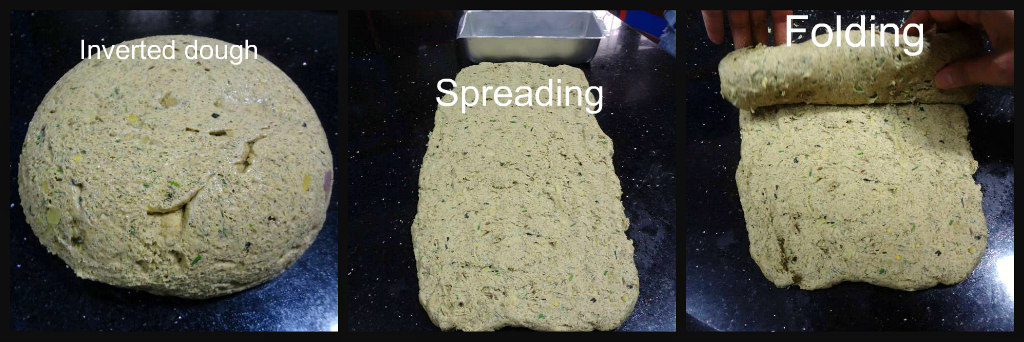
-After one and a half hours, remove this raised dough and place it over the work table by sprinkling some dry flour over the counter.

Ribbet collage 4

-Spread this dough into rectangular shape by pulling by hand (width should roughly match the bread baking tin)

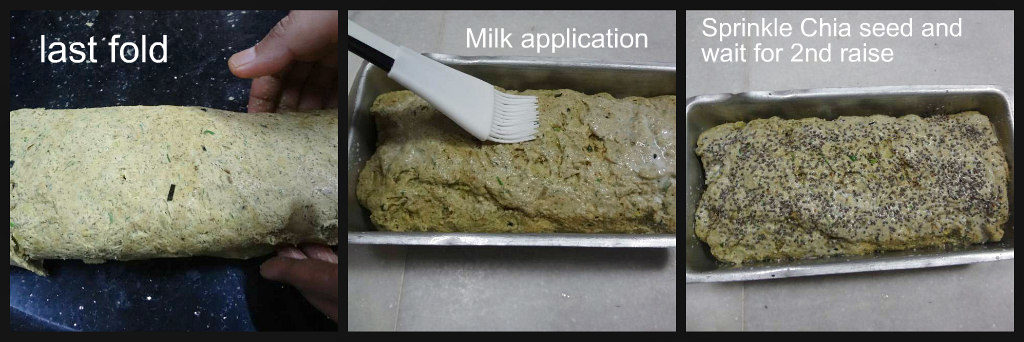
-After pulling and spreading like a rectangular mat, fold it thrice or four times, like a real folding of the mat.

-Keep this folded roll in a greased baking tin, apply milk on top of the dough to avoid drying. Sprinkle chia seed and keep it for second proofing (rise) by closing it with a wet cloth or bigger vessel.

Ribbet collage 5

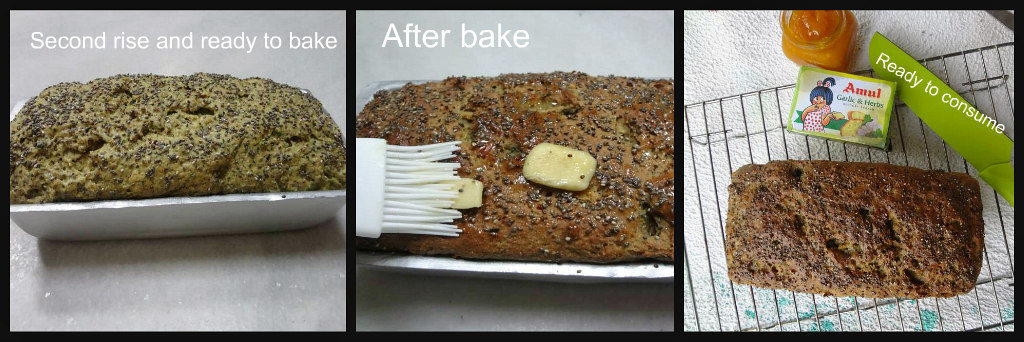
-When it rises after an hour, bake this in a pre-heated oven for 20 minutes at 200® C.

-Immediately after taking out from the oven, apply butter all over at the top part and keep it for cooling.

Ribbet collage 6

-After it cools down, de-mould and slice the bread and enjoy with any jam or butter.

Note:

-If you want vegan version, please skip application of milk and butter.


Peanut chutney:

Peanut or Ground nut is considered as a power house of nutrients and known as the poor man’s cashew. In our family everyone loves peanuts as a munching snack and not in a curry. As a Mangalorean, our taste buds were accustomed to coconut based curries from childhood days and we never prepared peanut based curries until my hubby introduced me to this super delicious recipe of his friend’s family. Thanks to our friend Seetha who obliged to pass on this recipe of her mother in law. This is an Andhra household’s day to day chutney recipe. We love this Spicy, tangy and creamy chutney or dip with anything and everything. It is a deadly combination with Sago and Rice Rotti too.

pic main

Ingredients:

Peanuts – ¾ cup (roasted)

Oil – 1 tea spoon

Onion – 1 (chopped)

Green chillies – 3 to4 (chopped)

Coriander leaves – 4 strings (chopped)

Garlic – 1 whole bulb

Salt

Tamarind – peanut size.

Method:

I take roasted peanuts with skin intact. If you want to remove the skin, you can do that and use.

Ribbet collage

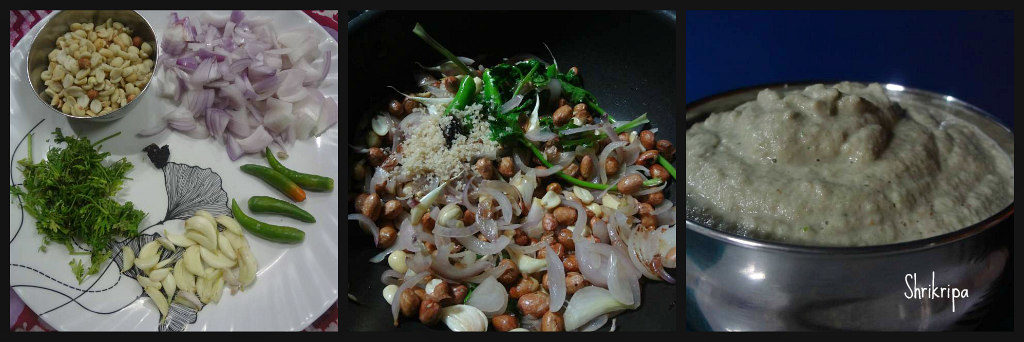
Now take one tawa, put oil. When it is hot, add chopped onion, garlic, green chillies and fry till it becomes translucent. (Onion Should be transparent and glossy)

 Switch off the gas and mix in chopped coriander leaves, roasted peanuts and tamarind.

Cool this mixture and grind this mixture by adding salt and required amount of water.

 I normally don’t add any seasoning to this chutney. If you want you can add or serve as it is.
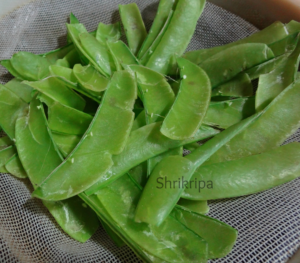
  It goes very well with any south Indian Breakfast dishes.

Plantain/Raw banana flour:

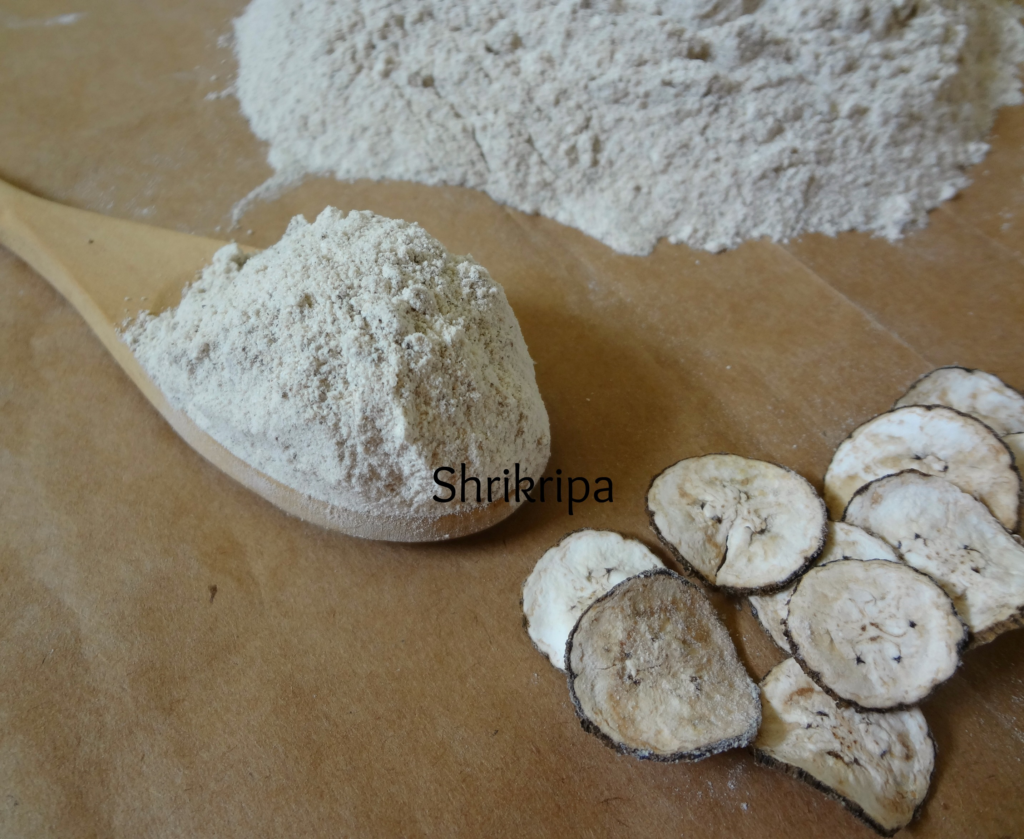
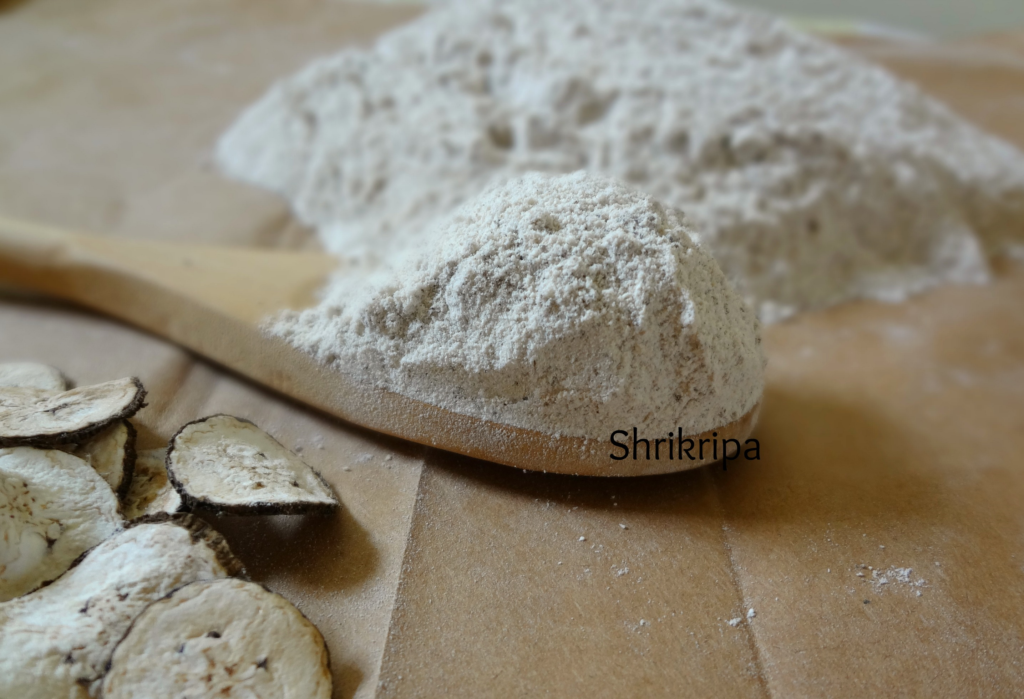
Plantain flour is a powdered form of dried banana, which can be a good raw material for any healthy baking or cooking, for people who follow Paleo, Vegan, gluten-free diet and it is diabetic friendly and organic too. Last month when I was thinking about gluten-free baking and options regarding its flours, what immediately comes to mind is our day to day available ingredient- the cheaper, more nutritious alternative to commercially available gluten-free flours. I have seen banana flour as baby food in my native and people prepare this flour at home and feed their babies as a healthy top food. Keeping that in my mind, I headed towards preparing homemade banana flour. I took small varieties of homegrown bananas from my native and started my journey.
pic 1

Ingredients:

Raw bananas – 1 kgs

Method:

-Select firm and raw bananas.

-wash, peel outer skin and immerse in plain water.

collage 1

-Take one wide, big plate. Line with one clean towel.

-Slice bananas directly on towel. Keep this in bright area, either near window sill or under sunlight.

collage 2

-If you keep under sunlight, it will take 2 days to dehydrate and become crisp.

-If you keep indoors, it will take 4 days to dehydrate.

-After it becomes crisp and dry, powder this in a dry grinding jar in a mixer grinder.

-Sieve the mixture and collect the fine powder.

pic 2

-Such a simple method and you will be ready with your gluten-free healthy flour for any of your bakes or for cooking!

Banana Berati / Plantain Preserve:

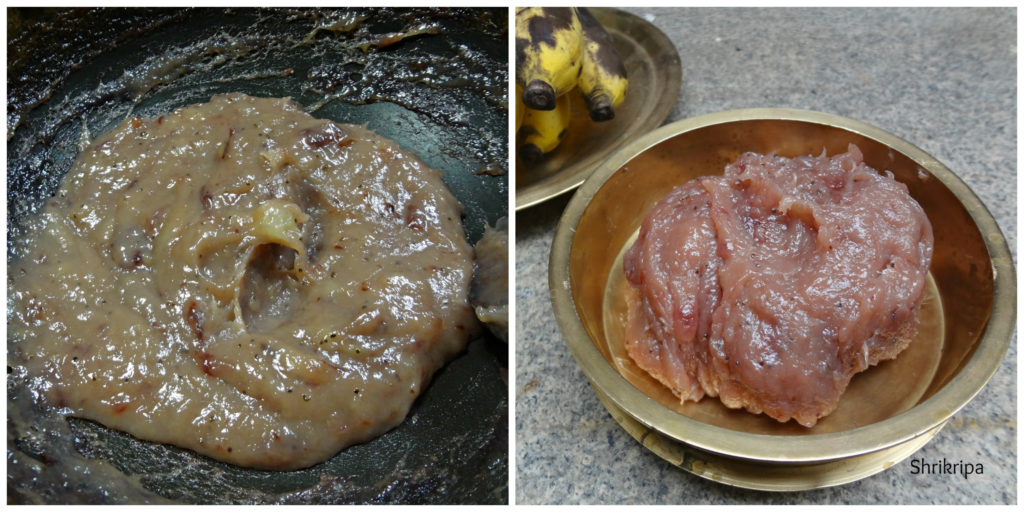
Whenever you have large stock of over ripe bananas, this is one such procedure one can follow and finish off all the stock and preserve this for future use. This preserve stays good almost a year or more in the freezer. It is a very handy when you want to make banana payasam/kheer or HalwaHere I have used yellow small variety of banana from Mangalore and we call this as Kadali.

pic main

Ingredients:

Over ripe banana – 22

Sugar – 1 bowl 

Method:

 Put all the peeled bananas to mixer grinder and make a smooth paste.

  Measure this by using any bowl of your choice. If this paste is 3 cups in quantity take one cup of sugar in that same measurement cup.

  So, your ratio of banana paste and sugar will be 3:1.

Take one thick bottomed kadai, put this paste and keep gas flame in a very low flame and cook for a while.

collage 1

       When it changes its colour to milky white, then to a pale colour and when you smell the banana flavour in the air, add sugar and mix this in a regular interval.

   After some time, it will turn into a pinkish or reddish colour and it will start to leave the sides of the kadai. Now it is the time to remove it from the fire.

collage 2

   Keep as it is and when it reaches room temperature; store it in an airtight container or a zip lock.

   You can do this in a microwave as well. Only thing, you should remove the glass bowl at regular intervals and give a stir and proceed as given above.


Idly/Idli Batter:

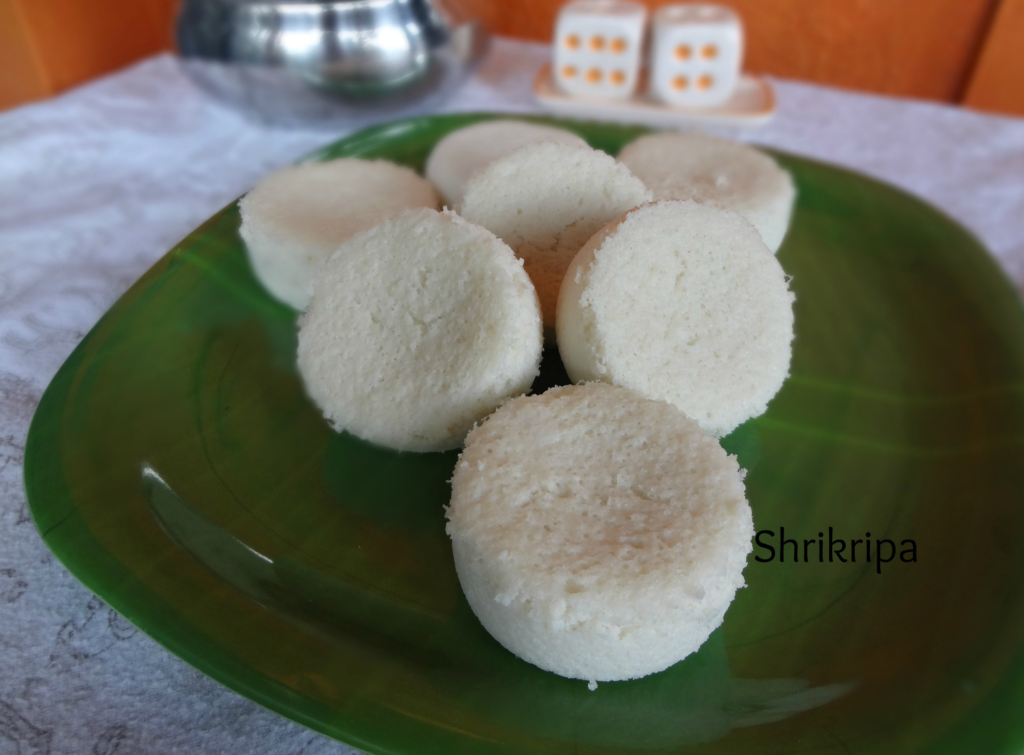
Idli is very basic, staple breakfast of south India. It is very healthy steam cooked rice and lentil cake which is very nutritious too. Each place has their own rice and lentil ratio or proportion and grinding technique also changes from region to region. In Mangalore, we soak rice and dal separately and grind very fine paste of urad dal and either we mix rice rawa or we are grinding the rice, we keep it a little coarse, hence this batter will be a little coarse. After fermenting the batter, the next day we proceed to make idlies by using either idly stand or idly cups. In our region, idly cups are regular and very common in every house hold and we use special type of idly steamer and invariably we use this for so many kinds of steam cooking.

pic 14

Ingredients for idli batter:

Idly rice or Idly rawa – 2 cups

Urad/Black gram dal – 1 cup

Poha – 1 fist full

salt

Method:

-Wash and soak rice in one vessel. If you are using idli rawa, you can wash idly rawa and put very little water and keep aside.

collage 1

-Wash Urad dal and poha in another vessel and soak for 3 to 4 hours.

-At first, drain excess water from urad dal and put this into wet grinder.

-Grind this into smooth paste by adding water in-between while grinding.

-When urad dal batter becomes fine and smooth, its consistency becomes almost double and colour of the batter looks milky white.

collage 2

– When you think urad dal batter is ready, add soaked rice or rice rawa by draining its soaked water.

-You can use this water while grinding or adjusting the consistency of the batter or to wash wet grinder at first to remove the dough that is stuck on the stone.

-Grind this into small rawa consistency by adding salt and remove this ready batter into big vessel. If you are using rice rawa ,allow batter to mix for couple of minutes and then remove.

-I usually grind urad dal first, then mix in drained rice so that batter mixes uniformly and becomes light and airy. 
– Batter consistency should be a little thick and when u hold and drop the batter it should not drop very easily and it should stick to the spoon.

pic 7

-Close the lid and keep this batter for 8 to 10 hours or more (according to outside weather where you live) for fermentation.

-Next day morning fill idly steamer or pressure cooker with sufficient water, place the porous plate at the centre of the vessel and keep this on the fire.

collage 3

-Mix fermented batter vigorously, if needed add water and adjust the consistency keep it ready.

-Rinse the idly moulds in fresh water once, it will act as a non-sticky layer between idly and mould.

-When water starts boiling, pour one spoon of batter into respective moulds and steam cook.

collage 4

-If you are using cups, cook this in a steamer for 15 to 20 minutes. Cups holds more batter than idly stand.

-If you are using idly stand, 7 to 8 minutes of steam cooking is sufficient.

-When it is done, switch off the gas, open the lid and remove moulds outside.

-Once it is cool, remove idly and serve with chutney or sambar or with your choice of side dish.

NOTE:

-Use wet grinder to get awesome soft idlies.

– Use soaked and drained water from the dal or rice while grinding. It will enhance the taste.

-Always mix and pour the batter to the moulds, only after water starts boiling.


Kadle Bele –Gerubeeja Payasa / Chana dal and Cashew Kheer:

Happy Yugadi! Yugadi is celebrated as the beginning of a new year in India (but through different names). In Bangalore, we start this festival by eating neem and jaggery. Neem denotes the bitterness we face in life, and the jaggery represents all the sweet things of life. By eating the neem and jaggery together, it is a symbol of promising ourselves to face the bitterness and sweetness of life with confidence.           

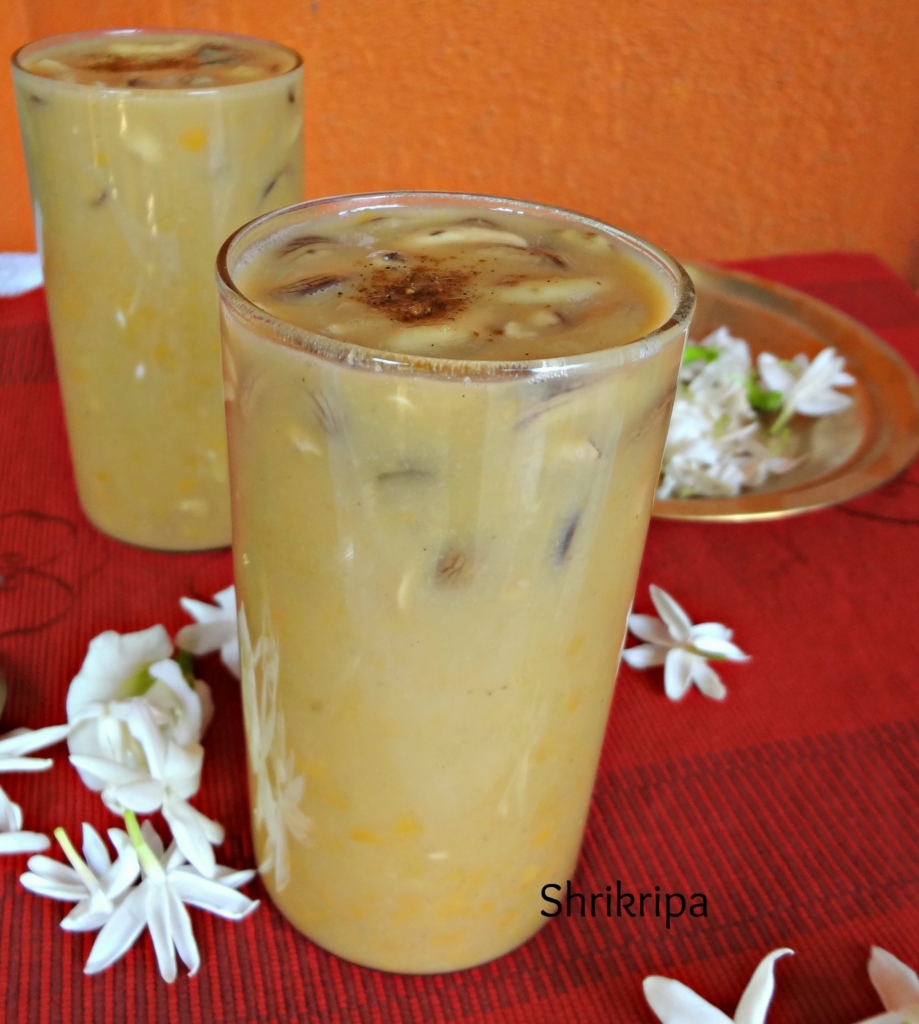
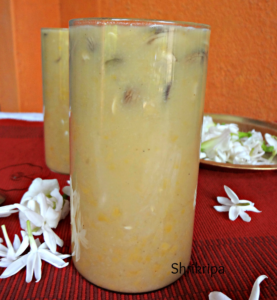
In Mangalore, we celebrate this festival by savouring a kadle Bele (Bengal gram or chanadal) and gerubeeja (raw cashew) Payasa. It is a delicious dessert which is made more delightful because of the cashew nuts which are present in every spoonful.

pic main

We will see the procedure –

Ingredients:

Chana dal/Split Bengal gram – 1 cup

Whole raw Cashew – 1 cup

Coconut milk – 1 tetra pack

Jaggery – 1 ½ block (used Organic jaggery blocks)

Cardamom powder – ½ tsp.

Salt – ½ tsp.

Method:

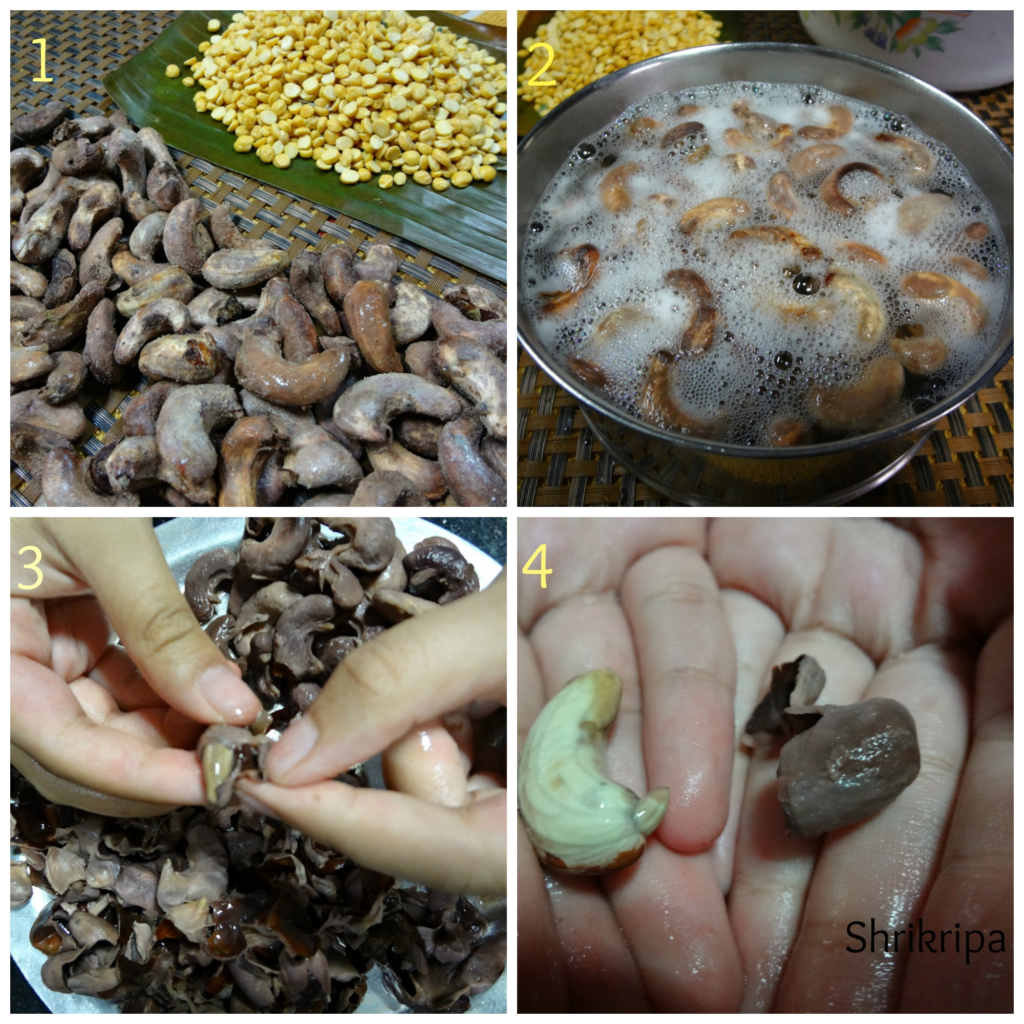
-At first we have to remove outer cover of the young cashew. Take one bowl, put all those young and raw cashew kernels into it, pour boiling water and keep it aside for 10 to 15 minutes by closing the lid.

-When outer cover of the kernels swells, remove the outer cover and keep aside.

collage 1

-Wash chana dal and cook this in a cooker by putting sufficient water for two whistles.

-Cook dal till it is perfectly cooked. Dal should be well cooked and easily crushed. Doneness is very important, after adding jaggery, dal becomes little stiff and firm.

pic 2

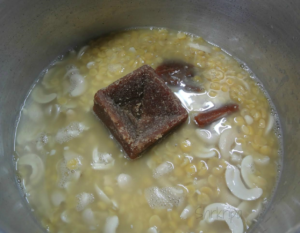
– When its pressure relieves add cashew kernels and cook. After one whistle, switch off the gas and cool this.

-Now add salt and jaggery and boil till you get a nice aroma and till the raw smell of jaggery disappears.

pic 3

 – When it is done, add one tetra pack of coconut milk and give one boil. That is it. Garnish with powdered cardamom and enjoy.              

           pic 12              pic main

        Note: –

          If you don’t have access to raw cashew kernels, you can use regular cashew and you can cook this with Chana dal for 3 whistles and proceed by adding jaggery.

           If you are using fresh coconut for extracting milk, take grated coconut (from one coconut), add one cup of water and grind, and extract milk. (This is a thick extract and should be added at the end)

          Once again add little water and grind, to take out thin milk and you can add this while boiling jaggery.

          If you are using regular jaggery, at first self-boil this with little water, make a liquid and sieve this before adding to the kheer, to remove impurities.


Green Peapod Pakoda or Pakora:

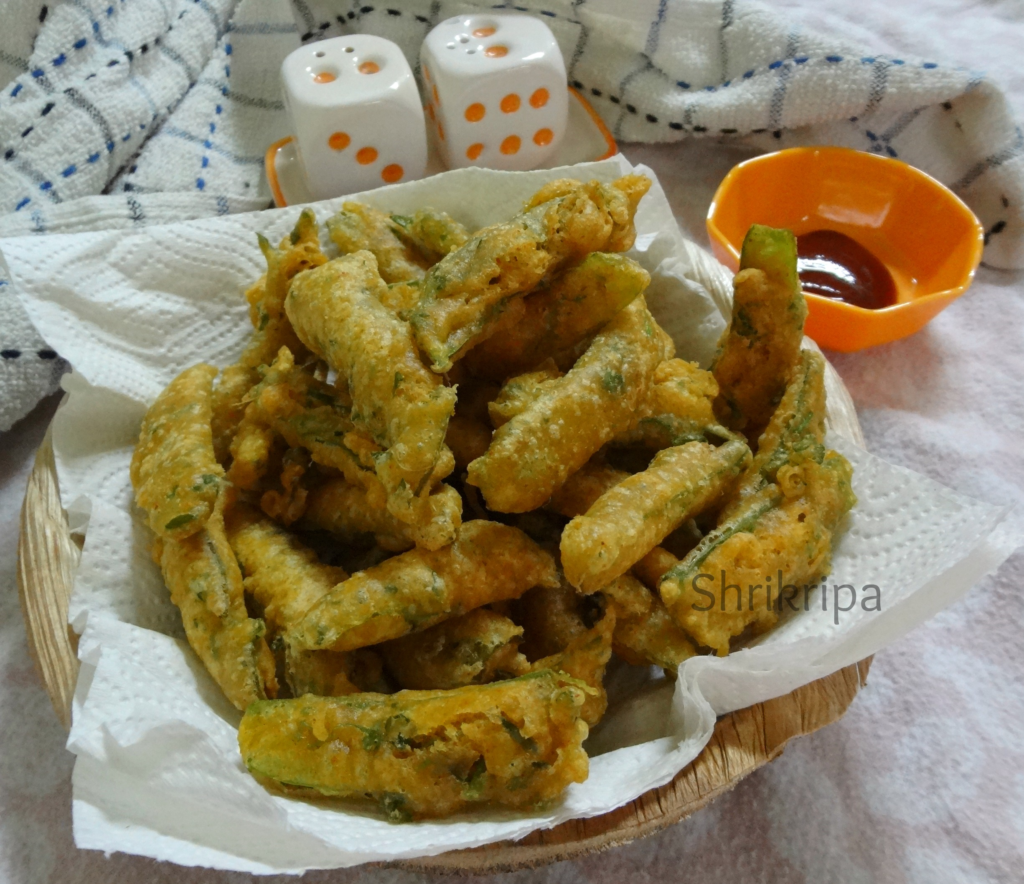
What do you do with nutritionally rich Peapods after removal of green peas? Usually people throw them away and it is less commonly consumed. Last year, my sister introduced me to snap pea Crispi’s. I liked the taste and wanted to include this treasure house of nutrition in our diet. I tried using them with our regular Indian pea pod a couple of times, and failed to achieve the result. While chewing, the fibre used to hinder us from enjoying the dish, after a couple of failed attempts, I came across This Site in which she has mentioned how exactly we should peel the pod, after removing the peas. Once again, I tried with very little quantity and succeeded. Everyone in my family liked it and asked me to share this recipe. It was so tasty and peapod’s natural sweetness and flavour was the highlight of this pakoda.

pakoda-main-1

Recipe in detail –

Ingredients:

Peapods – as required

Oil for deep fry

For batter:

Bengal gram flour /Besan – 1 cup

Salt

Green chilli – 1

Red chilli powder-  ½ tsp

Curry leaves – 1 spring

Chopped Coriander leaves – 1 tsp

Cooking soda –  a pinch

Method:

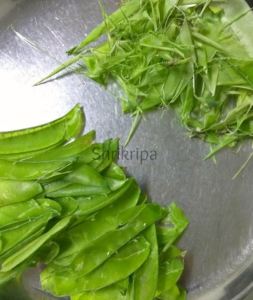
-Separate fresh and green peels (pods) while opening, to collect green peas.

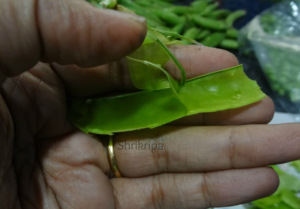
-After this, peel off the inner membrane (which will not cook and it is fibrous too)

-How to remove inner membrane: take one of the ends, fold in and pinch inwards and slide your thumb beneath and remove the glossy membrane and separate. If membrane breaks in-between, try from the other side.

pic-5

-Discard inner membrane and use outer green cover to make pakodas.

pic-1-jpg-jpg

-Wash these peels and drain, keep aside.

pic-2

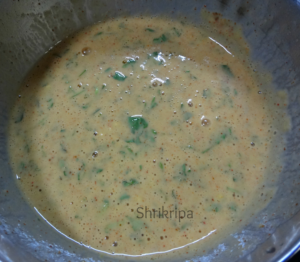
-Prepare pakoda batter by putting Besan, salt, chopped green chillies, curry leaves, coriander leaves, cooking soda and water; batter should be like Dosa batter consistency.

pic-3

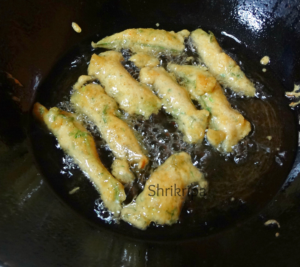
-Now heat the oil in a kadai and when it is hot, drop pea pods one by one after dipping into the batter.

pic-4-Fry in a medium heat and when it is done, remove these into a tissue laid serving plate.

-Enjoy these pakodas with hot cup of tea or coffee.