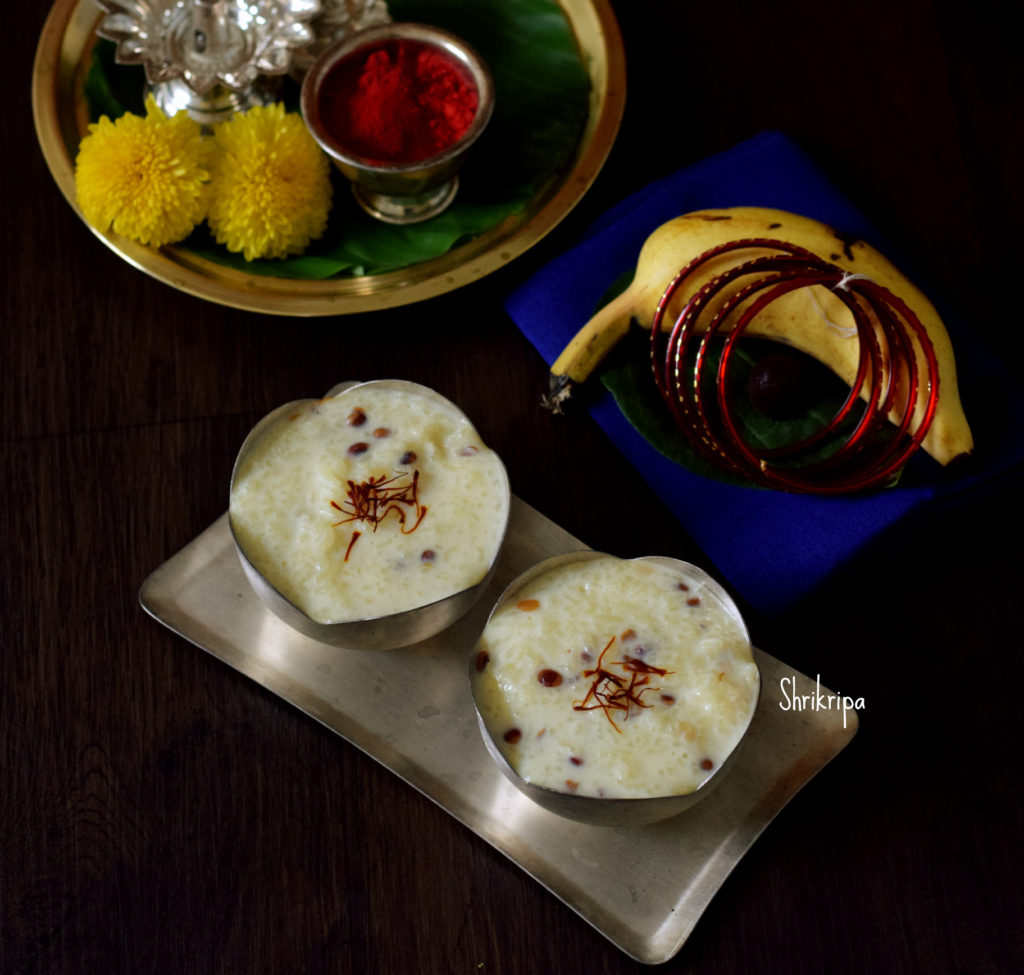
Rice kheer:

As a south Indian, moreover in Mangalore, we normally make Akki Payasa aka rice kheer as a prasadam for some poojas, either by adding jaggery or sugar by adding coconut milk or normal milk and it usually in thin consistency. If it is thick, it is known as pindi payasam and I have already posted the recipe earlier. I learnt this recipe from my close friend Surekha, who hails from Allahabad, all thanks to her for such a wonderful tasty kheer recipe. It is one of my daughter’s favourite as well. 

In this recipe, washed rice is cooked in milk, until done and in this process, milk condenses and yields creamy texture and kheer holds melt in the mouth texture as well. Speciality of this kheer is, addition of nutty flavoured Chironji or Charoli. It tastes a little like almonds and are tiny roundels in shape and good substitute to almonds as well. Which contains good fat, vitamins, minerals and dietary fibres in a considerate amount.  This is an ideal recipe for any kind of festival, potluck party.

Now we will see the procedure –

Jeera samba rice / small grain rice – 1 cup (you can use any fragrant rice)

Chironji – 100 grams

Milk – 1 to ½ litre (boiled)

Saffron – 10 strands

Sugar – 1 to 1 ½ cup (according to your sweet level)

Method:

-Wash rice, soak rice for 10 minutes.

-Soak saffron in 2 table spoons of hot milk and keep it aside.

– Take one thick kadai, add little ghee and fry Chironji until light brown.

-Add milk to this vessel and heat this. When it starts boiling, add soaked and drained rice.

-Cook in a very low flame, until rice is done and soft.

-If additional milk is needed, please add the extra amount. Each rice is different, so, please take care while adding milk.

-Now add sugar and saffron with soaked milk into it and boil. When kheer is ready, you will see the top glossy layer and it is the time to switch off the gas.

-Serve this kheer hot or cold, however you like to have it.


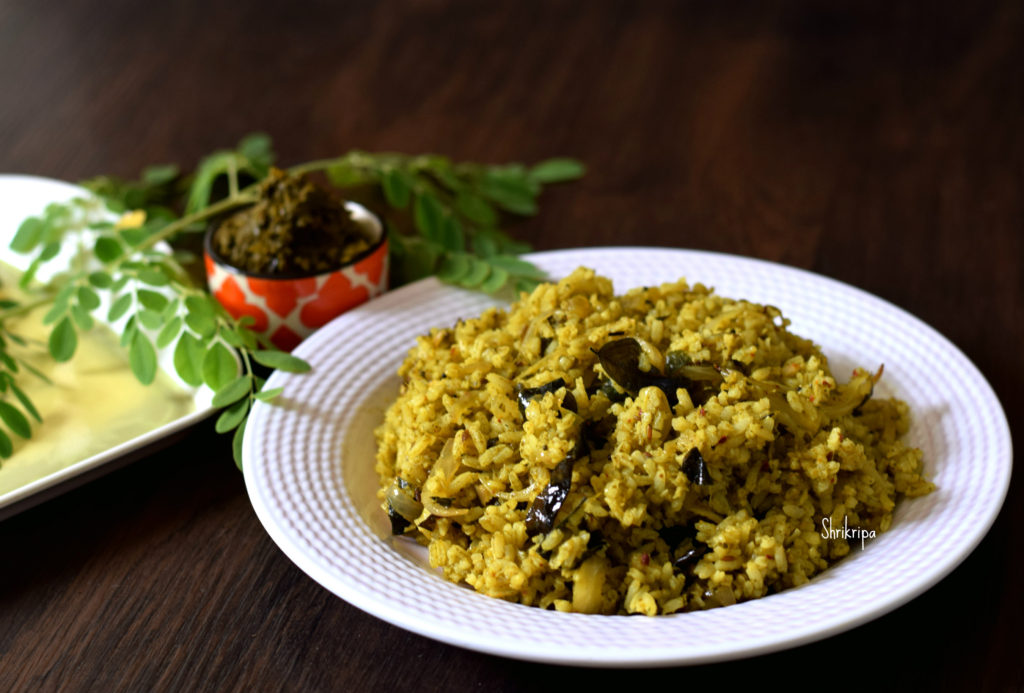
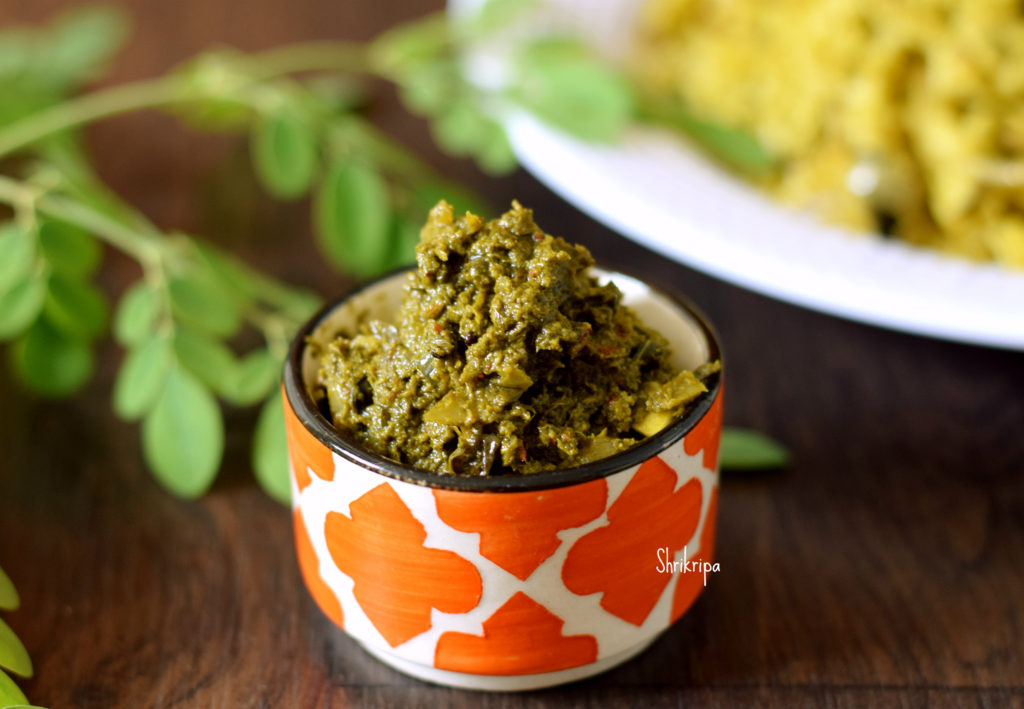
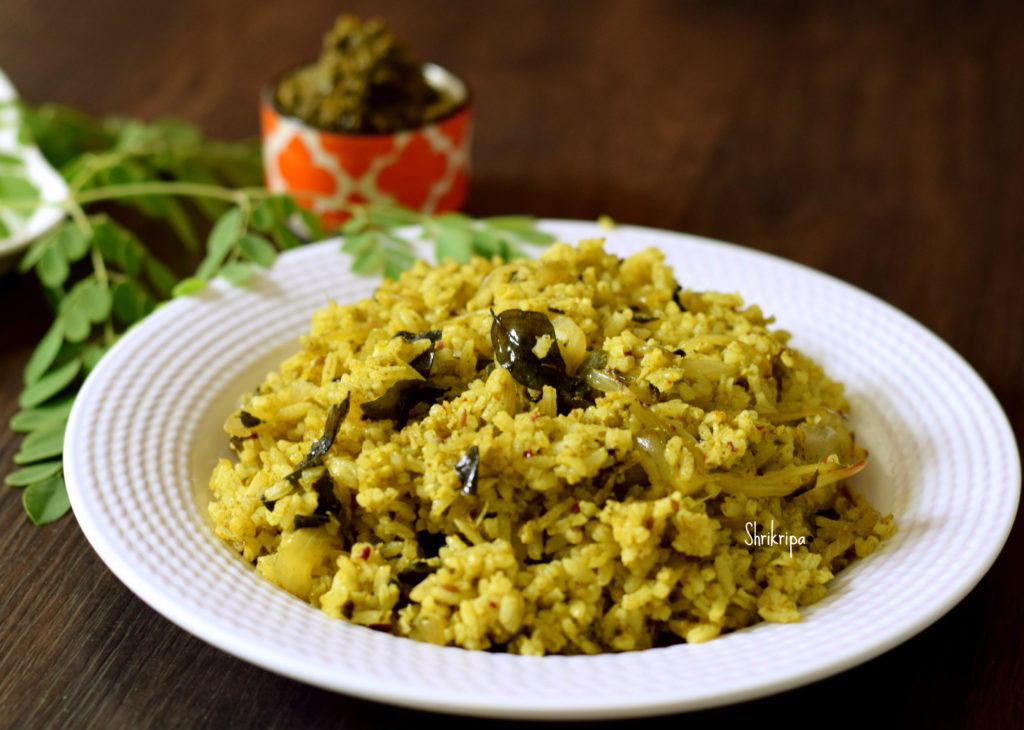
Moringa / Drumstick leaves chutney and Rice:

Nugge Soppu ,Moringa or Drumstick leaves are a power house of nutrients.  Back in 2016 I had tried a bunch of drumstick recipes to publish in Vijaya next kannada daily. This chutney recipe is from that trial and after that it is in my regular menu and I have made it many times, as well as tried to mix this same chutney into cooked rice after doing some seasoning and liked it a lot and It is an awesome way to feed small kids with added goodness of moringa.

I will first describe how to make chutney and at last I will add the procedure of rice as well.

This chutney stays good for up to one week and we can store this in a refrigerator and can be enjoyed as a side dish or make rice item and relish and can be packed as a carry meal in a tiffin box as well.

Procedure for  Chutney:

Moringa leaves – 4 cups (keep aside some young leaves for seasoning)

To be ground:

Roasted red chillies – 3

Black pepper – 3

Garlic – 10 cloves

Tamarind – ¼ tea spoon

Coriander leaves – 3 table spoons (chopped)

Cumin – 1 tea spoon

Jaggery – ½ to 1 tea spoon

Salt

Seasoning;

Oil – 2 table spoons

Mustard – 1 tea spoon

Curry leaves – 2 strings

Garlic – 10 cloves (chopped)

Onion – 1 (chopped)

Turmeric – ½ tea spoon

Method:

-Take moringa leaves (keep aside a little) and grind with all the items under “To be Ground” from Roasted red chillies to salt in the list by adding little water into coarse paste.

-Now take one kadai, do seasoning part. Heat oil, splutter mustard, add curry leaves, chopped garlic, onion ,turmeric and fry until onion and garlic becomes light brown.

-Add moringa leaves, which we have kept aside and fry till it wilts and add ground paste and fry for 3 to 5 minutes or until raw smell vanishes and mixture changes in colour.

-You can serve this as a side dish with hot rice and ghee. This chutney stays good under refrigeration and can be used as a moringa rice mix as well.

Now we will see the procedure for Moringa Rice:

It is simple. Take some oil and put one tea spoon of cumin, little curry leaves and one or two table spoons of ready chutney, little salt and mix nicely. Switch off the gas. Mix required amount of ready cooked rice in this mixture and mix nicely to devour aromatic moringa rice. If you have ready chutney around, it is a quick recipe.


Nacho’s Aloo Chat:

This 72nd Indian Independence Day, my daughters’ school had organised a fund-raising event and my daughters wanted to make a couple of attractive dishes with no usage of gadgets, on the spot kind of menu. They made a group of 9 kids and chalked down ideas decided to do Nachos. One dish was nachos with dips and deciding one more item was the task. Finally, I also chipped in and after a couple of ideas we all finalised with the Nacho aloo chat.

Now started my headache of deciding on how to make it, quantity of the ingredients etc. Because quantity was huge, and preparation should happen at the early morning as well.  Kids wanted to do a food photography for their banner and board to hang in their food stall. I grabbed the opportunity and thought of making Aloo chat for their group which contained 9 students. Last Sunday, made tamarind and date chutney, and went ahead with one kg of potato. So, that I would know, how many plates we can make from this much.

After preparing and plating, it turned out well and kids were happy with the dish as well as they enjoyed the activities of banner making, painting the board and food photography as well.

I was relieved and finalised the quantity. Why I made this post is – it is a perfect dish for any parties and this mixture turned out very good and as a tasty sandwich stuffing as well, with a little grated cheese.

 Pic by : Aneesh Navanale

Let us see how I planned and proceeded.

Event was on Wednesday morning.

Sunday, I made tamarind and Date chutney and stored it in a fridge.

Monday, I made Mint and coriander chutney and stored it in a fridge.

Tuesday night before going to bed, cooked whole potatoes, drained and kept it for cooling.

1 kg of potato yields 10 to 12 plates of chat. So, used 5 kgs of potatoes for around 50 to 60 plates.

Wednesday morning peeled the potatoes, diced into small bits and proceeded.

Khatta Meeta tamarind and Dates chutney:
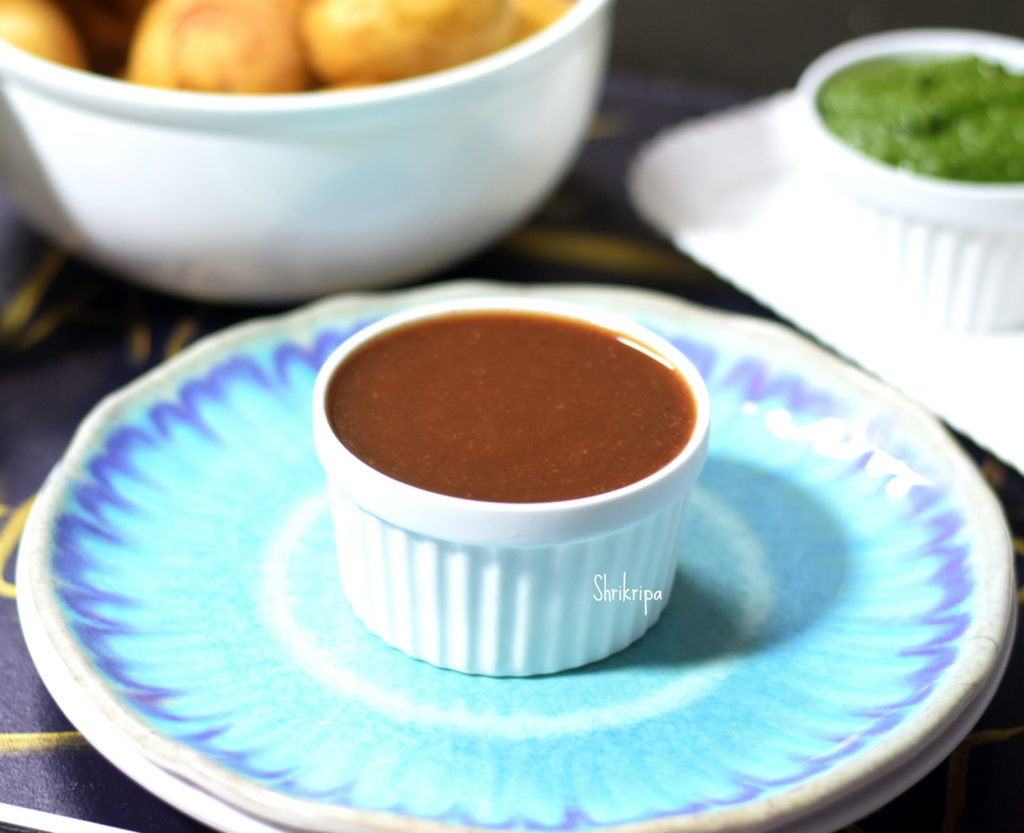
Ingredients :

Dates – 200 grams (please adjust according to its sweetness)

Tamarind – 100 grams (please use according to sourness of the tamarind)

Jaggery – As needed.

Green chillies – 2

Red chilli powder

Black Salt or Sea salt – very little

Roasted cumin powder

Method:

-Mine is home grown, hand cleaned tamarind, so I went ahead as it is. If it is store bought one, please remove any impurities.

-Boil one to two cups of water, soak tamarind and pitted dates in it.

-After an hour, grind this in a mixer grinder by adding 1 or 2 green chillies. You will get very smooth paste.

-Adjust the consistency by adding water and boil. While boiling add red chilli powder, salt, cumin powder and required amount of jaggery.

Once cooked, raw smell of dates, tamarind and jaggery is vanished, switch off the gas.

Cool completely and store it in a refrigerator.

Note:

  • I usually prefer to make little thicker version. So that, if thicker or thinner version is needed, scoop out a little from this batch, adjust by adding little water.
  • Adjust the ingredient according to your taste.
  • One can add more jaggery if mixture is sour.

Green chutney/ Mint – Coriander chutney:
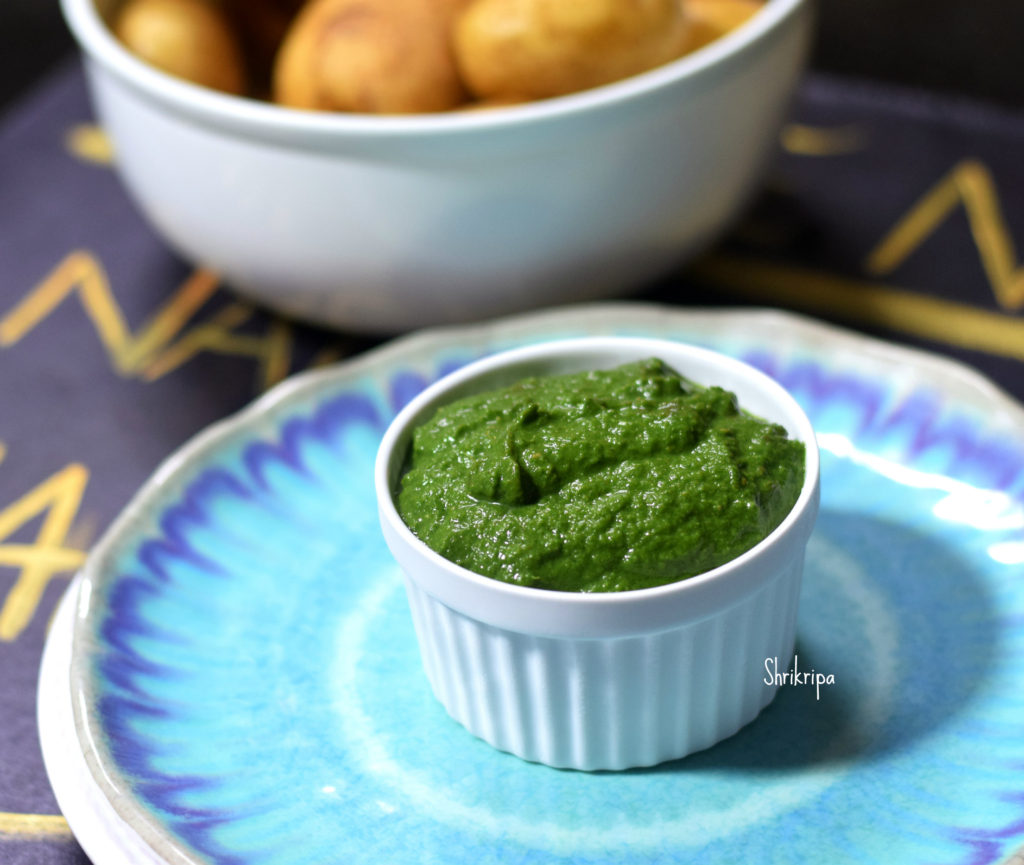
This is my basic sandwich chutney, which I usually make and store it in a fridge for an emergency use.

Ingredients:

Coriander – ½ bunch.

Pudina – 1 small bunch

Green chillies – 1 or 2

Garlic – 2 cloves

Cumin – 1 tea spoon (without roasting)

Dry mango powder – ½ tea spoon

Salt

Sugar or jaggery – ½ tea spoon

Ready sev or boondi – 2 to 3 tea spoons (to give thickness)

Method:

-Wash coriander, pudina, green chillies, drain, chop.

-Put everything and grind in a mixer grinder by adding required amount of water.

-I normally store this as a thick chutney. So that if it is sandwich, use as it is like a spread. If it is chat, adjust the consistency by adding water.

For Aloo Chat:
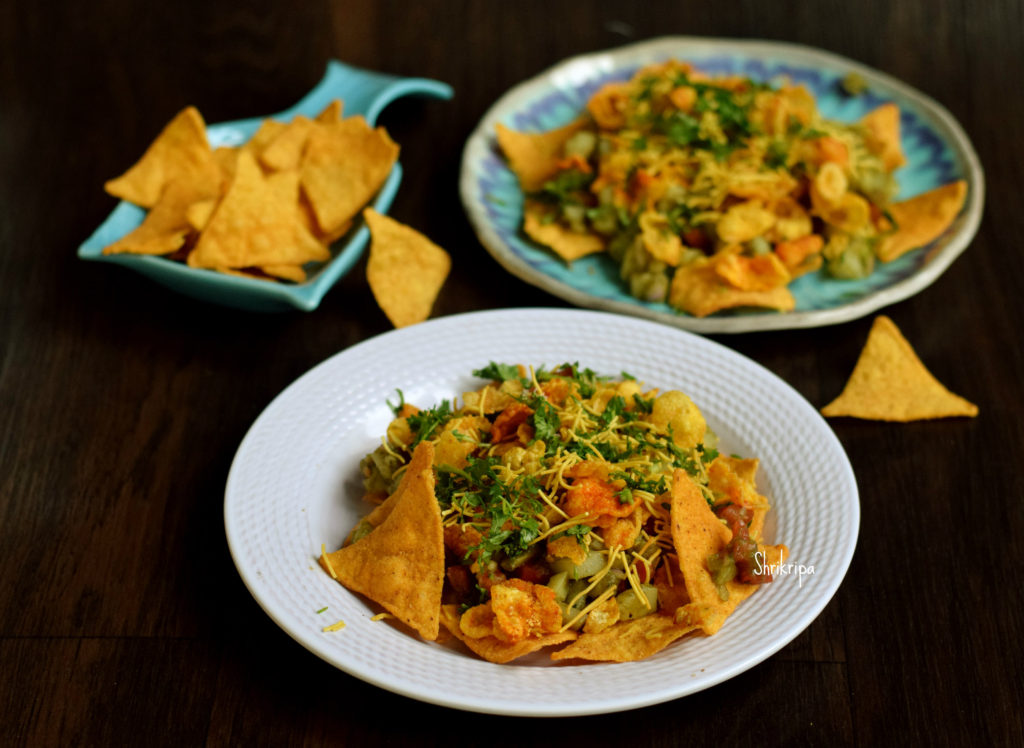
 Pic by : Aneesh Navanale

I am giving here for the quantity of one kg potato. Which will yield approximately 12 plates of ready chat.

Ingredients:

Potato – 1 kg

Tomato – 3 (big)

Onion – 2 (big)

Lemon – ½ to 1

Green Coriander – As needed

Black salt – As needed

Cumin powder – As needed

Chat masala – As needed

Dry mango powder – As needed

Sweet chutney – As needed

Green chutney – As needed

Nacho chips – As needed

Corn mixture – As needed

Thin Sev – As needed

Method:

Wash potato,cook whole potatoes by immersing in water by adding very little salt ( potato should absorb very little salt) for one whistle in a pressure cooker, drain and keep it for cooling.

-When it is cool, peel outer skin,dice potatoes in to small chunks. Chop onion and tomatoes in to small pieces.

-Chop coriander as well.

-Take one big bowl. Mix in chopped potatoes, onions, tomatoes.

-Pour sweet chutney, green chutney, black salt, cumin powder, chat masala, dry mango powder and lemon juice and adjust the seasoning according to your taste.

-Take a serving plate, spread nacho chips at first.

-As a second layer, spread potato mixture over chips layer.

-Sprinkle corn mixture, sev , chopped coriander and serve.

Potato and cheese / Aloo Sandwich:
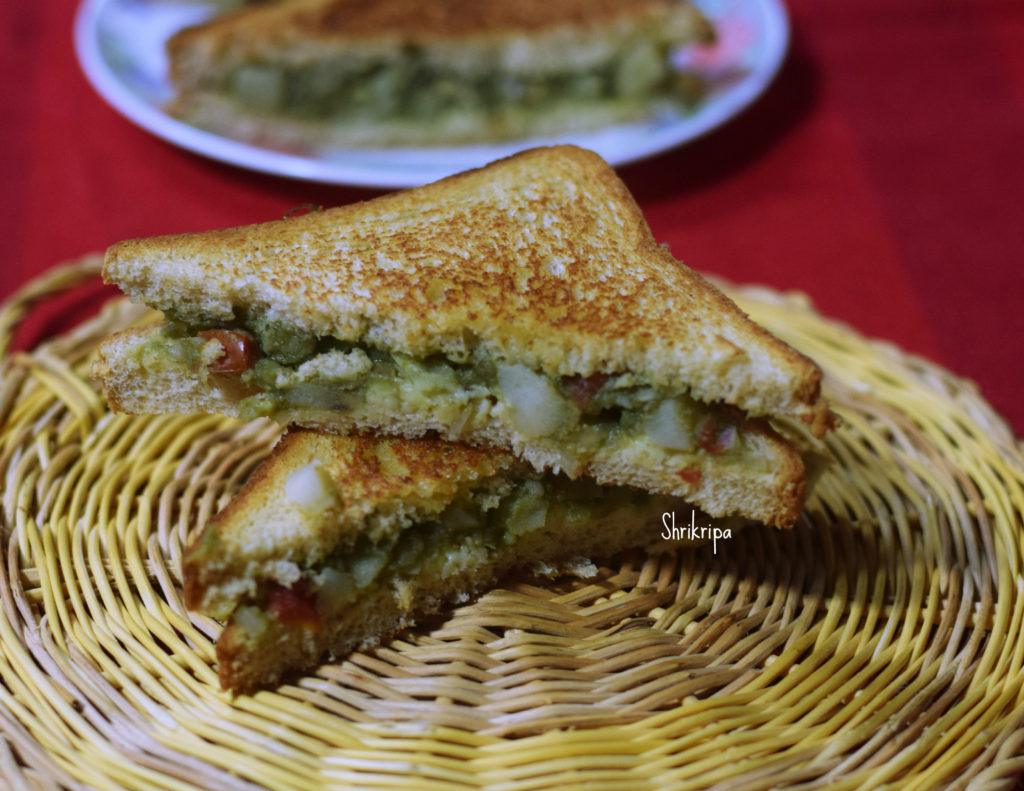
If this above ready mixture is available, you can make and serve awesome tasty sandwiches as well.

Just take a couple of breads. Spread aloo mixture over one bread. Grate some cheese and close with another slice of bread. Apply some butter and grill or roast it on Dosa tawa and enjoy.
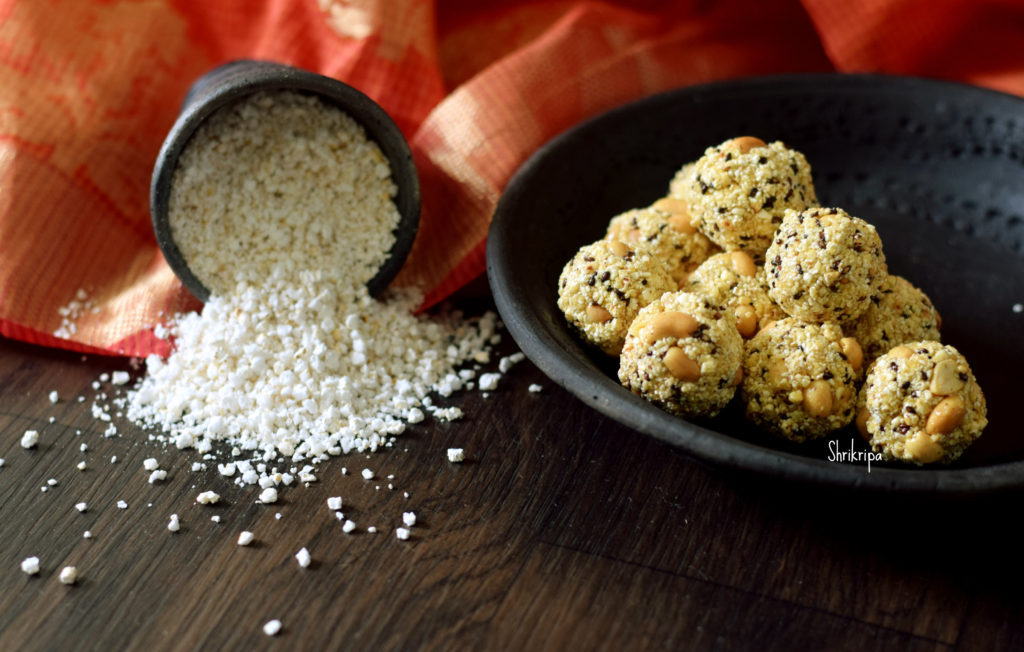
Aralu laddu / Puffed Paddy snow ball:

Aralu, Hodalu or Puffed paddy is made by roasting paddy itself. Usually we see puffed rice in the market. Puffed paddy is very rare to find nowadays. It has a very important role in any divine occasions like marriage, Ganapathi havan, Nag Panchami or chauthi festivals in our region.

Normally we don’t eat rice preparations during vrath (fasting) and Aralu fits the bill. Aralu or puffed paddy is prepared by roasting the paddy in an iron tawa. Usually in villages, they do it in an open air. Normally, in open air, wood fire setting will be laid, iron tawa is heated uniformly by putting little sand into it. When sand becomes hot, fist full of dried paddy would be dropped and tossed regularly until paddy puffs and bursts into white popped rice. It is not cooked or done by using water and it is done by roasting. That is the reason it is considered as Pure /auspicious thing and used in prasadam or any divine purposes.

We can make this and use as a regular energy ball as well. It has all the goodness that our body needs. It fits the bill as #eatlocal #healthy #natural #ironrich #fibrerich #refinedfree #holistic #glutenfree #healthysnack #kidfriendly as well.

We normally get puffed paddy in two forms. Either whole or powdered.

Here in this laddu, I have used powdered form. If you have whole paddy, nothing to worry. Make powder by using mixer jar and use it.

I have used chikki jaggery which is also known as Antu bella. One can use normal jaggery as well.

Ingredients:

Powdered puffed paddy – 1 ½ cup

Jaggery – ½ cup (I have used chikki jaggery)

Black Sesame – 2 tea spoons

Broken peanuts – 3 to 4 table spoons

Ghee – 2 table spoons

Water – 2 table spoons

Cardamom powder – ½ to 1 tea spoon

Method:

-Clean puffed paddy powder, by removing any leftover paddy husks and keep it ready.

-Dry roast peanuts, remove outer skin and make it into halves or use roasted and halved peanuts itself.

-Dry roast sesame seeds as well.

-Dilute jaggery in water by boiling. When jaggery melts, sieve and collect. In this way, we can discard the impurities from the jaggery.

-Take one thick bottomed kadai, add jaggery solution, 1 table spoon of ghee and boil until it reaches one thread consistency.

-If you are confused with this stage, take one small tumbler, filled with water. Drop the jaggery mixture and see. If jaggery becomes hard when it drops, and you can make a ball when you press and rotate it by placing in between your thumb and forefinger.

-Mix in puffed paddy powder, roasted sesame, peanut halves, cardamom powder, remaining one table spoon of ghee and mix everything.

-Switch off the gas.

– Apply little ghee on your palm and start making roundels. Sometimes, In-between If it cools down completely, it doesn’t bind, and you can keep the vessel on fire, re heat a little and proceed and finish off the mixture by making roundels.


Palak paneer:

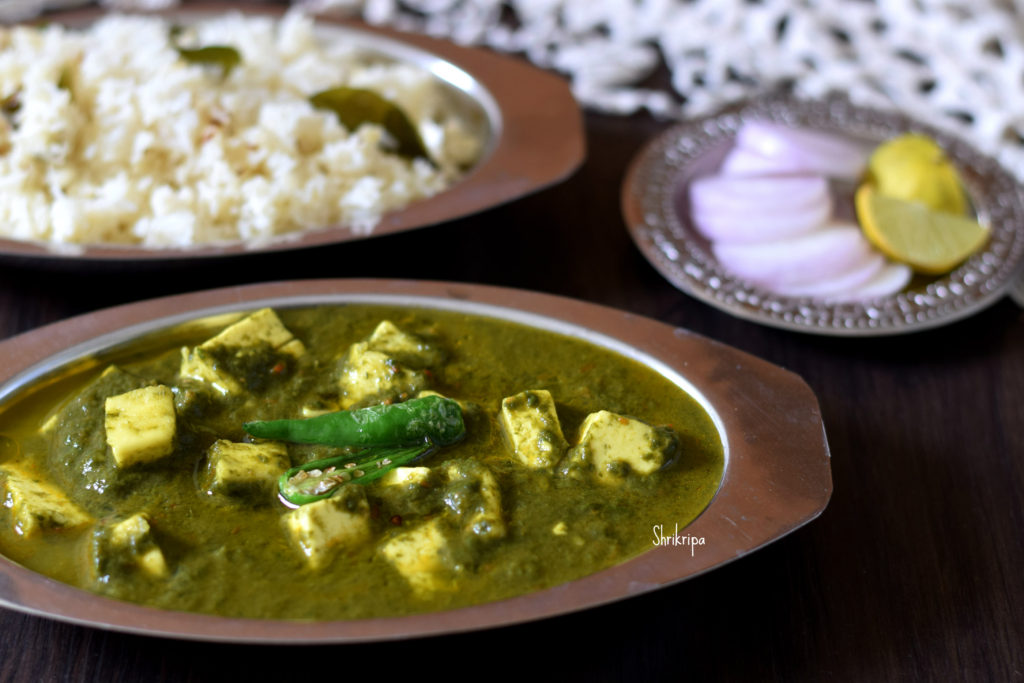
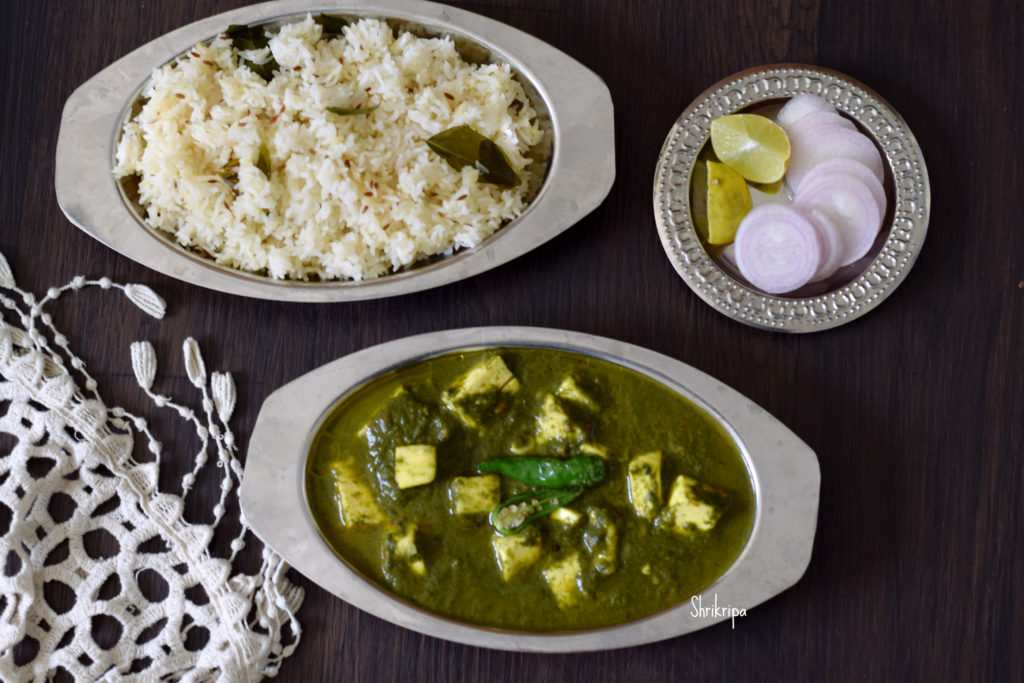
Spinach with cottage cheese is one of the healthiest option of Indian curries. It is the most popular North Indian side dish and goes well with any flavoured rice as well flat breads. We all know the goodness of spinach or paneer. Both are very nutritious- spinach is iron rich, and on the other hand paneer is rich in calcium.

This curry which I make is light, low calorie and creamy without adding any cream or deep fry.

Cottage cheese or paneer is soaked in warm milk and cooked with spinach paste with the added mild spice. This recipe is easy to cook and works just fine as a toddler’s food or for the tiffin box.

How I proceed –

Ingredients:

Palak – 1 big punch

Paneer – 200 or 400 grams

Milk – 1 cup

Tomatoes – 2

Salt

Sugar – ½ tea spoon

Oil – 2 table spoons

Hing – one pinch

Cumin – 1 tea spoon

Garlic – 10 -12 cloves (sliced)

Ginger – 1” (julienne)

Turmeric – ½ tea spoon

Red chilli powder – 1 tea spoon

Cumin powder – 1 tea spoon

Garam masala powder – ½ tea spoon

Method:

-Chop Tomato, spinach and make chunks of paneer and keep it ready. Chop garlic and ginger as well.

-Heat milk, add chunks of paneer and keep aside by closing the lid.

-Grind tomato in the mixer jar and keep aside.

-Take one kadai, add chopped spinach, sprinkle sugar, little salt and cook until wilts.

– Sugar will help to retain the colour green and salt will help spinach to leave its water to cook.

-Cool this wilted spinach, grind into rough paste and keep it aside.

-Now keep one tawa for seasoning, pour oil, when it is hot, add cumin, hing, ginger and garlic. Fry for 2 minutes.

-Add tomato paste, turmeric, red chilli powder, cumin powder, garam masala powder and fry until oil oozes from the sides.

-Now add spinach paste, milk-soaked paneer content and give a stir. Check for the salt and add the required amount.

-After boiling it for some time, you will see a layer of oil or dark coloured layer at the top. Now it is ready.

-Serve this rich gravy with your choice main dish. We always prefer jeera rice as a main dish for this curry.


Kanile palya/Bamboo Shoot and jack seed palya:

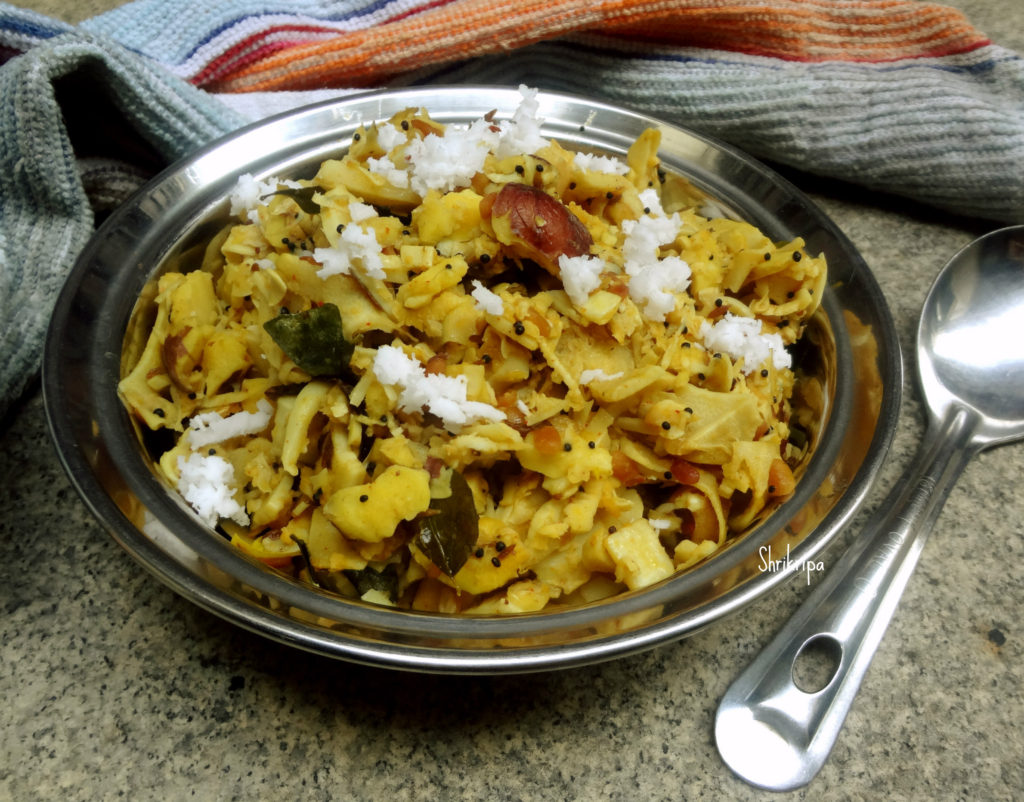
Kanile is nothing but Bamboo shoot. We coastal people, prepare some delicacies from this seasonal high fiber veggie, such as Bamboo shoot and green gram gravy or this dry Subzi/palya is prepared by mixing with crushed Jackfruit seed. It is protein rich, subtle in flavor, blends very well with bamboo shoot. This palya goes very well with hot Rice with a dollop of ghee or as a side dish with any kind of gravy, Rasam or sambar.  So, it is a seasonal monsoon season’s treat for us.

We normally use fresh bamboo shoot and chop it in circular manner. (please refer to the Post of How to chop Bamboo shoot)

I normally preserve jack seeds in frozen form and procedure is already shared in my blog as well.

Ingredients:

Ready Bamboo shoot – 1 cup

Fresh or Frozen jack seeds –2 fists full

Grated coconut – 3 table spoons

Turmeric – ½ tea spoon

Red chilli powder – 1 tea spoon

Salt- as needed

Jaggery – as needed (optional)

Seasoning:

Coconut oil – 1 table spoon

Mustard – 1 tea spoon

 Urad dal – 1 tea spoon

Cumin – ½ tea spoon

Red chilli -1

Curry leaves – 2 springs

Method:

-I normally crush and store the jack seeds. So, no need of chopping or crushing. If you have fresh seeds with you, please crush the seed by using hitting stone and remove outer stiff cover and use inner seed.

– Take one thick bottomed pan, do seasoning. Heat oil, splutter mustard, add urad dal. When dal becomes light brown, add cumin, red chilli and curry leaves.

-Now add in crushed jack seeds, a cup of water and cook at low fire by closing the lid.

– When it is half done, add chopped and ready bamboo pieces, Red chilli powder, salt and jaggery, required amount of water.

-Close the lid and cook this in a low flame, until it is cooked or up to water drains.

-If water drains first, add some more water and make sure to cook properly.

Garnish with fresh grated coconut and mix, cook for 2 minutes and switch off the gas.

-Serve with hot rice and enjoy as a side dish.


Ghee Residue Apple-Cinnamon Tea cake:

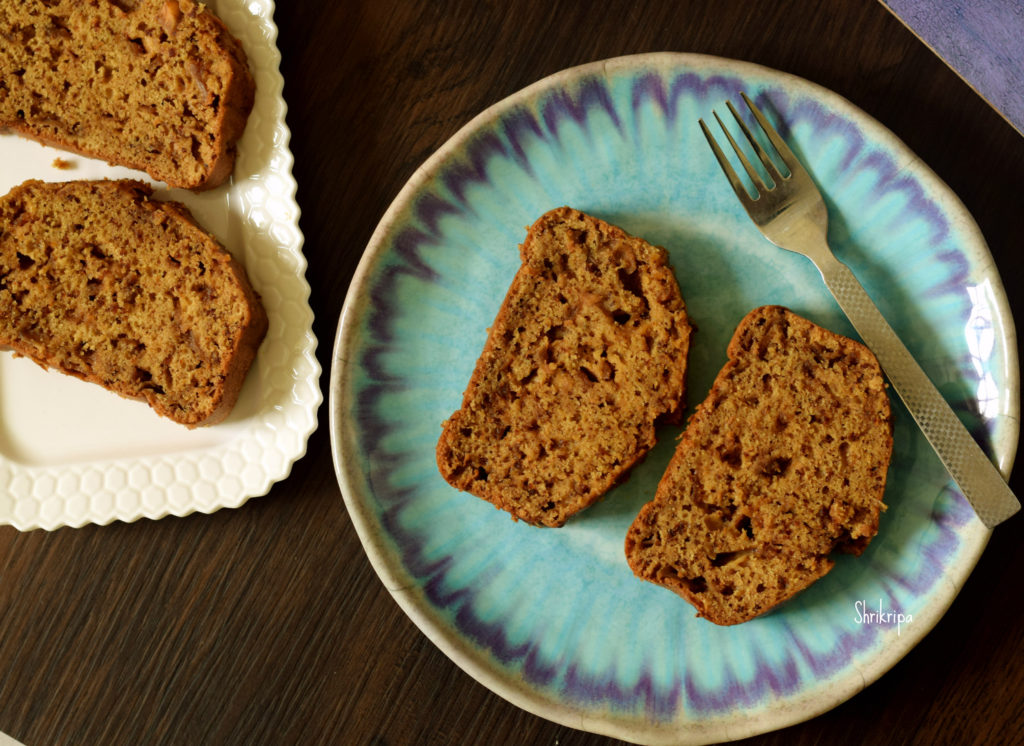
Ghee residue is a moist, brown coloured, by-product formed after preparing ghee from white butter. It is a rich source of essential fatty acids, anti-oxidants and proteins.

As of now, you will know my love towards this sediment and I usually make it a point to prepare any tea cakes after making fresh homemade ghee. Usually I play with the ingredient and flavours in these cakes. Already I have Egg less Tea cake and Chocolate cake in my blog.

This time, I included cinnamon flavour in my cake by using chopped fresh apple. I have used tasteless mini apples which I took in the market for its attractive size and colour, turned out to be a tasteless apple, after cutting 😉 

Now we will see how to make this,

Ingredients:

Apples – 1 cup (chopped)

Ghee residue  – 2 to 3 table spoons

Sugar – ½ cup

Organic jaggery powder – ½ cup

All purpose flour – 1 cup

Whole wheat flour – 1 cup

Cinnamon – 1/2 tea spoon

Eggs –  2 (beaten)

Water – 1 cup

Cooking soda – 1 tsp or little less.

Method:

– Wash all the apples and chop it into tiny pieces. No need to remove the peel.

-Grease the baking tray (you can use bread tin as well). Line this with butter paper, keep it ready.

–In another bowl, dry mix All purpose flour, whole wheat flour, cinnamon powder and keep aside.

-Take vessel in which you prepare ghee. There will be 2-3 table spoon ghee residues.

-To this add water, chopped apples, sugar, jaggery and heat it until sugar dissolves. Switch off and cool.

-Add cooking soda and keep aside at least for 20 min.

– After it cools, add beaten eggs and mix nicely.                        

-Now fold in flour mixture, mix gently and pour this batter to a greased and lined baking vessel.                                           

-Bake this in a pre- heated oven for 35 -40 min or until done at 180 C.

-If you want to check its doneness, use tooth pick or knife. Insert this, if it comes out clean, remove the tin, keep it outside.

-After some time, remove butter paper and cool further.                  

-When it reaches room temperature, you can slice it or cut according to your wish and enjoy with cup of coffee or tea.

Note:

-You can use only All-purpose flour or mixture of any flour.

-You can use only sugar, Jaggery or mixture of both.

-If you like it sweeter, please increase the quantity of sweet by adding ¼ cup more of sugar or jaggery.