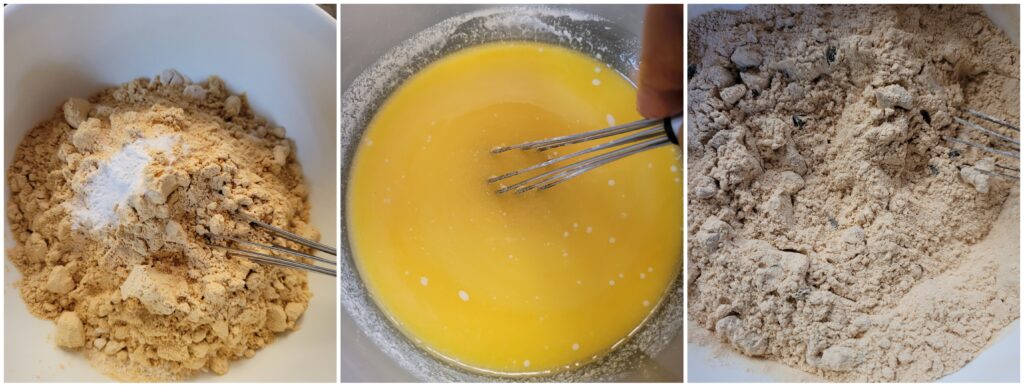
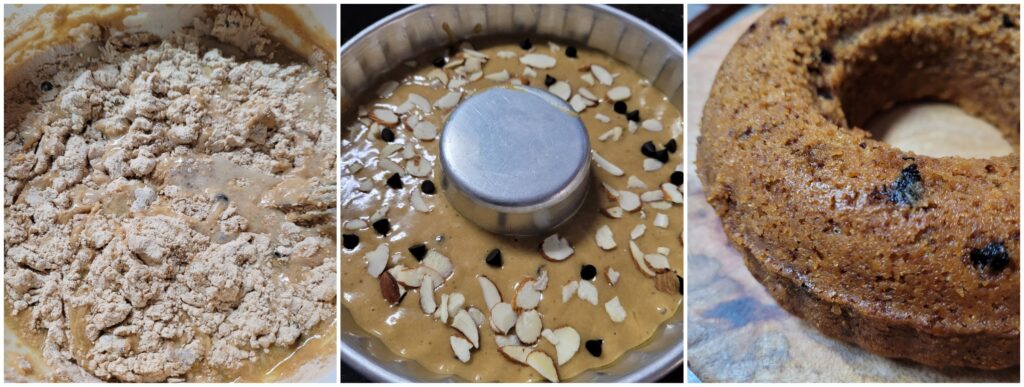
Horlicks Cake: (Eggless)

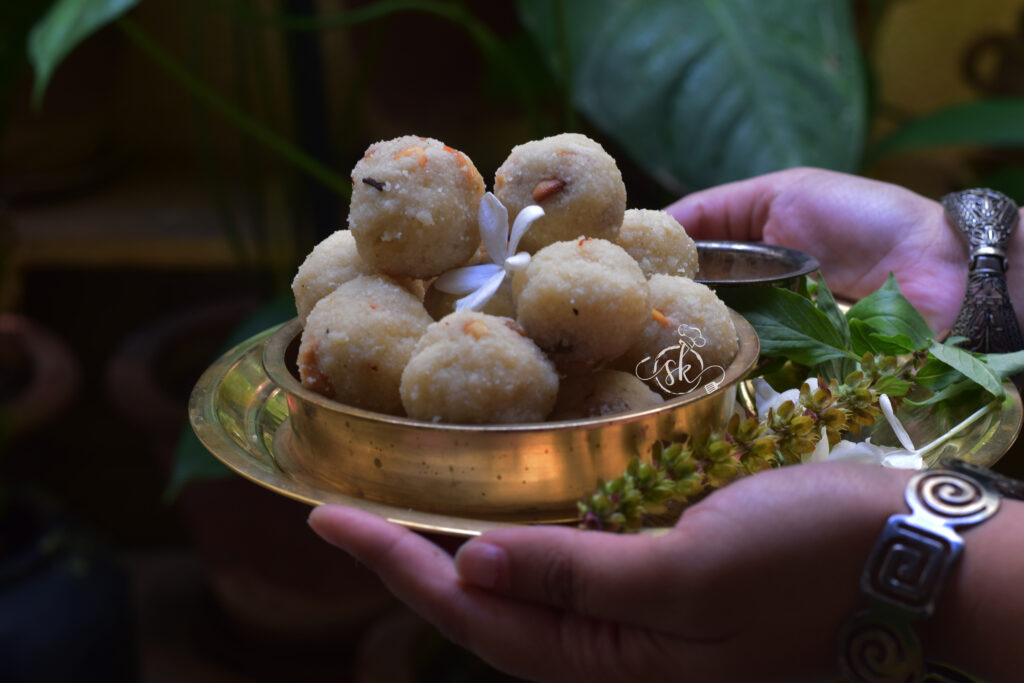
Sajjige ladoo/ Rava laddu:

Happy Deepavali wishes to dear readers.

Sajjige is semolina or Rava in our mangaluru, coastal region of Karnataka. Rava ladoo has never made an appearance in my blog. Hence, I made the ladoo for this Diwali and here I am, sharing a mouth-watering super soft laddu of our region. To make this ladoo, we need minimal ingredients and don’t need any milk or coconut, and it has a good shelf life when stored in an airtight container.

This laddu recipe is an age-old recipe I learned from my friend’s mom.

Method:

Medium Rava – 4 cups (also known as Uppittu rava/Bombay rava)

Ghee – 3 to 4 tablespoons

Cloves -4 (crushed)

Saffron strands – 8- 10

Cardamom – 1tsp

Cashew bits – 3 to 5 tablespoons (fried)

Raisins – 3 tablespoons (use as it is)

Sugar – 3 ½ cups

Water – 1 ¾ cup (just enough to cover the sugar)

Method:

-Take little ghee and fry cashew bits and keep it aside.

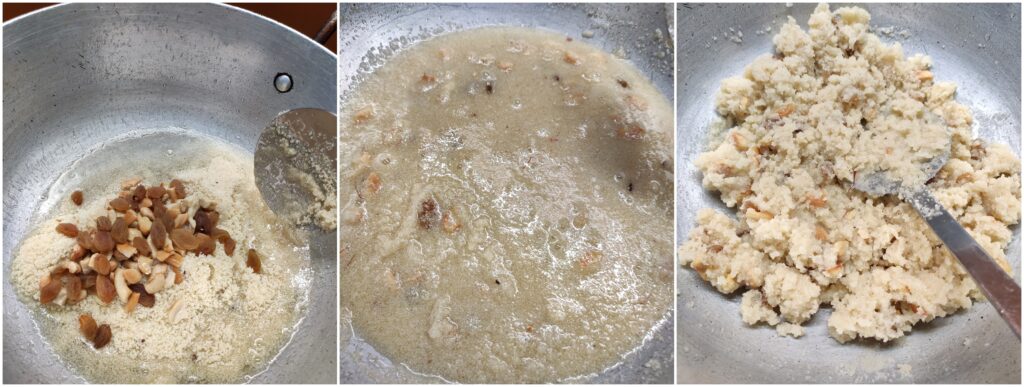
-Put Rava, saffron, and crushed cloves, and roast everything until it is grainy and white by adding ghee.

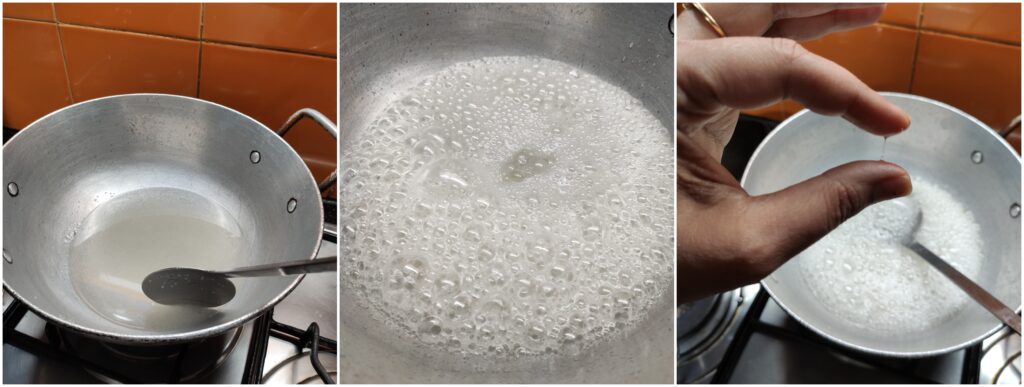
-In a saucepan or thick-bottomed pan, make a sugar syrup of half-thread consistency. Now, this is very important to get soft, melt-in-a-mouth laddu.

(To make sugar syrup, heat sugar and water until it boils and becomes shiny. To test the half-thread consistency, touch the sugar syrup between your forefinger and thumb, and when you open those fingers away, the sugar thread should break).

-Now, mix roasted rava, cardamom powder, roasted cashew, and raisins and mix everything properly. Mass would look watery, no worries. Close the lid and keep it aside for some time ( it takes 1 hour or more) until the mixture dries up.

-start binding the roundels and keep them aside to cool and dry properly. Store it in an airtight container and enjoy.

Kesari bath:

Kesari bath is made in many ways. Traditionally, it is made with Bansi Rava, and that is how my husband likes it. Since it is our Anniversary, presenting one of the much-cherished desserts and an integral part of our wedding menu.

Today, I am celebrating five years of blogging and 23 years of our togetherness with the much-loved sweet of my Husband, Kesari bath.

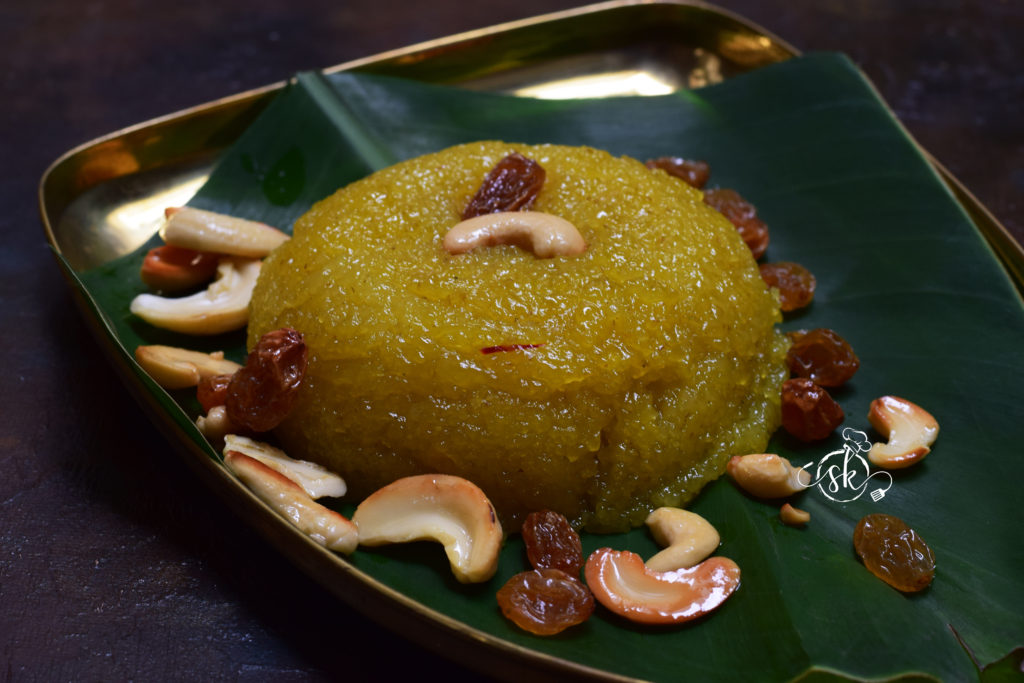
It is a simple sweet, with minimal ingredients like Bansi Rava, Sugar, Saffron and ghee, garnished with ghee fried cashews and raisins. Earlier I used to eyeball the measurements and prepare. The traditional measure and this foolproof recipe, which we cherish, is by my friend Madhu.

For measurements, use any tumbler of your choice.

Ingredients:

Bansi Rava- 1cup

Water-3cup

Sugar – 1 ½ to 2 cups ( Acc to your sweet level)

Salt – ¼ tsp

Cardamom powder – 1 tsp

Saffron – 10 to 12 strings (soak it in hot water or milk)

Ghee- ½ cup or a little more, as needed.

Cashews 10-15

Dry grapes- 15-20

Method:

-Take a small cup, add saffron, pour little hot milk or water, and allow soak.

-Keep water to boil in a saucepan.

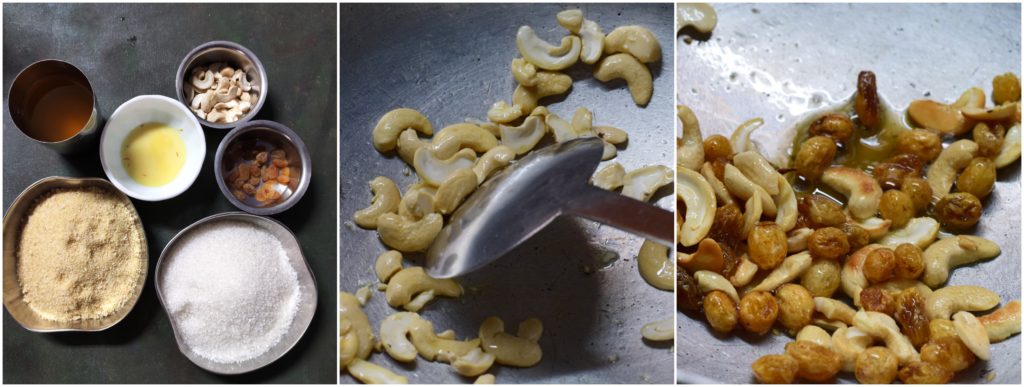
-In a pan, add a tablespoon of ghee, fry cashew and dry grapes and keep aside.

-In the same pan, roast Bansi Rava till a pleasant aroma comes and turns grainy.

-Add salt and pour boiling water and allow to cook on a low flame.

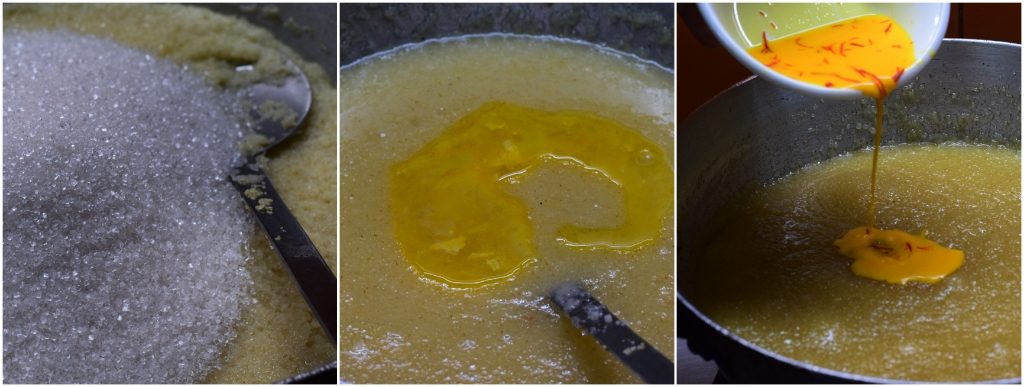
– Once Rava is cooked, add sugar stir well to make sure there is no lump.

-While stirring, In every small interval, add ghee and proceed to stir.

– After 10 minutes of stirring, you can add saffron laced milk and mix well.

– Keep adding ghee little by little and mix well. Cook this mixture until ghee starts leaving from the sides.  Finally, add cardamom powder,  dry fruits mix well.

Serve hot.

NOTE:

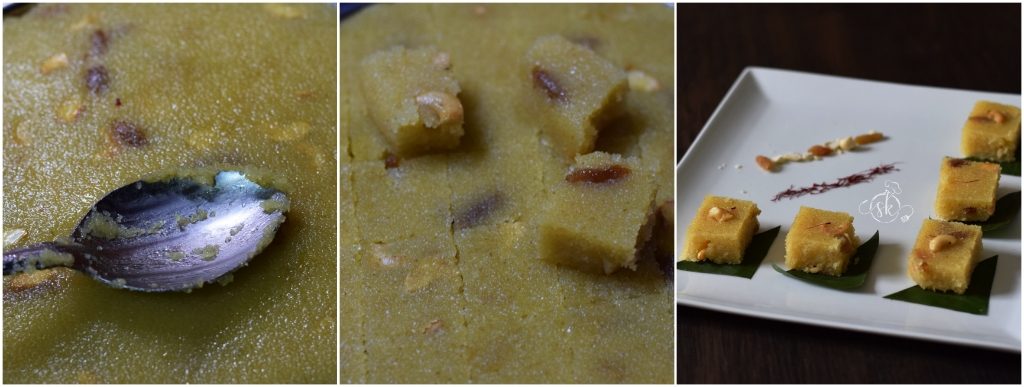
If you wish to make square pieces out of it, when the Kesari bath is done, Spread the content on a ghee applied plate.

Allow to cool, mark the shape, get the perfectly shaped pieces, and store them in an air-tight container.

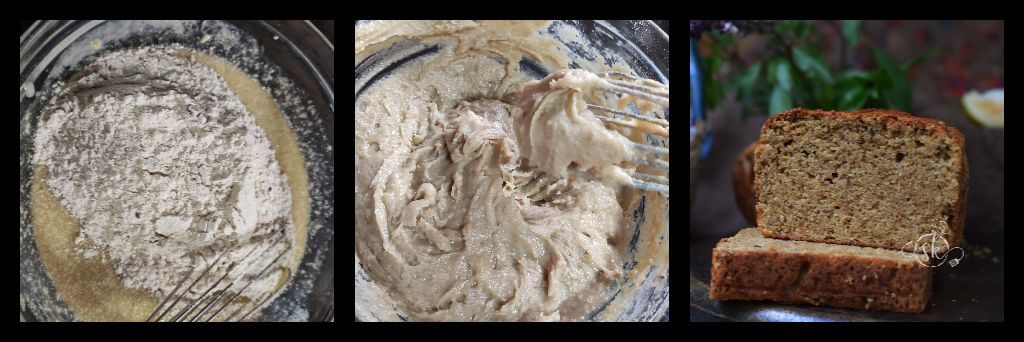
Eggless Chocolate Banana Cake:

After trying my hand in Homemade Pure Cocoa powder, I thought of using Cocoa powder in several recipes; I first wanted to include it in my all-time favourite banana cake. It is an ideal recipe to finish off overripe bananas and the perfect tea time snack for anyone, including small kids. The cake, which has whole wheat flour, natural cocoa, natural vanilla as well as milk. If you want to make it vegan, replace it with vegan milk and proceed to bake.

Let us see how I have done it –

Ingredients:

Whole Wheat flour – 1 1/3 cup ( I took 1 cup of whole wheat flour + 1/3 cup of Emmer wheat flour)

Fresh/Desiccated coconut – 2 tbl sp

Baking soda – 1 tsp

Baking powder – 1 tsp

Salt – ¼ tsp

Milk – ¾ cup

Coffee powder – 1 tsp

Pure Cocoa powder – ½ cup (unsweetened cocoa powder)

Brown Sugar – ½ cup

Oil – 1/3 cup

Vanilla – 1 tsp (I have used pure powdered vanilla)

Bananas – 2 ( ½ to ¾ cup of pulp)

Chocolate chip or Cocoa nibs – 3 tbl sp

Method:

-Mix dry ingredients like flour, baking soda, baking powder, salt, desiccated coconut in a bowl and keep aside.

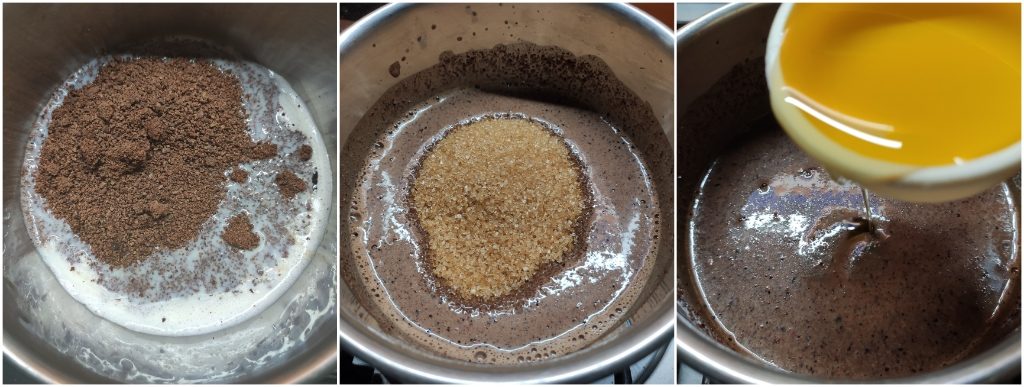
-In a saucepan, heat milk, mix in cocoa, coffee powder and make a concoction. Add in vanilla, Sugar and oil one by one. Beat well.

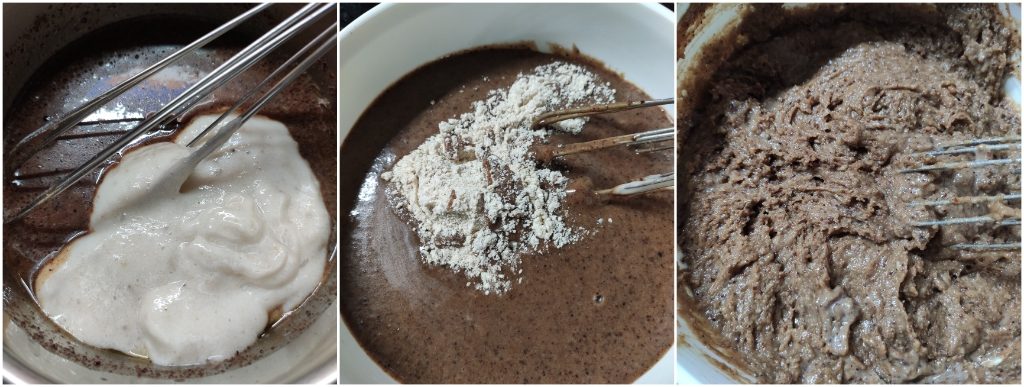
-Next, make a puree of banana and mix in, beat well. Now, the wet ingredient is ready.

-Fold in dry ingredient to wet ingredient. Don’t over mix.

-Pour the mixture into a lined loaf pan, top it with the choco-chip or cocoa nibs and bake at 180°C preheated oven for 40 minutes or until it is done.

-Take out, cool the cake and slice it and enjoy. It stays good for 3 to 4 days under refrigeration.

-Reheat the cake for 30sec in the microwave and enjoy with a cup of coffee or tea.

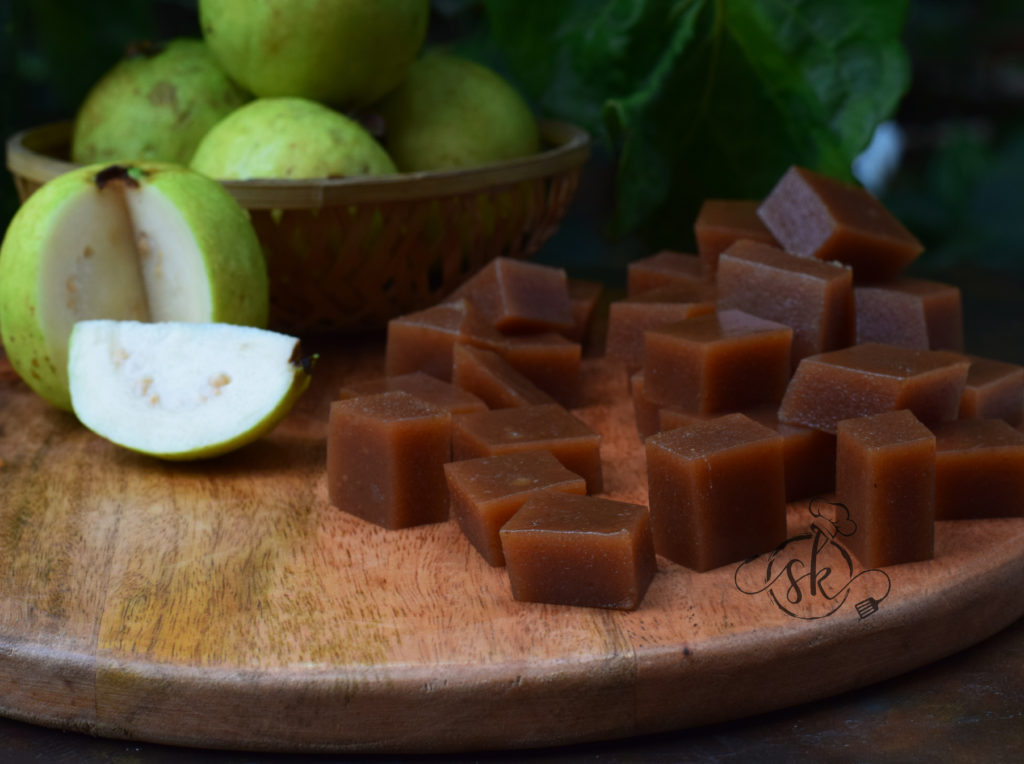
Guava Cake:

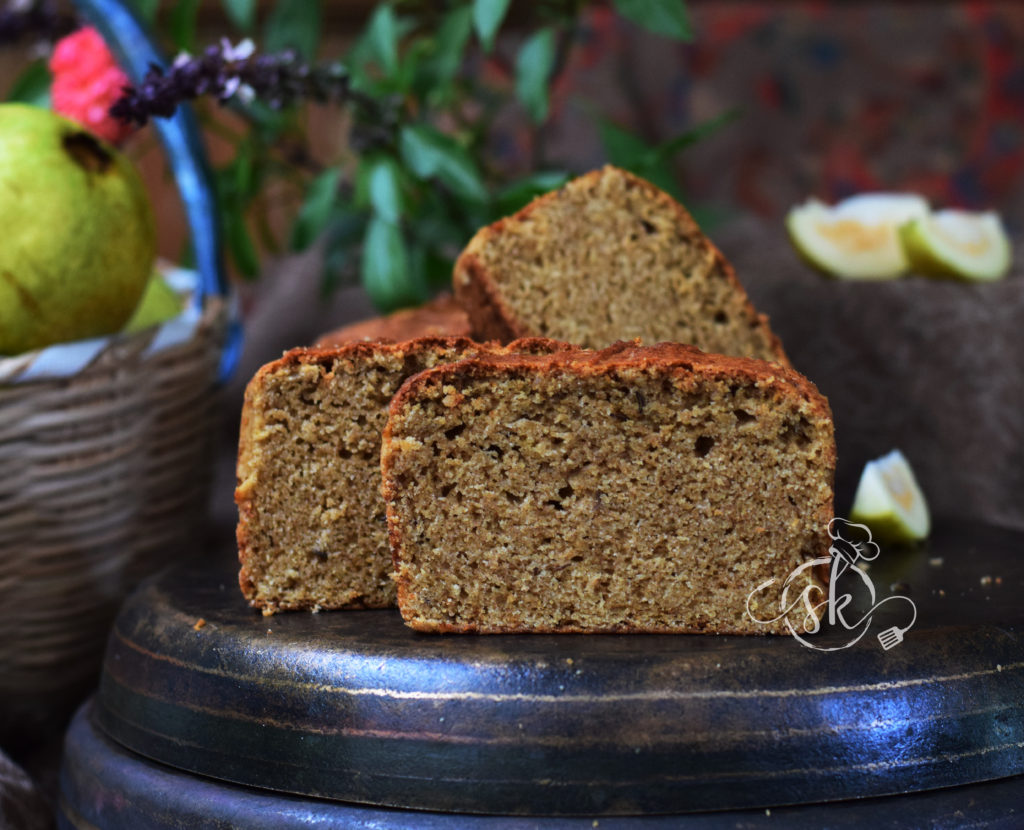
This cake was totally experimental and turned out to be a soft, delicious coffee cake with the mild taste of guava with a sweet tinge. One more thing, I am happy about this cake is the usage of cake seed and 100% whole wheat. Usually, when I attempt a new flavour, I prefer half and half.

Here, cake seed is nothing but Caraway seeds, which has a distinct flavour.

If you need to make eggless, please go ahead with any egg replacer. I usually use flax gel as an egg replacer, and it turns out best and gets an additional nutrition quotient.

For flax gel: -To make flax gel: The necessary ratio is 2 ½ tsp of flaxseed powder and three tablespoons of hot water, and then you whisk in the mixture until it becomes gelatinous to replace one egg.

Ingredients:

Whole wheat flour – 1 ½ cup

Baking powder – ¾ tsp

Baking soda – ¾ tsp

Salt – a pinch

Caraway/Cake seed – 1 tsp

Eggs – 2

Butter – 100 grams

Vanilla – 1 tsp

Sugar – 1 cup (used brown sugar)

Guava puree – ½ cup ( recipe is here)

Milk – 2 to 4 tablespoons (to adjust the consistency)

Method:

-Dry mix all the dry ingredients-whole wheat flour, salt, caraway seed, baking powder and soda, by sieving 2 to 3 times or with a wire whisk.

-In another bowl, beat guava puree, butter, eggs by adding one by one. Add sugar, vanilla essence and beat until sugar almost dissolves.

-Fold in dry ingredients, adjust the consistency by adding milk. The batter should be a little stiff.

-Take a loaf pan, line with parchment paper, pour the dough, bake in a preheated oven at 180°C for 40 -50 minutes or until done.

-take out, cool and slice.


Guava Cheese/ Perad/halwa :

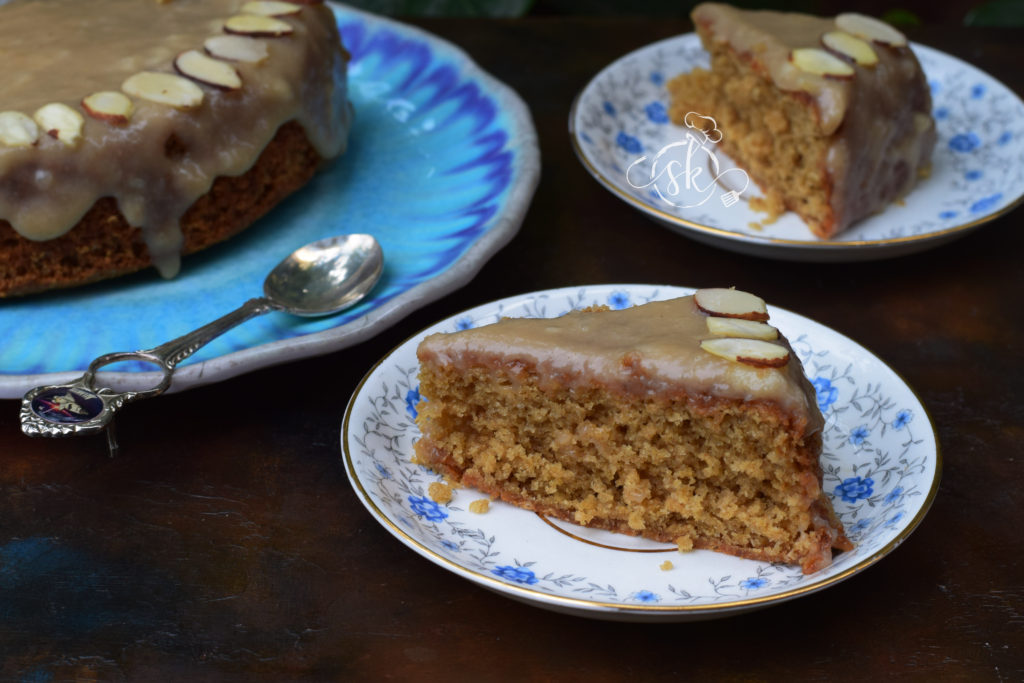
When the neighbour comes and hands me a big bag full of substantial sized overripe guavas, I knew, it is going to be a strenuous task. I need to deal with my mindset of ‘no wastage.’ First thing, came to my mind was my favourite Guava cheese.

When I was reading about the guava cheese, its origin, it traces back to Portuguese settlers in Brazil where it’s known as Goiabada. I am guessing that is how this recipe landed with them in Goa and is known as Perad/Peraad.

In simple terms, guava cheese is nothing but guava halwa. It doesn’t taste like cheese. Its texture is something you can easily bite into, yet is slightly chewy, somewhat like our Banana halwa, with a grainy texture, of course with added guava taste. Colour of the cheese depends on the variety of the Guava. If it is white, the colour turns our light brown, like mine. I usually mix a half red and half white variety of Guava to get beautiful hue.

Ingredients:

Overripe Guava – 2kgs

Sugar – 800 grams to 1 kg (acc to your palette)

Salt – ½ tsp

Butter – 3 tablespoons

Lemon juice -1 tablespoon 

Method:

-Wash, chop the fruit into quarters—Cook with sufficient water for two whistles, cool.

-Pulse it in a mixer jar along with cooked water, sieve the Puree, separate the seed and its roughage.

-Weigh the pulp. For 2 kgs of pulp, I have taken 800 grams of sugar. You can take up to one kg if you prefer sweeter.

-Take one thick bottomed Kadai, add the pulp and boil for 20 minutes or until it starts boiling. Allow 10 minutes more to boil and add sugar and salt, continue to cook in a low flame.

-When the mixture turns pinkish brown add butter and proceeds to cook further. When it starts leaving the sides, add lemon juice, cook ten more minutes.

-Remove the mixture to the greased plate, leave 4 to 6 hours and then cut.

-Stays good for 3 to 5 months without any problem, at room temperature, stored in an airtight container.


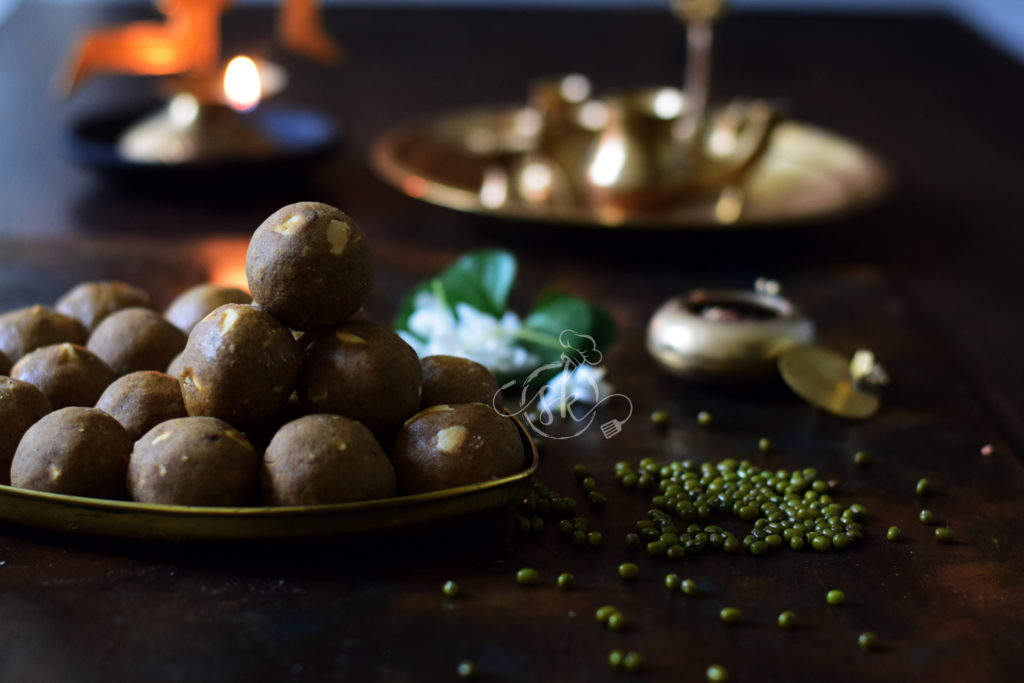
Almond Vanilla cake :

Hey, Anushree here! This is my second guest post on my mom’s blog ( My first one was a red velvet cake, if you haven’t checked that out, click right here).

So, it is my parents as well as my mom’s Blog anniversary today, and since my sister and I are home, and the world has come to a pause (pretty much), I thought it would be a good idea to make something for their special day. My mom doesn’t like chocolate much and loves milder flavours. My dad pretty much loves all desserts, so I decided to make a healthy, and yummy almond and vanilla cake, with a glaze instead of frosting as we aren’t too fond of the cream icing. So, while frosting, instead of new age cream cheese, I have opted for an original Ermine icing, which is also known as boiled milk frosting. Here, instead of All-purpose flour, I have used a mixture of  Almond flour, oats flour, and whole wheat flour.

Ingredients:

For the cake:

Almond flour/ meal – ½ cup

Whole wheat flour – ½ cup

Oats flour – ½ cup

Sugar -¾ cup 

Baking powder -1/2 tsp

Baking soda- ½ tsp

Salt – ¼ tsp

Butter – 2 tablespoons

Curd – ½ cup

Egg – 1

Vanilla essence – 1 tsp

For the Glaze:

Milk – 1 cup

Almond flour – 5 tablespoons

Arrowroot powder – 1 tablespoon

Butter – 50 grams

Sugar – ½ cup

Vanilla – 1 tsp

Slivered Almonds – As needed

Method:

To Bake the cake:

-Preheat oven for 180° C . Line the baking tray and keep it ready.

-Measure every ingredient and keep it ready. Melt butter and keep aside.

-Take one glass bowl, beat egg, then sugar, melted butter, curd, vanilla beat everything until it is well mixed and keep aside.

-Now take one more bowl, put all the dry ingredients, all the three flours, salt and baking soda, baking powder. Sieve a couple of times or dry whisk and keep it ready.

–Pour the previously prepared wet mixture to dry ingredients and fold the batter by using any spatula.

-Pour the batter in the lined baking tray and keep this for baking for 40 -50  minutes or until done.
-Before removing, check with a knife by inserting, in the baked cake. It should come out clean.

-Cool the cake completely before doing the frosting part.

Method for Frosting:

-Take milk, Almond flour, and Arrowroot powder in a saucepan. Boil the mixture until it is cooks and becomes creamy.

-Switch off the flame, add in butter, sugar, and vanilla, mix well. Cool the mixture and keep it in the fridge to cool further making it thicker. ( I have not kept it in the fridge)

-Now, slice the cake, make a 2-equal slice, Apply the frosting on the first layer and cover it with the second slice.

-Now pour the frosting on the top, we like the sauce texture and left it like that.

-Decorate the cake with slivered almonds and serve and enjoy with the family <3

Hasaru Unde/Green gram Laddu/ Whole moong flour Laddu:

Wishing all my readers a happy Navarathri!

Green gram / whole moong is very nutritious and loved by everyone at our home. When I found the whole moong flour at my regular organic stores, I was excited to try my hand at using it in my regular cooking. While thinking of utilising it, idea of preparing laddu came to my mind and I immediately tried my best by using my Besan laddu recipe as a base and it did turn out super delicious with its earthy flavour. Everyone gave a thumbs up at home and  liked it .

So, I am sharing the recipe with you all.

Ingredients:

Green gram flour/ whole Moong flour  – 3 cups

Sugar – 2 ¼ cups

Ghee – 1 ¼  cup

Dry fruits – 1 cup

Cardamom powder – 1 teaspoon

Method:

-Chop dry fruits. I normally use half cup of cashew bits and half cup of slivered Almond bits.

-Dry roast almond and cashew bits and keep aside.

-Powder sugar and keep aside.

-Take one thick bottomed wok, roast green gram flour in very low temperature.

-When it is a little hot, start adding ghee little by little during the roasting process.

-Do not add or pour all the ghee at one go. It will not help to roast evenly, and it will form a muddy consistency, and will affect it in even roasting.

– I took exactly 20 minutes over a small flame.

-After it roasts and you’ve added all the ghee, mixture becomes very runny and colour will turn greenish brown.

-At this time, your house will filled with roasted flour’s aroma. This is the time you should switch off the gas and leave this mixture to cool completely.

-It will take anywhere between 30 to 40 minutes.

-Now add powdered sugar, cardamom powder and roasted dry fruits and mix everything properly.

-Now start using your hand and mix it once and start making small roundels by taking little mixture at a time.

-At this time, you will feel that the laddus are a little wet and glossy and shining.

-Arrange these over a clean, dry platter. After some time (one hour) laddu’s will be dry and glossy texture will vanish.

-Store it in a dry container and enjoy with your family.

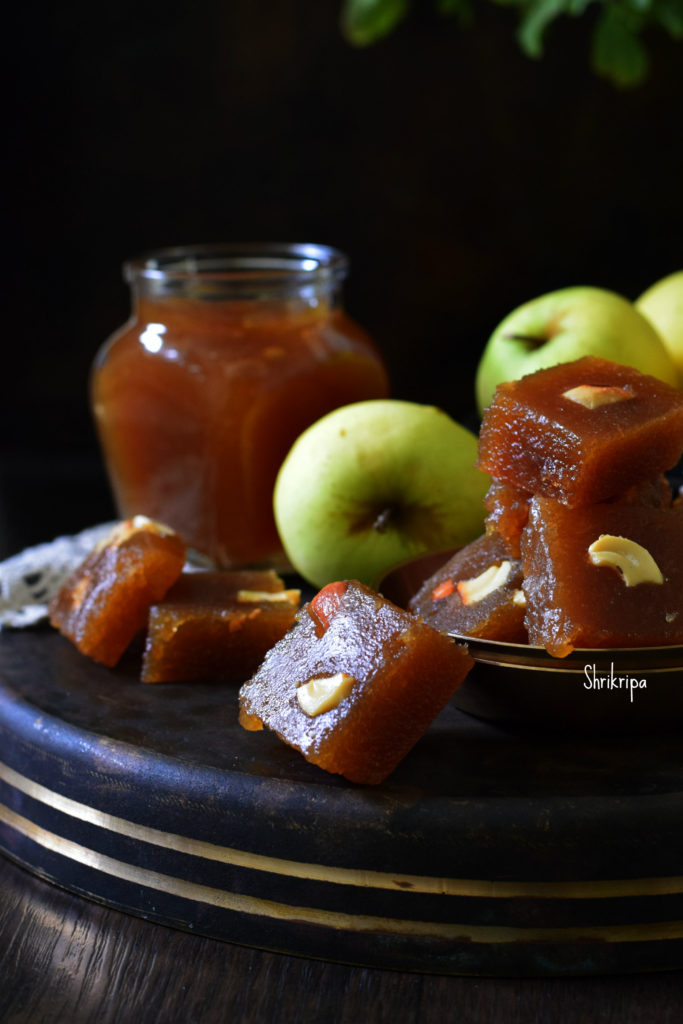
Apple Halwa

Yesterday, while preparing Apple jam, my Research oriented husband came in and asked me what I was doing, I said – Apple jam , planning to finish the stock which we bought couple of weeks back

He said, “why not halwa?” I was like 🙄🤔

Then, I changed my mind and took my share of  jam when it was done. Proceeded to make Halwa with the remaining quantity, by adding little ghee in-between at a regular interval.

Surprisingly, it turned out super delicious and here I am presenting my end result which was experimental.

Here I have used fruit as a whole /with skin. Normally Apple turns out sour when you cook /boil . To avoid the sour taste, normally I bake it until it is done, then grind into a puree, sieved, and proceed to make jam then halwa with the added mild cinnamon flavour. One can add cardamom as well. Sugar can be replaced with an organic jaggery as well. Even though I have not tried with the jaggery, my friend Aruna has tried with the jaggery and result was just amazing, which was deep brown in colour.

Ingredients:

Golden yellow Apple – 1 kg (Any variety would do)

 Sugar – ¾ kg

Ghee – ½ to ¾ cup

Cinnamon or Cardamom – 1 or 2 pinches

Method:

-Wash Apples, dice ,remove seed part and arrange in a baking dish. For Initial preparation, please refer here

-Bake this in a 170°C pre-heated oven for 15 minutes at first.

-Remove, flip those apple pieces, and continue further 15 minutes.

-After 30 minutes, check the doneness. If it is soft, well cooked ,remove it.

-If it is not done, bake for further 5 or 10 minutes.

-When it is cool, add a little water and churn in a juicer by adding 1 or 2 cups of water.

-Sieve ,discard the roughage ( fibre as well as outer skin remains)

-Put this pulp in a thick bottomed kadai, add sugar,  cook until it turns into little thick and turns into mass.

-Add ghee 2 tablespoons at a time in-between while stirring. If you feel that the Apple puree  needs a little more ghee, add up to ¾ cup, some varieties of Apple need very less ghee and some need more.

-Now we will see, how we decide the quantity of ghee. While stirring if you feel that the mixture is a little dry and the bottom part becomes a little brown, keep adding it. If the ghee starts oozing at the sides, it is an indication to stop the addition of ghee.        


-Now we will see how you know the doneness. It is quite simple, keep on stirring until mixture leaves the sides of the kadai and ghee oozes out from the mixture. You can add cashew pieces at this stage or spread those pieces in a greased plate like me.

-After you are done with this, it is almost ready to shift to the plate. Before shifting I prefer to check, by taking one small peanut sized portion of the mixture and rolling it in-between my thumb and forefinger to make a small ball like structure. If it holds a ball like structure and does not stick to your finger, it is ready.

-Now remove from the flame, shift to a greased plate, and pat this mixture evenly by using a flat, greased (apply some ghee) back of the spoon.       


-Keep this aside for two or three hours to cool. Then cut this into the desired shape and store it in an airtight container.

-You can store this Halwa for a really long time (up to a month or two).


Almond Cashew Mawa Burfi:

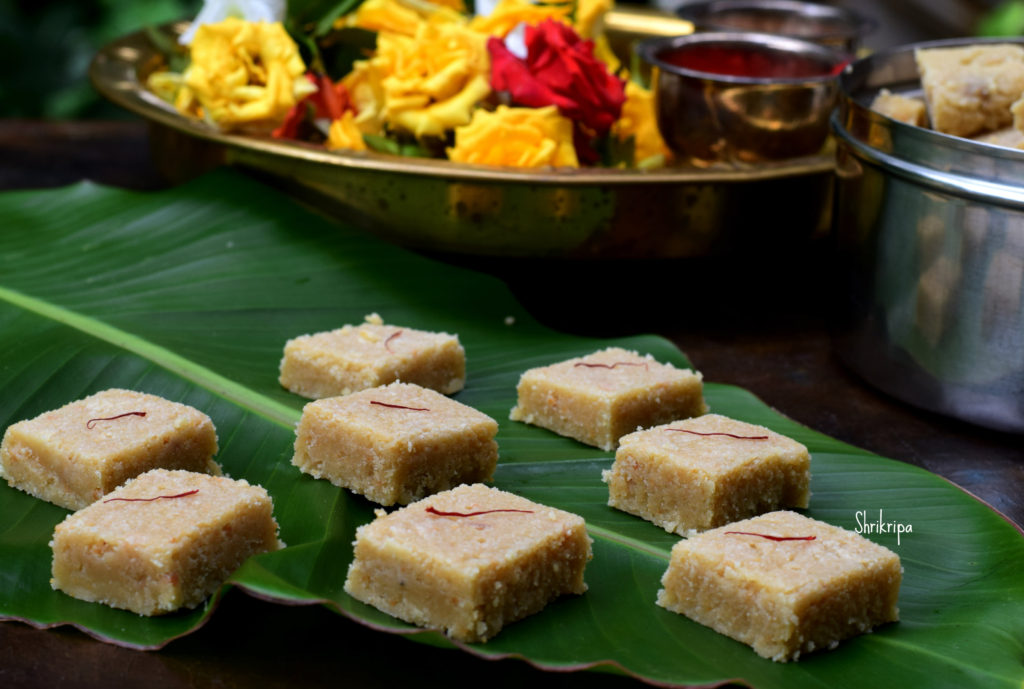
Who does not love Almond or Kaju Katli? Here I have combined the much loved two raw materials,  with milk solid/ khoya, to give a melt in a mouth Indian dessert, In the form of burfi.

Almond cashew mawa Barfi is a super delicious, easy to make, melt in mouth Indian sweet or fudge recipe. A perfect sweet to make on any special occasion! Or festive time.

Ingredients:

Almond – ¾ cup

Cashew –  1/3 cup

Khoya /mawa – ½ cup / 100 grams ( unsweetened)

Sugar – 1 ½ cup

Water – ½ cup

Ghee – ¼ cup

Saffron – 10 – 12 strands

Method:

-Heat a cup of water, soak almond and cashew. Close the lid and keep it for 2 hours.

-After two hours, peel the almonds, drain the water, spread these on kitchen towel to remove extra moisture.

-Grind them in a small mixer jar, by using pulse option by giving intervals for mixing in between to get a smooth paste. Grease one steel plate and keep it ready as well.

-Now, take one thick kadai, pour sugar, water, and boil until it reaches one thread consistency. It takes hardly 5 minutes, after initial boil.

-Add in Almond, cashew paste, after it melts and forms a homogeneous mix, add in grated Mawa.

-Stir everything in a low fire, without leaving hand. While stirring, add a tsp of ghee at regular interval and add saffron strands as well.

-When mixture leaves the sides, as well as thickens, check for the doneness. Take out little mixture, hold a small quantity, in between your thumb and forefinger, try to make a ball. Formed ball should shine as well as should not stick to your finger.

-If it passes the test, switch off the gas, and keep stirring for another 5 to 7 minutes, if any ghee is remaining, pour in between stirring.

 -Take the greased plate, pour the mixture, and spread evenly and leave it for 10 minutes. Mark the line and keep it aside for cooling. After cooling, take out pieces, store it in an airtight box.