Breadfruit Peel Chutney:

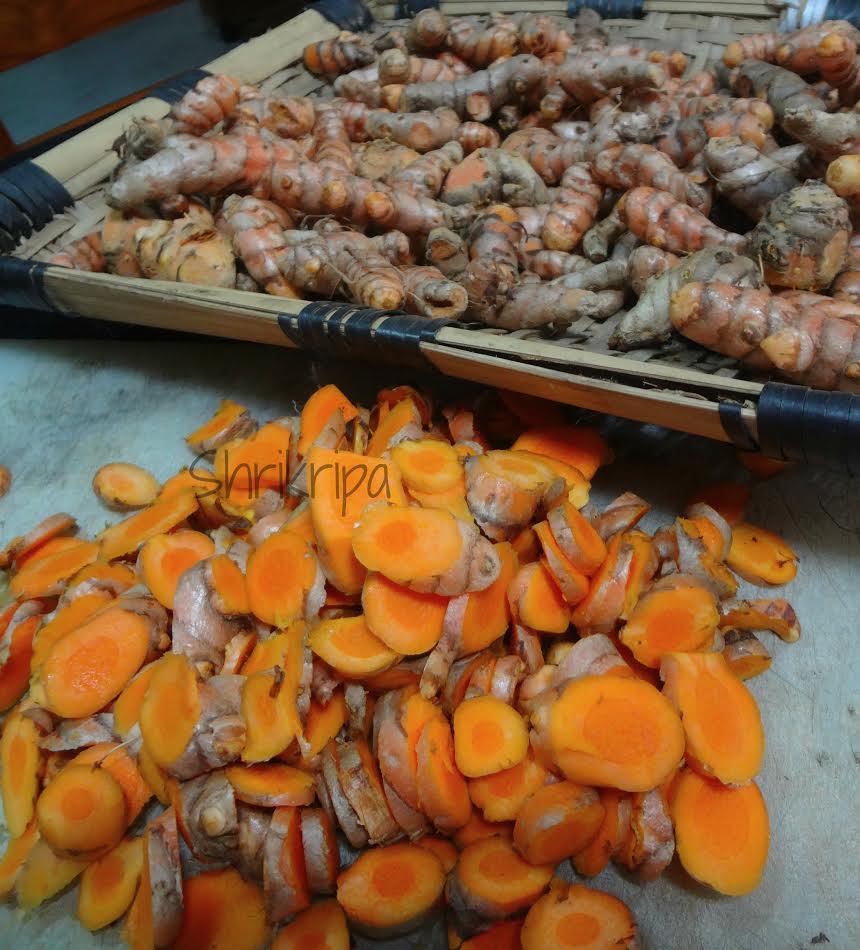
Yes!!! You heard it right. In our household we never throw out nutritionally filled outer peel of the veggie or the seeds. I normally make it a point to use as frequently as possible in one form or the other. Normally vegetable stock is an easy option. If only one variety is available, chutney or relish is an alternative tasty option too.

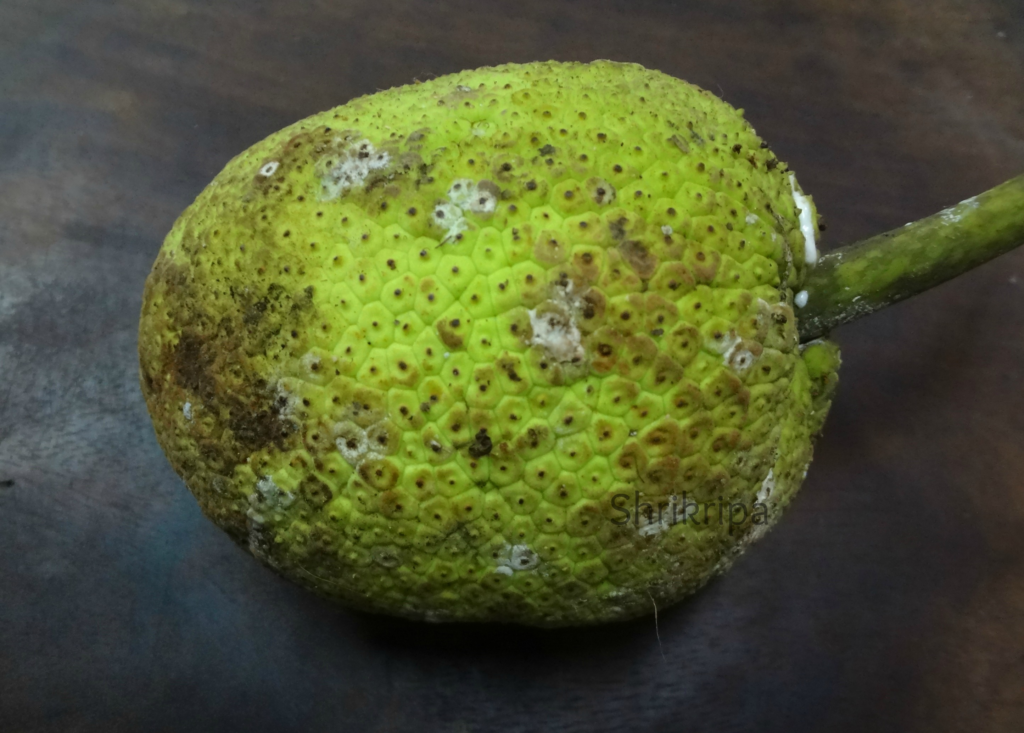
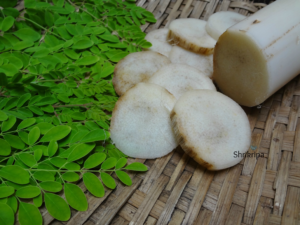
Don’t throw away organically grown or home-grown veggie skins. These are a real treasure of flavour and vitamins. Normally breadfruit is grown without any pesticide. 

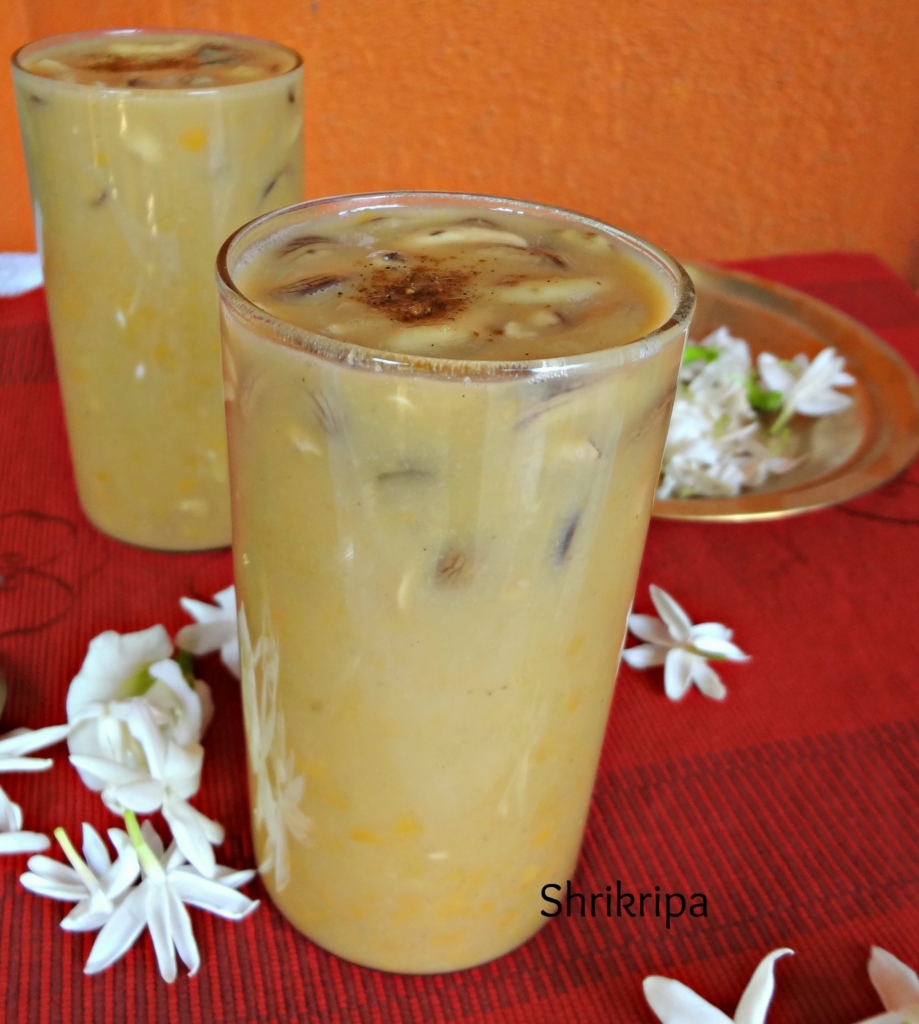
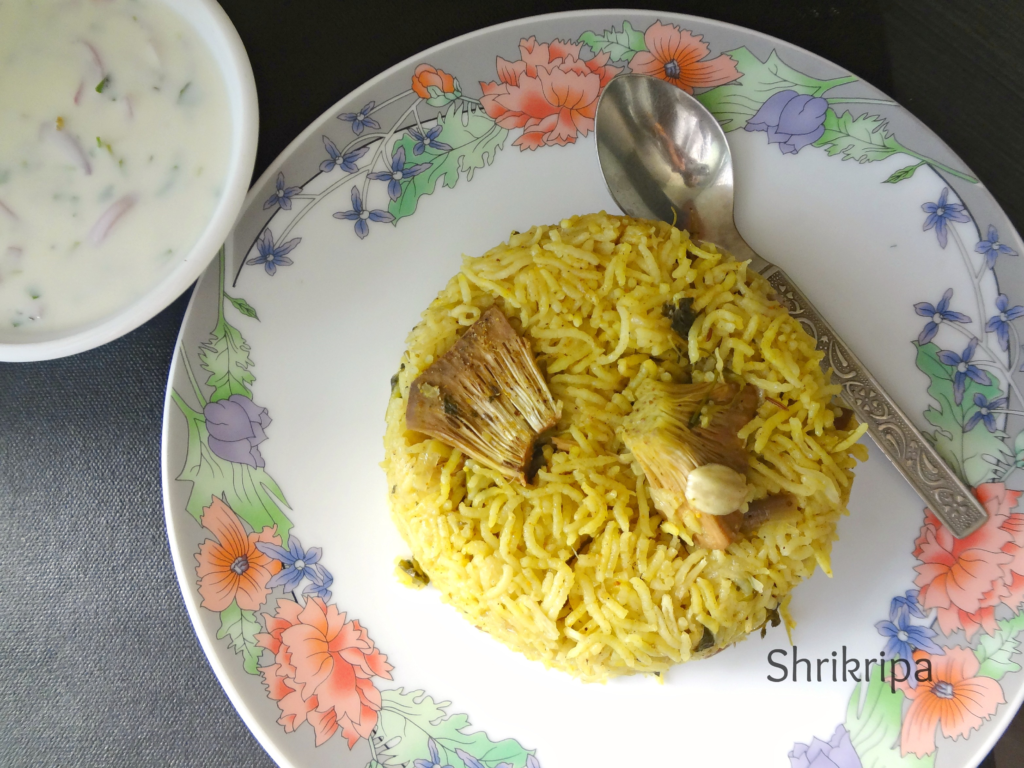
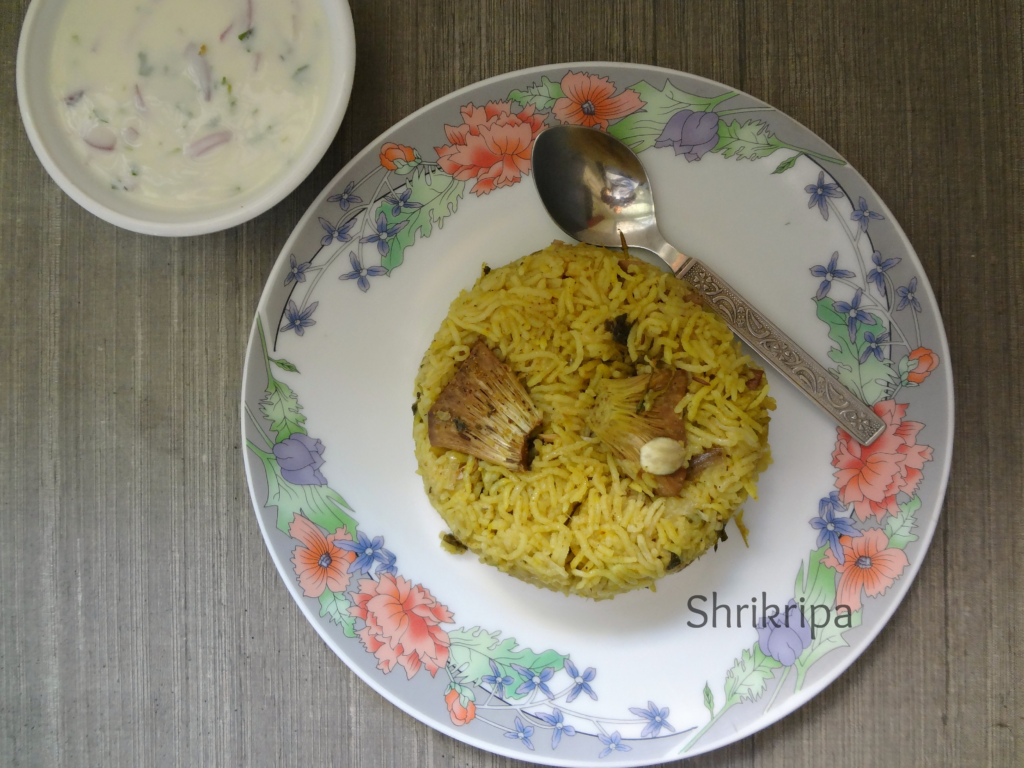
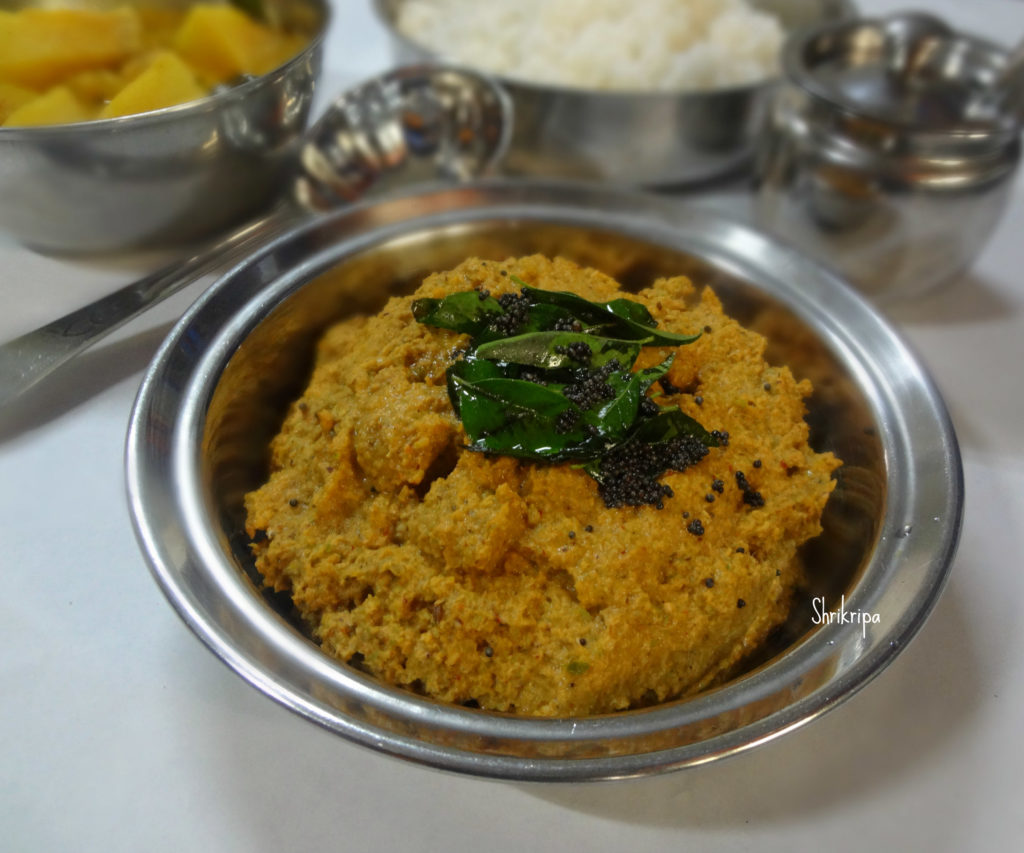
This chutney can be relished with hot plain rice with ghee or with any flat breads. 
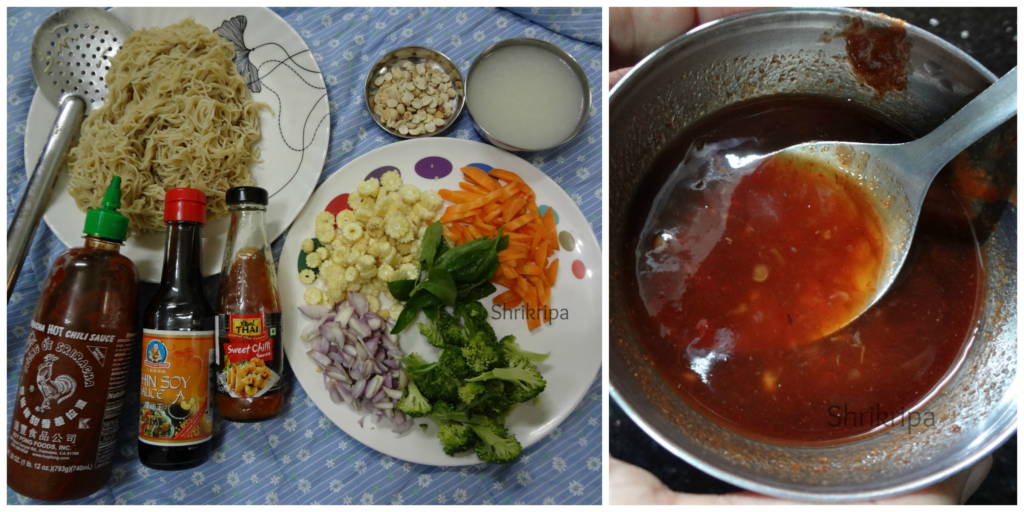
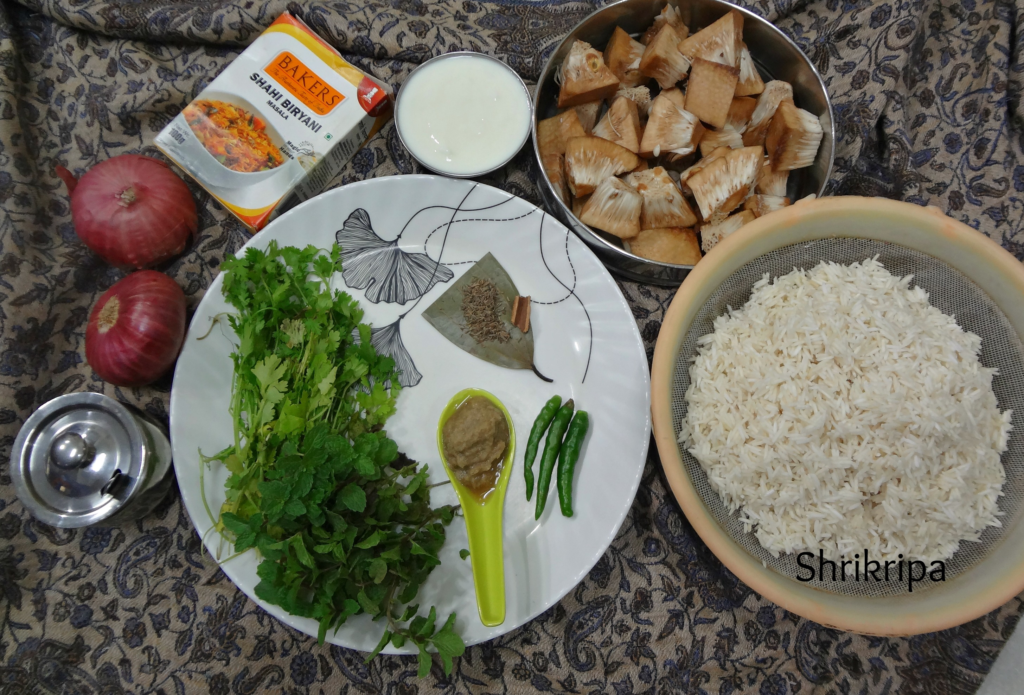
chutney main

Ingredients: 

Breadfruit peel – From one fruit

Coconut – ½ cup

Urad dal – 1 tea spoon

Cumin – ½ tea spoon

Dried red chilli – 2

Green chilli – 1 or 2

Garlic – 3 to 4 cloves

Tamarind – ½ tea spoon

Coconut oil – 1 table spoon

Salt

Seasoning:

Coconut oil – 1 tea spoon

Mustard – ½ tea spoon

Curry leaves – 1 spring

Method:

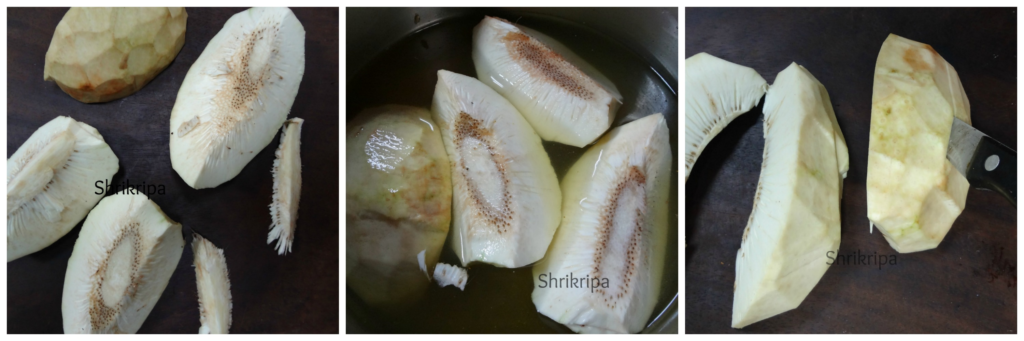
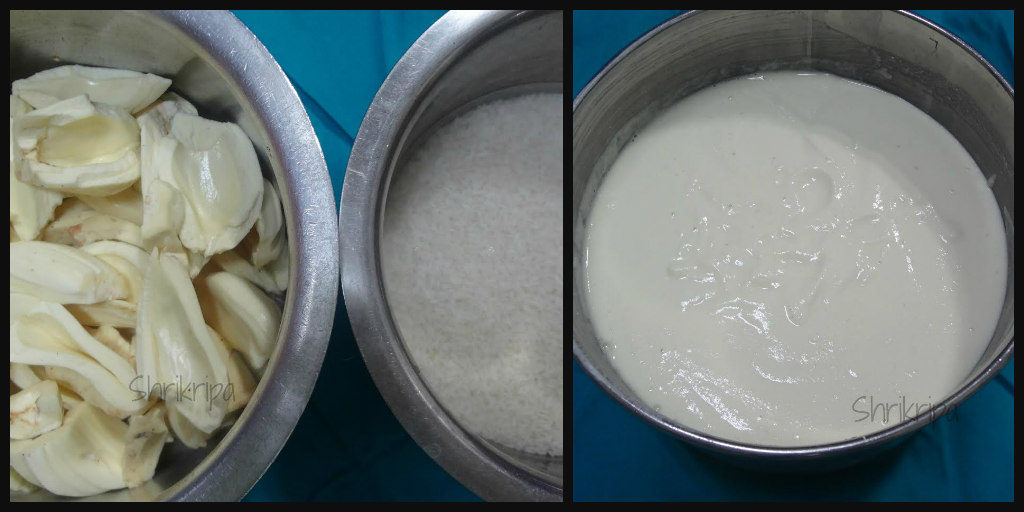
-Wash bread fruit peel before peeling. Once again wash and remove white latex, which oozed out while peeling.

-Take one small kadai, pour oil, when it is hot add urad dal fry until it is light brown.

Ribbet collage 1

-Next add cumin, red chilli, and fry until chilli puffs and becomes crisp.

– Now add peels, garlic, green chilli and fry until outer peel changes its colour and wilts a little.

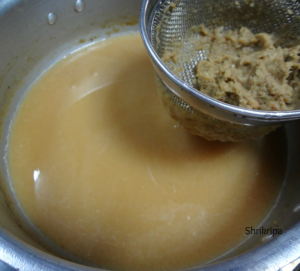
-Next you can add coconut, tamarind and salt, switch off the gas. Toss for one minute and cool this mixture.

-Grind this cooled mixture in a mixer grinder with enough water.

– Do seasoning by heating oil, splutter mustard and add curry leaves and pour it over the chutney.


Citrus medica / Dudle huli Chithranna:

Dudle huli is a big lemon and is known as Citrus medica. Citrus medica is much bigger than normal lemon with thick outer rind and less sour and sweeter than normal lemon, excellent for thin Rasam, juice, pickles or Chithranna. This Chithranna is fragrant, rich in vitamin C and very tasty. We normally serve this in any festivals or weddings. It is a no onion no garlic recipe and we use mustard, dry red chilli and coconut for flavour. This is our traditional and much-loved recipe for Chithranna.

chithranna main

Ingredients:

Rice – 3 cups

Citrus medica – 1 (big citrus fruit)

Dried red chillies – 2 to 3

Mustard – 1 tsp

Coconut – ½ cup

Jaggery – 1 to 2 tsp

Salt

Oil – 1 tsp

Seasoning:

Coconut Oil – 3 tbl sp (any refined oil is ok)

Mustard – 1 tsp

Urad dal – 1 tsp

Cumin – 1 tsp

Hing – ¼ tsp

Curry leaves – 2 springs

Ground nuts – ¼ cup

Method:

-For cooking rice:

Boil water in a big vessel by putting 1 tsp of salt and oil. Add washed rice and cook for 7 to 8 minutes or until it is soft and firm and cooks. Drain cooked water and spread this rice in a colander.

– Grind masala by putting coconut, roasted red chillies, mustard, jaggery and dry run without adding any water.

-Seasoning:

-Take one thick bottomed kadai, add oil and heat. When it is hot, add mustard.

collage 1

-When it starts splutter, add urad dal and ground nut and fry until it becomes little dark. Next add cumin, hing and curry leaves.

-Now add ground masala and fry for 2 minutes. Add drained rice, juice of citrus medica and salt.

collage 2

-Mix well and switch off the gas. Check for the seasoning and adjust according to your taste.

– This is very ideal vitamin C rich option for tiffin box as well.


Breadfruit chips:

Breadfruit is commonly known as Jeegujje or Deevi halasu in our native language. It is a staple food in many tropical region and considered as an exotic veggie and wonder food only because of its richness either in its taste, fragrance, its high source of gluten free carbohydrate, protein and minerals.

pic 4

Breadfruit is a seasonal, much-loved veggie in our coastal region of Karnataka. It can be consumed when it is mature, but still firm and can be cooked and eaten in many forms. Today I am going to write about its chips. How we can make this exotic savoury and enjoy the gloomy weather.

I got this fresh Breadfruit from my cousin brother’s farm and got an opportunity to make these chips and had them after ages. Guidance was given by my lovely co sister who prepares this in our native, during every season.

pic 2

Ingredients:

Breadfruit – 2

Salt -1 table spoon

Turmeric – ½ tea spoon (optional)

Water – 1 small cup

Coconut oil – To deep fry

Chips slicer – to slice

Method:

– Apply some oil to your hand. To some extent it will protect your hand from blackening.

– Take fresh breadfruit, wash properly. Take one sharp knife and remove outer skin as thin as possible.

– Make four longitudinal pieces, remove inner pith (which is slightly harder and rubbery in nature)

– Immerse these pieces in bowl of water.

collage 1

– Take one small bowl of water and mix salt, turmeric powder and keep aside. It is your salted water, which is used while frying and addition of turmeric will enhance the colour of the chips.

– Now you can keep coconut oil for heating. When it is very hot, start making chips. To test the hotness of oil, drop one small piece of breadfruit, if it pops up immediately, it is ready.

collage 2

– Take out breadfruit from water, remove traces of water by wiping it out. Make each quarter into half and now you will get 8 total pieces from one bread fruit.

– Take each piece and start slicing directly to the hot oil by using slicer. Keep gas flame at medium.

– When the breadfruit slices cook, the bubbling sound of the oil becomes faint. Now you can add 1 to 2 tsp of salted water.

collage 3

– You will hear lot of bubbles and bubbling sound immediately after adding salted water to the hot oil.

– When the sound reduces, the chips are ready to be removed from the oil.

pic 1

– Remove the chips from the oil and keep them on a tissue paper laid plate.

– After cooling store it in an air tight container and proceed with the remaining bread fruit.

Bendekayi/Okra Palya:

Bendekai/lady’s finger/okra/bhindi- so many names for this simple, high fibre, low calorie vegetable. Some people just avoid this slimy vegetable without knowing how to cook. It is just simple, if you know the right technique.

We normally don’t use any onion, garlic or tomato in festive cooking. In Mangalore, we prefer this simple coconut based side dishes for any weddings or festivities.

Here we use tamarind base to cook Bendekai to remove its slime. To avoid sliminess , you should remember 2 to 3 things. First thing, drops the veggie, only after tamarind water starts boiling. secondly, don’t over mix the veggie, while cooking. Thirdly, don’t cover the lid, while cooking lady’s finger. These are all the tricks I learnt from my elder’s while learning cooking from over the years.

You can use any varieties of lady’s finger for this recipe. Here I have used local variety from Mangalore which I have grown and harvested from my terrace garden. It is Red Okra and after cooking, it becomes like any other okra.

pic 1

Ingredients:

Ladies’ finger – ½ kg

Tamarind – 1 tsp

Salt

Jaggery

Red chilli powder – ½ tsp

To grind:

Fresh Coconut – 1 small cup

Red chillies – 2 to 3

Mustard – ½ tsp

Hing – very little

Seasoning:

Coconut oil – 1 tbl sp

Mustard – 1tsp

Urad dal – 1 tsp

Red chilli – 1

Curry leaves – 1 string

Method:

-Wash and cut the bhindi into half inch pieces.

collage 2

-soak tamarind in one cup of water.

-Roast red chillies and hing in a drop of coconut oil.

-Dry grind coconut, roasted red chillies, hing, mustard and keep it aside.

– Take one tawa, do the seasoning by putting oil, mustard seeds, urad dal, red chilli.

collage 3

-When mustard starts spluttering, add curry leaves and pour tamarind water (squeeze soaked tamarind in water and use)

-Add required amount of salt, jaggery and red chilli powder.

-When it starts boiling, add chopped Bendekai and cook this in a low flame.

-when water drains or Bendekai cooks, add ground coconut mixture and mix thoroughly and keep this in a simmer for couple of minutes.

pic 3

-serve this as a side dish with hot rice or Chapati.

Vegetarian Thai Noodles: Gluten free and Vegan

This time when I had visited my sister, who stays in America, I got an opportunity to experiment with some new ingredients, veggies etc and I bought a couple of new items back home as well. This gluten free, Brown rice & millet ramen noodle is one of them.

When we were shopping, my eyes went to this noodle pack. I love to work with new ingredients and wanted to pick it up. After trying a couple of recipes, my daughter told me, how it should be. She asked me to prepare this as a little wet, soup kind. She said, regular kind of preparations tastes bland and it needs some flavoured soup to enhance the taste of this kind of sticky noodles and she was right. Ramen is a Japanese dish, consisting of a clear broth containing thin white noodles and sometimes vegetables, meat etc.

Finally, I came up with this, and got a green signal from my super-efficient critic!!! She said, hmmm yummy, go ahead and post: D

pic 10

Ingredients:

Noodles – 3 cakes

Shallots – 10

Baby corn -4

Carrot-1

Broccoli- couple of small florets

Ginger garlic paste – ½ tsp

Tomato sauce – 1tbl sp

Thai sweet chilli sauce – 1tbl sp

Sriracha sauce -1 tbl sp

Soy sauce -1 tbl sp

Cooked broth – 1 small cup

Salt

Sesame oil – 2 tbl sp

Basil leaves – 5 to 6

Roasted peanut halves – 1 table spoon

Method:

-Boil water with one spoon of salt and oil. Put noodle, cook until al dente (it should cook and texture should be firm)

collage 1

-Drain the water, rinse the noodle in cold tap water.

-Collect one small cup of drained water and keep aside for next use.

– Chop vegetables according to your taste.

collage 2

– wash basil and roast peanuts, remove skin and make halves and keep aside.

– Mix all the sauces in one small bowl and keep it ready

-Take one wide kadai, add sesame oil. When it is hot, add chopped shallots and fry for a while.

-Next, drop in all the veggies and fry for a while.

collage 3

-Add ginger garlic paste, fry until veggies are fried.

-Add all the sauce mixture and fry vigorously to avoid this to burn.

-Add reserved cooked and drained water of noodles. Check for the salt. If needed add and adjust.

collage 4

-When it starts boiling, add noodles and mix.

-Garnish with torn basil leaves and sprinkle roasted peanuts and serve.

pic 11

Note:

-You can use any noodles instead of gluten free noodle.

Plantain stem and Moringa Rasam:

Where to start about the benefits of these two super foods? From my childhood, we used to relish banana stem and its flower in various dishes. Every part of banana plant is useful, be it its leaves, flower, stem, its outer fibre or fruit. No wastage of any part. Usually after the harvest of Banana fruit bunch, we should remove that plant and should allow its baby plant to grow and fruit. Usually after the harvest, banana plant is chopped off, outer fibre is peeled off and it is dried under the sun and used as a thread in tying Jasmine flowers. Inner core or pith is divided into 3 parts. Top most part, which is very slender and less fibrous will be used in raw salads. Middle portion is little more fibrous and used in cooking and making Dosa’s. Bottom part, which is more fibrous, mature and hard to chew will be used in juices, soups or Rasam’s.

Plantain stem is one of the best, natural high fibre vegetable. It also maintains fluid balance in our body and acts as a coolant, especially in Summer season.

Moringa or Drumstick leaves are considered as a “Power food” for its nutritionally rich nature.

Here I have combined these two ingredients and made Rasam and trust me it is very tasty and can be used as an appetizer shot as well.

pic4

Ingredients:

Plantain stem – 6- 8 inches long

Drumstick leaves – 1 cup

Tomatoes – 2

Tamarind – ½ tsp

Garlic – 8 cloves

Cumin – 1 tsp

Green chillies – 2 to 3

Salt

Jaggery – 1tsp

Coriander leaves – 1 table sp.

Seasoning:

Coconut oil – 2 tsp

Mustard – 1 tsp

Cumin – ½ tsp

Hing – one pinch

Red chilli-1

Curry leaves – 1 spring

Method:

  Slice plantain stem into discs, remove thread like fibre while slicing.

  Chop the roundels into thin slices.

pic 1   pic 2

  Wash drumstick leaves, here you can use as it is, with its sticks intact. No need to remove intact stalks of these tiny leaves.

  Cook plantain stem pieces, drumstick leaves, chopped tomatoes, green chilli, tamarind in a pressure cooker for one whistle. Cool this mixture, grind and sieve. Discard the fibrous part.

pic 3  pic4

  Dry grind garlic and cumin. Add this to collected solution, add salt, jaggery and boil for a while.

  Garnish with coriander leaves and do the seasoning.

  Heat coconut oil, add mustard, when it starts to splutter, add broken red chilli, cumin and curry leaves.

  Serve this as an appetizer shot before food or as a Rasam with hot rice.


RAW JACKFRUIT DOSA:

Raw jackfruit Dosa is known as “Halasina kayi dose”. It is a traditional recipe of Mangalore. Usually Jack season is always a feast in our coastal area. We have so many dishes of jack from its raw form to ripe. This particular recipe is one among them and it is freshly prepared and served with Honey or coconut- ginger chutney. No fermentation is required. This particular Dosa is very crispy as well as paper thin. Jack used in this is freshly plucked, before ripening and in a raw form.

Ingredients:

Dosa rice – 2 cups

Raw jack – 1 big bowl

Salt

Method:

-Wash and soak Dosa rice in sufficient water for 3 to 4 hours.

– Chop raw jack, which should be really fresh and should not be ripe. Remove bulbs and separate outer cover and inner seed. Chop these bulbs into tiny pieces, so that grinding will be easy in mixer grinder.

– Now take soaked rice, chopped bulbs, put little water and grind this in to a smooth paste by adding sufficient salt.

– If you want to use this batter for next day morning, please refrigerate the same and use next day.

-make paper thin Dosa’s by using hot iron griddle. No need to ferment this batter. Use ghee while roasting this Dosa.

-When it is little brown and roasted, flip this and cook on the other side.

-serve this with honey or with ginger chutney.

Note:

For ginger chutney: Fry red chillies with little oil and grind this with coconut, salt, little tamarind and piece of ginger.


Kadle Bele –Gerubeeja Payasa / Chana dal and Cashew Kheer:

Happy Yugadi! Yugadi is celebrated as the beginning of a new year in India (but through different names). In Bangalore, we start this festival by eating neem and jaggery. Neem denotes the bitterness we face in life, and the jaggery represents all the sweet things of life. By eating the neem and jaggery together, it is a symbol of promising ourselves to face the bitterness and sweetness of life with confidence.           

In Mangalore, we celebrate this festival by savouring a kadle Bele (Bengal gram or chanadal) and gerubeeja (raw cashew) Payasa. It is a delicious dessert which is made more delightful because of the cashew nuts which are present in every spoonful.

pic main

We will see the procedure –

Ingredients:

Chana dal/Split Bengal gram – 1 cup

Whole raw Cashew – 1 cup

Coconut milk – 1 tetra pack

Jaggery – 1 ½ block (used Organic jaggery blocks)

Cardamom powder – ½ tsp.

Salt – ½ tsp.

Method:

-At first we have to remove outer cover of the young cashew. Take one bowl, put all those young and raw cashew kernels into it, pour boiling water and keep it aside for 10 to 15 minutes by closing the lid.

-When outer cover of the kernels swells, remove the outer cover and keep aside.

collage 1

-Wash chana dal and cook this in a cooker by putting sufficient water for two whistles.

-Cook dal till it is perfectly cooked. Dal should be well cooked and easily crushed. Doneness is very important, after adding jaggery, dal becomes little stiff and firm.

pic 2

– When its pressure relieves add cashew kernels and cook. After one whistle, switch off the gas and cool this.

-Now add salt and jaggery and boil till you get a nice aroma and till the raw smell of jaggery disappears.

pic 3

 – When it is done, add one tetra pack of coconut milk and give one boil. That is it. Garnish with powdered cardamom and enjoy.              

           pic 12              pic main

        Note: –

          If you don’t have access to raw cashew kernels, you can use regular cashew and you can cook this with Chana dal for 3 whistles and proceed by adding jaggery.

           If you are using fresh coconut for extracting milk, take grated coconut (from one coconut), add one cup of water and grind, and extract milk. (This is a thick extract and should be added at the end)

          Once again add little water and grind, to take out thin milk and you can add this while boiling jaggery.

          If you are using regular jaggery, at first self-boil this with little water, make a liquid and sieve this before adding to the kheer, to remove impurities.


Kathal Ki Biryani / Raw Jackfruit Biryani:

Raw jackfruit is a less known, very healthy, fibre-rich and low glycemic index wholesome vegetable. In our coastal region, we start using jack from its very tender form. We have so many traditional recipes. Apart from that, we even enjoy this one-pot meal, and it is a very good option for tiffin boxes for lunch.

picture6

Ingredients:

Basmati Rice – 3 cups

Raw Jack pieces – 1 big bowl.

Ghee – 3 tablespoon

Bay leaf – 1

Shah jeera – ½ teaspoon

Cinnamon – 1” piece

Turmeric powder – 1 teaspoon

Salt

Onion- 2

Green chillies – 3

Ginger garlic paste – 1 tablespoon

Curd – 1 small cup

Shahi Biryani Masala – 1 to 1 ½ tablespoon

Pudina – 10 strings (chopped)

Coriander leaves – 10 strings (chopped)

Method:

-Wash Basmati rice and soak it while preparing other things.

pic1

-Chop Young Jack into bite-size pieces by removing the outer skin (thorny part) and inner pith and soak this in a bowl of water.

-Chop onion, slice green chillies, chop Pudina and coriander leaves.

-Before keeping the cooker vessel, drain the soaked rice and chopped jack pieces and keep aside.

-Now, take one cooker vessel and heat the ghee. Put bay leaf, Shahjeera and cinnamon.

-Next, add chopped onion, green chillies, turmeric, salt and fry until it becomes light brown.

jack collage

-Add ginger garlic paste and fry when the onion becomes brown until its raw smell vanishes.

-Next, mix Biryani masala, Curd, and jack pieces until masala coats the Jack pieces.

-Now, add drained rice and fry it for a while. Then, add chopped pudina and coriander.

-Add sufficient water (6 cups) and check for the salt.

-When it starts boiling, close the lid and cook until one whistle; keep it in a simmer for 3 minutes and switch off the gas.

picture5

-When pressure relieves, serve this with onion raita.

NOTE: I usually use 2 cups of water for 1 cup of Basmati rice.

Home-made Turmeric powder :

Turmeric is one of the most important spices we use in everyday cooking. It has so many health benefits and is commonly used to heal Cold and cough in infants. When my kids were small and when I started to give them turmeric milk to heal their sour throat, I was really thinking about making homemade turmeric powder as I was very uncomfortable using readymade powder, after hearing about it being adulterated.

So I started growing turmeric at home. Every year, usually at the time of June, fresh turmeric will start sprouting and we should plant them at that time .It will take six months to grow and when it is ready, the plant will start wilting and leaves will become yellowish brown and become dry. This happens during end of December and is then ready to harvest.

unnamed (3)

This method is what my maternal grandmother used to follow-

Method:

-Take fresh turmeric rhizomes, remove mud, extra roots etc. Wash it several times until it is clean.

-Now slice those rhizomes.

unnamed

-Take one cooker vessel and put all these sliced pieces and steam cook (without cooker weight) in a cooker or idly steamer for 10 to 15 minutes.

unnamed (1)

-Remove this and dry under the sun for 2 to 3 days or until it is crisp. Usually it takes 2 to 3 days.

unnamed (2)

-When it is crisp, take small mixer jar and powder it.

– Sieve this and collect fine powder and repeat this process until all the dried slices are powdered.

unnamed (4)

-Store this in a dry airtight container.