This time when I had visited my sister, who stays in America, I got an opportunity to experiment with some new ingredients, veggies etc and I bought a couple of new items back home as well. This gluten free, Brown rice & millet ramen noodle is one of them.
When we were shopping, my eyes went to this noodle pack. I love to work with new ingredients and wanted to pick it up. After trying a couple of recipes, my daughter told me, how it should be. She asked me to prepare this as a little wet, soup kind. She said, regular kind of preparations tastes bland and it needs some flavoured soup to enhance the taste of this kind of sticky noodles and she was right. Ramen is a Japanese dish, consisting of a clear broth containing thin white noodles and sometimes vegetables, meat etc.
Finally, I came up with this, and got a green signal from my super-efficient critic!!! She said, hmmm yummy, go ahead and post: D
Ingredients:
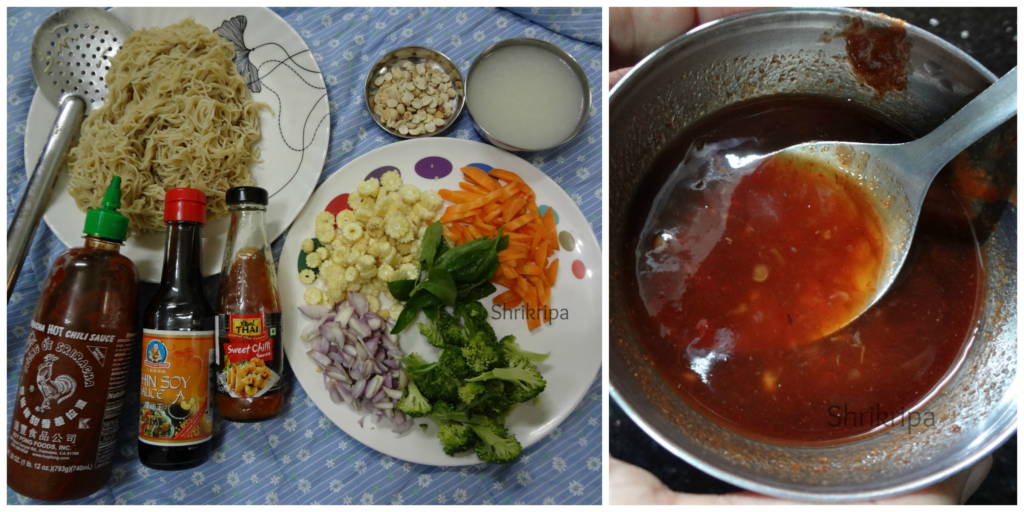
Noodles – 3 cakes
Shallots – 10
Baby corn -4
Carrot-1
Broccoli- couple of small florets
Ginger garlic paste – ½ tsp
Tomato sauce – 1tbl sp
Thai sweet chilli sauce – 1tbl sp
Sriracha sauce -1 tbl sp
Soy sauce -1 tbl sp
Cooked broth – 1 small cup
Salt
Sesame oil – 2 tbl sp
Basil leaves – 5 to 6
Roasted peanut halves – 1 table spoon
Method:
-Boil water with one spoon of salt and oil. Put noodle, cook until al dente (it should cook and texture should be firm)
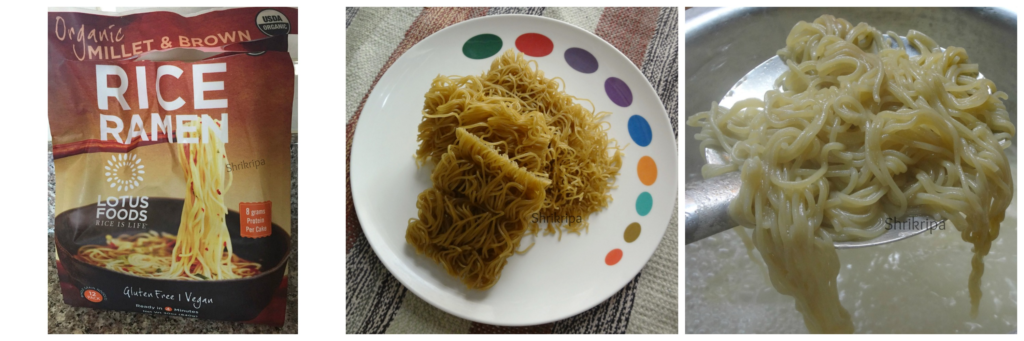
-Drain the water, rinse the noodle in cold tap water.
-Collect one small cup of drained water and keep aside for next use.
– Chop vegetables according to your taste.
– wash basil and roast peanuts, remove skin and make halves and keep aside.
– Mix all the sauces in one small bowl and keep it ready
-Take one wide kadai, add sesame oil. When it is hot, add chopped shallots and fry for a while.
-Next, drop in all the veggies and fry for a while.
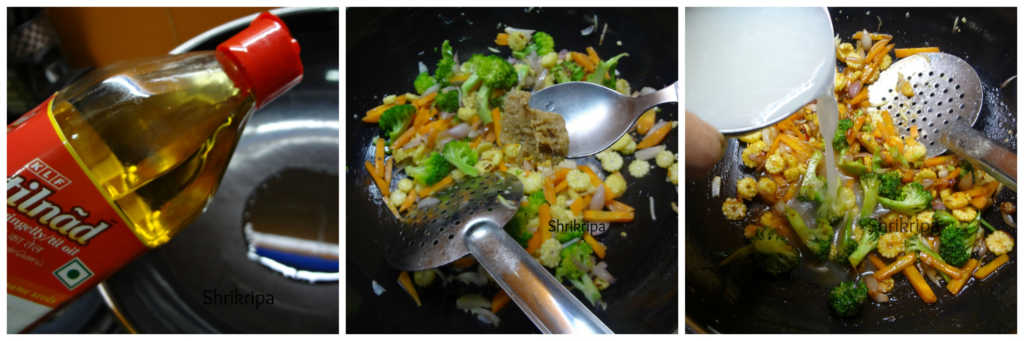
-Add ginger garlic paste, fry until veggies are fried.
-Add all the sauce mixture and fry vigorously to avoid this to burn.
-Add reserved cooked and drained water of noodles. Check for the salt. If needed add and adjust.
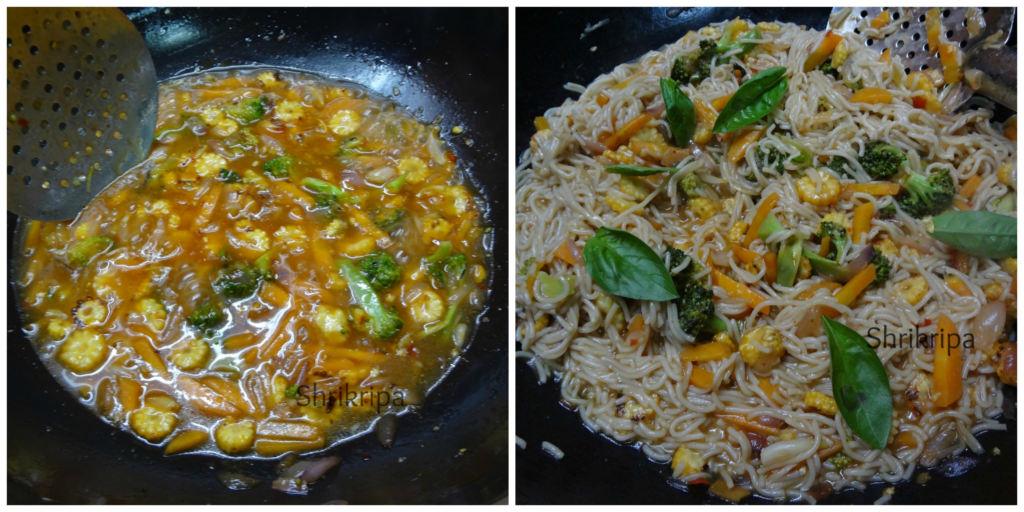
-When it starts boiling, add noodles and mix.
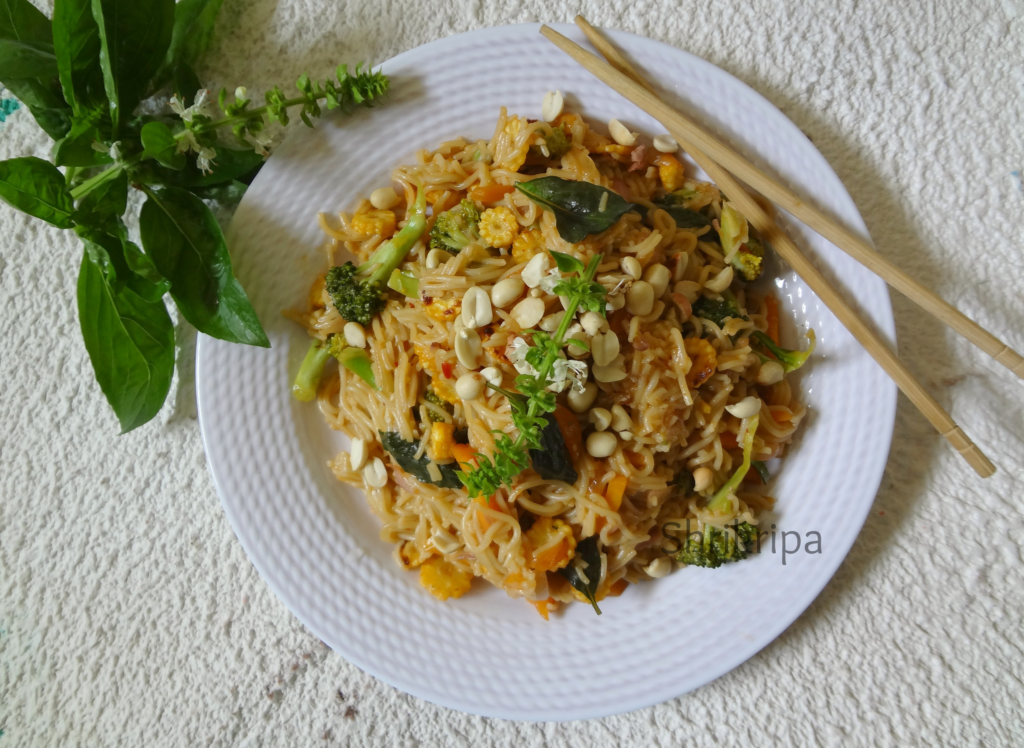
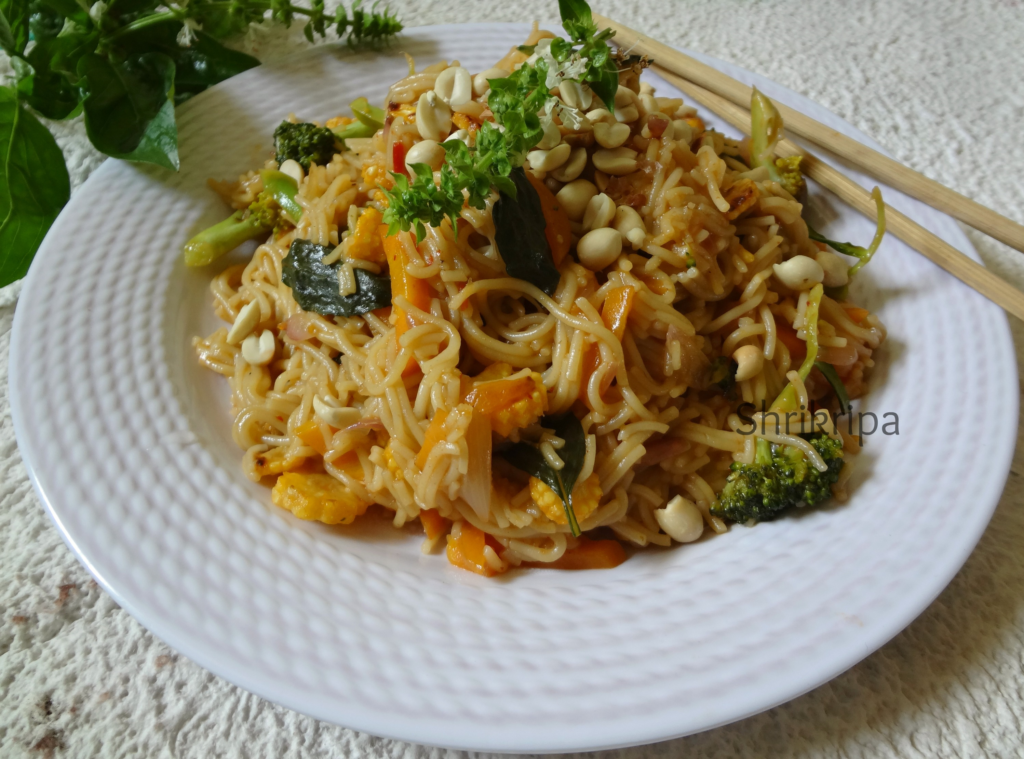
-Garnish with torn basil leaves and sprinkle roasted peanuts and serve.
Note:
-You can use any noodles instead of gluten free noodle.