Apple Halwa

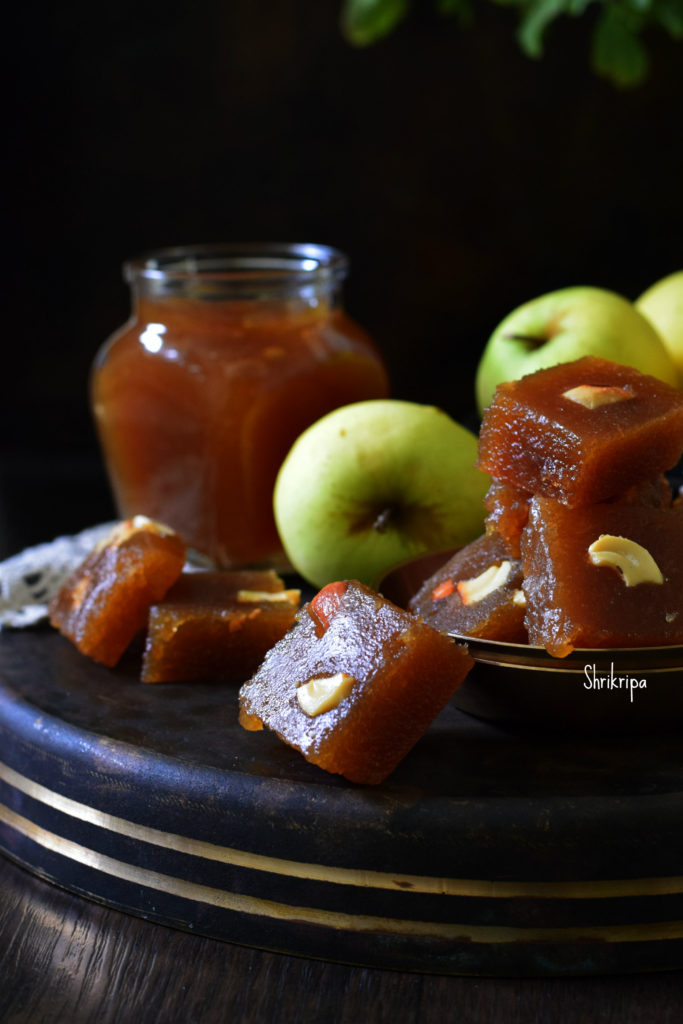
Yesterday, while preparing Apple jam, my Research oriented husband came in and asked me what I was doing, I said – Apple jam , planning to finish the stock which we bought couple of weeks back

He said, “why not halwa?” I was like 🙄🤔

Then, I changed my mind and took my share of  jam when it was done. Proceeded to make Halwa with the remaining quantity, by adding little ghee in-between at a regular interval.

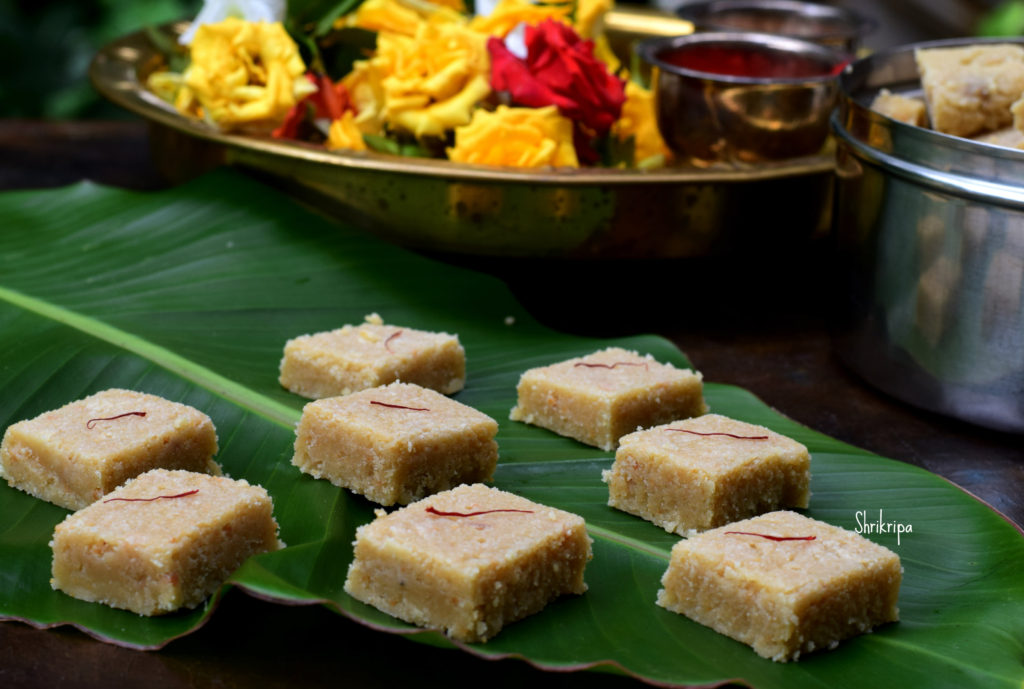
Surprisingly, it turned out super delicious and here I am presenting my end result which was experimental.

Here I have used fruit as a whole /with skin. Normally Apple turns out sour when you cook /boil . To avoid the sour taste, normally I bake it until it is done, then grind into a puree, sieved, and proceed to make jam then halwa with the added mild cinnamon flavour. One can add cardamom as well. Sugar can be replaced with an organic jaggery as well. Even though I have not tried with the jaggery, my friend Aruna has tried with the jaggery and result was just amazing, which was deep brown in colour.

Ingredients:

Golden yellow Apple – 1 kg (Any variety would do)

 Sugar – ¾ kg

Ghee – ½ to ¾ cup

Cinnamon or Cardamom – 1 or 2 pinches

Method:

-Wash Apples, dice ,remove seed part and arrange in a baking dish. For Initial preparation, please refer here

-Bake this in a 170°C pre-heated oven for 15 minutes at first.

-Remove, flip those apple pieces, and continue further 15 minutes.

-After 30 minutes, check the doneness. If it is soft, well cooked ,remove it.

-If it is not done, bake for further 5 or 10 minutes.

-When it is cool, add a little water and churn in a juicer by adding 1 or 2 cups of water.

-Sieve ,discard the roughage ( fibre as well as outer skin remains)

-Put this pulp in a thick bottomed kadai, add sugar,  cook until it turns into little thick and turns into mass.

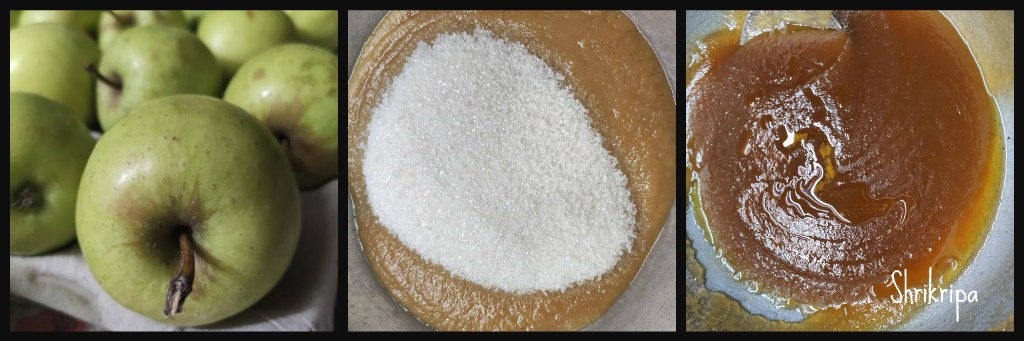
-Add ghee 2 tablespoons at a time in-between while stirring. If you feel that the Apple puree  needs a little more ghee, add up to ¾ cup, some varieties of Apple need very less ghee and some need more.

-Now we will see, how we decide the quantity of ghee. While stirring if you feel that the mixture is a little dry and the bottom part becomes a little brown, keep adding it. If the ghee starts oozing at the sides, it is an indication to stop the addition of ghee.        


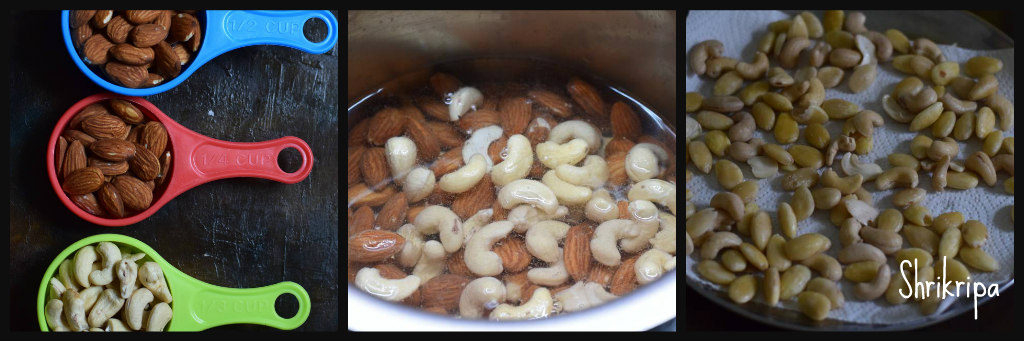
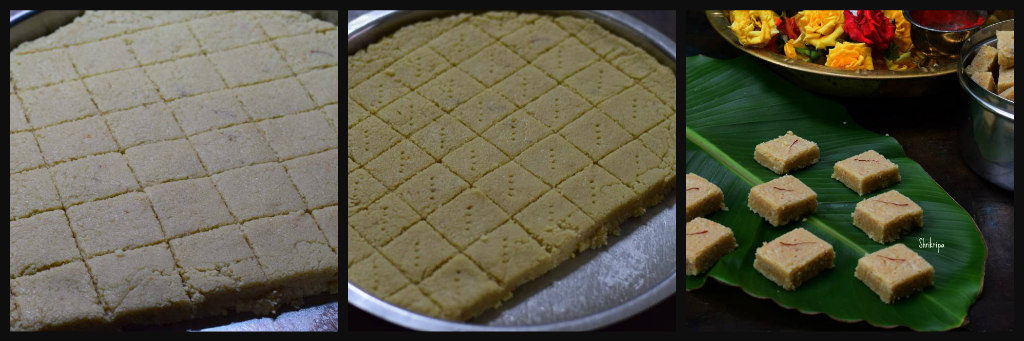
-Now we will see how you know the doneness. It is quite simple, keep on stirring until mixture leaves the sides of the kadai and ghee oozes out from the mixture. You can add cashew pieces at this stage or spread those pieces in a greased plate like me.

-After you are done with this, it is almost ready to shift to the plate. Before shifting I prefer to check, by taking one small peanut sized portion of the mixture and rolling it in-between my thumb and forefinger to make a small ball like structure. If it holds a ball like structure and does not stick to your finger, it is ready.

-Now remove from the flame, shift to a greased plate, and pat this mixture evenly by using a flat, greased (apply some ghee) back of the spoon.       


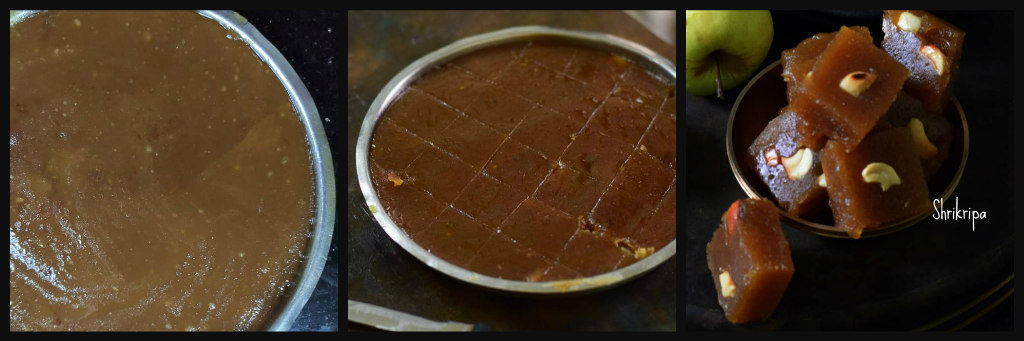
-Keep this aside for two or three hours to cool. Then cut this into the desired shape and store it in an airtight container.

-You can store this Halwa for a really long time (up to a month or two).


Carrot Greens Thepla:

Usually carrot tops are chopped off and discarded. I do not get carrot tops very frequently and if I get the greens, I normally make 3 batches, while cleaning the greens. Tender, medium and dark green, almost woody.

Tender one would go to Roti or any saag. Medium one would go to dhal . 3rd batch would go to vegetable stock. If you are worried about carrot greens edibility status, no need to worry on that aspect. Yes! It is safe and absolutely edible.

Only concern is its taste. It has its own, slight bitter taste with astringent after effect due to its high Potassium content. It has more beta carotene than the actual carrot root as well as fibre rich. So, it is time to rethink before trashing these super nutritious greens and we need to act smartly to include all this goodness in our diet, at least occasionally.

We would jump into the details of these tasty thepla’s –

Ingredients:

Whole wheat flour – 2 to 3 cups

Chopped tender greens – 1 cup

Salt

Oil or ghee – 2 tsp

Sesame seeds – 2 tsp

Carom seeds – 1 tsp

Turmeric – ½ tsp

Red chilli powder – 1 tsp

Garam masala – ½ tsp

Method:

-Take everything , mix nicely. Add sufficient water and make a pliable dough.

-Keep it aside for half an hour, to rest by closing it.

–Now take lemon sized chapati dough in hand, roll this ball by using a roller, like regular chapati.

-Cook both the sides by using either oil, ghee, or butter.

-Serve with sweetened curd or pickle.


Almond Cashew Mawa Burfi:

Who does not love Almond or Kaju Katli? Here I have combined the much loved two raw materials,  with milk solid/ khoya, to give a melt in a mouth Indian dessert, In the form of burfi.

Almond cashew mawa Barfi is a super delicious, easy to make, melt in mouth Indian sweet or fudge recipe. A perfect sweet to make on any special occasion! Or festive time.

Ingredients:

Almond – ¾ cup

Cashew –  1/3 cup

Khoya /mawa – ½ cup / 100 grams ( unsweetened)

Sugar – 1 ½ cup

Water – ½ cup

Ghee – ¼ cup

Saffron – 10 – 12 strands

Method:

-Heat a cup of water, soak almond and cashew. Close the lid and keep it for 2 hours.

-After two hours, peel the almonds, drain the water, spread these on kitchen towel to remove extra moisture.

-Grind them in a small mixer jar, by using pulse option by giving intervals for mixing in between to get a smooth paste. Grease one steel plate and keep it ready as well.

-Now, take one thick kadai, pour sugar, water, and boil until it reaches one thread consistency. It takes hardly 5 minutes, after initial boil.

-Add in Almond, cashew paste, after it melts and forms a homogeneous mix, add in grated Mawa.

-Stir everything in a low fire, without leaving hand. While stirring, add a tsp of ghee at regular interval and add saffron strands as well.

-When mixture leaves the sides, as well as thickens, check for the doneness. Take out little mixture, hold a small quantity, in between your thumb and forefinger, try to make a ball. Formed ball should shine as well as should not stick to your finger.

-If it passes the test, switch off the gas, and keep stirring for another 5 to 7 minutes, if any ghee is remaining, pour in between stirring.

 -Take the greased plate, pour the mixture, and spread evenly and leave it for 10 minutes. Mark the line and keep it aside for cooling. After cooling, take out pieces, store it in an airtight box.


Kantola Palya / Subzi/ dry curry:

Kantola has many names like Spine gourd, Teasel Gourd, phagila, Mada hagala, locally we call this as “Kaadu peere” in Mangalore. Kantola is one of the famous and nutritious vegetable of coastal region and some Eastern parts of states. This monsoon vegetable is loved by all. This resembles a bitter gourd in structure, but not in taste. It is a crunchy mild flavoured vegetable.  It is a great health food as it is rich in proteins, Iron, and antioxidants and low in calories. It is high in fibre too.                  

In my family, we usually relish this in two ways. One is crunchy,  tawa fry form or as a palya. I make palya in two ways. One is garnished with  fresh coconut. Other one is  with coconut, along with little crushed roasted peanut. Both side dishes tastes equally good.

Ingredients:

Kantola – 500 grams

Onion – 1

Garlic – 7 to8

Turmeric – 1 tsp

Tamarind – small gooseberry size.

Red chilli powder – 1 to 2 tsp

Salt – to taste

Jaggery –  to taste

Fresh Coconut – to garnish

For seasoning: Coconut/ Vegetable oil, Mustard, urad dal, chana dal, cumin , curry leaves.

Method:

-Wash Kantola, chop into small slices. Chop onion and crush garlic. Soak tamarind in a cup of water.

– Take one kadai, heat oil, splutter mustard, add urad and chana dal. Fry until it turns red. Add cumin and curry leaves as well as crushed garlic.

-Add chopped onion, add turmeric, fry until onion turns transparent. Add tamarind water, red chilli powder, salt, jaggery.

-When it starts boiling, add chopped Kantola and mix everything , close the lid, and cook in a low flame.

-After water drains, Kantola turns soft, garnish with coconut or coconut as well as crushed roasted peanuts.

Mix everything and cook further 3 more minutes and switch off. Serve as a side dish with rice or roti.