Malabar spinach and Raw papaya curry:

Malabar spinach is commonly known as Basale in our coastal area. It is a common creeping vein in the backyard of every household.

Its leaf is very rich in iron, fibre, antioxidants and vitamins and low in calorie. Malabar spinach is a go getter veggie at any given point of time. You can harvest, as soon as the main stem is growing and spreads all over. Snip the leaves and use the stems as well.

On the other hand, raw papaya is also a power house of nutrients and it is a natural cleanser of intestine and colon.

Like Malabar spinach, Papaya tree also plays an integral part in our garden. May be because of the easy availability, we have a couple of traditional dishes with Raw papaya and one curry is this. Our elders had so much knowledge to include all the goodness in their cooking. One such recipe is Raw papaya and Malabar spinach with a freshly ground coconut masala. It can be relished with Boiled rice or white rice. It is an overall package of health benefits from both the veggies.

Ingredients:

Malabar spinach – one small bundle

Raw papaya – 1 small

Onion – 1

Salt

Jaggery (optional)

Red chilli powder – 1 tsp

Toor dal – ½ cup

For Masala paste:

Coriander – 1-2 tablespoon

Cumin – 1 tsp

Methi – ½ tsp

Dried red chillies – 5 to 6

Tamarind – 1 tsp

Coconut – 1 to 1 ½ cup

Seasoning:

Coconut oil – 1 tablespoon

Mustard – 1 tsp

Red chilli – 1

Small onion – 1

Curry leaves – 1 spring

Method:

-Wash Malabar spinach leaves, chop them and keep them aside. Cut it into 2 to 3-inch pieces if you are using its stem.

-Chop Raw papaya by removing the outer skin and the inner seeds. Dump in a water bowl to remove all the oozed latex and drain.

-Wash Toor dal; if you have chopped Malabar spinach stem, combine it and cook with dal by adding turmeric and salt.

-When toor dal is ready, remove the lid, add a little water, salt, jaggery, red chilli powder, Papaya pieces, and chopped leaves. Cook for one whistle.

-Now prepare masala by roasting methi, coriander, cumin and red chillies in a little oil. Grind into a paste by adding coconut, tamarind and water.

-Add the ground paste to cooked veggies, adjust everything, boil and add seasoning.

-To season, heat oil, splutter mustard, red chilli, curry leaves and chopped onion. When the onion becomes brown, add it to the curry.

-Serve with Hot rice.

Bannangayi Dosey /tender (young) coconut Dosa:

When I was a little girl, my mom used to work, and I used to spend the summer vacation at my grandparents’ house. I used to enjoy at the farm house by having an unlimited supply of Mangoes, tender coconut, pineapples etc.

There used to be abundant supply of fallen young coconuts, also called ‘bannangayi’ which have much harder flesh than what we get in the normal tender coconut carts over.

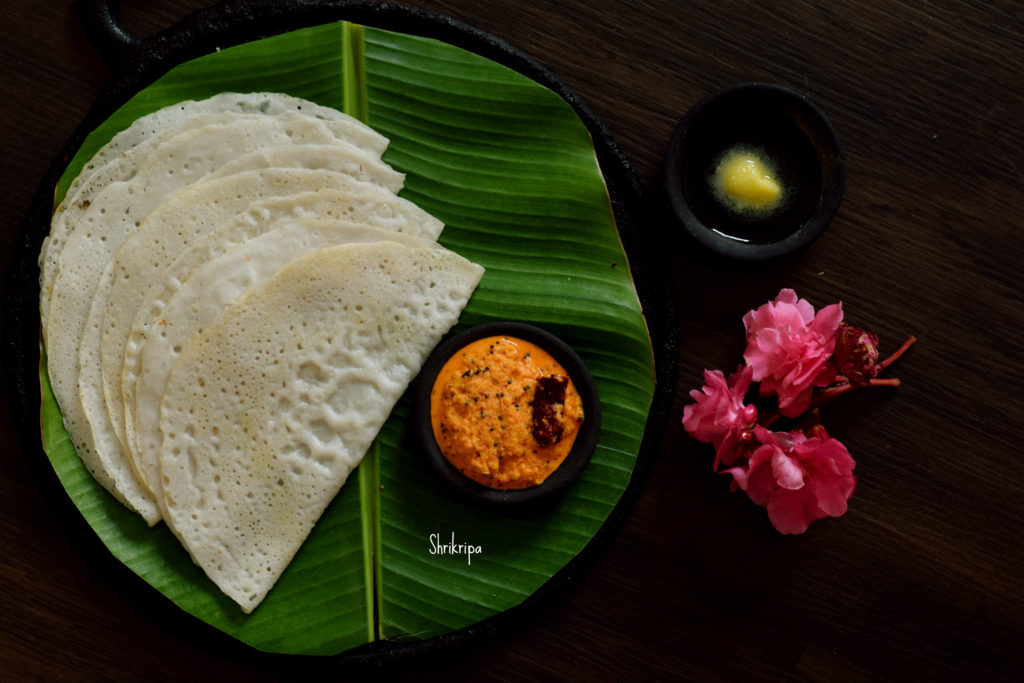
My aunt used to make a very tasty Dosa out of this and we used to relish this along with chutney and Jaggery syrup topped with homemade ghee.

Yesterday, when we had tender coconuts here in Bangalore, inner pulp was very thick and couldn’t eat. So, I thought about Dosa and prepared this after ages. It was such a nostalgic moment for me. Let us see how to make this tasty Dosa.

Ingredients:

Tender coconut – 1

Dosa rice – 2 cups

Salt

Method:

-wash and soak Dosa rice for 3 to 4 hours.

-Grate or chop tender /young coconut and keep aside.        


-Grind soaked rice with grated young coconut by adding little water and salt and make smooth paste. This batter must be like our regular Dosa batter and there is no need of fermentation.                           

-You can make use of this batter straight away. Usually we prepare this batter in the morning itself.

-If you want to prepare this batter in the evening, to make the Dosa in the morning, you can store the batter in the refrigerator.

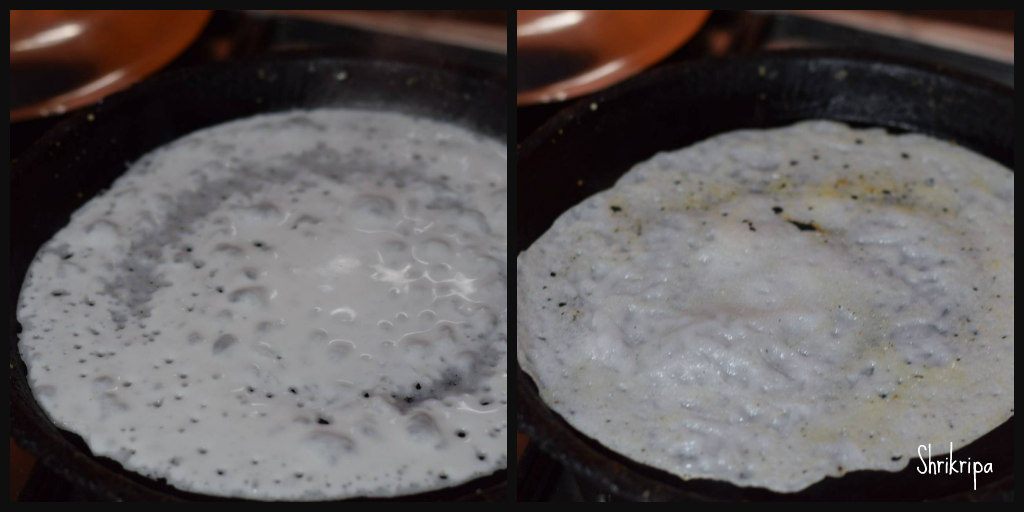
-To prepare Dosa, heat iron Dosa tawa. When it is hot, don’t apply any oil. You can pour one serving spoon of batter and make Dosa like our regular Dosa. Pour ½ tsp of ghee and Close the lid.     


When it shows little brownish spots here and there, flip the side, cook upper side and serve with Coconut and onion chutney , jaggery syrup which is topped with ghee or honey.


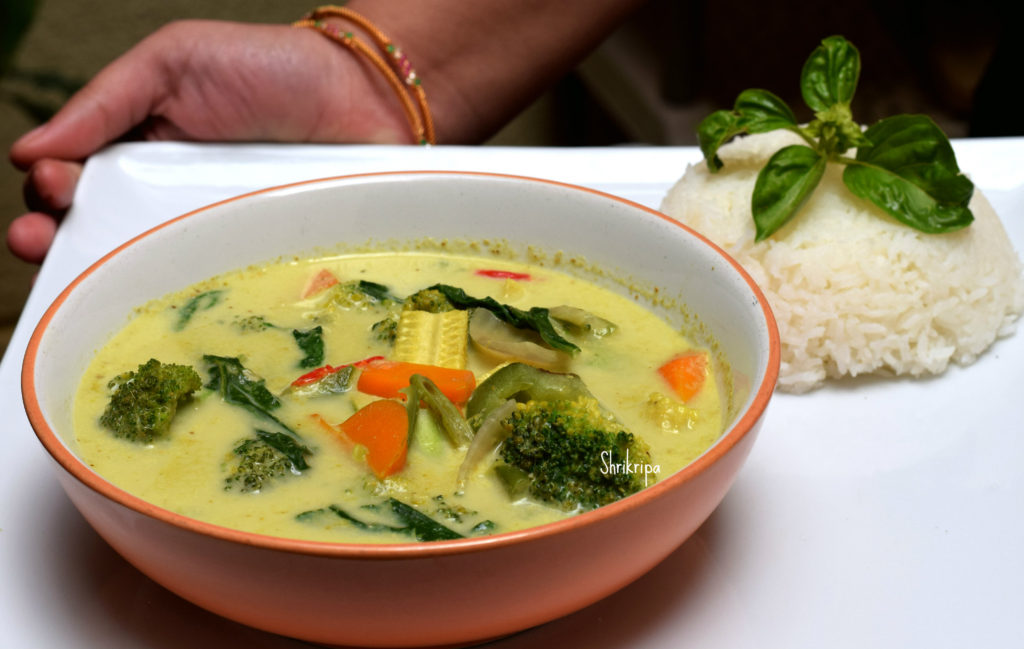
Homemade Vegetarian Thai Green curry paste /Curry:

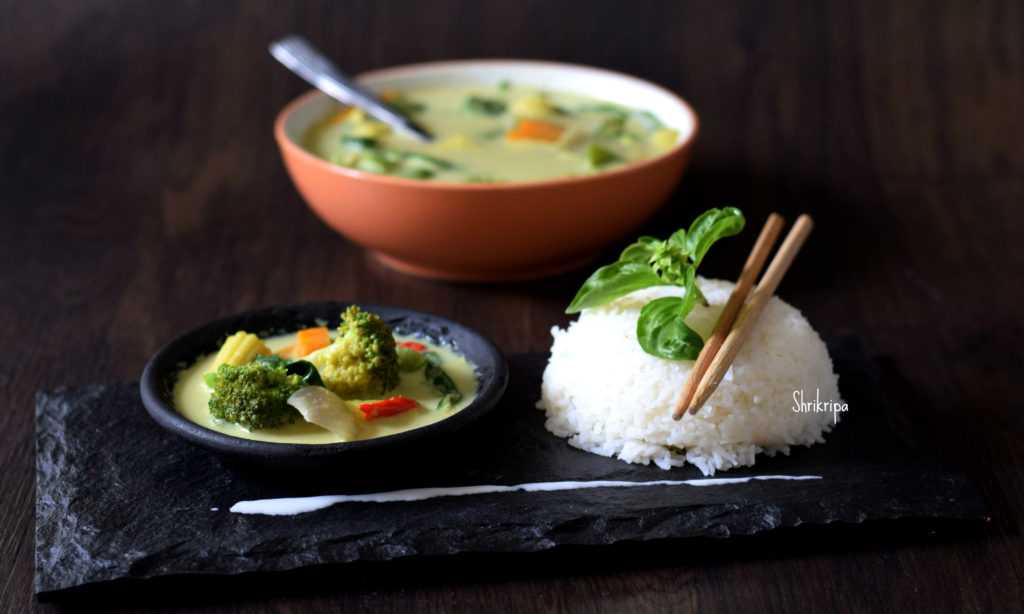
Being a coconut eater, born and brought up in Coastal Karnataka, we like Thai food over any other cuisine. Thai green curry is our favourite and when it is with homemade fresh paste, nothing like it.

Homemade curry paste is very simple to make and loaded with rich flavour as well as delicious. It is the perfect menu for weekend family lunch.

      Pic credit: My daughter

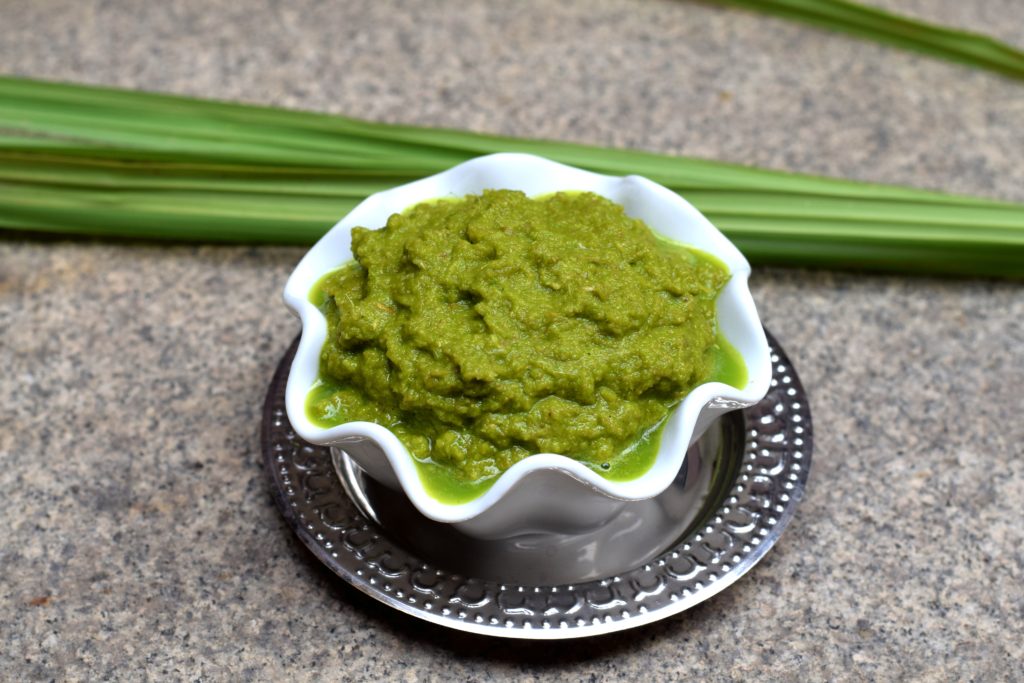
Three main ingredients which are very important is lemon grass, galangal (Thai ginger), Thai sweet basil and tender lemon leaves.

Instead of lemon leaves one should be able to use grated lemon rind (only outer layer) as well.

First, we will see the procedure for Fresh Green curry paste:

Ingredients:

Coriander seeds – 1 table spoon

Cumin seeds – 1 tea spoon

Turmeric – ½ tea spoon

Ginger – ½ inch

Garlic – 6 cloves

Galangal – ¾ to 1 inch (Thai Ginger)

Coriander leaves – 4 sticks

Onion – 1 small size

Green chillies – 8-10

Lemon grass bulb – 2

Pink salt – 1sp

Tender Lemon leaves – 3

Method:

-Slice ginger, galangal, onion, green chillies. Mine was home grown heirloom variety, which is less spicy. If your chilli is spicier, please remove inner seeds.

-Remove outer stiff cover from the lemon grass bulb. Then slice it and keep it ready.

-Put everything in the mixer jar and make a paste by adding very minimal water. Store this paste in an air tight bottle. This portion suffice for twice.

How to make Curry:

Ingredient:

Vegetables – Choice of yours

I have used Broccoli, baby corn, capsicum, carrot, beans and baby spinach.

Green curry paste – 2 table spoons

Salt

Sugar – 1 tsp

Corn flour – 1 tsp

Coconut milk – 1 tetra pack

Oil – 2 table spoons

Onion – 1

Basil leaves – 8

Red bird eye chillies – 2 (optional)

Method:

-Chop veggies, dice onions and separate each layer and keep aside.

-Heat oil, add onion and fry for 2 min. Add chopped veggies and fry for a while.

-Add green curry paste, salt, sugar and fry until raw smell vanishes.

-Add water,corn flour and boil, until veggies are half cooked. Add Coconut milk and give only one boil.

-Garnish with basil and red tiny chillies and serve with small grain rice.


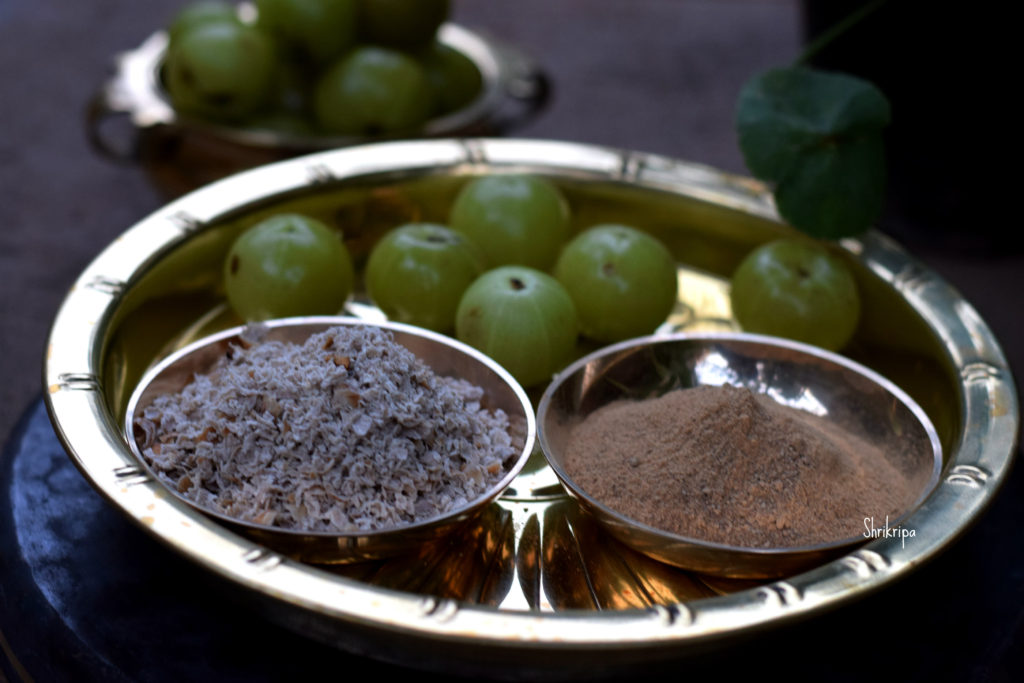
Sundried Amla/ Preserved Indian gooseberries:

Amla is good for human kind. It is a great source of Vitamin C and antioxidant as well as anti-inflammatory which boosts the immune system. It is a source of total nourishment for our hair as well as skin.

Traditionally each region has its own method to preserve the goodness of Amla. Be it in a morabba form or as a candy.  In our household, I make it a point to preserve it by Sun drying. One with salt and other one with plain, powder form.

Salted Amla is used for making chutney or Tambli for any stomach ailments. To drink with buttermilk by mixing it. (Raw form of goodness)

Powder form for any smoothies, hair pack or face pack.

Method:

-Wash, either grate it or cut open and remove the seed.

-Put all the pieces in a vegetable chopper / small processor. In this way, you would get nice uniform chunks in an easy way.

-If you want to make powder, don’t add any salt. Straightway sundry until it is crisp and powder and store it.

-If you want a salted one. Add some salt to gratings, mix by hand and sundry until it is crisp and store it in an air tight pouch or container.

-I normally keep it in a fridge.

How to use these salted chunks: Soak 1 tsp of dried amla chunks in a table spoon of water and after 10minutes, use it for chutneys, tambli’s or drink with buttermilk.

Dum Aloo:

Dum Aloo is originally from Kashmir. Normally baby potatoes are deep fried and dunked in a mild and flavorful gravy. Here I have made it without deep frying as well as without peeling the outer skin. I normally avoid removing outer skin of potatoes due to its nutritional value as well as the taste.

In dum aloo, curd is the main ingredient, which is used as a souring agent with the additional Indian spices. Dum aloo tastes very good with any Indian flat breads or with mild Pulav.

Ingredient:

Baby potatoes – 15

Onions – 3 medium size

Green chillies – 2

Ginger – 1 tsp (freshly chopped)

Oil – 3 to 4 table spoons

Fennel seeds – ½ tsp

Turmeric – ½ tsp

Red chilli powder – 1tsp

Garam masala – 1 tsp

Salt

Coriander powder – 1 tsp

Coriander leaves – 3 to 4 table spoons

Hung Curd – ¼ cup

Cashew chunks – 2 table spoons

Hot milk – ¼ cup

Kishmish / Dried grapes – 2 table spoons

Method:

-Soak cashews in Hot milk and keep aside.

-Wash potatoes, make half or quarter pieces according to its size.

-Heat 1 table spoon of oil and roast potato pieces a little and keep aside.

-Take one mixer jar, dry churn onions, ginger and green chillies.

-Heat oil in a kadai, add fennel seeds, roughly churned onion – ginger- chilli.

-Fry until it is light brown, add all the powders, salt and fry for a while and add roasted potatoes, cup of water and cook in a low flame.

-When potato is done, it is a time to switch off the gas. Never add curd while boiling the mixture, it curdles immediately.

-Now mix in curd, chopped coriander and mix everything, adjust the consistency by adding water and boil this mixture by switching on the gas.

-When gravy is ready, you would see a shiny layer at the surface. Switch off the gas.

-Now make a paste of cashew and milk and garnish the curry with cashew paste and dry grapes and serve with Roti or Pulav.


Lemon Bread Roll:

Homemade lemon curd is pretty much going with anything. It is perfect for cookies, tarts, bread or bun, or topping with any dessert.

These sweet lemon rolls are packed with delicious flavours with a lemony tinge that pairs well with tea or coffee as a snack option.

If you are a lemon fan like me, this is for you. It is an alternative to the cinnamon roll, a lemon roll!!

The recipe which I follow is easy to make.

To make 8- 10 rolls

For the Dough:

Milk – 1 cup ( I usually take skimmed milk)

Butter – ¼ cup ( 50 grams)

Sugar – ¼ cup

Active dry yeast – ¾  tsp

Flour – 2 ½ cup ( I took a mixture of oats flour + brown rice flour + whole wheat flour, and All-purpose little flour )

Baking powder – ½ tsp

Salt – 1 tsp

Lemon cream cheese filling:

cream cheese or paneer – 1/3 cup

sugar – 2 tbl spoons

hung curd – 2 tbl spoons

fresh lemon juice – 1tsp

all-purpose flour /fine semolina – 2 tbl spoons

homemade lemon curd – 1/4 cup

Method:

First: Bloom the yeast:  In a large glass bowl, add warm milk, sugar, melted butter, and mix. Sprinkle yeast, stir well, close the lid, set aside for 10 minutes or until yeast starts to bloom. (Milk should barely be warm while touching. Otherwise, the yeast would not bloom; instead, it will die)

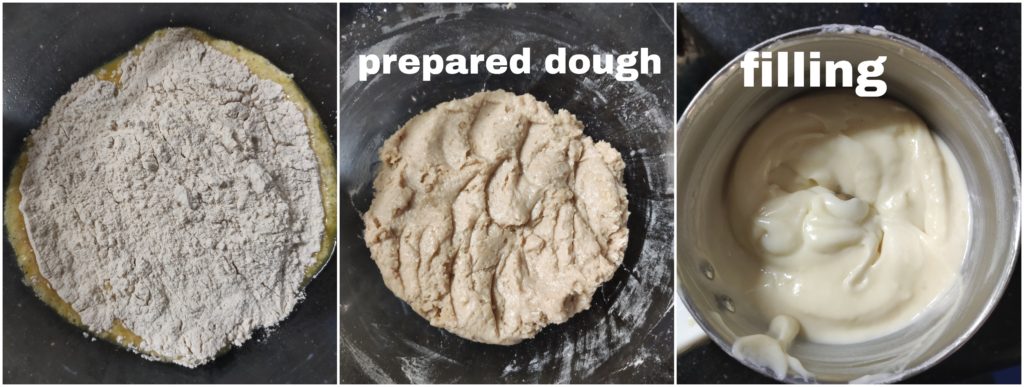
Second: Prepare a dough: Take whatever flour you are using, combine everything, add to the bloomed yeast and milk mixture. Fold everything together, keep it covered, let it rise in a warm place for another one hr or more until it nearly doubled in size.

Third: Prepare the filling: In a small mixer jar, at first, churn paneer pieces, sugar, hung curd, then add the remaining ingredients and, whip once or twice and keep it ready.

Line your baking tray or grease your muffin tray and keep it ready.

Fourth: Kneading the dough for good 10 minutes: Dust the clean kitchen counter with the flour, Remove the dough from the bowl, start kneading. If needed, add little flour, and adjust the consistency. Until dough does not stick to your hand or surface. Now start kneading the dough by hand until it reaches a silky smooth texture and springs back when poked.

Fifth: Now it is ready to Roll: Roll the dough into a large rectangle using the hand and the roller. It should be around ½ inch in thickness, roughly 12” by 16” long. Fix the shape of all the corners.

Sixth: Spreading: Drop the filling here and there over the rectangle, spread evenly using a spatula or spoon.

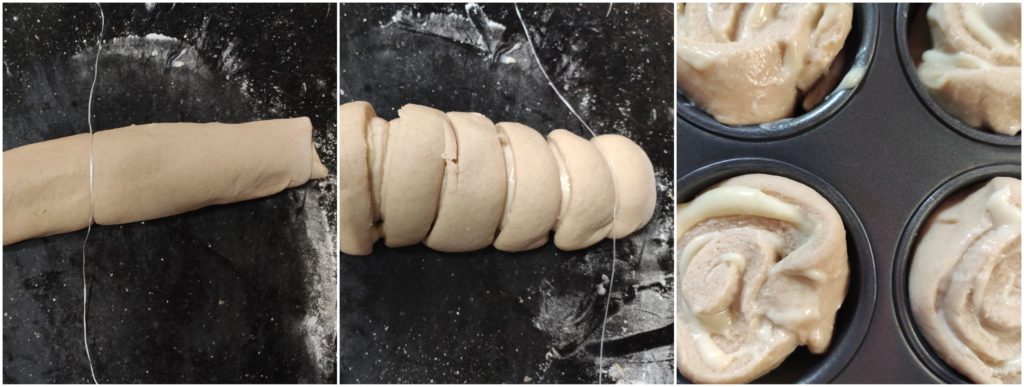
Seventh: Make a log: Start rolling from one end ( longest side); roll up the dough slowly by sealing correctly and tightly. At the other end, seal the edge correctly, place seam side down.

Eighth: Cutting: Cut the log into even pieces using dental floss, twine, or knife. Take a long enough string, keep it at the bottom of the rolled log and pull upwards to get uniform pieces. Place all these pieces in a baking tray. Close the tray with the kitchen towel and leave it to rise. ( mine took hardly 5 minutes)

Ninth: Baking: Preheat the oven to 180°C; if it has risen/ second proof, apply the milk wash and keep it in the pre-heated range. ( I have baked in a mid rack of my oven ) It took me around 35 minutes. Keep an eye after 30 minutes, and when its upper surface turns brown, remove it from the oven.

After taking it out, apply butter over hot rolls to retain moisture. After it cools down, break one by one and serve. I have not used any glaze or cream cheese. It was delicious as it is.