Taro Root/ Arbi Fry:

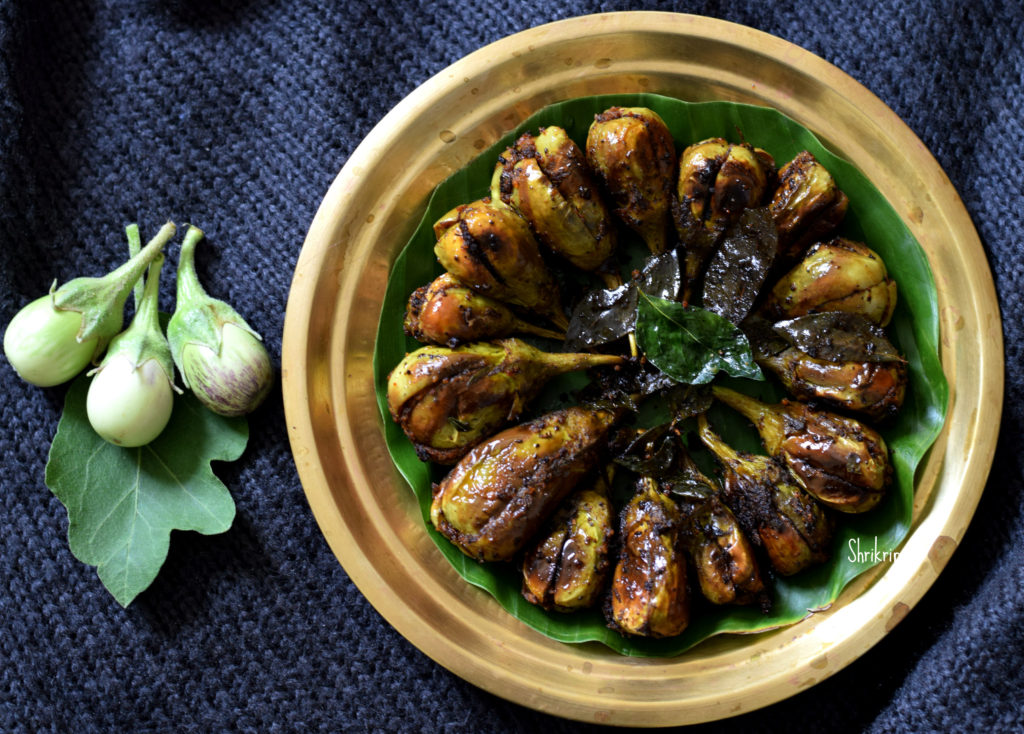
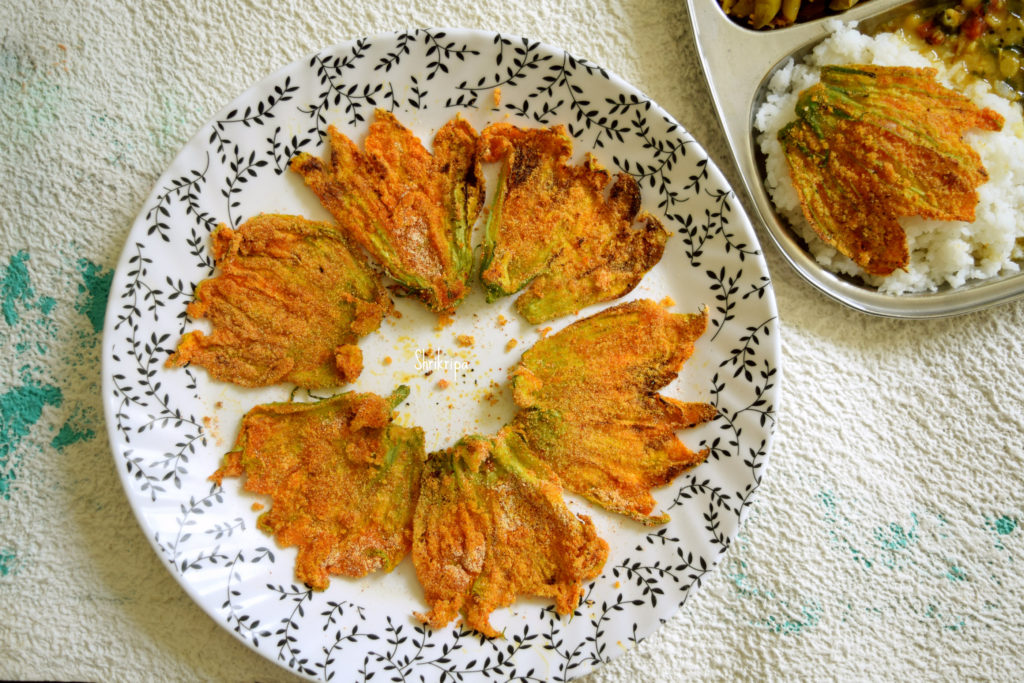
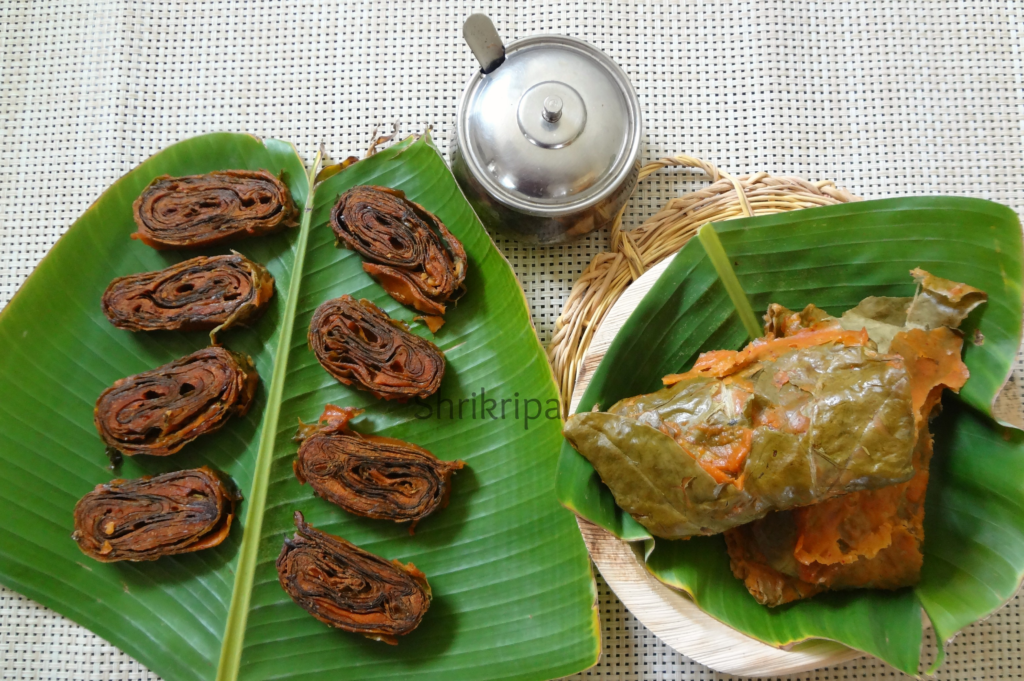
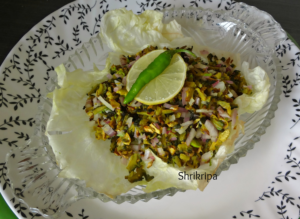
A perfect side dish to enjoy with humble curd rice or Rasam rice. It is flavourful, healthy, and easy to make a side dish.

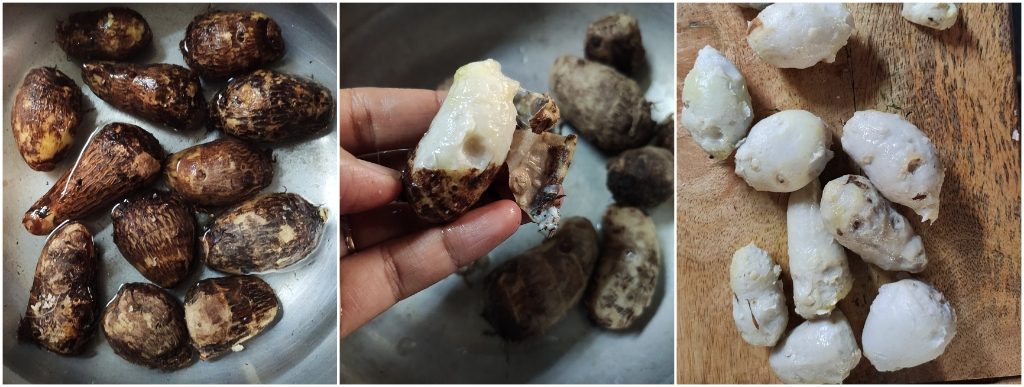
Now prepare the Taro root or Arbi;  if you are new to the usage of Arbi, please go through my detailed description of handling Arbi, how to cook etc., in “Understanding the roots and tubers.” And go down until Tubers, and you would find the Taro/Arbi under Number 7, and it is HERE.

Now, the procedure for Arbi Fry:

Ingredients:

Arbi root – ¼ kg

Salt – as needed

Turmeric – ½ tsp

Red chilli powder – 1tsp

Tamarind powder or paste – ½ tsp

Coriander powder – ½  – 1 tsp

Hing – one pinch

Garam masala powder – ½ – 1 tsp

Curry leaves – 1 – 2 springs

Oil – 2 – 3 tablespoons

Rice flour – 1 to 2 tablespoons

Method:

-Wash the Arbi root, cook for one whistle in a pressure cooker. Peel the skin and slice it ( ½ inch thick pieces).

-Take one bowl, put these slices, all the masalas from salt to garam masala from the ingredient list. Let it sit for half an hour to 1 hour.

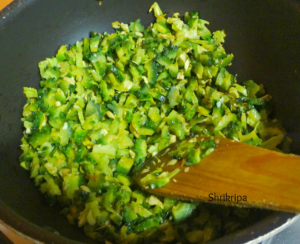
-Take one iron skillet, heat oil, put curry leaves, then marinate taro, toss-up and down in a slow flame.

When it is slightly crisp, sprinkle some rice flour and toss further and enjoy with your meal to make it crispier.

Tips: For example, while roasting Arbi, adding little rice flour when 3/4 is done gives it a crisp texture and does not get sticky and mushy. And the necessity to use excess oil also does not arise, thus making it healthier.


Barbeque Oyster Mushrooms:

Oyster mushrooms are Fan-shaped, soft, with a mild Umami in flavour, when compared to button mushrooms. They appear in different colours starting from white, baby pink, cream, light grey etc. Mushroom is known for its low calorie, rich in protein, low in calorie aspects.

According to my daughters, it tastes much better than the button mushrooms and one of my twins who doesn’t love button mushroom started loving mushrooms by eating a pink variety of Oyster by seeing its cute colour :D. My family prefers simple olive oil, garlic salt and pepper tossed Oyster or Barbecue style (My jugaad style 😉 ) / marinated and baked version as a side dish or salad with fried rice or noodles. 

How I made:

Ingredients:

Oyster Mushroom – 2 packs

Sriracha sauce – 1 tablespoon

Tomato ketchup – 1 tablespoon

Vinegar – 1 tsp

Soy sauce – 1 tsp

Brown sugar or Maple syrup – as needed

Black Pepper powder – ¼ tsp

Olive oil – 1 to 2 tablespoons

Method:

-Clean the mushrooms, drain thoroughly.

-Heat the olive oil, drop Mushrooms, roast it, and remove.

-Prepare the sauce by mixing all the sauces from Sriracha to black pepper. Marinate the roasted mushroom in this sauce for 10 to 20 minutes.

-Bake in a pre-heated oven at 180°C for 10 minutes and serve as you wish.

Note: You can use Iron Tawa to roast, instead of the oven. 


Knol khol leaves and sweetcorn Steamed dumpling/patties:

Desi sweet corn is in season now and we get plenty from local vendors. Indian maize corn isn’t sweet, but when it is cooked and mashed  or ground into paste it has the binding ability due to its starchy texture.

We all enjoy our seasonal roadside  bhutta treat, which is nothing but charcoal roasted corn on the cob, makki Ki atta to make roti or as a popcorn. This cereal is healthy, nutritious and can be utilised in a day to day diet, at least in winter months, when it is in the season. Corn kernels have less fat as well as low in calories.

Here, I have used ground corn on knol khol leaves and steam cooked until done. Basic method of making/steaming is like Pathrode or pathra, but ingredients are different. After steaming those folded parcels, it can be devoured as it is like a pathra or steamed dumpling, drizzled with coconut oil or it can be rolled in dry rava mixture and pan fried and served with ketchup.

So, when corn is mixed with Knol khol leaves not only does its nutrition increase but also, we get added benefit of all the goodness of knol khol leaves as well. It is rich in fibre and leaves are big enough to play around and fold however we want.

Recipe goes like this –

Ingredients:

Fresh Sweet corn – 2 cups

Onion – 2 (medium) chopped

Green chillies – 2 to 4

Fresh coriander – 1 fist full (chopped)

Cumin seeds – 1 tsp (dry roasted)

Salt – as needed

Chilli  powder – 1 tsp

Turmeric powder – ½ tsp

Fresh coconut – 1 cup ( grated)

Fresh Knol khol leaves – as needed (even cabbage leaves would do)

For Tawa roast:

Small size rava – ½ cup ( chiroti rava)

Hing – ¼ tsp

Red chilli – 1 tsp

Coconut Oil – for frying

Method:

-Wash knol khol greens or cabbage greens, drain and keep it ready.

-Make a fine paste of Sweet corn, onion, green chillies, coriander greens, dry roasted cumin, salt, chilli powder, turmeric with coconut.

-Spread the batter evenly on  knol khol leaves, fold the leaves at the two sides, then roll like a mat.

-Finish all the batter, by following this same method, place all those rolls in an idli steamer, cook for 20 minutes.

-After steaming if you want to enjoy hot steamed rolls, smear some coconut oil, and enjoy.

OR

-make a tawa roast by rolling in a rava mix. ( dry mix rava, hing, salt, red chilli powder) :

-Heat iron tawa, place all those steamed dumplings by rolling in rava and pour coconut oil and roast both the sides and serve with tomato ketchup.


Kantola Tawa Fry:

Kantola has many names like Spine gourd, Teasel Gourd, phagila, Mada hagala, locally we call this as “Kaadu peere” in Mangalore. Kantola is one of the famous and nutritious vegetable of coastal region and some Eastern parts of states. This monsoon vegetable is loved by all. This resembles a bitter gourd in structure, but not in taste. It is a crunchy mild flavoured vegetable.  It is a great health food as it is rich in proteins, iron and anti-oxidants and low in calories. It is high in fibre too.       

In my family, we usually relish this in tawa fry form. Let’s see how I do this.

Ingredients:

Kantola: 5 to 6

Salt to taste

Red chilli powder – ½ tsp

Turmeric – ½ tsp

Asafoetida / hing powder – ¼ tea spoon

Coconut oil – to shallow fry

Ingredients for outer cover:

Chiroti/fine rawa – 1 small cup

Rice flour – 1 table spoon

Salt

Asafoetida  powder – ¼ to ½ tsp.

Red chilli powder – 1 tsp

Method:

-Wash Kantola and slice them into a very thin slices. Don’t remove outer skin or inner seeds. Use as it is.

– Sprinkle salt, red chilli powder, hing, turmeric on these slices and mix this nicely by using your hand and   keep aside for 10 to 15 minutes to marinate.

-While marinating it will leave some water and it helps to hold outer coating.

 – Now take one bowl, dry mix all the ingredients like fine rawa, rice flour,salt, asafoetida, red chilli powder, for outer cover.don’t add any water.

– Now take each marinated Kantola piece and roll both the sides over rawa mix, keep aside after coating one by one.     

-Take one iron Dosa tawa ,heat it ,keep 6 to 7 coated pieces over it and pour one or two teaspoon of coconut oil and fry nicely on one side.

-After some time, flip the side, once again pour one tsp of coconut oil and fry this side too.

– After frying both the sides, serve this as a side dish with dhal -rice, Rasam –rice or curd- rice.

  Note: You should use coconut oil and more asafoetida to get authentic taste.


Instant Stuffed Brinjal:

Tiny brinjals are very delicious in dry curries as well as in gravies. When I have plenty of home grown organic brinjals, I normally make this quick dish, which can be handy as well as tasty when you are super lazy to cook. If chutney powder (any chutney powder will do) is around, within no time you will be able to make this delicious dish. It can be relished as a starter, side dish or with curd rice.

Ingredients:

Tiny Brinjals – 12

Garlic Chutney powder – 2 to 3 table spoons

Hucchellu/ gurellu or Nigella seed powder – 1 tea spoon (optional)

Red chilli powder – 1 tea spoon

Amchur powder – ½ tea spoon

Salt

Turmeric – ½ tea spoon

Cooking oil – 2 tea spoons

Method:

-Hucchellu powder is purely optional. If you have roasted Hucchellu powder, use it.

-Take one bowl, mix chutney powder, gurellu powder, salt, turmeric, red chilli powder, amchur powder, salt.

-Wash brinjal, make 2 slits (+ shape) and fill this mixture and keep aside. If any mixture is remaining, keep aside.

-Take one kadai, add oil. When oil becomes hot, add masala filled brinjals and toss for couple of minutes.

-Sprinkle little (1 table spoon) water and close the lid and cook in a low flame.

-Once again sprinkle water in between and cook until brinjal shrinks and cooks properly.

-Lastly, sprinkle remaining masala mixture, give one stir and serve as you wish.


Pumpkin Flower Tawa fry:

Pumpkin flower is bright yellow coloured, which is loaded with essential nutrients, minerals and used in a different cuisine around the world and considered as a rare delicacy in a gourmet cuisine as well. 

Pumpkin plant bears male as well as female flowers separately. Usually Male flowers appears initially, and female flower is a rarity. These flowers last only for a day and wither by the evening. That is the reason why we see only Male flower in cooking. It has a main role in pollination and after that it will wither, and female flower will grow as a Pumpkin. If you have a doubt in distinguishing between male and female flowers, male has only a long stalk and the female has a round green, big swollen structure(ovary) at the base of the petals.

Pumpkin flowers are used either in a raw, tossed, pan fried, cooked forms in various recipes and it is found occasionally in salads, soups or batter fried. Here I am showing Mangalore style tawa fry in which pumpkin flower will be coated with seasoned fine semolina and tawa roasted by drizzling some coconut oil to give coastal touch.

If you have Pumpkin, squash or Zucchini plant in your garden, collect all the male flowers and make this and enjoy your meal. You can collect the fresh flowers every day and store it in an air tight box for 3 to 4 days and utilise in your cooking.

DSC_4222_Fotor main

This is how I make-

Ingredients:

Pumpkin flowers – 5 to 6

Fine semolina – 1 small cup (chiroti rawa)

Salt

Hing – ¼ tea spoon

Turmeric powder – ½ tea spoon

Red chilli powder – 1 tea spoon

Coconut oil – as needed

Method:

-Wash flower, give one fine slit at the bottom of the flower and cut open.

-Remove stamen.

Ribbet collage 1

-Dry mix all seasoning items from rawa, salt, red chilli powder, turmeric powder and hing.

-Take each flower and coat with the seasoning, by rolling.

-Heat iron tawa/ griddle, place all these coated flowers.

Ribbet collage 2

-Roast these by using sufficient coconut oil on both the sides.

-Serve these with hot rice and Rasam or dhal.


Stuffed Capsicum (South Indian style)

Stuffed capsicum is usually done with potato, paneer, cheese or moong dal. In this recipe I have used coconut and onion which is mixed with south Indian style masala powder for the filling. It can be relished with plain roti or rice as a side dish. It is very tasty, and we relish it every now and then, whenever I get to catch hold of tiny capsicums. This recipe I learnt almost a decade ago by Radha athe. She is a treasure house of North canara traditional recipes and I have learnt so many things from her.

main 3

Ingredient:

Capsicum – ½ kg (small sized)

Onion – 2 to 3

Coconut – 1 cup

Salt – as needed

Tamarind powder – ½ tsp

Oil – 2 table spoons

For masala powder:

Chana dal – 2 table spoons

Urad dal – 1 tea spoon

Cumin – 1 tea spoon

Hing – small pea size

Dried red chillies – 6 to 8

White sesame seed (til) – 1 tea spoon

Mustard – ½ tea spoon

Turmeric – ½ tea spoon

Method:

-For masala, dry roast Chana dal, urad dal, cumin, white sesame and mustard and keep it aside.

-Next take couple of drops of oil and fry red chillies and hing.

-Cool everything and make powder by using mixer jar.

-Now take one bowl, add chopped onion, grated coconut, salt, tamarind powder and required amount of masala powder (don’t pour at once, use as required).

-Here salt and masala should be on a slightly higher side, because while cooking, even capsicum will absorb the masala and salt.

-Next wash small sized capsicum, make a round mark near the stalk region and cut open that top part. If possible, keep it intact.

Ribbet collage 1

-Remove inner seed part and clean inside.

-Fill ready coconut and onion masala and close it with upper stalk part and make it firm.

-Now take one wide nonstick pan, pour oil and heat.

-Place all the masala filled capsicum and sprinkle little water and close the lid.

-Cook in a simmer, check in between and turn the sides.

Ribbet collage 2

-All the sides should be uniformly cooked and outer skin should have charred effect.

-When it is done, switch off and serve hot with rice or plain phulka’s.


Marakesavu Pathrode:

Pathrode, name itself will make any Mangalorean drool. That too if it is marakesavu leaf, fun is even more. Marakesavu is non-itchy, seasonal colocasia leaves. It is one more classic monsoon special from Mangalore. Pathrode is usually served with coconut oil either plain or pan fried by slicing.

pic main

Marakesavu is commonly known as hitchhiker elephant ear and botanical name of this leaf is Remusatia vivipara. Leaf is large, oval, leathery textured, glossy on both the sides. Foliage disappears in winter and emerges after the first rain during monsoon. Grows widely on big tree trunks or in-between the stones, mainly emerges from the moss bed. The name itself suggests about its habitat. Here, “Mara” is Tree and “Kesavu” is colocasia.

collage 1

We will see the Procedure-

Ingredients:

Dosa rice – 3 cups

Fresh Coconut – 1 ½ cup

Dried red chillies – 12 (Roasted)

Hing – ¼ teaspoon

Salt

Jaggery – 1 table spoon

Tamarind – 1 table spoon (if normal colocasia use little more)

Marakesavu – 3 bundles

Coconut oil – for serving

Method:

Wash the leaves, remove stem and trim.

  Wash and soak rice for 3 hours.

  Fry red chillies by putting very little oil.

collage 2

Grind soaked rice, coconut, tamarind, jaggery, salt, roasted red chillies into smooth paste by adding sufficient water.

  Batter consistency should be like Dosa batter.

  Now, we are ready to make Pathrode.

collage 3

  Take biggest leaf from the lot, place upper glossy part downwards and apply ground batter on back side of the leaf. (pc:step 1)

 After applying on the first leaf, keep second one (slightly smaller than the first one)

Proceed with the application. After applying on second leaf, keep the third leaf then fourth one and proceed.(pc: step 2&3)

collage 4

  Now lift sideways, and fold. Make it like a mat. Apply some batter on these folds as well.

  Roll from the tip and proceed until the end and apply some batter on outer shell and keep this in a water filled idly steamer.

collage 5

  Cook this for 45 minutes to one hour, depending on the quantity of the content inside the vessel, in a low fire.

collage 6

  Serve fresh with coconut oil by slicing these cooked rolls or apply coconut oil and fry these in an iron tawa on both the sides and enjoy as it is for breakfast or with lunch or dinner.

NOTE:

-Tamarind is a key ingredient while making Pathrode.

– If it is Mara Kesavu, it is non-itchy and quantity of the tamarind doesn’t matter.

– If you are using normal colocasia leaves, tamarind plays a very crucial part, in removing the itchiness of the leaves. Use little more quantity than normal.

– You can prepare this same recipe by using big spinach leaves as well.

Sautéed Asparagus:

Asparagus is thin, pencil like green shoot. It is high in fibre and one of the most nutritious, food. Which is low in fat and calorie too.

Snap them at a natural breaking point and peel the outer tough fibre from the hard part and one can use this in any dish by slicing or as it is.

Asparagus is very delicious when it is sautéed or baked. It can be served as a “crunchy” side dish or salad.

Here in India, we don’t get plump variety and this time when I went to USA, in my sister’s house I tried this and it is much tastier than what we get it in Bangalore.

pic 9

Ingredients:

Asparagus – 1 bundle

Olive oil – 1 table spoon

Red chilli flakes – 1 tsp

Garlic salt – to taste.

Method:

pic 2

  • Wash Asparagus, snap them by hand at a natural breaking point.
  • If you want to use bottom woody part, remove outer fibre by peeling, either chop them or use inner core as it is in this salad or any other dish.

pic 4   pic 5

  • Bring a large pot of water to a boil, add asparagus, cook until it blanches. It hardly takes 2 to 3 minutes.
  • Drain and proceed to sauté.
  • Take one tawa, put oil and heat.

pic 6   pic 7

  • Drop Asparagus, sprinkle garlic salt and red chilli flakes and toss until you see a charred look.
  • Serve hot.


Bitter gourd salad:

Bitter gourd is a very healthy vegetable and is considered as a therapeutic vegetable, used mainly in controlling diabetes and weight reduction in Ayurveda. I have come up with this recipe to utilise fresh produce from my terrace garden. We are a bitter gourd loving family and my daughters are very fond of gourd in any form. I usually make dry curry or tawa fry but I tried my hand at this salad and everyone loved this as a side dish with rice and yellow dal.

collage

Ingredient:

Bitter gourd – 2 to 3

Onion – 1 to 2 (chopped)

Green chillies – 3

Salt

Turmeric – ½ tsp.

Lemon – ½

Coriander leaves – 1 tbl sp (chopped)

Coconut Oil – 1 tbl sp.

Method:

-Wash bitter gourd, make bite size pieces, including outer skin and inner seeds. Chop green chillies and put together.

– Sprinkle some salt, turmeric and mix nicely and keep aside for 10 minutes.

pic 2         pic 3

-Take one tawa, put oil. When it is hot, put marinated bitter gourd and chilli pieces and fry in a low flame until it is crisp.

– Cool this mixture. Add chopped onion, some more salt, lemon juice and mix nicely and serve.

pic 5

-It is very simple to make and tastes really great with hot rice and dal.