Instant Oats-Rava Idli:

This is how I prepare oats idli/idly at home. This recipe is so handy, healthy and a very good option to finish off our stock of sour curd. I usually roast rawa and oats the previous night and proceed directly to prepare in the morning, so that one can save time and it also gets enough time to cool down properly. I don’t use any seasoning and make it exactly like our regular normal idly and serve either with hing or onion and coconut chutney.

pic main

Ingredients:

Quick cooking oats – 1 ½ cup

Normal rava/semolina – 1 cup

Sour Curd – 2 cups

Water -1 cup

Eno fruit salt – 1tsp

Salt

Ghee /clarified butter – 1 table spoon

Method:

          Take one tawa and roast rava by adding ghee.

          When rawa becomes white, sandy in texture, add oats and proceed frying it for 2 to 3 minutes and switch off the gas.
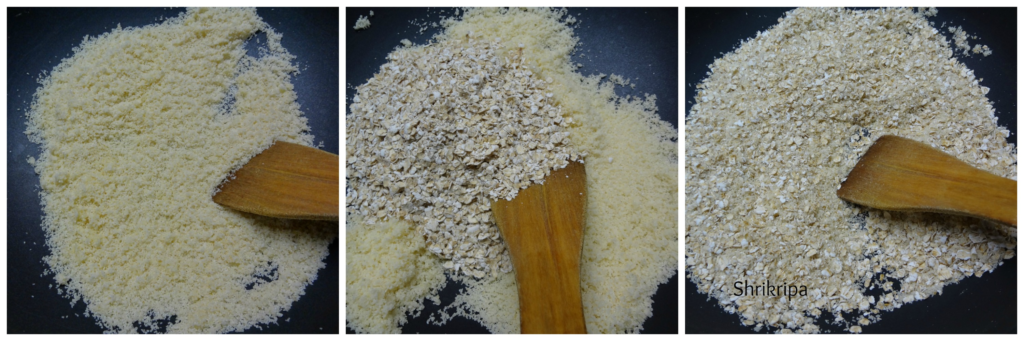
collage 1

          Cool this properly. (I usually do this the previous night)

          Mix curds, water, required amount of salt (around 1 tsp) and Eno.

          Add roasted rawa and oats mixture. Consistency should be like regular idly batter.

          Set cooker for steam cooking, by adding 1 to 2 cups of water and keep it on a fire.

          Rinse idly moulds or stand with clean water (This will help as a non-sticky coating)
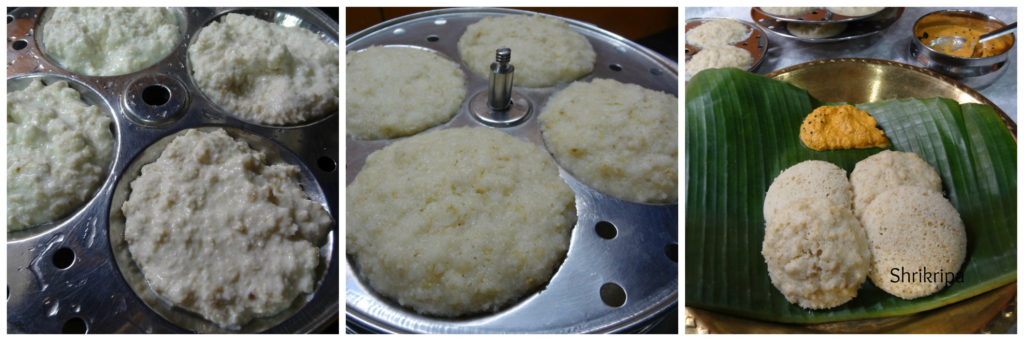
collage 2

          Pour 1 serving spoon of a ready batter, steam cook for 8 to 10 minutes.
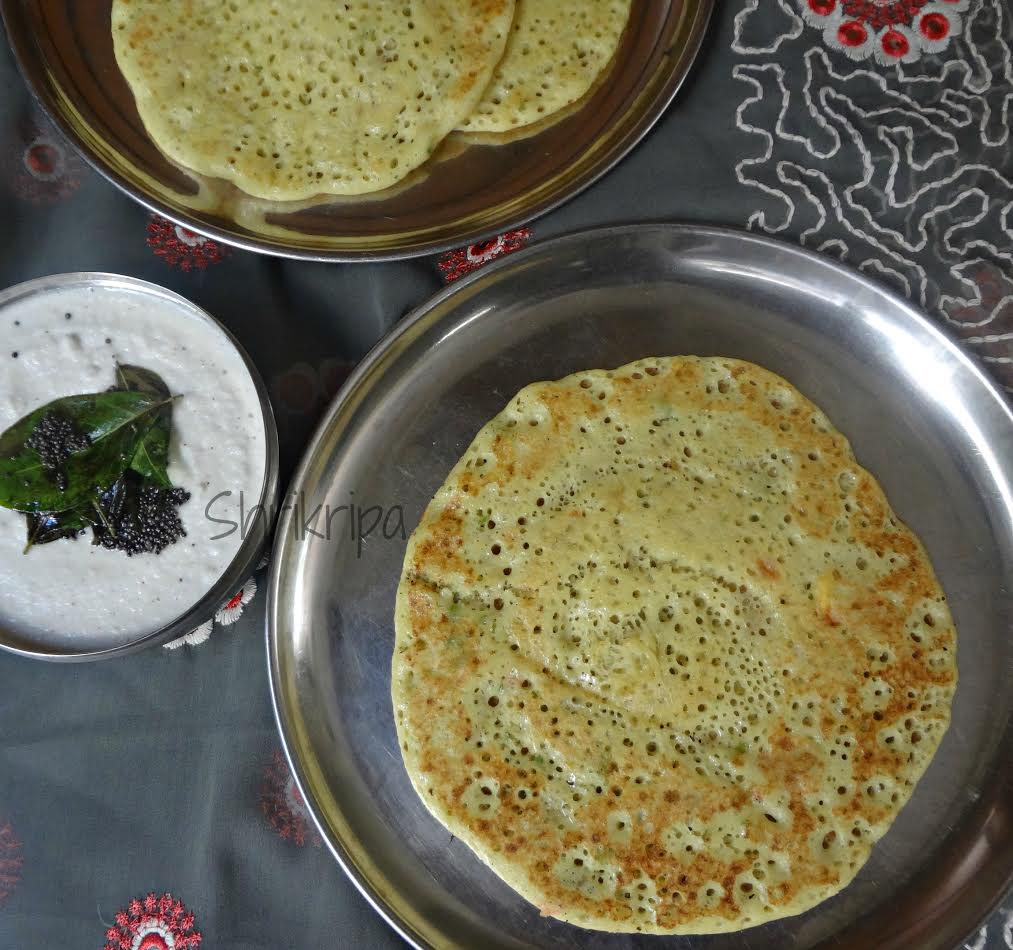
          Serve with any chutney of your choice.


Tomato Omelette /Dosa:

tomato-omlette

This time when we went to Sirsi, we stayed at Hotel Madhuvana. When I looked at their menu, I was very curious to taste this special omelette, and ordered the same .When I tasted it, it was this amazing blend of flavours, and not at all like the usual tomato omelette which I prepare. Everybody liked the taste. It was little sweet, tangy at the same time filled with flavour. Immediately, my curious mind, started to check the ingredients. I had asked my hubby to note it down, one by one while I was checking the ingredients .After coming back, I took that list and tried to imitate the same and succeeded. Here I am, sharing this super tasty Dosa recipe.

Ingredients:

  • Dosa rice- 3 cups
  • Fenugreek/methi seed -2 tsp.
  • Beaten rice/poha- 1 ½ cup
  • Coconut – 2 fists full (grated)
  • Jaggery -2 table sp.
  • Salt –to taste
  • Turmeric – ½ tsp.
  • Eno fruit salt or cooking soda – 1tsp (optional)
  • Cumin- 1tsp.
  • Grated ginger – 1 tsp.
  • Firm tomatoes – 2
  • Coriander leaves – 2tblsp.

Method:

-Wash and soak Dosa rice, beaten rice and methi for 2 to 3 hours.

-Grind this into a smooth paste by adding turmeric, salt, jaggery, coconut to an idly batter consistency (little thicker than normal Dosa).

-Pour this batter into one big vessel, add jeera and keep it aside for fermentation.

-If you are living in the cold climate, next day morning add 1 tsp. Eno fruit salt, mix nicely and keep it aside for 10 min.

-Now chop Tomatoes, coriander leaves and grated ginger.

tomato-omlette-batter

-Mix this into Dosa batter and start making Dosa by pouring one serving spoon of the batter on a hot iron or non-stick tawa, don’t spread much. You will see thousands of holes on the upper surface. Smear with butter or clarified butter. When it is cooked, flip and cook on another side too. Serve this spongy tomato omelette with coconut chutney. Here I have served this with coconut-ginger chutney.

How to cook Vermicelli:

Initial days of cooking are very challenging. We face lots of hardships at the kitchen. Generally in south Indian cooking,  the quantity of water used, is crucial and the end result is depends on that. So, if we know the requirement of water for cooking that particular ingredient, half the battle is won.

Usually I get a query in my message box regarding some doubts or the other from my near and dear ones. In one such query’s person had asked me, why she can’t cook perfect vermicelli Upma?  Further she said, her preparation becomes little soggy each time she makes vermicelli upma. That day, while answering her query, I thought of making one separate category for learners in my future blog and today here I am, writing my first post, dedicated to cooking learners.

Here, I will guide you to make simple Vermicelli Upma

pic-9

Ingredients:

Vermicelli – 2 cups

Onion – 2 medium

Green chillies -2

Salt

Grated coconut – 1 table sp

Lemon – 1/2

For seasoning –

Mustard – 1 teaspoon

Urad dal – 1teaspoon

Curry leaves – 1 spring

Cumin- ½ teaspoon

Red chilli -1

Oil /ghee – 2 table spoon.

Method:

-First, Chop the onions, chillies and measure vermicelli and keep aside.

pic-1

  • Keep one small bowl of water for boiling.

pic-2

  • In another burner, keep thick bottomed kadai; do seasoning by heating ghee or oil, or mix of both. When it is hot, add mustard. When the mustard splutters add urad dal. After it becomes light brown add red chilli, cumin, curry leaves.
  • After this add chopped onion, green chillies and fry for a while.

pic-3

  • If you wish to add turmeric, you can add it now.
  • Add little salt and fry onion until it is light brown.
  • Add vermicelli and fry for a while.
  • How to check if oil is sufficient or not: while mixing vermicelli, if oil coats vermicelli and becomes wet and shiny, oil content is perfect for this upma. If you feel vermicelli is dry and it is not holding together, add little more oil or ghee.

pic-4

  • Next- how much roasting or frying is needed? After frying it for a couple of minutes on a low flame, you will see the colour change and each strand will becomes whitish and crispy. It is now time to add boiling water.(refer to this above picture)

pic-5

  • How much quantity of water? Please refer to the picture. While pouring, Water should be just above the vermicelli. Mix the mixture and check for the salt. If salt is needed add and cover the kadai with a lid and cook it in a low flame.

pic-6

  • After a couple of minutes, open the lid, if water is evaporated and top part of the layer appears cooked, that is it. If you find, it is yet to cook, sprinkle little water and keep it covered for couple of minutes.

pic-7

  • If you like to garnish with coconut, add coconut and add lemon juice and mix.

pic-8

Serve this upma with a cup of coffee or tea.

Munge Dosey/Coconut Sprout Dosa:

Come December, coconuts start sprouting and in our native, Agricultural background people will become so busy with seasonal activities. Usually December –January is the time frame to make coconut oil. First thing of the process starts by removing all the coconuts from the attic, where it was stored after each harvest.

Then comes, removing outer husk and inner fibre. Third job is breaking each and every coconut from the lot. This is the time; we find lots of sprouts, inside the coconut and these sprouts are so tasty to eat and spongy in texture.

Sprouted Coconuts or coconut sprouts are the edible spherical sponge-like cotyledons of germinating coconuts. They have a crunchy watery texture with a slight sweetness. They are eaten in coconut-growing countries either as is or as part of various dishes. We call it as munge, “sprout” which is a default name of coconut sprout and dosey which we prepare out of it is “Munge dosey”

People eat it as it is or make some delicacies. One of such item is Coconut sprout Dosa, which is very delicious and  it has a mild earthy  flavour. When I went last month to my native, my mom in law gave me some coconuts and one of the coconuts was sprouted and I felt so happy to see this sprout. First thing that came to my mind was this Dosa and I felt Nostalgic by thinking of my childhood.

Ingredients:

Dosa rice – 2cups

Coconuts sprout -1 ( if you have 2 sprouts, no need to add grated coconut)

Grated Coconut – ½ cup

Salt

Method:

Wash and soak Dosa rice for 3 to 4 hours. Chop coconut sprout in to small chunks.

-Grind soaked rice with chopped pieces of 2 sprouts, or one sprout with grated coconut by adding little water and salt.

-Make smooth paste. This batter must be like our regular Dosa batter and there is no need for fermentation.

-You can make use of this batter straight away. Usually we prepare this batter in the morning itself.

-If you want to prepare this batter in the evening, to make the Dosa in the morning, you can store the batter in the refrigerator.

-To prepare Dosa, heat iron Dosa tawa. When it is hot, don’t apply any oil .

-You can pour one serving spoon of batter and make Dosa like our regular Dosa. Pour ½ tsp of ghee and Close the lid. Or make little thinner batter and pour like a Neer Dosa or rawa Dosa.

-When it shows little brownish spots here and there, flip the side, cook upper side and serve with Coconut and onion chutney or honey or liquid jaggery syrup with ghee.

Note: If you have more than one sprout, no need to add grated coconut while grinding. Instead of one sprout, use two.