Aralu laddu / Puffed Paddy snow ball:

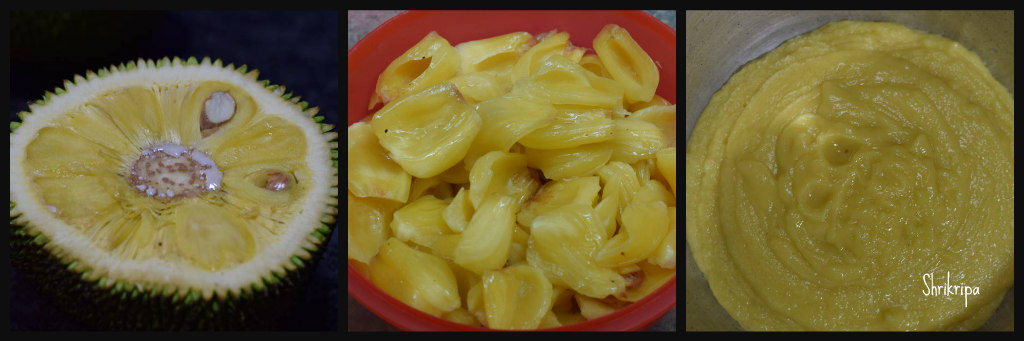
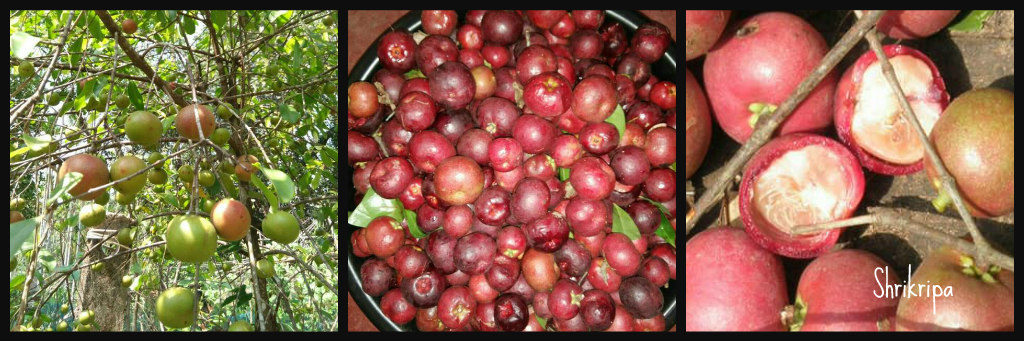
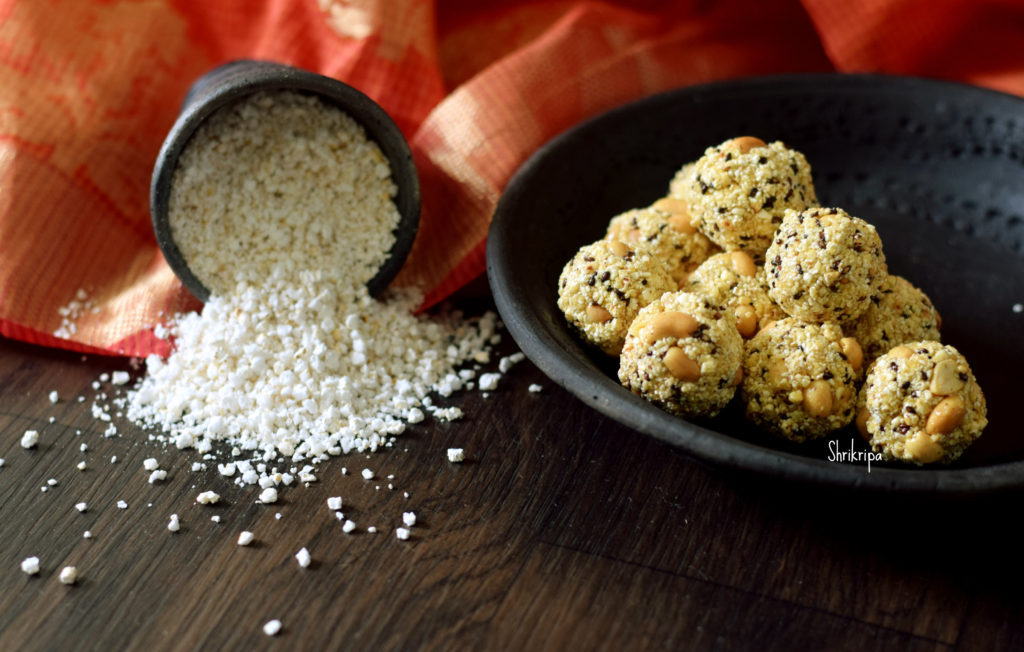
Aralu, Hodalu or Puffed paddy is made by roasting paddy itself. Usually we see puffed rice in the market. Puffed paddy is very rare to find nowadays. It has a very important role in any divine occasions like marriage, Ganapathi havan, Nag Panchami or chauthi festivals in our region.

Normally we don’t eat rice preparations during vrath (fasting) and Aralu fits the bill. Aralu or puffed paddy is prepared by roasting the paddy in an iron tawa. Usually in villages, they do it in an open air. Normally, in open air, wood fire setting will be laid, iron tawa is heated uniformly by putting little sand into it. When sand becomes hot, fist full of dried paddy would be dropped and tossed regularly until paddy puffs and bursts into white popped rice. It is not cooked or done by using water and it is done by roasting. That is the reason it is considered as Pure /auspicious thing and used in prasadam or any divine purposes.

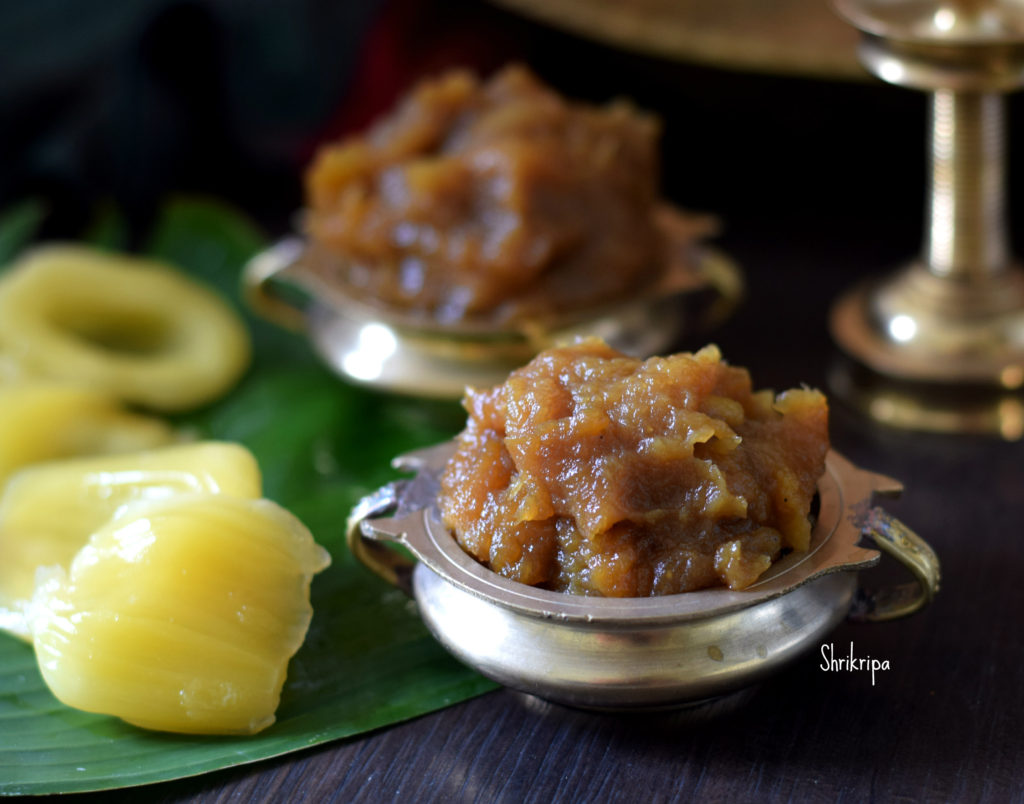
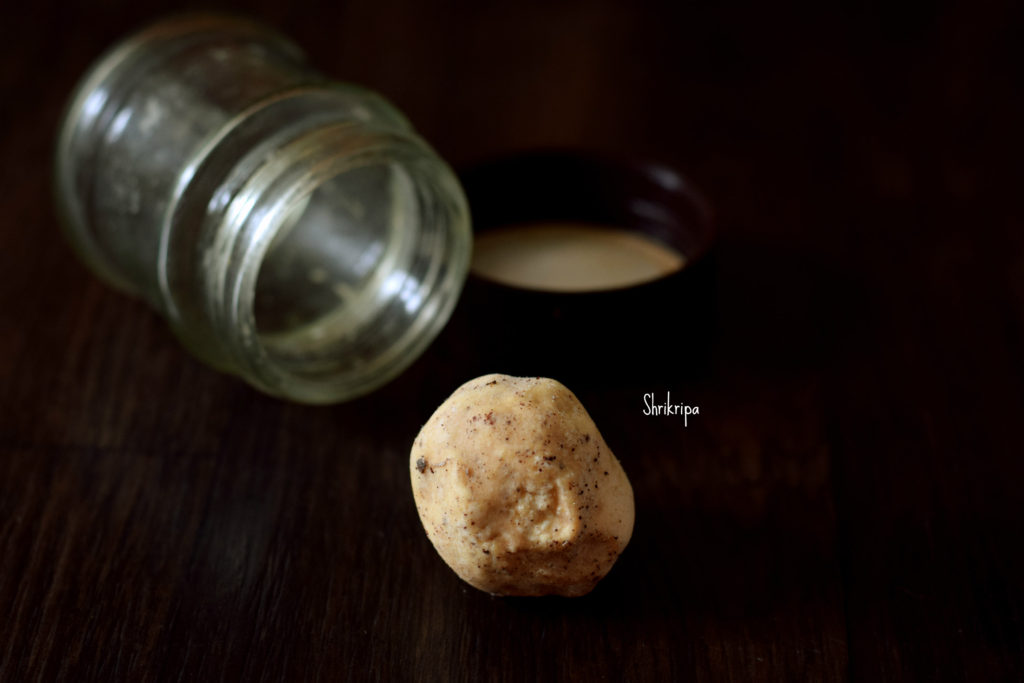
We can make this and use as a regular energy ball as well. It has all the goodness that our body needs. It fits the bill as #eatlocal #healthy #natural #ironrich #fibrerich #refinedfree #holistic #glutenfree #healthysnack #kidfriendly as well.

We normally get puffed paddy in two forms. Either whole or powdered.

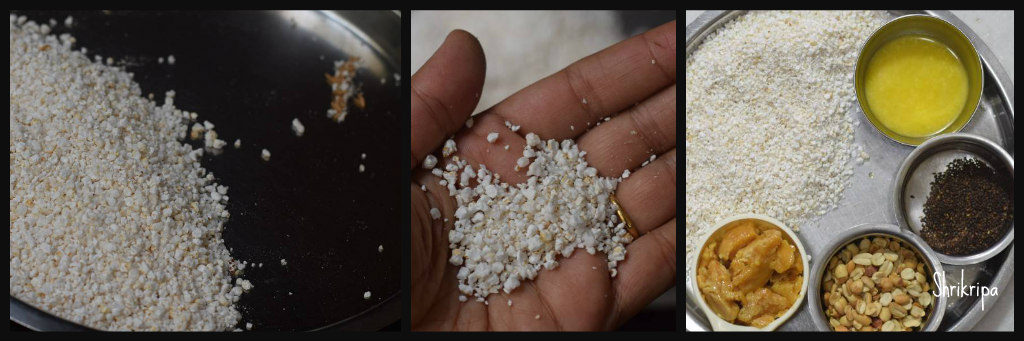
Here in this laddu, I have used powdered form. If you have whole paddy, nothing to worry. Make powder by using mixer jar and use it.

I have used chikki jaggery which is also known as Antu bella. One can use normal jaggery as well.

Ingredients:

Powdered puffed paddy – 1 ½ cup

Jaggery – ½ cup (I have used chikki jaggery)

Black Sesame – 2 tea spoons

Broken peanuts – 3 to 4 table spoons

Ghee – 2 table spoons

Water – 2 table spoons

Cardamom powder – ½ to 1 tea spoon

Method:

-Clean puffed paddy powder, by removing any leftover paddy husks and keep it ready.

-Dry roast peanuts, remove outer skin and make it into halves or use roasted and halved peanuts itself.

-Dry roast sesame seeds as well.

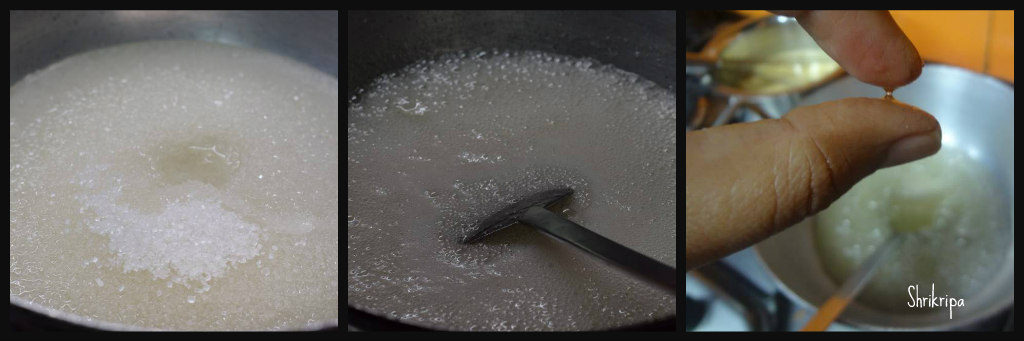
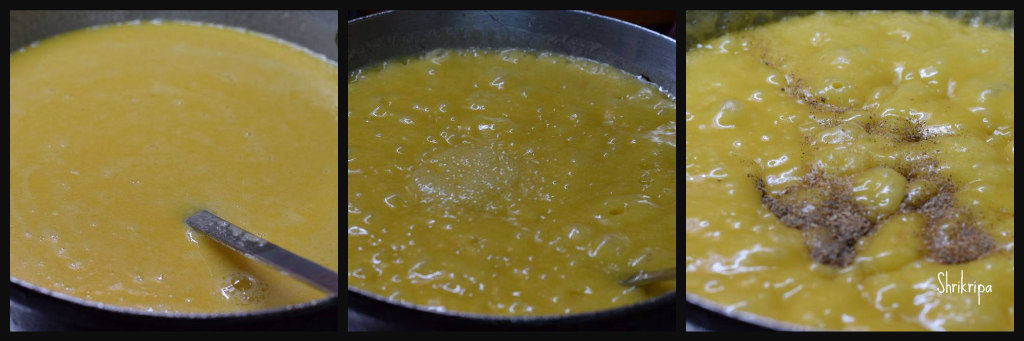
-Dilute jaggery in water by boiling. When jaggery melts, sieve and collect. In this way, we can discard the impurities from the jaggery.

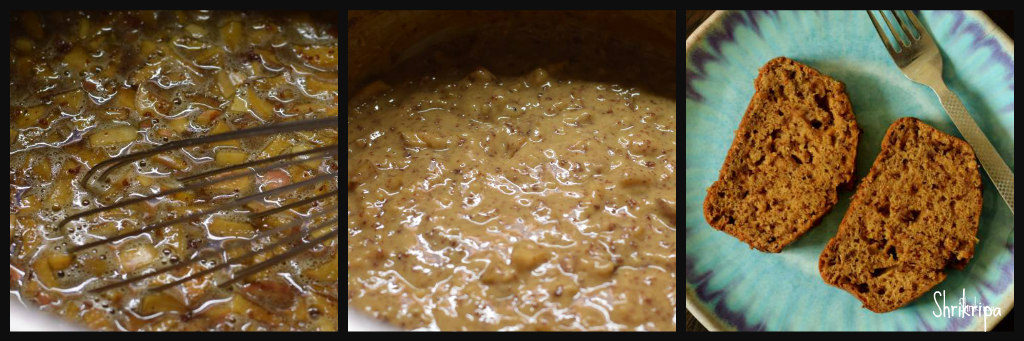
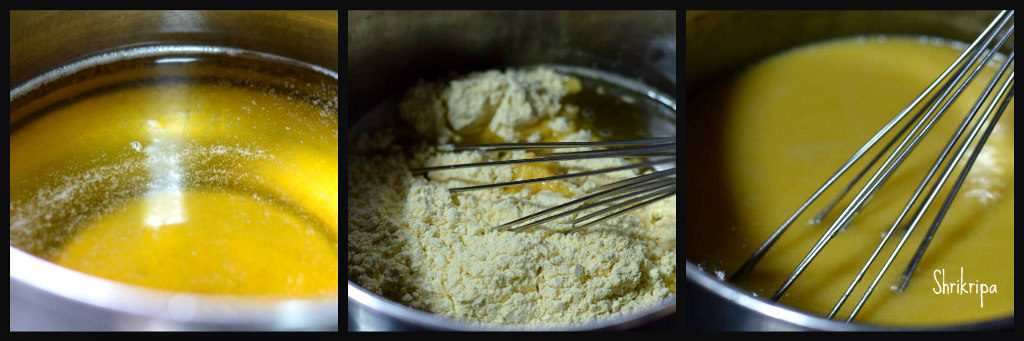
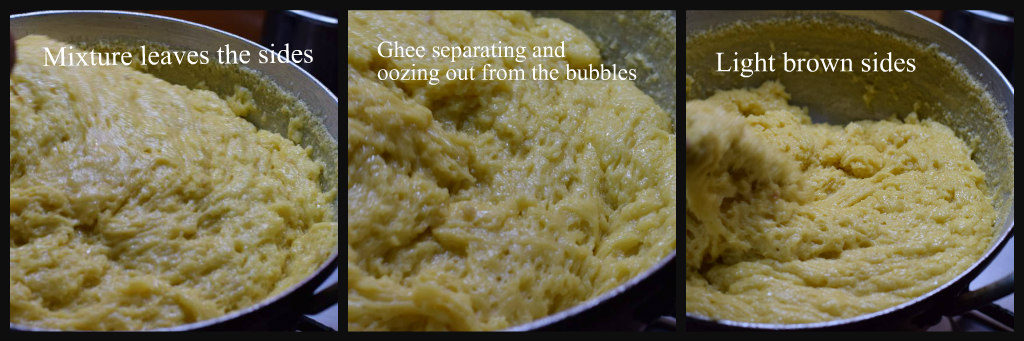
-Take one thick bottomed kadai, add jaggery solution, 1 table spoon of ghee and boil until it reaches one thread consistency.

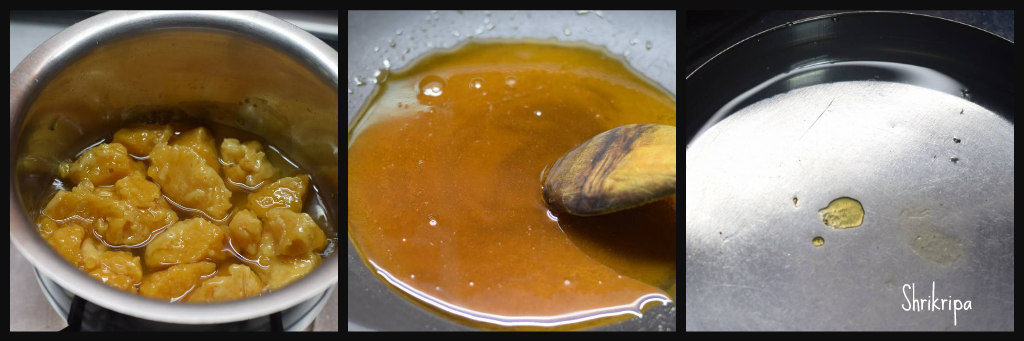
-If you are confused with this stage, take one small tumbler, filled with water. Drop the jaggery mixture and see. If jaggery becomes hard when it drops, and you can make a ball when you press and rotate it by placing in between your thumb and forefinger.

-Mix in puffed paddy powder, roasted sesame, peanut halves, cardamom powder, remaining one table spoon of ghee and mix everything.
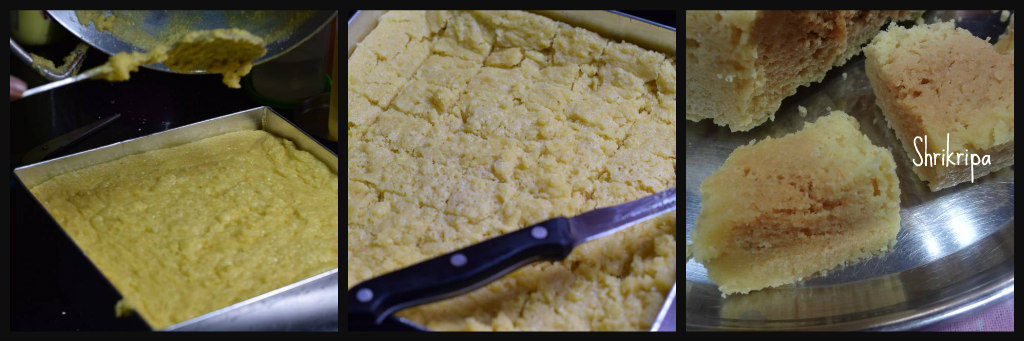
-Switch off the gas.

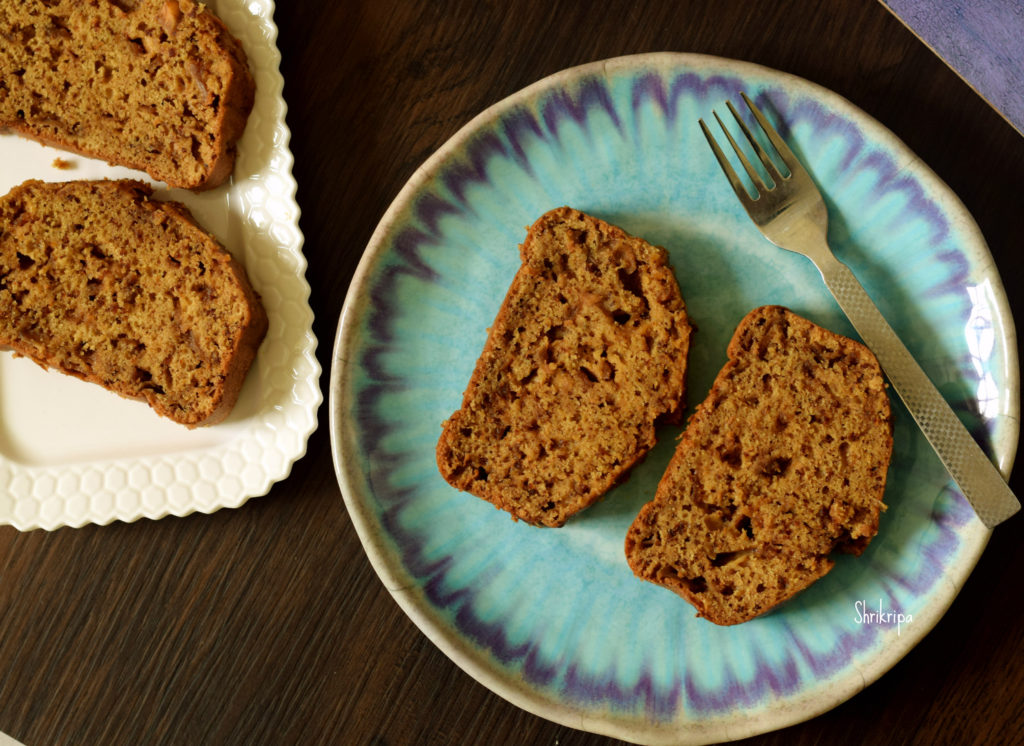
– Apply little ghee on your palm and start making roundels. Sometimes, In-between If it cools down completely, it doesn’t bind, and you can keep the vessel on fire, re heat a little and proceed and finish off the mixture by making roundels.


Palak paneer:

Spinach with cottage cheese is one of the healthiest option of Indian curries. It is the most popular North Indian side dish and goes well with any flavoured rice as well flat breads. We all know the goodness of spinach or paneer. Both are very nutritious- spinach is iron rich, and on the other hand paneer is rich in calcium.

This curry which I make is light, low calorie and creamy without adding any cream or deep fry.

Cottage cheese or paneer is soaked in warm milk and cooked with spinach paste with the added mild spice. This recipe is easy to cook and works just fine as a toddler’s food or for the tiffin box.

How I proceed –

Ingredients:

Palak – 1 big punch

Paneer – 200 or 400 grams

Milk – 1 cup

Tomatoes – 2

Salt

Sugar – ½ tea spoon

Oil – 2 table spoons

Hing – one pinch

Cumin – 1 tea spoon

Garlic – 10 -12 cloves (sliced)

Ginger – 1” (julienne)

Turmeric – ½ tea spoon

Red chilli powder – 1 tea spoon

Cumin powder – 1 tea spoon

Garam masala powder – ½ tea spoon

Method:

-Chop Tomato, spinach and make chunks of paneer and keep it ready. Chop garlic and ginger as well.

-Heat milk, add chunks of paneer and keep aside by closing the lid.

-Grind tomato in the mixer jar and keep aside.

-Take one kadai, add chopped spinach, sprinkle sugar, little salt and cook until wilts.

– Sugar will help to retain the colour green and salt will help spinach to leave its water to cook.

-Cool this wilted spinach, grind into rough paste and keep it aside.

-Now keep one tawa for seasoning, pour oil, when it is hot, add cumin, hing, ginger and garlic. Fry for 2 minutes.

-Add tomato paste, turmeric, red chilli powder, cumin powder, garam masala powder and fry until oil oozes from the sides.

-Now add spinach paste, milk-soaked paneer content and give a stir. Check for the salt and add the required amount.

-After boiling it for some time, you will see a layer of oil or dark coloured layer at the top. Now it is ready.

-Serve this rich gravy with your choice main dish. We always prefer jeera rice as a main dish for this curry.


Kanile palya/Bamboo Shoot and jack seed palya:

Kanile is nothing but Bamboo shoot. We coastal people, prepare some delicacies from this seasonal high fiber veggie, such as Bamboo shoot and green gram gravy or this dry Subzi/palya is prepared by mixing with crushed Jackfruit seed. It is protein rich, subtle in flavor, blends very well with bamboo shoot. This palya goes very well with hot Rice with a dollop of ghee or as a side dish with any kind of gravy, Rasam or sambar.  So, it is a seasonal monsoon season’s treat for us.

We normally use fresh bamboo shoot and chop it in circular manner. (please refer to the Post of How to chop Bamboo shoot)

I normally preserve jack seeds in frozen form and procedure is already shared in my blog as well.

Ingredients:

Ready Bamboo shoot – 1 cup

Fresh or Frozen jack seeds –2 fists full

Grated coconut – 3 table spoons

Turmeric – ½ tea spoon

Red chilli powder – 1 tea spoon

Salt- as needed

Jaggery – as needed (optional)

Seasoning:

Coconut oil – 1 table spoon

Mustard – 1 tea spoon

 Urad dal – 1 tea spoon

Cumin – ½ tea spoon

Red chilli -1

Curry leaves – 2 springs

Method:

-I normally crush and store the jack seeds. So, no need of chopping or crushing. If you have fresh seeds with you, please crush the seed by using hitting stone and remove outer stiff cover and use inner seed.

– Take one thick bottomed pan, do seasoning. Heat oil, splutter mustard, add urad dal. When dal becomes light brown, add cumin, red chilli and curry leaves.

-Now add in crushed jack seeds, a cup of water and cook at low fire by closing the lid.

– When it is half done, add chopped and ready bamboo pieces, Red chilli powder, salt and jaggery, required amount of water.

-Close the lid and cook this in a low flame, until it is cooked or up to water drains.

-If water drains first, add some more water and make sure to cook properly.

Garnish with fresh grated coconut and mix, cook for 2 minutes and switch off the gas.

-Serve with hot rice and enjoy as a side dish.


Ghee Residue Apple-Cinnamon Tea cake:

Ghee residue is a moist, brown coloured, by-product formed after preparing ghee from white butter. It is a rich source of essential fatty acids, anti-oxidants and proteins.

As of now, you will know my love towards this sediment and I usually make it a point to prepare any tea cakes after making fresh homemade ghee. Usually I play with the ingredient and flavours in these cakes. Already I have Egg less Tea cake and Chocolate cake in my blog.

This time, I included cinnamon flavour in my cake by using chopped fresh apple. I have used tasteless mini apples which I took in the market for its attractive size and colour, turned out to be a tasteless apple, after cutting 😉 

Now we will see how to make this,

Ingredients:

Apples – 1 cup (chopped)

Ghee residue  – 2 to 3 table spoons

Sugar – ½ cup

Organic jaggery powder – ½ cup

All purpose flour – 1 cup

Whole wheat flour – 1 cup

Cinnamon – 1/2 tea spoon

Eggs –  2 (beaten)

Water – 1 cup

Cooking soda – 1 tsp or little less.

Method:

– Wash all the apples and chop it into tiny pieces. No need to remove the peel.

-Grease the baking tray (you can use bread tin as well). Line this with butter paper, keep it ready.

–In another bowl, dry mix All purpose flour, whole wheat flour, cinnamon powder and keep aside.

-Take vessel in which you prepare ghee. There will be 2-3 table spoon ghee residues.

-To this add water, chopped apples, sugar, jaggery and heat it until sugar dissolves. Switch off and cool.

-Add cooking soda and keep aside at least for 20 min.

– After it cools, add beaten eggs and mix nicely.                        

-Now fold in flour mixture, mix gently and pour this batter to a greased and lined baking vessel.                                           

-Bake this in a pre- heated oven for 35 -40 min or until done at 180 C.

-If you want to check its doneness, use tooth pick or knife. Insert this, if it comes out clean, remove the tin, keep it outside.

-After some time, remove butter paper and cool further.                  

-When it reaches room temperature, you can slice it or cut according to your wish and enjoy with cup of coffee or tea.

Note:

-You can use only All-purpose flour or mixture of any flour.

-You can use only sugar, Jaggery or mixture of both.

-If you like it sweeter, please increase the quantity of sweet by adding ¼ cup more of sugar or jaggery.


Instant Stuffed Brinjal:

Tiny brinjals are very delicious in dry curries as well as in gravies. When I have plenty of home grown organic brinjals, I normally make this quick dish, which can be handy as well as tasty when you are super lazy to cook. If chutney powder (any chutney powder will do) is around, within no time you will be able to make this delicious dish. It can be relished as a starter, side dish or with curd rice.

Ingredients:

Tiny Brinjals – 12

Garlic Chutney powder – 2 to 3 table spoons

Hucchellu/ gurellu or Nigella seed powder – 1 tea spoon (optional)

Red chilli powder – 1 tea spoon

Amchur powder – ½ tea spoon

Salt

Turmeric – ½ tea spoon

Cooking oil – 2 tea spoons

Method:

-Hucchellu powder is purely optional. If you have roasted Hucchellu powder, use it.

-Take one bowl, mix chutney powder, gurellu powder, salt, turmeric, red chilli powder, amchur powder, salt.

-Wash brinjal, make 2 slits (+ shape) and fill this mixture and keep aside. If any mixture is remaining, keep aside.

-Take one kadai, add oil. When oil becomes hot, add masala filled brinjals and toss for couple of minutes.

-Sprinkle little (1 table spoon) water and close the lid and cook in a low flame.

-Once again sprinkle water in between and cook until brinjal shrinks and cooks properly.

-Lastly, sprinkle remaining masala mixture, give one stir and serve as you wish.


Garlic Chutney Powder:

Basically, it is a very simple garlic flavoured dry coconut chutney. One of the most loved condiments of my kitchen. It works wonders when you sprinkle it on Dosa or onion uthappam while making. When you are lazy to prepare fresh coconut chutney, take this chutney powder and drizzle some coconut oil and relish with any south Indian breakfast items. It works just fine with North Indian Parata as plain or mix it with sweetened curds and relish. It tastes yummy with hot rice as well with ghee. Sometimes I even use this chutney powder as a stuffing for some veggies as well 😉. So, overall it is a multi-dimensional ingredient.

Garlic is intensely high on aroma as well as flavour. When you roast it and use it, aroma increases even more. It is considered as very good for human health. Garlic is widely used in medicinal purpose to combat many illnesses.

As we grow coconut in our coastal area, chutney powder will be made by adding dried coconut and because of its no moisture content, shelf life of the powder increases, and health benefit of dry coconut can be included by this way as well. Health benefit of dry coconut is many, and it contains many essential nutrients, dietary fibres and some important minerals as well.

I use Urad dal for its nutritional benefit as well as for its aroma with added benefits from the Chillies and curry leaves as well as sharing one more version of  chutney powder with added neem  flower at the end of this post.   

Now I will jump into the procedure –

Ingredients:

Dry coconut / Copra – 2

Dry red chillies – 20 to 25 (Byadagi)

Urad dal – 1 to 2 table spoons

Garlic – 2 (whole)

Curry leaves – 10 – 15 strings

Tamarind – 1 tea spoon

Salt – as needed

Sugar or jaggery powder – as needed.

-At first, slice coconut into thin chips.

-I usually air dry these slices for one or two days in open air (optional)

-Wash curry leaves and spread this to air dry.

-Dry coconut has high degree of oil content and while roasting and powdering, it tends to leave oil and becomes wet. When I tried to make after air drying, it never becomes wet and powdering becomes very easy.

-After air drying, make powder by using mixer grinder. This step will help in equal roasting.

-Take one kadai, dry roast urad dal until it becomes light brown.

-Dry roast garlic (I usually clean only loose skin of garlic clove and leave inner skin intact).

-Dry roast air dried curry leaves until crisp.

-Roast Red chillies by sprinkling some coconut oil.

-Dry roast coconut powder.

-Spread everything and cool.

-Take one mixer grinder, powder urad dal, red chillies at first. Then add curry leaves and powder.

-To this add garlic and use “PULSE” option and churn for a short interval.

-Now you will see a mass of masala.

-Take out all this and mix with roasted and cooled coconut.

-Now add salt, sugar or jaggery, tamarind and mix.

-Now take this mixture little by little and “pulse” in a mixer grinder to attain powder form.

-After completing the procedure, use dry hand and mix a whole lot of chutney powder nicely in one vessel.

-Check for salt, sugar, chilli.

-If needed add red chilli powder, salt or sugar and adjust.

-After it cools down, store it in a dry container. It stays good for 3 to 4 months in normal temperature or without any refrigeration.

Garlic Chutney powder with Neem Flower: Perfect for winter months.

Same recipe to follow and If you want to add Neem flowers in this chutney recipe, you can use dried neem flowers with all the other ingredients of garlic chutney powder.

Dry roast sun dried flowers for a couple of minutes, cool and add with other ingredients while dry grinding the powder and enhance the nutrition value during winter months.

It equally tastes great like regular garlic chutney powder.


Karkali / Arbi leaves Chutney:

Monsoon is the time, we relish our dose of colocasia leaves, which is known as “Kesavu” in Kannada. Coastal people relish Pathrode, which is a rice batter smeared steam cooked rolls. Apart from this we usually relish its chutney and with mix veg curry as well. It goes very well with hot rice with a dollop of ghee or coconut oil.

Colocasia leaves has many names in India. It is known as Taro leaves, Arbi leaves, pathra leaves, Alu chi bhaji, kesavina ele and so on. Every state has its own speciality with this iron rich leaves. Because it tends to get itchy, we need to add sufficient amount of tamarind and it should get balanced with the taste.

If you learn the trick of this, half the battle is won, and you can master the art of cooking this leaf for sure. In our traditional preparation, we do use bird eye chilli for this chutney and if you don’t have access, you can use normal green chilli as well.

How to make this flavourful chutney:

Ingredients:

Arbi leaves – 12 to 14

Bird eye chillies – 8 -10 (if green chilli use 4 to 6)

Salt

Tamarind powder or tamarind – 1 ½ tea spoon

Garlic – 8- 10 cloves

Seasoning:

Coconut oil – 3 table spoons

Mustard – 1 tea spoon

Curry leaves – 1 spring

Chopped garlic – 4 to 5

Dried Red chilli – 1 (optional)

Method:

-Wash Arbi leaves as well as its stem and bird eye chillies.

-Chop leaves and stem.

-Take one cooker, add chopped leaves, stem, chillies, garlic, tamarind, salt and cup of water.

-Cook for 2 whistles, when it is cool, grind the content into smooth paste.

-Prepare seasoning, heat oil, splutter mustard, add curry leaves and chopped garlic and fry.

-To this seasoning, pour the ground mixture and boil it nicely.

-Serve this with hot rice and ghee or coconut oil.


Halasina Hannina Berati / Jackfruit Preserve:

When summer ends, a whole lot of your favourite fruits also vanish from your eye sight and you will surely miss the season!! The best thing one can do is, prepare some jams or preserves and try to store this for future use.  This jackfruit preserve stays good for almost a year or more in the freezer. It is very handy when you want to make payasam for any festivals or any special occasions. Here is my recipe for homemade jackfruit preserve, which we make every year and use it for Prathamam, which is nothing but kheer or payasam from the preserve!!!

Ingredients:

Jack fruit – 1 big bowl (cleaned)

Jaggery – 2 blocks (I have used organic one)

Method:

  • Put little by little jack bulbs and make a smooth paste in a mixer grinder.
  • Take one thick bottomed kadai, put this paste and keep gas flame in a very low flame and cook for a while.

  • When it changes its colour from bright yellow to a pale colour and when you smell the cooked jackfruit flavour in the air, add jaggery and mix this in a regular interval.
  • After some time, it will turn into a light brown then to darkish colour and it will start to leave the sides of the kadai. Now it is the time to remove it from the fire.
  • Keep as it is and when it reaches room temperature; store it in an airtight container or a zip lock.
  • Keep it under refrigeration/ freezer.

  • You can do this in a microwave as well. Only thing, you should remove the glass bowl at regular intervals and give a stir and proceed as given above.

Note:

-You can use sugar or regular jaggery as well.

-Traditionally we use jaggery in our region.

Mysorepak /Mysorepaka:

There are a lot of sweets which have originated from south Indian kitchens, even then Mysore Pak has a very special place in people’s hearts. Some like it very soft, ghee dripping melt in the mouth kind and some like little harder, porous and little grainy in texture.

Usually in the Mysore – Bangalore side, you will find softer version and In Mangalore we usually get latter one, with grainy texture.

I have received a couple of requests to update my version of Mysorepak recipe, which I prepare almost from past 25 years and it is our family and extended family member’s favourite sweet. My little niece who relishes it, and thinks it is the ultimate sweet, ends up having couple of pieces at one go. I usually wait to see her priceless expression while relishing her share of Mysorepak. This recipe yields firm, porous and grainy in texture with darkish inner and light colour on both the outer sides. Last week I prepared this sweet on my husband’s birthday and now sharing the recipe with you all.

Recipe goes like this-

Ingredients:

Besan /Bengal gram flour – 2 cups

Ghee – 3 cups

Sugar – 3 ¾ cups

Water – 1 cup

Cardamom powder – 1 to 2 tea spoons

Method:

-Take one baking tray or any deep wide vessel, apply ghee and keep aside.

-Take one vessel, pour ghee and keep it on the flame. When it becomes hot (before boiling), switch off the gas, add Besan to hot ghee, stir well and keep aside.

-Mixture should be uniform and without any lumps. I prefer to use wire whisk to do this.

-Next comes the main part.

-Take one thick bottomed kadai, add sugar, pour water and keep it on the flame, boil until it is frothy and reaches single thread consistency.

-During boiling, fire should be kept at low and you should stir in-between.

-When the consistency of the sugar is ready, add ghee mixed Besan and start stirring.

-Fire should be kept at low flame and you should continue stirring without removing your hand.

-After 10 to 15 minutes you will see the changes and mixture will become bubbly and shiny.

-Now it is the time to add cardamom powder and be vigilant. It would be ready in any moment from now.

-When it is done, mixture will leave the sides, base and sides of the vessel will become light brown or sometimes we see the ghee separating and oozing out from the bubbles. (these are the indications to remove)

-Now pour this mixture to a greased vessel, don’t touch or press after pouring, leave as it is.

-Cool it for about 5 min and mark the lines by using a sharp knife.

-Once it is completely cooled (it takes anywhere between 2 to 3 hours)

-Invert the plate on another plate or by keeping butter paper. It needs some knocking at the base because air bubbles would restrict the easy exit.

-Remove gently, break all the pieces and store it in an air tight container.

Your Mysorepak is ready to serve!

Note:

-Besan should be as fresh as possible. (do check the manufacturing date)

-When ghee is hot, you will hear couple of “tup” “tup” sound. That is the time you should mix in the Besan.

-Ghee shouldn’t boil.

-When sugar reaches single thread consistency, solution will start bubbling and rise upwards.

-Take a deep pan or baking tin or deep flat vessel to get long pieces and two tone colours.


Punarpuli Saaru aka Kokum Rasam:

To start with this wonder fruit, I should introduce its plant, benefit, procedure to preserve the outer skin, to rest of the world. Kokum is belonging to Guttiferae family, same as mangosteen and its botanical name is Garcinia Indica, is a fruit bearing plant only found in western Ghats and coastal southern India.

 (pic source : From, Vidya lakshmi of SAHAJA FARMS ) 

It is a summer fruit, which is widely used for juices or Rasam in our region to quench thirst as well as to balance body heat. It has so many health benefits as well. It is a natural healer for acidity.

It is a ritual in our native to dry the outer skin in summer months to preserve to use whenever it is needed. Fresh fruit of Kokum is often halved, discard the inner pulpy white part which is a fleshy coating of real seed to make Kokum butter, which is used in medicinal as well as cosmetic products as a raw material. Then outer dark maroon skin will be sun dried and when it becomes crispy, it’s stored in an air tight manner. During this process, we used to prepare fresh pulp to make juice and I used to love fresh juice from its inner pulp. It is much tastier than the outer dried skin juice.

The seed kernels which are coated with white flesh (fruit) has oil content, which is solid at room temperature. When I was young, our grand mom used to prepare kokum butter from these seeds and it used to be like a wax ball and she always used to keep this ball in hand’s reach to treat any accidental burns (that time, cooking was much more tedious and burning episodes were very frequent, due to fire wood cooking). She used to hold the ball against the fire for 2 min, oil used to start dripping and she used to apply this over the wound. She used to say, in this way, healing is very fast, and it acts as a coolant on burning wound as well. I have one kokum butter ball with me, which she has prepared almost 20 years back and when my kids were small, Amma has handed this wonder medicine to me by saying, keep this ball for emergency and it is still with me as a souvenir. ( Seen in below picture)

In urban dwellings, it is sold as a dried rind, dark purple, little sticky and shiny with curved edges. If you infuse these dried skins in water, it releases very nice colour. If dried skin is darker, you will get darkish pink and if it is little old and turned black, your dish will become dark and pale in colour. Taste wise it is tangy like tamarind and used exactly like tamarind in cooking to give tart taste.

If you want to prepare Rasam you need hardly 7 to 8 dried rind or if you want to add to any curry, you need very less, hardly 2 or 3 rinds according to the requirement. It is usually used, without any chopping.

Thanks for reading, I appreciate your patience. Now we will see the procedure of our traditional recipe for simple Rasam by using dried rind or kokum concentration.

Ingredients:

Dried Kokum – 7 to 8 (If you are using kokum extract or pulp, use 2 to 3 table spoons)

Onion – 1 big

Red chilli powder – 1 to 2 tea spoons

Jaggery – As needed

Salt

Seasoning:

Coconut oil – 1 table spoon

Mustard- 1 tea spoon

Red chilli – 1

Garlic – 8 to 10

Curry leaves – 1 spring

Method:

-Soak kokum in sufficient water for 1 to 2 hours.

-When you boil, add sliced onion, red chilli powder, salt, jaggery (I prefer little sweetish Rasam, so usually I add little more)

-When onion cooks, do seasoning.

-heat oil, splutter mustard, red chilli, curry leaves and add crushed garlic.

-When garlic turns brown, add this to Rasam and close the lid for 2 minutes.

-Serve hot with rice or drink as an appetizer.