Steamed Modaka / Steamed Rice dumpling with Coconut Jaggery filling:

Ganesha Festival aka Vinayaka Chaturthi is the time, when we indulge in so many varieties of traditional delicacies- Genasale, patholi, Chakkuli or Chakli– to name a few. Two varieties of Modaka (steamed and deep fried) Panchakajjaya, Halittu (nothing but rice noodles), Guliyappa are the main things which we normally find in our region.

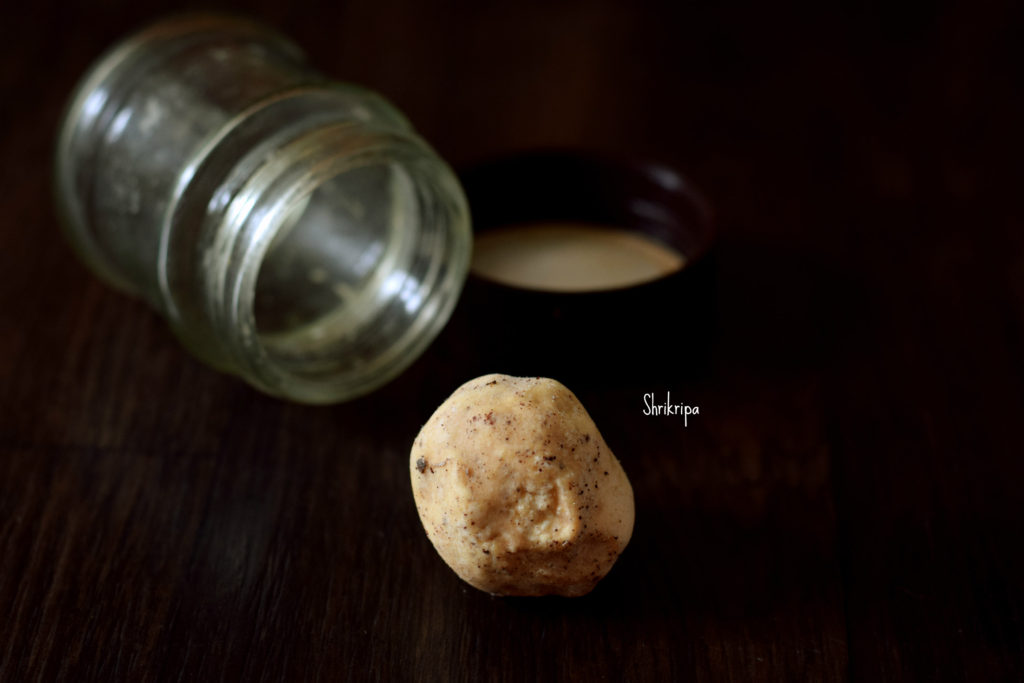
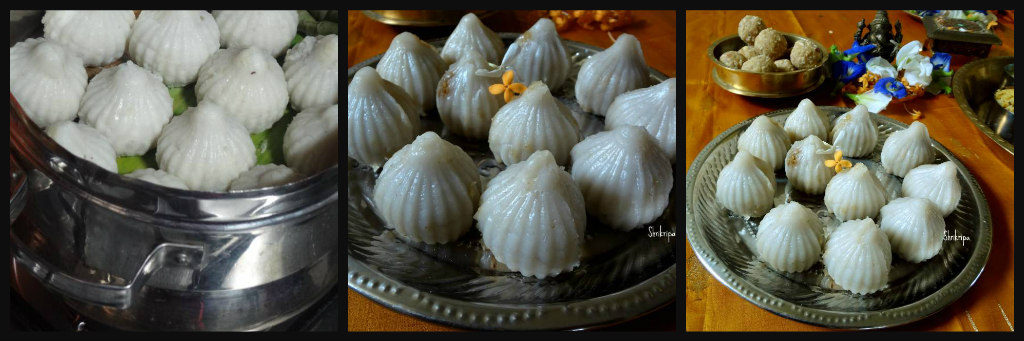
Ganesha has one more name as a “Modaka Priya” means, he loves to eat Modaka. Steamed medakas are also known as Ukkarisida Modaka / Ukdiche modak in India.

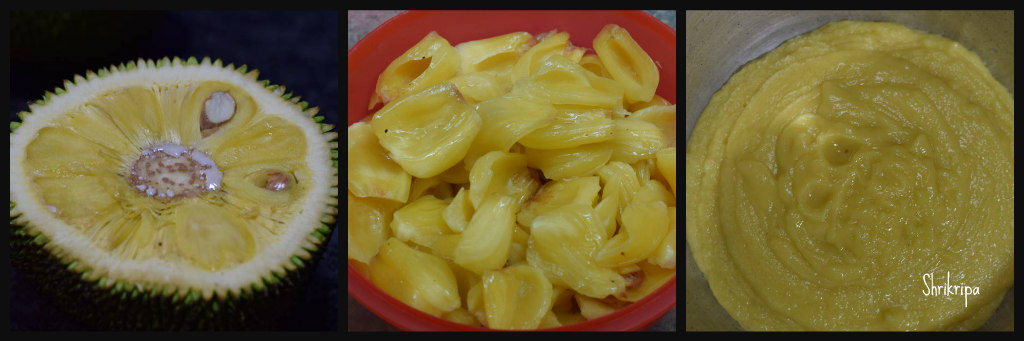
Which is ground rice batter, which is cooked until it reaches a ball form and kneaded and stuffed with a coconut jaggery filling and steam cooked.

Some people or in some region, people do use rice flour, instead of soaked and ground batter.

Now a days, people make various kinds of modak from, khoya, chocolate, dry fruits etc. But traditionally it is done in this way.

Procedure goes like this –

Ingredients:  

Dosa rice /white rice – 2 cups

Grated coconut – 1 cup

Grated Jaggery – ½ cup (to taste).

Ghee/ Clarified butter – 4 tsp.

Salt to taste

Modaka mould – (optional)

Method:

-Wash rice and soak it for 2 to 3 hours.

-Grind soaked rice into smooth paste by adding water and salt.

-Now keep thick bottomed kadai, pour the ground batter and add some water to make thin consistency.

– Now add 2 tsp of ghee and start heating this mixture by continuous stirring. When it becomes little thick and forms a mass, switch off the gas and keep it aside to cool.

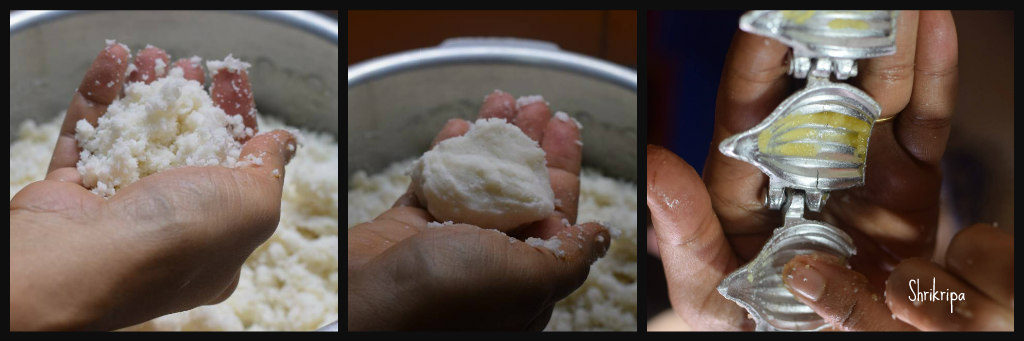
-When it is ready to handle, knead it further and form a smooth dough.

-Cover the dough with wet cloth, to retain moisture.

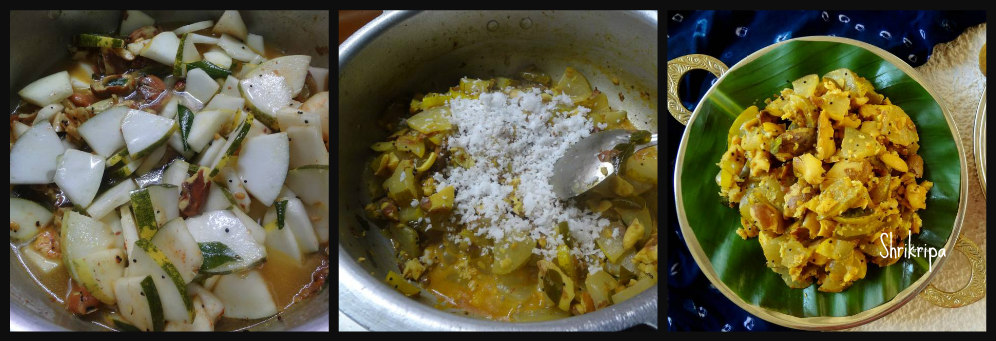
In the meantime, make sweet coconut-jaggery mixture. In a thick bottomed vessel add jaggery and ½ cup of water and heat. If you find some impurities in jaggery syrup, sieve this liquid and heat further and add fresh grated coconut and cook until it is sticky and forms mass. Add remaining ghee to this and mix. Now stuffing is ready.

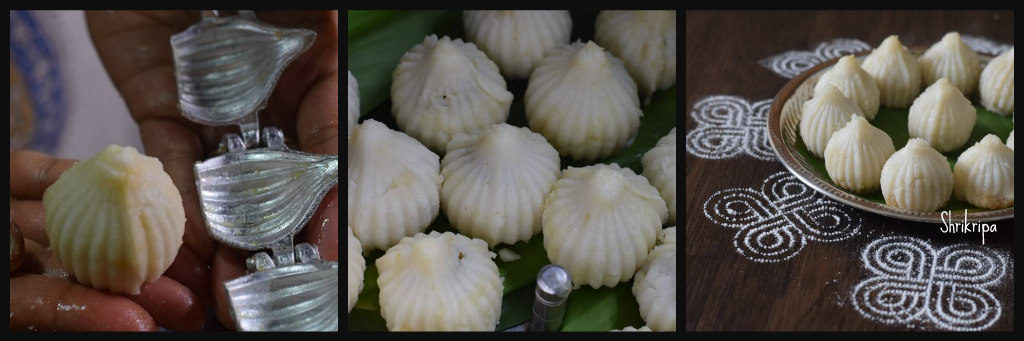
Method to make Modaka by using mould-

-Grease the mould by using ghee.

-Take a lemon sized dough at a time, knead a little and use.

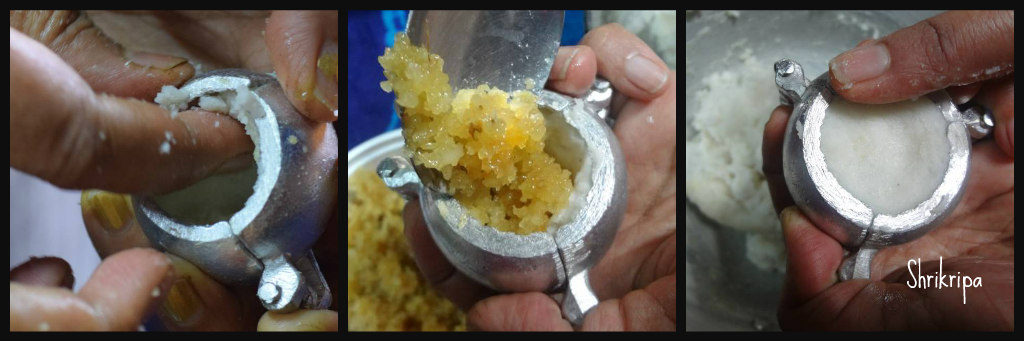
-Close the mould, apply the dough all around the mould, fill a tea spoon of coconut jaggery mixture by leaving very little place at the neck of the mould.

-Now take a tea spoon of dough and seal it. Now Stuffed Modaka is ready.

-Proceed until all the dough is over and arrange all these medakas in an idli steamer.

-Steam cook for 15 to 20 minutes.


If you are using Rice flour or Modaka flour:

Ingredients:

Rice flour – 2 cups

Water – 2 cups

Salt

Ghee – 1 tea spoon

Method:

-Boil water by adding salt, ghee in a thick bottomed pan.

-When water starts to boil, add rice flour and keep in a simmer for 5 minutes.

– Switch off the gas. After some time, knead the dough and follow the same procedure as above. 

-While kneading, if needed , sprinkle some hot water and proceed.

-Proceed until all the dough is over and arrange all these medakas in an idli steamer.

-Steam cook for 15 to 20 minutes.

Note:

-If you don’t have Modaka mould, take a lemon sized dough, make a 4” disc by using your thumb and fore finger of both hands.

-Keep this in your left palm, in a cup shape, put filling (smaller in size) and cover it. Arrange all these medakas in an idli steamer.

-Steam cook for 15 to 20 minutes.


Halasina Hannu Berati Payasa / Preserved jack fruit payasam:

First, I want to wish a very very happy “Krishna Janmashtami” to all my readers. On the eve of this festival I made our traditional payasam and enjoyed with my family.

Berati” is nothing but preserved jackfruit pulp, which is cooked until it forms into thick mass and usually made during Jack fruit season and stored for future use.

How to preserve jackfruit / Berati is already shared in my blog and it is here .

In Coastal region we love jack in many forms. Berati Payasa is one of them.

Now we will see traditionally how it is made:

Ingredients:

Berati / jackfruit preserve – 1 bowl

Coconut – 1 (To extract milk)

-OR-

Thin coconut milk – 2cups

Thick coconut milk – ½ cup

Jaggery – to taste

Salt – ½ tsp

Cardamom powder – ½ tsp

For Seasoning:

Ghee – 1 tbl sp

Thin Coconut slices – 2 tbl sp

Cashew pieces – 2 tbl sp

OR

Toasted black sesame – 1 table spoon

Fresh coconut slices – 1 to 2 table spoons

Method:

  • Take out Berati from your freezer and keep aside for some time to attain room temperature.
  • Slice coconut by using small knife, chop these sliced pieces into small bits.

  • Toast black sesame and keep aside.
  • Take little ghee and fry coconut bits and keep aside.

  • If you want to, you can add ghee roasted cashew bits as well.
  • Grate coconut (coconut should be fresh), put one cup of water and grind this in a mixer jar and extract milk by sieving this ground mixture.
  • This is thick coconut milk and you should keep this separately. We use this at the end stage of Payasa making.
  • Do this procedure a couple of times to get a thin extract and lastly discard coconut fibre.
  • If you are using readymade coconut milk, please skip this step.
  • Now take one thick bottomed vessel, put Berati, thin coconut milk and dissolve Berati and keep this on a gas stove to boil.

  • Usually while making Berati, we put little jaggery, so add required amount of jaggery and boil until raw smell of the jaggery vanishes.
  • Lastly add thick extract of coconut milk and give one boil. Don’t boil it much. Add Cardamom powder and mix.    

  • Remove from fire and add fried coconut pieces, toasted black sesame or cashew brittles to prepared Payasa.
  • Serve with lunch thali or as a dessert.

NOTE:

  • Traditionally only toasted sesame and coconut bits are added.

Kanile palya/Bamboo Shoot and jack seed palya:

Kanile is nothing but Bamboo shoot. We coastal people, prepare some delicacies from this seasonal high fiber veggie, such as Bamboo shoot and green gram gravy or this dry Subzi/palya is prepared by mixing with crushed Jackfruit seed. It is protein rich, subtle in flavor, blends very well with bamboo shoot. This palya goes very well with hot Rice with a dollop of ghee or as a side dish with any kind of gravy, Rasam or sambar.  So, it is a seasonal monsoon season’s treat for us.

We normally use fresh bamboo shoot and chop it in circular manner. (please refer to the Post of How to chop Bamboo shoot)

I normally preserve jack seeds in frozen form and procedure is already shared in my blog as well.

Ingredients:

Ready Bamboo shoot – 1 cup

Fresh or Frozen jack seeds –2 fists full

Grated coconut – 3 table spoons

Turmeric – ½ tea spoon

Red chilli powder – 1 tea spoon

Salt- as needed

Jaggery – as needed (optional)

Seasoning:

Coconut oil – 1 table spoon

Mustard – 1 tea spoon

 Urad dal – 1 tea spoon

Cumin – ½ tea spoon

Red chilli -1

Curry leaves – 2 springs

Method:

-I normally crush and store the jack seeds. So, no need of chopping or crushing. If you have fresh seeds with you, please crush the seed by using hitting stone and remove outer stiff cover and use inner seed.

– Take one thick bottomed pan, do seasoning. Heat oil, splutter mustard, add urad dal. When dal becomes light brown, add cumin, red chilli and curry leaves.

-Now add in crushed jack seeds, a cup of water and cook at low fire by closing the lid.

– When it is half done, add chopped and ready bamboo pieces, Red chilli powder, salt and jaggery, required amount of water.

-Close the lid and cook this in a low flame, until it is cooked or up to water drains.

-If water drains first, add some more water and make sure to cook properly.

Garnish with fresh grated coconut and mix, cook for 2 minutes and switch off the gas.

-Serve with hot rice and enjoy as a side dish.


Garlic Chutney Powder:

Basically, it is a very simple garlic flavoured dry coconut chutney. One of the most loved condiments of my kitchen. It works wonders when you sprinkle it on Dosa or onion uthappam while making. When you are lazy to prepare fresh coconut chutney, take this chutney powder and drizzle some coconut oil and relish with any south Indian breakfast items. It works just fine with North Indian Parata as plain or mix it with sweetened curds and relish. It tastes yummy with hot rice as well with ghee. Sometimes I even use this chutney powder as a stuffing for some veggies as well 😉. So, overall it is a multi-dimensional ingredient.

Garlic is intensely high on aroma as well as flavour. When you roast it and use it, aroma increases even more. It is considered as very good for human health. Garlic is widely used in medicinal purpose to combat many illnesses.

As we grow coconut in our coastal area, chutney powder will be made by adding dried coconut and because of its no moisture content, shelf life of the powder increases, and health benefit of dry coconut can be included by this way as well. Health benefit of dry coconut is many, and it contains many essential nutrients, dietary fibres and some important minerals as well.

I use Urad dal for its nutritional benefit as well as for its aroma with added benefits from the Chillies and curry leaves as well as sharing one more version of  chutney powder with added neem  flower at the end of this post.   

Now I will jump into the procedure –

Ingredients:

Dry coconut / Copra – 2

Dry red chillies – 20 to 25 (Byadagi)

Urad dal – 1 to 2 table spoons

Garlic – 2 (whole)

Curry leaves – 10 – 15 strings

Tamarind – 1 tea spoon

Salt – as needed

Sugar or jaggery powder – as needed.

-At first, slice coconut into thin chips.

-I usually air dry these slices for one or two days in open air (optional)

-Wash curry leaves and spread this to air dry.

-Dry coconut has high degree of oil content and while roasting and powdering, it tends to leave oil and becomes wet. When I tried to make after air drying, it never becomes wet and powdering becomes very easy.

-After air drying, make powder by using mixer grinder. This step will help in equal roasting.

-Take one kadai, dry roast urad dal until it becomes light brown.

-Dry roast garlic (I usually clean only loose skin of garlic clove and leave inner skin intact).

-Dry roast air dried curry leaves until crisp.

-Roast Red chillies by sprinkling some coconut oil.

-Dry roast coconut powder.

-Spread everything and cool.

-Take one mixer grinder, powder urad dal, red chillies at first. Then add curry leaves and powder.

-To this add garlic and use “PULSE” option and churn for a short interval.

-Now you will see a mass of masala.

-Take out all this and mix with roasted and cooled coconut.

-Now add salt, sugar or jaggery, tamarind and mix.

-Now take this mixture little by little and “pulse” in a mixer grinder to attain powder form.

-After completing the procedure, use dry hand and mix a whole lot of chutney powder nicely in one vessel.

-Check for salt, sugar, chilli.

-If needed add red chilli powder, salt or sugar and adjust.

-After it cools down, store it in a dry container. It stays good for 3 to 4 months in normal temperature or without any refrigeration.

Garlic Chutney powder with Neem Flower: Perfect for winter months.

Same recipe to follow and If you want to add Neem flowers in this chutney recipe, you can use dried neem flowers with all the other ingredients of garlic chutney powder.

Dry roast sun dried flowers for a couple of minutes, cool and add with other ingredients while dry grinding the powder and enhance the nutrition value during winter months.

It equally tastes great like regular garlic chutney powder.


Karkali / Arbi leaves Chutney:

Monsoon is the time, we relish our dose of colocasia leaves, which is known as “Kesavu” in Kannada. Coastal people relish Pathrode, which is a rice batter smeared steam cooked rolls. Apart from this we usually relish its chutney and with mix veg curry as well. It goes very well with hot rice with a dollop of ghee or coconut oil.

Colocasia leaves has many names in India. It is known as Taro leaves, Arbi leaves, pathra leaves, Alu chi bhaji, kesavina ele and so on. Every state has its own speciality with this iron rich leaves. Because it tends to get itchy, we need to add sufficient amount of tamarind and it should get balanced with the taste.

If you learn the trick of this, half the battle is won, and you can master the art of cooking this leaf for sure. In our traditional preparation, we do use bird eye chilli for this chutney and if you don’t have access, you can use normal green chilli as well.

How to make this flavourful chutney:

Ingredients:

Arbi leaves – 12 to 14

Bird eye chillies – 8 -10 (if green chilli use 4 to 6)

Salt

Tamarind powder or tamarind – 1 ½ tea spoon

Garlic – 8- 10 cloves

Seasoning:

Coconut oil – 3 table spoons

Mustard – 1 tea spoon

Curry leaves – 1 spring

Chopped garlic – 4 to 5

Dried Red chilli – 1 (optional)

Method:

-Wash Arbi leaves as well as its stem and bird eye chillies.

-Chop leaves and stem.

-Take one cooker, add chopped leaves, stem, chillies, garlic, tamarind, salt and cup of water.

-Cook for 2 whistles, when it is cool, grind the content into smooth paste.

-Prepare seasoning, heat oil, splutter mustard, add curry leaves and chopped garlic and fry.

-To this seasoning, pour the ground mixture and boil it nicely.

-Serve this with hot rice and ghee or coconut oil.


Halasina Hannina Berati / Jackfruit Preserve:

When summer ends, a whole lot of your favourite fruits also vanish from your eye sight and you will surely miss the season!! The best thing one can do is, prepare some jams or preserves and try to store this for future use.  This jackfruit preserve stays good for almost a year or more in the freezer. It is very handy when you want to make payasam for any festivals or any special occasions. Here is my recipe for homemade jackfruit preserve, which we make every year and use it for Prathamam, which is nothing but kheer or payasam from the preserve!!!

Ingredients:

Jack fruit – 1 big bowl (cleaned)

Jaggery – 2 blocks (I have used organic one)

Method:

  • Put little by little jack bulbs and make a smooth paste in a mixer grinder.
  • Take one thick bottomed kadai, put this paste and keep gas flame in a very low flame and cook for a while.

  • When it changes its colour from bright yellow to a pale colour and when you smell the cooked jackfruit flavour in the air, add jaggery and mix this in a regular interval.
  • After some time, it will turn into a light brown then to darkish colour and it will start to leave the sides of the kadai. Now it is the time to remove it from the fire.
  • Keep as it is and when it reaches room temperature; store it in an airtight container or a zip lock.
  • Keep it under refrigeration/ freezer.

  • You can do this in a microwave as well. Only thing, you should remove the glass bowl at regular intervals and give a stir and proceed as given above.

Note:

-You can use sugar or regular jaggery as well.

-Traditionally we use jaggery in our region.

Punarpuli Saaru aka Kokum Rasam:

To start with this wonder fruit, I should introduce its plant, benefit, procedure to preserve the outer skin, to rest of the world. Kokum is belonging to Guttiferae family, same as mangosteen and its botanical name is Garcinia Indica, is a fruit bearing plant only found in western Ghats and coastal southern India.

 (pic source : From, Vidya lakshmi of SAHAJA FARMS ) 

It is a summer fruit, which is widely used for juices or Rasam in our region to quench thirst as well as to balance body heat. It has so many health benefits as well. It is a natural healer for acidity.

It is a ritual in our native to dry the outer skin in summer months to preserve to use whenever it is needed. Fresh fruit of Kokum is often halved, discard the inner pulpy white part which is a fleshy coating of real seed to make Kokum butter, which is used in medicinal as well as cosmetic products as a raw material. Then outer dark maroon skin will be sun dried and when it becomes crispy, it’s stored in an air tight manner. During this process, we used to prepare fresh pulp to make juice and I used to love fresh juice from its inner pulp. It is much tastier than the outer dried skin juice.

The seed kernels which are coated with white flesh (fruit) has oil content, which is solid at room temperature. When I was young, our grand mom used to prepare kokum butter from these seeds and it used to be like a wax ball and she always used to keep this ball in hand’s reach to treat any accidental burns (that time, cooking was much more tedious and burning episodes were very frequent, due to fire wood cooking). She used to hold the ball against the fire for 2 min, oil used to start dripping and she used to apply this over the wound. She used to say, in this way, healing is very fast, and it acts as a coolant on burning wound as well. I have one kokum butter ball with me, which she has prepared almost 20 years back and when my kids were small, Amma has handed this wonder medicine to me by saying, keep this ball for emergency and it is still with me as a souvenir. ( Seen in below picture)

In urban dwellings, it is sold as a dried rind, dark purple, little sticky and shiny with curved edges. If you infuse these dried skins in water, it releases very nice colour. If dried skin is darker, you will get darkish pink and if it is little old and turned black, your dish will become dark and pale in colour. Taste wise it is tangy like tamarind and used exactly like tamarind in cooking to give tart taste.

If you want to prepare Rasam you need hardly 7 to 8 dried rind or if you want to add to any curry, you need very less, hardly 2 or 3 rinds according to the requirement. It is usually used, without any chopping.

Thanks for reading, I appreciate your patience. Now we will see the procedure of our traditional recipe for simple Rasam by using dried rind or kokum concentration.

Ingredients:

Dried Kokum – 7 to 8 (If you are using kokum extract or pulp, use 2 to 3 table spoons)

Onion – 1 big

Red chilli powder – 1 to 2 tea spoons

Jaggery – As needed

Salt

Seasoning:

Coconut oil – 1 table spoon

Mustard- 1 tea spoon

Red chilli – 1

Garlic – 8 to 10

Curry leaves – 1 spring

Method:

-Soak kokum in sufficient water for 1 to 2 hours.

-When you boil, add sliced onion, red chilli powder, salt, jaggery (I prefer little sweetish Rasam, so usually I add little more)

-When onion cooks, do seasoning.

-heat oil, splutter mustard, red chilli, curry leaves and add crushed garlic.

-When garlic turns brown, add this to Rasam and close the lid for 2 minutes.

-Serve hot with rice or drink as an appetizer.


Kendathadya/ Baked Cucumber-Rice cake:

Every adult has a nostalgic dish from their childhood. I have a “secret” love for this dish because of fond memories of my maternal Ajji (grandmother), who used to pamper me to the core and prepare many such dishes by using the fresh produce that she grew in her kitchen garden.

Kendathadya is a traditional recipe of our Coastal Karnataka region, a special baked dish made by putting “Kenda” (hot burning firewood) on top and at the bottom of the earthen pot or thick metal vessel. Creating an oven affects burning firewood at the top and bottom of the closed vessel containing the batter.

Here, Cucumber used is our heirloom (local) variety, known as Mullu southe, which is light in colour, watery, and flavourful. Soaked rice is mixed with grated Cucumber, jaggery syrup, and fresh coconut to make a flavorful cake with homemade ghee. 

In modern life, we don’t have access to traditional firewood chulha. So, I make this age-old recipe in my OTG and satisfy my craving year after year and relive my childhood while having it.

Ingredient:

Raw Rice/Dosa rice – 1 cup

Cooked rice – 1 serving spoon. ( Red boiled rice or white rice)

Well grown Cucumber – 2 cups (grated)

Coconut – ½ cup (fresh, grated)

Jaggery – ¾ cup (grated)

Cardamom powder – 1 tsp

Ghee –2 to 3 tbl spoons

Salt – as needed

Eno or Cooking soda – 1 tsp

Method:

-Wash and soak the rice for 3 to 4 hours.

-Make jaggery syrup by adding ¼ cup of water to the grated jaggery, boil until its raw smell goes away, strain the liquid and keep it ready.

-Peel the outer skin, make halves, remove the seeded inner core. Grate it. Mix salt and allow the Cucumber to release its water.

-Drain the water from the soaked rice and discard.

-Collect water from grated Cucumber by sieving it in a strainer and using it for grinding as needed.

-Grind drained rice into a slightly coarse paste by adding collected water from the Cucumber, cooked rice, grated coconut, jaggery syrup.

-At the last round, add grated Cucumber and whip once and remove. Add ghee, Eno fruit salt and give a nice whip. The batter should not be too runny or too thick.

-Pour this into greased, lined baking tin and bake this in a pre-heated oven at 180C for 40 to 50 minutes, and a knife comes out clean when you insert it into the baking cake.

-Serve Hot with a drop of ghee.

Note:

– Addition of Eno fruit salt is optional. If you wish for a softer and lighter cake, add Eno or cooking soda.

-Without Eno, it turns out to be a firm and dense cake. I sometimes don’t add Eno and enjoy my dense cake to relive my memories of Ajji.

Jack seed and Mangalore cucumber palya:

Jack seed is halasina beeja, which is a seed of jackfruit and most underrated protein rich nature’s gift to mankind. All thanks to our elders, who have gifted us with the knowledge of lots of combinations of ingredients, vegetables. One such combination is coloured cucumber which is also known as Mangalore cucumber/ sambar cucumber with jack seed.  It is an ultimate, tasty side dish from our region and I am eager to share this recipe with you all –

I normally preserve jack seeds in a frozen form and procedure is already shared in my blog as well.

Ingredients:

Coloured cucumber – ½ or 1

Fresh or Frozen jack seeds –2 fists full

Grated coconut – 3 table spoons

Turmeric – ½ tea spoon

Red chilli powder – 1 tea spoon

Salt- as needed

Jaggery – as needed

Seasoning:

Coconut oil – 1 table spoon

Mustard – 1 tea spoon

 Urad dal – 1 tea spoon

Cumin – ½ tea spoon

Red chilli -1

Curry leaves – 2 springs

Method:

-Wash Mangalore/Coloured/sambar cucumber.

-Chop off 2 ends, slice in to 4 pieces and remove inner core (seed part) and chop into thin slices. (see the picture)

-Check now for the taste. If it is bitter in taste, soak the pieces in plain water for 5 minutes.

-Discard the water and proceed.

-If cucumber tastes good, no need to soak in water and you can directly proceed in cooking.

-I normally crush and store the jack seeds. So, no need of chopping or crushing. If you have fresh seeds with you, please crush the seed by using hitting stone and remove outer stiff cover and use inner seed.

– Take one pressure pan or cooker, do seasoning. Heat oil, splutter mustard, add urad dal. When dal becomes light brown, add cumin, red chilli and curry leaves.

-Now add in crushed jack seeds, little water and cook for one whistle.

-When pressure releases, remove cooker lid and proceed to make palya.

-Switch on the gas, Add Red chilli powder, salt and jaggery, required amount of water and chopped cucumber pieces.

-Close the lid and cook this in a low flame, until cucumber is cooked or up to water drains.

-If water drains first, add some more water and make sure to cook cucumber.

Garnish with fresh grated coconut and mix, cook for 2 minutes and switch off the gas.

-Serve with hot rice and enjoy as a side dish.

Alasande Palya / Yard long beans dry curry:

Alasande aka yard long bean is very popular and one of the age old cultivated crops of Mangalore coast. It is tender, immature pods of black eye pea. In rainy season, most of the vegetable kitchen gardeners grow this super tasty veggie for day to day use.

Immature pods are one of the favourite food for little birds as well. It is a low calorie, high in fibre vegetable and tastes little sweetish and texture is little chewy and watery.

Alasande side dish is one of the very popular dishes during the festivities- either in weddings, festival cooking or day to day cooking. For day to day cooking, we normally toss this veggie with mild seasoning and for festivity cooking, we use coconut masala. Today I am going to share the recipe of my house hold which my family relishes whenever I prepare.

Ingredients:

Alasande / Yard long beans – 500 grams

Red chilli powder – ½ tea spoon

Turmeric – ½ tea spoon

Salt

Jaggery – 1 tea spoon

For seasoning:

Coconut oil – 1 table spoon

Mustard – 1 tea spoon

Urad dal – 1 tea spoon

Red chilli – 1 (optional)

Curry leaves – 1 spring

For Masala:

Coconut – ¼ cup

Roasted Byadagi Red chillies – 2 to 3

Cumin – 1 tea spoon

Tamarind – ½ tea spoon

Method:

-Wash, remove two ends of yard long beans and chop as required.

-Dry grind coconut with roasted chillies, cumin and tamarind for masala and keep aside.

-Now take one kadai, heat oil for seasoning, splutter mustard, add urad dal. If you are adding red chilli add that as well.

-When urad dal becomes red, add curry leaves, chopped beans, turmeric, salt, jaggery, red chilli powder and toss for two minutes.

-Add one small cup of water and cook until it is soft and firm.

-Add dry ground masala and mix everything. Keep it covered for two to three minutes and switch off the gas.

-Serve with hot rice or with thali as a side dish.