Guava Cheese/ Perad/halwa :

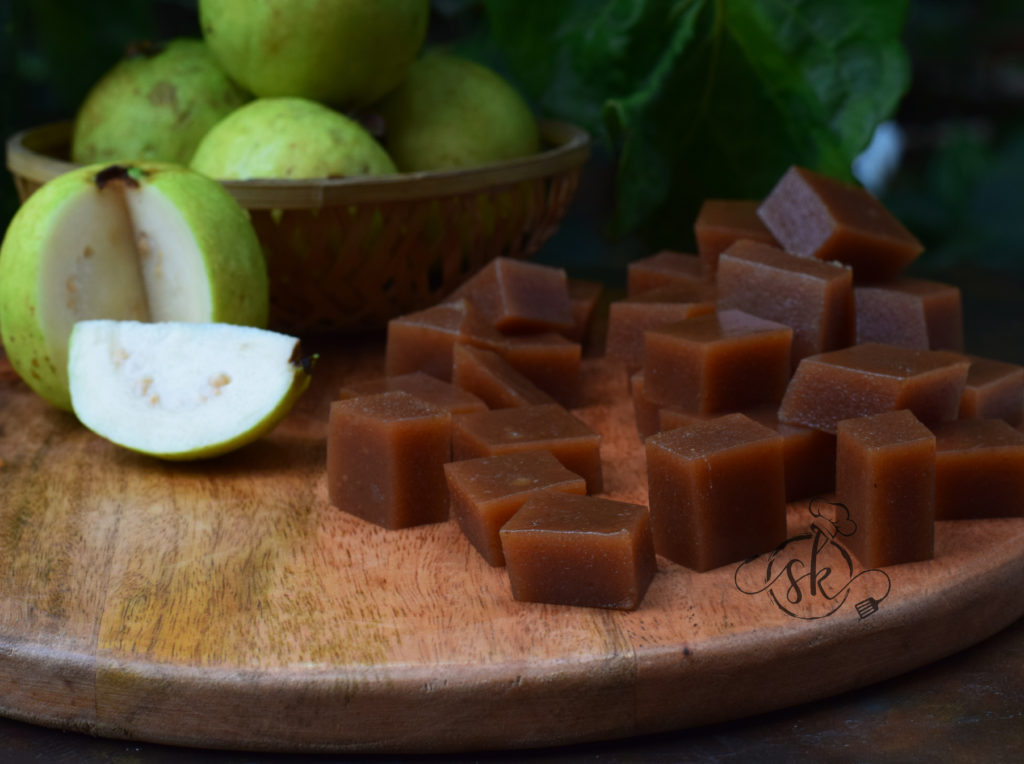
When the neighbour comes and hands me a big bag full of substantial sized overripe guavas, I knew, it is going to be a strenuous task. I need to deal with my mindset of ‘no wastage.’ First thing, came to my mind was my favourite Guava cheese.

When I was reading about the guava cheese, its origin, it traces back to Portuguese settlers in Brazil where it’s known as Goiabada. I am guessing that is how this recipe landed with them in Goa and is known as Perad/Peraad.

In simple terms, guava cheese is nothing but guava halwa. It doesn’t taste like cheese. Its texture is something you can easily bite into, yet is slightly chewy, somewhat like our Banana halwa, with a grainy texture, of course with added guava taste. Colour of the cheese depends on the variety of the Guava. If it is white, the colour turns our light brown, like mine. I usually mix a half red and half white variety of Guava to get beautiful hue.
Ingredients:

Overripe Guava – 2kgs

Sugar – 800 grams to 1 kg (acc to your palette)

Salt – ½ tsp

Butter – 3 tablespoons

Lemon juice -1 tablespoon 

Method:

-Wash, chop the fruit into quarters—Cook with sufficient water for two whistles, cool.

-Pulse it in a mixer jar along with cooked water, sieve the Puree, separate the seed and its roughage.

-Weigh the pulp. For 2 kgs of pulp, I have taken 800 grams of sugar. You can take up to one kg if you prefer sweeter.

-Take one thick bottomed Kadai, add the pulp and boil for 20 minutes or until it starts boiling. Allow 10 minutes more to boil and add sugar and salt, continue to cook in a low flame.

-When the mixture turns pinkish brown add butter and proceeds to cook further. When it starts leaving the sides, add lemon juice, cook ten more minutes.

-Remove the mixture to the greased plate, leave 4 to 6 hours and then cut.

-Stays good for 3 to 5 months without any problem, at room temperature, stored in an airtight container.

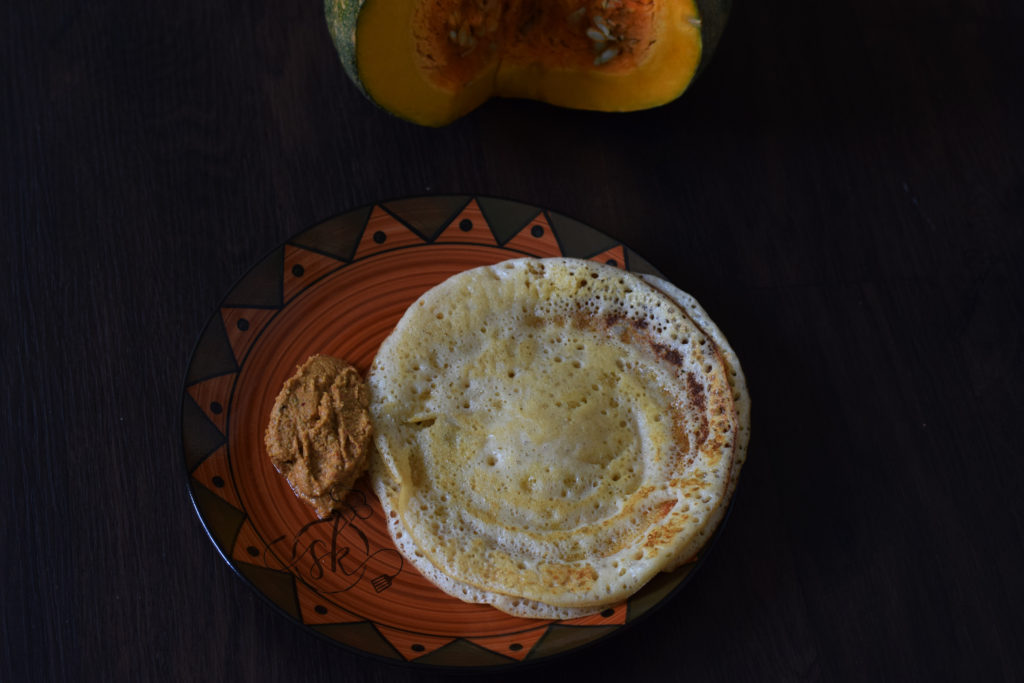


Cheenikayi thirulina dosey/ Pumpkin Core dosa:

Delicious dosa by using nutritionally rich , pulpy pumpkin cores which we usually tend to throw away. Whenever we use pumpkin in larger quantities such as pumpkin puree  , Sambar , kalasu etc, the inner core would be more in quantity and it is an awesome way to utilise in dosa batter. In this way, it can be utilised and turned into a healthy breakfast option.

Let us see how I make this super soft, porous dosa.

Ingredients:

Dosa rice – 2 cups

Urad dal – ¼ cup

Methi seeds – 1 tablespoon

Inner soft core – ¼ cup to ½ cup ( quantity may vary according to the availability)

Salt

Method:

-Wash , soak dosa rice, urad dal, methi in water for 2 to 3 hours.

-Clean the pumpkin core, remove seeds, and keep it ready.

-Grind soaked rice and pumpkin core by adding sufficient salt into smooth paste.

-Ferment overnight or 8 – 10 hours. Next day prepare soft Dosas .

-If you like crisp roasted one, spread as thin as possible on heated iron griddle.

-Serve with coconut chutney or any other curry.

Rice Nippattu:

In our Native, Nippattu is nothing but savoury Rice crackers. We normally buy our favourite Rice Nippat from “Popular sweet mart”,  from my native town, Putter.

Maybe around 5 -6  years ago, while conversing, my husband asked me to replicate this particular item at home. I was thrilled to hear this and sat down with a couple of Nippattu, pen and paper. I noted down the ingredients one by one after tasting it bit by bit.

Then comes the trial session. At first, I used roasted urad dal powder and rice flour and used a roti presser for pressing. It turned out a little thick and hard.

After a couple of trials with different proportions, addition, and deletion of a couple of ingredients. I succeeded in replicating our favourite snack and it was published long ago in Readoo at that time. Finally, during this Deepavali, I did manage to publish in my own space 😀 

Now we will see how it is made –

Ingredients:

Rice flour – 2 cups

Urad dal – ¼ cup

Chana dal – 2 tbl sp

Butter – 1tbl sp.

Green chillies – 4

Red chillies – 2

Cumin – 1 ½ tbl sp

Black sesame seed – 1 tbl sp.

Curry leaves – 6 strings

Asafoetida /hing – ½ tsp

Salt

Oil- for frying

Method:

-Soak chana dal in water for 2 hours.

-Cook urad dal with one cup of water for two to three whistles in cooker. Mash it by hand or whisker.

-Now add butter, soaked-drained chana dal, jeera, sesame seeds, hing, salt, chopped green chillies, red chillies, and curry leaves.

-Mix nicely and add rice flour. If needed, sprinkle some water while mixing.

-Make firm dough and keep aside for 5 minutes.

-Take small amount of dough and make roundels.

-Pat these into flat thin discs on greased wax paper or butter paper or any thick plastic sheet.        

-Now keep Coconut or any preferred oil for deep frying. When oil is hot, add patted flat discs and deep fry until it is golden brown.

-Enjoy with evening tea!


Menthe Idli /Fenugreek sweet idli:

We Indians do not need any introduction for methi. Methi seeds are an integral part of our day to day cooking and has an important role in our cooking, even though it is used in a minuscule portion.

Fenugreek or Methi is a power packed, nutritionally rich and produces heat in our body. Hence, the usage of methi is recommended in winter months to keep our body warm and disease free. Traditionally methi has been used as a seed as well as greens. It plays a main part in post-partum/ after delivery diet of Indian ladies. It is believed that it helps in breast milk production.

Today, I am going to share our age old, traditional recipe, which I used to relish during my childhood.

It is a semi sweet idli and tastes really good with methi flavour and is usually served with coconut – ginger chutney, to give it a bit of a kick.

Ingredients:

Dosa rice – 2 cups

Methi – 1 fistful ( approx. 2 tablespoons)

Jaggery –  2 / 2 block  ( according to the taste)

Poha – ½ cup

turmeric powder – 1/2 tsp (optional)

Method:

-Soak methi and rice separately for 4 hrs , after washing it properly.

-Grind methi into a fine paste, by adding sufficient water.

-Add soaked rice into it, add salt, jaggery and grind, until rice turns into small grainy texture. Like a small rava consistency.

-After grinding, remove the batter, it should be a little watery. Now add turmeric, poha into the batter, mix properly, leave overnight or until it ferments. It takes a little longer in cold regions.

-Next day, mix nicely, make idlies in an idli mould, like a regular idli.

-Serve with coconut – ginger chutney.

Chutney in brief: Fresh coconut, roasted red chillies, fresh ginger, little tamarind, and salt.


Mangalore style Traditional Chakkuli/Chakli:

Today, I am going to post my mom’s chakli recipe – which used to be made on the same day of the festival/ pooja to offer as an offering to the god. This recipe does not need much planning. In our tradition, offerings to the deity should be done on the same day. It cannot be made beforehand nor readymade from the shop.

Here, you can take any tumbler as a measuring device.

Dosa rice – 1 cup

Urad dal – ½ cup

Poha or Sabudana – 1 tablespoon

Salt

Butter – small lemon size

Sesame seeds – 1 to 2 tsp

Method:

-Wash, soak dosa rice for an at least 2 hours.

-Dry roast urad dal until light brown and poha or Sabudana until crisp. Cool and make a fine powder.

-Sieve and collect those rough powder, repeat the grinding process to get fine powder. Keep it aside.

-Now, take soaked rice, grind into smooth paste with very minimal water and required salt.

-Now mix rice batter, sieved powder, butter, sesame seeds and make a smooth dough by adding required water, if needed.

-Heat coconut oil or any vegetable oil, prepare chakli’s by using chakli press. Drain excess oil, cool and store in a sir tight container.

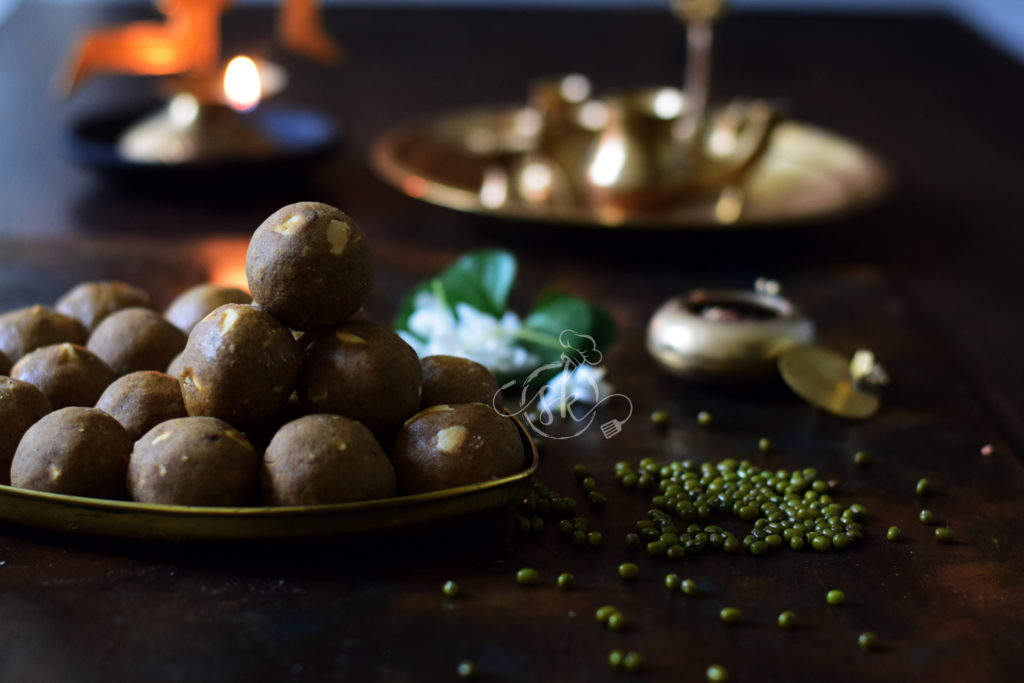
Hasaru Unde/Green gram Laddu/ Whole moong flour Laddu:

Wishing all my readers a happy Navarathri!

Green gram / whole moong is very nutritious and loved by everyone at our home. When I found the whole moong flour at my regular organic stores, I was excited to try my hand at using it in my regular cooking. While thinking of utilising it, idea of preparing laddu came to my mind and I immediately tried my best by using my Besan laddu recipe as a base and it did turn out super delicious with its earthy flavour. Everyone gave a thumbs up at home and  liked it .

So, I am sharing the recipe with you all.

Ingredients:

Green gram flour/ whole Moong flour  – 3 cups

Sugar – 2 ¼ cups

Ghee – 1 ¼  cup

Dry fruits – 1 cup

Cardamom powder – 1 teaspoon

Method:

-Chop dry fruits. I normally use half cup of cashew bits and half cup of slivered Almond bits.

-Dry roast almond and cashew bits and keep aside.

-Powder sugar and keep aside.

-Take one thick bottomed wok, roast green gram flour in very low temperature.

-When it is a little hot, start adding ghee little by little during the roasting process.

-Do not add or pour all the ghee at one go. It will not help to roast evenly, and it will form a muddy consistency, and will affect it in even roasting.

– I took exactly 20 minutes over a small flame.

-After it roasts and you’ve added all the ghee, mixture becomes very runny and colour will turn greenish brown.

-At this time, your house will filled with roasted flour’s aroma. This is the time you should switch off the gas and leave this mixture to cool completely.

-It will take anywhere between 30 to 40 minutes.

-Now add powdered sugar, cardamom powder and roasted dry fruits and mix everything properly.

-Now start using your hand and mix it once and start making small roundels by taking little mixture at a time.

-At this time, you will feel that the laddus are a little wet and glossy and shining.

-Arrange these over a clean, dry platter. After some time (one hour) laddu’s will be dry and glossy texture will vanish.

-Store it in a dry container and enjoy with your family.

Sprouted Ragi Idli:

We all know, Ragi is extremely healthy plant-based grain, which is fibre rich, calcium rich and what not? It is a new age “Super food” which was earlier considered as a staple, poor man’s food, or farmer’s diet.

Ragi also known as finger millet or Nachni. Interesting part is, when we sprout the ragi, its nutritional benefits increases 10 folds.

Soaking and sprouting ragi is easy to digest, high in calcium, protein, low in glycaemic index as well as high in vitamin B12, which is a boon to vegetarians. Ragi has the natural property to balance sugar levels in our body, hence it is an extremely  good option for all the age groups, including diabetics.

 Some people do not like ragi for varied reasons, it may be due to its bland taste or something else. If that is the case, one can try to sneak in Ragi in various forms, combining with the other grains in cooking or while baking.

Here, I have tried to make sprouted Ragi idli with mixing rice. When it is combined with sambar or chutney it tastes delicious and my family likes it a lot.

Preparation goes like this-

Ingredients:

Whole Ragi -1 cup

Idli rice – 2 cups ( you can use normal rice as well)

Urad dal – 1 cup

Poha – 1 cup (loosely packed)

Salt

Method:

-Wash Ragi, soak overnight, drain and keep aside to sprout, In Bangalore weather it takes almost a day or day and a half. After sprouting it swells and becomes 1 ½ cup.

-Next day, wash , soak  Idli rice in one vessel. In another vessel, Urad dal and poha. Soak for 3 to 4 hrs.

-According to your weather, opt the timing to grind. Ragi batter ferments little quick, compared to normal idli batter. SO, keep that in mind as well.

-I normally opt for a wet grinder to make idli or dosa batter.

-While grinding, first grind urad dal into fine batter, then add sprouted ragi, it takes little longer to grind. While halfway through add soaked idli rice, salt and grind the batter into small rava consistency.

-Remove from the wet grinder, adjust the consistency of the batter, mix nicely, and keep aside to ferment.

-Next day morning, steam idlies like a Regular idli and enjoy with little hot coconut chutney or any vegetable sambar.

Thondekai melara / Ivy gourd Kayi huli:

Melara is one of our  specialities, only found in our community and must in our functions or any festivity.  Melara has different names according to the region from which we belong to such as Kayi Huli / Majjige Huli. This post was long due and glad to be able to post at least now.

Kayi is nothing but Coconut. Here, fresh coconut ( which is known as Hasi kayi/ not dried/should be filled with coconut water, not dehydrated one)  is ground without any masala and added to cooked veggie , lastly one serving spoon of slightly sour buttermilk or beaten curd has been added and seasoned.

Melara can be done with extremely limited choices of vegetables. Well known  suitable vegetables which can be used in this curry are, Ivy gourd, Tender Mangalore coloured cucumber( which should be green and white) , Ivy gourd and Mangalore cucumber mixed together, Yam alone or with White Kabuli Chana , Bread fruit ,Giant Taro alone or with White Kabuli chana, White Bitter gourd , Red  Amaranth greens, yard long beans, brined raw jackfruit etc are some of our traditional “qualified” vegetables  to cook melara.

As time passes by, even this list has some additional English vegetables 😉 (Yes! Other than our native veggies are known by this name)  like Raw green tomato, Capsicum, potato, and beans)
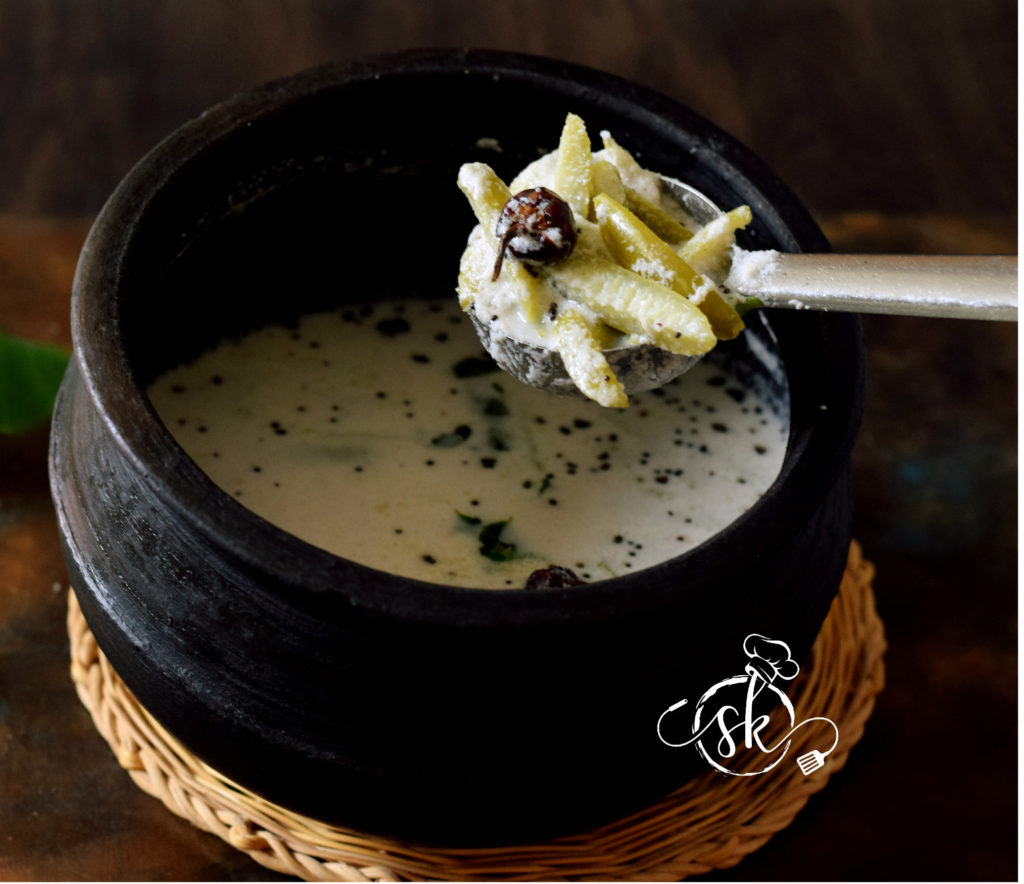
Now we would move towards the recipe –

Ingredients:

Ivy gourd – 500 grams ( Or Vegetable of your choice)

Green chillies – 2

Salt

Grated fresh coconut – from ½ to ¾ coconut 

Thick buttermilk – 1 serving spoon

Coconut oil – 2 tsp

Mustard – 1 tsp

Red chilli -1

Curry leaves – 1 string

Method:

-Wash ivy gourd ,chop into 4 pieces lengthwise. Cook with just enough water to immerse, by adding salt, slit green chillies.

-Make a really fine paste of fresh grated coconut. When veggie cooks, add this ground masala, adjust the consistency and boil for 2 minutes.

-Add buttermilk or beaten curd and when it starts to boil, switch off.

-Prepare seasoning, heat oil, splutter mustard, add red chilli and curry leaves fry and pour over melara.


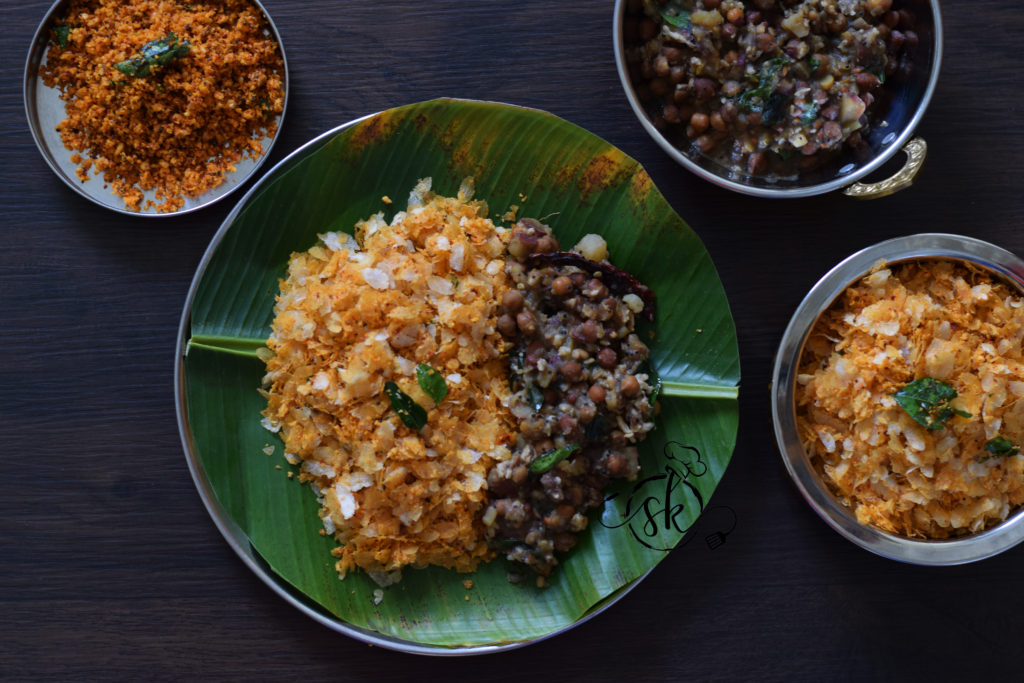
Avalakki – Genasina upkari/ Seasoned Poha with Sweet potato and chana curry:

Bajil/ Avalakki is a default name for seasoned paper thin poha either with added chopped onion or plain. It is a speciality of our native, Mangalore .

When it is combined with Chana curry, which is known as Kadle- Bajil. It is very nutritious ,protein rich combo breakfast option and truly  filling to our tummy as well. Here I have used my home-grown Sweet potato with soaked black chana or Bengal gram. It is two very  easy dishes combined together to make a pair. It is a no onion dish and appropriate breakfast option for any day either feast / Vrat .

Even though many people would have tasted Avalakki oggarane in any of our temples. This particular dish is almost extinct in today’s world. Hence wanted to share it with you all.

At first, we would see, how to prepare Kadle/Chana curry: Addition of Sweet potato is an optional. 

It is a semi solid ,simple, little sweet as well as spicy seasoned dish.

Ingredients:

Black Chana – ½  cup

Sweet potato – 1 or 2 (optional) 

Salt

Jaggery (optional)

Red chilli powder – 1 tsp

Coconut oil – 1 tablespoon

Mustard – 1 tsp

Urad dal – 1 tsp

Hing – ¼ tsp

Red chilli – 1 or 2

Curry leaves – 1 spring

Coconut – (grated)

Method:

-Soak Chana , on previous night.

-Cook chana with little water and salt in a cooker. Dice Sweet potato with outer skin intact.

-When Chana is done, add sweet potato pieces and cook that as well.

-Prepare seasoning, heat oil, splutter mustard, add urad dal, red chilli, when dal becomes red, add curry leaves.

-Now add cooked chana and sweet potato and mash a little, to give a texture.

-Add jaggery, red chilli powder, adjust salt and Boil. when it becomes little thick, add grated fresh coconut, and switch off the gas. Serve with Seasoned Poha/ Avalakki Oggarane.

Now We would how to prepare Seasoned Poha/ Avalakki Oggarane:

Ingredients:

Fresh grated coconut – 1 cup

Salt

Rasam powder OR Roasted coriander, cumin, red chilli, little hing.

Little tamarind

Jaggery – ½ tsp

Paper thin poha – as needed

For seasoning:

Mustard – 1 tsp

Urad dal – ½ tsp

Red chilli -1

Curry leaves – 1 spring

Method:

-At first, dry grind coconut, Rasam powder or roasted masala , jaggery, tamarind ,salt.

-To this mixture, add seasoning mix nicely by hand.

-Add required amount of poha and mix nicely by using your hand and serve with Chana and Sweet potato curry.

-Relish the Age-old filling breakfast with your near and dear ones.

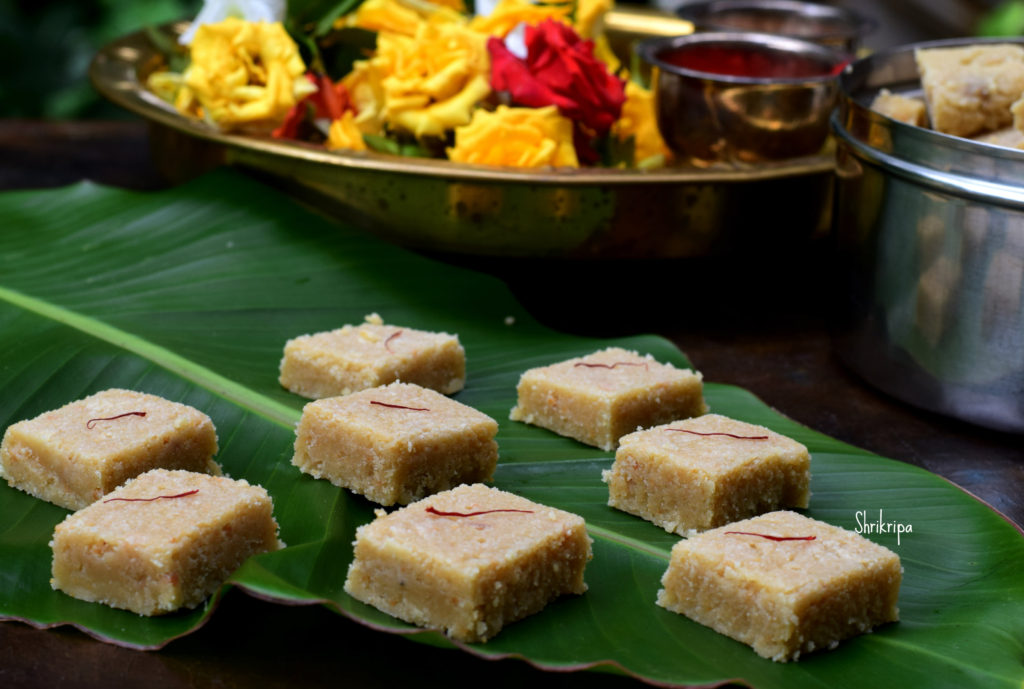
Almond Cashew Mawa Burfi:

Who does not love Almond or Kaju Katli? Here I have combined the much loved two raw materials,  with milk solid/ khoya, to give a melt in a mouth Indian dessert, In the form of burfi.

Almond cashew mawa Barfi is a super delicious, easy to make, melt in mouth Indian sweet or fudge recipe. A perfect sweet to make on any special occasion! Or festive time.

Ingredients:

Almond – ¾ cup

Cashew –  1/3 cup

Khoya /mawa – ½ cup / 100 grams ( unsweetened)

Sugar – 1 ½ cup

Water – ½ cup

Ghee – ¼ cup

Saffron – 10 – 12 strands

Method:

-Heat a cup of water, soak almond and cashew. Close the lid and keep it for 2 hours.

-After two hours, peel the almonds, drain the water, spread these on kitchen towel to remove extra moisture.

-Grind them in a small mixer jar, by using pulse option by giving intervals for mixing in between to get a smooth paste. Grease one steel plate and keep it ready as well.

-Now, take one thick kadai, pour sugar, water, and boil until it reaches one thread consistency. It takes hardly 5 minutes, after initial boil.

-Add in Almond, cashew paste, after it melts and forms a homogeneous mix, add in grated Mawa.

-Stir everything in a low fire, without leaving hand. While stirring, add a tsp of ghee at regular interval and add saffron strands as well.

-When mixture leaves the sides, as well as thickens, check for the doneness. Take out little mixture, hold a small quantity, in between your thumb and forefinger, try to make a ball. Formed ball should shine as well as should not stick to your finger.

-If it passes the test, switch off the gas, and keep stirring for another 5 to 7 minutes, if any ghee is remaining, pour in between stirring.

 -Take the greased plate, pour the mixture, and spread evenly and leave it for 10 minutes. Mark the line and keep it aside for cooling. After cooling, take out pieces, store it in an airtight box.