Ghee Residue Apple-Cinnamon Tea cake:

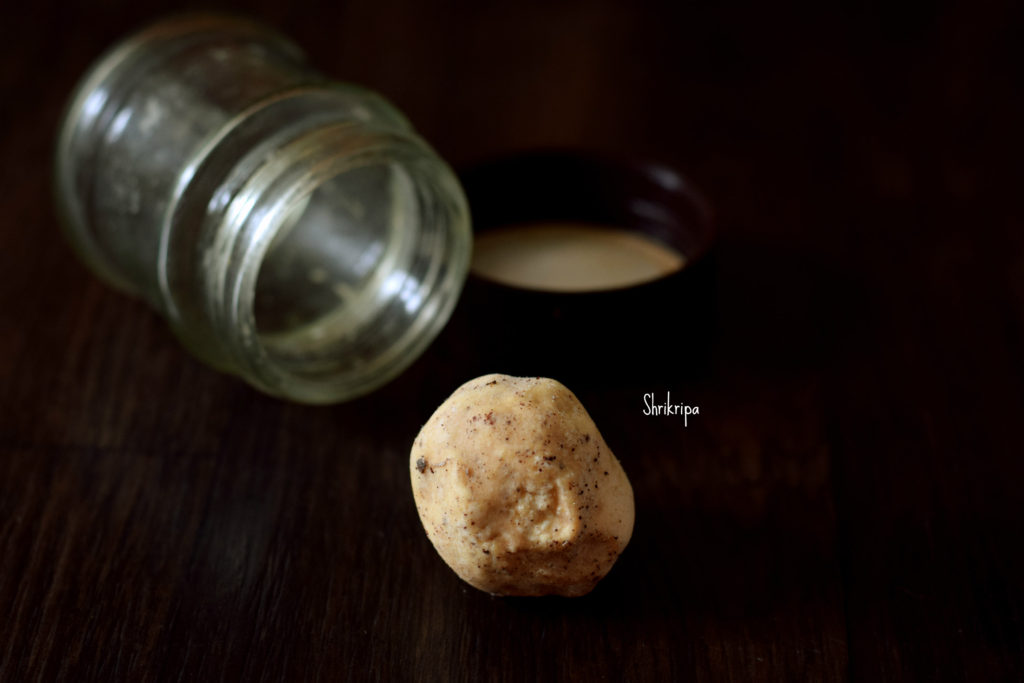
Ghee residue is a moist, brown coloured, by-product formed after preparing ghee from white butter. It is a rich source of essential fatty acids, anti-oxidants and proteins.

As of now, you will know my love towards this sediment and I usually make it a point to prepare any tea cakes after making fresh homemade ghee. Usually I play with the ingredient and flavours in these cakes. Already I have Egg less Tea cake and Chocolate cake in my blog.

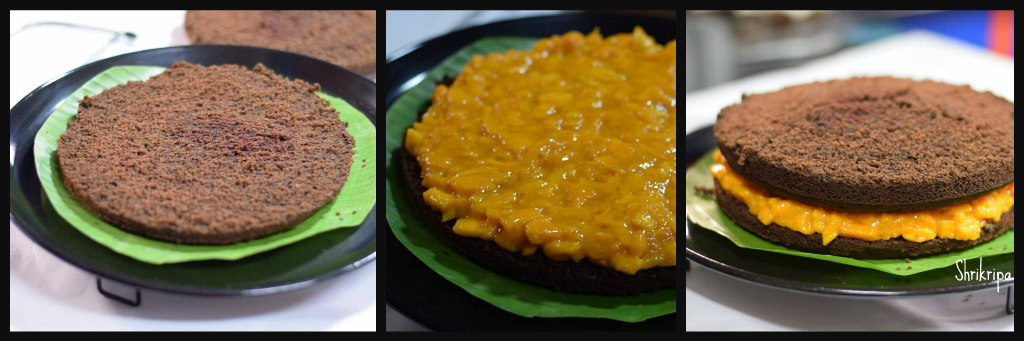
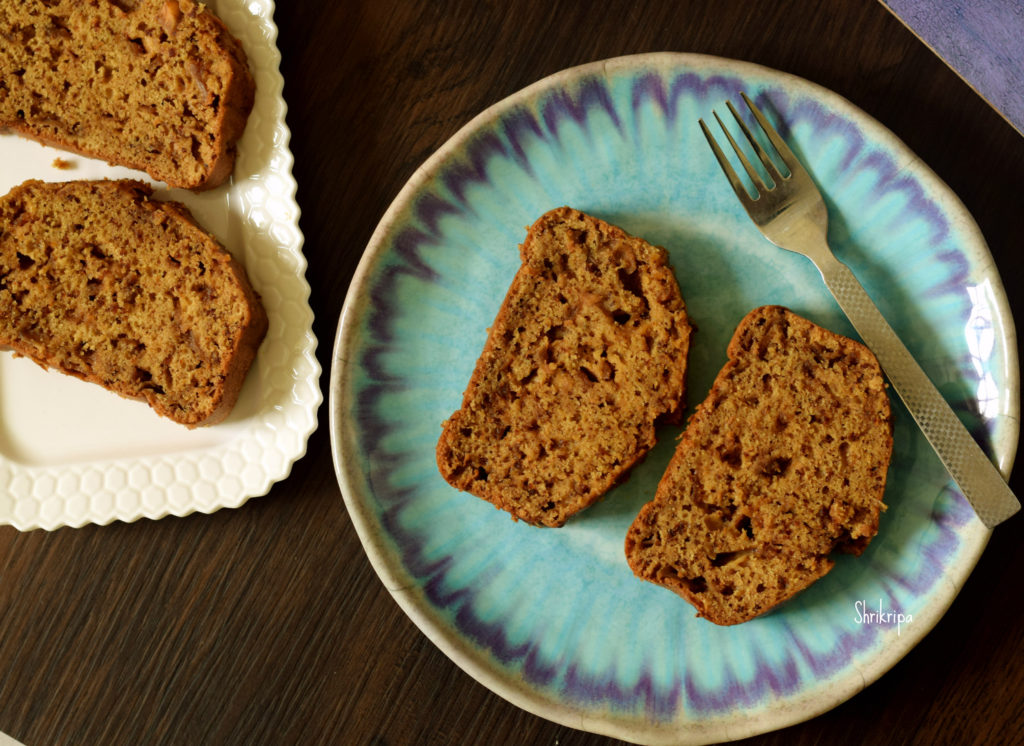
This time, I included cinnamon flavour in my cake by using chopped fresh apple. I have used tasteless mini apples which I took in the market for its attractive size and colour, turned out to be a tasteless apple, after cutting 😉 

Now we will see how to make this,

Ingredients:

Apples – 1 cup (chopped)

Ghee residue  – 2 to 3 table spoons

Sugar – ½ cup

Organic jaggery powder – ½ cup

All purpose flour – 1 cup

Whole wheat flour – 1 cup

Cinnamon – 1/2 tea spoon

Eggs –  2 (beaten)

Water – 1 cup

Cooking soda – 1 tsp or little less.

Method:

– Wash all the apples and chop it into tiny pieces. No need to remove the peel.

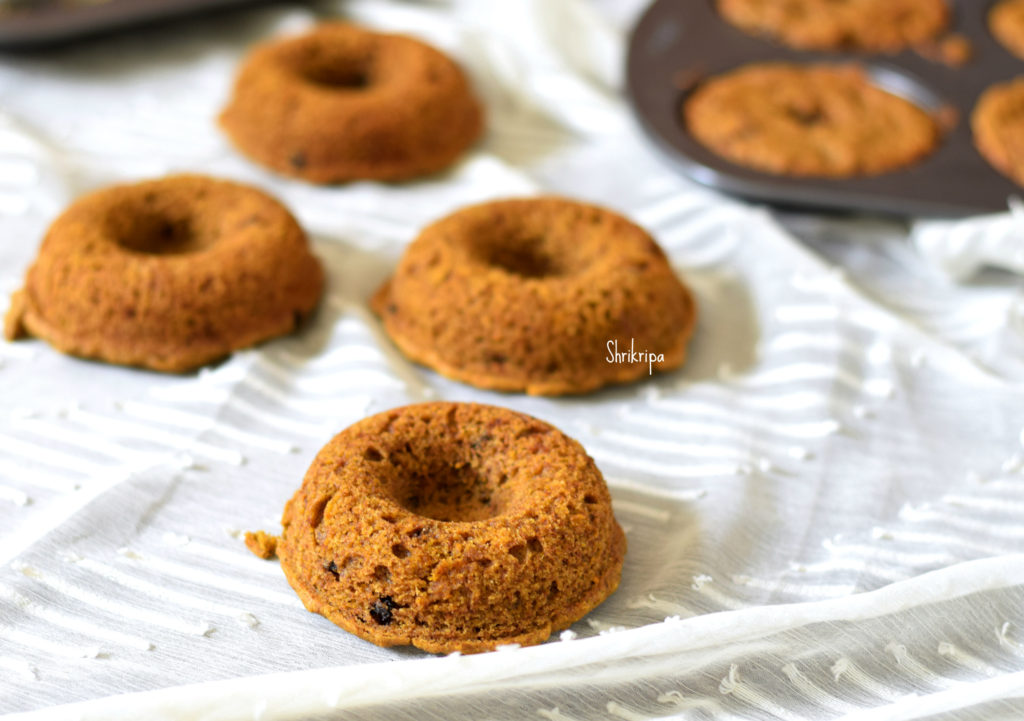
-Grease the baking tray (you can use bread tin as well). Line this with butter paper, keep it ready.

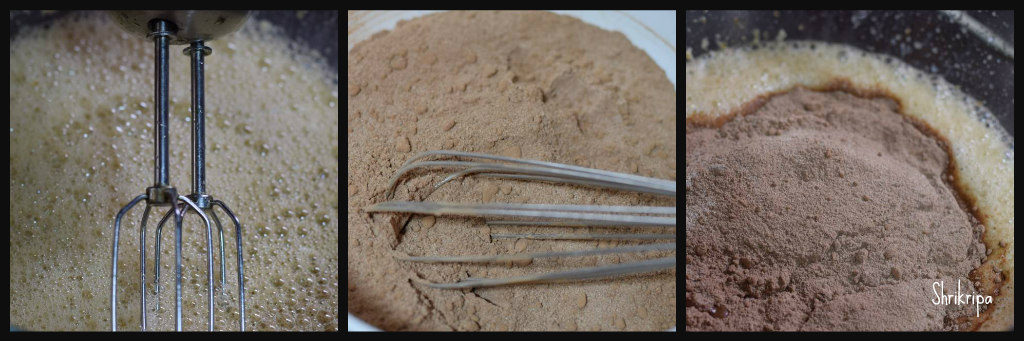
–In another bowl, dry mix All purpose flour, whole wheat flour, cinnamon powder and keep aside.

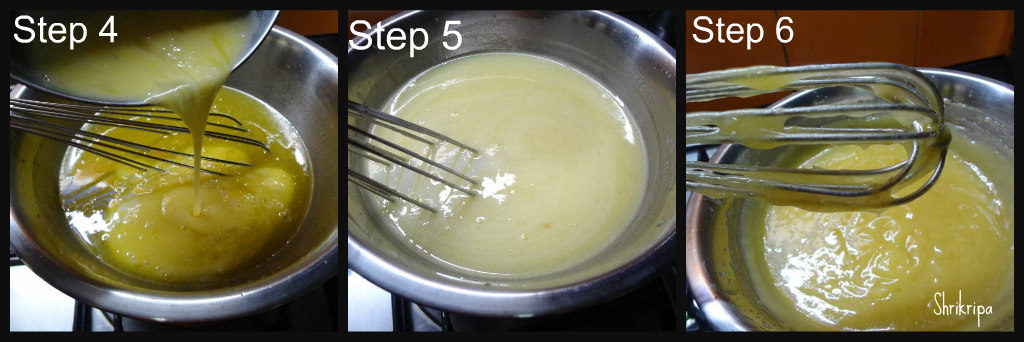
-Take vessel in which you prepare ghee. There will be 2-3 table spoon ghee residues.

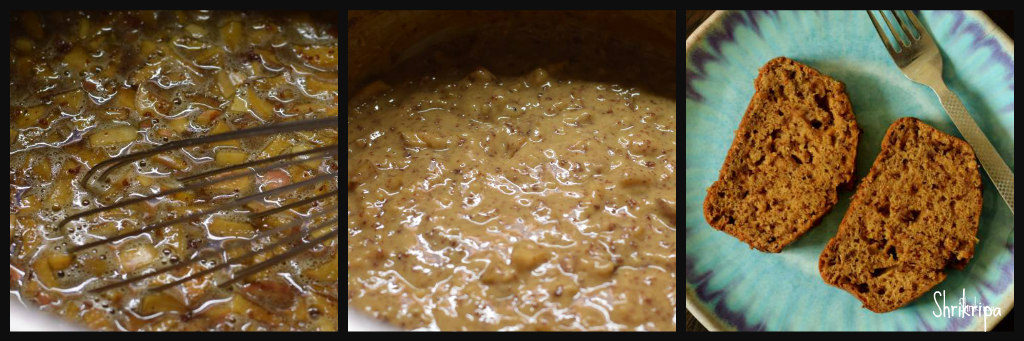
-To this add water, chopped apples, sugar, jaggery and heat it until sugar dissolves. Switch off and cool.

-Add cooking soda and keep aside at least for 20 min.

– After it cools, add beaten eggs and mix nicely.                        

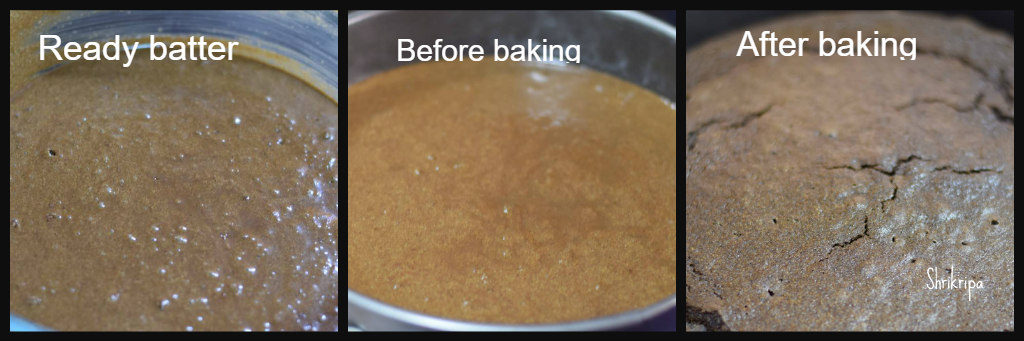
-Now fold in flour mixture, mix gently and pour this batter to a greased and lined baking vessel.                                           

-Bake this in a pre- heated oven for 35 -40 min or until done at 180 C.

-If you want to check its doneness, use tooth pick or knife. Insert this, if it comes out clean, remove the tin, keep it outside.

-After some time, remove butter paper and cool further.                  

-When it reaches room temperature, you can slice it or cut according to your wish and enjoy with cup of coffee or tea.

Note:

-You can use only All-purpose flour or mixture of any flour.

-You can use only sugar, Jaggery or mixture of both.

-If you like it sweeter, please increase the quantity of sweet by adding ¼ cup more of sugar or jaggery.


Halasina Hannina Berati / Jackfruit Preserve:

When summer ends, a whole lot of your favourite fruits also vanish from your eye sight and you will surely miss the season!! The best thing one can do is, prepare some jams or preserves and try to store this for future use.  This jackfruit preserve stays good for almost a year or more in the freezer. It is very handy when you want to make payasam for any festivals or any special occasions. Here is my recipe for homemade jackfruit preserve, which we make every year and use it for Prathamam, which is nothing but kheer or payasam from the preserve!!!

Ingredients:

Jack fruit – 1 big bowl (cleaned)

Jaggery – 2 blocks (I have used organic one)

Method:

  • Put little by little jack bulbs and make a smooth paste in a mixer grinder.
  • Take one thick bottomed kadai, put this paste and keep gas flame in a very low flame and cook for a while.

  • When it changes its colour from bright yellow to a pale colour and when you smell the cooked jackfruit flavour in the air, add jaggery and mix this in a regular interval.
  • After some time, it will turn into a light brown then to darkish colour and it will start to leave the sides of the kadai. Now it is the time to remove it from the fire.
  • Keep as it is and when it reaches room temperature; store it in an airtight container or a zip lock.
  • Keep it under refrigeration/ freezer.

  • You can do this in a microwave as well. Only thing, you should remove the glass bowl at regular intervals and give a stir and proceed as given above.

Note:

-You can use sugar or regular jaggery as well.

-Traditionally we use jaggery in our region.

Punarpuli Saaru aka Kokum Rasam:

To start with this wonder fruit, I should introduce its plant, benefit, procedure to preserve the outer skin, to rest of the world. Kokum is belonging to Guttiferae family, same as mangosteen and its botanical name is Garcinia Indica, is a fruit bearing plant only found in western Ghats and coastal southern India.

 (pic source : From, Vidya lakshmi of SAHAJA FARMS ) 

It is a summer fruit, which is widely used for juices or Rasam in our region to quench thirst as well as to balance body heat. It has so many health benefits as well. It is a natural healer for acidity.

It is a ritual in our native to dry the outer skin in summer months to preserve to use whenever it is needed. Fresh fruit of Kokum is often halved, discard the inner pulpy white part which is a fleshy coating of real seed to make Kokum butter, which is used in medicinal as well as cosmetic products as a raw material. Then outer dark maroon skin will be sun dried and when it becomes crispy, it’s stored in an air tight manner. During this process, we used to prepare fresh pulp to make juice and I used to love fresh juice from its inner pulp. It is much tastier than the outer dried skin juice.

The seed kernels which are coated with white flesh (fruit) has oil content, which is solid at room temperature. When I was young, our grand mom used to prepare kokum butter from these seeds and it used to be like a wax ball and she always used to keep this ball in hand’s reach to treat any accidental burns (that time, cooking was much more tedious and burning episodes were very frequent, due to fire wood cooking). She used to hold the ball against the fire for 2 min, oil used to start dripping and she used to apply this over the wound. She used to say, in this way, healing is very fast, and it acts as a coolant on burning wound as well. I have one kokum butter ball with me, which she has prepared almost 20 years back and when my kids were small, Amma has handed this wonder medicine to me by saying, keep this ball for emergency and it is still with me as a souvenir. ( Seen in below picture)

In urban dwellings, it is sold as a dried rind, dark purple, little sticky and shiny with curved edges. If you infuse these dried skins in water, it releases very nice colour. If dried skin is darker, you will get darkish pink and if it is little old and turned black, your dish will become dark and pale in colour. Taste wise it is tangy like tamarind and used exactly like tamarind in cooking to give tart taste.

If you want to prepare Rasam you need hardly 7 to 8 dried rind or if you want to add to any curry, you need very less, hardly 2 or 3 rinds according to the requirement. It is usually used, without any chopping.

Thanks for reading, I appreciate your patience. Now we will see the procedure of our traditional recipe for simple Rasam by using dried rind or kokum concentration.

Ingredients:

Dried Kokum – 7 to 8 (If you are using kokum extract or pulp, use 2 to 3 table spoons)

Onion – 1 big

Red chilli powder – 1 to 2 tea spoons

Jaggery – As needed

Salt

Seasoning:

Coconut oil – 1 table spoon

Mustard- 1 tea spoon

Red chilli – 1

Garlic – 8 to 10

Curry leaves – 1 spring

Method:

-Soak kokum in sufficient water for 1 to 2 hours.

-When you boil, add sliced onion, red chilli powder, salt, jaggery (I prefer little sweetish Rasam, so usually I add little more)

-When onion cooks, do seasoning.

-heat oil, splutter mustard, red chilli, curry leaves and add crushed garlic.

-When garlic turns brown, add this to Rasam and close the lid for 2 minutes.

-Serve hot with rice or drink as an appetizer.


Mango Truffle Cake:

It is a ritual at our home to make mango stuffed chocolate cake every year when king of fruit is in season. This year, I had a lot of over ripe mangoes and wanted a way to utilize it in this cake itself. I tried mango sauce as a topping and it worked out wonderfully and kids gang liked it too.

Truffle cakes are melt in the mouth chocolate and cream cakes but when fresh fruit is added as a stuffing between the layers it tastes rich with a natural fruit flavour. I normally prefer less cream or high calorie stuff when I am baking for my family and friends. If you are looking out for healthy options for truffle cakes, this recipe is for you.

Now we will see the procedure, how I went ahead –

First – For the chocolate cake:

Ingredients:

Very fine semolina – 1 ¼ cup (Known as Chiroti Rava)

Ragi / finger millet flour – ½ cup

Cocoa powder – ½ to ¾ cup

Baking powder – 1 tea spoon

Baking soda – 1 tea spoon

Eggs – 2

Butter – 100 grams

Sugar – ¾ to 1 cup (if you want less sweet use ¾ th cup)

Milk – ½ cup

Instant coffee powder – 1 tea spoon

Hot boiling water – 1 cup

Method:

-Pre- heat oven @ 180 °C and line a baking tin with butter paper.

-Take one bowl, prepare dry mixture. Take semolina, Ragi, cocoa, baking powder and baking soda by using wire whisk or you can sieve all these twice or thrice.

-In another bowl we will prepare wet mix, beat egg one by one, add milk, sugar, butter and beat until frothy.

-Boil water, mix in coffee and pour this into wet mix and once again beat and make a homogenous mixture.

-Now fold in dry ingredients by using wooden spatula. Don’t over mix this content.

-Pour the batter to lined baking tin, bake for 40 minutes in a pre-heated oven.

-when it is done, remove, cool and keep it ready for stuffing.

Second – Mango filling:

Ingredients:

Mango – 1 or 2 (depending on the size)

Icing sugar – 2 tea spoons

Method:

-Peel the skin, hold the mango flat on your left hand. Mark so many cuts in horizontal and vertical manner and make tiny square pieces. Finally squeeze the seed to extract remaining pulp.

-Add icing sugar or sugar powder, mix nicely and keep this in the fridge until you are done with the sauce making and slicing the cake.

Third- Mango sauce for dressing or to drizzle:

Ingredients:

Mango – 1 or 2

Icing sugar – 1 or 2 tea spoons

Butter – 1 table spoon

Juice of Lemon – 1 tea spoon

Method:

-Remove outer skin of mango, chop and make a puree.

-Take one sauce pan, add mango puree, butter, icing sugar, lemon juice and boil it nicely and switch off the gas.

Fourth: Now Comes the assembling part:

Step 1: Take the cake (completely cooled one) and slice it horizontally. You will get 2 discs.

Step 2: Take out mango filling, equally spread this on one of the flat disc.

Step 3: place another halved disc on mango filling.

Step 4: If you like mango, go ahead and pour the sauce as a dressing to cover the top of the cake and slice it or you can drizzle the sauce while serving as well.

NOTE:

-One can use 2 cups of All purpose flour as well in place of 2 combined flours OR Use 1 ½ cup of All purpose or whole wheat and ½ cups of Ragi as well.

– To substitute eggs, use flax gel and recipe is here.

-I have used is ¾ cup of brown sugar. Cake was less in sweetness and it tasted more like coffee and was chocolatey.

-You can use less or more chocolates according to the quality of brand which you use.


Mango mini cake doughnuts:

Mini cake doughnut is an eye pleaser for any one. As summer is coming to an end and it’s school reopening time, wanted to try my hand at this Mango cake by using my protein rich millet health mix instead of All purpose flour. Usually I make this cake by using All purpose flour /Maida. I don’t like the taste of whole wheat with mango. When I was thinking to replace Maida in this recipe, I thought of using millet flour and proceeded. It turned out very tasty and soft. It worked out just fine as a short break snack for my ever-supportive daughter V, who tastes and gives her feedback in every step of my kitchen experiments. 

It is an eggless recipe as well as healthy and I don’t consider this as a dessert. It is a 100 % snack and very filling as well as filled with goodness and natural flavour from summer fruit Mango. If you are into healthy baking and want to try it out, I am sure, you will like this recipe.

I’m excited to share this recipe with you all –

Ingredients:

Millet health mix – 1 ½ cup (you can use all purpose flour as well)

Salt – ¼ tsp

Chocolate chip – ¼ cup

Cardamom powder – ½ tea spoon

Baking powder – ½ tea spoon

Baking soda – 1 tea spoon

Mango puree – ¾ cup

Butter – 100 grams

Sugar – ½ cup

Curd – ½ cup

Method:

-Pre heat oven at 180°C. If you are using a baking tin, line the tray with butter paper or apply some butter, grease the mould and keep it ready.

-Mix all the dry ingredients together – Flour, salt, Choco chip, cardamom powder, baking powder, baking soda.

-Dry whisk everything and mix properly and keep aside.

-make mango puree from the cut pieces of mango’s. You can take any good variety of mango.

-Now take another bowl, take melted butter and beat. Add in sugar, mango puree, curd one by one respectively and beat nicely.

-Fold in dry ingredient and make homogenous mixture by using wooden or rubber spatula or with a light hand with a wire whisk.

-Pour the batter in cake tin, here I have used doughnut shaped mould.

– Bake the cake in a pre-heated oven for 15 to 20 minutes or until done.


Mango Trifle:

Trifle, name itself brings a smile on my face. I started my non-Indian dessert preparation journey from this recipe and it has come a long long way. It has been almost 20 years now. When I was in my native, exposure to the outside world was minimal and our day to day preparations were all traditional and prepared with locally available ingredients or seasonal vegetables. After my wedding, my opportunities got widened as well as the encouragement. It was not an internet era. My sources were library books and my notebook and pen. I used to read about the different cuisines, uses and ingredients. In the meantime, I tried to implicate all of that knowledge in my cooking.

Trifle is an English dessert, which is cold and creamy, that contains 3 layers. Here I usually use Sponge cake at the base, then vanilla milk custard which is topped with any seasonal fruits. Mostly Mango or strawberries. Here sponge cake will be soaked with hot custard and will swell like a thick foam. It is cooled under refrigeration and while serving, last layer will be added. It is a party pleaser and a very good idea for a large gathering and usually is loved by all. Prepared this easy dessert to celebrate 6th Anniversary of our Foodie group in  Facebook.

Ingredients:

Sponge cake – ½ kg

Custard powder – 4 table spoons

Milk – 1 litre

Sugar – ½ to ¾ cup (I usually prefer light sweet)

Mango fruits – 3 to 4

Method:

-Take one flat, rectangular or square glass dish or baking dish.

-Place the first layer.  Slice the sponge cake and place flat at the bottom of the dish.

-Prepare custard first:

-Pour milk to the vessel, remove half cup of milk from this vessel, mix in custard powder and make a paste and keep it ready.

-When milk starts boiling, add the custard paste and boil for some more time (2 to 3 minutes)

-Mix in sugar and stir nicely.

-Pour this hot custard over the first layer (over the sponge cake)

-Sometimes sponge cake pops up, while pouring the custard. It is ok. After some time, you will be able to press it back.

-Now cool it completely, cover with the cling wrap and keep it under refrigeration to cool.

-It takes almost 4 to 6 hours or overnight is also fine.

-Next is Fruit layer: Chop the fruits into small chunks. Remove all the pulps which is attached to the inner seed as well.

-Mix in couple of spoons of sugar and keep it in the fridge.

-Before serving, remove cling wrap and spread the fruit all over the custard.

-Take one serving spoon, dig it up to the bottom, take out all three layers, while serving and enjoy.

-If you are making this for a larger crowd, you can prepare this in advance and serve.

Jackfruit kottige:

Halasina hannu is Jack fruit and Kottige is nothing but idly or kadubu,also known as Halasina Hannina kottige Or Gatti in local language. In which mixture is wrapped in pre-wilted banana leaves like pockets and steam cooked. Like bottle gourd kottige, which I have posted earlier, it is not a savoury kind, it is sweetish and bustling with jackfruit flavour which is enhanced even more with the usage of banana leaves wrap.

Jackfruit season is considered as a feast time in our region. Usage starts from tiny raw fruit form to ripened stage. You will find couple of curry recipes in my blog which I have posted earlier as well as Ripe jack fruit Dosa.

Now we will see how to make kottige, in our traditional method.

Ingredients:

Dosa rice – 2 cups

Jackfruit – 2 cups (cleaned)

Fresh coconut gratings – 1 cup

Grated jaggery – ¼ to ½ cup (according to your taste)

Ghee – 1 table spoon

Salt

Method:

-Wash Dosa rice (white raw rice) and soak for 2 to 3 hours.

-If you are using banana leaves, wilt the leaves on gas flame, wipe with a wet cloth and keep it ready.

-If you are using idli mould, grease the moulds with little ghee and keep aside.

-Chop jack fruit, separate fruit pods, remove outer thin white fibres as well as inner seed and take only yellow fruit part.

-Mix grated coconut and jaggery as well as ghee and keep aside.

-Grind rice into fine paste by adding very little water and salt.

-Now take jack fruit little by little and whip a little to chop roughly by using same mixer jar in which rice batter is ground.

-Take one wide bowl, mix in ground batter, roughly whipped fruit pulp, coconut-jaggery mixture.

-Mix nicely, spread the wilted banana leaves and pour one spoon and fold it like a sealed pocket. (refer the below pictures)

-Assemble all these packets in a water filled idli steamer or Momo steamer and cook this for half an hour to 40 minutes in medium to slow heat.

-If you are using idli mould, pour required amount of batter and steam cook like an idli.

-Relish this jackfruit idli or kottige with ghee or coconut and ginger chutney.

-We usually steam cook this on the previous night and keep it ready for the next day’s breakfast. In this way, It will be easy in the morning as now you just have to prepare chutney and serve.


Fresh muskmelon seed and Watermelon smoothie:

If you are calorie conscious or under restricted diet, this smoothie is especially for you. It is nutty flavoured, rich, creamy and at the same time, No sugar and Less in Calories. It is a “No guilt” smoothie for scorching heat.With Summer at its peak, we are one happy family who consumes lots of musk melon and water melon on every day basis. I usually feel very bad to discard power packed melon seeds into dustbin.

Muskmelon has lot to offer, fruit itself is fibre rich, vitamin rich and seeds which you usually throw it away is even more nutritious. Seeds are high in fibre, plant-based protein, minerals, calcium and Omega-3 and when you add this to prepare smoothies, it gives very smooth, creamy texture without adding any high calorie substance. It is very ideal for diabetic, weight loss or even for children.

Here I have added inner core (flesh and seed part) of one musk melon fruit to give thick texture as well as nutty taste and water melon chunks to give sweetish taste.

DSC_0049_Fotor

Ingredients:

Muskmelon inner core – from one muskmelon

Watermelon – one cup

Sea salt – ¼ tea spoon

Pepper powder – ¼ tea spoon

Method:

-Peel outer skin from one muskmelon, collect inner core with seed and proceed.

Ribbet collage

-I have not used fruit part. It can be consumed as you wish.

-Take water melon chunks.

-Take your juicer jar, put inner core of musk melon, water melon chunks, sea salt, pepper powder and churn.

– Sieve this liquid and discard the roughage and serve smoothie by adding a couple of ice cubes to beat the heat.


Bell fruit -Raw Mango- Mint juice:

Summer is the season, when we need lot of water to keep our body hydrated. The humble bell fruit is one such fruit, which we had in our front yard while I was a kid. It is the most underrated fruit when I was growing and other than eating, fruits used to be wasted on the ground after it fell from the tree.

 Almost all the household has one or the other watery fruit plant in our native. It has several names like wax apple, java apple, water apple, Syzygium, Jambi fruit or jambu nerale.

Last week when I tried this otherwise bland, watery fruit with Raw mango and mint in the form of juice, we liked the flavour and enjoyed it.

DSC_1045_Fotor

Recipe goes like this-

Ingredients:

Bell fruits – 8 to 10

Raw mango – ¼ piece of one mango

Mint – 1to 2 strings

Sea Salt – ¼ teas poon

Sugar – as needed.

Water – 2 cups

Ice cubes – if needed

Method:

-Wash, make half, remove seed and clean the bell fruit.

Ribbet collage

-Chop mango

-Take one juicer jar and put everything and churn until sugar dissolves.

DSC_1058_Fotor

-Strain the juice, pour this into a serving glass, put couple of ice cubes and serve.

Homemade Lemon curd

Fruit curd is a dessert spread and topping usually made with citrus fruit, such as lemon, lime, orange or tangerine. Other flavor variations include passion fruit, mango, and berries such as raspberries, cranberries or blackberries. Wikipedia

Every year a cousin of mine, gifts me with these home-grown cuties and I love these kinds of lemon’s flavor especially in baking.

Today I will post how to make “Homemade Lemon curd”. Homemade lemon curd is quick and easy and so much more mouthwatering than the shop-bought variety. Made by cooking (by using double boiler method) a mixture of fresh lemon juice, grated outer skin/rind, sugar, butter, and eggs, lemon curd is enjoyed on buttered toast, and is a delicious filling for breads, tarts, cakes and cookies. In the coming posts, I will explain the usage of curds one by one.

Equipment needed: Wire whisk (egg beater) and nice, sharp grater with tiny holes, so that it will help to remove only the lemon’s outermost layer (coloured layer) inner white layer will be bitter, 2 vessels.

DSC05033_Fotor

Ingredients:

Had 4 big lemons and took all those.

zest of 1 lemon and juice of 4 lemons
200g sugar
100g butter (cut into chunks)
3 eggs

-Collect lemon zest, lemon juice and assemble everything.

Ribbet collage 1

-Put lemon zest, juice, sugar and the butter, into a basin kind of a vessel (Step 2) over a pot of boiling water, make sure that the bottom of the basin doesn’t touch the boiling water (step 1).

-Stir with a whisk until the butter melts (step 3)

Ribbet collage 2

-Mix in eggs (beat lightly before adding by using fork), after adding eggs, whisk in between, until it is thick, it should be heavy (should stick to the whisk) (step 4 to 6)

Ribbet collage 3

-It took me around half an hour to complete the process.

-Remove from the heat and stir occasionally till it cools…transfer the content to clean glass jar and store it in a refrigerator.