Balloon Vine Dosa:

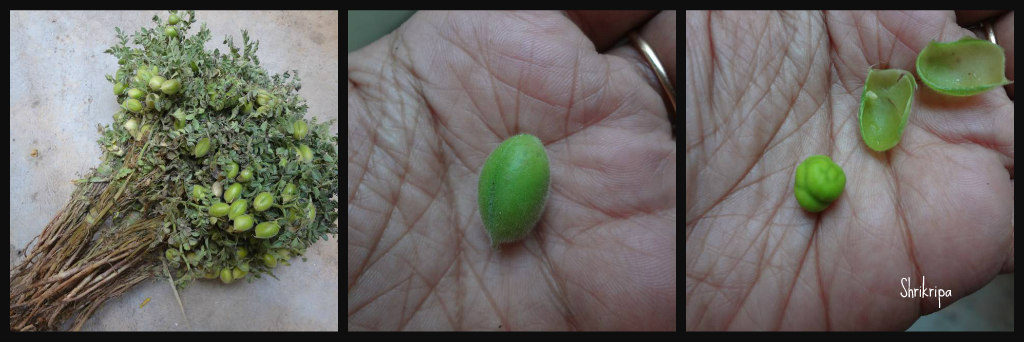
Balloon vine is well known and widely used as medicinal herb. In Tamilnadu it is used mainly in treating joint pains. I was not aware of this super food until recently which was introduced to me by our beloved uncle Senguttuvan on our Facebook Foodie group. I am very lucky to experience the taste, because of my Foodie friend Ashwini, who came all the way to my home and dropped off the leaves and asked me to prepare the Dosa. 😊

It is a medicinal herb and botanical name is cardiospermum halicacabum (Family sapindaceae).

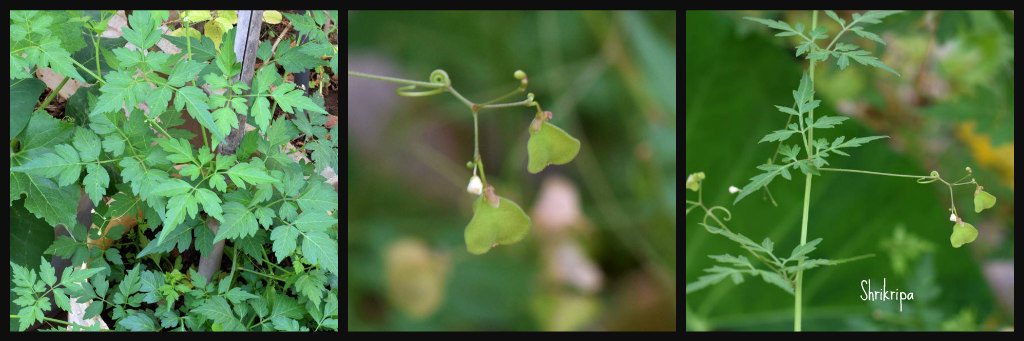
Balloon vine is also known as Heart seed, Heart-Pea, Love in a puff, winter cherry (English).

The plant got its name because of its Balloon like seed pods.

Some of the regional names are-

Indravalli – In Sanskrit

Agniballi, bekkinatoddinaballi, erumballi – In Kannada

 Mudakathan keerai – In Tamil

Jyotishmati, katabhi – In Malayalam

Kapalphoti, khanphuti – In Hindi

It has numerous health benefits and is used in many ailments from Anaemia, diarrhoea, eczema, rheumatism in the form of tea, paste application, kozhambu or mixed with Dosa batter etc.

I tried this Dosa by grinding fresh batter by mixing the leaves in, and it was very tasty. It tastes like plain Dosa with green natural colour.

DSC_4279_Fotor

Now we will see the procedure-

Ingredients:

Dosa rice – 1 cup

Idly rice – 1 cup

Urad dal –¼ cup

Chana dal – one fist full.

Methi – 1 teaspoon.

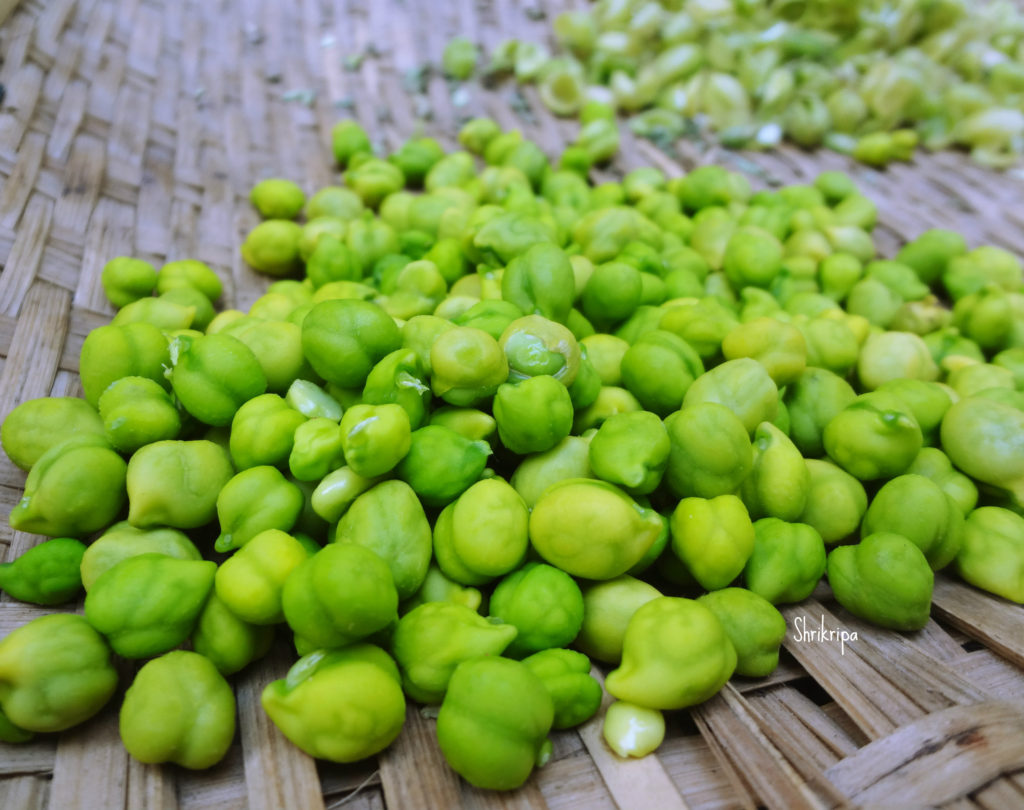
Balloon vine greens – 2 cups

Cumin – 1 teaspoon

Red chilli – 1 (use Byadagi variety)

Salt

Method:

-Wash and soak Dosa rice, idli rice, methi and soak for 3 hours.

-Wash cleaned greens and keep them aside.

Ribbet collage 1

-Grind soaked rice, greens, salt, cumin, and red chilli into a fine paste.

-Ferment the batter for 8 to 10 hours or overnight.

-Next day mix the batter, and adjust the consistency.

Ribbet collage 2

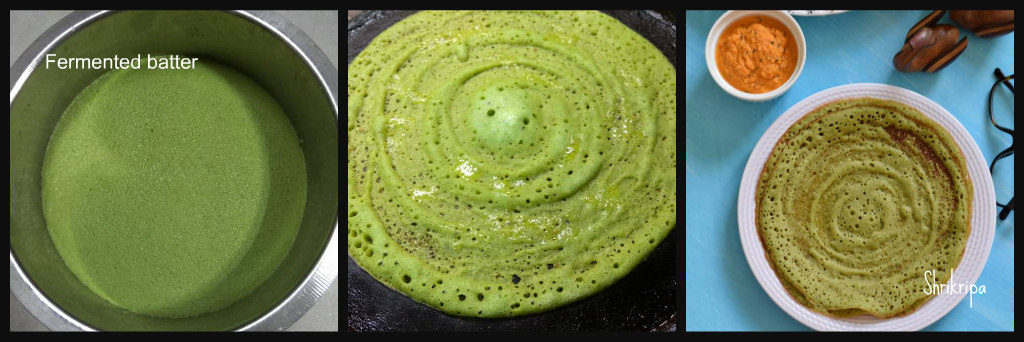
-Heat Iron Dosa griddle, pour one serving spoon of batter, spread and cook on one side.

-Pour some ghee or oil and flip the side and cook.

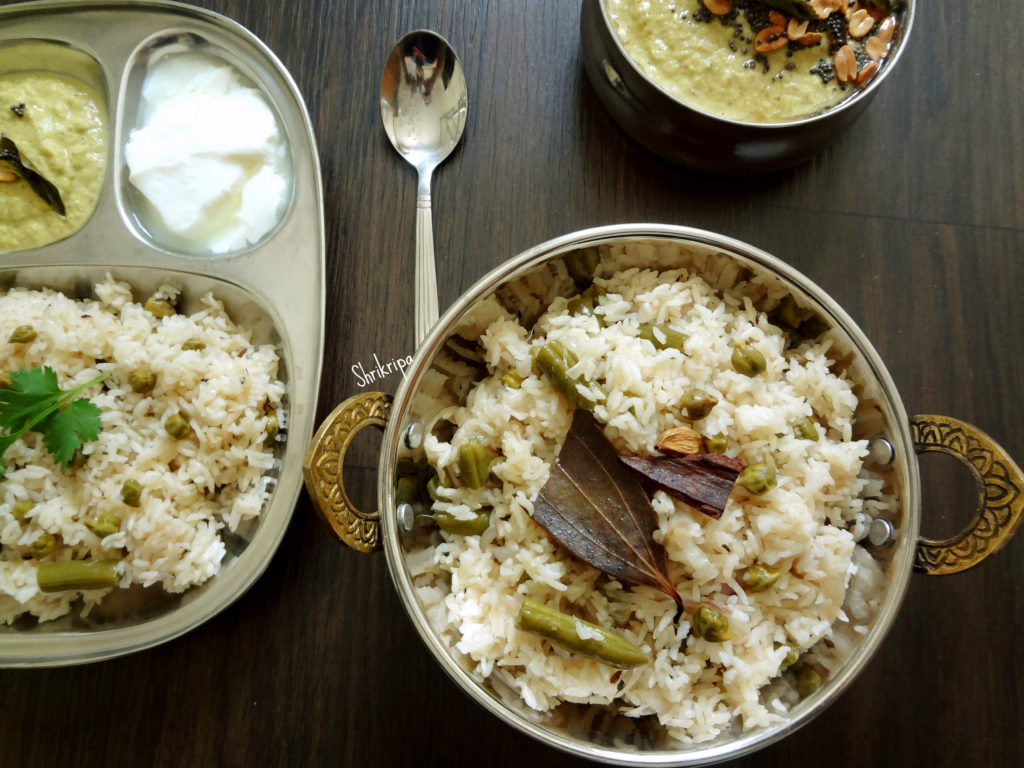
-Serve the Dosa with any chutney of your choice.

Gujje palya/ Tender jackfruit Subzi:

Gujje is nothing but tender jackfruit. We Mangalore people start using Gujje from its very tender form. This particular recipe is for very tender means even before its formation of eyes (seed) and known as “Guddhi palya” as it is prepared after crushing. We will see how to prepare this in a traditional way.        

DSC06083_Fotor

Ingredient:

Tender jackfruit – 1

Mustard- 1 tsp.

Black gram dal – 1 tsp.

Red chilli – 1 (for seasoning)

Curry leaves – 4 springs

Coconut oil – 4 tsp.

Red chilli powder – 1 tsp.

Turmeric – ½ tsp.

Tamarind – ½ tsp.

Salt and jaggery – for taste.

Grated coconut – 3 tbl sp.

Methi seeds – ½ tsp(roasted)

Red chilli – 2 to 3 (roasted)

Method:

  • Remove outer thorny skin and centre core. Cut the inner pith into one-inch cubes. Immerse in water for 10 minutes. Drain and keep aside.
  • Take one thick-bottomed kadai or pressure cooker. I usually prefer one whistle a pressure cooker. This method fastens the procedure.
  • Put chopped jack pieces, salt, tamarind, jaggery, red chilli powder, turmeric. Now add a cup of water and cook until one whistle.

Ribbet collage 1

  • When it becomes cool, remove the cooker lid.
  • Mash the cooked jack a little so that all the segments of the jack pieces will open, and it will help to enhance the taste and structure of the palya.
  • Dry grind coconut, roasted methi and red chilli into rough powder and add.

Ribbet collage 2

  • Now check for the seasoning and cook until any remaining water is dried and the masala cooks and coats well.
  • Garnish with curry leaves, two tsp. Take raw coconut oil, keep it closed, and cook for a while so the coconut and curry leaves’ flavours will spread to give a very authentic “homely” flavour.
  • Season it by heating coconut oil and adding mustard. When it splits, add Urad dal, red chilli and curry leaves and pour over the ready palya/sabzi.
  • This palya will taste great with ghee and hot rice or as a side dish with Rasam rice.


Baby potato fry:

Baby potatoes are naturally sweetish with thin outer skin. I usually don’t peel baby potato skin, due to its richness in taste as well as vitamins and minerals as well. This potato fry tastes great as it is or as a side dish with plain dal or Rasam.

I am preparing this potato fry from so many years and my guests usually love this and ask for the recipe, so I thought of sharing the recipe with my readers, as well. It is made with very minimal oil and one can indulge in it, as much as they want.

DSC03768_Fotor

How I make:

Ingredients:

Baby potatoes – ½ kgs

Salt- as needed

Oil – 2 table spoons

Curry leaves – 2 springs

Turmeric – ½ tea spoon

Red chilli powder – 1 tea spoon

Coriander powder – 1 tea spoon

Garam masala powder – ½ tea spoon

Amchur/ dry mango powder – ½ tea spoon

Method:

-Soak baby potatoes for some time, scrub a little and clean properly.

-Cut all the potatoes in half.

-Take water in a sauce pan, boil, add halved potatoes in this water and cook until it is tender but firm.

Ribbet collage 1

-When you keep the potatoes in between your thumb and fore finger and press, it should crack.

-Switch off the gas, drain the water.

-Now take one tawa, heat oil, splutter curry leaves, add drained potato pieces and fry for 2 to 3 minutes.

Ribbet collage 2

-Add all the powders, salt and fry until you get a little charred texture.

-Check the taste and adjust the masala accordingly.

-Serve either as a starter or side dish with rice and dhal.

DSC03780_Fotor

NOTE: If you have Ready Tawa fry masala (MDH brand) use 3 to 4 tsp of that, omit coriander powder, garam masala, red chilli powder and amchur powder.


Leek and Broccoli Soup:

This soup is light and creamy in texture, that too with very little calories. Addition of broccoli neutralises the strong flavour of leek as well as gives creaminess and appealing colour without adding any fat.

This is a lovely option to have when it is cold outside. With a slice of garlic bread or whole wheat bread or with lots of croutons this can be a delicious, nutrient filled meal.

leek soup_Fotor

First, we will see how to prepare this soup:

Ingredients:

Leeks- 2 to 3 (white and green parts are chopped and tops can be used in stock)

Broccoli – 1 medium head.

Toasted Pine nuts- ¼ to ½ cup (you can use any nuts of your choice)

Vegetable stock – 4 cups

Butter – 1 tsp

Turmeric- ½ tsp.

Salt

Pepper

Red chilli flakes

Method:

Method:

  • Clean leek by removing each cover,( Refer note) and chop (keep aside some roundels for garnishing).
  • Heat butter in a pan ,add reserved roundels and fry till you see the charred look. Keep aside.(this is for garnishing)
  • In this same tawa ,by using remaining butter ,add chopped leeks, sauté for a while. Then add broccoli florets ,turmeric, garlic salt and sauté for some time.

Ribbet collage

  • Then add toasted pine nuts.
  • Now add vegetable stock.
  • Boil for 10 minutes and remove from the heat.
  • After it cools down a bit ,blend this carefully.
  • Bring this puree to boil ,check the seasoning.

leek soup_Fotor

  • Serve this soup by sprinkling red chilli flakes ,pepper and toasted leek roundels.
  • If you want you can add bread croutons or have it with garlic bread.

Note:

How to clean leek : Leek has very tightly packed leafy layers. Usually we find a lot of mud in between the layers ,because they usually grow in  loose ,sandy soil. To clean this , trim off the roots and top dried part if any. Now halve the leek lengthwise ,separate all the layers ,so that it will be really easy to rinse and clean. Now leek is ready to use.


Paramanna/ Pindi payasam:

Pindi payasam is nothing but our traditional rice kheer without adding any milk or coconut milk, which is usually offered to god as a Naivedyam and served as a prasadam at any pooja. It is considered as a favourite of goddess Devi. When I look back and think, Pandan leaves were widely used in our region(Mangalore) as well. One can make this payasam even without adding Pandan leaves.

pic main

Pandan leaves are known as gandhasaale ele in our Mangalore region.
Gandhasaale rice is a traditional, flavoured and scented rice variety of Karnataka and Kerala, cultivated in small pockets. Gandhasaale rice is the best rice for meals, Pulav, payasam and other eatables. The Gandhasaale rice is known especially for its rich aroma. It is also called Kerala’s basmati.
In our native, to get aroma of “gandhasaale” in ordinary rice, my grand mom used to put these leaves in, while cooking the rice. Pandan (Scientific Name: Pandanus, also known as screw pine or palm pine) is a herbaceous tropical plant that grows in Southeast-Asia. In Chinese, it is known as ‘fragrant plant’ because of its unique, sweet aroma. The cultivated plant features upright bright green leaves, and it’s the leaves that are used for cooking up many Thai and Southeast-Asian dishes. Pandan is also made into a paste that is used in cakes and desserts, much the way we use vanilla flavouring in the Western cuisine. However, in addition to flavour, Pandan paste also instil foods with a bright green colour. Some Thai and Malayan desserts which I have tasted are Pandan baked cake, Pandan jelly and Pandan sticky rice in Malaysia. Personally, I dint like it much because of its overpowering fragrance and felt that, like my ajji (grand mom), one should use one or 2 leaves to get that perfect blend.

DSC05949_Fotor

Ingredients:

White rice – 1 cup (I have used small grain rice)

Grated jaggery – 1 cup

Ghee – 2to 3 table spoons

Coconut – 2 table spoons (grated)

Cardamom powder – 1 tea spoon

Pandan leaves – 2

Cashew bits – as needed

Method:

-Wash rice, Pandan leaves. Soak rice for 10 minutes.

-Boil 2 to 3 cups of water, add rice, Pandan leaves and cook until it is done.

Ribbet collage 1

-After cooking, remove Pandan leaves.

-In the meantime, take one cup of water, boil, add jaggery and melt.

-Sieve this solution and remove all the impurities.

-Add this solution to cooked rice and boil.

-When the mixture becomes thick, add ghee and mix nicely.

Ribbet collage 2

-Lastly add coconut, cardamom powder and give a stir for 2 to 3 minutes or until it becomes like a creamy mass.

-Roast cashew bits in a little ghee and garnish.

-If you want to offer this to god, do that and then serve. Other wise serve hot and enjoy this delicacy.


Cucumber Chutney:

When I saw this chutney recipe in our Facebook Foodie group, I was attracted mainly because of the veggie. One of my daughters loves cucumber and I tried this recipe by pairing it with very mild flavoured Fresh chick peas Pulav. It was a pair made in heaven, and everyone liked this chutney, not only with the Pulav, but also with rice, Dosa or chapati. 

This recipe is by Jayanth Desai one of our Foodie member and all thanks to him for sharing this flavourful chutney of North Karnataka region.

DSC05898_Fotor

Ingredients:

Cucumber – 2 (grated)

Green chillies – 3 to 4

Curry leaves – 2 strings

Turmeric – ½ tea spoon

Oil – 1 table spoon

Hing – ¼ tea spoon

Cumin – 1 tea spoon

Peanuts – 5 tea spoons

Sesame seeds – 2 tea spoons

Tamarind – gooseberry size

Jaggery – small piece

Salt

Seasoning:

Oil – 1 tea spoon

Mustard – ½ tea spoon

Peanut – 1 tea spoon

Method:

-Dry roast sesame seeds until it splutters.

-Dry roast peanuts. Keep aside.

Ribbet collage 1

-In the same pan, heat oil, add hing, cumin, curry leaves, green chillies and fry for a minute.

-Add grated cucumber, turmeric and fry until cucumber changes in colour and cooks.

Ribbet collage 2

-Cool the mixture.

– Take one mixer jar, add roasted sesame, peanuts and make powder.

-To this, add cooled cucumber mixture, jaggery, tamarind and salt.

– If necessary, add very little water and blend into smooth paste.

-Do seasoning by heating little oil, mustard and peanuts.

-Serve as you wish.


Fresh Chick Peas Pulav:

Fresh chick peas are green in colour and known as Cholia / Hara Chana. They are fresh young Garbanzo beans which are usually sold as a small bundle of plants with roots intact. These are found only in winter months here in Bangalore. People usually enjoy eating this as a fresh bean by shelling its outer green pod. Chickpeas are high in dietary fibre, mineral, vitamins, proteins.

Ribbet collage 1

These pods are tiny compared to green peas pods. Usually one pod will contain only one garbanzo bean, rarely we find two beans as well. Not more than that.

DSC05879_Fotor

One pot meal is a super cool idea to consume these fresh beans, which I have paired with a cucumber chutney, which I will post next.

Here we will see how I made this Pulav –

DSC05895_Fotor

Ingredients:

Small grain rice – 3 cups (we call this as Jeera samba rice)

Onions – 2

Green chillies – 3 to 4

Ginger garlic paste – 1 table spoon

Fresh chick peas /green Chana – 1 small cup

French beans – 8 to 10 (chopped)

Pudina leaves – 2 tblsp (chopped)

Coriander leaves – 2 tblsp ( chopped)

Salt

Lemon – ½

Ghee – 1 table spoon

Oil – 2 table spoons

Shahi jeera – 1 tea spoon

Bay leaves – 2 small

Cloves – 4

Cinnamon – 1” piece

Mace – 1

Cardamom – 2

Method:

-Wash rice, drain and keep aside.

-Slice onion, green chillies.

-Take one cooker, heat oil, put all the masalas from Shahi jeera to cardamom.

Ribbet collage 2

-Fry onion, green chillies till it is light brown.

-Add ginger garlic paste and toss. Add chopped beans, fresh chick peas and fry for a while.

-Add salt, drained rice, chopped coriander, pudina and fry for 2 minutes. Add 5 ½ cups of water (rice 1: 1 ½ cups of water + 1cup for veggie)

Ribbet collage 3

-When water starts to boil, check for salt, add lemon juice and I table spoon of ghee. Close the cooker lid.

– Cook until one whistle, then simmer for 2 minutes. Switch off the gas.

DSC05907_Fotor

-When steam relieves mix the rice and serve with Hot cucumber chutney

Note:

-I usually use 1 ½ cups of water for 1 cup of small grain rice.

-Here additional 1 cup of water is to cook fresh bean.

-Instead of Chana one can use fresh green peas as well.

Fresh Pigeon pea and Methi Pulav:

Winter is that time of the year, where you can relish all the fresh produce from the bean family. One such bean is Thogari kayi/Fresh Tuvar/Pigeon peas. These are beautiful green pearls with maroon spots all over them and we can make so many varieties of dishes from them. This rice dish is a very easy, one pot meal which has the goodness of Tuvar dal, methi leaves with coconut flavour which will enhance the flavour of the dish to another level.

DSC05585_Fotor

Recipe goes like this-

Ingredients:

Rice – 3 cups

Onion – 2

Fresh Pigeon peas – 1 cup

Fresh methi leaves – 1 small bundle

Veggies of your choice – 1 cup (French beans, carrot)

Ghee /oil – 2 to 3 table spoons

Bay leaves -2

Cumin – 1 tea spoon

Mace – 1

Marathi moggu – 2

To grind: Little coriander leaves, Cinnamon one stick,3 to 4 green chillies and 1-inch ginger.

Coconut milk – 1 cup

Lemon –  ½

Salt

Method:

-At first take a fresh Tuvar bean pod, remove outer thick green skin and separate the green bean with the beautiful red spots. Collect all the shelled beans.

Ribbet collage 1

-Wash rice and soak for 10 minutes, drain and keep aside.

-Chop onions, methi leaves and vegetables of your choice.

-Grind a paste of coriander leaves, cinnamon, green chillies and ginger by adding little water and keep.

-Take one cooker, add oil and ghee or only ghee. Drop whole masalas like bay leaves, cumin and mace.

Ribbet collage 2

-Fry onions until brown and add methi leaves, fresh tuvar, chopped veggies and fry until it wilts.

-Add salt, ground masala and fry for 2 minutes and add drained rice and fry for a minute.

Ribbet collage 3

-Add coconut milk and 5 cups of water, juice of half lemon, boil, close the lid and cook until one whistle and 2 minutes into simmer.

DSC05591_Fotor

-Serve with any kind of raita.


Energy cake:

This energy filled cake has millets, oats, coconut flour. Usually after extracting coconut milk from the fresh coconut, the residue that remains will go into the trash. Coconut residue is very high in fibre. It is much healthier than wheat bran or oats bran. I usually collect this residue, after extracting the milk for any south Indian kheer, and use it in my baking as it is, by storing it under refrigeration for a couple of days.

This energy bar is a little softer than a normal crunchy bar. So, I named it as Energy cake. Shelf life is any where between 2 to 3 days at room temperature, Up to 10 days under refrigeration. If it was under refrigeration, please re-heat to get soft texture.

DSC05271_Fotor

Ingredients:

Oats – 1 cup

Mix millet flour – 1 cup

Coconut residue – ¾ to 1 cup (You can use coconut flour or desiccated coconut as well)

Brown Sugar – ¾ cup

Butter – 100 grams

Honey – 2 table spoons

Milk – ¼ cup

Cooking soda – ½ tea spoon

Vanilla essence – 1 tea spoon

Choco chip and almond flakes – to garnish

Method:

-Pre-heat oven, line a baking tray.

-In one bowl, combine oats, 2 flours and mix thoroughly.

Ribbet collage 1

-Take one sauce pan, heat butter and sugar. When sugar melts, switch off.

-Add in honey, milk,vanilla and cooking soda and mix.

-Pour the frothy wet mixture over oat and flour mixture and fold the batter.

Ribbet collage 2

-Batter will be a little thick and heavy. Pour the mixture and spread evenly on a lined baking tray.

-Garnish with Choco chips and almond flakes and press a little.

Ribbet collage 3

-Bake this in a pre-heated oven at 180 C for about 25 to 30 minutes or until done.

-Cool, cut into pieces and serve as a snack or a breakfast bar.


Homemade Lemon curd

Fruit curd is a dessert spread and topping usually made with citrus fruit, such as lemon, lime, orange or tangerine. Other flavor variations include passion fruit, mango, and berries such as raspberries, cranberries or blackberries. Wikipedia

Every year a cousin of mine, gifts me with these home-grown cuties and I love these kinds of lemon’s flavor especially in baking.

Today I will post how to make “Homemade Lemon curd”. Homemade lemon curd is quick and easy and so much more mouthwatering than the shop-bought variety. Made by cooking (by using double boiler method) a mixture of fresh lemon juice, grated outer skin/rind, sugar, butter, and eggs, lemon curd is enjoyed on buttered toast, and is a delicious filling for breads, tarts, cakes and cookies. In the coming posts, I will explain the usage of curds one by one.

Equipment needed: Wire whisk (egg beater) and nice, sharp grater with tiny holes, so that it will help to remove only the lemon’s outermost layer (coloured layer) inner white layer will be bitter, 2 vessels.

DSC05033_Fotor

Ingredients:

Had 4 big lemons and took all those.

zest of 1 lemon and juice of 4 lemons
200g sugar
100g butter (cut into chunks)
3 eggs

-Collect lemon zest, lemon juice and assemble everything.

Ribbet collage 1

-Put lemon zest, juice, sugar and the butter, into a basin kind of a vessel (Step 2) over a pot of boiling water, make sure that the bottom of the basin doesn’t touch the boiling water (step 1).

-Stir with a whisk until the butter melts (step 3)

Ribbet collage 2

-Mix in eggs (beat lightly before adding by using fork), after adding eggs, whisk in between, until it is thick, it should be heavy (should stick to the whisk) (step 4 to 6)

Ribbet collage 3

-It took me around half an hour to complete the process.

-Remove from the heat and stir occasionally till it cools…transfer the content to clean glass jar and store it in a refrigerator.