Chikki from ellu bella/ Energy bar from left over sesame mixture:

Makara sankranti festival is over and you may have left over Ellu Bella which you got from your near and dear ones during distribution to each other.Usually there will be no takers for this after two days of festival. Even I had some left over sesame mixture and tried this Indian Chikki or energy bar from these power packed ingredients.This mixture usually has lots of sesame seed, which is a high iron source, peanuts, coconut bits etc.

pic 6

Ingredient:

Left over ellu bella mix – as much as you have

Sugar – 3 to 4 spoons (What I took)

Butter – 1 table spoon

Cardamom powder – ¼ teaspoon

Method:

  • Separate Sugar blocks as well as jaggery chunks from the mixture.

pic 1

  • Take one thick bottomed vessel; add all these jaggery and sugar chunks as well as extra sugar with butter.
  • Heat this by constant stirring, until it becomes caramelized liquid.
  • Immediately mix in the rest of the sesame mixture and cardamom powder mix nicely to coat caramel liquid uniformly.

chikki collage

  • Spread this on a clean kitchen counter or butter paper laid baking tray and press this nicely till it is uniformly flat.
  • You can use either pav bhaji masher or roti belan to press this mix.
  • Make a mark when it is hot by using sharp knife.pic 5
  • When it is cool, store this in an airtight container.


Vegetable Nagercoil Biryani:

When I saw this Nagercoil biryani on this website, I couldn’t wait more and tried it with a vegetarian option. Instead of mutton, I tried with double beans, baby potatoes and sweet corn. Kids liked it and I’m happy to share it with you all.

It is little different than our usual biryanis. Usage of small grain rice is a highlight of this biryani.

pic 3

Ingredient:

Jeera or small grain rice – 3 cups

Vegetables – ½ kg

Oil – 3 table spoon

Ghee – 3 table spoon

Onion – 3 (chopped)

Ginger garlic paste – 1 table spoon

Green chillies – 4

Tomato – 2

Turmeric – ½ teaspoon

Red chilli powder – ½ teaspoon

Coriander powder – 1 teaspoon

Coriander leaves – handful

Mint leaves –handful

Curd- ½ cup

Cashew – 10

Raisins – 10

Salt

Whole masala: Cinnamon -1 stick, clove -4, Cardamom-2, Bay leaf – ½, star anise -2, stone flower -2, Cumin – 1 tsp, Mace – 2 petals .

Method:

  • Wash and soak rice for half an hour. After half an hour drain the water and keep aside.
  • Chop vegetables, here I have taken sweet corn cob, baby potatoes, carrot, beans and double beans.
  • Heat oil and 2 table spoon of ghee in a cooker. Add whole masalas.

pic 1

  • Add Chopped onions and green chillies, fry until it becomes light brown.
  • Add ginger garlic paste and fry for a while.
  • Add chopped tomatoes, chopped veggies, sufficient salt and fry until tomatoes becomes mushy and veggies are coated with masala.
  • Add turmeric, red chilli powder and coriander powder and fry for a while.
  • Add chopped coriander, mint and curd.
  • Add drained rice and mix everything together and add sufficient water (here I took 5 ½ cups of water)

pic 2

  • Fry cashews and raisins in a table spoon of ghee and add it to cooker vessel.
  • Check for salt and close the lid and cook until one whistle, keep it in a simmer for 3 to 4 minutes and switch off the gas.
  • When pressure relieves, open the lid and mix everything together and serve this tasty biryani with onion raita.

pic 4

NOTE:

  • I usually take 1 ½ cups of water for 1 cup of Jeera/small grain rice.
  • Additional 1 cup of water for veggies to cook.

Til Chikki /Indian Sesame Brittle:

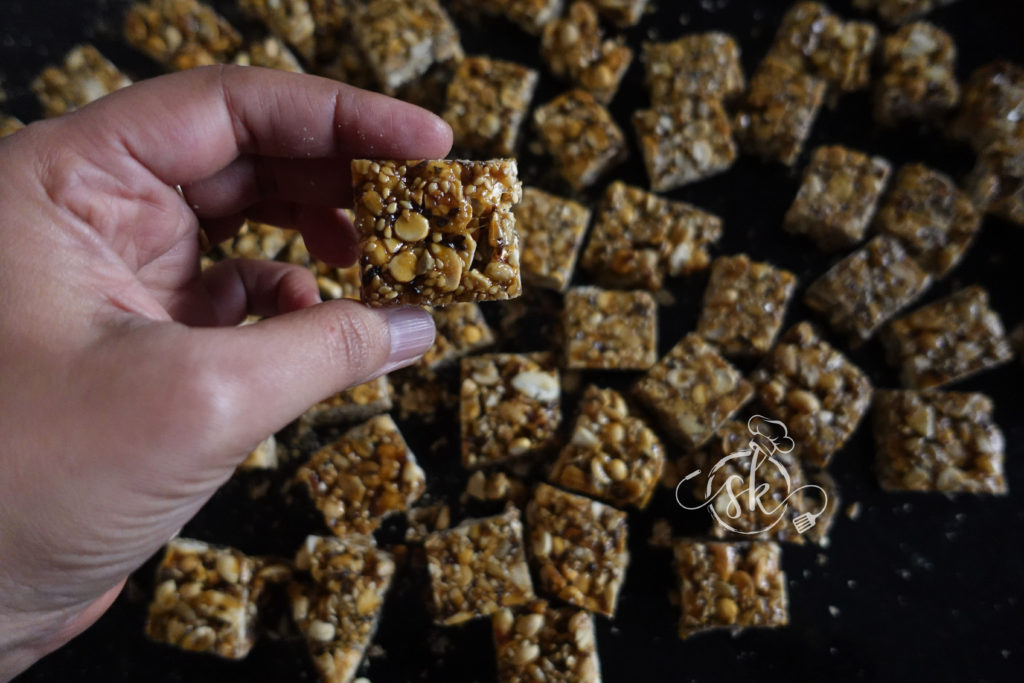
Makara Sankranti and Sesame/Til seed are very much associated with each other. Every year my kids look forward to having their favourite Chikki on this auspicious day. This time I wanted to make a different type by enhancing its nutritional value by adding other ingredients too. Finally came up with this recipe. 

chikki main

Here I have taken one big water tumbler as a measuring cup.
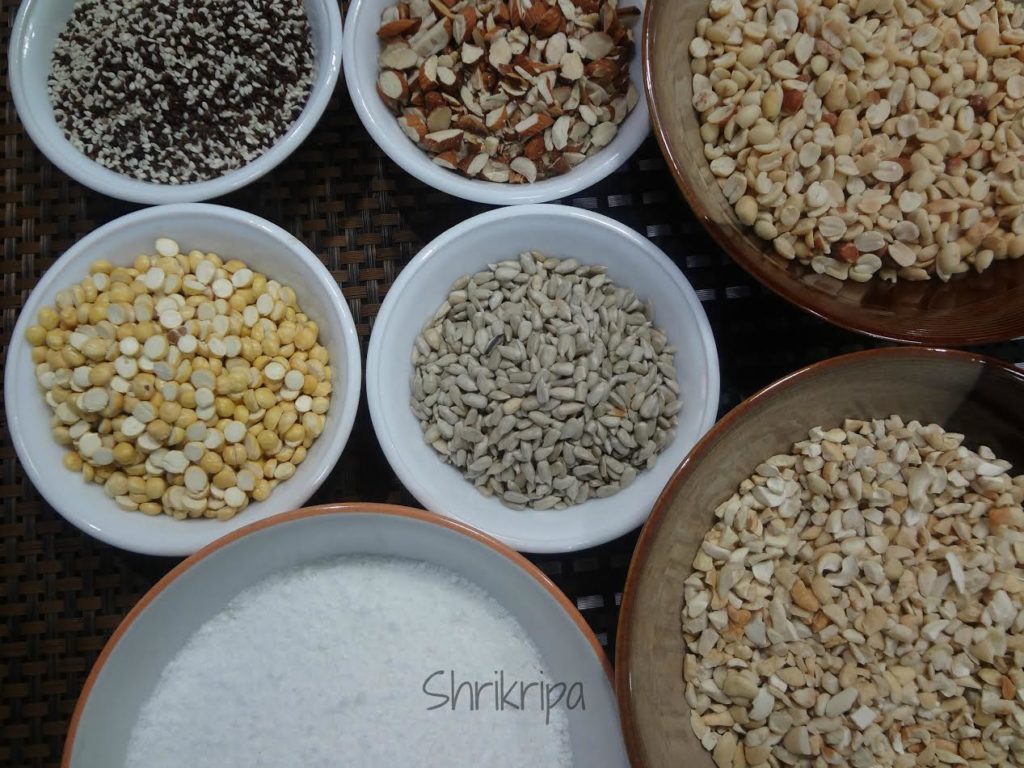
Ingredients:

Peanut: 1 cup

Sesame seed – ½ cup (white and black mix)

Sunflower seed -1/2 cup (de-skinned one)

Roasted gram – ½ cup

Almond – ½ cup (slice or chunks)

Cashew bits – ½ cup

Desiccated coconut – ½ cup

Sugar – 2 ¼ to 2 ½  cups  ( if light sweet, add 2 1/4 cup otherwise, add more) 

Ghee/clarified butter – 2 tablespoons

Cardamom powder – 1/2 tsp 

Method:

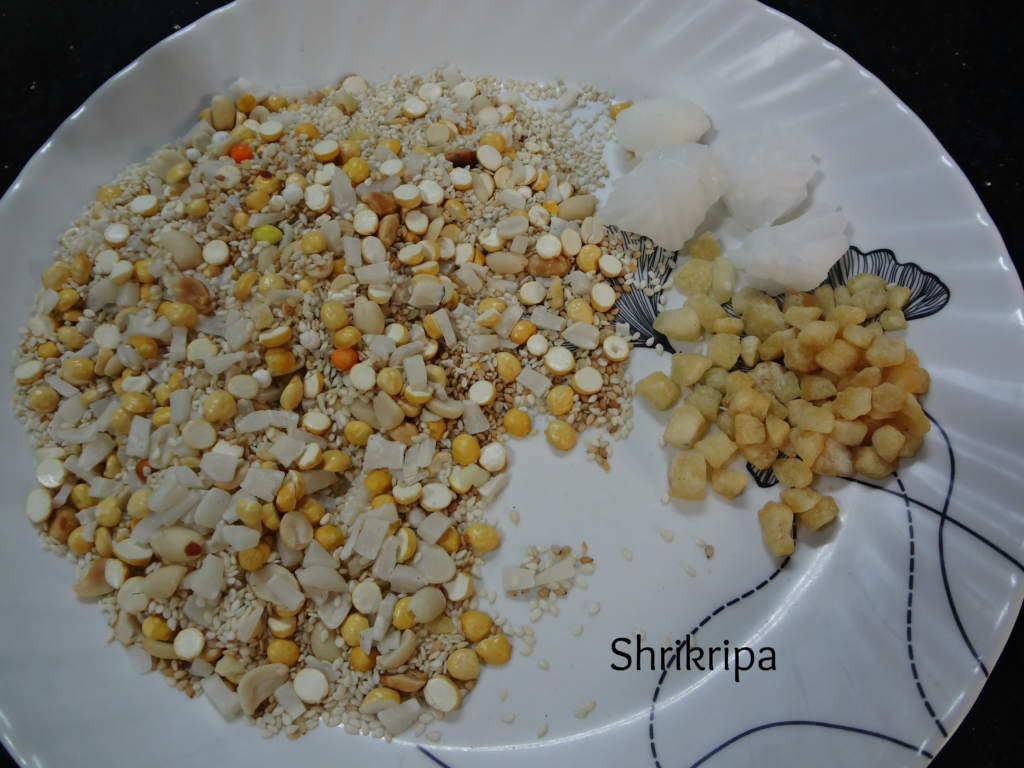
-Dry roast peanuts, remove the outer skin and make halves.

-Now dry roast sesame seeds, Sunflower seeds, Roasted gram, almond chunks, and Cashew bits one by one and keep aside. For roasting, you can use a stovetop method or microwave.

pic 1

-When it’s a little cool, add desiccated coconut, cardamom powder and mix nicely. Keep it aside.

-Take one rolling pin and apply little ghee and keep aside.

-Now we have to make the caramel by adding sugar and ghee in a thick bottomed vessel/tawa. Keep this on a stovetop, heat it until it attains liquid form and becomes light brown in colour. This is caramel. (Please refer to the below picture for stages to attain light brown colour)

pic 2pic 3

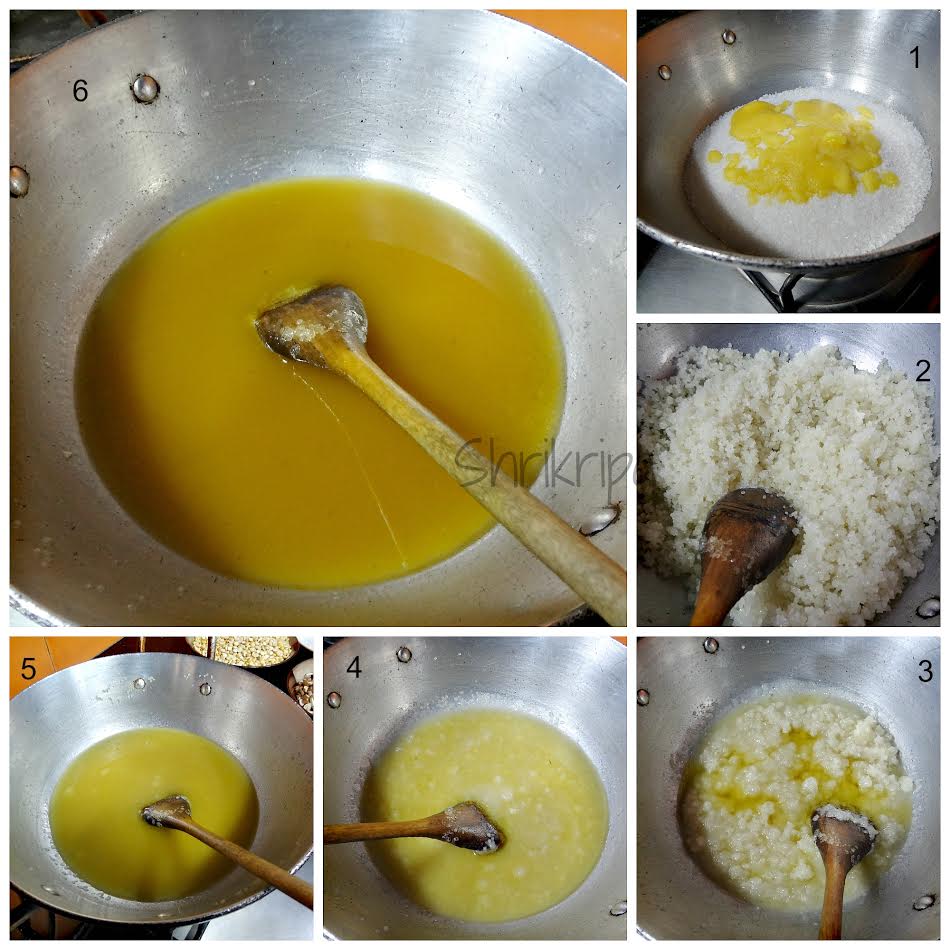
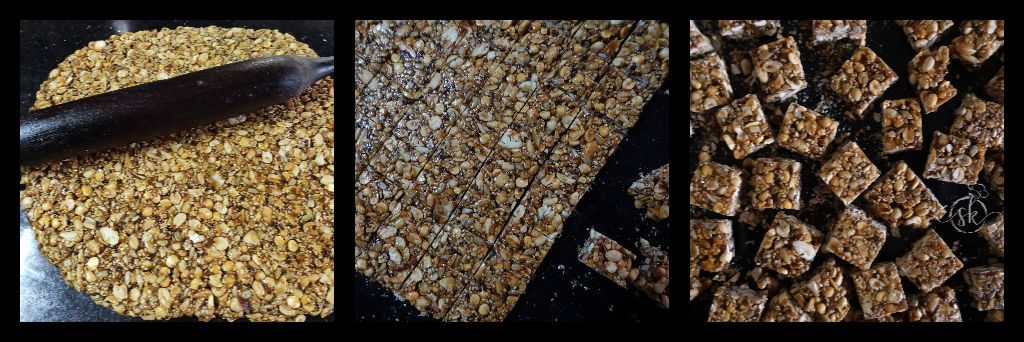
-Without wasting any time, mix in the nuts and spread this on a wooden plank or on a clean kitchen platform. Use ghee applied chapati rolling pin (belan) and spread this mixture nicely till it is uniformly flat.

-Leave this for 5 minutes. Take one knife and mark, cut it into the desired shape. After it cools down completely you can store this in an airtight container.

Chikki Preparation by Using Jaggery: (Ratio should be 1 part of dry fruits: ½ part of jaggery)

Follow all the steps precisely like Sugar added chikki. You can omit or add any ingredients according to your wish.

Instead of Sugar, take grated jaggery, loosely fill the cup and measure, by using the cup in which you are taking the ingredients.

-First, take the jaggery, put water, ghee. Heat the solution and strain. If any sediment or tiny particles, it would go away, and the final result would be perfect.

-Then start boiling, until it reaches the frothy, thick. At this stage, pour one drop of the liquid in a small cup of water and check. It should come together, like a crystal and you should be able to break it easily.

-If it is not yet ready, it will come(extend) like a chewy thread. You will not be able to break it.

-If it is ready, pour all the roasted dry fruit, mixed and kept into the solution. Switch off the gas. Give a stir, spread, and follow all the steps like a sugared one, which I have dealt earlier.

-Enjoy all the goodness without a pang of guilt.

NOTE: -I would suggest the usage of Sugar for the first-timers. It is foolproof and easy.

-After a couple of trials with Sugar, you would be knowing about the stages and gradually shift to jaggery.

-Here, I have taken round, organic ball jaggery, made into chunks by using the stone pestle.


Buddha’s delight:

It is a vegetarian dish well known in Chinese and Buddhist Cuisine.We love Buddha’s delight at our favourite restaurant Chung wah. Their version has lemon grass flavour in the gravy, and we especially like this flavour. I wanted to try their version of veggie Buddha’s delight at home from so long. Finally I did try it this week for our dinner.

So I thought of making lemongrass infused water for preparing it and proceeded. I used the available veggies in my pantry. You can use them according to your choice. You can add couple of tofu pieces as well.

pic-2

How I prepared:

Vegetables – 1 bowl (took Zucchini, lettuce, onion, carrot, mushroom, capsicum,snap peas)

Chilli vinegar – 1 tsp

Red chilli flakes – ½ tsp

Garlic – 5 cloves

Ginger – ½ “

Green chilli -1

Salt

Spring onion – 2 tbl sp

Corn flour – 1 to 2 tbl sp

Lemon grass – 4 sticks

Water – 2 cups

Method:

-Boil water with lemon grass bits until water becomes little yellowish and lemongrass is cooked.

-Sieve this water and discard lemon grass. This is our lemon grass water which is used for gravy. Keep it aside.

– Chop spring onion, ginger and garlic. Slit green chilli.

– Chop mushroom, carrot.

-Chop capsicum, onion, zucchini into I inch chunks.

– Tear lettuce by using hand and keep aside.

-Take one tawa, put either butter /olive oil .When it is hot, add ginger, garlic and green chilli and fry for a while.

– Add onion, fry for 2 minutes. Next you can add capsicum, carrot zucchini and mushroom. Fry for 2 to 3 minutes and sprinkle little salt and red chilli flakes.

– Next you can add corn flour and fry in this mixture for 1 minute and add lemon grass water.

-when it starts boiling add vinegar. When it becomes little thick and shiny add torn lettuce and garnish with chopped spring onion.

pic-3

-Enjoy this either with fried rice, noodles or simple steamed rice. It is very filling, nutritionally very rich and taste wise – Pure bliss!!!!

Chana Saarupkari /Chickpea Rasam:

In last post we did chana and ivy gourd dry curry and I promised you to post the Rasam which utilizes the drained water of cooked chana or chick pea. This is very nutritious and tasty too.

What we need-

Ingredient:

Drained water of cooked chickpea – whatever you get.

Cooked tor dal – 1/4 cup 

Green chillies -2

Salt

Jaggery – 1/2  tsp

Hing – ¼ tsp

Seasoning:

Coconut oil – 1 tbl sp

Mustard – 1tsp

Red chilli – 1

Curry leaves – 1 spring

Crushed garlic – 6

Method:

-Drain water from the cooked chana or chick pea while making any curries.

-Boil this drained water by adding 1 cup of water, cooked toor dal, salt (if needed) ,jaggery, hing, green chillies.

-Cook until green chillies are cooked and flavour  is released to water.

-Add seasoning by heating coconut oil. When it is hot, add mustard. When it splutters add  red chilli, curry leaves, crushed garlic.

-Fry till garlics are brown and add this seasoning to Rasam.

Enjoy this Rasam with hot rice and any side dishes, like chickpea dry curry and papad.


Manoli Kadle Ajadina /Thondekai Kadle palya /Ivy gourd and chick pea Dry curry:

This is one of our family favourite curries, which is loved by all. We make two types of curries by using ivy gourd and chickpea.

One is with onion and garlic, other one without it.

This name is derived from Tulu language, which is a local language of Mangalore. Manoli is ivy gourd or Tindora, Kadle is black chick pea and Ajadina is dry curry.

This particular masala is used in Bunt community of Mangalore and it is an integral part of their festive cooking.

How I make this-

Ingredient:

Ivy gourd – ¼ to ½ kg

Black Chick pea – 1 cup

Salt

Jaggery – ½ tsp (optional)

For Masala:

Fresh grated coconut- 1 cup

Coriander seeds – 1 tsp

Cumin – ½ tsp

Urad dal – 1 tsp

Methi/ fenugreek seed – ½ tsp

Dry red chillies- 3 to 4

For Seasoning:

Coconut oil – 1 to 2 tbl sp

Mustard – 1 tsp

Curry leaves – 1 spring

Method:

-Soak black chick peas in water overnight. Next day discard soaked water and add fresh water, salt and cook this in a cooker for 3 to 4 whistles.

-Wash ivy gourd, cut this lengthwise into 4 pieces. Cook this by putting very little water and salt and jaggery.  keep aside.

-When pressure releases from the cooker, open the lid, drain the water and keep chick pea aside. Don’t discard the drained water. You can make really yummy Rasam or soup out of this.

Next is the masala preparation-

-Heat little oil, fry methi seeds until it is light brown, add remaining ingredients, coriander, cumin, urad dal,  red chillies, and fry nicely.

-Take one mixer jar, put roasted masala, make  a powder, and add coconut into it and whip couple of times to get dry coarse powder.  

Now we can proceed to make palya-

-Take one kadai, put coconut oil, when it is hot, splutter mustard seeds, add curry leaves.

-Now add ground masala and fry for a while.

-Now add cooked chickpea and ivy gourd mix well, check for the salt and adjust.

-Cook this until it becomes like a mass and veggies are coated well with the masala.

-Serve this as a side dish with hot rice.

NOTE:

-Usage of coconut oil will give authentic taste.

-Don’t discard drained water from cooked chick pea. It is very nutritious and you can prepare really tasty Rasam, and it is here.


Pea pod salad:

After peapod pakoda, I wanted to try some more with peapod. Peapods are so rich in flavour as well as taste. So, I tried a salad and it turned out so tasty and healthy. Here’s the recipe.

collage-1

Ingredients:

Peapods –as required

Olive oil – 1 to 2 teaspoon

Garlic – 7 -8 flakes

Salt

Red chilli flakes – ½ – 1 teaspoon

White sesame – 1 teaspoon

Method:

  • Separate fresh and green peels (pods) while opening, to collect green peas.
  • After this, peel off the inner membrane (which will not cook and it is fibrous too)
  • How to remove inner membrane: If you want to see a pictorial guide, click here
  • You basically have to take one of the ends, fold in and pinch inwards, slide your thumb beneath and remove the glossy membrane and separate. If membrane breaks in-between, try from the other side.
  • Discard inner membrane and use outer green cover to make salad.
  • Wash these peels and drain, keep aside.
  • Slice garlic and keep aside.
  • Dry roast sesame and keep aside.

collage

  • Take one tawa, add oil .When oil becomes hot, add garlic slices and fry until it is brown.
  • Add in washed and drained peapods, fry for a while. Sprinkle salt and red chilli flakes.
  • Garnish with toasted sesame seeds and serve.
  • I served this with Spinach Khichdi. Click here to see the recipe.

Millet and spinach khichdi:

Millet’s are tiny cereals, which are low in Carbohydrates and a very good source of Protein, fibre and Vitamins. This is a very tasty, easy to make, healthy one pot meal which makes a very light meal.

millet-1

Ingredients:

Saame rice/Foxtail millet – 1 cup (you can use normal rice as well)

Moong/green gram dhal – ½ cup

Spinach – 1bunch

Cumin seeds – 1 tsp.

Hing – ½ tsp

Ginger – 1” piece

Green chillies – 1 to 2 (slit)

Salt- to taste

Ghee – 1 to 2 tbl sp

Water – 4 to 6 cups

Method:

-Soak dhal and millet rice after washing, for 10 minutes.

-Wash and grind spinach into puree.

-Heat ½ table spoon of ghee in a pressure cooker.

-Add Cumin seeds, hing, green chillies and ginger and fry for a minute.

-Now add spinach puree, water, salt and bring to boil. When it starts boiling, add soaked and drained dal and millet rice mixture.

-Check for salt and cook till 3 to 4 whistles.

-After the pressure releases, open the lid and pour in the remaining amount of ghee.

khichdi


-Enjoy with any crispy side dishes or raita!!!


Green Peapod Pakoda or Pakora:

What do you do with nutritionally rich Peapods after removal of green peas? Usually people throw them away and it is less commonly consumed. Last year, my sister introduced me to snap pea Crispi’s. I liked the taste and wanted to include this treasure house of nutrition in our diet. I tried using them with our regular Indian pea pod a couple of times, and failed to achieve the result. While chewing, the fibre used to hinder us from enjoying the dish, after a couple of failed attempts, I came across This Site in which she has mentioned how exactly we should peel the pod, after removing the peas. Once again, I tried with very little quantity and succeeded. Everyone in my family liked it and asked me to share this recipe. It was so tasty and peapod’s natural sweetness and flavour was the highlight of this pakoda.

pakoda-main-1

Recipe in detail –

Ingredients:

Peapods – as required

Oil for deep fry

For batter:

Bengal gram flour /Besan – 1 cup

Salt

Green chilli – 1

Red chilli powder-  ½ tsp

Curry leaves – 1 spring

Chopped Coriander leaves – 1 tsp

Cooking soda –  a pinch

Method:

-Separate fresh and green peels (pods) while opening, to collect green peas.

-After this, peel off the inner membrane (which will not cook and it is fibrous too)

-How to remove inner membrane: take one of the ends, fold in and pinch inwards and slide your thumb beneath and remove the glossy membrane and separate. If membrane breaks in-between, try from the other side.

pic-5

-Discard inner membrane and use outer green cover to make pakodas.

pic-1-jpg-jpg

-Wash these peels and drain, keep aside.

pic-2

-Prepare pakoda batter by putting Besan, salt, chopped green chillies, curry leaves, coriander leaves, cooking soda and water; batter should be like Dosa batter consistency.

pic-3

-Now heat the oil in a kadai and when it is hot, drop pea pods one by one after dipping into the batter.

pic-4-
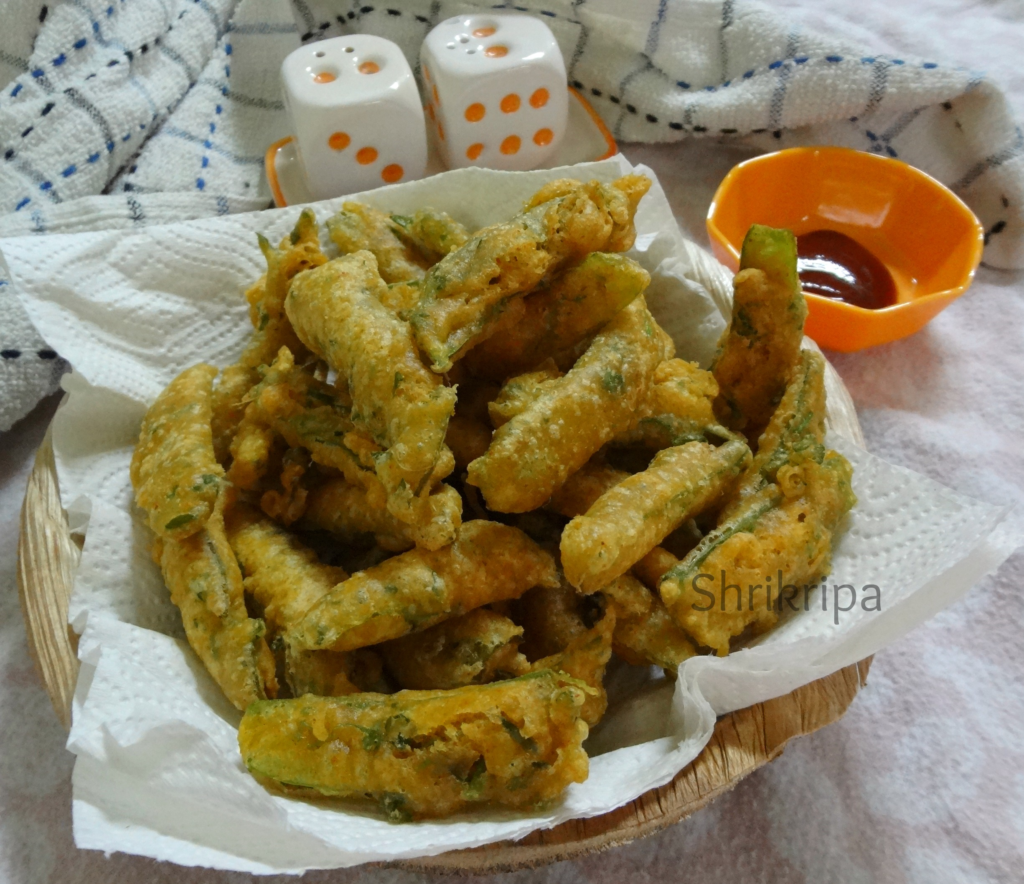
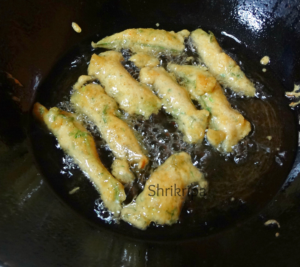
Fry in a medium heat and when it is done, remove these into a tissue laid serving plate.

-Enjoy these pakodas with hot cup of tea or coffee.

Tomato Omelette /Dosa:

tomato-omlette

This time when we went to Sirsi, we stayed at Hotel Madhuvana. When I looked at their menu, I was very curious to taste this special omelette, and ordered the same .When I tasted it, it was this amazing blend of flavours, and not at all like the usual tomato omelette which I prepare. Everybody liked the taste. It was little sweet, tangy at the same time filled with flavour. Immediately, my curious mind, started to check the ingredients. I had asked my hubby to note it down, one by one while I was checking the ingredients .After coming back, I took that list and tried to imitate the same and succeeded. Here I am, sharing this super tasty Dosa recipe.

Ingredients:

  • Dosa rice- 3 cups
  • Fenugreek/methi seed -2 tsp.
  • Beaten rice/poha- 1 ½ cup
  • Coconut – 2 fists full (grated)
  • Jaggery -2 table sp.
  • Salt –to taste
  • Turmeric – ½ tsp.
  • Eno fruit salt or cooking soda – 1tsp (optional)
  • Cumin- 1tsp.
  • Grated ginger – 1 tsp.
  • Firm tomatoes – 2
  • Coriander leaves – 2tblsp.

Method:

-Wash and soak Dosa rice, beaten rice and methi for 2 to 3 hours.

-Grind this into a smooth paste by adding turmeric, salt, jaggery, coconut to an idly batter consistency (little thicker than normal Dosa).

-Pour this batter into one big vessel, add jeera and keep it aside for fermentation.

-If you are living in the cold climate, next day morning add 1 tsp. Eno fruit salt, mix nicely and keep it aside for 10 min.

-Now chop Tomatoes, coriander leaves and grated ginger.

tomato-omlette-batter

-Mix this into Dosa batter and start making Dosa by pouring one serving spoon of the batter on a hot iron or non-stick tawa, don’t spread much. You will see thousands of holes on the upper surface. Smear with butter or clarified butter. When it is cooked, flip and cook on another side too. Serve this spongy tomato omelette with coconut chutney. Here I have served this with coconut-ginger chutney.