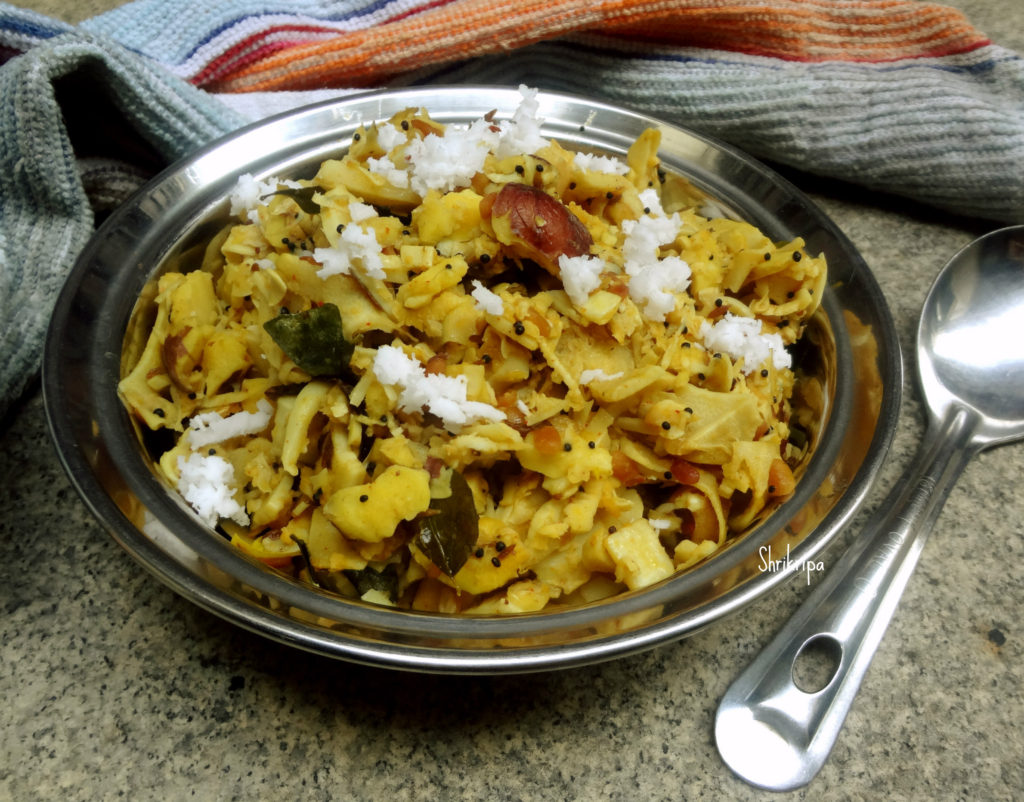
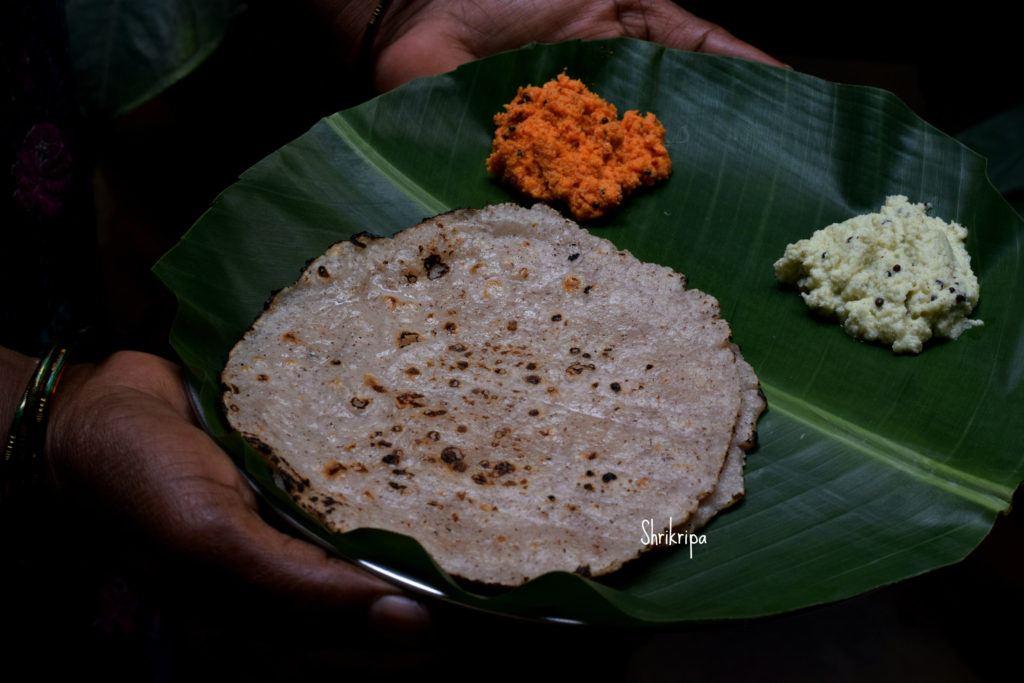
Made Ubbu Rotti for today’s lunch, one of the most laborious and very tasty dishes of south canara region. It is a simple rice flat bread and made by soaking Red rice. This is an age old, gluten free and healthy flat bread.
Ubbu Rotti is made as well as served in different styles. Each household has their own method even though the basic ingredient is the same Red rice which is also known as boiled rice or Kerala Matta rice.
In our household we make the Rotti by soaking Red rice and Idli rice in hot water and ground to smooth batter with salt. The ready batter is then cooked on a low heat to make a dough. Then it is pressed into discs by keeping in-between the two plantation leaves. In our native, people use clay tawa to cook the roti. I normally use my Iron Roti tawa. After cooking on both the sides, normally in villages, we put it on “Kenda” (hot burning firewood) to puff up nicely. Here I normally use direct gas flame to do the same. It is low in calorie as well as very healthy and tasty.
While serving, some families prefer chutney and some Malabar spinach gravy. It depends on one’s family preference. In our household, my Mom used to serve Garlic or Onion chutney and Mom -in -law used to serve with Raw mango chutney.
I have mentioned that it is laborious at the beginning itself. You must be thinking by now, why? It is very simple and straight forward and sounds easy as well. I am telling you, it is one of the most difficult recipes to master! Because it needs a lot of patience and time. Roti cooks really slow and vanishes very fast as well 😉 Once you get a hold of it, you can make it very easily. So, if you attempt and practice you will get the hang of it and can make easily.
Ingredients:
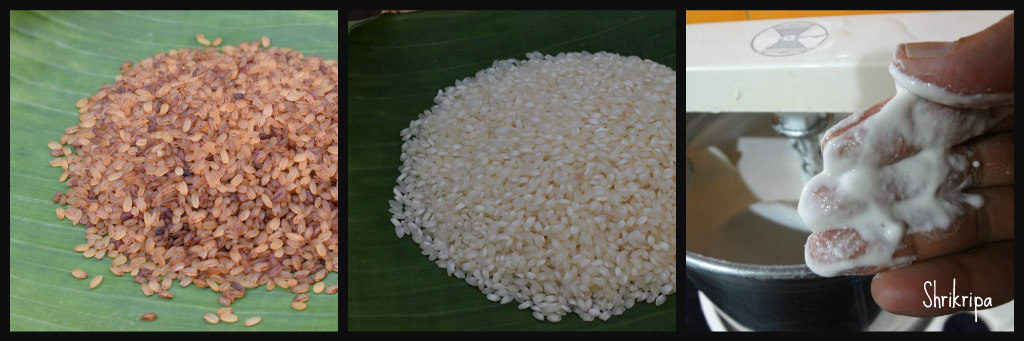
Boiled rice – 1 cup
Idli rice – 1 cup
Salt
Coconut oil – to apply
Method:
-Wash rice and soak it for one to two hours by adding hot boiling water and close the lid.
-Grind into smooth batter by adding enough water.
-Cook the batter( I normally add 1 tsp of coconut oil to batter to enhance the taste) until it forms a dough consistency.
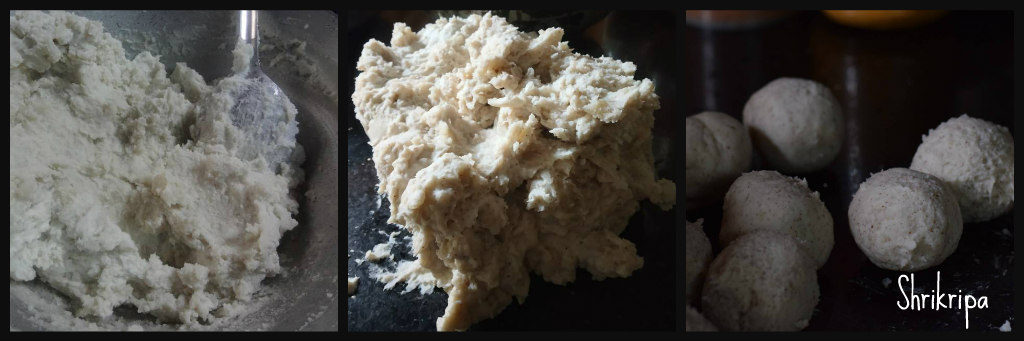
-Take out and cool a little and start making the discs.
-Take small banana leaves, wash and keep it ready as well as a roti presser or two wooden planks to press.
-Take a big lemon size dough and knead a little and form a round shape.
-Take one banana leaf, place it on a roti presser. Place the dough roundel over it and close it with another leaf and press the presser. If you are using plank, do it exactly like this by using the plank.
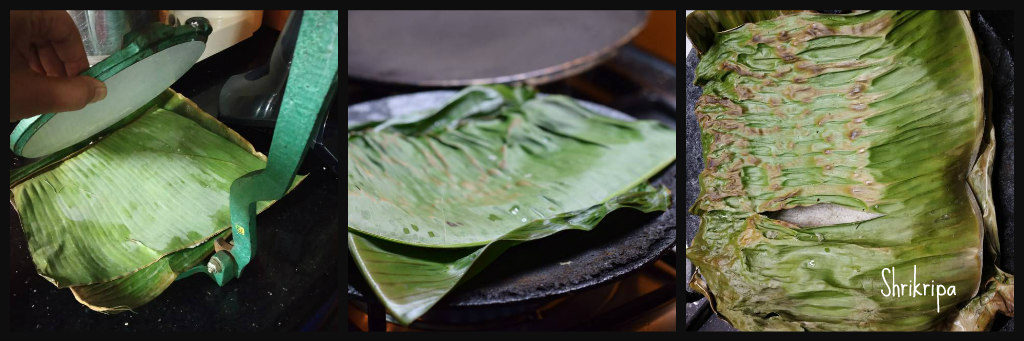
-Heat the griddle, place the discs (including banana leaf) over the hot iron griddle. Cook in a medium heat.
-Flip the sides couple of times, when roti cooks, leaf will become loose and at that moment, remove the leaf and discard it.

-continue to cook the roti, until you see the light brown spots. Now it is the time to place it on the direct fire and do it. Some would puff, some would not or partially puff.

-That is it. Remove, apply some coconut oil and enjoy with Onion/garlic chutney or Raw mango chutney or Malabar spinach curry.