Kadu Mavina hannina Sasive / Wild Mangoes in coconut and mustard sauce:

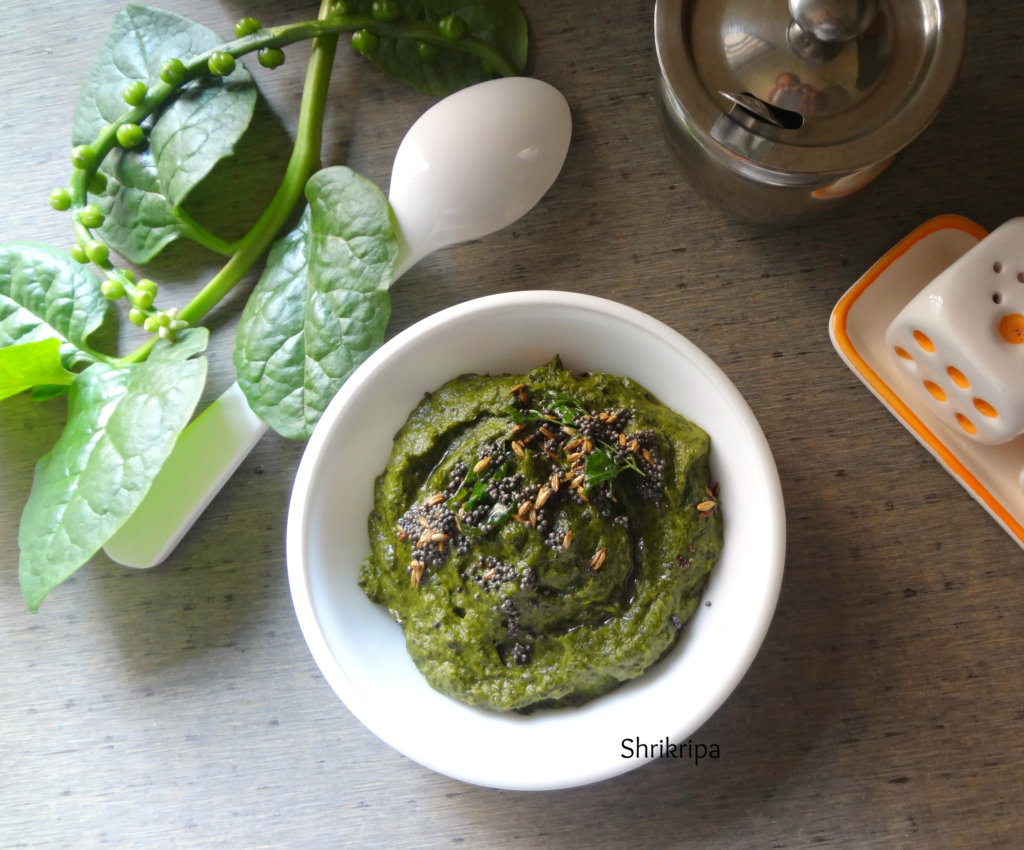
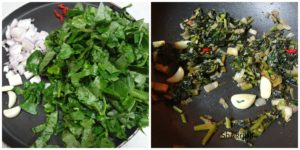
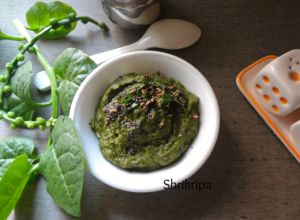
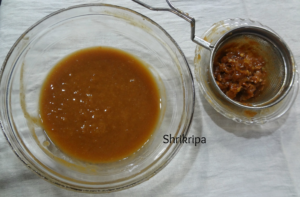
Wild mangoes are known as Kadu mavina hannu in our local language. Which is very fibrous, tangy as well as sweet in taste. It has distinct taste, it is widely used in varieties of curries in our region. This particular curry doesn’t need any heating and is a perfect treat for summer. Usually we enjoy this with hot rice.

unnamed

Ingredients:

Wild mangoes -5-6

Salt – to taste

Jaggery – to taste

Fresh Coconut gratings – 1 bowl
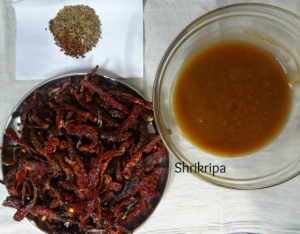
Red chillies – 2

Mustard – 1 tsp

Seasoning: Coconut oil – 1 tsp, mustard – 1 tsp, Red chilli – 1, Curry leaves – little.

Method:

–  Wash wild mangoes, remove top part of the mango, remove outer skin and keep this in a separate vessel. Keep inner fruit part in another vessel.

unnamed (1)

  Add one cup of water to outer skin, mash nicely, collect pulpy water and add this to fruit. Discard outer remaining skin. Add required amount of jaggery, salt and mix.
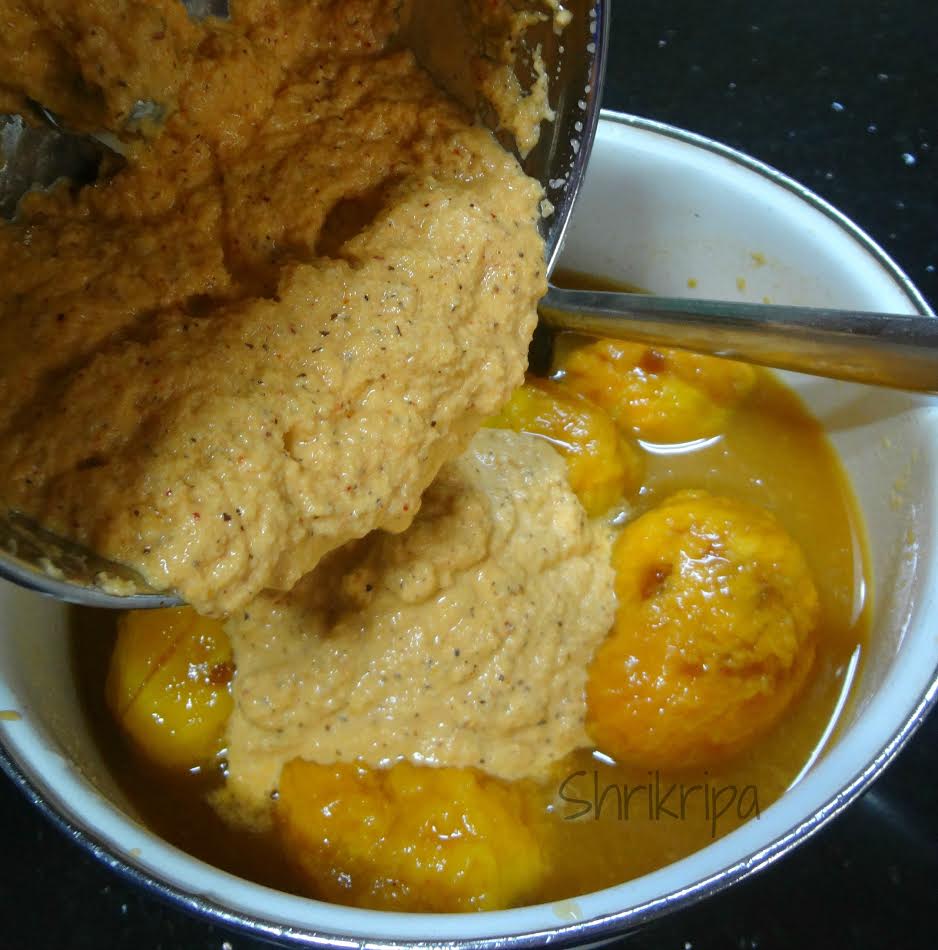
  Grind fresh coconut, mustard and red chillies to a fine paste by adding little water.(No need to roast Chillies and mustard)
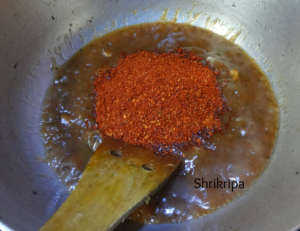
  Add this ground paste to mango and check for the seasoning. If needed add some more grated jaggery or salt.
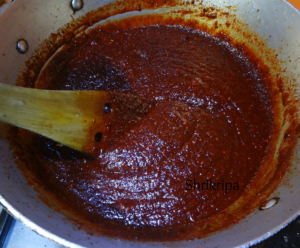
                      unnamed (2)

  Season by using coconut oil. When it is hot, add mustard, after it splutters, add red chilli and curry leaves, add this to mango curry.

  Enjoy this with hot rice.

NOTE:

-If you don’t have access to wild mango, don’t worry. Pick up any varieties of mango, peel the outer skin and chop the fruit into bite size pieces and proceed with above method.


Bitter gourd salad:

Bitter gourd is a very healthy vegetable and is considered as a therapeutic vegetable, used mainly in controlling diabetes and weight reduction in Ayurveda. I have come up with this recipe to utilise fresh produce from my terrace garden. We are a bitter gourd loving family and my daughters are very fond of gourd in any form. I usually make dry curry or tawa fry but I tried my hand at this salad and everyone loved this as a side dish with rice and yellow dal.

collage

Ingredient:

Bitter gourd – 2 to 3

Onion – 1 to 2 (chopped)

Green chillies – 3

Salt

Turmeric – ½ tsp.

Lemon – ½

Coriander leaves – 1 tbl sp (chopped)

Coconut Oil – 1 tbl sp.

Method:

-Wash bitter gourd, make bite size pieces, including outer skin and inner seeds. Chop green chillies and put together.

– Sprinkle some salt, turmeric and mix nicely and keep aside for 10 minutes.

pic 2         pic 3

-Take one tawa, put oil. When it is hot, put marinated bitter gourd and chilli pieces and fry in a low flame until it is crisp.

– Cool this mixture. Add chopped onion, some more salt, lemon juice and mix nicely and serve.

pic 5

-It is very simple to make and tastes really great with hot rice and dal.

Kadle Bele –Gerubeeja Payasa / Chana dal and Cashew Kheer:

Happy Yugadi! Yugadi is celebrated as the beginning of a new year in India (but through different names). In Bangalore, we start this festival by eating neem and jaggery. Neem denotes the bitterness we face in life, and the jaggery represents all the sweet things of life. By eating the neem and jaggery together, it is a symbol of promising ourselves to face the bitterness and sweetness of life with confidence.           

In Mangalore, we celebrate this festival by savouring a kadle Bele (Bengal gram or chanadal) and gerubeeja (raw cashew) Payasa. It is a delicious dessert which is made more delightful because of the cashew nuts which are present in every spoonful.

pic main

We will see the procedure –

Ingredients:

Chana dal/Split Bengal gram – 1 cup

Whole raw Cashew – 1 cup

Coconut milk – 1 tetra pack

Jaggery – 1 ½ block (used Organic jaggery blocks)

Cardamom powder – ½ tsp.

Salt – ½ tsp.

Method:

-At first we have to remove outer cover of the young cashew. Take one bowl, put all those young and raw cashew kernels into it, pour boiling water and keep it aside for 10 to 15 minutes by closing the lid.

-When outer cover of the kernels swells, remove the outer cover and keep aside.

collage 1

-Wash chana dal and cook this in a cooker by putting sufficient water for two whistles.

-Cook dal till it is perfectly cooked. Dal should be well cooked and easily crushed. Doneness is very important, after adding jaggery, dal becomes little stiff and firm.

pic 2

– When its pressure relieves add cashew kernels and cook. After one whistle, switch off the gas and cool this.

-Now add salt and jaggery and boil till you get a nice aroma and till the raw smell of jaggery disappears.

pic 3

 – When it is done, add one tetra pack of coconut milk and give one boil. That is it. Garnish with powdered cardamom and enjoy.              

           pic 12              pic main

        Note: –

          If you don’t have access to raw cashew kernels, you can use regular cashew and you can cook this with Chana dal for 3 whistles and proceed by adding jaggery.

           If you are using fresh coconut for extracting milk, take grated coconut (from one coconut), add one cup of water and grind, and extract milk. (This is a thick extract and should be added at the end)

          Once again add little water and grind, to take out thin milk and you can add this while boiling jaggery.

          If you are using regular jaggery, at first self-boil this with little water, make a liquid and sieve this before adding to the kheer, to remove impurities.


Basale chutney / Malabar Spinach chutney:

Malabar spinach is commonly known as Basale in our coastal area. It is a common creeping vein in the backyard of every household.

Its leaf is very rich in iron, fibre, antioxidants and vitamins and low in calorie. This chutney that I prepare is very delicious and finger licking good!! One can enjoy this as a side dish with hot rice or roti. Here I have used bird eye chilles which is commonly known as gandhari chillies. These are tiny, very hot chillies of our region.

pic main

Ingredients:

Basale leaves – 1 bowl (chopped)

Onion – 1 (chopped)

Garlic cloves – 4

Green chillies or bird eye chillies – 2 (as required)

Salt

Jaggery – 1tsp

Tamarind – ½ tsp

Oil – 1 tbl sp

Seasoning: Oil – 1 Tsp, mustard – ½ tsp, cumin – ¼ tsp and curry leaves.

Method:

  • Take little oil in a pan, add chillies, chopped onions,garlic and fry for a while.
  • When onion becomes light brown, add chopped basale leaves and fry until it wilts.

collage 1

  • Add salt, jaggery, tamarind and cook for a while.
  • When it is done, switch off the gas.
  • Cool the mixture and grind this into smooth paste. If required add very little water.

pic main 2

  • Season with oil, mustard, cumin and curry leaves.

Tamarind Pickle:

pic 1

Tamarind has a very important place in the Indian kitchen and it has loads of health benefits as well as it is a treasure of anti-oxidants and dietary fibres.

Indians love its tangy and sweetish taste and enjoy this in chutney, relish, digestive candies, pickles and more.

tamarind 1            tamarind 2

From childhood, I used to enjoy tamarind pickle and never knew about the recipe. Thanks to my brother-in-law who sourced the recipe and made it possible for me to enjoy this relish after so many years.

This is a family recipe of one of our friends from Mangalore and speciality of the local Jain community form coastal region.

Ingredients:

Tamarind- 100 grams

Dried red chillies – 200 grams (Byadagi variety)

Jaggery – 250 grams

Salt – 8 to 10 teaspoons

Water – 3 to 4 cups

Fenugreek /methi seeds – 1 tea spoon

Cumin – 2 tea spoon

Gingelly oil – 1 to 2 table spoon.

Mustard – 1 tea spoon

Garlic – 5 to 6 cloves (crushed)

Curry leaves – 1 spring

Method:

  • Soak tamarind and grated jaggery in water for some time.
  • When it becomes soft, nicely squeeze out and sieve the liquid.

pic 9           pic 10

  • Discard all the roughage and fibres.
  • Dry roast methi and cumin.
  • Roast red chillies by putting very little oil.
  • Powder all the roasted items by using dry mixer jar.
  • Now keep one thick bottomed vessel on the gas stove, put oil and do seasoning.
  • When oil is hot, splutter mustard seeds, then add crushed garlic and curry leaves.

pic 11                pic 12

  • Pour tamarind and jaggery concentrate, salt, ground masala powder and boil.
  • After boiling it for some time, upper layer of the mixture will look glossy and it is the sign for its doneness.
  • Switch off the gas, cool this mixture completely and store it in dry glass bottles and keep outside for two days to set and afterwards keep it in the fridge.

pic 6

  • It will stay up to one year if you store it in the fridge.


Home-made Turmeric powder :

Turmeric is one of the most important spices we use in everyday cooking. It has so many health benefits and is commonly used to heal Cold and cough in infants. When my kids were small and when I started to give them turmeric milk to heal their sour throat, I was really thinking about making homemade turmeric powder as I was very uncomfortable using readymade powder, after hearing about it being adulterated.

So I started growing turmeric at home. Every year, usually at the time of June, fresh turmeric will start sprouting and we should plant them at that time .It will take six months to grow and when it is ready, the plant will start wilting and leaves will become yellowish brown and become dry. This happens during end of December and is then ready to harvest.

unnamed (3)

This method is what my maternal grandmother used to follow-

Method:

-Take fresh turmeric rhizomes, remove mud, extra roots etc. Wash it several times until it is clean.

-Now slice those rhizomes.

unnamed

-Take one cooker vessel and put all these sliced pieces and steam cook (without cooker weight) in a cooker or idly steamer for 10 to 15 minutes.

unnamed (1)

-Remove this and dry under the sun for 2 to 3 days or until it is crisp. Usually it takes 2 to 3 days.

unnamed (2)

-When it is crisp, take small mixer jar and powder it.

– Sieve this and collect fine powder and repeat this process until all the dried slices are powdered.

unnamed (4)

-Store this in a dry airtight container.

Millet and spinach khichdi:

Millet’s are tiny cereals, which are low in Carbohydrates and a very good source of Protein, fibre and Vitamins. This is a very tasty, easy to make, healthy one pot meal which makes a very light meal.

millet-1

Ingredients:

Saame rice/Foxtail millet – 1 cup (you can use normal rice as well)

Moong/green gram dhal – ½ cup

Spinach – 1bunch

Cumin seeds – 1 tsp.

Hing – ½ tsp

Ginger – 1” piece

Green chillies – 1 to 2 (slit)

Salt- to taste

Ghee – 1 to 2 tbl sp

Water – 4 to 6 cups

Method:

-Soak dhal and millet rice after washing, for 10 minutes.

-Wash and grind spinach into puree.

-Heat ½ table spoon of ghee in a pressure cooker.

-Add Cumin seeds, hing, green chillies and ginger and fry for a minute.

-Now add spinach puree, water, salt and bring to boil. When it starts boiling, add soaked and drained dal and millet rice mixture.

-Check for salt and cook till 3 to 4 whistles.

-After the pressure releases, open the lid and pour in the remaining amount of ghee.

khichdi


-Enjoy with any crispy side dishes or raita!!!


Munge Dosey/Coconut Sprout Dosa:

Come December, coconuts start sprouting and in our native, Agricultural background people will become so busy with seasonal activities. Usually December –January is the time frame to make coconut oil. First thing of the process starts by removing all the coconuts from the attic, where it was stored after each harvest.

Then comes, removing outer husk and inner fibre. Third job is breaking each and every coconut from the lot. This is the time; we find lots of sprouts, inside the coconut and these sprouts are so tasty to eat and spongy in texture.

Sprouted Coconuts or coconut sprouts are the edible spherical sponge-like cotyledons of germinating coconuts. They have a crunchy watery texture with a slight sweetness. They are eaten in coconut-growing countries either as is or as part of various dishes. We call it as munge, “sprout” which is a default name of coconut sprout and dosey which we prepare out of it is “Munge dosey”

People eat it as it is or make some delicacies. One of such item is Coconut sprout Dosa, which is very delicious and  it has a mild earthy  flavour. When I went last month to my native, my mom in law gave me some coconuts and one of the coconuts was sprouted and I felt so happy to see this sprout. First thing that came to my mind was this Dosa and I felt Nostalgic by thinking of my childhood.

Ingredients:

Dosa rice – 2cups

Coconuts sprout -1 ( if you have 2 sprouts, no need to add grated coconut)

Grated Coconut – ½ cup

Salt

Method:

Wash and soak Dosa rice for 3 to 4 hours. Chop coconut sprout in to small chunks.

-Grind soaked rice with chopped pieces of 2 sprouts, or one sprout with grated coconut by adding little water and salt.

-Make smooth paste. This batter must be like our regular Dosa batter and there is no need for fermentation.

-You can make use of this batter straight away. Usually we prepare this batter in the morning itself.

-If you want to prepare this batter in the evening, to make the Dosa in the morning, you can store the batter in the refrigerator.

-To prepare Dosa, heat iron Dosa tawa. When it is hot, don’t apply any oil .

-You can pour one serving spoon of batter and make Dosa like our regular Dosa. Pour ½ tsp of ghee and Close the lid. Or make little thinner batter and pour like a Neer Dosa or rawa Dosa.

-When it shows little brownish spots here and there, flip the side, cook upper side and serve with Coconut and onion chutney or honey or liquid jaggery syrup with ghee.

Note: If you have more than one sprout, no need to add grated coconut while grinding. Instead of one sprout, use two.