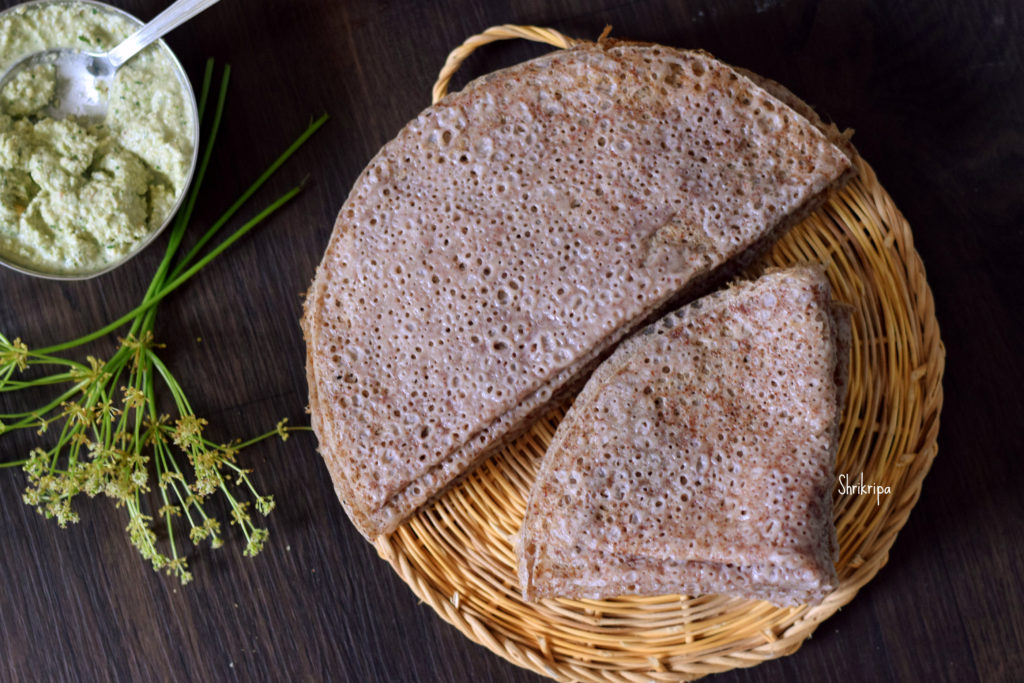
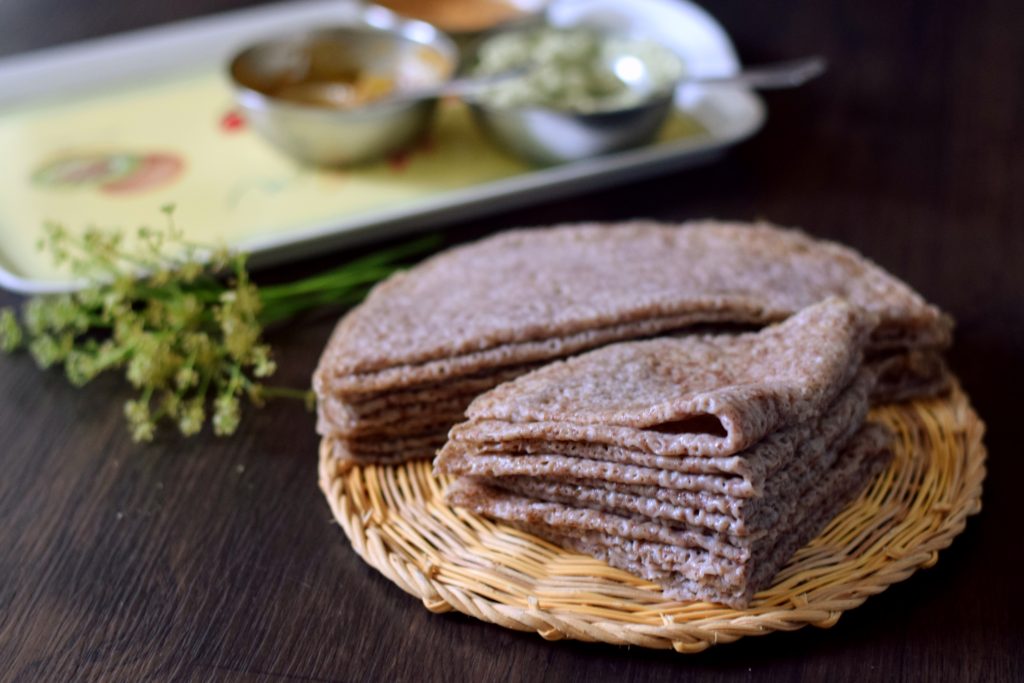
Bannangayi Dosey /tender (young) coconut Dosa:

When I was a little girl, my mom used to work, and I used to spend the summer vacation at my grandparents’ house. I used to enjoy at the farm house by having an unlimited supply of Mangoes, tender coconut, pineapples etc.

There used to be abundant supply of fallen young coconuts, also called ‘bannangayi’ which have much harder flesh than what we get in the normal tender coconut carts over.

My aunt used to make a very tasty Dosa out of this and we used to relish this along with chutney and Jaggery syrup topped with homemade ghee.

Yesterday, when we had tender coconuts here in Bangalore, inner pulp was very thick and couldn’t eat. So, I thought about Dosa and prepared this after ages. It was such a nostalgic moment for me. Let us see how to make this tasty Dosa.
Ingredients:

Tender coconut – 1

Dosa rice – 2 cups

Salt

Method:

-wash and soak Dosa rice for 3 to 4 hours.

-Grate or chop tender /young coconut and keep aside.        


-Grind soaked rice with grated young coconut by adding little water and salt and make smooth paste. This batter must be like our regular Dosa batter and there is no need of fermentation.                           

-You can make use of this batter straight away. Usually we prepare this batter in the morning itself.

-If you want to prepare this batter in the evening, to make the Dosa in the morning, you can store the batter in the refrigerator.

-To prepare Dosa, heat iron Dosa tawa. When it is hot, don’t apply any oil. You can pour one serving spoon of batter and make Dosa like our regular Dosa. Pour ½ tsp of ghee and Close the lid.     
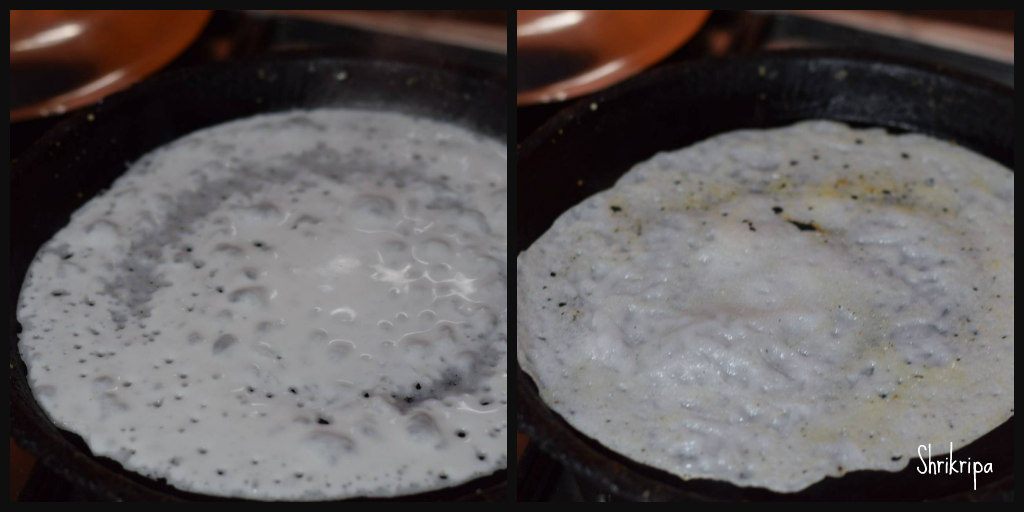
             

When it shows little brownish spots here and there, flip the side, cook upper side and serve with Coconut and onion chutney , jaggery syrup which is topped with ghee or honey.


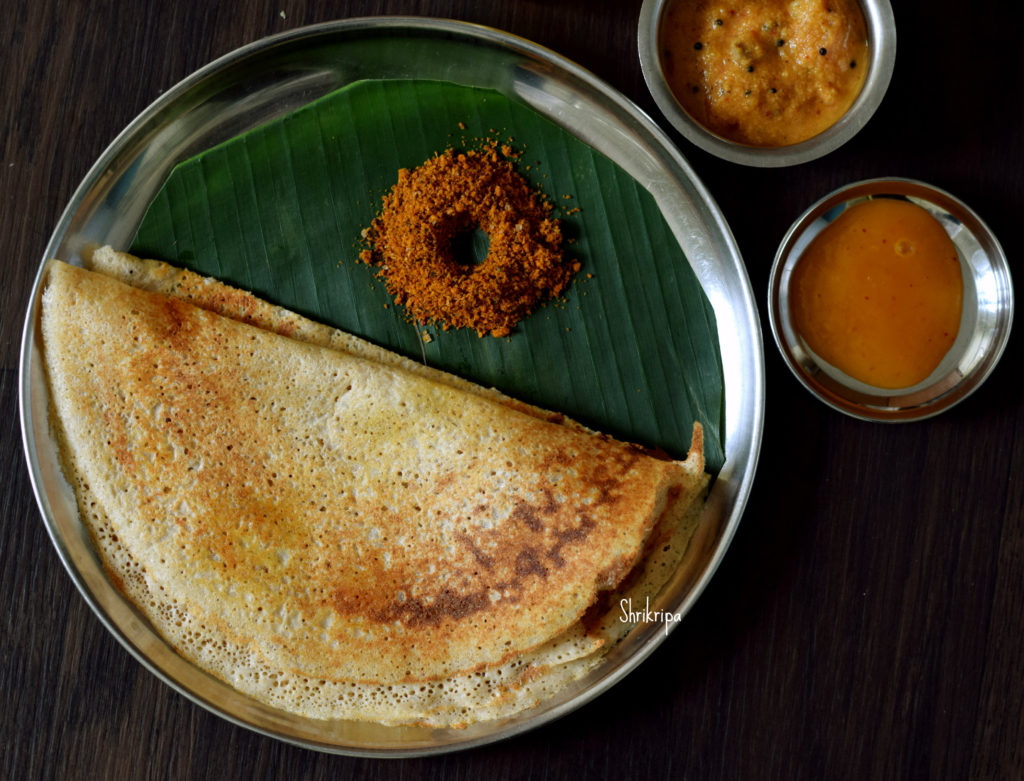
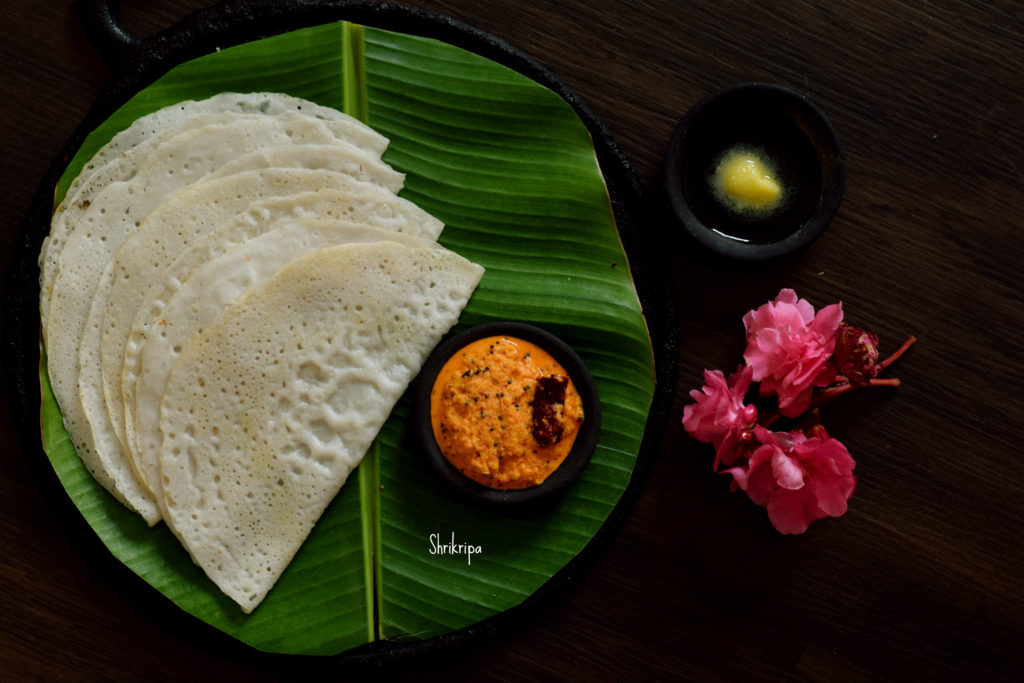
Surnoli: (Bread dosa/ Buttermilk dosa)

Surnoli is a traditional breakfast recipe of south canara; it is also called as bread dosa or buttermilk dosa. This is usually prepared if you have left over buttermilk or curds in excess. Usually we make this by adding jaggery.

Here I am giving both sweet and normal dosa version.

Ingredients:

Dosa rice – 3 cups

Fenugreek seeds – 2 tsp.

Beaten rice /poha – 1 ½ cup

Salt – to taste

Buttermilk /curd – 2 cups

Grated coconut – from half coconut or 2 fists full.

Eno fruit salt – 1 tsp. each (for sweet/normal version)

Grated jaggery – according to taste (2 to 3tbl sp) (For sweeter version)

Turmeric powder – 1 tsp. (for sweeter version)

Method:

  • Wash dosa rice, fenugreek and beaten rice twice; discard water. Pour curds and soak this for 3 to 4 hours.
  • Grind this in to a smooth paste by adding coconut and salt to an idly batter consistency (little thicker than normal dosa)
  • If butter milk is very sour add milk while grinding or else you can add water too (if batter is too thick)
  • Now divide this batter into two, take out one portion of batter into a steel vessel in which you keep it for fermenting. This is our normal dosa batter.
  • For sweeter version, add turmeric and jaggery to the mixer jar and grind until it is homogenous.
  • Remove this batter to another vessel and keep it for fermentation.
  • Next day morning add 1 tsp. Eno fruit salt to both the batter and leave it aside for 10 min.

  • Make a dosa by pouring one serving spoon of the batter on hot iron griddle, don’t spread.
  • You will see thousands of holes on upper surface, smear with butter(Vegan’s can avoid) and cook this in a low flame by closing it with a lid.
  • Cook this dosa only on one side and don’t flip.

    -Spongy bread dosa is ready to serve and indulge in it with homemade butter or any chutney. Here I have served this with Onion-coconut chutney.

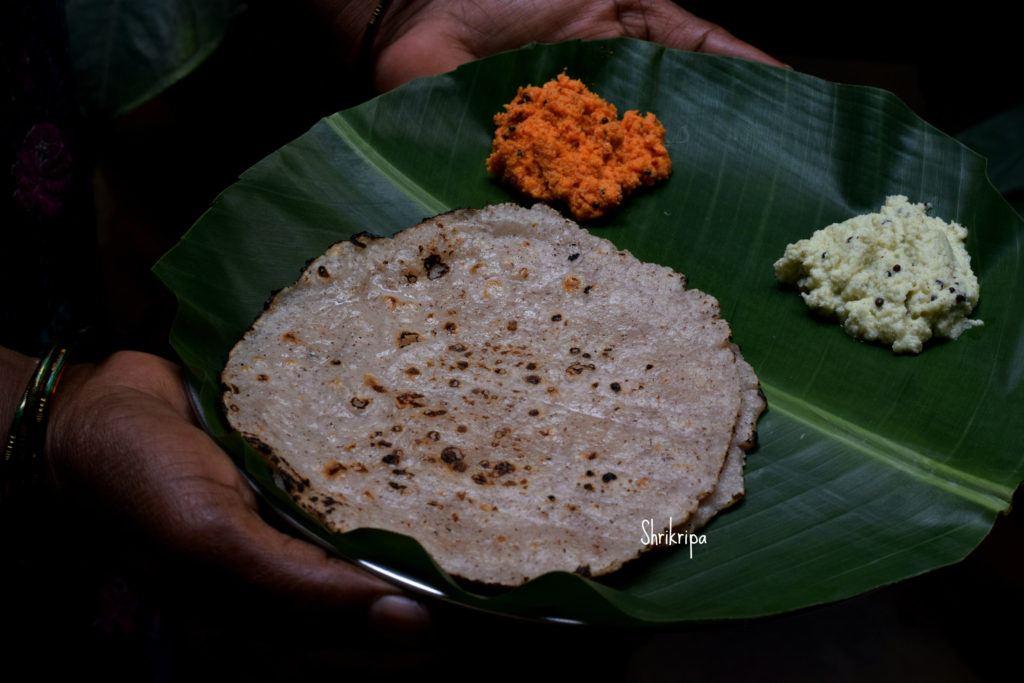
Ubbu Rotti : ( In a Traditional way)

Made Ubbu Rotti for today’s lunch, one of the most laborious and very tasty dishes of south canara region. It is a simple rice flat bread and made by soaking Red rice. This is an age old, gluten free and healthy flat bread.

Ubbu Rotti is made as well as served in different styles. Each household has their own method even though the basic ingredient is the same Red rice which is also known as boiled rice or Kerala Matta rice.

In our household we make the Rotti by soaking Red rice and Idli rice in hot water and ground to smooth batter with salt. The ready batter is then cooked on a low heat to make a dough. Then it is pressed into discs by keeping in-between the two plantation leaves. In our native, people use clay tawa to cook the roti. I normally use my Iron Roti tawa. After cooking on both the sides, normally in villages, we put it on “Kenda” (hot burning firewood) to puff up nicely. Here I normally use direct gas flame to do the same. It is low in calorie as well as very healthy and tasty.
While serving, some families prefer chutney and some Malabar spinach gravy. It depends on one’s family preference. In our household, my Mom used to serve Garlic or Onion chutney and Mom -in -law used to serve with Raw mango chutney.

I have mentioned that it is laborious at the beginning itself. You must be thinking by now, why? It is very simple and straight forward and sounds easy as well. I am telling you, it is one of the most difficult recipes to master! Because it needs a lot of patience and time. Roti cooks really slow and vanishes very fast as well 😉 Once you get a hold of it, you can make it very easily. So, if you attempt and practice you will get the hang of it and can make easily.

Ingredients:

Boiled rice – 1 cup

Idli rice – 1 cup

Salt

Coconut oil – to apply

Method:

-Wash rice and soak it for one to two hours by adding hot boiling water and close the lid.

-Grind into smooth batter by adding enough water.

-Cook the batter( I normally add 1 tsp of coconut oil to batter to enhance the taste)  until it forms a dough consistency.

-Take out and cool a little and start making the discs.

-Take small banana leaves, wash and keep it ready as well as a roti presser or two wooden planks to press.

-Take a big lemon size dough and knead a little and form a round shape.

-Take one banana leaf, place it on a roti presser. Place the dough roundel over it and close it with another leaf and press the presser. If you are using plank, do it exactly like this by using the plank.

-Heat the griddle, place the discs (including banana leaf) over the hot iron griddle. Cook in a medium heat.

-Flip the sides couple of times, when roti cooks, leaf will become loose and at that moment, remove the leaf and discard it.

-continue to cook the roti, until you see the light brown spots. Now it is the time to place it on the direct fire and do it. Some would puff, some would not or partially puff.

-That is it. Remove, apply some coconut oil and enjoy with Onion/garlic chutney or Raw mango chutney or Malabar spinach curry.


Steel cut Oats and lentil Dosa:

It is a no rice urad dal Dosa. I have used Steel cut oats  or broken Oats instead of rice and avoided rice fully in this batter. These oats are considered as cut pieces of original grain. It is healthy compared to quick cooking oats. It takes much longer time to cook but when it is soaked and ground, almost tastes like rice and you can’t figure out the difference. This is Gluten free, high in fibre, protein and iron. It is low in glycaemic index.

I have bought Kosh broken oats to try out my experiment and it is whole oat grains cut into smaller pieces. It looks like broken wheat. When it is cooked, tastes like our broken wheat with outer thick skin with nutty taste. Loaded with insoluble fibre which helps in our gut health as well. Because of its low glycaemic property, it is a very good option for diabetic people and its fibre level will help to keep them full for longer hours.

I have used my regular plain Dosa batter recipe. I simply avoided rice and added broken oats.

Ingredients:

Steel cut Oats – 2 cups

Urad dal – ½ cup

Methi – 1 tea spoon

Chana dal – 2 table spoons

Poha – 1 fist full (optional)

Salt

Method:

-Wash oats, urad dal, methi, chana dal twice and soak this with poha (if you are using) for 3 to 4 hours.

-Grind this soaked ingredient by adding soaked water little by little with added salt.

-Ferment this batter over night or 8 to 10 hours according to the climatic condition.

-When it is ready, mix nicely, adjust the consistency of the batter and start making dosas by heating iron griddle.

-Take one ladle spoon of batter, spread into thin Dosa, pour oil or ghee and roast on one side, then flip and cook the other side, remove and serve with chutney or sambar.

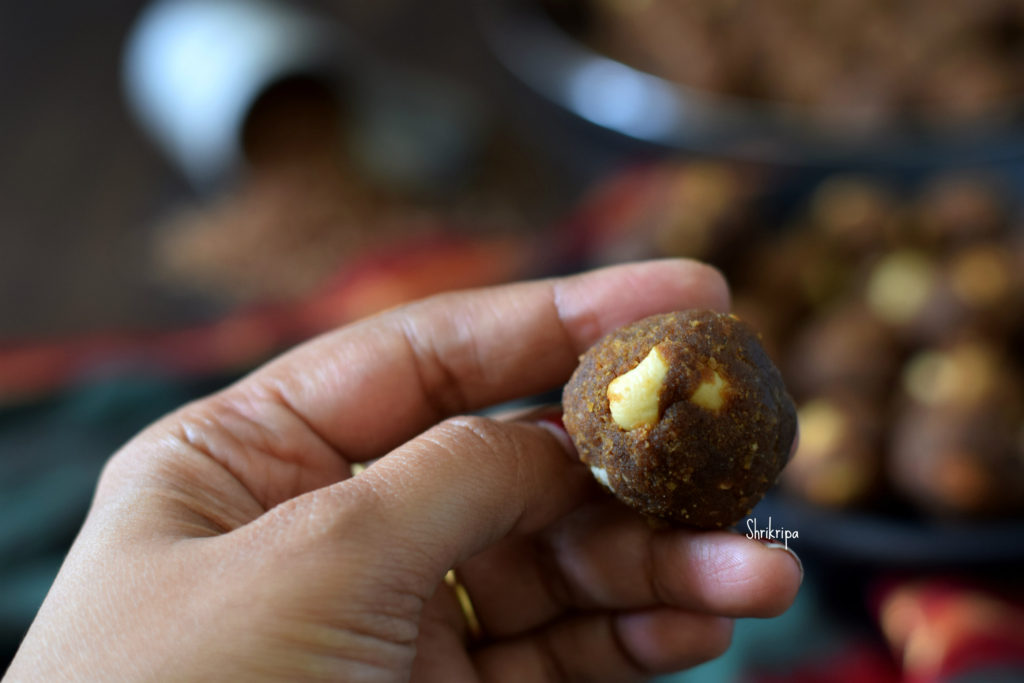
Thambittu Unde / Brown Rice Laddu:

Brown rice laddu is also known as “Thambittu unde” in our coastal region of Karnataka. It is an age-old recipe of my aunt’s family. This tasty laddu is very dear to my heart, which I used to relish whenever I visited my maternal uncles place.

Brown rice, also known as boiled rice/matta rice/Kerala rice is very healthy and packed with many nutrients, at the same time it is gluten free and you can have it without any hesitation. It requires very minimum ingredients but tastes heavenly.

Now we will see the procedure –

Ingredients:

Brown rice /matta rice – 500 grams.

Fresh Coconut – 1 (grated)

Jaggery – 500 grams (used organic, hence the colour is dark)

Ghee – 50 -100 ml

Cardamom powder – 1 tsp.

Cashew bits – ½ to 1 cup

Method:

-Wash rice once or twice, drain completely and Spread this on a clean cloth and let it air dry. It takes one to two hours. After one to two hours, check the moisture.

-If it is completely dry while handling, it is ready to use.

-Heat one thick bottomed wok/vessel, add dried rice little by little and roast, it will pop a little and texture will become brittle and little puffy.

-Do this procedure in 3 to 4 batches and cool.

-When it cools down, make powder either in a mixer jar or nearby flour mill. Sieve this powder and keep aside.

-Now dry roast grated coconut until it emits fragrance. Keep aside. (you can use mixer jar and pulse once or twice to get uniform tiny gratings. This would help in uniform roasting)

-Boil jaggery by putting one cup of water. When it melts sieve this solution to remove any impurities.

-Take this liquid and boil further till it reaches one thread consistency. At this stage you will hear “Tup” “Tup” bubbling sound too (this is the clue which I have received from the elders)

-When it reaches one thread consistency, mix in roasted coconut gratings, ghee, roasted cashew bits, rice powder and cardamom powder.

-Mix nicely. At this stage mixture will be too wet to handle. So, keep aside for half to one hour, till mixture becomes little dry and ready to handle.

-When you feel it is ready, take a small amount in a hand and make laddu and keep aside.

-When all the mixture gets over and you have finished the process, store these laddu’s in an airtight container. This laddu stays good for long even in room temperature.


Vegetable Pulav (Bangalore Style):

Vegetable Pulav is very versatile and made in many ways. Each house or family has their own favourite recipes. But this one is found in any small darshini or small eateries in Bangalore. It is a native Bangalore style Pulav which is green in colour due to the usage of Pudina and coriander leaves. It is fried with onion and other masalas and ground to paste. Selection of the vegetable is also unique. With other vegetables, Knol khol, double beans as an added attraction, when compared to normal Pulav. Added to all this, we find deep fried bread croutons.  

Ingredients:

Basmati rice – 3 cups (small steel tumbler)

Beans – 10

Carrot – 1

Knol khol – 2

Green peas – ¾ cup

Double beans – ¾ cup

Lemon – 1

Bread slices – 3

For Masala: (please refer the picture)

Oil – 2 table spoons

Cinnamon – 4 to 5 small pieces

Clove – 4

Cardamom – 2

Black pepper – 10 to 15

Cumin – 1 table spoon

Onion – 2 (medium)

Green chillies – 5 to 8

Ginger – 2-inch piece

Garlic – 12 to 14

Mint / Pudina leaves – 1 fist full

Coriander leaves – 1 fist full

Fresh Coconut – 1 small cup

Seasoning:

Oil – 8 to 10 table spoons

Cumin – 1 tea spoon

Bay leaves – 3 half pieces

Marathi moggu – 2

Star anise – 2

Method:

-Wash rice a couple of times, soak and keep aside.

-Wash pudina, coriander leaves, Chop veggies, onions etc. If you are adding double beans and green Peas keep it ready.

-Now prepare ground masala: Take everything under masala and keep it ready by washing or chopping.

-Take one wok, heat oil, drop all the dry spices from cinnamon to cumin.

-Fry onions, garlic, ginger, green chillies when onion becomes transparent add pudina and coriander.

-Fry until it wilts. Add coconut and fry for 2 minutes and switch off the gas.

-Cool, grind into paste by adding very minimum water. Keep aside.

-Now we would move towards the main preparation. It is the time to drain the soaking rice.

-Take one pressure cooker, pour oil for the seasoning, drop all the dry spices from cumin to star anise, fry for 2 minutes.

-Now put all the veggies, green peas, double beans and fry nicely until raw smell vanishes and all the pieces coats with the oil.

-Next comes the turn of adding ground green masala and salt. Fry nicely and lastly add drained rice and fry for couple of minutes.

-Add water (I normally add 1: 2 for Basmati rice or Sona masuri rice) If you are using small grain (Jeera rice) Use 1: 1 ½ ratio for water. Here 1 is rice and 2 or 1 ½ is water.

-Use rice measured cup for water measurement.

-Check for salt and squeeze lemon and close the lid. Cook for 1 whistle and keep it in a simmer for 2 to 3 minutes.

-During this time, we can prepare bread croutons. Usually bread pieces will be deep fried, drained and added.

But, I normally avoid deep frying and make it like this.

-Take one tawa, drop couple of spoons of ghee or oil, when it is hot, drop the bread pieces and fry for 2 to 4 minutes, until all the bread pieces coats partially and half roasted.

-Now switch off the gas, spread those bread pieces in a baking dish, bake for 20 minutes or until it is crisp in a pre-heated oven or convection microwave at 170-degree C.

-When Pressure relieves, open the cooker lid and mix in bread croutons and mix well. Close the lid and leave for some time to soak all these bread pieces to absorb the aroma.

-Then serve with Onion raita at the side.


Steamed Modaka / Steamed Rice dumpling with Coconut Jaggery filling:

Ganesha Festival aka Vinayaka Chaturthi is the time, when we indulge in so many varieties of traditional delicacies- Genasale, patholi, Chakkuli or Chakli– to name a few. Two varieties of Modaka (steamed and deep fried) Panchakajjaya, Halittu (nothing but rice noodles), Guliyappa are the main things which we normally find in our region.

Ganesha has one more name as a “Modaka Priya” means, he loves to eat Modaka. Steamed medakas are also known as Ukkarisida Modaka / Ukdiche modak in India.

Which is ground rice batter, which is cooked until it reaches a ball form and kneaded and stuffed with a coconut jaggery filling and steam cooked.

Some people or in some region, people do use rice flour, instead of soaked and ground batter.

Now a days, people make various kinds of modak from, khoya, chocolate, dry fruits etc. But traditionally it is done in this way.

Procedure goes like this –

Ingredients:  

Dosa rice /white rice – 2 cups

Grated coconut – 1 cup

Grated Jaggery – ½ cup (to taste).

Ghee/ Clarified butter – 4 tsp.

Salt to taste

Modaka mould – (optional)

Method:

-Wash rice and soak it for 2 to 3 hours.

-Grind soaked rice into smooth paste by adding water and salt.

-Now keep thick bottomed kadai, pour the ground batter and add some water to make thin consistency.

– Now add 2 tsp of ghee and start heating this mixture by continuous stirring. When it becomes little thick and forms a mass, switch off the gas and keep it aside to cool.

-When it is ready to handle, knead it further and form a smooth dough.

-Cover the dough with wet cloth, to retain moisture.

In the meantime, make sweet coconut-jaggery mixture. In a thick bottomed vessel add jaggery and ½ cup of water and heat. If you find some impurities in jaggery syrup, sieve this liquid and heat further and add fresh grated coconut and cook until it is sticky and forms mass. Add remaining ghee to this and mix. Now stuffing is ready.

Method to make Modaka by using mould-

-Grease the mould by using ghee.

-Take a lemon sized dough at a time, knead a little and use.

-Close the mould, apply the dough all around the mould, fill a tea spoon of coconut jaggery mixture by leaving very little place at the neck of the mould.

-Now take a tea spoon of dough and seal it. Now Stuffed Modaka is ready.

-Proceed until all the dough is over and arrange all these medakas in an idli steamer.

-Steam cook for 15 to 20 minutes.


If you are using Rice flour or Modaka flour:

Ingredients:

Rice flour – 2 cups

Water – 2 cups

Salt

Ghee – 1 tea spoon

Method:

-Boil water by adding salt, ghee in a thick bottomed pan.

-When water starts to boil, add rice flour and keep in a simmer for 5 minutes.

– Switch off the gas. After some time, knead the dough and follow the same procedure as above. 

-While kneading, if needed , sprinkle some hot water and proceed.

-Proceed until all the dough is over and arrange all these medakas in an idli steamer.

-Steam cook for 15 to 20 minutes.

Note:

-If you don’t have Modaka mould, take a lemon sized dough, make a 4” disc by using your thumb and fore finger of both hands.

-Keep this in your left palm, in a cup shape, put filling (smaller in size) and cover it. Arrange all these medakas in an idli steamer.

-Steam cook for 15 to 20 minutes.


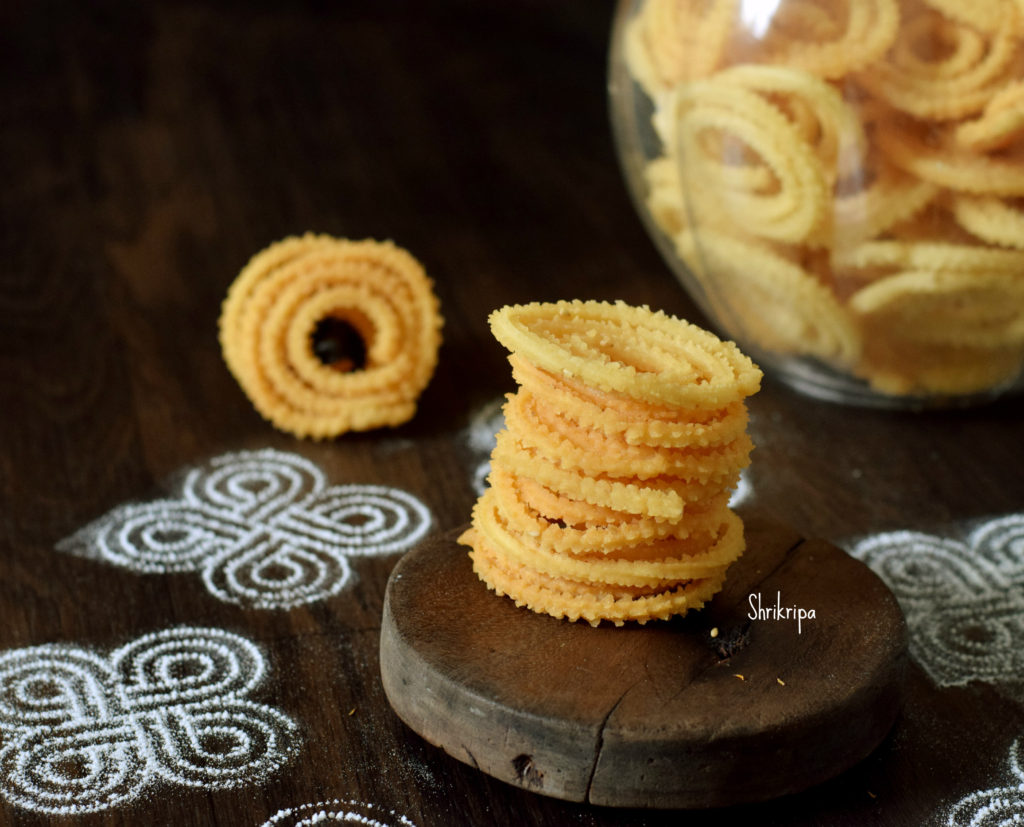
Chakkuli / Chakli:( Traditional Way)

Chakli is a default and very important savory in Ganesh Chaturthi offerings. This chakli is the one, I have learnt from my close family friend which she prepares during the Krishnashtami / Janmashtami festival which is very important in their Iyengari community.

She usually prepares Chakkuli flour little ahead of the festival. This can be stored in room temperature for up to 6 months. If ready chakli flour is in hand, you can make these super soft butter chaklis in no time and can relish whenever you want.

First, I would explain how to prepare the powder and then we will move towards chakli making.

For Chakli Flour:

Use One glass for measurement.

Ingredients :

Sona masuri or Dosa rice – 4 cups

Urad dal – 1 cup

Method:

-Wash Rice and Urad dal separately, couple of times.

-Drain water, keep this in a strainer for some time.

-Then spread this on a clean towel and dry this for couple of hours by keeping it indoors.

-When it is dry, if you feel little cold while touching, it is ok.

– Keep one kadai, when it is hot, pour rice little by little and heat a little in batches. You should fry only for 2 minutes.

-Spread this on a towel or paper and cool.

-Next Dry roast washed and dried Urad dal until it is light brown and emits nice fragrance.

-Cool these two ingredients and give it to nearby flour mill and make powder.

-After powdering, mix everything nicely or sieve couple of times and keep it in a cool dry place. It is your Basic Chakli flour.

For Chakli:

Ingredients:

Chakli flour – 1 cup

Butter – 2 table spoons (small lemon sized ball)

Salt

Hing – ½ tea spoon

White sesame seeds – 1 tea spoon

Water – to bind the dough

Oil – For frying

Method:

-Take one wide bowl, put flour, salt, hing, sesame, butter and rub everything nicely.

-Pour water little by little and bind to make a dough. It should be soft and non-sticky.

-Set aside this dough for 5 to 10 minutes or until oil heats.

-Take oil in a kadai, when it is hot, start making chakli on a piece of paper or butter paper, by using chakli press.

-Drop these chaklis in hot oil and fry in a low flame.

-When it is done, remove and drain the excess oil and cool.

-Store these chaklis in an air tight container.

NOTE:

-When you drop the chaklis, initially you will hear bubbly noise and gradually noise becomes less and stops. That is the time, you should remove the ready, fried chaklis.


Healthy “Brown” Neer Dosa:

Usually Neer dosa is made from using only white Dosa rice and it contains only carbohydrate and recipe is already shared and it is here

Couple of years back, when I was thinking of including millets in our regular neerdosa to make a healthier version, dosa used to turn out hard and crispy and I was not at all satisfied with the result. After couple of trial and errors, addition and deletion of ingredients, I got this soft and smooth textured neer dosa like the regular white one and henceforth it is one of our regular breakfast items and we named this as “Brown Neer Dosa”.

How I included these many items? As I mentioned above, I wanted to make soft neerdosa without any compromise on taste. Usually when we add millet in Dosa batter, Dosa becomes little hard and brittle. So, I thought of adding Whole Ragi to give softness with Fox tail millet.

Here I have added Ragi, Organic red unpolished rice with normal white rice to enhance the value, and fox tail millet. Instead of fox tail millet, one can use any other millet as well.

It is an excellent breakfast option for Toddler’s, weight watchers, diabetic diet or low carb diet as well as tiffin box options. It is very soft, easy to chew, digestible and at the same time filled with nutrients and fibre apart from carbohydrates. It doesn’t need any fermentation or planning. Soak in the night, grind and make it in the morning in a jiffy.

Recipe goes like this-

Ingredients:

White Dosa rice – 1 cup

Whole Ragi / finger millet – ½ cup

Red organic unpolished rice – ½ cup

Fox tail millet -1 cup

Salt

Method:

-Measure everything and put it in one bowl, wash twice and soak this in water for 2 to 3 hours or during the previous night like me.

-Next morning, grind this soaked rice into fine paste with water (I use soaked water while grinding, it gives nice aroma for the Dosa) and salt as per requirement.

-Make batter into pourable consistency like this (refer a picture) and check for the salt.

-Now keep Iron griddle for heat.

-When it is ready, apply oil like this.

-Pour one serving spoon of batter like how we make Rawa Dosa, you can see it in the picture below.

-Now close the lid by keeping the gas on full flame.

-After two minutes, remove the lid and keep the gas in simmer the edges of the Dosa rise a little, like this.

-Now flip this Dosa on the plate, leave for 2 minutes, then fold like this.

– Now keep repeating this with the remaining batter and stack one over the other or take one big plate and stalk one opposite another alternately.

-Serve these Dosa with coconut and grated jaggery mixture or coconut chutney.


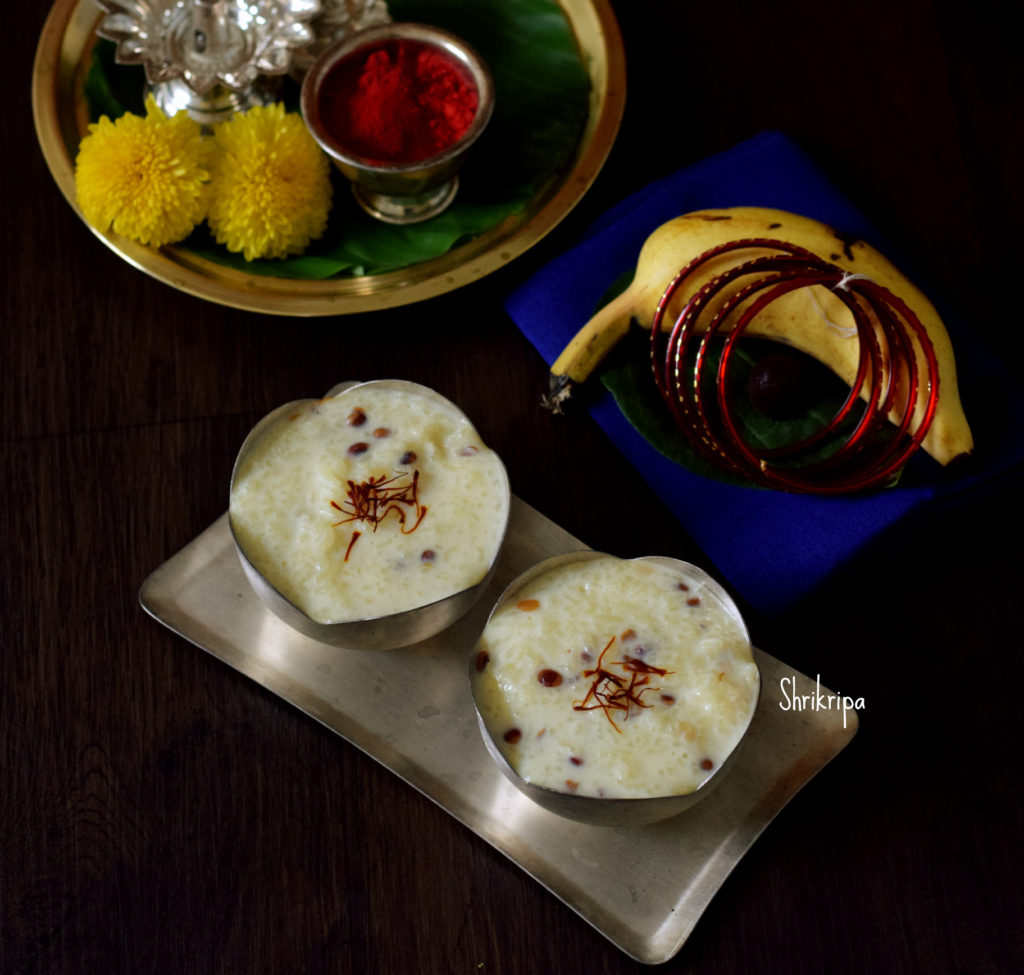
Rice kheer:

As a south Indian, moreover in Mangalore, we normally make Akki Payasa aka rice kheer as a prasadam for some poojas, either by adding jaggery or sugar by adding coconut milk or normal milk and it usually in thin consistency. If it is thick, it is known as pindi payasam and I have already posted the recipe earlier. I learnt this recipe from my close friend Surekha, who hails from Allahabad, all thanks to her for such a wonderful tasty kheer recipe. It is one of my daughter’s favourite as well. 

In this recipe, washed rice is cooked in milk, until done and in this process, milk condenses and yields creamy texture and kheer holds melt in the mouth texture as well. Speciality of this kheer is, addition of nutty flavoured Chironji or Charoli. It tastes a little like almonds and are tiny roundels in shape and good substitute to almonds as well. Which contains good fat, vitamins, minerals and dietary fibres in a considerate amount.  This is an ideal recipe for any kind of festival, potluck party.

Now we will see the procedure –

Jeera samba rice / small grain rice – 1 cup (you can use any fragrant rice)

Chironji – 100 grams

Milk – 1 to ½ litre (boiled)

Saffron – 10 strands

Sugar – 1 to 1 ½ cup (according to your sweet level)

Method:

-Wash rice, soak rice for 10 minutes.

-Soak saffron in 2 table spoons of hot milk and keep it aside.

– Take one thick kadai, add little ghee and fry Chironji until light brown.

-Add milk to this vessel and heat this. When it starts boiling, add soaked and drained rice.

-Cook in a very low flame, until rice is done and soft.

-If additional milk is needed, please add the extra amount. Each rice is different, so, please take care while adding milk.

-Now add sugar and saffron with soaked milk into it and boil. When kheer is ready, you will see the top glossy layer and it is the time to switch off the gas.

-Serve this kheer hot or cold, however you like to have it.