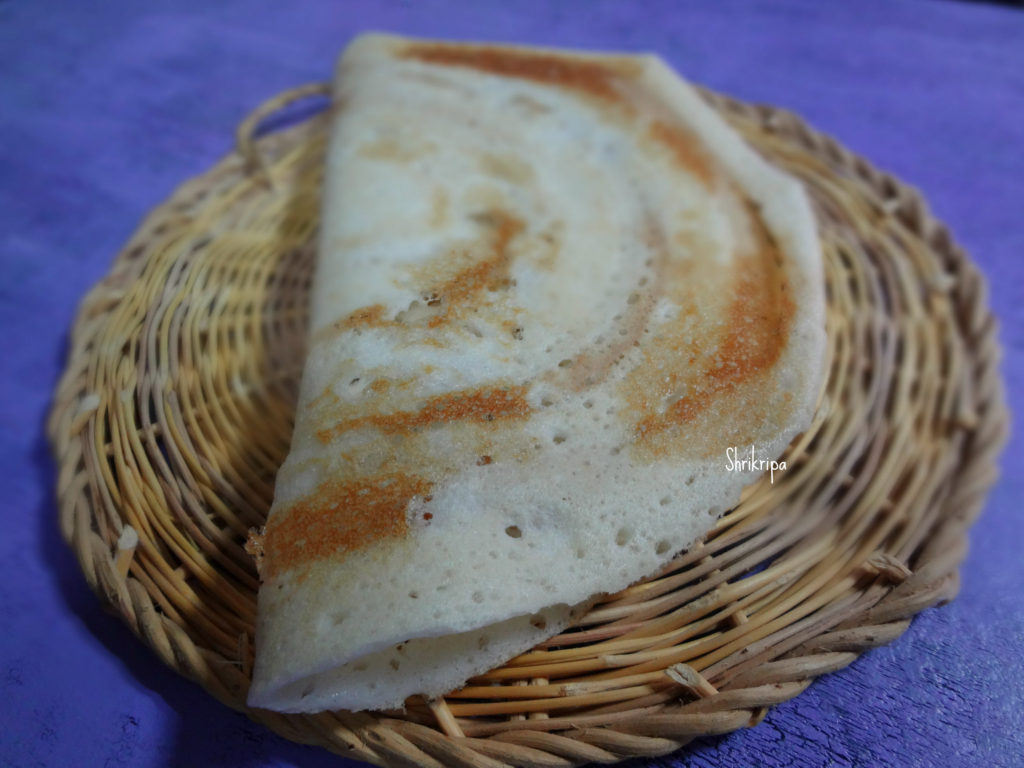
Moringa / Drumstick leaves chutney and Rice:

Nugge Soppu ,Moringa or Drumstick leaves are a power house of nutrients.  Back in 2016 I had tried a bunch of drumstick recipes to publish in Vijaya next kannada daily. This chutney recipe is from that trial and after that it is in my regular menu and I have made it many times, as well as tried to mix this same chutney into cooked rice after doing some seasoning and liked it a lot and It is an awesome way to feed small kids with added goodness of moringa.
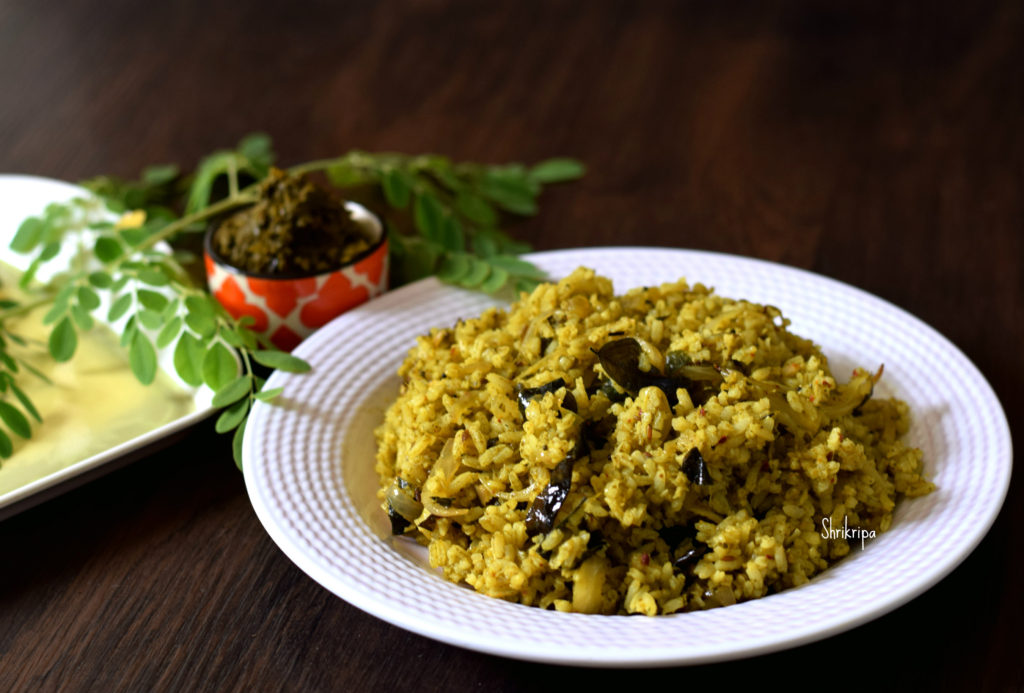
I will first describe how to make chutney and at last I will add the procedure of rice as well.

This chutney stays good for up to one week and we can store this in a refrigerator and can be enjoyed as a side dish or make rice item and relish and can be packed as a carry meal in a tiffin box as well.

Procedure for  Chutney:
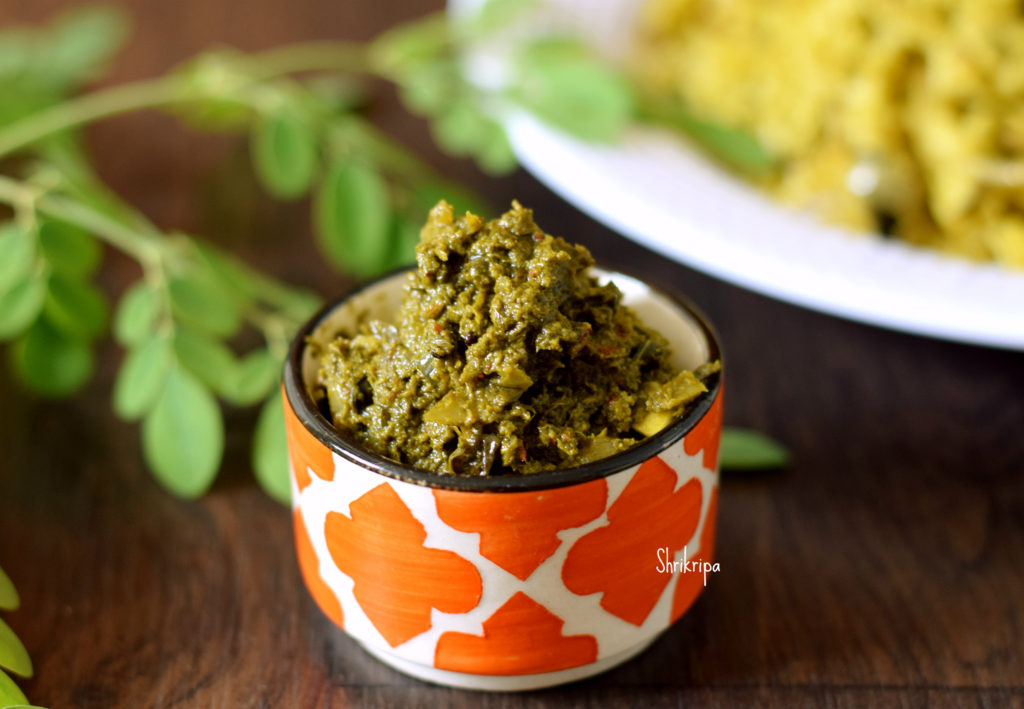
Moringa leaves – 4 cups (keep aside some young leaves for seasoning)

To be ground:

Roasted red chillies – 3

Black pepper – 3

Garlic – 10 cloves

Tamarind – ¼ tea spoon

Coriander leaves – 3 table spoons (chopped)

Cumin – 1 tea spoon

Jaggery – ½ to 1 tea spoon

Salt

Seasoning;

Oil – 2 table spoons

Mustard – 1 tea spoon

Curry leaves – 2 strings

Garlic – 10 cloves (chopped)

Onion – 1 (chopped)

Turmeric – ½ tea spoon

Method:

-Take moringa leaves (keep aside a little) and grind with all the items under “To be Ground” from Roasted red chillies to salt in the list by adding little water into coarse paste.

-Now take one kadai, do seasoning part. Heat oil, splutter mustard, add curry leaves, chopped garlic, onion ,turmeric and fry until onion and garlic becomes light brown.

-Add moringa leaves, which we have kept aside and fry till it wilts and add ground paste and fry for 3 to 5 minutes or until raw smell vanishes and mixture changes in colour.

-You can serve this as a side dish with hot rice and ghee. This chutney stays good under refrigeration and can be used as a moringa rice mix as well.

Now we will see the procedure for Moringa Rice:
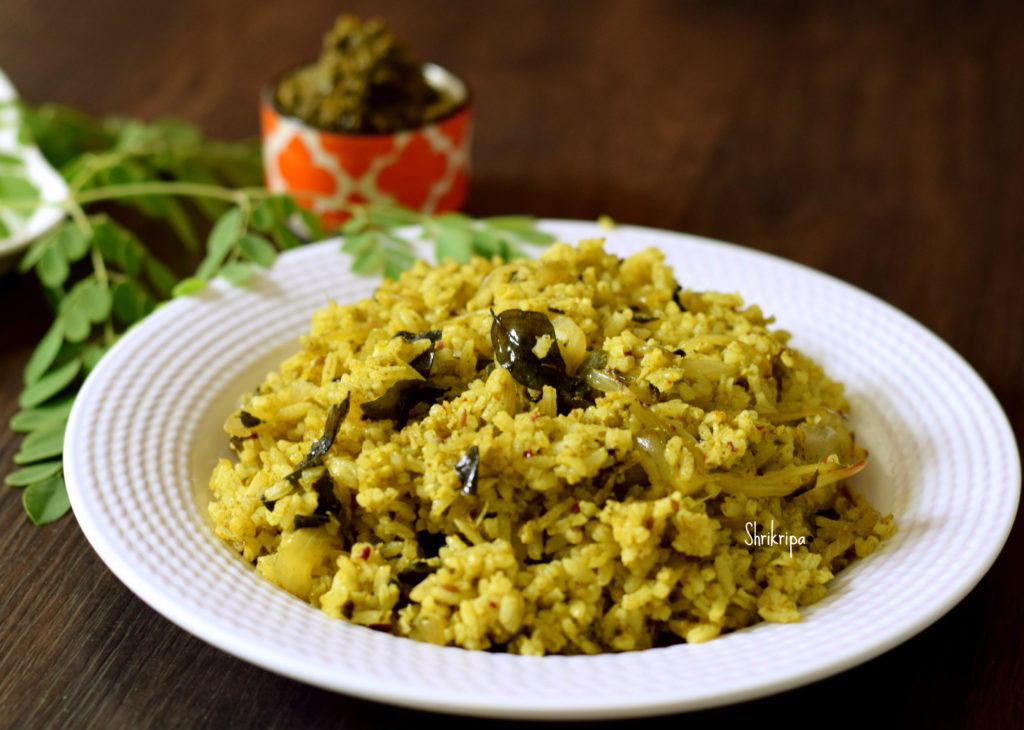
It is simple. Take some oil and put one tea spoon of cumin, little curry leaves and one or two table spoons of ready chutney, little salt and mix nicely. Switch off the gas. Mix required amount of ready cooked rice in this mixture and mix nicely to devour aromatic moringa rice. If you have ready chutney around, it is a quick recipe.

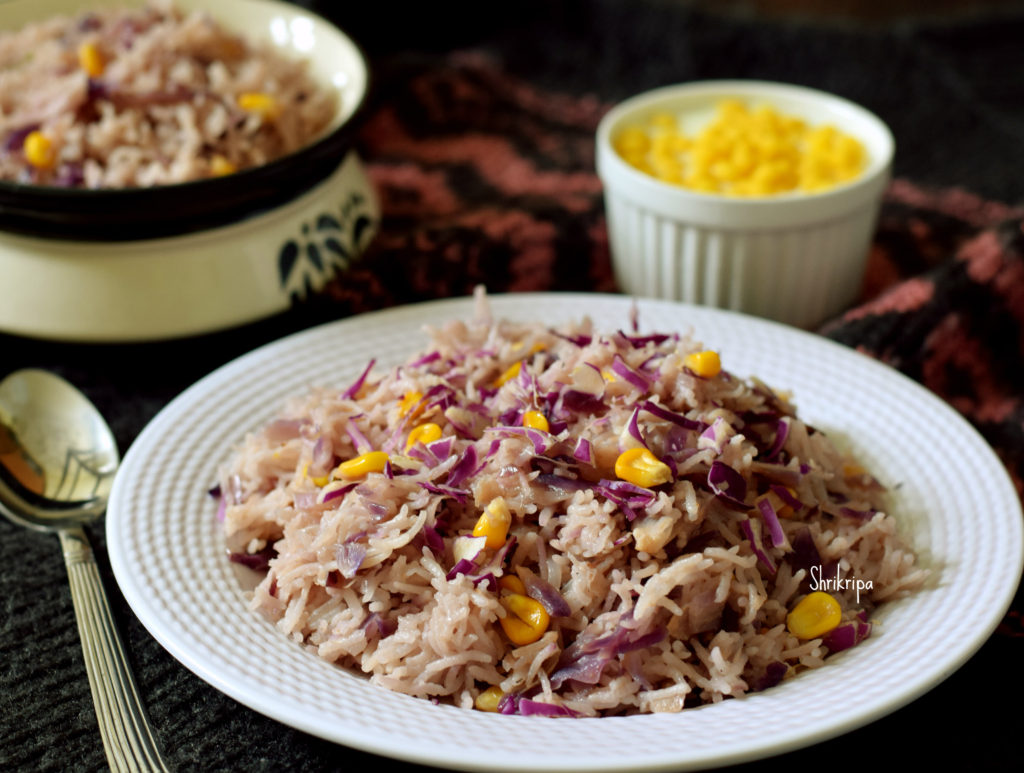


Red cabbage and Sweet corn Pulav: One pot meal

I have promised to post my trial on rice dish by adding red cabbage and sweet corn in my earlier post. Here I am with the detailed account on this beautiful pink hued rice.

Red cabbage is smaller and dense in structure, when we compare it to the green one. Leaf is thicker as well. Because of this, it doesn’t loose its texture, even after cooking. So, pressure cooking does not ruin its shape or texture in this trial of one pot meal.

When we want to cook Purple or red cabbage, we make sure to add some souring agent to it. It can be anything like lemon, vinegar or yogurt. Here I have added curd while cooking. If souring agent is not there, red cabbage will surely turn pale blue and loose its crunchiness.

Now we will see how I have worked in this recipe –

Ingredients:

Basmati Rice – 3 cups

Shredded cabbage – 1 ½ cup

Sweet corn – 1 cup

Oil – 3 table spoons

Cinnamon – 1 “

Cumin – 1 tea spoon

Bay leaf – 1

Star anise – 1

Clove – 2

Cardamom – 1

Green chillies – 3(slit)

Onion – 2 (sliced)

Ginger garlic paste – 1 ½ table spoon

Curd – ½ cup

Salt

Method:

-Wash rice, drain and keep aside.

-Take one cooker, add oil, cinnamon, cumin, bay leaf, star anise, cloves and cardamom.

-After frying for a couple of minutes, add green chillies and onion and fry.

-When onion turns light brown, add ginger garlic paste and continue frying.

-Next add shredded cabbage and corn and mix once.

-Immediately add curds, salt, drained rice  and coat evenly.

-Add 6 cups of water, when it starts to boil, close the lid and cook until one whistle and keep it in a simmer for 2 minutes and switch off.

-When pressure releases, open the lid and mix gently and serve with any raita. I have served this rice with slightly sweet Boondi raita.


Kendathadya/ Baked Cucumber-Rice cake:

Every adult has a nostalgic dish from their childhood. I have a “secret” love for this dish because of fond memories of my maternal Ajji (grandmother), who used to pamper me to the core and prepare many such dishes by using the fresh produce that she grew in her kitchen garden.

Kendathadya is a traditional recipe of our Coastal Karnataka region, a special baked dish made by putting “Kenda” (hot burning firewood) on top and at the bottom of the earthen pot or thick metal vessel. Creating an oven affects burning firewood at the top and bottom of the closed vessel containing the batter.

Here, Cucumber used is our heirloom (local) variety, known as Mullu southe, which is light in colour, watery, and flavourful. Soaked rice is mixed with grated Cucumber, jaggery syrup, and fresh coconut to make a flavorful cake with homemade ghee. 

In modern life, we don’t have access to traditional firewood chulha. So, I make this age-old recipe in my OTG and satisfy my craving year after year and relive my childhood while having it.

Ingredient:

Raw Rice/Dosa rice – 1 cup

Cooked rice – 1 serving spoon. ( Red boiled rice or white rice)

Well grown Cucumber – 2 cups (grated)

Coconut – ½ cup (fresh, grated)

Jaggery – ¾ cup (grated)

Cardamom powder – 1 tsp

Ghee –2 to 3 tbl spoons

Salt – as needed

Eno or Cooking soda – 1 tsp

Method:

-Wash and soak the rice for 3 to 4 hours.

-Make jaggery syrup by adding ¼ cup of water to the grated jaggery, boil until its raw smell goes away, strain the liquid and keep it ready.

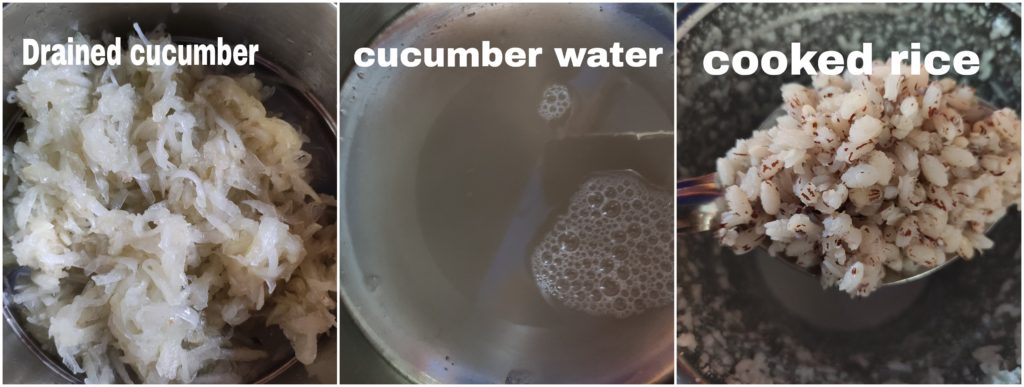
-Peel the outer skin, make halves, remove the seeded inner core. Grate it. Mix salt and allow the Cucumber to release its water.

-Drain the water from the soaked rice and discard.

-Collect water from grated Cucumber by sieving it in a strainer and using it for grinding as needed.

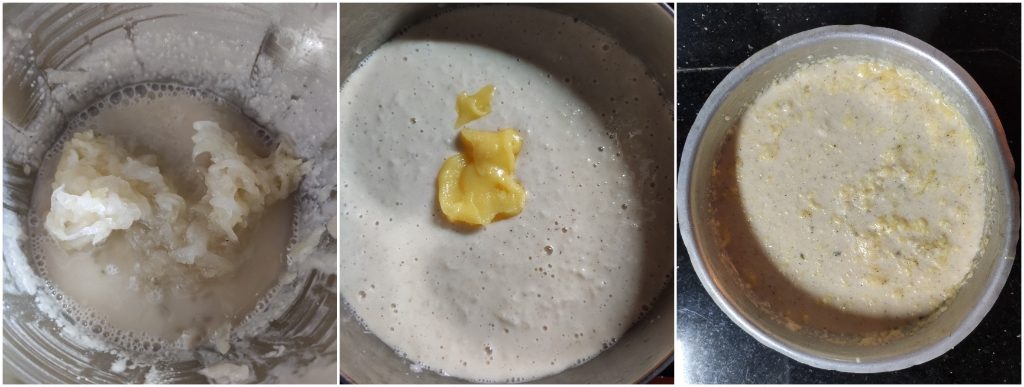
-Grind drained rice into a slightly coarse paste by adding collected water from the Cucumber, cooked rice, grated coconut, jaggery syrup.

-At the last round, add grated Cucumber and whip once and remove. Add ghee, Eno fruit salt and give a nice whip. The batter should not be too runny or too thick.

-Pour this into greased, lined baking tin and bake this in a pre-heated oven at 180C for 40 to 50 minutes, and a knife comes out clean when you insert it into the baking cake.

-Serve Hot with a drop of ghee.

Note:

– Addition of Eno fruit salt is optional. If you wish for a softer and lighter cake, add Eno or cooking soda.

-Without Eno, it turns out to be a firm and dense cake. I sometimes don’t add Eno and enjoy my dense cake to relive my memories of Ajji.

Paddu:

Paddu or Guliyappa is a very popular South Indian breakfast item. Which is nothing but Dosa batter or idli batter which is seasoned with some onion and poured and cooked in an appe pan, which normally has 7 or 9 small round molds. Traditionally, people use left over batter to make this delicacy to finish off the batter. But, personally I prefer to make fresh batter to make only this, because my family just loves this, and we enjoy our dose of guliyappa in any given point of time.

These super tasty roundels have many names in south Indian kitchens. In coastal region we call this as Guliyappa, In Bangalore, it is known as Paddu. In Tamilian house hold it is Kuzhi paniyaram, Telugu it is Gunta ponganalu, Malayalm it is Paniyaram. All the above which means that, a dish which is cooked in an appe pan.

My procedure goes like this-

Ingredients:

Dosa rice – 2cups

Urad dal – ½ cup

Poha – one fist full

Salt

Spring onion – as needed (onion and greens)

Coriander leaves – as needed

Ghee/ oil – for cooking

Method:

-Wash and soak rice, urad dal and poha. Soak for 2 to 3 hours.

-Grind this into smooth batter by adding salt.

-Consistency should be a little thicker than Dosa batter.

-Ferment this over night or according to your climatic conditions.

-Next day, add chopped coriander and spring onion and mix in.

-Heat appe or Paddu pan. When it is hot, pour ¼ tsp of ghee or oil.

-Pour the batter in each mold and close the lid and cook for a couple of minutes.

-Flip the side and cook upper side as well.

-Serve with chutney. We normally prefer Zucchini chutney as a side dish for Paddu.

-Repeat the process and enjoy your breakfast or brunch or dinner.

Note: If you want to make it vegan, use any vegetable oil and skip ghee.

Balloon Vine Dosa:

Balloon vine is well known and widely used as medicinal herb. In Tamilnadu it is used mainly in treating joint pains. I was not aware of this super food until recently which was introduced to me by our beloved uncle Senguttuvan on our Facebook Foodie group. I am very lucky to experience the taste, because of my Foodie friend Ashwini, who came all the way to my home and dropped off the leaves and asked me to prepare the Dosa. 😊

It is a medicinal herb and botanical name is cardiospermum halicacabum (Family sapindaceae).

Balloon vine is also known as Heart seed, Heart-Pea, Love in a puff, winter cherry (English).

The plant got its name because of its Balloon like seed pods.

Some of the regional names are-

Indravalli – In Sanskrit

Agniballi, bekkinatoddinaballi, erumballi – In Kannada

 Mudakathan keerai – In Tamil

Jyotishmati, katabhi – In Malayalam

Kapalphoti, khanphuti – In Hindi

It has numerous health benefits and is used in many ailments from Anaemia, diarrhoea, eczema, rheumatism in the form of tea, paste application, kozhambu or mixed with Dosa batter etc.

I tried this Dosa by grinding fresh batter by mixing the leaves in, and it was very tasty. It tastes like plain Dosa with green natural colour.

DSC_4279_Fotor

Now we will see the procedure-

Ingredients:

Dosa rice – 1 cup

Idly rice – 1 cup

Urad dal –¼ cup

Chana dal – one fist full.

Methi – 1 teaspoon.

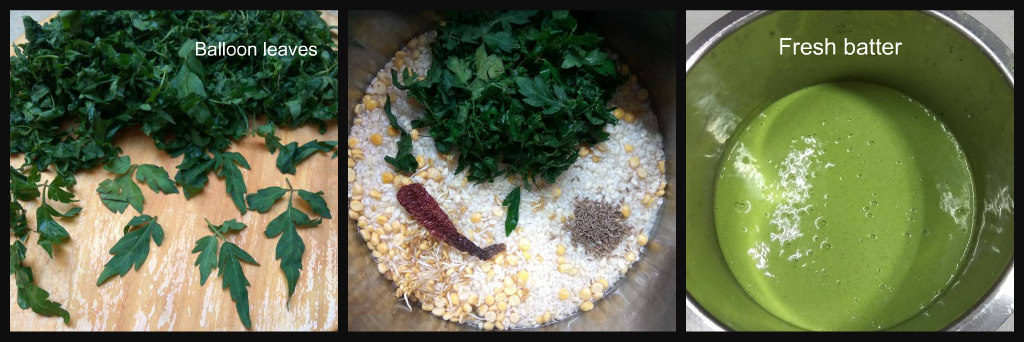
Balloon vine greens – 2 cups

Cumin – 1 teaspoon

Red chilli – 1 (use Byadagi variety)

Salt

Method:

-Wash and soak Dosa rice, idli rice, methi and soak for 3 hours.

-Wash cleaned greens and keep them aside.

Ribbet collage 1

-Grind soaked rice, greens, salt, cumin, and red chilli into a fine paste.

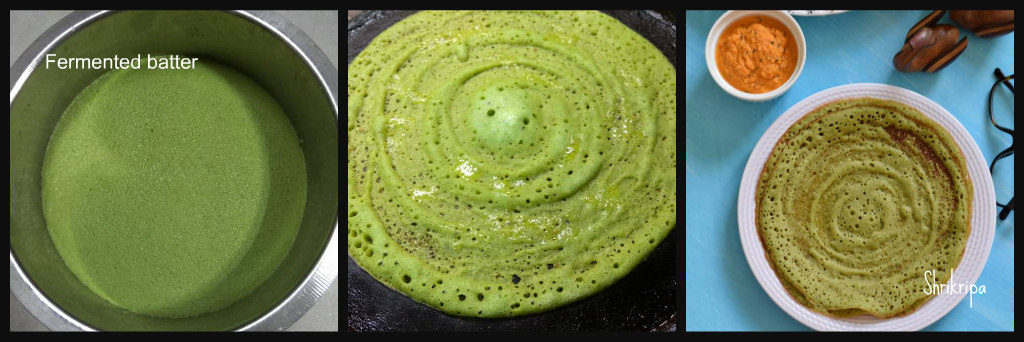
-Ferment the batter for 8 to 10 hours or overnight.

-Next day mix the batter, and adjust the consistency.

Ribbet collage 2

-Heat Iron Dosa griddle, pour one serving spoon of batter, spread and cook on one side.

-Pour some ghee or oil and flip the side and cook.

-Serve the Dosa with any chutney of your choice.

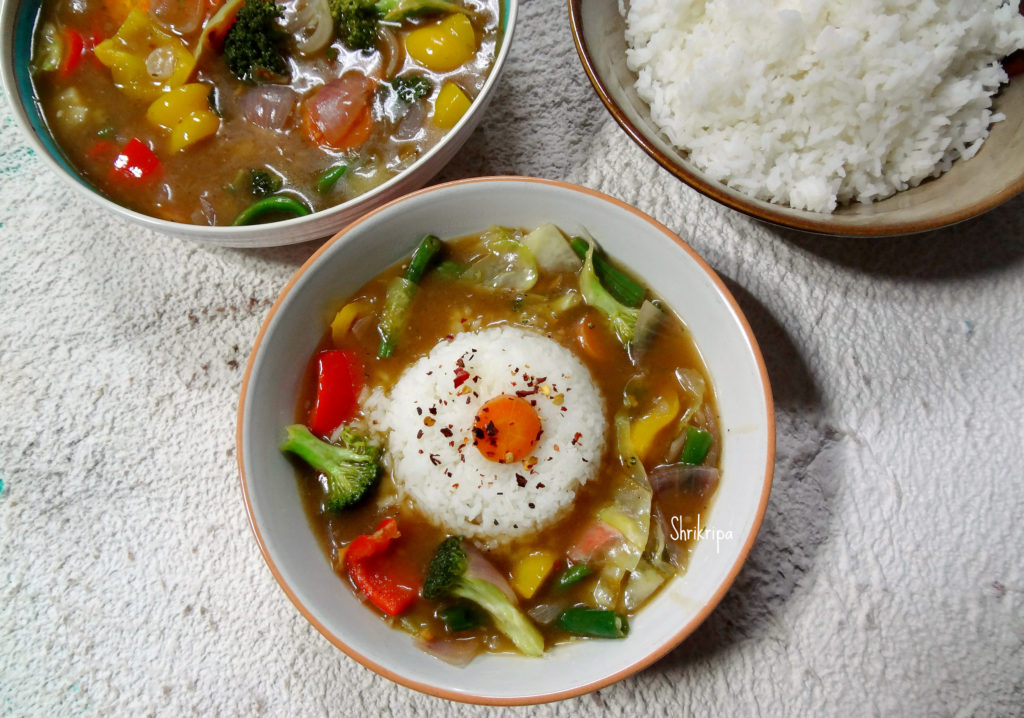
Steamed rice with Hot and sour vegetables:

Hot and sour veggies with some steamed rice works perfect for a winter night dinner. It is light, filling at the same time, very nutritious and tasty as well. It doesn’t need any major preparation and I love making it on winter nights when we need a tongue tickling hearty dinner.

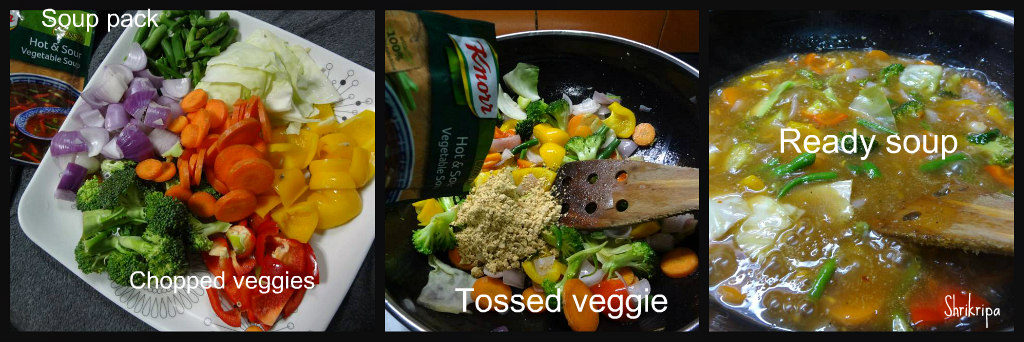
It is very simple, usually I use some chunks of veggies which is tossed with chunks of onion and simmered with one packet of hot and sour soup powder with sufficient water. Yes!! It is such a simple affair. While serving I usually take a couple of spoons of cooked rice as well.

This quantity suffices for a 4-member family.

DSC05442_Fotor

How I make –

Ingredients:

Onion – 1 big

Green chilli – 1

Veggies – 1 bowl (veggie pieces in byte sizes)

Garlic salt or chopped fresh garlic – little

Oil – 1 table spoon

Hot and Sour Veg soup – 1 pack (Knorr Or Maggi brand)

Basil or Lemon grass – for an additional flavour (optional)

Method:

-Chop vegetables and onions into chunk size. Slit green chilli. If you are using garlic, chop that as well.

Ribbet collage 1

-I usually prefer French beans, carrot, broccoli or cauliflower, capsicum, cabbage or lettuce.

-Take one big wok, pour oil, when it is hot, if you are using garlic, add garlic, green chilli, onion and fry for a minute.

-If you want to use basil or lemon grass, add now.

-Add vegetable chunks and toss. If you are using garlic salt, add it now, otherwise you can also add plain salt.

-When veggies wilts, add one pack of soup powder and mix.

-Add 4 cups or more of water to adjust the consistency.

-Boil until gravy cooks up and becomes shiny.

DSC05438_Fotor

-Serve with plain steamed or cooked rice.


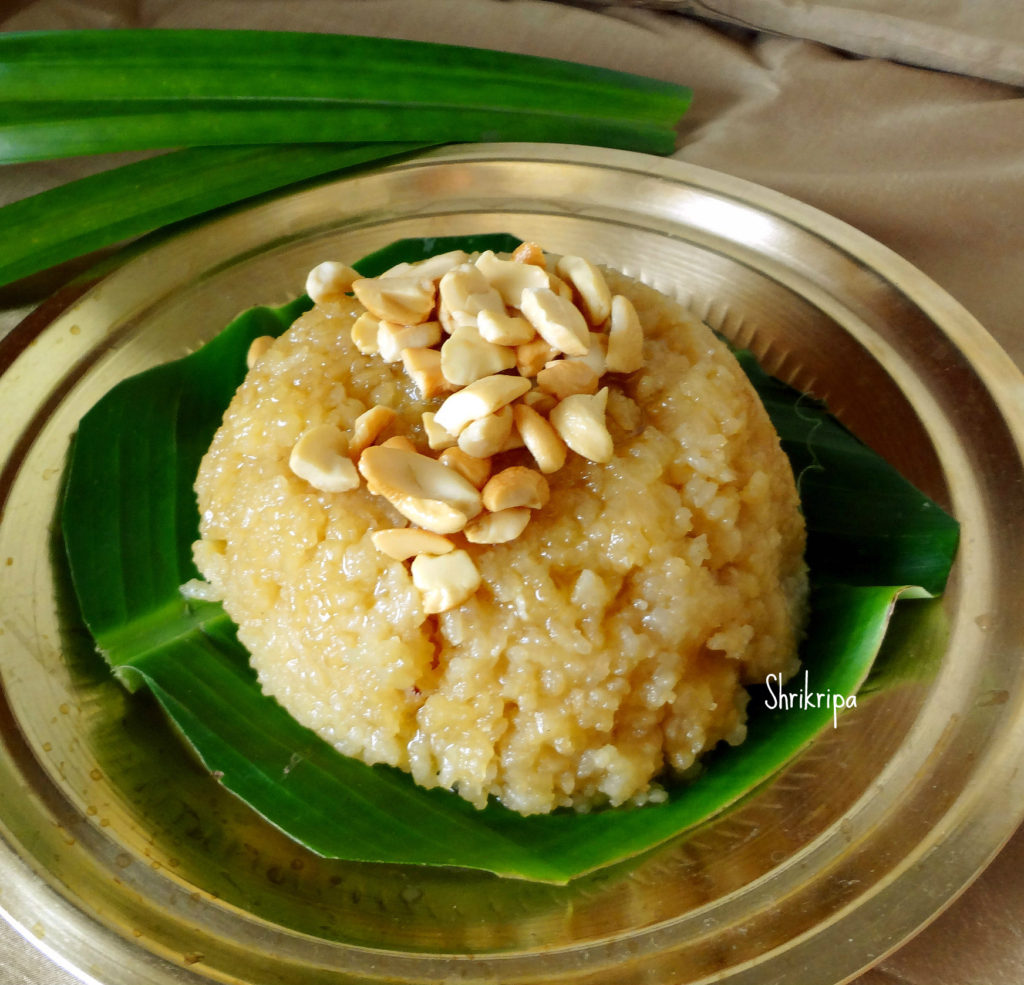
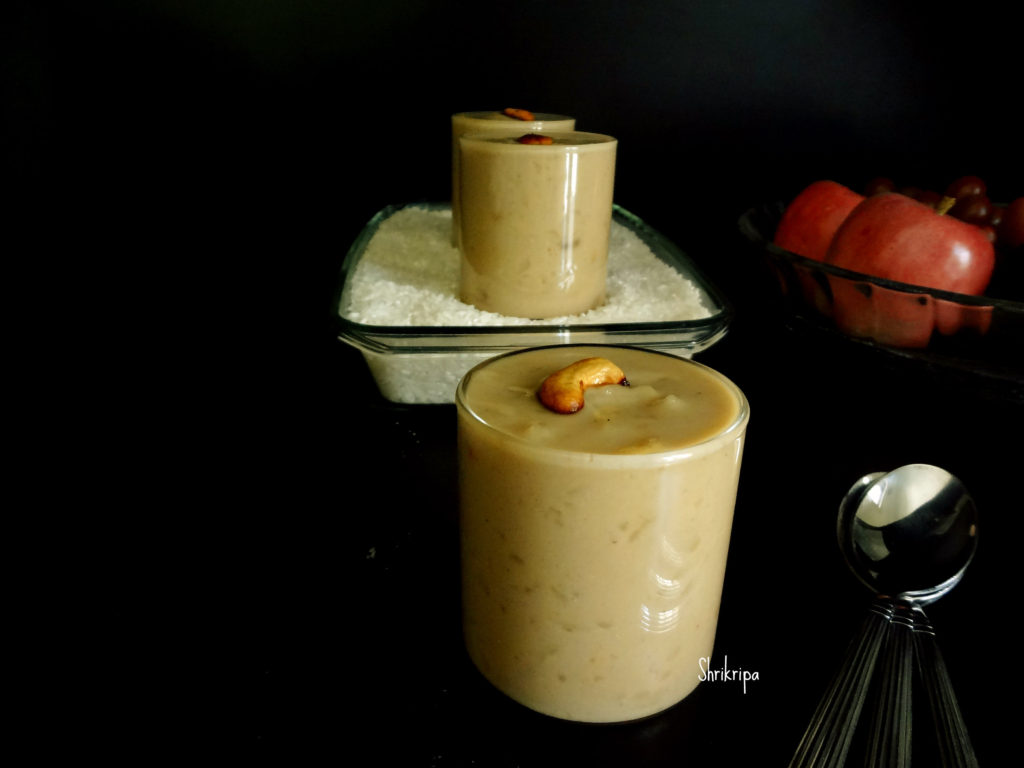
Paramanna/ Pindi payasam:

Pindi payasam is nothing but our traditional rice kheer without adding any milk or coconut milk, which is usually offered to god as a Naivedyam and served as a prasadam at any pooja. It is considered as a favourite of goddess Devi. When I look back and think, Pandan leaves were widely used in our region(Mangalore) as well. One can make this payasam even without adding Pandan leaves.

pic main

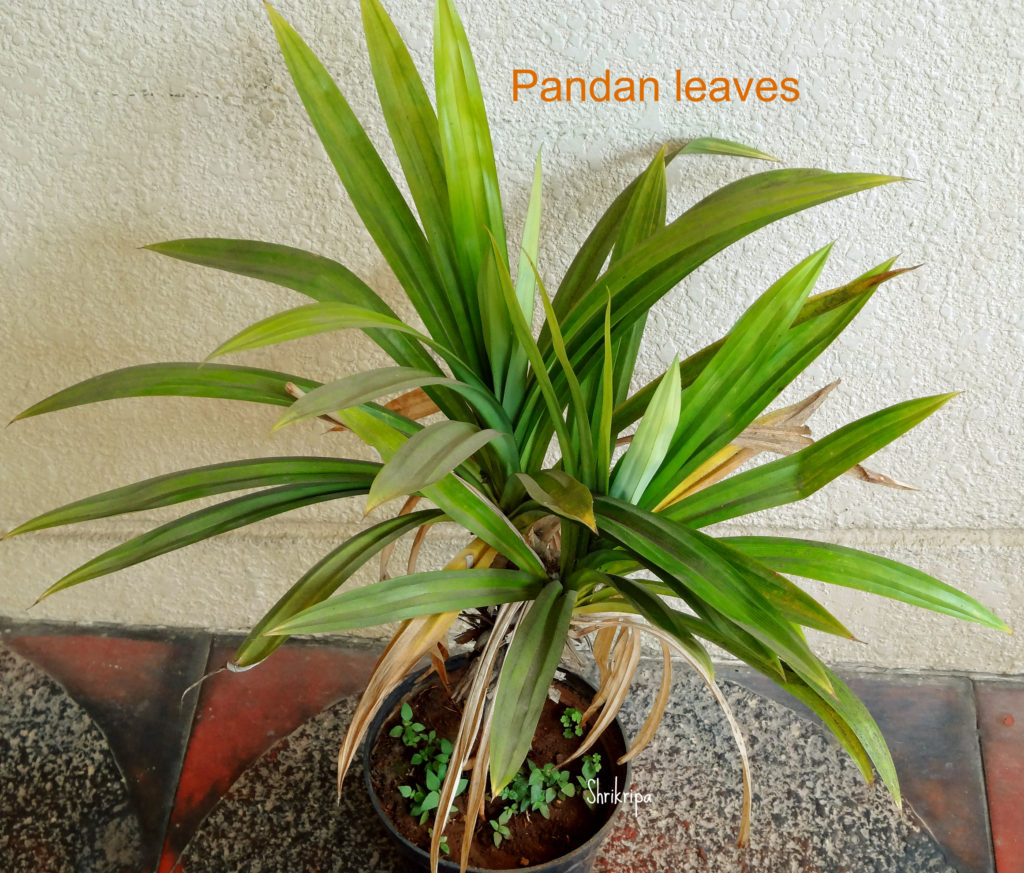
Pandan leaves are known as gandhasaale ele in our Mangalore region.
Gandhasaale rice is a traditional, flavoured and scented rice variety of Karnataka and Kerala, cultivated in small pockets. Gandhasaale rice is the best rice for meals, Pulav, payasam and other eatables. The Gandhasaale rice is known especially for its rich aroma. It is also called Kerala’s basmati.
In our native, to get aroma of “gandhasaale” in ordinary rice, my grand mom used to put these leaves in, while cooking the rice. Pandan (Scientific Name: Pandanus, also known as screw pine or palm pine) is a herbaceous tropical plant that grows in Southeast-Asia. In Chinese, it is known as ‘fragrant plant’ because of its unique, sweet aroma. The cultivated plant features upright bright green leaves, and it’s the leaves that are used for cooking up many Thai and Southeast-Asian dishes. Pandan is also made into a paste that is used in cakes and desserts, much the way we use vanilla flavouring in the Western cuisine. However, in addition to flavour, Pandan paste also instil foods with a bright green colour. Some Thai and Malayan desserts which I have tasted are Pandan baked cake, Pandan jelly and Pandan sticky rice in Malaysia. Personally, I dint like it much because of its overpowering fragrance and felt that, like my ajji (grand mom), one should use one or 2 leaves to get that perfect blend.

DSC05949_Fotor

Ingredients:

White rice – 1 cup (I have used small grain rice)

Grated jaggery – 1 cup

Ghee – 2to 3 table spoons

Coconut – 2 table spoons (grated)

Cardamom powder – 1 tea spoon

Pandan leaves – 2

Cashew bits – as needed

Method:

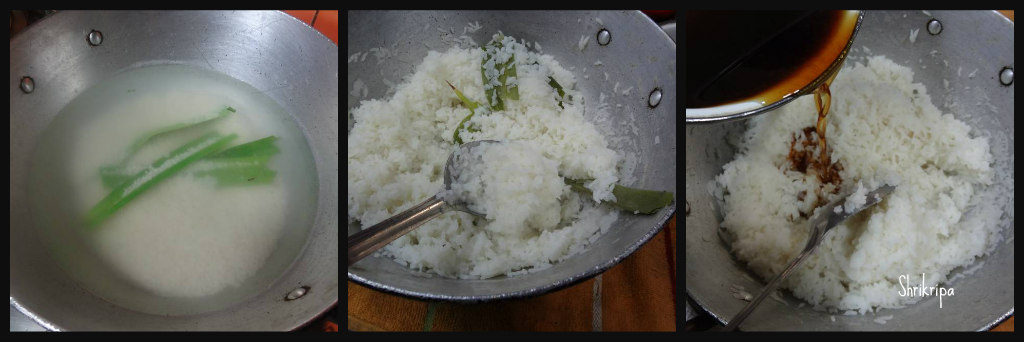
-Wash rice, Pandan leaves. Soak rice for 10 minutes.

-Boil 2 to 3 cups of water, add rice, Pandan leaves and cook until it is done.

Ribbet collage 1

-After cooking, remove Pandan leaves.

-In the meantime, take one cup of water, boil, add jaggery and melt.

-Sieve this solution and remove all the impurities.

-Add this solution to cooked rice and boil.

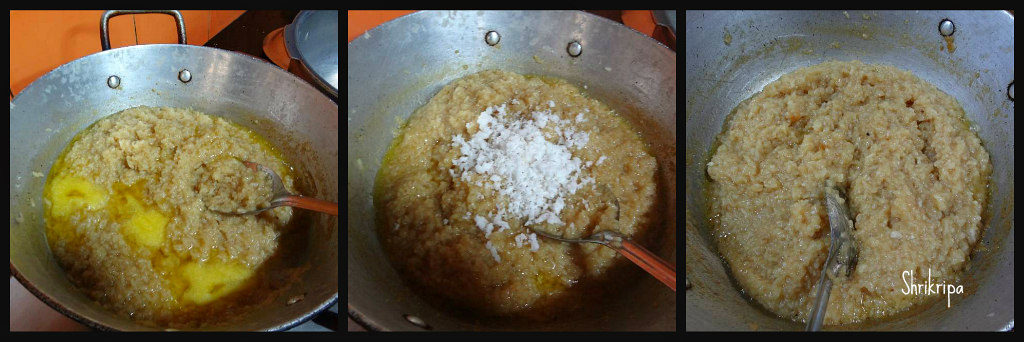
-When the mixture becomes thick, add ghee and mix nicely.

Ribbet collage 2

-Lastly add coconut, cardamom powder and give a stir for 2 to 3 minutes or until it becomes like a creamy mass.

-Roast cashew bits in a little ghee and garnish.

-If you want to offer this to god, do that and then serve. Other wise serve hot and enjoy this delicacy.


Akki Rotti Payasa /Rice flat bread kheer:

Happiness is when one of your readers messages you regarding this recipe, which he used to relish in his childhood and attempted a couple of times without any success. He wanted to know the exact recipe for the same, with proper measurements. When he explained about this payasam, I was clueless and thought it must be his grand mom’s own creation to fulfil the needs of her big family by making it easier. He patiently explained the process about how his grand mom used to prepare it and What amazed me was, as a small child, he has seen and observed how his grand mom does etc. After listening to his explanation, it was like a dream to me.  I couldn’t resist, and wanted to try it out As soon as possible. The next day was my wedding anniversary and I grabbed the opportunity and started my experiment. It indeed was a treat and I was super duper happy with the result. Here is the recipe and I am dedicating it to that great soul from whom this recipe came to light and my reader who has shared his childhood nostalgic memories with me by explaining it patiently.

DSC05209_Fotor5209 main

Now we will see how I proceeded with the recipe-

Ingredients:

Dosa rice – 1 small cup

Salt

Jaggery – 4 small cubes

One fresh coconut – to extract milk

Cardamom powder – 1 tea spoon.

Banana leaves – 2 pieces

Ghee – 1 tea spoon

Cashew pieces – 2 table spoons

Method:

-Wash and soak Dosa rice for 2 hours.

-Grind the rice into smooth paste with sufficient water (use soaked water itself) and salt.

Ribbet collage 1

-Batter should be of spreadable consistency (little thinner than regular Dosa batter)

-Next is a coconut milk extraction:

Ribbet collage 2

-Take fresh gratings, put one cup of water and grind into smooth paste and extract milk through sieve. This milk is a thick milk and is used at the end. Hence, it should be kept aside separately.

-Now once again take roughage of the coconut, put one more cup of water and grind, sieve the paste and it is our second extraction of milk.

-Repeat the process and take out a third extraction as well and if you are using the roughage of the coconut in any other purpose, you can store it in a freezer for future use.

– Take one wide thick bottomed vessel, Pour diluted, very thin milk (3 rd. extraction) and jaggery. Boil nicely.

Ribbet collage 3

-Now pour second extraction of milk (thin milk) and boil further.

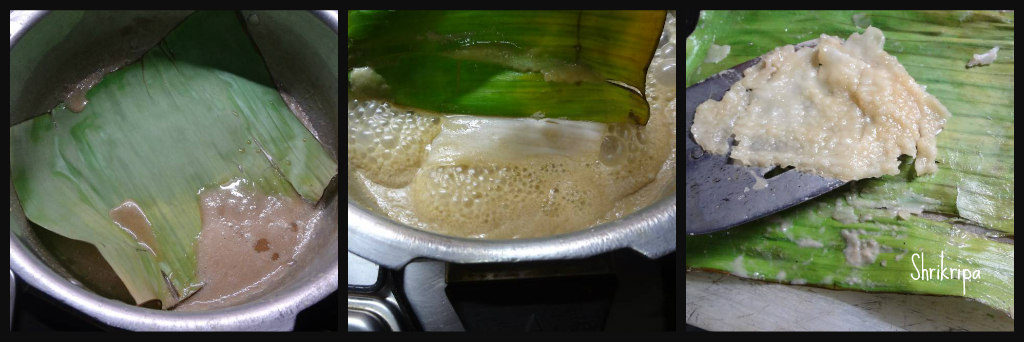
-Now start preparing Rotti, take one clean banana leaf, spread a ladle of rice batter and spread as thin as possible and flip this leaf over boiling jaggery solution.

Ribbet collage 4

-Within 2 minutes, it will be ready to remove. Now start pulling your banana leaf by peeling it slowly.

-After peeling, if at all some cooked Rotti part remains, take one flat ladle and remove and put it in the boiling jaggery solution.

-Repeat the procedure, until batter finishes. I did it 4 times.

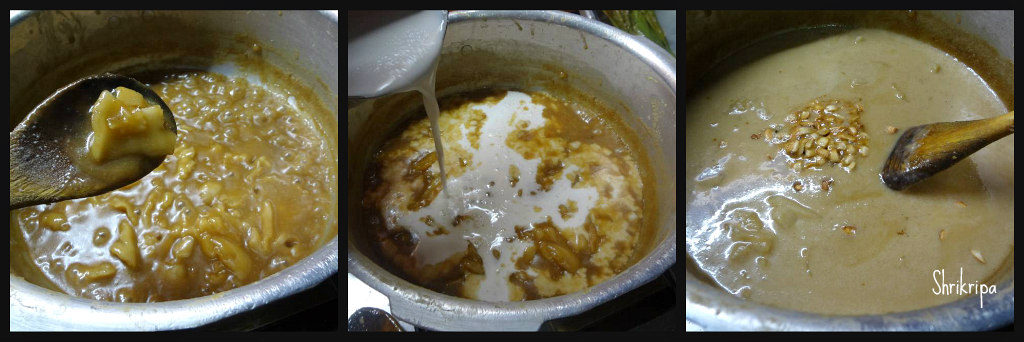
-Now boil this further for 3 to 4 minutes and mix it in-between by using very light hand.

Ribbet collage 5

-It is the time to use thick first extract of the coconut milk.

-When it starts boiling, remove from the flame. Add cardamom powder and ghee fried cashews and serve hot.

DSC05211_Fotor5211 main 2

Note:

  • We liked this dessert as a Hot option.
  • When it cools down, at room temperature it tastes good.
  • Under refrigeration, if Rotti pieces becomes slightly hard, one can relish after re heating.

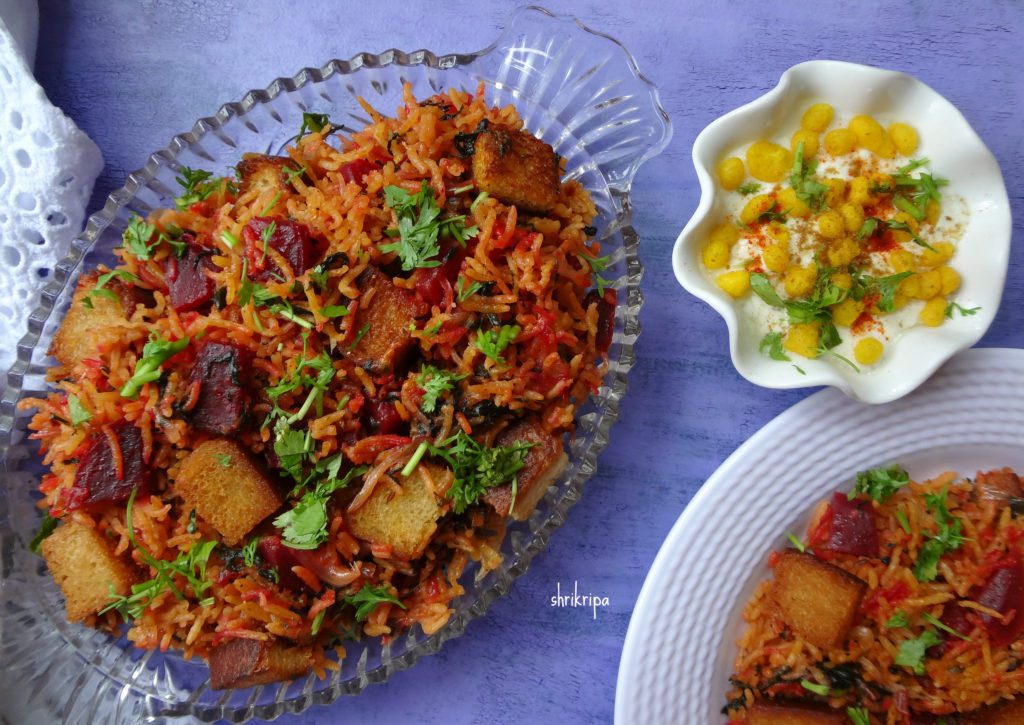
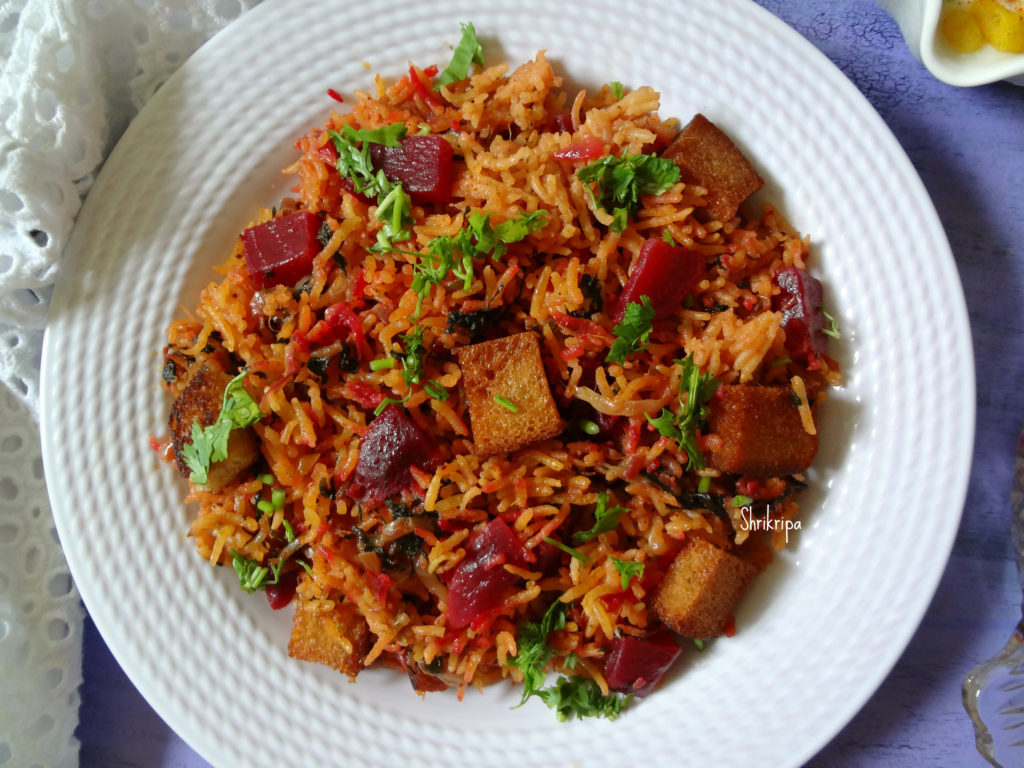
Red Amaranth and Beet Pulav:

Red amaranth is very beautiful and a natural source of energy, rich in iron and a whole lot of micro nutrients and fibre. It is very high in calcium and very good for all ages, from infants to adults.

On the other hand, beets are also packed with anti-oxidants, Folic acid and Iron. Which is considered as a super food to fight anaemia.

When my home grown red amaranth is harvested, this rice dish is what we love to eat, by adding Beetroot chunks to enhance the nutritional value. One can enjoy this one pot super tasty dish with any form of yogurt based side dish or even with plain yogurt and pickle. One can carry this in a tiffin box as well. It is a very good idea to feed greens to those who don’t like them, without they even noticing 😉

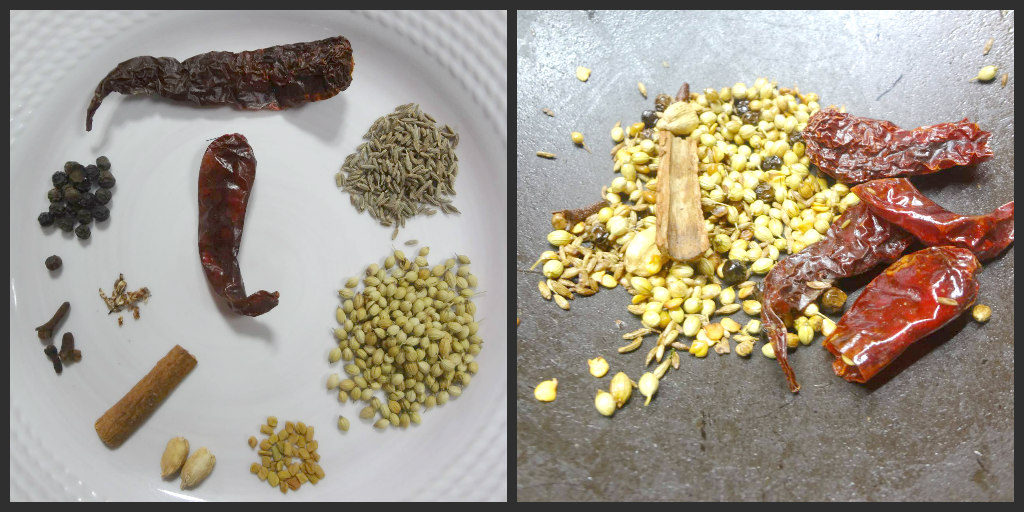
This time, when I harvested red amaranth, I thought of using fresh ground masala and it really tasted divine, oozing with flavours.

second 2

Ingredients:

Basmati Rice – 3 cups

Beet root – 1 big

Red Amaranth – 1 Small bunch

Onions – 2 (sliced)

Ghee/oil– 3 table spoons+1 tea spoon

Cumin -1 tea spoon

Bay leaves – 2 (small)

Ginger garlic paste – 1 table spoon

Milk – 1 cup

Curd -1 cup

Brown Bread – 3 slices

For Fresh masala:

Coriander – 1 tea spoon

Cumin – ½ tea spoon

Cardamom -2

Cloves- 2

Cinnamon – 1”

Black pepper – 8

Nutmeg – 1 pinch

Dried Red chillies – 2

Fenugreek seeds – ¼ tsp

Method:

-Wash rice and soak for 15 minutes.

-Wash Beetroot, chop into bite size pieces.

– Wash Amaranth greens, chop.

-Dry roast fenugreek seeds. When it is slightly brown, add all the other ingredients under masala and fry.

Ribbet collage 1

-Make a powder and keep it.

-Now take one pressure cooker. Add ghee or oil, fry cumin and bay leaves.

Ribbet collage 2

-Add sliced onion, fry until it is brown.

-Add ginger garlic paste, fry for 2 minutes.

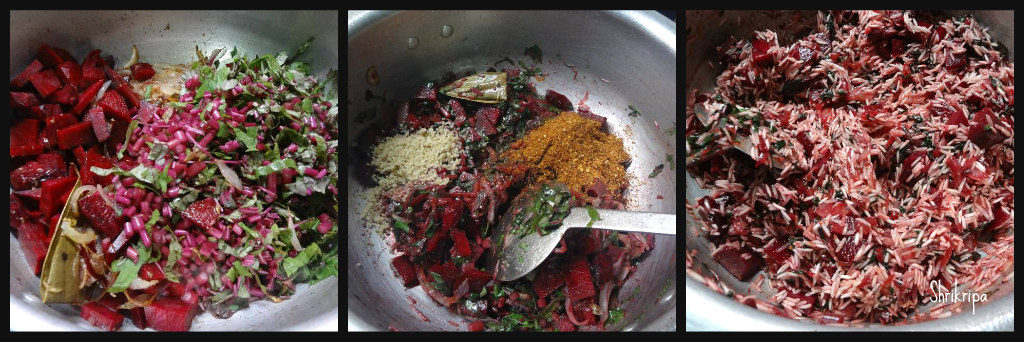
-Add beetroot, chopped greens, fry until green wilts.

Ribbet collage 3

-Next add fresh ground masala powder, drained rice, salt.

-Mix everything and add milk, curd , 4 cups of water and 1 tea spoon of ghee,close the lid.

-After one whistle, keep it in a simmer for one/two minutes and switch off the gas.

Ribbet collage 4

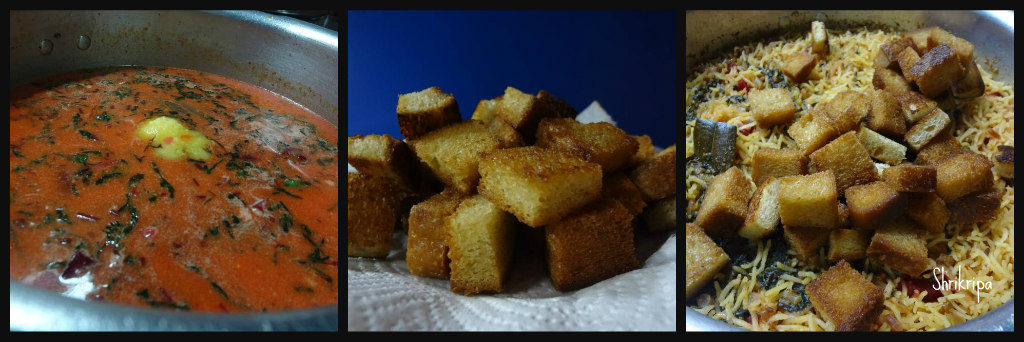
-Now make small square size pieces of brown bread and deep fry and drain out excess oil.

-When pressure releases, add bread croutons and lightly mix everything.

second 3

– serve with any raita or plain curd and pickle.


Tamilnadu Style Idli and Dosa Batter:

It is a Two in one bonanza—Yes!!!!

I always wondered how to get a pillowy soft kind of idli which is a speciality of Tamilnadu. In our coastal side, idli turns out soft but has a little grainy texture, not spongy which we get in all Tamilian eating joints. During one such discussion in our Foodie group, we asked to provide Tamilian style idli recipe with our ever energetic, multitalented uncle Senguttuvan. I really was not expecting this kind of response after one week. He and his wife literally took all the trouble and wrote step by step procedures with pictures, some tricks and notes. Added to that, there were a couple of video’s too. I was really overwhelmed and wanted to give its due credit by publishing this recipe in my blog after preparing it myself at home and we all loved it.

pic main

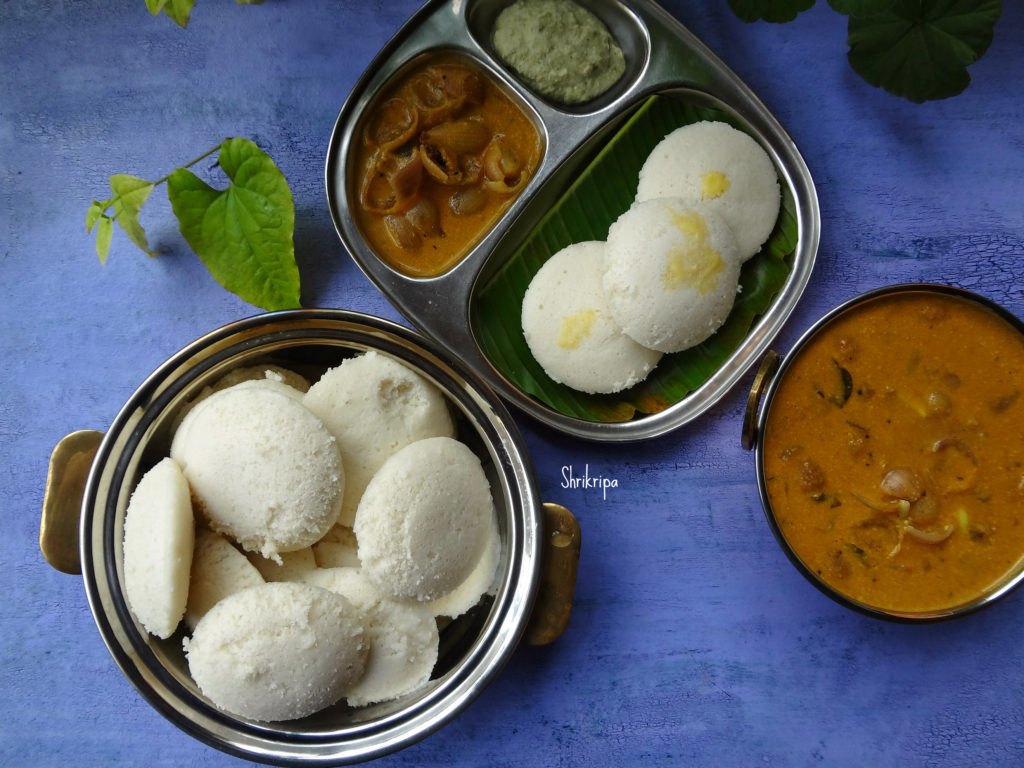
I tried his Idli recipe and paired it with another hit recipe of his Onion Garlic Kolumbu. It was a pair made in heaven kind of breakfast. I will post the Kolumbu recipe next and once again all thanks to Senguttuvan Subburathina and his wife Jayanthi Senguttuvan for this amazing recipe. Now, over to his words as it is and my pictures-

Here we go!

Ribbet collage 1

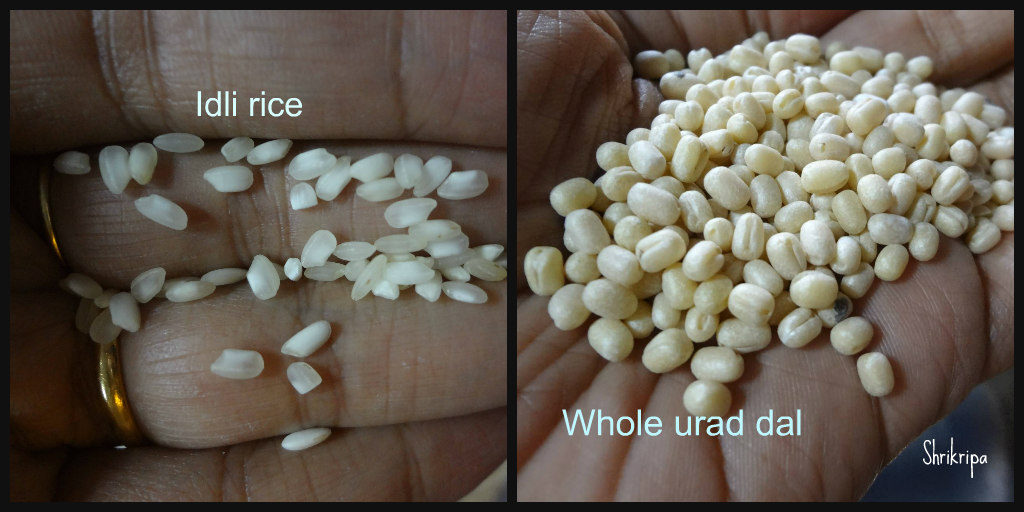
The selection of Rice is important. Boiled Rice (Idly rice) with patches of white will help in better softness of Idly.

We use whole white Urad Dal. Not broken one. (why? This also help soft Idly they say. I am not sure)
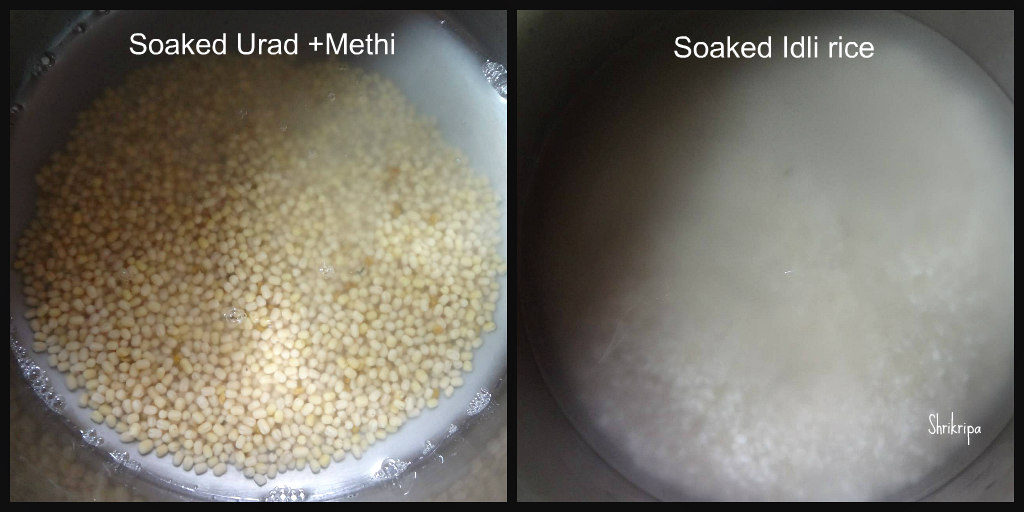
Fenugreek (Methi /Menthya Seeds)

Salt to taste.

Water as required.

Only the above ingredients go into making of this Idly / Dosa batter.

Wash the Rice 2-3 times with water and soak in clear water for 2hrs.
Simultaneously, wash Urad Dal and Menthya seeds and soak in water.

Ribbet collage 2

THE RATIO IS – RICE 4:1 URAD DAL. One TeaSpoon of Menthya.

Use of wet grinder is recommended. Heat generated during use of Mixie / blender spoils the Batter making. Though ice water usage will minimize the effect in mixie.

First, Grind the Urad Dal first, using the same water in which it was soaked. Grind for 25 mins adding water little by little so that a soft thick fluffy batter consistency is reached.

Ribbet collage 3

Transfer to a vessel and start grinding the Rice adding water little by little as you grind. About half an hour of grinding will give a little coarseness in batter. This thick batter is to be added to the Urad/ Fenugreek mixed batter.

Add required ROCKSALT (to taste) and mix well with hands. This is important. The good bacteria in hands help fermentation of batter. Take care to choose a vessel that will allow 25% raise in the height of batter after fermentation.

Ribbet collage 4

Normally, the batter is prepared by noon around 2pm. By night, around 8-9 pm, the batter is well fermented, for Chennai weather. In cold climate, it is recommended to switch the light on in OTG and keep it in, so that the warm light helps in faster fermentation.

At 9pm, when you find the batter well fermented, mix it well with ladle and close and keep refrigerated.

As and when required, take the small quantity of batter in a separate vessel and use that portion leaving the main portion of batter under constant refrigeration, so that it does not get further fermented.

The batter is ready for Idly / Dosa preparation the next day morning. Mix well and use for fresh fluffy Idly.

Use a drop of oil in each pit of Idly plate and spread oil so that Idly comes out smooth. We cook Idly in pressure cooker without placing the weight. It just takes 7 minutes to get fluffy Idlies cooked.

After removing the Idly plates from cooker allow a minute or two to cool down and remove the Idly for easy removal.

Ribbet collage 5

For Dosa preparation:

dosa main
Remove small quantity of this batter to another vessel and add little water mix well and use. A thick Dosa or thin roast Dosa can be prepared with same batter.

Trust the above details help.

Note from Me:

-In Bangalore weather it takes more time to ferment. It took me almost 16 hours.

-I personally feel very lazy to remove urad dal after grinding. So, I add soaked rice and continue grinding as it is. It also works just fine.