Banana Halwa:

Banana or Plantain Halwa was an integral part of my childhood. Usually this Halwa is made by using Kerala big banana which is called as” Nendra variety” but in our home, we used to have lots of overripe bananas from our family farm. To finish off all those overripe small bananas (Kadali variety of Mangalore), amma used to make Halwa or Banana Preserve/ Berati all the time. It was a very regular sweet at our house hold. Today I will share this recipe to all our readers-      

Ingredients:

Over ripe banana – 22

Sugar – 1 bowl

Ghee – ½ to ¾ cup

Cashew nuts – 2 tbl sp.

Method:

-Put all the peeled bananas to mixer grinder and make a smooth paste. Measure this by using any bowl of your choice.

-If this paste is 3 cups in quantity take one cup of sugar in that same measurement cup. So, your ratio of banana paste and sugar will be 3:1.

-Fry cashew bits in a teaspoon of ghee and keep aside. Grease one plate with ghee and keep it ready.

-Take one thick bottomed kadai, put this paste and keep gas flame in a very low flame and cook for a while.

-When it changes its colour to milky white and then to a pale colour and when you smell the banana flavour in the air, add sugar and mix this in at a regular interval.

-Add ghee 2 table spoons at a time in-between while stirring. If you feel that the banana paste needs a little more ghee, add up to ¾ cup, some varieties of bananas need very less ghee and some need more.

-Now we will see, how we decide the quantity of ghee. While stirring if you feel that the mixture is a little dry and the bottom part becomes a little brown, keep adding it.

-If the ghee starts oozing at the sides, it is an indication to stop the addition of ghee.

-Now we will see how you know the doneness. It is very simple, keep on stirring until mixture leaves the sides of the kadai and ghee oozes out from the mixture.

-You can add cashew pieces at this stage or spread those pieces in a greased plate like me. After you are done with this, it is almost ready to shift to the plate.

-Before shifting I prefer to check, by taking one small peanut sized portion of the mixture and rolling it in-between your thumb and forefinger to make a small ball like structure. If it holds a ball like structure and does not stick to your finger, it is ready.

-Now remove from the flame, shift to a greased plate and pat this mixture evenly by using a flat, greased (apply some ghee) back of the spoon.

-Keep this aside for two or three hours to cool. Then cut this into the desired shape and store it in an airtight container.

-You can store this Halwa for a really long time (up to a month or two).



Rice kheer:

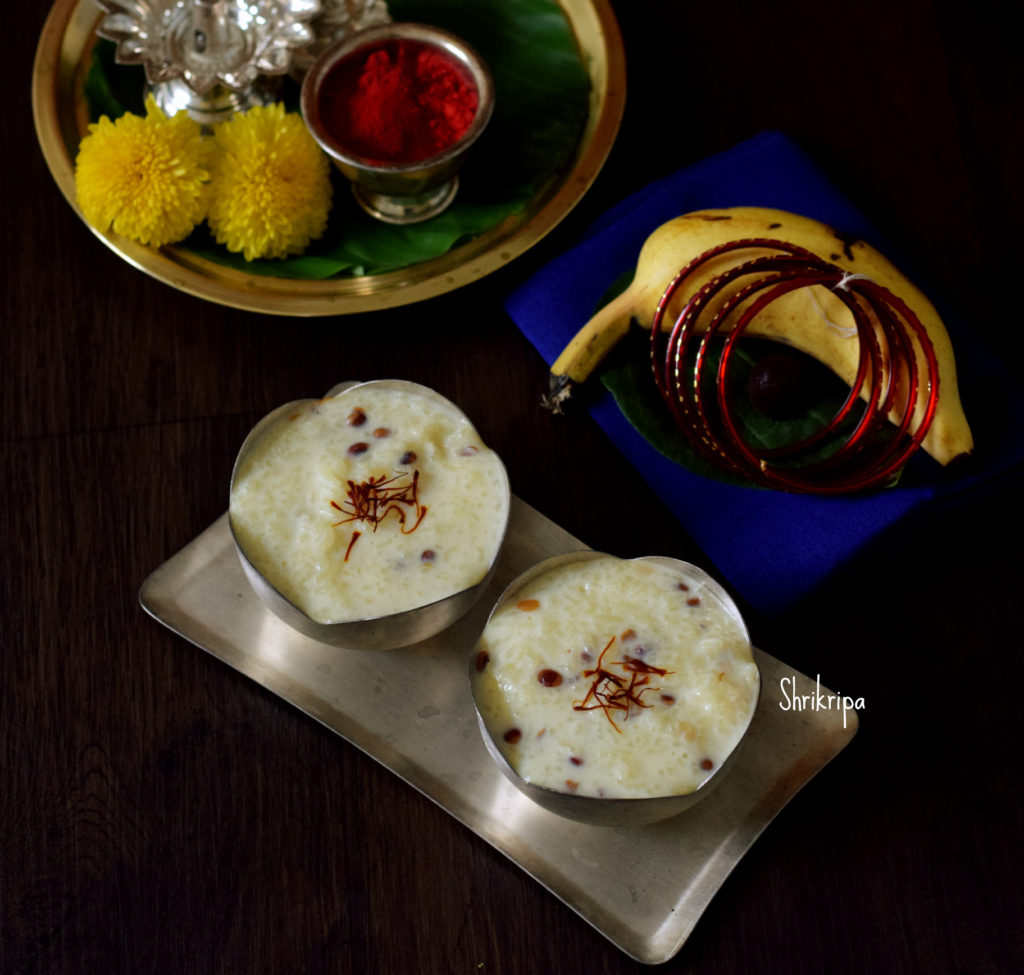
As a south Indian, moreover in Mangalore, we normally make Akki Payasa aka rice kheer as a prasadam for some poojas, either by adding jaggery or sugar by adding coconut milk or normal milk and it usually in thin consistency. If it is thick, it is known as pindi payasam and I have already posted the recipe earlier. I learnt this recipe from my close friend Surekha, who hails from Allahabad, all thanks to her for such a wonderful tasty kheer recipe. It is one of my daughter’s favourite as well. 

In this recipe, washed rice is cooked in milk, until done and in this process, milk condenses and yields creamy texture and kheer holds melt in the mouth texture as well. Speciality of this kheer is, addition of nutty flavoured Chironji or Charoli. It tastes a little like almonds and are tiny roundels in shape and good substitute to almonds as well. Which contains good fat, vitamins, minerals and dietary fibres in a considerate amount.  This is an ideal recipe for any kind of festival, potluck party.

Now we will see the procedure –

Jeera samba rice / small grain rice – 1 cup (you can use any fragrant rice)

Chironji – 100 grams

Milk – 1 to ½ litre (boiled)

Saffron – 10 strands

Sugar – 1 to 1 ½ cup (according to your sweet level)

Method:

-Wash rice, soak rice for 10 minutes.

-Soak saffron in 2 table spoons of hot milk and keep it aside.

– Take one thick kadai, add little ghee and fry Chironji until light brown.

-Add milk to this vessel and heat this. When it starts boiling, add soaked and drained rice.

-Cook in a very low flame, until rice is done and soft.

-If additional milk is needed, please add the extra amount. Each rice is different, so, please take care while adding milk.

-Now add sugar and saffron with soaked milk into it and boil. When kheer is ready, you will see the top glossy layer and it is the time to switch off the gas.

-Serve this kheer hot or cold, however you like to have it.


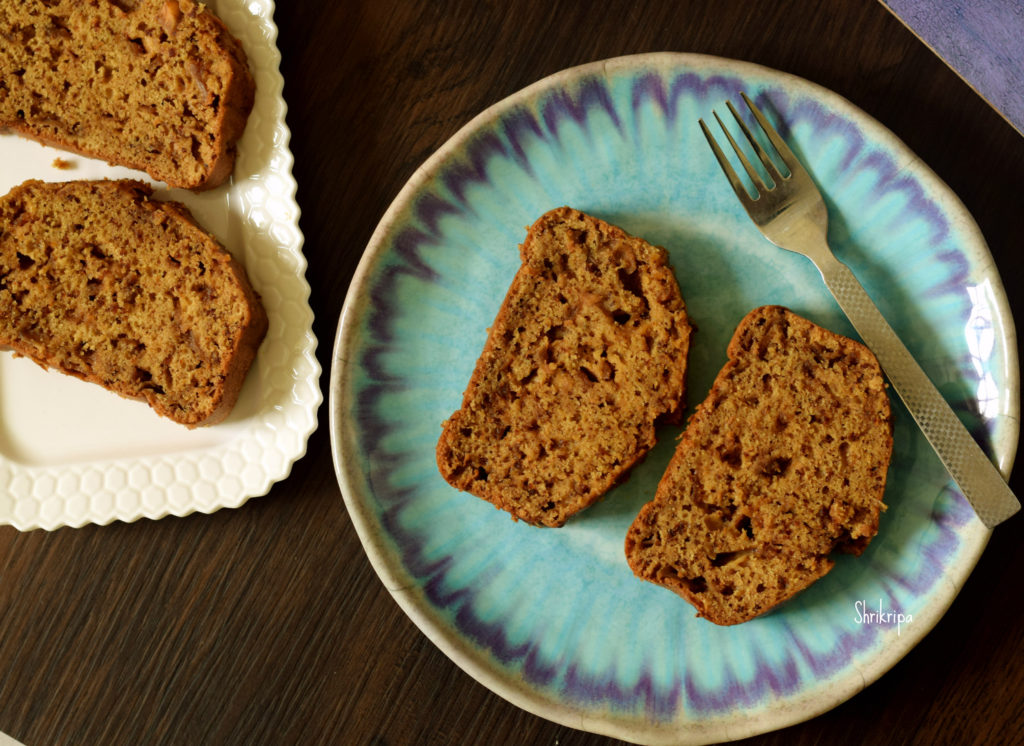
Ghee Residue Apple-Cinnamon Tea cake:

Ghee residue is a moist, brown coloured, by-product formed after preparing ghee from white butter. It is a rich source of essential fatty acids, anti-oxidants and proteins.

As of now, you will know my love towards this sediment and I usually make it a point to prepare any tea cakes after making fresh homemade ghee. Usually I play with the ingredient and flavours in these cakes. Already I have Egg less Tea cake and Chocolate cake in my blog.

This time, I included cinnamon flavour in my cake by using chopped fresh apple. I have used tasteless mini apples which I took in the market for its attractive size and colour, turned out to be a tasteless apple, after cutting 😉 

Now we will see how to make this,

Ingredients:

Apples – 1 cup (chopped)

Ghee residue  – 2 to 3 table spoons

Sugar – ½ cup

Organic jaggery powder – ½ cup

All purpose flour – 1 cup

Whole wheat flour – 1 cup

Cinnamon – 1/2 tea spoon

Eggs –  2 (beaten)

Water – 1 cup

Cooking soda – 1 tsp or little less.

Method:

– Wash all the apples and chop it into tiny pieces. No need to remove the peel.

-Grease the baking tray (you can use bread tin as well). Line this with butter paper, keep it ready.

–In another bowl, dry mix All purpose flour, whole wheat flour, cinnamon powder and keep aside.

-Take vessel in which you prepare ghee. There will be 2-3 table spoon ghee residues.

-To this add water, chopped apples, sugar, jaggery and heat it until sugar dissolves. Switch off and cool.

-Add cooking soda and keep aside at least for 20 min.

– After it cools, add beaten eggs and mix nicely.                        

-Now fold in flour mixture, mix gently and pour this batter to a greased and lined baking vessel.                                           

-Bake this in a pre- heated oven for 35 -40 min or until done at 180 C.

-If you want to check its doneness, use tooth pick or knife. Insert this, if it comes out clean, remove the tin, keep it outside.

-After some time, remove butter paper and cool further.                  

-When it reaches room temperature, you can slice it or cut according to your wish and enjoy with cup of coffee or tea.

Note:

-You can use only All-purpose flour or mixture of any flour.

-You can use only sugar, Jaggery or mixture of both.

-If you like it sweeter, please increase the quantity of sweet by adding ¼ cup more of sugar or jaggery.


Mysorepak /Mysorepaka:

There are a lot of sweets which have originated from south Indian kitchens, even then Mysore Pak has a very special place in people’s hearts. Some like it very soft, ghee dripping melt in the mouth kind and some like little harder, porous and little grainy in texture.

Usually in the Mysore – Bangalore side, you will find softer version and In Mangalore we usually get latter one, with grainy texture.

I have received a couple of requests to update my version of Mysorepak recipe, which I prepare almost from past 25 years and it is our family and extended family member’s favourite sweet. My little niece who relishes it, and thinks it is the ultimate sweet, ends up having couple of pieces at one go. I usually wait to see her priceless expression while relishing her share of Mysorepak. This recipe yields firm, porous and grainy in texture with darkish inner and light colour on both the outer sides. Last week I prepared this sweet on my husband’s birthday and now sharing the recipe with you all.

Recipe goes like this-

Ingredients:

Besan /Bengal gram flour – 2 cups

Ghee – 3 cups

Sugar – 3 ¾ cups

Water – 1 cup

Cardamom powder – 1 to 2 tea spoons

Method:

-Take one baking tray or any deep wide vessel, apply ghee and keep aside.

-Take one vessel, pour ghee and keep it on the flame. When it becomes hot (before boiling), switch off the gas, add Besan to hot ghee, stir well and keep aside.

-Mixture should be uniform and without any lumps. I prefer to use wire whisk to do this.

-Next comes the main part.

-Take one thick bottomed kadai, add sugar, pour water and keep it on the flame, boil until it is frothy and reaches single thread consistency.

-During boiling, fire should be kept at low and you should stir in-between.

-When the consistency of the sugar is ready, add ghee mixed Besan and start stirring.

-Fire should be kept at low flame and you should continue stirring without removing your hand.

-After 10 to 15 minutes you will see the changes and mixture will become bubbly and shiny.

-Now it is the time to add cardamom powder and be vigilant. It would be ready in any moment from now.

-When it is done, mixture will leave the sides, base and sides of the vessel will become light brown or sometimes we see the ghee separating and oozing out from the bubbles. (these are the indications to remove)

-Now pour this mixture to a greased vessel, don’t touch or press after pouring, leave as it is.

-Cool it for about 5 min and mark the lines by using a sharp knife.

-Once it is completely cooled (it takes anywhere between 2 to 3 hours)

-Invert the plate on another plate or by keeping butter paper. It needs some knocking at the base because air bubbles would restrict the easy exit.

-Remove gently, break all the pieces and store it in an air tight container.

Your Mysorepak is ready to serve!

Note:

-Besan should be as fresh as possible. (do check the manufacturing date)

-When ghee is hot, you will hear couple of “tup” “tup” sound. That is the time you should mix in the Besan.

-Ghee shouldn’t boil.

-When sugar reaches single thread consistency, solution will start bubbling and rise upwards.

-Take a deep pan or baking tin or deep flat vessel to get long pieces and two tone colours.


Mango Truffle Cake:

It is a ritual at our home to make mango stuffed chocolate cake every year when king of fruit is in season. This year, I had a lot of over ripe mangoes and wanted a way to utilize it in this cake itself. I tried mango sauce as a topping and it worked out wonderfully and kids gang liked it too.

Truffle cakes are melt in the mouth chocolate and cream cakes but when fresh fruit is added as a stuffing between the layers it tastes rich with a natural fruit flavour. I normally prefer less cream or high calorie stuff when I am baking for my family and friends. If you are looking out for healthy options for truffle cakes, this recipe is for you.

Now we will see the procedure, how I went ahead –

First – For the chocolate cake:

Ingredients:

Very fine semolina – 1 ¼ cup (Known as Chiroti Rava)

Ragi / finger millet flour – ½ cup

Cocoa powder – ½ to ¾ cup

Baking powder – 1 tea spoon

Baking soda – 1 tea spoon

Eggs – 2

Butter – 100 grams

Sugar – ¾ to 1 cup (if you want less sweet use ¾ th cup)

Milk – ½ cup

Instant coffee powder – 1 tea spoon

Hot boiling water – 1 cup

Method:

-Pre- heat oven @ 180 °C and line a baking tin with butter paper.

-Take one bowl, prepare dry mixture. Take semolina, Ragi, cocoa, baking powder and baking soda by using wire whisk or you can sieve all these twice or thrice.

-In another bowl we will prepare wet mix, beat egg one by one, add milk, sugar, butter and beat until frothy.

-Boil water, mix in coffee and pour this into wet mix and once again beat and make a homogenous mixture.

-Now fold in dry ingredients by using wooden spatula. Don’t over mix this content.

-Pour the batter to lined baking tin, bake for 40 minutes in a pre-heated oven.

-when it is done, remove, cool and keep it ready for stuffing.

Second – Mango filling:

Ingredients:

Mango – 1 or 2 (depending on the size)

Icing sugar – 2 tea spoons

Method:

-Peel the skin, hold the mango flat on your left hand. Mark so many cuts in horizontal and vertical manner and make tiny square pieces. Finally squeeze the seed to extract remaining pulp.

-Add icing sugar or sugar powder, mix nicely and keep this in the fridge until you are done with the sauce making and slicing the cake.

Third- Mango sauce for dressing or to drizzle:

Ingredients:

Mango – 1 or 2

Icing sugar – 1 or 2 tea spoons

Butter – 1 table spoon

Juice of Lemon – 1 tea spoon

Method:

-Remove outer skin of mango, chop and make a puree.

-Take one sauce pan, add mango puree, butter, icing sugar, lemon juice and boil it nicely and switch off the gas.

Fourth: Now Comes the assembling part:

Step 1: Take the cake (completely cooled one) and slice it horizontally. You will get 2 discs.

Step 2: Take out mango filling, equally spread this on one of the flat disc.

Step 3: place another halved disc on mango filling.

Step 4: If you like mango, go ahead and pour the sauce as a dressing to cover the top of the cake and slice it or you can drizzle the sauce while serving as well.

NOTE:

-One can use 2 cups of All purpose flour as well in place of 2 combined flours OR Use 1 ½ cup of All purpose or whole wheat and ½ cups of Ragi as well.

– To substitute eggs, use flax gel and recipe is here.

-I have used is ¾ cup of brown sugar. Cake was less in sweetness and it tasted more like coffee and was chocolatey.

-You can use less or more chocolates according to the quality of brand which you use.


Mango mini cake doughnuts:

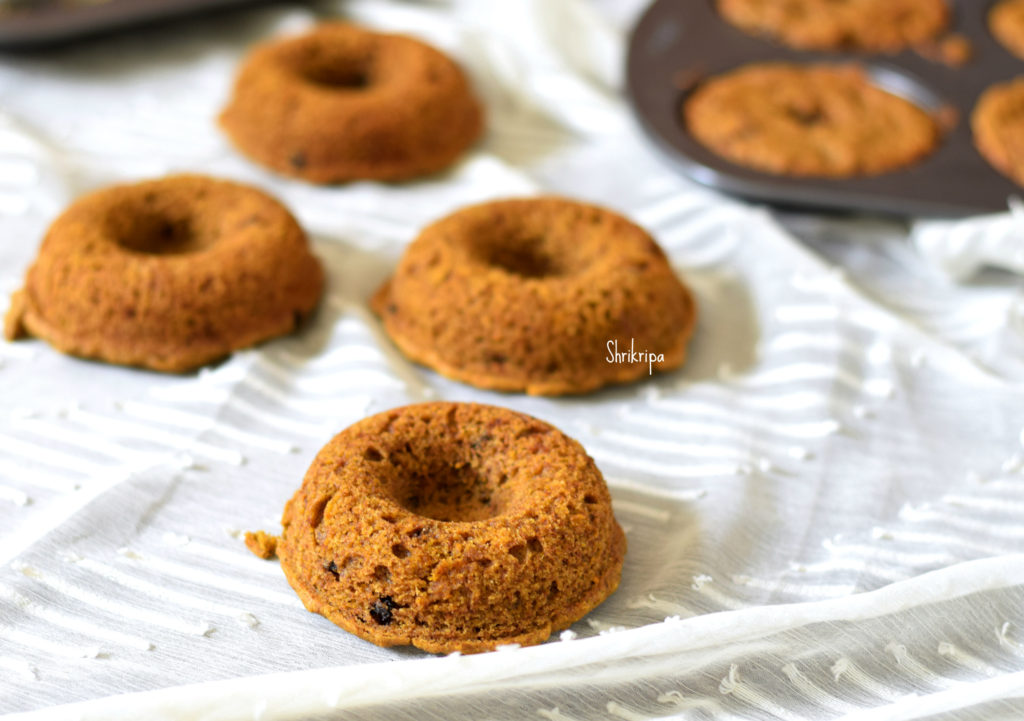
Mini cake doughnut is an eye pleaser for any one. As summer is coming to an end and it’s school reopening time, wanted to try my hand at this Mango cake by using my protein rich millet health mix instead of All purpose flour. Usually I make this cake by using All purpose flour /Maida. I don’t like the taste of whole wheat with mango. When I was thinking to replace Maida in this recipe, I thought of using millet flour and proceeded. It turned out very tasty and soft. It worked out just fine as a short break snack for my ever-supportive daughter V, who tastes and gives her feedback in every step of my kitchen experiments. 

It is an eggless recipe as well as healthy and I don’t consider this as a dessert. It is a 100 % snack and very filling as well as filled with goodness and natural flavour from summer fruit Mango. If you are into healthy baking and want to try it out, I am sure, you will like this recipe.

I’m excited to share this recipe with you all –

Ingredients:

Millet health mix – 1 ½ cup (you can use all purpose flour as well)

Salt – ¼ tsp

Chocolate chip – ¼ cup

Cardamom powder – ½ tea spoon

Baking powder – ½ tea spoon

Baking soda – 1 tea spoon

Mango puree – ¾ cup

Butter – 100 grams

Sugar – ½ cup

Curd – ½ cup

Method:

-Pre heat oven at 180°C. If you are using a baking tin, line the tray with butter paper or apply some butter, grease the mould and keep it ready.

-Mix all the dry ingredients together – Flour, salt, Choco chip, cardamom powder, baking powder, baking soda.

-Dry whisk everything and mix properly and keep aside.

-make mango puree from the cut pieces of mango’s. You can take any good variety of mango.

-Now take another bowl, take melted butter and beat. Add in sugar, mango puree, curd one by one respectively and beat nicely.

-Fold in dry ingredient and make homogenous mixture by using wooden or rubber spatula or with a light hand with a wire whisk.

-Pour the batter in cake tin, here I have used doughnut shaped mould.

– Bake the cake in a pre-heated oven for 15 to 20 minutes or until done.


Mango Trifle:

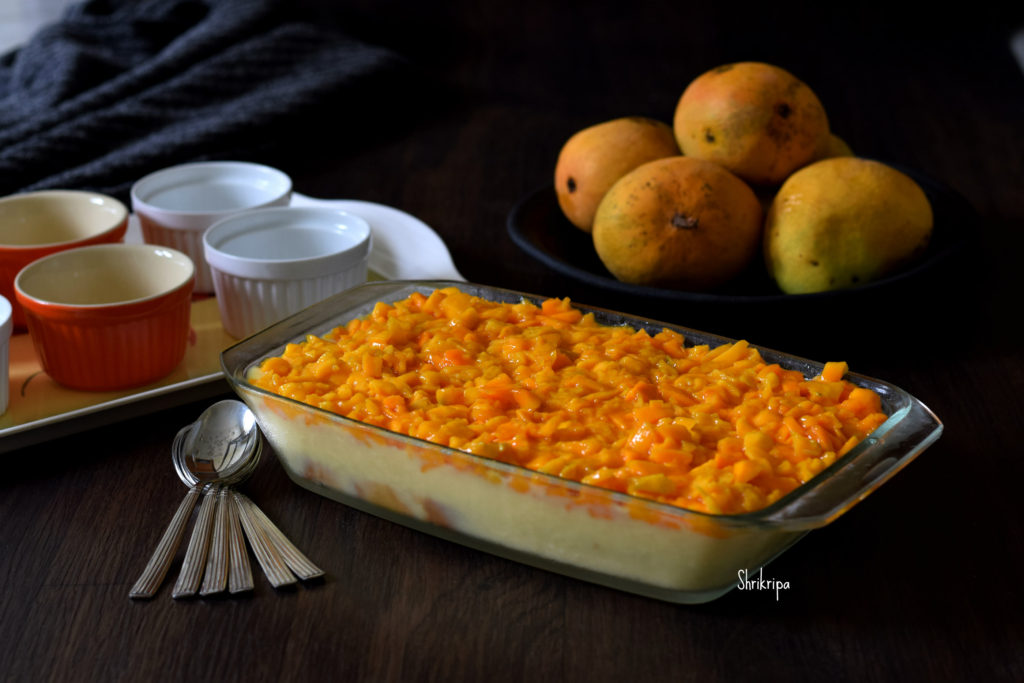
Trifle, name itself brings a smile on my face. I started my non-Indian dessert preparation journey from this recipe and it has come a long long way. It has been almost 20 years now. When I was in my native, exposure to the outside world was minimal and our day to day preparations were all traditional and prepared with locally available ingredients or seasonal vegetables. After my wedding, my opportunities got widened as well as the encouragement. It was not an internet era. My sources were library books and my notebook and pen. I used to read about the different cuisines, uses and ingredients. In the meantime, I tried to implicate all of that knowledge in my cooking.

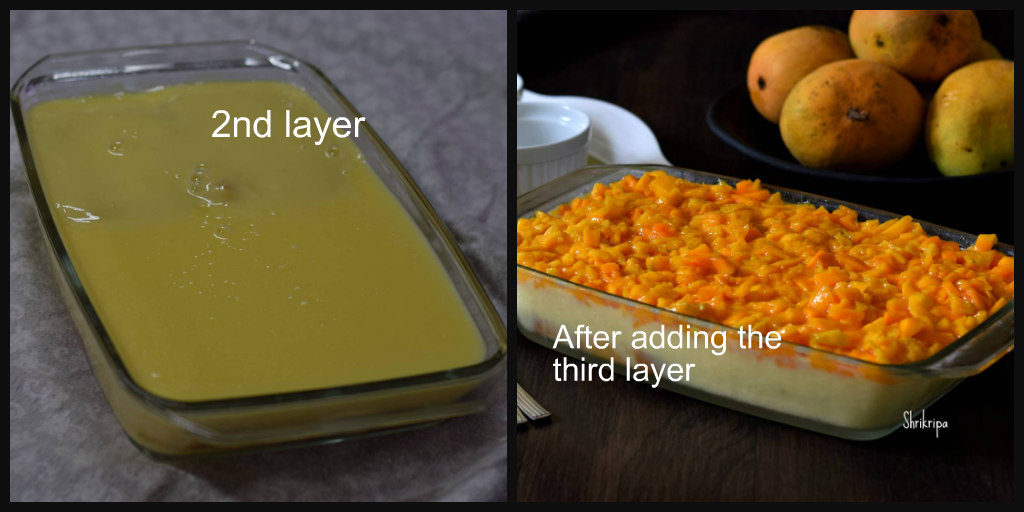
Trifle is an English dessert, which is cold and creamy, that contains 3 layers. Here I usually use Sponge cake at the base, then vanilla milk custard which is topped with any seasonal fruits. Mostly Mango or strawberries. Here sponge cake will be soaked with hot custard and will swell like a thick foam. It is cooled under refrigeration and while serving, last layer will be added. It is a party pleaser and a very good idea for a large gathering and usually is loved by all. Prepared this easy dessert to celebrate 6th Anniversary of our Foodie group in  Facebook.

Ingredients:

Sponge cake – ½ kg

Custard powder – 4 table spoons

Milk – 1 litre

Sugar – ½ to ¾ cup (I usually prefer light sweet)

Mango fruits – 3 to 4

Method:

-Take one flat, rectangular or square glass dish or baking dish.

-Place the first layer.  Slice the sponge cake and place flat at the bottom of the dish.

-Prepare custard first:

-Pour milk to the vessel, remove half cup of milk from this vessel, mix in custard powder and make a paste and keep it ready.

-When milk starts boiling, add the custard paste and boil for some more time (2 to 3 minutes)

-Mix in sugar and stir nicely.

-Pour this hot custard over the first layer (over the sponge cake)

-Sometimes sponge cake pops up, while pouring the custard. It is ok. After some time, you will be able to press it back.

-Now cool it completely, cover with the cling wrap and keep it under refrigeration to cool.

-It takes almost 4 to 6 hours or overnight is also fine.

-Next is Fruit layer: Chop the fruits into small chunks. Remove all the pulps which is attached to the inner seed as well.

-Mix in couple of spoons of sugar and keep it in the fridge.

-Before serving, remove cling wrap and spread the fruit all over the custard.

-Take one serving spoon, dig it up to the bottom, take out all three layers, while serving and enjoy.

-If you are making this for a larger crowd, you can prepare this in advance and serve.

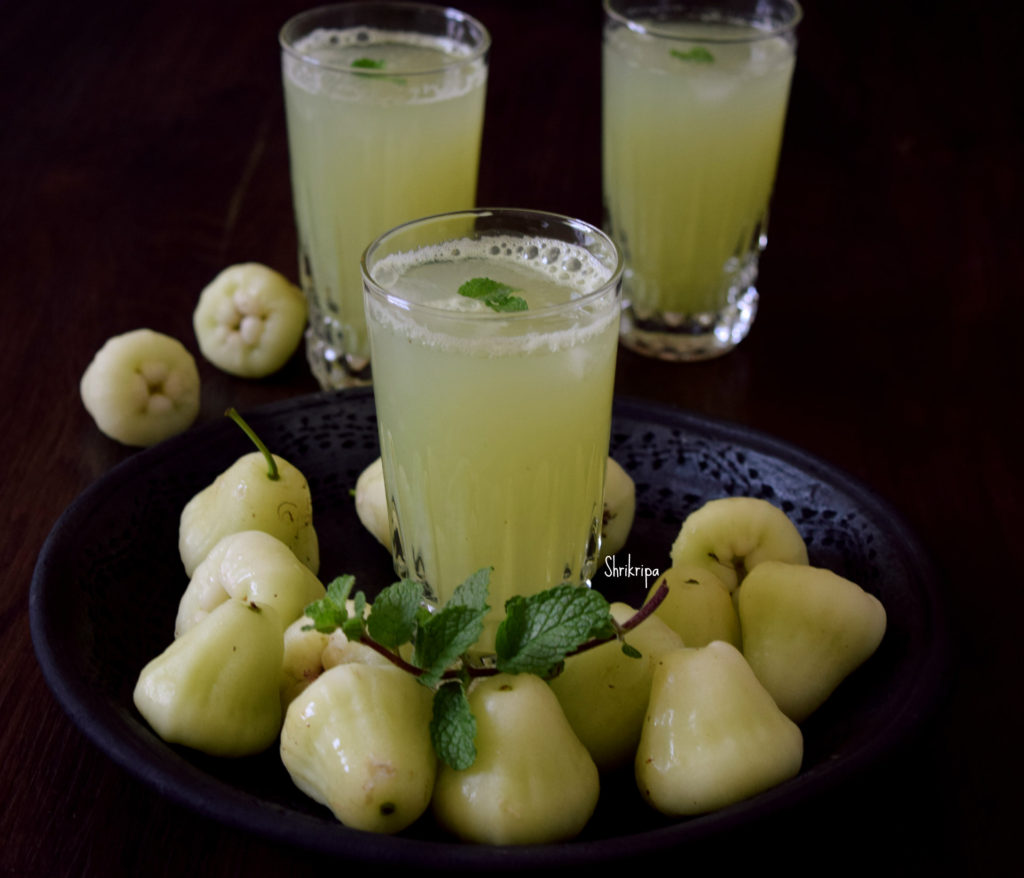
Bell fruit -Raw Mango- Mint juice:

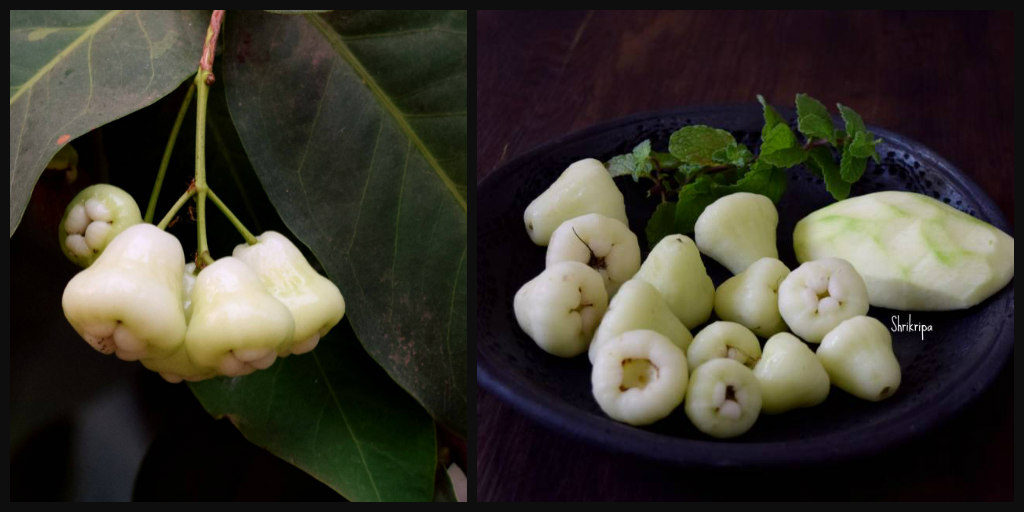
Summer is the season, when we need lot of water to keep our body hydrated. The humble bell fruit is one such fruit, which we had in our front yard while I was a kid. It is the most underrated fruit when I was growing and other than eating, fruits used to be wasted on the ground after it fell from the tree.

 Almost all the household has one or the other watery fruit plant in our native. It has several names like wax apple, java apple, water apple, Syzygium, Jambi fruit or jambu nerale.

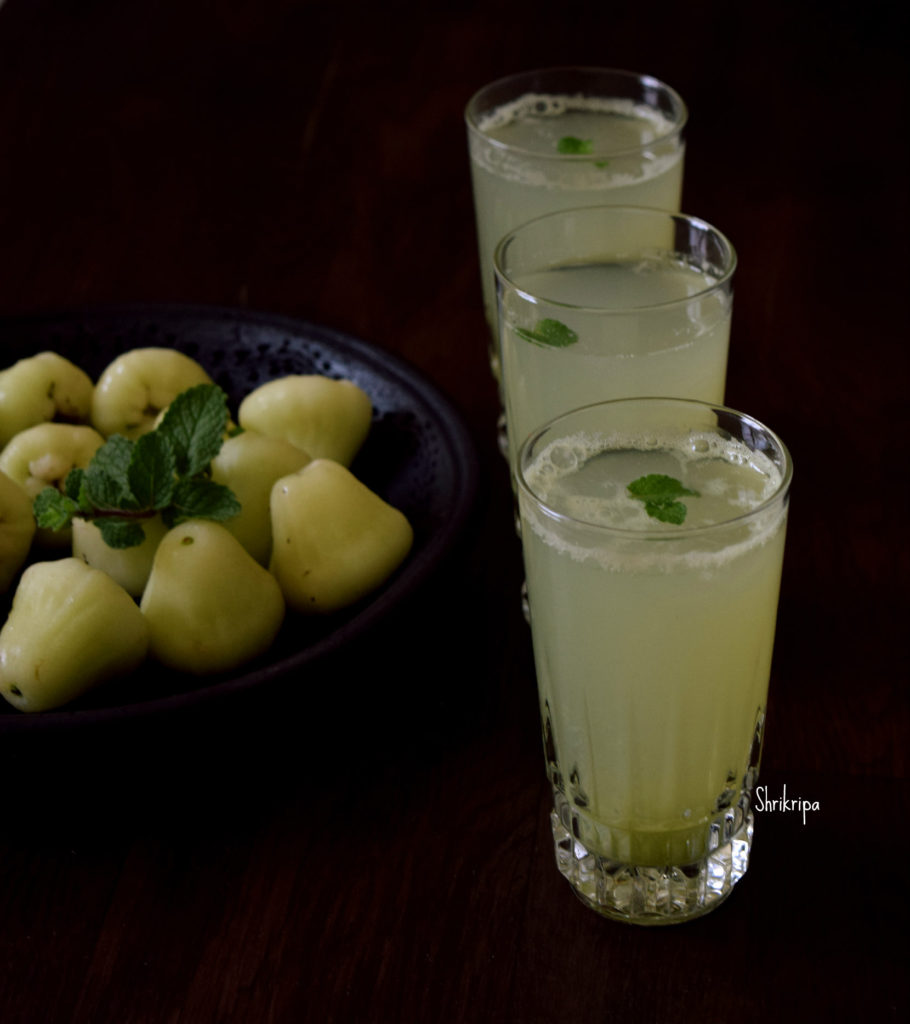
Last week when I tried this otherwise bland, watery fruit with Raw mango and mint in the form of juice, we liked the flavour and enjoyed it.

DSC_1045_Fotor

Recipe goes like this-

Ingredients:

Bell fruits – 8 to 10

Raw mango – ¼ piece of one mango

Mint – 1to 2 strings

Sea Salt – ¼ teas poon

Sugar – as needed.

Water – 2 cups

Ice cubes – if needed

Method:

-Wash, make half, remove seed and clean the bell fruit.

Ribbet collage

-Chop mango

-Take one juicer jar and put everything and churn until sugar dissolves.

DSC_1058_Fotor

-Strain the juice, pour this into a serving glass, put couple of ice cubes and serve.

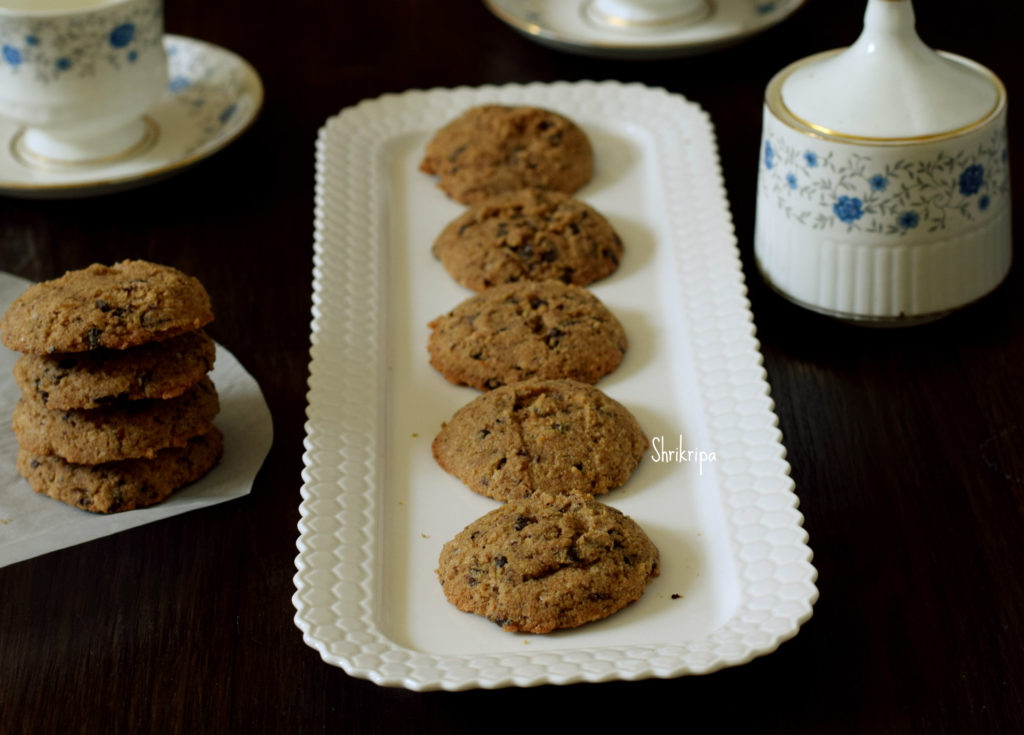
Eggless Coconut Flour Choco chip cookies:

In my last post I have discussed regarding homemade coconut flour. Previously I did try one recipe from coconut residue (without drying and making flour), but this is my first trial or recipe after making the flour, and I am really exited and happy.

One thing we must keep in our minds while using coconut flour is, don’t under estimate its absorption power by seeing its light and airy texture. It absorbs moisture like a sponge. What I learnt from this experience is, it needs almost equal amount of moisture content as flour volume.

Here I have taken flax gel as an egg replacer, mainly because of its gel like texture. Coconut flour doesn’t have any holding capacity, so thought of using flax gel.

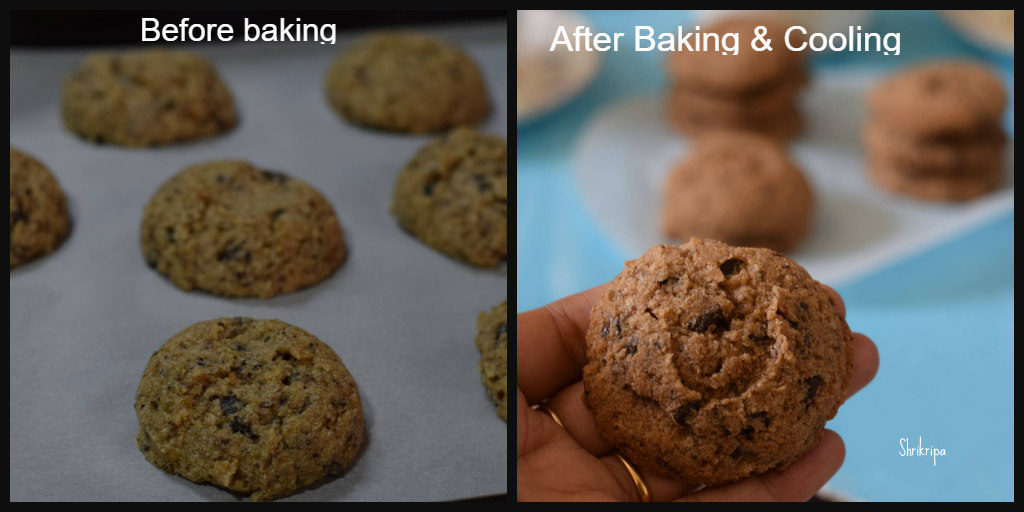
In this experiment I have taken half cup of coconut flour and it did absorb the liquid, swell and gave me 9 cookies . More than everything, this was interesting!! Chocolate Chip Coconut Flour Cookie. This was a little experiment, and the results were not bad at all! I got the big thumbs up from my twins 😀

DSC_4745main_Fotor

Let us see the procedure-

Ingredients:

Coconut flour – ½ cup

Flax gel – ½ cup

Ghee or Oil – 1 table spoon

Choco chip – ¼ cup

Organic Natural brown sugar – ½ cup (you can use normal sugar as well)

Sea salt – ½ tea spoon

Vanilla – 1 tea spoon

Method:

– How to make flax gel: Take 2 tsp of flax seed, make powder. Put this powder in thick bottomed small pan, add one cup of water and boil until it is thick, slimy and reduced to almost half.

-Pre heat oven at 170 °C. Line the baking tray with the butter paper.

-Take one glass bowl, put flour, sugar, salt crystals, ghee, flax gel, vanilla and mix. Dough will be little wet. Mix in Choco chip and mix once more.

Ribbet collage 1

-Scoop out the mix by using ice cream scooper and arrange in a lined baking tray.

-Bake this in a pre-heated oven for 15 to 20 minutes.

Ribbet collage 2

-Don’t touch while removing, it will be very soft. Remove the tray and cool as it is.

-After cooling, it will harden a bit. After it cools down completely, store it in an air tight container.

– These cookies are slightly crunchier at outer circle, soft and chewy at the centre.

– It becomes a little more harder and firm the next day .


Eggless tea cake from Ghee Residue:

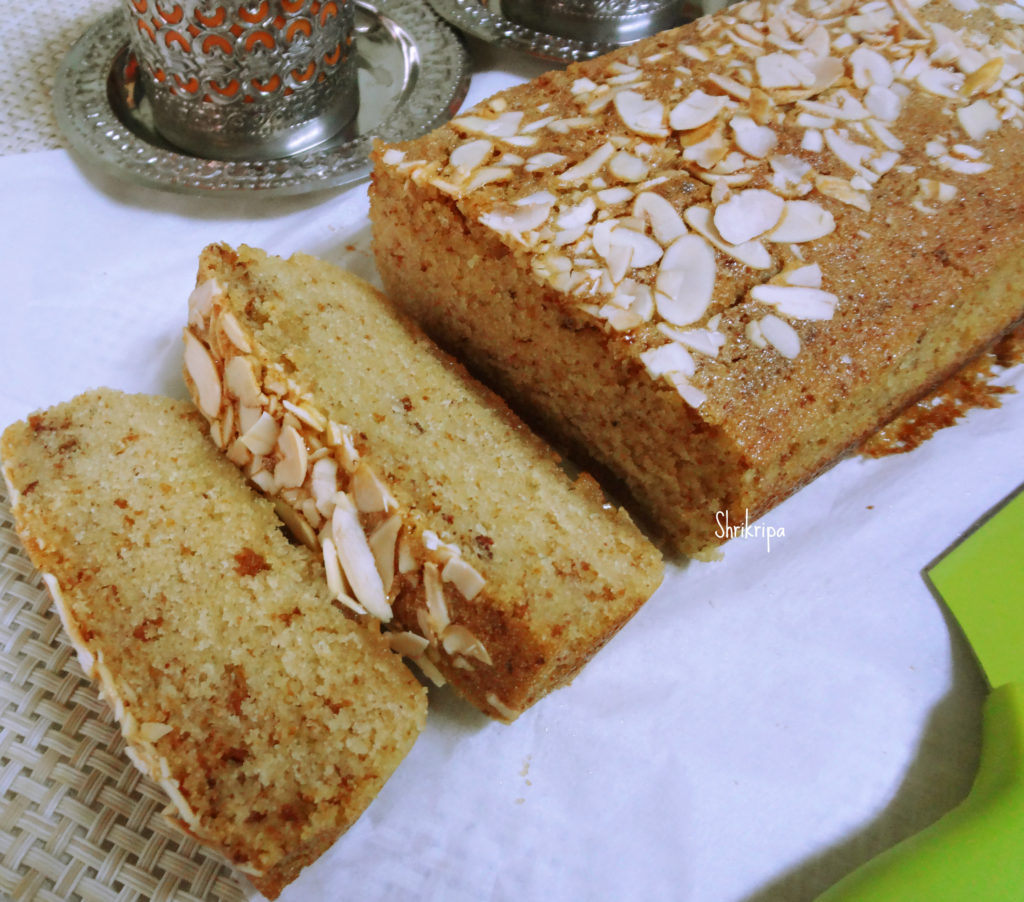
When I prepare ghee at home, I use this super beneficial ghee residue in preparing roti dough /methi Parata or this very mild flavored cake. I have already posted one chocolate cake using pea protein in my earlier post. This time it is my all-time favorite Cinnamon or Cardamom flavored tea cake.

DSC03315_Fotor

Ingredients:

Ghee residue – 2-3tbl

Milk – 1 cup

Sugar – ¾ cup

Chiroti rawa/fine semolina – 1 cup

Cinnamon powder- ½ tsp.

Eno fruit salt -1tsp

Salt – ¼ tsp.

Slivered Almond – 2 table spoon (optional)

Method:

-Take vessel in which you prepare ghee. There will be 2-3 table spoon ghee residues.

-To this add milk, sugar and heat it until sugar dissolves. Switch off and cool.

Ribbet collage 1

-In another bowl, dry mix semolina/rawa, cinnamon powder, salt.

-Mix both and keep it aside for five minutes, at this time rawa will absorb all the moisture.

-After 5 minutes, add Eno fruit salt, mix nicely and pour this mixture into a baking tin.

Ribbet collage 2

-If you want to add slivered almond at the top to enhance its taste and nutritional value.

-Place this tin in a preheated oven for 40-45 minutes or till done, at 180 C.

DSC03299_Fotor

Note: you can replace rawa with Ragi (finger millet flour) and wheat flour. If you are using only flour, add 1 ½ cup, because it absorbs less moisture than the rawa.