Sarson Ka Saag/ Mustard greens curry:

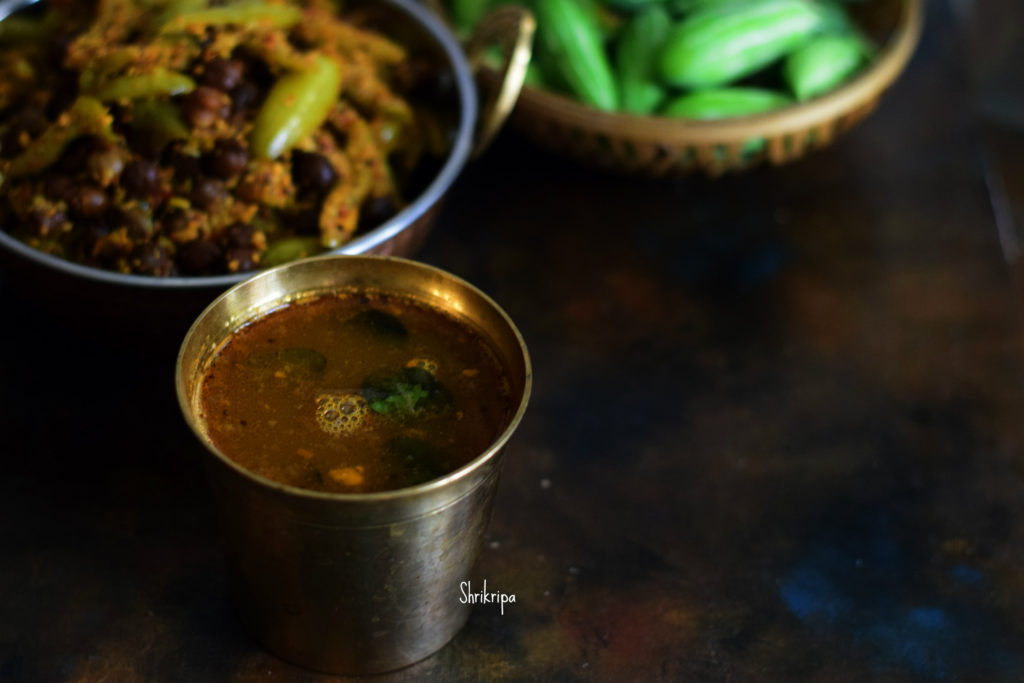
Come January, my veggie vendor will bring mustard greens and Bathua greens. In Kannada, we call Bathua as chakotha and mustard as sasive soppu .Last week I got a bunch from him and I prepared this curry. I love to include seasonal veggies in my cooking and it is a yearly ritual to make Saag at least once in winter.

DSC06005_Fotor

How I make –

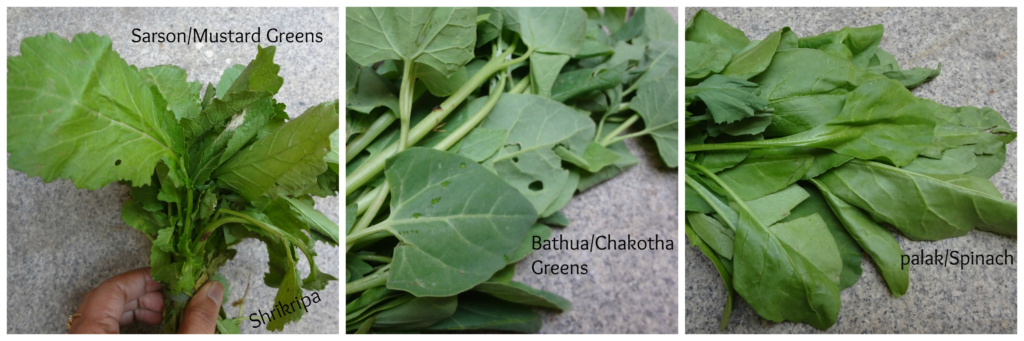
Sarson / Mustard greens – 2 bunches

Bathua / chakotha leaves – 2 bunches

Palak/spinach – 2 bunches
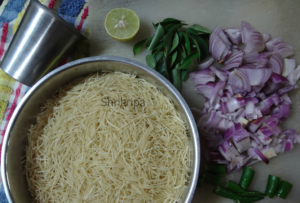
Onion – 1

Green chillies – 4

Garlic – 10

Ginger- 1 inch

Maize flour – 1 table spoon

Cumin – ½ teaspoon

Turmeric – ½ teaspoon

Hing- ¼ teaspoon

Butter – 1 table spoon

Salt

Method:

  • Clean all the greens remove stalks and discard.

sarso-1

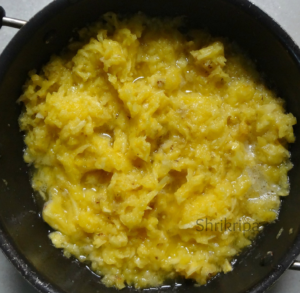
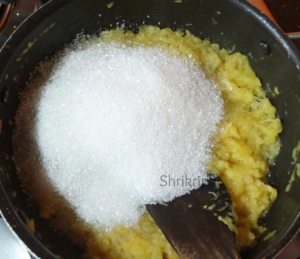
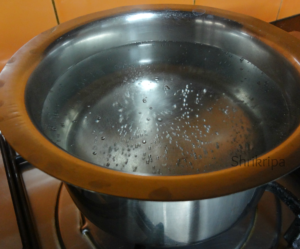
  • Wash and chop the leaves into fine strips and cook this in a vessel by putting half cup of water, little salt, sugar for 10 to 15 minutes.
  • Take one mixer jar and put sliced onion, crushed ginger; chopped chillies and garlic, dry grind all this into rough paste.
  • When greens are cool, grind this as well. Don’t make smooth paste. Whip only once or twice, you will get required consistency.

sarso-2

  • I usually use earthen vessel to cook traditional items. If you have one, you can use it otherwise use normal kadai.
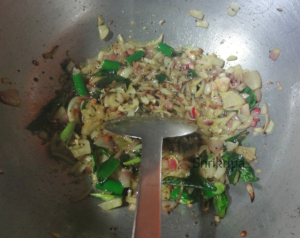
  • Take vessel, put butter, when it is hot add cumin and hing. Then onion and chilli paste. Fry for a while. Add turmeric and salt. Salt will help to ooze out water from the onion and will retain moisture while frying.

sarso-3

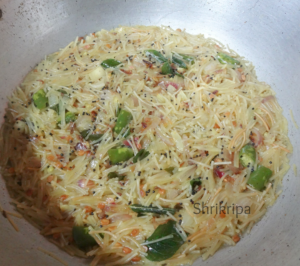
  • When it is light brown, add maize flour and fry for 2 minutes.
  • Add one cup of water and mix onion and maize flour mixture. This will look like a paste now.

sarso-4

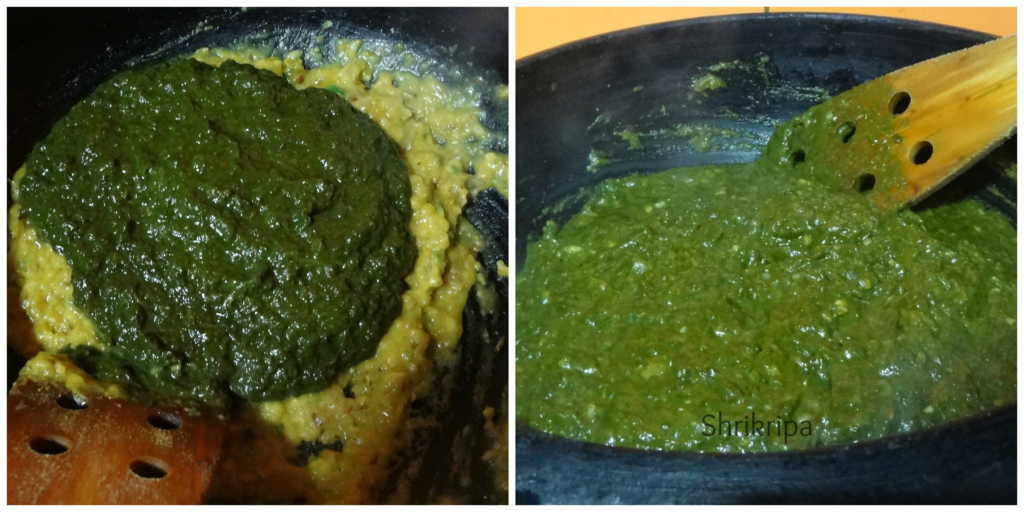
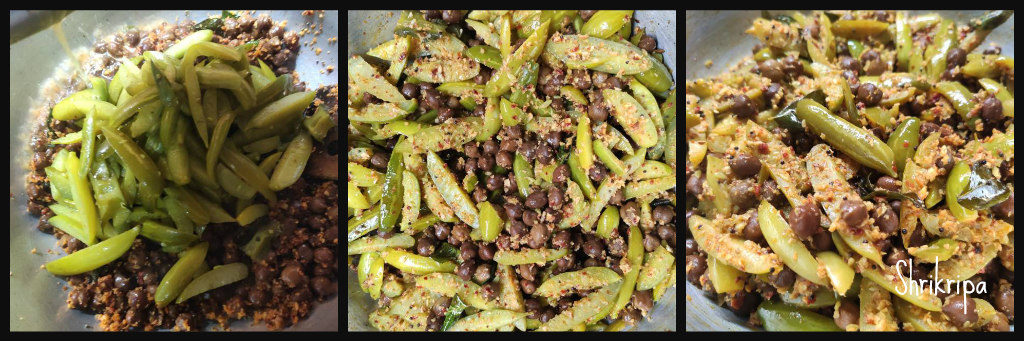
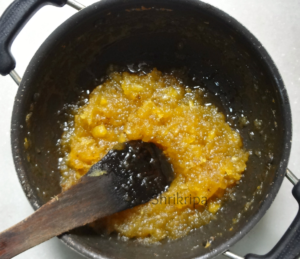
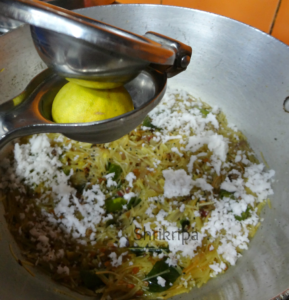
  • Add Ground greens and boil, If you feel water is needed you can add water and cook until you get the right consistency, and when it is done , mixture becomes like a mass and surface becomes little glossy.
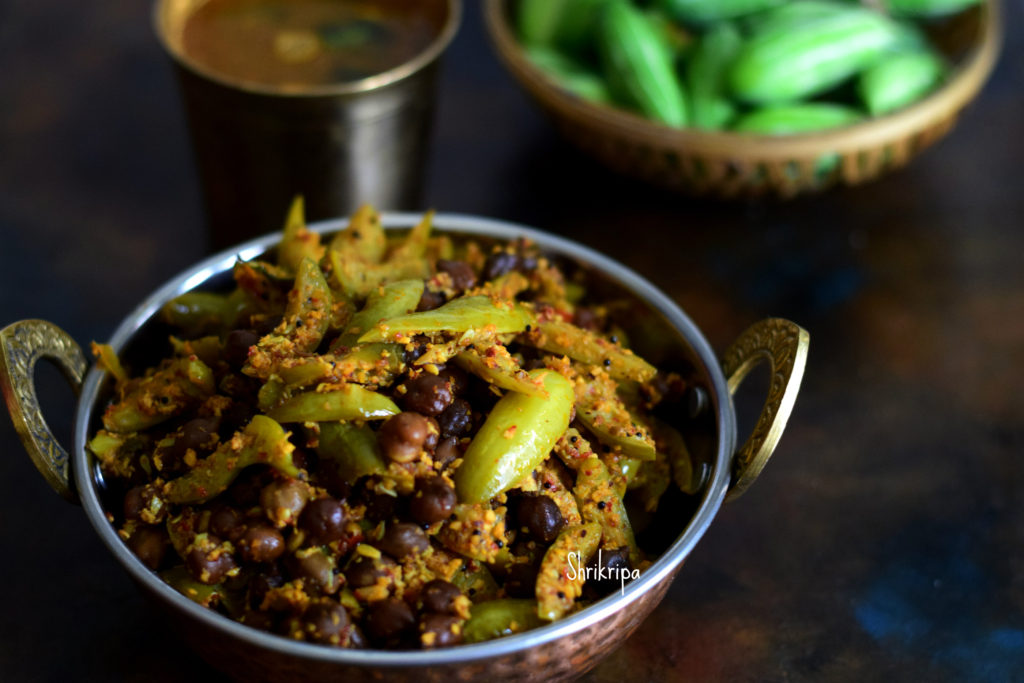
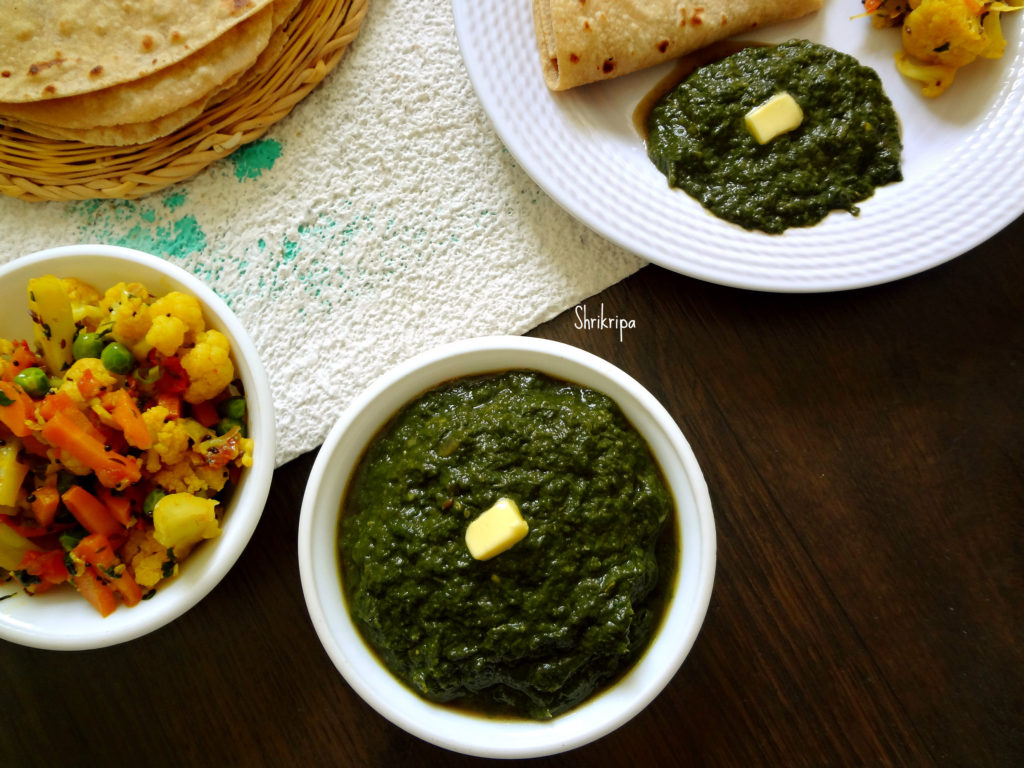
DSC06027_Fotor

Buddha’s delight:

It is a vegetarian dish well known in Chinese and Buddhist Cuisine.We love Buddha’s delight at our favourite restaurant Chung wah. Their version has lemon grass flavour in the gravy, and we especially like this flavour. I wanted to try their version of veggie Buddha’s delight at home from so long. Finally I did try it this week for our dinner.

So I thought of making lemongrass infused water for preparing it and proceeded. I used the available veggies in my pantry. You can use them according to your choice. You can add couple of tofu pieces as well.

pic-2

How I prepared:

Vegetables – 1 bowl (took Zucchini, lettuce, onion, carrot, mushroom, capsicum,snap peas)

Chilli vinegar – 1 tsp

Red chilli flakes – ½ tsp

Garlic – 5 cloves

Ginger – ½ “

Green chilli -1

Salt

Spring onion – 2 tbl sp

Corn flour – 1 to 2 tbl sp

Lemon grass – 4 sticks

Water – 2 cups

Method:

-Boil water with lemon grass bits until water becomes little yellowish and lemongrass is cooked.

-Sieve this water and discard lemon grass. This is our lemon grass water which is used for gravy. Keep it aside.

– Chop spring onion, ginger and garlic. Slit green chilli.

– Chop mushroom, carrot.

-Chop capsicum, onion, zucchini into I inch chunks.

– Tear lettuce by using hand and keep aside.

-Take one tawa, put either butter /olive oil .When it is hot, add ginger, garlic and green chilli and fry for a while.

– Add onion, fry for 2 minutes. Next you can add capsicum, carrot zucchini and mushroom. Fry for 2 to 3 minutes and sprinkle little salt and red chilli flakes.

– Next you can add corn flour and fry in this mixture for 1 minute and add lemon grass water.

-when it starts boiling add vinegar. When it becomes little thick and shiny add torn lettuce and garnish with chopped spring onion.

pic-3

-Enjoy this either with fried rice, noodles or simple steamed rice. It is very filling, nutritionally very rich and taste wise – Pure bliss!!!!

Masala Whole Wheat Laddu/ Pinni Ke Ladoo:

Happy New Year wishes to all my Readers!!!!

Masala whole wheat laddu’s are pure bliss!!!! I had some apprehension before tasting this mainly because, I couldn’t imagine the taste of laddu’s with fennel, pepper etc.! These beauties are originally from Punjab and known as Pinni ke ladoo. This recipe is from my friend and according to her; each family has their own style of preparation of Pinni and is a must for winter months. I have prepared according to our taste and availability of the ingredients in my pantry.

main-1

Ingredients:

Note: Here I have used steel tumbler or regular steel glass to measure ingredients.

Whole wheat flour – 3 cups

Ghee – 1 ¼ to 1 ½ cups

Almond- ½ cup

Pista – ½ cup

Desiccated coconut – ½ cup

Flax seed powder – 1tblsp

Sugar – 1 ½ cup (powdered)

Jaggery – ¼ cup (powdered)

For masala: Fennel – 1 tsp, black pepper – 1 tsp, cardamom – 1 tsp, ginger powder – ¼ tsp.

Salt – ¼ tsp

Edible gum – 30 – 50 gms.

Method:

-Dry roast almond and Pista, cool, powder it and keep aside.

-Dry roast desiccated coconut for 2 minutes, to increase its fragrance.

picture-1-
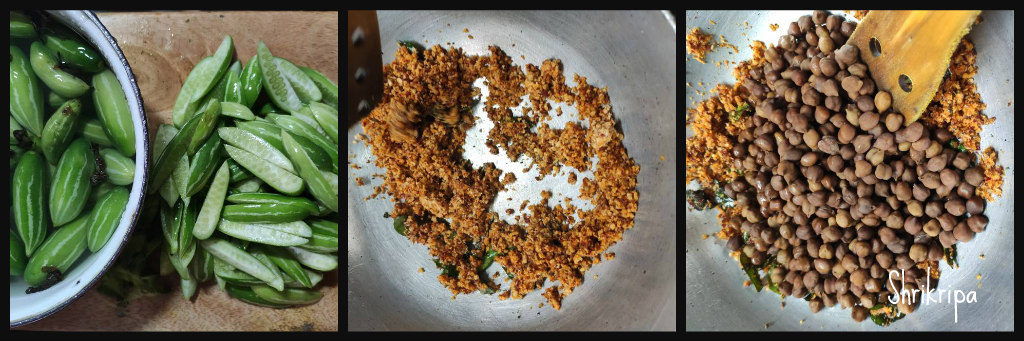
Powder masala ingredients in a small mixer jar. No need to roast this.

-Put 1 tsp of ghee, fry edible gum in a hot ghee until it puffs and becomes transparent. Cool it and powder in a mixer jar.

picture-2

-Take one thick bottomed kadai, add one cup of ghee and roast whole wheat four in a very low fire, until it becomes light brown and sandy in texture.

picture-3

-Switch off the gas. Add in edible gum, sugar powder, jaggery powder, masala powder, salt, coconut, dry fruits powder,flax seed powder etc.

picture-4

-Mix everything together, try to make roundels. If you are able to bind it together, well you can proceed to make laddu’s.

-If it breaks while binding, add little by little hot ghee and mix, and then make the roundels.

main-2

-Cool completely before storing it in an air tight container.

Chana Saarupkari /Chickpea Rasam:

In last post we did chana and ivy gourd dry curry and I promised you to post the Rasam which utilizes the drained water of cooked chana or chick pea. This is very nutritious and tasty too.

What we need-

Ingredient:

Drained water of cooked chickpea – whatever you get.

Cooked tor dal – 1/4 cup 

Green chillies -2

Salt

Jaggery – 1/2  tsp

Hing – ¼ tsp

Seasoning:

Coconut oil – 1 tbl sp

Mustard – 1tsp

Red chilli – 1

Curry leaves – 1 spring

Crushed garlic – 6

Method:

-Drain water from the cooked chana or chick pea while making any curries.

-Boil this drained water by adding 1 cup of water, cooked toor dal, salt (if needed) ,jaggery, hing, green chillies.

-Cook until green chillies are cooked and flavour  is released to water.

-Add seasoning by heating coconut oil. When it is hot, add mustard. When it splutters add  red chilli, curry leaves, crushed garlic.

-Fry till garlics are brown and add this seasoning to Rasam.

Enjoy this Rasam with hot rice and any side dishes, like chickpea dry curry and papad.


Manoli Kadle Ajadina /Thondekai Kadle palya /Ivy gourd and chick pea Dry curry:

This is one of our family favourite curries, which is loved by all. We make two types of curries by using ivy gourd and chickpea.

One is with onion and garlic, other one without it.

This name is derived from Tulu language, which is a local language of Mangalore. Manoli is ivy gourd or Tindora, Kadle is black chick pea and Ajadina is dry curry.

This particular masala is used in Bunt community of Mangalore and it is an integral part of their festive cooking.

How I make this-

Ingredient:

Ivy gourd – ¼ to ½ kg

Black Chick pea – 1 cup

Salt

Jaggery – ½ tsp (optional)

For Masala:

Fresh grated coconut- 1 cup

Coriander seeds – 1 tsp

Cumin – ½ tsp

Urad dal – 1 tsp

Methi/ fenugreek seed – ½ tsp

Dry red chillies- 3 to 4

For Seasoning:

Coconut oil – 1 to 2 tbl sp

Mustard – 1 tsp

Curry leaves – 1 spring

Method:

-Soak black chick peas in water overnight. Next day discard soaked water and add fresh water, salt and cook this in a cooker for 3 to 4 whistles.

-Wash ivy gourd, cut this lengthwise into 4 pieces. Cook this by putting very little water and salt and jaggery.  keep aside.

-When pressure releases from the cooker, open the lid, drain the water and keep chick pea aside. Don’t discard the drained water. You can make really yummy Rasam or soup out of this.

Next is the masala preparation-

-Heat little oil, fry methi seeds until it is light brown, add remaining ingredients, coriander, cumin, urad dal,  red chillies, and fry nicely.

-Take one mixer jar, put roasted masala, make  a powder, and add coconut into it and whip couple of times to get dry coarse powder.  

Now we can proceed to make palya-

-Take one kadai, put coconut oil, when it is hot, splutter mustard seeds, add curry leaves.

-Now add ground masala and fry for a while.

-Now add cooked chickpea and ivy gourd mix well, check for the salt and adjust.

-Cook this until it becomes like a mass and veggies are coated well with the masala.

-Serve this as a side dish with hot rice.

NOTE:

-Usage of coconut oil will give authentic taste.

-Don’t discard drained water from cooked chick pea. It is very nutritious and you can prepare really tasty Rasam, and it is here.


Christmas Fruit cake:

The day before yesterday, my daughter V asked, ‘Amma, everywhere I can feel the Christmassy atmosphere, why haven’t you made anything?  Please make a plum cake.”

Immediately, daughter A said, “No need to do that grrrrrrrrrrr, It has raisins; I don’t like raisins in any baked goodies. Make Red velvet instead of plum cake.”

Finally, mamma came up with this win-win cake for both –

This cake has no booze or fruit juice, or raisins.

Ingredients:

Dry fruits to soak – 1/2 to 1 cup (dried cranberries, tutti-frutti)

For the Caramel:

Light brown sugar – ½ cup

Water – ¾ cup

Butter – 1 tsp

For the Cake:

All-purpose flour – 1 ½ cups ( you can take whole wheat flour + all-purpose flour as well)

Baking powder – ¾ tsp

Baking soda – ¾ tsp

Dry ginger powder – ¼ tsp

Cinnamon powder – ¼ tsp

Cardamom powder – ¼ tsp

Pinch of salt

Eggs – 2

Melted Butter – ¾ cup

Fresh Orange rind – 1 to 2 tsp (grated)

Caramel – ½ cup

Dry Nuts – 1/4  cup (cashew and almonds)

Method:

-The next step is the preparation of the cake batter –

-First, we will mix all the dry ingredients, from flour, baking powder, baking soda, ginger powder, cinnamon powder, cardamom powder, and salt, in one bowl and dry mix using a wire whisk.

-Drop all the dry fruits like soaked and drained dry fruits, chopped cashews and almonds

-Once again, mix the flour nicely and keep it aside. This is the dry ingredient mixture.

-The next step is- to preheat the oven to 180 degrees centigrade.

-Line the cake tin in which you want to bake. I have used a bread tin over here.

-Next, we should make a wet ingredient mixture. Break the eggs, beat them properly, and mix in butter, caramel, sugar, and grated Orange rind. Beat all these together until the sugar dissolves.

-Take one wooden spatula, fold it in the dry mixture, and make a uniform batter of wet and dry ingredients with a very light hand. Don’t overmix this.

-Now pour this ready batter into the lined cake tin, sprinkle some cashew and almond chunks, and bake this for 40 to 45 minutes or until done at  180* C. Enjoy this fruit cake this festive season!!!

Tomato Omelette /Dosa:

tomato-omlette

This time when we went to Sirsi, we stayed at Hotel Madhuvana. When I looked at their menu, I was very curious to taste this special omelette, and ordered the same .When I tasted it, it was this amazing blend of flavours, and not at all like the usual tomato omelette which I prepare. Everybody liked the taste. It was little sweet, tangy at the same time filled with flavour. Immediately, my curious mind, started to check the ingredients. I had asked my hubby to note it down, one by one while I was checking the ingredients .After coming back, I took that list and tried to imitate the same and succeeded. Here I am, sharing this super tasty Dosa recipe.

Ingredients:

  • Dosa rice- 3 cups
  • Fenugreek/methi seed -2 tsp.
  • Beaten rice/poha- 1 ½ cup
  • Coconut – 2 fists full (grated)
  • Jaggery -2 table sp.
  • Salt –to taste
  • Turmeric – ½ tsp.
  • Eno fruit salt or cooking soda – 1tsp (optional)
  • Cumin- 1tsp.
  • Grated ginger – 1 tsp.
  • Firm tomatoes – 2
  • Coriander leaves – 2tblsp.

Method:

-Wash and soak Dosa rice, beaten rice and methi for 2 to 3 hours.

-Grind this into a smooth paste by adding turmeric, salt, jaggery, coconut to an idly batter consistency (little thicker than normal Dosa).

-Pour this batter into one big vessel, add jeera and keep it aside for fermentation.

-If you are living in the cold climate, next day morning add 1 tsp. Eno fruit salt, mix nicely and keep it aside for 10 min.

-Now chop Tomatoes, coriander leaves and grated ginger.

tomato-omlette-batter

-Mix this into Dosa batter and start making Dosa by pouring one serving spoon of the batter on a hot iron or non-stick tawa, don’t spread much. You will see thousands of holes on the upper surface. Smear with butter or clarified butter. When it is cooked, flip and cook on another side too. Serve this spongy tomato omelette with coconut chutney. Here I have served this with coconut-ginger chutney.

Home-Style Pineapple Jam:

Some things are such that, it brings back lots and lots of fond memories from your childhood. This pineapple jam is one among the list, which is so flavourful and has lovely texture of grated pineapple. This week, when I saw a pile of pineapples over the carts in every nook and corner of our streets, immediately my mind went back to my grandparents farmland, loads of pineapples and home style pineapple jams, which I used to cherish with breads, Roti’s or Dosa’s. My urge to have that taste in my taste bud was so strong, I couldn’t resist it and I bought one pineapple and made this jam.

Now we will jump into the recipe part  –

pic-4

Ingredients:

Pineapple – 1

Sugar – 1  to 1 ½  cups (adjust according to your taste)

Lemon juice – 1 teaspoon

Method:

-Remove outer skin and make 4 vertical pieces.

-Grate the fruit.

pic1

-Now put these gratings in a thick bottomed Kadai and start cooking on a low fire.

-Mix in-between to avoid burning.

-When pineapple is cooked and all the water, which oozed out while cooking has evaporated, add sugar and mix.

pic2

-Cook until pineapple mixture leaves from the sides of the kadai.

-Add lemon juice, give one stir and switch off the gas.

pic-3

-Cool this mixture and store this in a glass bottle.


Herbal Hair Oil :

Oil massage is very useful for the hair. It helps in preventing dandruff, hair fall and split ends. At least once in a week we should oil our hair and scalp to prevent it from all these problems.

pic-main


Traditional home made Herbal hair oil which we used to apply during our childhood contained so many rare ingredients like Bhringaraja, Bilvapatra etc. After marrying and settling in a bigger city, I had no access to these things and over the years I made some modifications to attain that goodness by mixing easily accessible ingredients from our surroundings.

This is how I prepare my yearly stock of very useful herbal hair oil.

Ingredients: Take some leaves from your surroundings like

-Brahmi (potted or any Mangalore store has it) you can use Brahmi powder as well.

-Rose leaves or Flowers.

-Curry leaves.

-Leaves of any variety of Jasmine.

-Tulsi leaves/Holy Basil

-Ixora flower bunch.

-Hibiscus flower and some leaves.

-Methi leaves or Stem or both combined.

-Little raw methi/Fenugreek seeds.

1- lemon.

-Coconut oil -1 liter.

pic-1


Method:

-wash all these materials (other than raw methi) very well.

-Take your mixer jar. At first take raw methi and powder. Then add leaves and chopped lemon (with skin) .Grind this with sufficient water. Now Herbal concentration is ready.

-Now take one thick bottomed vessel. Mix this ground mixture with one litre Coconut oil and boil nicely.

-it is exactly like ghee making, but will take much longer time. At first you will see a frothy texture, but slowly the bubbling will stop and the liquid will become transparent .At the bottom you will see a brown thick fibre like structure. Now switch off the gas and keep it for cooling.

When it comes to room temperature, sieve this and collect this fragrant herbal oil in a clean vessel and discard bottom fibrous part. After collecting this oil, store this in a dry airtight bottle. Use this at least once a week and enjoy.

pic-2

How to cook Vermicelli:

Initial days of cooking are very challenging. We face lots of hardships at the kitchen. Generally in south Indian cooking,  the quantity of water used, is crucial and the end result is depends on that. So, if we know the requirement of water for cooking that particular ingredient, half the battle is won.

Usually I get a query in my message box regarding some doubts or the other from my near and dear ones. In one such query’s person had asked me, why she can’t cook perfect vermicelli Upma?  Further she said, her preparation becomes little soggy each time she makes vermicelli upma. That day, while answering her query, I thought of making one separate category for learners in my future blog and today here I am, writing my first post, dedicated to cooking learners.

Here, I will guide you to make simple Vermicelli Upma

pic-9

Ingredients:

Vermicelli – 2 cups

Onion – 2 medium

Green chillies -2

Salt

Grated coconut – 1 table sp

Lemon – 1/2

For seasoning –

Mustard – 1 teaspoon

Urad dal – 1teaspoon

Curry leaves – 1 spring

Cumin- ½ teaspoon

Red chilli -1

Oil /ghee – 2 table spoon.

Method:

-First, Chop the onions, chillies and measure vermicelli and keep aside.

pic-1

  • Keep one small bowl of water for boiling.

pic-2

  • In another burner, keep thick bottomed kadai; do seasoning by heating ghee or oil, or mix of both. When it is hot, add mustard. When the mustard splutters add urad dal. After it becomes light brown add red chilli, cumin, curry leaves.
  • After this add chopped onion, green chillies and fry for a while.

pic-3

  • If you wish to add turmeric, you can add it now.
  • Add little salt and fry onion until it is light brown.
  • Add vermicelli and fry for a while.
  • How to check if oil is sufficient or not: while mixing vermicelli, if oil coats vermicelli and becomes wet and shiny, oil content is perfect for this upma. If you feel vermicelli is dry and it is not holding together, add little more oil or ghee.

pic-4

  • Next- how much roasting or frying is needed? After frying it for a couple of minutes on a low flame, you will see the colour change and each strand will becomes whitish and crispy. It is now time to add boiling water.(refer to this above picture)

pic-5

  • How much quantity of water? Please refer to the picture. While pouring, Water should be just above the vermicelli. Mix the mixture and check for the salt. If salt is needed add and cover the kadai with a lid and cook it in a low flame.

pic-6

  • After a couple of minutes, open the lid, if water is evaporated and top part of the layer appears cooked, that is it. If you find, it is yet to cook, sprinkle little water and keep it covered for couple of minutes.

pic-7

  • If you like to garnish with coconut, add coconut and add lemon juice and mix.

pic-8

Serve this upma with a cup of coffee or tea.