Coconut Flour and Buck wheat Chocolate chip cookies:

In my earlier posts I have discussed regarding homemade coconut flour as well as  eggless coconut flour cookie with chocolate chip.

One thing we must keep in our minds while using coconut flour is, do not underestimate its absorption power by seeing its light and airy texture. It absorbs moisture like a sponge. What I learnt from my previous experience is, it needs almost equal amount of moisture content as flour volume.

Here I have tried with egg as well as without egg by adding  flax gel as an egg replacer, mainly because of its gel like texture. Coconut flour does not have any holding capacity, so thought of using flax gel.

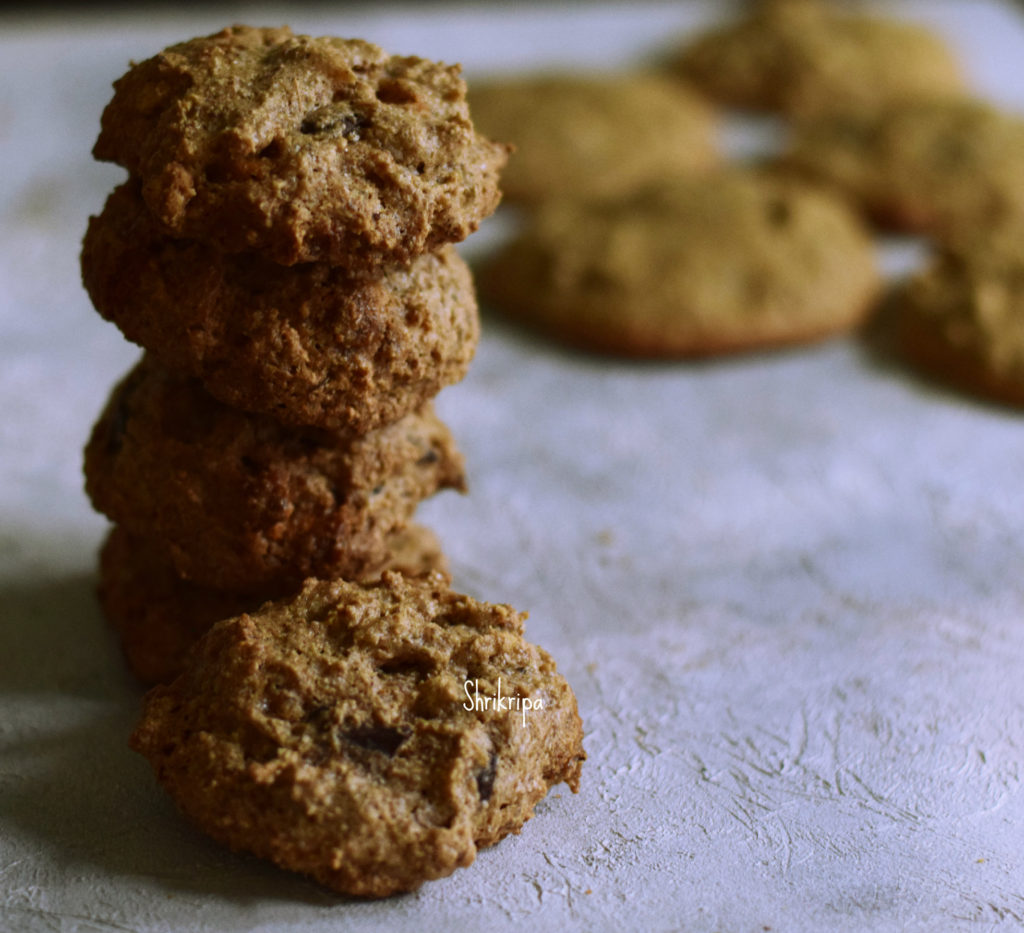
In this experiment I have taken equal amount of coconut flour and buck wheat flour ( I did try with millet flour as well)  it did absorb the liquid, swell and gave me Eleven  cookies 😊 More than everything, this was interesting!! Baking Coconut Flour by adding millet/ buck wheat flour . This was a little experiment, and the results were not bad at all! I got the big thumbs up from my twins.

Let us see the procedure for With Egg Version –

Ingredients:

Coconut flour – ½ cup

Millet/ Buck wheat flour – ½ cup

Choco chip – ¼ to ½ cup

Pink salt – ¼ teaspoon ( you can use normal salt as well)

Cinnamon powder – ½ tsp

Cooking soda  + baking powder – ¼ tsp ( 1/8th  tsp  each)

Eggs – 2

Ghee – 2 tablespoons

Vanilla – ½  teaspoon

Organic Natural brown sugar – ½ cup (you can use normal sugar or jaggery as well)

Method:

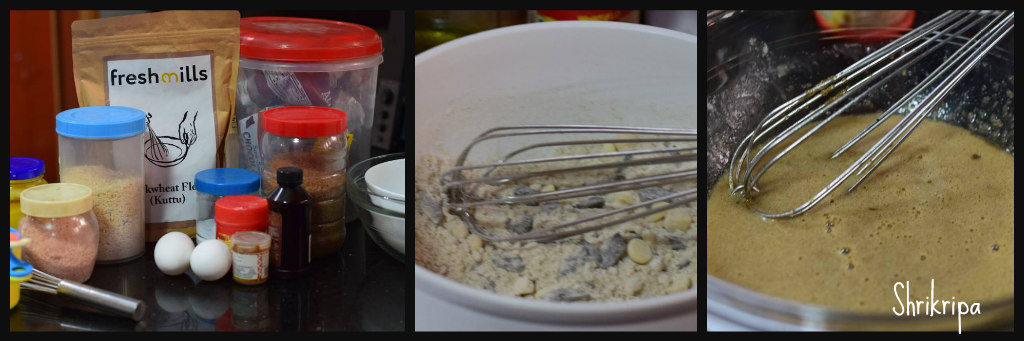
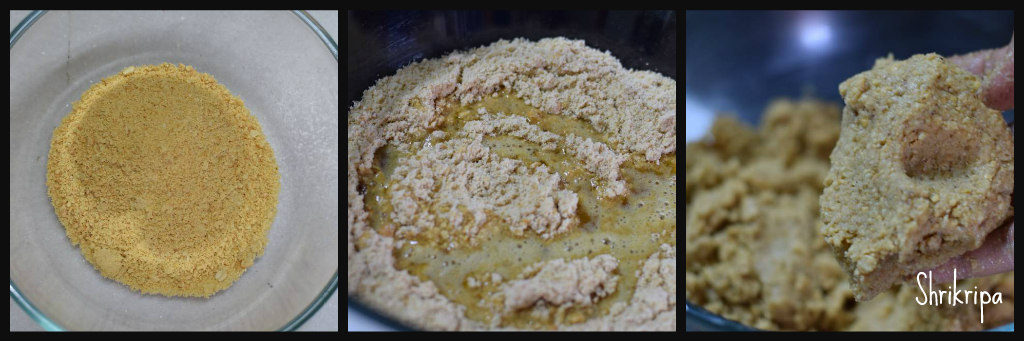
-take one bowl, add all the dry ingredients: Both the flours, salt, cinnamon powder, cooking soda, baking powder and Choco chip. Mix everything and keep it aside.

-Beat the egg , add vanilla, sugar, and ghee. Beat everything until you see a bubbly texture.

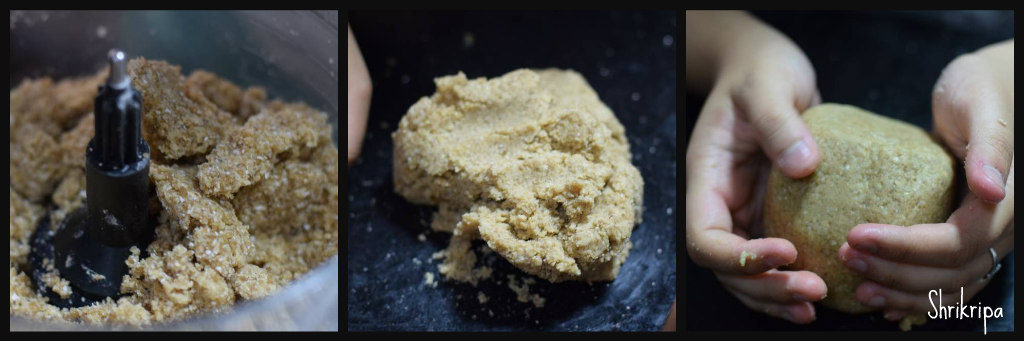
– Pour wet mix into dry ingredient and fold everything and prepare a dough. It would be sticky and wet.

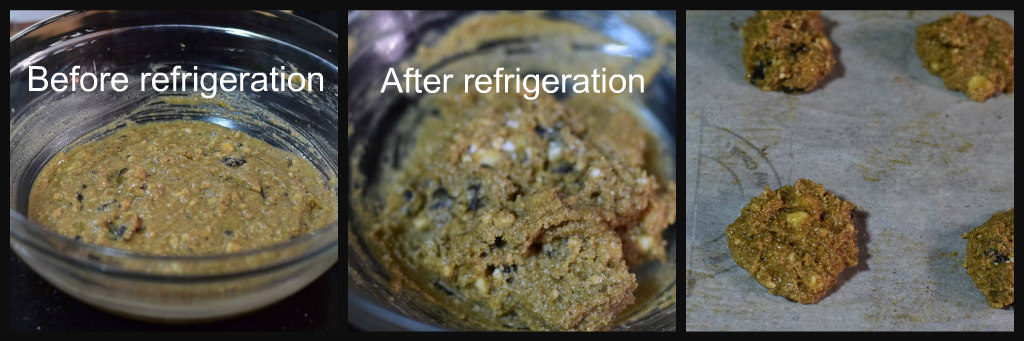
-Keep this in a refrigerator at least for a half an hour. By this time, coconut flour would absorb the moisture and batter would be perfect to scoop out.

-Pre heat oven at 170 °C. Line the baking tray with the butter paper.

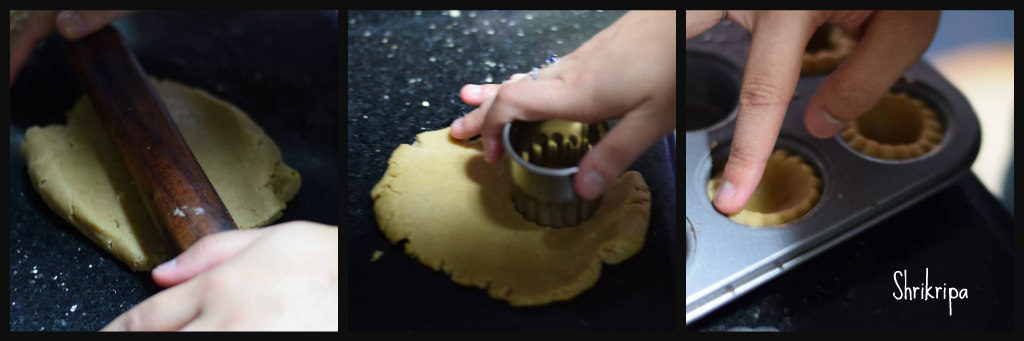
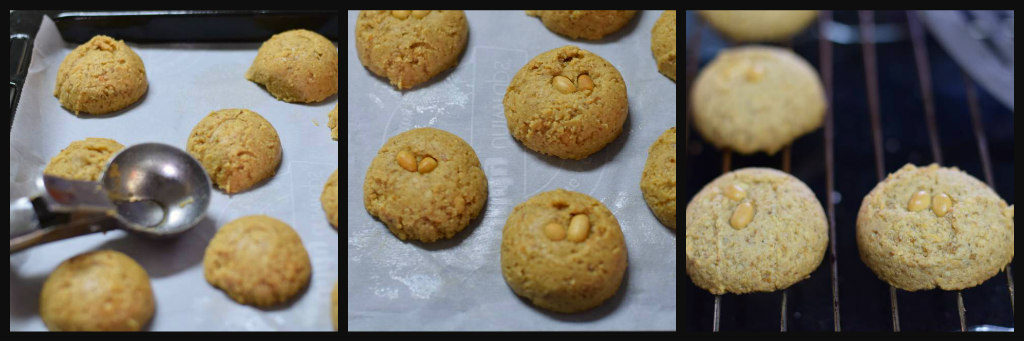
-Scoop out the mix by using ice cream scooper and arrange in a lined baking tray.

-Bake this in a pre-heated oven for 15 to 20 minutes.

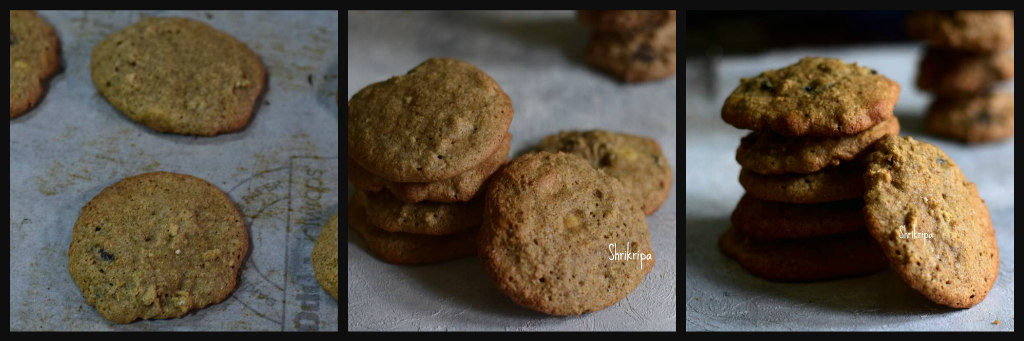
-Do not touch while removing, it will be incredibly soft. Remove the tray and cool as it is.

-After cooling, it will harden a bit. After it cools down completely, store it in an airtight container.

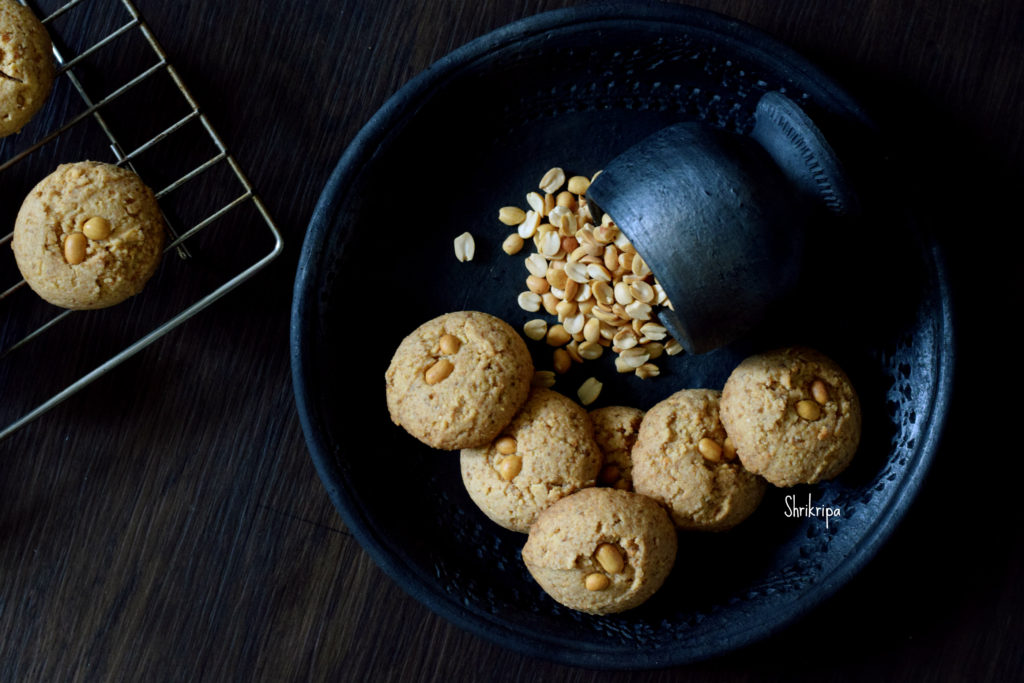
– These cookies are slightly crunchier at outer circle, soft and chewy at the centre.

– It becomes a little harder and firmer the next day .

For Without Egg Version:

For Egg less version, please use any egg replacer or 

Flax gel: The basic ratio is 2 ½ tsp of flax seed powder and three tablespoons of  hot water  and then you simply whisk in the mixture until it becomes gelatinous  to replace one egg.

-Here, after mixing the wet and dry mixture, you can directly proceed to baking. No need to keep it in the fridge. Dough is less liquid, compared to the with egg version.

-Cookies turn out much more heavy and crunchier than the with egg version. Does not spread while baking. It holds the shape very nicely.

Beans Palya:

Fresh French beans are really tasty and loaded with high fibre and nutrients. One of my twin daughters doesn’t like beans in any form and it is very tedious to make her eat this veggie. Whenever I want to cook this veggie, I surely reach out to this fool proof recipe of my mom, which is really simple with very minimal ingredients, at the same time, full of flavours of green chilli and onions. This Subzi tastes good with rice or roti.

Ingredients:

French beans – ½ kg

Onion – 1 or 2 (medium)

Green chillies – 2

Salt – as needed

Jaggery -as needed

Fresh grated coconut – 2 table spoons

Seasoning:

Coconut oil – 1 table spoon

Mustard – 1 tea spoon

Urad dal – 1 tea spoon

Cumin – ½ tea spoon

Curry leaves – 2 springs.

Method:

-Wash, remove fibre from both sides by breaking both the tops of French beans.

-Hold fistful of beans in your left hand and chop uniformly.

-Chop onions and green chilli.

-Take one thick kadai or wok, do seasoning. Heat oil, splutter mustard, add urad dal, cumin.

-When urad dal becomes red, add curry leaves, onion and green chillies and fry for a while until onion becomes transparent and glossy.

-Next add chopped beans, salt, jaggery and toss for two minutes.

-Add one cup of water, close the lid and cook this in a low fire.

-When water evaporates, if beans are yet to cook, add little extra water and cook further.

-When it is done, garnish with fresh coconut and mix this mixture. Cook further for 2 minutes and enjoy this super delicious, simple palya/ Subzi either with hot rice, Rasam or with chapati/Roti.


Vegan/ Vegetarian Thai Massaman Curry:

Massaman curry, is a wholesome, flavourful ,peanut based Thai curry. It originated from the south part of Thailand, near Malaysia. It has Red fresh masala, which includes Red chilli, whole spices, lemon grass, galangal and roasted peanuts to give a creamy texture as well as the richness of coconut flavour by adding coconut milk.

Massaman curry pairs really well with small grain rice either steamed, normal or flavoured one.

Vegetables which I have used are Broccoli, beans, capsicum and carrots. Since the lock down, I am not finding all the options due to my restricted outing. Hence, it is also proved as a non-fussy curry 😉

How I made:

For homemade Massaman Curry paste: (For single use/Serves 4)

Dried red chilli – 3 to 4 (According to the required hotness)

Whole coriander – 1 tablespoon

Cumin – ¾ tsp

Cinnamon – 1” piece

Clove – 3

Whole black pepper corns – 4

Galangal – 1” piece (you can substitute with ginger as well) 

Lemon grass bulbs – 2

Garlic cloves – 3

Shallot/ tiny onion – 1

Lemon rind – From 1 small lemon

Soy sauce – 1 tablespoon

Maple syrup / jaggery syrup – 1 tablespoon

Juice of lemon – from 1 small lemon

Roasted peanuts – ½  to ¾ cup

Method:

-Take ½ cup of water, boil and add broken red chillies , close and keep aside to soak.

-Dry roast Coriander ,cumin, whole pepper corns, clove, cinnamon until it changes colour and you feel the aroma.

-Dry roast peanuts and keep aside.

-Grate lemon rind, make it half, take out the juice from the same lemon and keep it ready.

-Slice shallot,  lemon grass bulbs, galangal ( I had my home-grown harvest, sliced and frozen)

-Now, take one mixer jar, powder peanuts, add roasted masala, soaked chilli with water, lemon rind, lemon juice, maple syrup, soy sauce, shallot ,lemon grass ,galangal and make a fine paste. Now you have a fresh homemade curry paste with you 😀

Next Comes the Easy part:

For Vegetable Massaman Curry:

Ingredients:

Massaman Curry paste – Whatever you have prepared and kept.

Vegetables of your choice – 1 bowl (Broccoli, beans, carrot, capsicum)

Shallot – 1 (sliced)

Oil – 1 tablespoon

Salt

Coconut milk –1- 1 ½  cup fresh or 1 tetra pack or 1 coconut milk powder sachet.

Method:

-Take one wok, heat oil, fry sliced onion, add washed ,cleaned veggies and fry for a while.

-Add salt and when vegetables start wilting, add prepared curry paste mix everything and fry for 2 minutes.

-Add sufficient water, allow to boil , adjust salt. Lastly add coconut milk and allow to boil once and switch off.

-Serve with choice of rice you wish to have. I normally make small grain flavoured steamed rice.


Veg Momo With Chilli and Peanut Chutney:

Should I say, Momo’s are everyone’s favourite or teenager’s favourite 😉 .

 If you have teens at your house, you can relate to me 😀 . Yes, it is the easiest, cheapest and tummy filling, in their language, it is healthy too 😉 . My daughters were missing their friend group as well as their usual outing to eat Momos with 3 dipping sauces 😀  I had the recipe of Momo as well as an easy chutney recipe ,which I had noted down during our Gangtok trip from a couple of local people there.

Tried my hand at an elaborate procedure and felt happy to see a happy face as well.

You can prepare chutney in the beginning and keep it ready, before making momos.

For Momo: It gives around 15 momos

At First: Outer covering/Dough:

Ingredients:

All-purpose flour – 1 cup

Salt

Oil – 2 sp

Water – to bind.

Method:

-Take a flour, add salt, oil. Rub for a while and make a pliable dough. Cover with a wet towel and keep it for rest, while preparing stuffing.

Second: Inner stuffing:

Ingredients:

Cabbage – 1 cup (grated)

Carrot – ½ to 1 cup (grated)

Onion – 1 (chopped)

Ginger – 1 tsp (grated)

Salt

Method:

-Mix everything, keep aside for 5 minutes. Drain all the water, which oozes out by holding/ placing in your palm , folding, and squeezing properly.

-Drain the liquid and keep it ready.

Final step: Folding and steaming

-Take ready dough, take a small portion , make a ball, apply little oil to flat surface as well as to wooden roller.

-Prepare a small disc by rolling, place a little filling at the centre. You can then either close it by folding like how I did . (Lift one side make pleats and fold to the other half and seal the edges OR gather all around and close it at the centre top like a cone.)

-Prepared Momos  should be under wet towels to avoid any dehydration.

-After making some , you can start to steam, by placing it in an idli /Momo steamer. Line the steamer either by spreading banana leaf, parchment paper/ butter paper or by oiling.

-Steam for 10 minutes and serve with any kind of chutney or sauce.

Now we would see how to make,

Hot chilli Chutney and Peanut Chutney to go with steamed momos:

It is sort of a one by two preparation. At first, we are going to make chilli chutney, divide into half and add roasted peanut to one half, grind and make really tasty additional dish.

For Chilli Chutney:

Tomatoes – 4

Red Byadagi chilli – 4 to 5

Garlic cloves – 5 to 6

Roasted sesame seeds – 2 tablespoons

Salt

Method:

-Take a half cup of water, boil and add red chilli, halved tomato, and boil for 2 more minutes.

-Remove outer skin from the tomato , cool.

-Take a mixer jar, powdered sesame, add peeled tomato, cooled red chilli with water, salt and grind smooth.

-It is our Hot Chilli chutney.

For Peanut Chutney:

Roast fistful of peanuts, cool and powder it. Add half the quantity of chilli chutney , little salt, and grind into paste. Voila!!! Your two sides are ready to indulge .

If you like Mayonnaise ,fill the third cup and indulge 😊

Note:

Don’t discard  the vegetable water, which can be used while kneading the dough for any kind of roti’s. 

If you want to serve these momo’s to any kind of parties, prepare before hand, keep inside the fridge /freeze, steam on that day, before serving.

Lemon Tart with Healthy Flour:

Lemon tarts are a real pleasure to have. When I have homemade lemon curd, usually I make it a point to use it in my baking and enjoy the tangy taste. Usually first preference would be Lemon thumb print cookies by using healthy flours. Then comes the Braided bread and lastly, lemon tart, which my daughters just love to have and this time, one of my daughters tried to bake it and she enjoyed the healthy baking process. At first, we did try by using Oats and whole wheat together and second batch with only whole wheat flour. Both the trials worked out just fine. Oats and whole wheat tart shell was more like a cookie with added flaky texture and whole wheat shell was like any normal tart shell.

We normally like mini cup cake size of lemon tart, due to its tangy and sweet taste. So, giving the measurements for 12 – 14 mini tarts.

This is an Egg-less version and I will update both the versions.

How we did:

Ingredients:

Flour – ¾ cup

Salt – ¼ tsp

Cold butter – 50 grams

Brown sugar – ¼ cup

Cold water – as needed.

Lemon curd – As needed

Method:

-If you are taking whole wheat flour, take ¾ cup. If you want to mix oats or any other flours of your choice, go ahead and use half the quantity of oats flour (by grinding ) or any other flour and half whole wheat flour.

-Now, take flour of your choice, salt and dry mix nicely. Add sugar powder and mix thoroughly.

-Add cold butter by cutting into chunks. Mix everything by using hand or processor. Until mixture looks crumbly.

-Now add couple of tablespoons of chilled water and make a dough. Keep it in an airtight box and allow to rest under refrigeration for 45 minutes.

-Pre heat oven at 170°C . Remove dough and roll the dough by using flour dusted platform.

-Take a cookie cutter, lay those circles in greased  mini muffin pan. Bake for 10 minutes.

-Remove, fill with lemon curd, once again keep it in the oven and continue baking for 5 more minutes.

-Remove, cool and enjoy sweet and tangy/ lemony treat.


Peperomia Herb / Neer kaddi Raita :

Pepperomia Pellucida also known as Vietnams Crab claw herb. which is known as Neer kaddi/ Neer panthi in our coastal line. Even though it is known for its medicinal as well as culinary use, we never use this in cooking.

Whenever I see a Peperomia herb in my small kitchen garden, feel nostalgic by thinking about my childhood activity. During that time, we used to play with its watery stem and used to wipe our writing slate with it 😀 It is a common weed, which is shallow rooted, water filled stem and light green transparent leaves with a tiny granule kind of flowers.

Which has a peppery taste with a pleasant aroma. Entire plant is an edible and known for its medicinal properties such as anti-arthritic, diuretic as well as analgesic . It is very popular as a salad herb and here I have used it in a curd-based dish.

Ingredients:

Peperomia herb – one small bunch

Coconut oil – 1 tsp

Mustard – ½ tsp

Urad dal – ½ tsp

Hing – little

Curry leaves

Green chilli – 1

Salt

Curd

Onion – 1 (small)

Coriander leaves

Method:

-Remove root, wash and drain the herb. Chop herb, green chilli.

-Do seasoning- heat oil, splutter mustard, add urad dal and fry. Add hing, curry leaves, green chilli and fry until green chilli wilts.

-Now add chopped herb and toss until it wilts.

-Cool the mixture, add chopped onion, salt, curd , coriander leaves.

-Tastes good as a side dish with hot rice or whole wheat paratha.


Apple Pie Pancake:

Pancakes are always a boon to our busy morning schedule or during the weekend brunch. When you are locked down at home, due to our recent Corona virus scenario, it is an ideal thing to use the ingredients that are available in your pantry to make filling healthy meal than to prepare apple pie, by rolling, filling and baking, this pancake is the perfect answer for your Apple pie craving and a much more healthier option due to the usage of varieties of healthy flours, as it has room for addition or deletion of flours and choice is yours.

Here I have used ground oats, whole wheat and brown rice flour with caramelised apples as well as with the goodness of flax seed to give extra fluffiness without adding any eggs. So, it is eggless too.

If you want to make gluten free version, replace the whole wheat flour and add any flour of your choice. I love this cinnamon flavoured pancake ,which is a perfect variation of the classic dessert and tastes really yum! With Maple syrup.

How I made: For 4 people

Ingredients:

Apples – 1 or 2 (chopped)

Salt 

Jaggery – 2 tsp

Cooking soda – ¾ tsp

Flax seed powder – 1 tsp

Cinnamon powder – ½ tsp

Milk – 1 cup

Oats – 1 cup ( powdered)

Whole wheat flour – ½ cup

Red rice flour – ½ cup

Method:

-Mix Apple, jaggery , cinnamon and keep aside for 5 minutes. Add milk and cook until apple cooks and becomes soft.

-Switch off ,leave aside for 5 minutes. Add in cooking soda, flax seed powder and mix vigorously until it is frothy.

-Add all the flours ,salt, water to make a batter pourable consistency.

-Heat tawa, when it is hot, pour a ladle of batter, sprinkle some ghee or butter, cook in a low flame.

-When it is almost cooked, flip and roast the other side. Serve with maple syrup and enjoy.


Chibud Harshale/ Mash melon Rasayana:

Chibud is a variety of Melon which is oblong and larger in size, normally found in various parts of India. Known by many names like chibbada, Chiber, Mash melon, Cucumis melo.

It belongs to the melon family; outer skin is like coloured cucumber and taste is bland and fleshy. Normally used in a raw uncooked form by making juice, lassi, salad or coconut milk or plain milk laden Rasayana as well as Poha added Rasayana. which is a snack by itself and considered as a Vrat/ fasting Food.

Just few days back, when I was returning from Karkal, found this fruit after a long time and picked up and relished with family by making Poha added Chilled Rasayana in this summer Heat.

If you want to try this recipe, you can use over ripe musk melons or Banana and proceed.

Ingredients:

Chibud melon – 1

Grated jaggery – as required

Coconut milk / plain milk – 1 to 2 cups

Cardamom powder – 1 tsp

Poha – little

Method:

-Chop Chibud melon into small chunks by removing outer skin as well as centre core.

-Mix in jaggery powder, cardamom powder and mix nicely.

-After mixing jaggery, it melts a little. If you are serving it chilled, refrigerate it.

-While serving, mix in coconut milk or plain milk according to your choice.

-Add little poha and serve as a cool snack.

Mango ginger Thokku:

Peanut Cookies with Millet :

When I was trying out some recipes for 2019 Millet calendar, I dished out a couple of recipes, which had turned out super tasty, and at the same time, healthy too.

Here, I have used Samai rice which is known as Little millet in English. I had some little millet flour and made fresh Peanut powder at home and proceeded. It had turned out super delicious as well as creamy/buttery, and at the same time crunchy on the outside.

Ingredients:

Samai flour/ any millet flour – 1 cup

Whole wheat flour – ¼ cup

Peanuts – 1 ½ cup (roasted)

Powdered Sugar or Jaggery – ½ cup

Salt – ½ tsp

Butter – 100 grams

Method:

-Grind peanut in a mixer jar as fine as possible.

-Take one bowl, cream butter and sugar, salt. Add flours, powdered peanut and make a dough.

– Make a uniform sized ball, arrange in a lined baking tray.

– Bake this for 12 to 14 minutes in a pre-heated oven at 170 C.

-When it is done, remove carefully and cool. Store this in an airtight container.