How to cook Par Boiled Red Rice/ Matta Rice:

Often, I get a query regarding the cooking method of our traditional parboiled Rice, red Rice, matta rice. So, I thought of including the procedure in my blog to share the link whenever required.

Before discussing the method, we would see how we used to prepare Rice in our traditional kitchen-

We have come a long way in the cooking method as well. Earlier, people used to cook Rice in a huge open pot by using a wood fire. You can see in this picture, which I clicked in our ancestral home; they follow this method, even now.

Then, gradually cooking medium has changed from firewood to a kerosene stove or hot plate. Hence, the system changed, and a huge wooden box insulated with a layer of thermocol was the trend to keep/cook Rice.

Pic Courtesy: By Google

In the modern era, the scenario has changed; with the micro family system, our huge box has turned into a small stainless steel insulated pot, marketed in the name of “China pot”. It consists of an insulated outer container and a cooking vessel.

Let us see The procedure of Cooking: (Open Vessel Method) 

-Procedure is simple, Boil water in a vessel; when it starts bubbling, add washed Rice, boil further for 5 to 10 minutes, remove, and keep it in a china pot.

-After one hour or so, check the doneness. You can refer to the picture. If you prefer soft Rice like us, boil one more time and keep it inside the china pot once again.

Within an hour, it would be soft and well cooked. Strain water and use it like regular Rice with curry or have it as a Ganji by including gruel.

To experience the real taste of parboiled Rice and curry,  you need to separate starch from the Rice.


Homemade Cocoa Powder:

Have you come across fermented and dried cocoa beans? Today, I will talk about my experience with these brown jewels, which we all love to enjoy in many forms, from powder to chocolate to ice cream.

If you have not seen the fresh cocoa fruit, I have attached the pictures and enjoy all the stages from the cocoa plant, whole fruit, halved fruit, and those white fleshy seeds.

(Pic courtesy: Madhura Pradeep)

As a kid, I used to enjoy plucking those cocoa fruits at my grandfather’s farm. Weekly twice, we used to break all those pods, collect the flesh and market it.

Cocoa fruit is elongated; the outer fruit is like a shell, which is red to yellow. Cutting is effortless; hold the fruit in your hand, bang against the floor/ brick/ hard surface. It breaks into halves, and you would see a long bunch of pulpy white mass, which is the natural juicy fruit, which is the protective cover of the inner cocoa seed.

Even though it is called a bean, it is not a bean; it is a fruit seed.

After removing the white pulp, it undergoes a fermentation process; during fermentation, natural white fruit is degenerated and loses its texture and taste. After this, the seed undergoes a drying process, and that is when we get the dried cocoa seed.

This dried seed is the raw material of chocolate and gives two kinds of raw materials for us.

One is Cocoa powder, and the other one is cocoa butter. Outer pulpy fruit is lost during the drying process and what we eat is practically a powdered seed. The taste of the fresh pulp is indeed an experience by itself, and if you get an opportunity to taste it, please don’t hesitate to taste it and enjoy the fruity taste.

Fermented and dried cocoa seeds were procured from my classmate, who has turned into a full-time farmer. I wanted to try some of the recipes by using fresh beans, and hence I bought it and tried a couple of recipes, which I will share in my next posts.

This post is regarding my experience with dried cocoa seeds.

First, I tried to make Pure chocolate powder;

-By roasting these dried cocoa seeds until it pops/ splutter sound arises or until you feel the soothing aroma of cocoa in a low flame.

After cooling, we need to remove and discard the outer shell. It resembles a thin chip. It was a bit tedious process, and my energy indeed dipped a couple of times 😀

While this process, I came to know, the cocoa seed is not intact. It has formed a kidney shape by the attachment of many tiny cocoa nibs. That was the reason, removal of the outer shell was challenging. The amount of pressure you apply is crucial over here to get the whole cocoa seed. Otherwise, easily it breaks, and we would end up collecting only cocoa nibs.

Cocoa Nibs are helpful as an ingredient by themselves, or you can use them as it is to garnish, to include in any of your recipes.

I made Cocoa nibs as well as homemade cocoa powder. It is straightforward, pour all the shelled cocoa nibs/seeds in a mixie jar or coffee grinder, use a pulse option and run a mixie in a regular interval by giving a slight pause. Why pause? While grinding, cocoa starts leaving its butter when it heats up. Homemade cocoa powder is a little grainy in texture and can be used as a cocoa powder wherever you want. It is PURE and subtle in taste. I otherwise, who hates chocolate, did enjoy it.


Vegetable and Soya Nuggets Biryani:

This recipe is for Soya Chunk/ nuggets lovers. Soya is known as vegetarian meat. A full-fledged protein source is a by-product of extracting soyabean oil and is relatively healthy, fibre-rich apart from the nutritional value.

Even though I’m not fond of the smell of Soya, My family love to have soya chunks in gravies or Biryani.

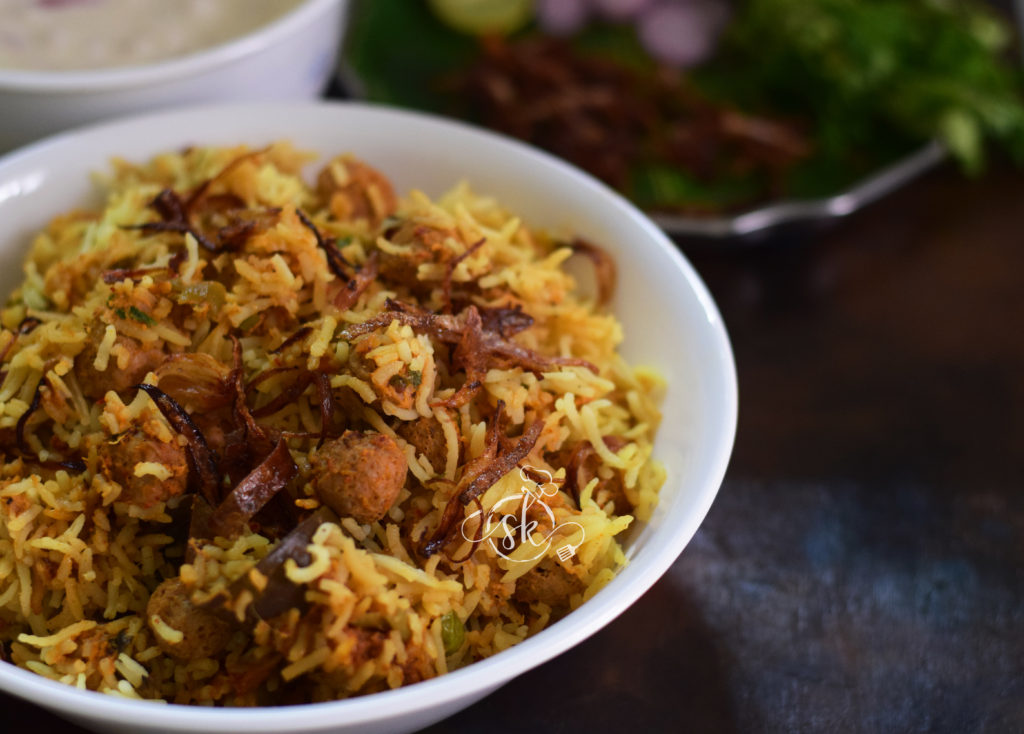
Let us see the Dum Biryani / which I make.

Ingredients:

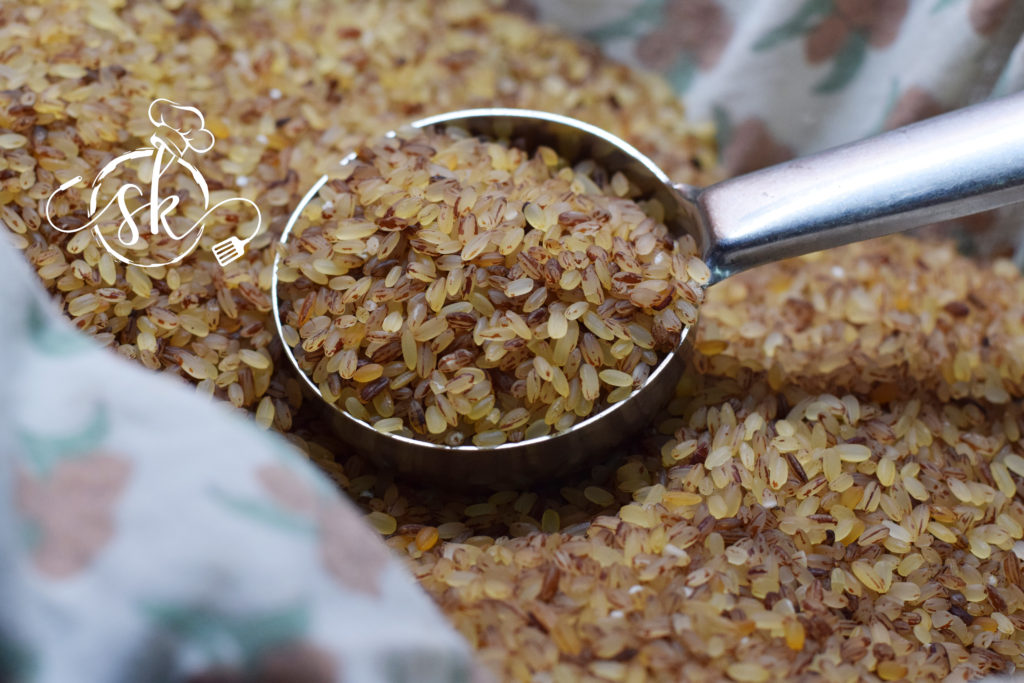
Basmati Rice – 2 cups (standard cup)

Soya Nuggets – ½ packet ( 2 or 3 cups)

Cashew – 1 fistful ( you can take a  mixture of melon seed and Cashew as well)

Milk – to soak Cashew (vegans can use hot water as well)

Onions – 4 medium-sized ( 2 for frying, 2 for the gravy masala)

Veggies – 1 cup ( Beans, Carrot, green peas )

Garam masala or Biryani masala – 2 tbl spoons

Red chilli powder – 1 tsp

Oil- ½ cup ( to deep fry onion and further cooking process)

Rosewater – 1 tablespoon

Lemon – Juice of 1 lemon

Saffron – 7 to 8 strands soaked in 2 tbl spoon of milk (vegans can use any plant-based milk)

Coriander and pudina leaves – chopped (as needed)

For the Gravy Masala:

To Ground into a paste:

Dry ingredients: Coriander seeds – 1 tablespoon, Cinnamon – 1″, Bayleaf – 1, clove – 2, Star anise – 1, Cardamom – 2, Black cardamom – 1, Black peppercorn – 5 to 6, Red chillies – 3 ( Byadagi)

Ginger garlic paste – 1 ½ tablespoon

Coconut – 2 tablespoons

To Make Gravy:

Cumin or Shajeera – 1 tsp, Cardamom – 2, Star anise – 1, Cinnamon -1″, bay leaf – 2, Black cardamom – 1, Stone flower – 1 small chunk.

Method:

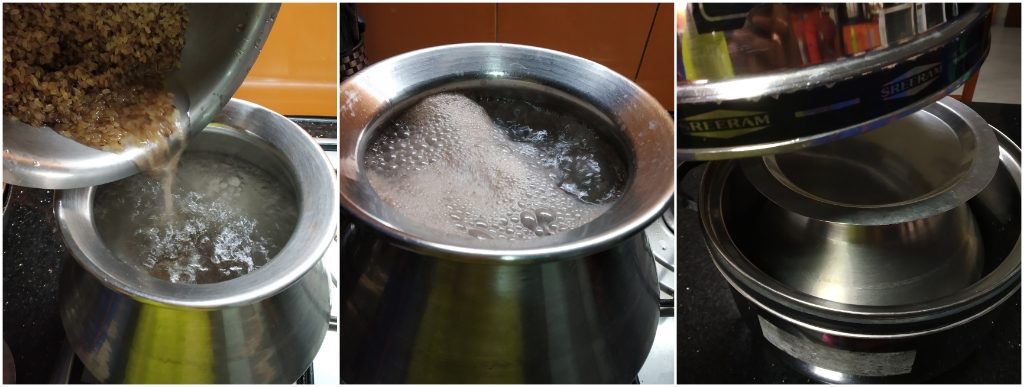
-Wash rice, soak for 10 minutes. Take one big pot, fill the water, add little salt, turmeric, 1 tsp of oil, one bay leaf, one cardamom, 1″ cinnamon. When it starts boiling, add soaked rice, cook only for 7 min (1/2 done), drain the water and keep aside.

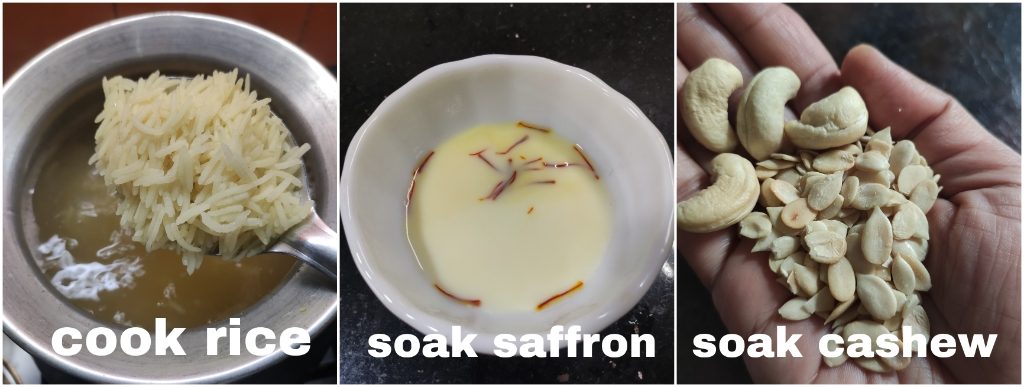
-Soak Saffron in a two tbl spoon of hot milk and keep it aside.

-Soak Cashew and melon seeds in hot milk, keep it ready.

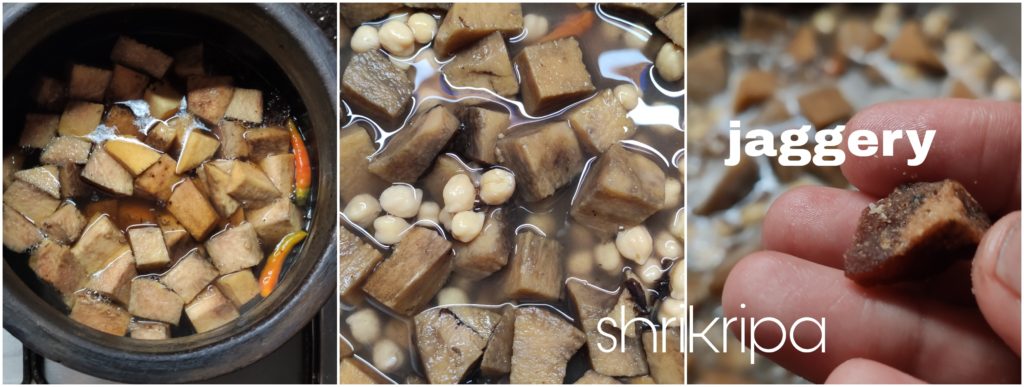
-Boil water in a saucepan, add a pinch of salt and give one boil for the soya chunks; drain and keep it aside.

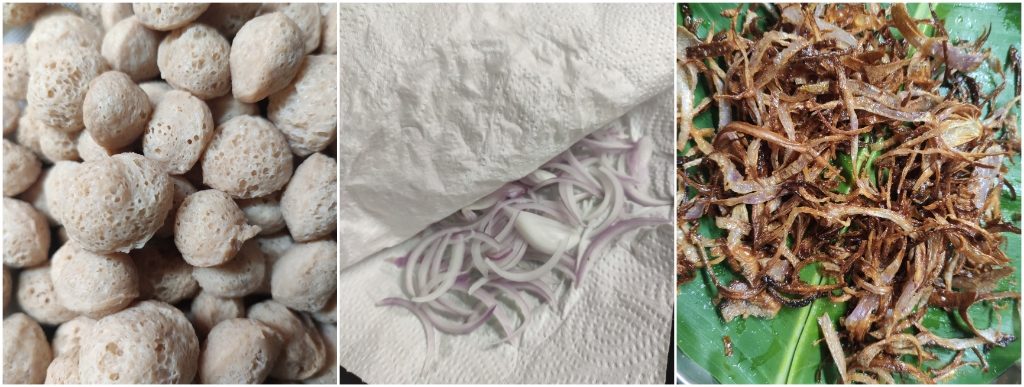
-Slice 2 onions, drain the excess moisture and deep fry and keep it aside. I usually sprinkle little salt and garam masala to this and mix it delicately.

-Now onwards, use leftover oil from the deep-fried onions.

Let us move towards grinding masala:

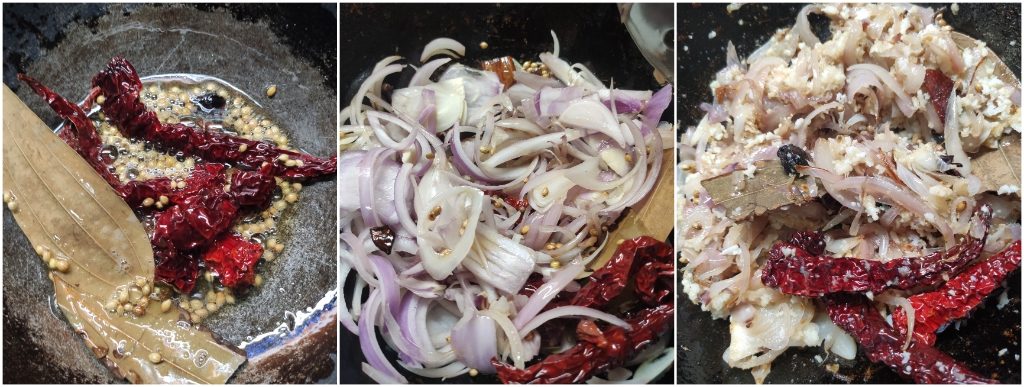
-Take one Kadai, add little oil, add all the masalas from Coriander seeds, Cinnamon, Bayleaf, clove, Star anise, Cardamom,  Black cardamom, Black peppercorns, Red chillies fry well. Add chopped two onions, fry until it is transparent. Add ginger-garlic paste fry for 2 minutes. Add in coconut fry for 2 minutes. Cool the mixture, grind with soaked Cashew and make a fine /smooth paste.

Next step is making veggie and soya nuggets gravy: 

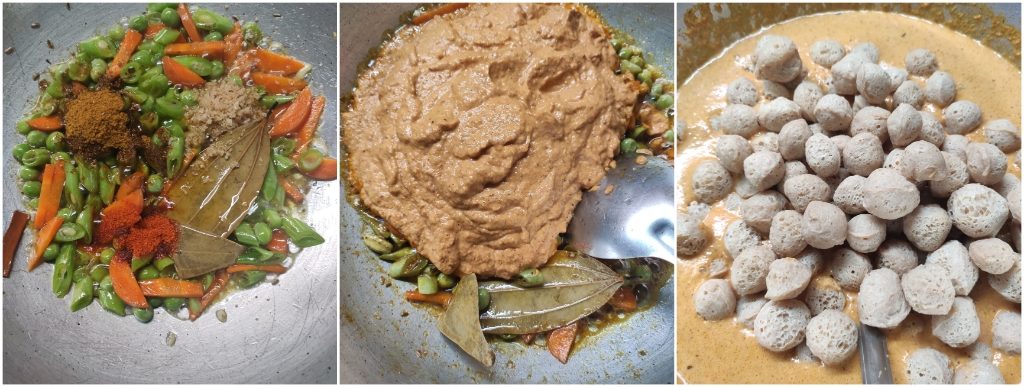
Take one Kadai, Add little oil, drop everything from shah jeera, cardamom, star anise, cinnamon, bay leaf, black cardamom, stone flower. After frying for 2 minutes, add in chopped veggies (beans, carrot, peas). Fry nicely by adding salt, a pinch of sugar, garam masala/biryani masala and red chilli powder. Add in ground masala, fry until oil oozes out. Adjust the consistency by adding water. When it starts boiling, add in drained soya chunks and give one boil. Switch off. Now, gravy is ready, and we are moving towards preparing dum by layering this with cooked rice and other elements.
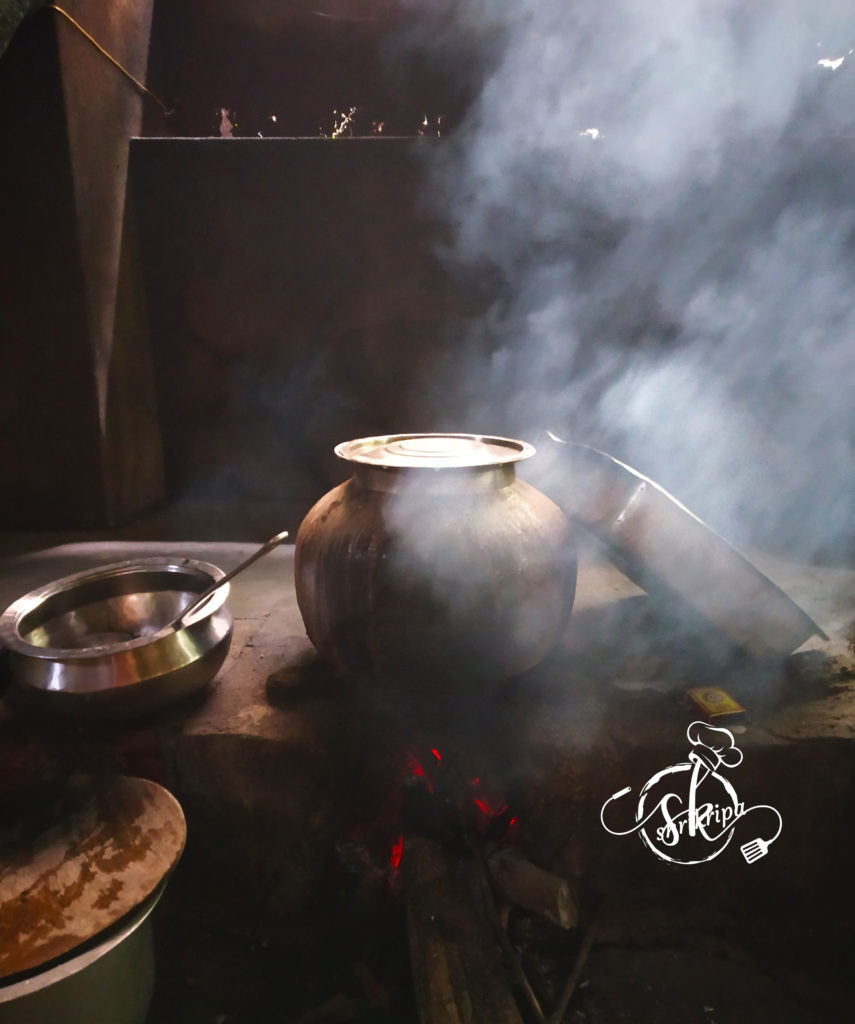
To Make Dum:

We need to layer the veggie and soya nuggets gravy, cooked rice, chopped coriander and pudina, lemon water, rose water, saffron milk, deep-fried onions and leftover oil after deep frying onions. Hence, keep everything in your hands reach.

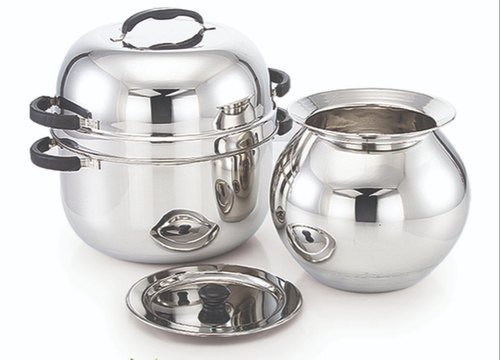
I use my pressure pan or big Kadai to assemble Dum.

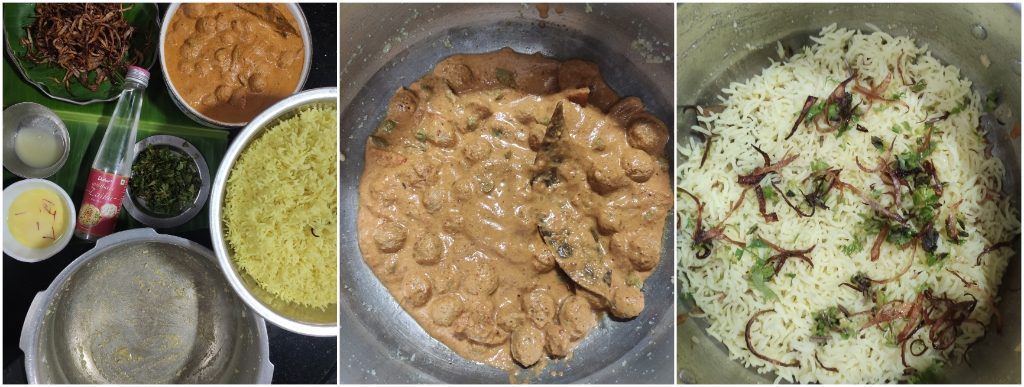
-Apply ghee or oil to the surface of Kadai or pan. Roughly, take one-third of the soya gravy and spread it at the bottom of the vessel.

Next, take 1/3 of the rice, spread it over the soya gravy. Now, Sprinkle 1/3 of each rose water, saffron milk, lemon juice, fried onions, chopped pudina and coriander.

-Next, 2nd layer of gravy, rice and repeat the process.

-Next, 3rd layer of gravy, remaining rice, lemon water, saffron milk, Rosewater, chopped greens, fried onions.

Now, make a hole at the centre by using your forefinger, pour all the remaining onion fried oil to the bottom, close the lid, and keep it in a simmer for 7 to 10 minutes.


Jackfruit seeds Rasam:

Jack seeds Rasam, perfect for rainy weather. It is a nutritious, authentic way to soothe our souls.

Traditionally, we use freshly roasted and ground masala to prepare the jack seed Rasam. Here, I took a shortcut method to ease my work, without affecting the outcome.

I usually keep the jack seed in my freezer, and the procedure is here. Other than that, I have a couple of other jack seed recipes in my blog. One is jack seed with Bamboo shoot, and another one is with Mangalore cucumber; both are our traditional recipes. Other than that, I have tried and shared jack seed Hummus, which is tasty, creamy and delicious.

Now, let us see the procedure of Rasam. It hardly needs any ingredients. A fistful of jack seeds and Rasam powder creates the magic.

Ingredients:

Jack seeds – 10 -15

Green chillies – 1 or 2

Rasam powder – 1 to 2 tbl spoons

Coconut – 1 to 2 tablespoons

Tamarind – small gooseberry size

Hing – ¼ tsp

Salt – to taste

Jaggery – to taste

Seasoning:

Coconut Oil – 1 tsp, Mustard – 1 tsp, red chilli – 1, curry leaves – 1 spring.

Method:

– Here, I add a little more seeds than the required amount. I like to retain those seeds in the rasam to enjoy the creaminess.

-Cook a fistful of jack seeds in an open vessel or cooker for one whistle. Peel the outer skin ( pink in colour)

-Take one serving spoon of cooked seeds, Rasam powder, coconut and grind into a smooth paste.

-Now take remaining cooked jack seeds with water, salt, jaggery, slit green chillies, hing and boil for 5 minutes.

– Add ground paste, tamarind pulp, adjust the consistency, boil well. Add seasoning and enjoy with hot rice and some papad.


Plantain flower palya:

Plantain flower, aka Banana flower, is a superfood for humans. It contains various vitamins, minerals and fibres. The abundance in every aspect makes them an excellent source of healthy nutrients for diabetes, nursing mothers, and anaemic persons to increase their haemoglobin level.

We usually use the whole flower, which we call Kundige / Baale Mothe, and I have already shared a delicious traditional chutney recipe and dosa recipe by using Banana/ plantain flower.

The age-old practice of soaking chopped banana flowers in buttermilk laced water will be beneficial in two ways. It would control blackening due to oxidization and eliminate the bitter sap that would turn bitter after cooking. The recipe is straightforward and earthy in taste.

Ingredients:

Banana flower – 1

Tamarind – 1 tsp

Salt

Turmeric – ½ tsp

Jaggery – 1 to 2 tsp

Red chilli powder – 1tsp

Grated coconut – 1 cup

For Seasoning:

Coconut oil– 1 tablespoon

Mustard – 1 tsp

Urad dal – 1tsp

Cumin – ½ teaspoon

Red chilli -1

Curry leaves – 1 spring

To soak:

Water – 1 bowl

Curd – 1 serving spoon or  little Tamarind

Method:

-Soak tamarind in a cup of water and keep aside.

-Wash banana flower from outside and remove outer purple bract (remove 2 layers) and discard.

-Now, take one bowl of water with 1 serving spoon of curd and mix and keep it ready. (This water will avoid decolouration of the choppings)

-Start chopping banana flower from the tip (refer to the above picture)

-Keep on adding the chopped part to curd water.

-While chopping, whenever the outer shell opens by itself, discard that and proceed to chop.

– After the chopping, drain the curd water and collect the banana flower choppings.

-Take one Kadai/ wok. Do seasoning, heat oil, splutter mustard, urad dal, cumin, red chilli, curry leaves.

-Add tamarind water, salt, turmeric, jaggery, red chilli powder, and drained choppings and cook in a low flame by closing the lid.

-When it is cooked and water drained, garnish with coconut and mix nicely. Serve with hot rice.

NOTE: For the vegan version, instead of curd, use diluted tamarind water


Vegetable/Egg Soba Noodles:

Firstly, we will see what soba noodles is? Soba noodles are Japanese noodles made from buckwheat flour. Buckwheat flour is greyish, so the noodles have a dull grey colour, and it is gluten-free. Due to this, noodle is slightly brittle.

 As 100% buckwheat, gluten-free noodle tends to break, people add some wheat flour when preparing their noodles. Using the noodles as is, with 100% buckwheat, I needed to be extra cautious while boiling and cooling.

Earlier I did try it by adding honey and sesame as well. The advantage of sweetened with honey, it is like a one-pot meal. No need for a side dish 😀

But, if you want to relish with side dishes, you can make a savoury version by adding veggies and opt to add a bit of scrambled egg as well. Soba noodles do not need much seasoning. It has its earthy flavour.

Now we will see how to cook noodles as well as the preparation.

Ingredients:

Soba noodles – 2 bundle

Spring onion bulbs or shallot – 2 tablespoons (chopped)

Veggies – 1 bowl ( beans, carrot, broccoli, cabbage, capsicum)

Salt

Pepper – little

Ginger – 1 tablespoon (juveniles) 

Garlic – 1 tablespoon (chopped) 

Soya sauce – 1 spoon

Vinegar – 1 spoon

Spring onion greens – to garnish (optional)

Method:

-Take water in a big vessel, add a little salt and a tsp of oil, boil. when water starts to boil, add noodles, and cook. When it Aldante, strain the water and keep it aside.

-Reserve the strained water to prepare side dish/Chinese curry (it is healthy as well as give an excellent texture to the prepared curry)

-Now cool the noodle and proceed towards seasoning.

-Take a wide wok, heat oil, fry garlic or ginger. You can add both as well. Add white spring onions or shallots and fry a little.

-Next, add chopped veggies, fry nicely. Add salt, soya sauce, vinegar, and fry for 2 minutes.

-Add cooled noodle and toss. Sprinkle salt, pepper and adjust the seasoning.

Suppose you are ok with the addition of egg, nothing like it. Go ahead, scramble a couple of eggs, add to noodle, serve your favourite Chinese side dish, or eat as it is and enjoy the wholesome meal.

Note: you can cook the noodle a little early and keep it under refrigeration. It gives an excellent result as well.

Passion fruit Gojju:

Passion fruits/Passiflora grows in hill stations of India or the colder region during the May -July months. It contains a hard outer shell and pulpy inner core with a lot of black seeds. As my daughters hate the texture, I love it and include it in my juice or lunch.

Passion fruit has a tart mixed sour taste. The fruit has many beneficial nutrients and a low glycemic index; hence, it is ideal for a diabetic condition. It is my way of indulging the sour fruit in its whole raw form. I followed our traditional charred brinjal gojju recipe and tried it. I loved the fresh fruit flavour, crunchy seeds in this gojju and enjoyed it with red parboiled rice.

Ingredients:

Fruit pulp – from 2 fruits

Green chillies -1 – 2

Jaggery – as per taste (grated)

Salt

Onion – 1 (chopped)

Seasoning: Coconut oil – 2 tsp, mustard – 1tsp, crushed garlic cloves – 6 -8, curry leaves – 1 string.

Method:

-Cut passion fruit in half, remove the pulp with those seeds. 

-Add salt, grated jaggery, crush green chilli by using your hand (it emits a lovely aroma to the gojju) and chopped onion. Adjust the consistency by adding little water.

-Season with coconut oil, mustard, crushed garlic. Fry until garlic is brown. Add curry leaves and pour the seasoning on the gojju.

-Enjoy with hot rice or with curd rice. If you like sweet and sour gojju, it is the perfect recipe.

Wild mango Rasam :

Kadu Mavinahannina saru: is a traditional delicacy of coastal Karnataka, which is a must during mango season. We have several recipes of wild mangoes in the coastal region, and each has its charm and taste. Some varieties are sour and fibrous, and some are sweet and juicy; some mangos do not have much pulp. According to their types, their usage also varies 😉

If tiny wild mangoes are sour, not so sweet, and fibrous, they go into the cooked form of saru / Beyisida gojju.  In this way, we can enhance the taste by adding additional jaggery and enjoy even the sourest mangoes.

Sigh!! These are all nostalgic memories for me. Here, In Bangalore, I do manage to cook all these varieties by using tiny mango, which is also known as Sakkara gutti or Sugar baby 😀

The recipe is simple and goes like this –

Ingredients:

Wild mangos / tiny mangos – 6

Green chillies – 2

Jaggery

Salt

Method:

-Clean the mangoes, remove the peel, put it in the vessel containing half a cup of water, squeeze and collect mango pulp; repeat the process until skin sheds all the pulps.

-Now, take mangoes, squeezed the water into a vessel. Add salt, crush two green chillies by using your hand ( it indeed a vital part to enhance the taste), jaggery ( little more),  1 tbsp of grated fresh coconut and boil until mango cooks. 

-Adjust the water content according to your taste. -Season it with Coconut oil, mustard,  red chilli and curry leaves. Serve with hot rice.

Suvarna gadde- Kadle Melara / Elephant foot yam -Kabuli chana Kayi Huli :

Yam and Chana Melara is the Most loved dish of our community. It is an absolute favourite of my family as well. Today, I will share one more traditional recipe of our region and one of the favourite dishes you find on our wedding menu.

-Now prepare the Elephant foot yam or simply Yam;  if you are new to the usage of Yam, please go through my detailed description of handling Yam, how to chop etc., in “Understanding the roots and tubers.” And go down until Tubers, and you would find the Yam under Number 6, and it is HERE.

Ingredient:

yam – around ¼ kg

White chickpeas – ½ cup

Salt- as needed.

Green chillies – 2

tamarind – one gooseberry size (soak in 1 cup of water)

To grind: Fresh Coconut – 1 ½  cup

For Seasoning: Ghee or Coconut oil- 1 tablespoon, mustard – 1tsp, red chilli – 1 (optional), curry leaves- 1 spring.

Method:

-Soak dry chickpeas overnight and cook in a pressure cooker for 3 to 4 whistles or until done.

-Cook Yam until it is half done, add tamarind pulp, slit green chillies, cooked chickpeas, salt, jaggery and cook until Yam is soft and perfect.

Now, grind the coconut into a fine paste, add the paste into cooked veggies, adjust the consistency, and boil for 2 minutes.

-Add buttermilk or beaten curd, and when it starts to boil, switch off.

-Prepare seasoning, heat oil, splutter mustard, add red chilli and curry leaves, fry and pour over Melara. Serve with Rice.

Bilimbi Saaru /Tree Sorrel Rasam :

Bimbuli / Beempuli, anyone? Yes! It is our local name to Bilimbi 😀
Averrhoa bilimbi, commonly known as Bilimbi, “Cucumber tree”, “tree sorrel”, is a tiny, tangy, juicy fruit that regularly appears in Coastal Karnataka cuisine.

Bimbuli is what we call it, and it is also known as Tree sorrel. It is a common backyard tree, and you would find it in every house of the coastal region. The beauty of our traditional cuisine is impressive. When we take only Mangalore cuisine, we find at least 6 to 7 varieties of souring agents used for specific purposes according to the ingredient and the recipe. For example, Kokum, tamarind, Monkey jack (known as Unde Huli or Kethe Huli), Hog plum, Bilimbi (beempuli), Raw mango and the list goes on.

Before the lockdown, I found this in my locality during our evening walk and introduced it to my daughter.

We used to eat this watery fruit by dipping it in salt and asked her to eat it with salt. She, who is fond of any khatta/ souring agent, enjoyed and asked for more. Besides eating, I loved pickle, which my paternal aunt used to prepare and get it.

While talking, remembering good old memories, my mother in law mentioned Bimpuli saaru, which her mom-in-law used to prepare. As a curious learner, I started asking her about the recipe? How did she use to make etc.?

As always, she said, what is the recipe? There is nothing in that saru—a little bit of cooked dal, green chilli and hing.

The next day, I made the saru, which I never tasted before, and it was indeed flavourful and delicious and thought of documenting it in my blog for future reference.

 Ingredients:

Bilimbi /Tree sorrel – 6 to 7 or acc to your taste

Cooked toor dal – 1 small Katori

Salt

Jaggery – to taste

Green chillies – 6 to 8 (slit)

Hing – peanut size

Seasoning:

Coconut oil – 1 tbl sp

Mustard – 1 tsp

Red chilli -1

Curry leaves – 1 spring

Method:

-Take a one cooking pot, put Chopped tree sorrel, slit green chillies, salt, jaggery, hing, 2 cups of water as well as cooked, mashed dal.

-When chillies and sliced tree sorrels are cooked, adjust the consistency by adding water, if necessary, salt, jaggery or hing. Boil a couple of minutes more and add seasoning.

-To season, heat oil, splutter mustard, red chilli and curry leaves. Yes! It is so simple and tasty.

-This tasty saru is pairs well with hot rice and papad with any vegetable side dish to accompany.