Healthy “Brown” Neer Dosa:

Usually Neer dosa is made from using only white Dosa rice and it contains only carbohydrate and recipe is already shared and it is here

Couple of years back, when I was thinking of including millets in our regular neerdosa to make a healthier version, dosa used to turn out hard and crispy and I was not at all satisfied with the result. After couple of trial and errors, addition and deletion of ingredients, I got this soft and smooth textured neer dosa like the regular white one and henceforth it is one of our regular breakfast items and we named this as “Brown Neer Dosa”.

How I included these many items? As I mentioned above, I wanted to make soft neerdosa without any compromise on taste. Usually when we add millet in Dosa batter, Dosa becomes little hard and brittle. So, I thought of adding Whole Ragi to give softness with Fox tail millet.

Here I have added Ragi, Organic red unpolished rice with normal white rice to enhance the value, and fox tail millet. Instead of fox tail millet, one can use any other millet as well.

It is an excellent breakfast option for Toddler’s, weight watchers, diabetic diet or low carb diet as well as tiffin box options. It is very soft, easy to chew, digestible and at the same time filled with nutrients and fibre apart from carbohydrates. It doesn’t need any fermentation or planning. Soak in the night, grind and make it in the morning in a jiffy.

Recipe goes like this-

Ingredients:

White Dosa rice – 1 cup

Whole Ragi / finger millet – ½ cup

Red organic unpolished rice – ½ cup

Fox tail millet -1 cup

Salt

Method:

-Measure everything and put it in one bowl, wash twice and soak this in water for 2 to 3 hours or during the previous night like me.

-Next morning, grind this soaked rice into fine paste with water (I use soaked water while grinding, it gives nice aroma for the Dosa) and salt as per requirement.

-Make batter into pourable consistency like this (refer a picture) and check for the salt.

-Now keep Iron griddle for heat.

-When it is ready, apply oil like this.

-Pour one serving spoon of batter like how we make Rawa Dosa, you can see it in the picture below.

-Now close the lid by keeping the gas on full flame.

-After two minutes, remove the lid and keep the gas in simmer the edges of the Dosa rise a little, like this.

-Now flip this Dosa on the plate, leave for 2 minutes, then fold like this.

– Now keep repeating this with the remaining batter and stack one over the other or take one big plate and stalk one opposite another alternately.

-Serve these Dosa with coconut and grated jaggery mixture or coconut chutney.


Moringa / Drumstick leaves chutney and Rice:

Nugge Soppu ,Moringa or Drumstick leaves are a power house of nutrients.  Back in 2016 I had tried a bunch of drumstick recipes to publish in Vijaya next kannada daily. This chutney recipe is from that trial and after that it is in my regular menu and I have made it many times, as well as tried to mix this same chutney into cooked rice after doing some seasoning and liked it a lot and It is an awesome way to feed small kids with added goodness of moringa.

I will first describe how to make chutney and at last I will add the procedure of rice as well.

This chutney stays good for up to one week and we can store this in a refrigerator and can be enjoyed as a side dish or make rice item and relish and can be packed as a carry meal in a tiffin box as well.

Procedure for  Chutney:

Moringa leaves – 4 cups (keep aside some young leaves for seasoning)

To be ground:

Roasted red chillies – 3

Black pepper – 3

Garlic – 10 cloves

Tamarind – ¼ tea spoon

Coriander leaves – 3 table spoons (chopped)

Cumin – 1 tea spoon

Jaggery – ½ to 1 tea spoon

Salt

Seasoning;

Oil – 2 table spoons

Mustard – 1 tea spoon

Curry leaves – 2 strings

Garlic – 10 cloves (chopped)

Onion – 1 (chopped)

Turmeric – ½ tea spoon

Method:

-Take moringa leaves (keep aside a little) and grind with all the items under “To be Ground” from Roasted red chillies to salt in the list by adding little water into coarse paste.

-Now take one kadai, do seasoning part. Heat oil, splutter mustard, add curry leaves, chopped garlic, onion ,turmeric and fry until onion and garlic becomes light brown.

-Add moringa leaves, which we have kept aside and fry till it wilts and add ground paste and fry for 3 to 5 minutes or until raw smell vanishes and mixture changes in colour.

-You can serve this as a side dish with hot rice and ghee. This chutney stays good under refrigeration and can be used as a moringa rice mix as well.

Now we will see the procedure for Moringa Rice:

It is simple. Take some oil and put one tea spoon of cumin, little curry leaves and one or two table spoons of ready chutney, little salt and mix nicely. Switch off the gas. Mix required amount of ready cooked rice in this mixture and mix nicely to devour aromatic moringa rice. If you have ready chutney around, it is a quick recipe.


Nacho’s Aloo Chat:

This 72nd Indian Independence Day, my daughters’ school had organised a fund-raising event and my daughters wanted to make a couple of attractive dishes with no usage of gadgets, on the spot kind of menu. They made a group of 9 kids and chalked down ideas decided to do Nachos. One dish was nachos with dips and deciding one more item was the task. Finally, I also chipped in and after a couple of ideas we all finalised with the Nacho aloo chat.

Now started my headache of deciding on how to make it, quantity of the ingredients etc. Because quantity was huge, and preparation should happen at the early morning as well.  Kids wanted to do a food photography for their banner and board to hang in their food stall. I grabbed the opportunity and thought of making Aloo chat for their group which contained 9 students. Last Sunday, made tamarind and date chutney, and went ahead with one kg of potato. So, that I would know, how many plates we can make from this much.

After preparing and plating, it turned out well and kids were happy with the dish as well as they enjoyed the activities of banner making, painting the board and food photography as well.

I was relieved and finalised the quantity. Why I made this post is – it is a perfect dish for any parties and this mixture turned out very good and as a tasty sandwich stuffing as well, with a little grated cheese.

 Pic by : Aneesh Navanale

Let us see how I planned and proceeded.

Event was on Wednesday morning.

Sunday, I made tamarind and Date chutney and stored it in a fridge.

Monday, I made Mint and coriander chutney and stored it in a fridge.

Tuesday night before going to bed, cooked whole potatoes, drained and kept it for cooling.

1 kg of potato yields 10 to 12 plates of chat. So, used 5 kgs of potatoes for around 50 to 60 plates.

Wednesday morning peeled the potatoes, diced into small bits and proceeded.

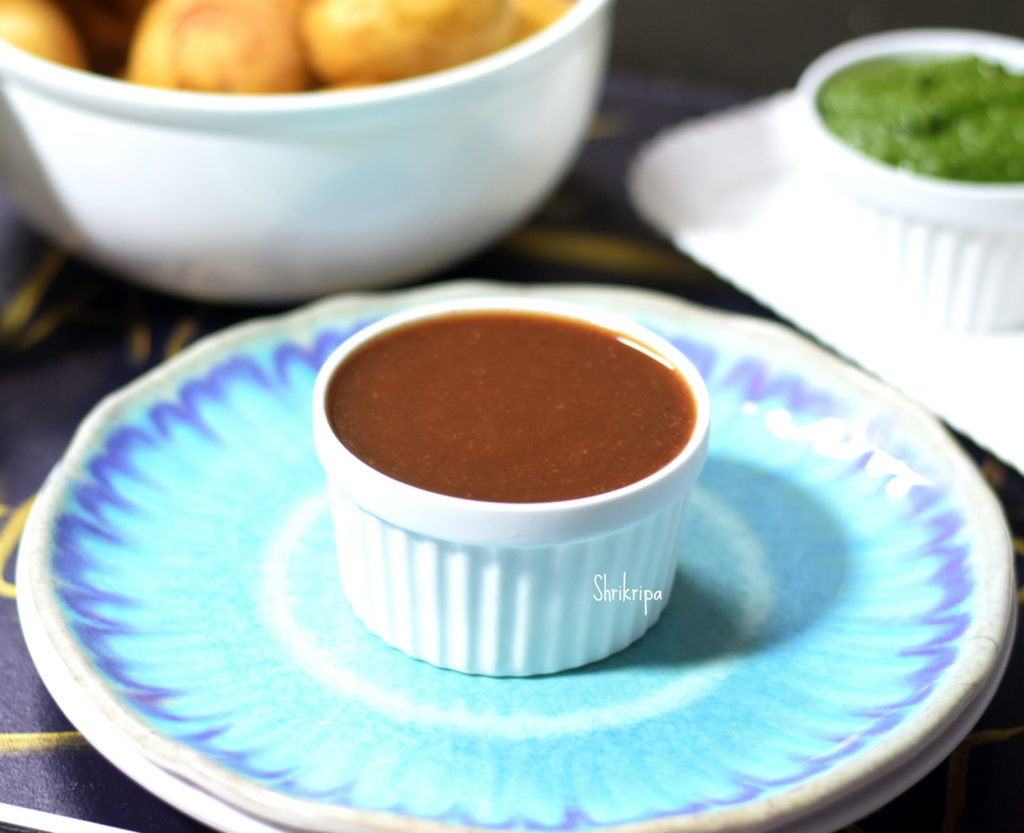
Khatta Meeta tamarind and Dates chutney:

Ingredients :

Dates – 200 grams (please adjust according to its sweetness)

Tamarind – 100 grams (please use according to sourness of the tamarind)

Jaggery – As needed.

Green chillies – 2

Red chilli powder

Black Salt or Sea salt – very little

Roasted cumin powder

Method:

-Mine is home grown, hand cleaned tamarind, so I went ahead as it is. If it is store bought one, please remove any impurities.

-Boil one to two cups of water, soak tamarind and pitted dates in it.

-After an hour, grind this in a mixer grinder by adding 1 or 2 green chillies. You will get very smooth paste.

-Adjust the consistency by adding water and boil. While boiling add red chilli powder, salt, cumin powder and required amount of jaggery.

Once cooked, raw smell of dates, tamarind and jaggery is vanished, switch off the gas.

Cool completely and store it in a refrigerator.

Note:

  • I usually prefer to make little thicker version. So that, if thicker or thinner version is needed, scoop out a little from this batch, adjust by adding little water.
  • Adjust the ingredient according to your taste.
  • One can add more jaggery if mixture is sour.

Green chutney/ Mint – Coriander chutney:

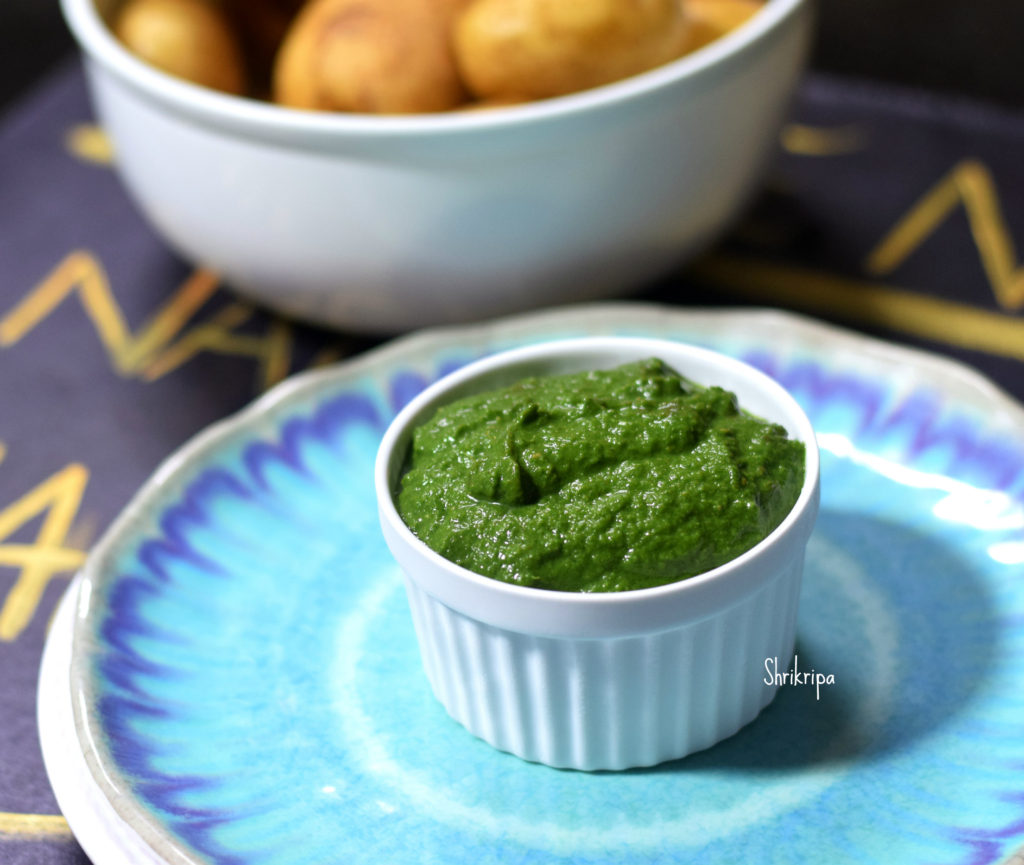
This is my basic sandwich chutney, which I usually make and store it in a fridge for an emergency use.

Ingredients:

Coriander – ½ bunch.

Pudina – 1 small bunch

Green chillies – 1 or 2

Garlic – 2 cloves

Cumin – 1 tea spoon (without roasting)

Dry mango powder – ½ tea spoon

Salt

Sugar or jaggery – ½ tea spoon

Ready sev or boondi – 2 to 3 tea spoons (to give thickness)

Method:

-Wash coriander, pudina, green chillies, drain, chop.

-Put everything and grind in a mixer grinder by adding required amount of water.

-I normally store this as a thick chutney. So that if it is sandwich, use as it is like a spread. If it is chat, adjust the consistency by adding water.

For Aloo Chat:

 Pic by : Aneesh Navanale

I am giving here for the quantity of one kg potato. Which will yield approximately 12 plates of ready chat.

Ingredients:

Potato – 1 kg

Tomato – 3 (big)

Onion – 2 (big)

Lemon – ½ to 1

Green Coriander – As needed

Black salt – As needed

Cumin powder – As needed

Chat masala – As needed

Dry mango powder – As needed

Sweet chutney – As needed

Green chutney – As needed

Nacho chips – As needed

Corn mixture – As needed

Thin Sev – As needed

Method:

Wash potato,cook whole potatoes by immersing in water by adding very little salt ( potato should absorb very little salt) for one whistle in a pressure cooker, drain and keep it for cooling.

-When it is cool, peel outer skin,dice potatoes in to small chunks. Chop onion and tomatoes in to small pieces.

-Chop coriander as well.

-Take one big bowl. Mix in chopped potatoes, onions, tomatoes.

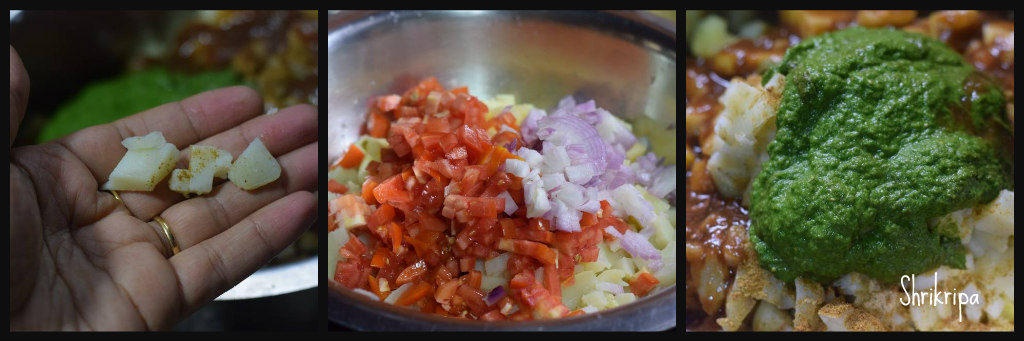
-Pour sweet chutney, green chutney, black salt, cumin powder, chat masala, dry mango powder and lemon juice and adjust the seasoning according to your taste.

-Take a serving plate, spread nacho chips at first.

-As a second layer, spread potato mixture over chips layer.

-Sprinkle corn mixture, sev , chopped coriander and serve.

Potato and cheese / Aloo Sandwich:

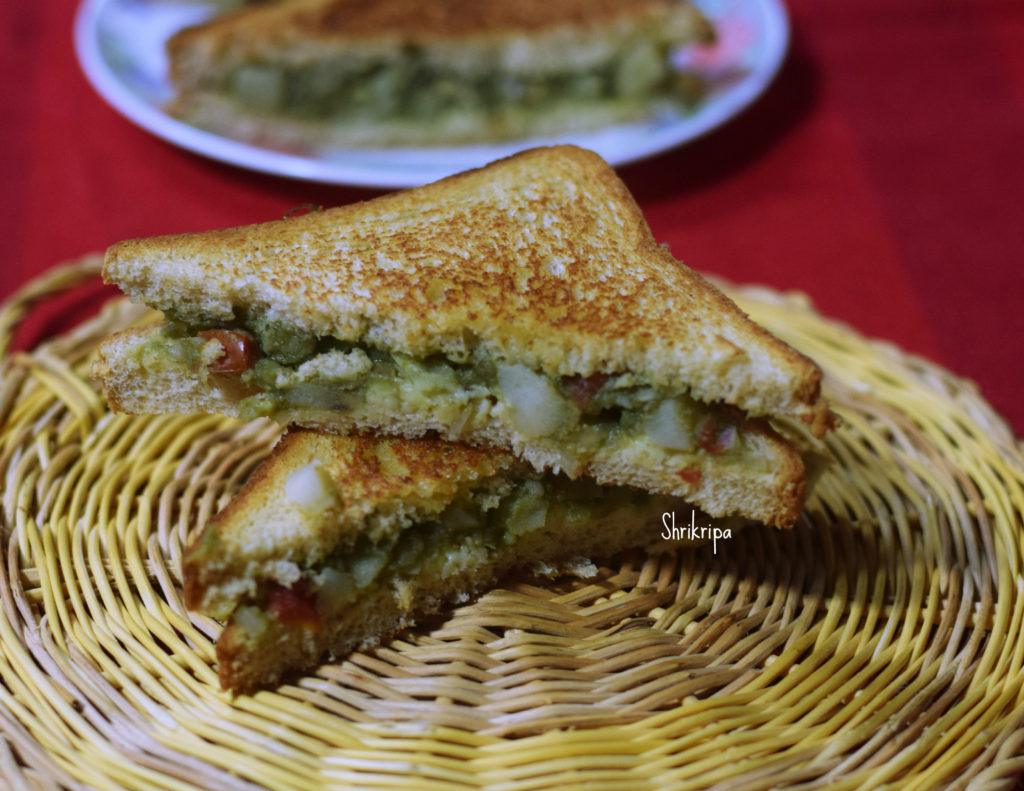
If this above ready mixture is available, you can make and serve awesome tasty sandwiches as well.

Just take a couple of breads. Spread aloo mixture over one bread. Grate some cheese and close with another slice of bread. Apply some butter and grill or roast it on Dosa tawa and enjoy.

Kanile palya/Bamboo Shoot and jack seed palya:

Kanile is nothing but Bamboo shoot. We coastal people, prepare some delicacies from this seasonal high fiber veggie, such as Bamboo shoot and green gram gravy or this dry Subzi/palya is prepared by mixing with crushed Jackfruit seed. It is protein rich, subtle in flavor, blends very well with bamboo shoot. This palya goes very well with hot Rice with a dollop of ghee or as a side dish with any kind of gravy, Rasam or sambar.  So, it is a seasonal monsoon season’s treat for us.

We normally use fresh bamboo shoot and chop it in circular manner. (please refer to the Post of How to chop Bamboo shoot)

I normally preserve jack seeds in frozen form and procedure is already shared in my blog as well.

Ingredients:

Ready Bamboo shoot – 1 cup

Fresh or Frozen jack seeds –2 fists full

Grated coconut – 3 table spoons

Turmeric – ½ tea spoon

Red chilli powder – 1 tea spoon

Salt- as needed

Jaggery – as needed (optional)

Seasoning:

Coconut oil – 1 table spoon

Mustard – 1 tea spoon

 Urad dal – 1 tea spoon

Cumin – ½ tea spoon

Red chilli -1

Curry leaves – 2 springs

Method:

-I normally crush and store the jack seeds. So, no need of chopping or crushing. If you have fresh seeds with you, please crush the seed by using hitting stone and remove outer stiff cover and use inner seed.

– Take one thick bottomed pan, do seasoning. Heat oil, splutter mustard, add urad dal. When dal becomes light brown, add cumin, red chilli and curry leaves.

-Now add in crushed jack seeds, a cup of water and cook at low fire by closing the lid.

– When it is half done, add chopped and ready bamboo pieces, Red chilli powder, salt and jaggery, required amount of water.

-Close the lid and cook this in a low flame, until it is cooked or up to water drains.

-If water drains first, add some more water and make sure to cook properly.

Garnish with fresh grated coconut and mix, cook for 2 minutes and switch off the gas.

-Serve with hot rice and enjoy as a side dish.


Instant Stuffed Brinjal:

Tiny brinjals are very delicious in dry curries as well as in gravies. When I have plenty of home grown organic brinjals, I normally make this quick dish, which can be handy as well as tasty when you are super lazy to cook. If chutney powder (any chutney powder will do) is around, within no time you will be able to make this delicious dish. It can be relished as a starter, side dish or with curd rice.

Ingredients:

Tiny Brinjals – 12

Garlic Chutney powder – 2 to 3 table spoons

Hucchellu/ gurellu or Nigella seed powder – 1 tea spoon (optional)

Red chilli powder – 1 tea spoon

Amchur powder – ½ tea spoon

Salt

Turmeric – ½ tea spoon

Cooking oil – 2 tea spoons

Method:

-Hucchellu powder is purely optional. If you have roasted Hucchellu powder, use it.

-Take one bowl, mix chutney powder, gurellu powder, salt, turmeric, red chilli powder, amchur powder, salt.

-Wash brinjal, make 2 slits (+ shape) and fill this mixture and keep aside. If any mixture is remaining, keep aside.

-Take one kadai, add oil. When oil becomes hot, add masala filled brinjals and toss for couple of minutes.

-Sprinkle little (1 table spoon) water and close the lid and cook in a low flame.

-Once again sprinkle water in between and cook until brinjal shrinks and cooks properly.

-Lastly, sprinkle remaining masala mixture, give one stir and serve as you wish.


Garlic Chutney Powder:

Basically, it is a very simple garlic flavoured dry coconut chutney. One of the most loved condiments of my kitchen. It works wonders when you sprinkle it on Dosa or onion uthappam while making. When you are lazy to prepare fresh coconut chutney, take this chutney powder and drizzle some coconut oil and relish with any south Indian breakfast items. It works just fine with North Indian Parata as plain or mix it with sweetened curds and relish. It tastes yummy with hot rice as well with ghee. Sometimes I even use this chutney powder as a stuffing for some veggies as well 😉. So, overall it is a multi-dimensional ingredient.

Garlic is intensely high on aroma as well as flavour. When you roast it and use it, aroma increases even more. It is considered as very good for human health. Garlic is widely used in medicinal purpose to combat many illnesses.

As we grow coconut in our coastal area, chutney powder will be made by adding dried coconut and because of its no moisture content, shelf life of the powder increases, and health benefit of dry coconut can be included by this way as well. Health benefit of dry coconut is many, and it contains many essential nutrients, dietary fibres and some important minerals as well.

I use Urad dal for its nutritional benefit as well as for its aroma with added benefits from the Chillies and curry leaves as well as sharing one more version of  chutney powder with added neem  flower at the end of this post.   

Now I will jump into the procedure –

Ingredients:

Dry coconut / Copra – 2

Dry red chillies – 20 to 25 (Byadagi)

Urad dal – 1 to 2 table spoons

Garlic – 2 (whole)

Curry leaves – 10 – 15 strings

Tamarind – 1 tea spoon

Salt – as needed

Sugar or jaggery powder – as needed.

-At first, slice coconut into thin chips.

-I usually air dry these slices for one or two days in open air (optional)

-Wash curry leaves and spread this to air dry.

-Dry coconut has high degree of oil content and while roasting and powdering, it tends to leave oil and becomes wet. When I tried to make after air drying, it never becomes wet and powdering becomes very easy.

-After air drying, make powder by using mixer grinder. This step will help in equal roasting.

-Take one kadai, dry roast urad dal until it becomes light brown.

-Dry roast garlic (I usually clean only loose skin of garlic clove and leave inner skin intact).

-Dry roast air dried curry leaves until crisp.

-Roast Red chillies by sprinkling some coconut oil.

-Dry roast coconut powder.

-Spread everything and cool.

-Take one mixer grinder, powder urad dal, red chillies at first. Then add curry leaves and powder.

-To this add garlic and use “PULSE” option and churn for a short interval.

-Now you will see a mass of masala.

-Take out all this and mix with roasted and cooled coconut.

-Now add salt, sugar or jaggery, tamarind and mix.

-Now take this mixture little by little and “pulse” in a mixer grinder to attain powder form.

-After completing the procedure, use dry hand and mix a whole lot of chutney powder nicely in one vessel.

-Check for salt, sugar, chilli.

-If needed add red chilli powder, salt or sugar and adjust.

-After it cools down, store it in a dry container. It stays good for 3 to 4 months in normal temperature or without any refrigeration.

Garlic Chutney powder with Neem Flower: Perfect for winter months.

Same recipe to follow and If you want to add Neem flowers in this chutney recipe, you can use dried neem flowers with all the other ingredients of garlic chutney powder.

Dry roast sun dried flowers for a couple of minutes, cool and add with other ingredients while dry grinding the powder and enhance the nutrition value during winter months.

It equally tastes great like regular garlic chutney powder.


Karkali / Arbi leaves Chutney:

Monsoon is the time, we relish our dose of colocasia leaves, which is known as “Kesavu” in Kannada. Coastal people relish Pathrode, which is a rice batter smeared steam cooked rolls. Apart from this we usually relish its chutney and with mix veg curry as well. It goes very well with hot rice with a dollop of ghee or coconut oil.

Colocasia leaves has many names in India. It is known as Taro leaves, Arbi leaves, pathra leaves, Alu chi bhaji, kesavina ele and so on. Every state has its own speciality with this iron rich leaves. Because it tends to get itchy, we need to add sufficient amount of tamarind and it should get balanced with the taste.

If you learn the trick of this, half the battle is won, and you can master the art of cooking this leaf for sure. In our traditional preparation, we do use bird eye chilli for this chutney and if you don’t have access, you can use normal green chilli as well.

How to make this flavourful chutney:

Ingredients:

Arbi leaves – 12 to 14

Bird eye chillies – 8 -10 (if green chilli use 4 to 6)

Salt

Tamarind powder or tamarind – 1 ½ tea spoon

Garlic – 8- 10 cloves

Seasoning:

Coconut oil – 3 table spoons

Mustard – 1 tea spoon

Curry leaves – 1 spring

Chopped garlic – 4 to 5

Dried Red chilli – 1 (optional)

Method:

-Wash Arbi leaves as well as its stem and bird eye chillies.

-Chop leaves and stem.

-Take one cooker, add chopped leaves, stem, chillies, garlic, tamarind, salt and cup of water.

-Cook for 2 whistles, when it is cool, grind the content into smooth paste.

-Prepare seasoning, heat oil, splutter mustard, add curry leaves and chopped garlic and fry.

-To this seasoning, pour the ground mixture and boil it nicely.

-Serve this with hot rice and ghee or coconut oil.


Halasina Hannina Berati / Jackfruit Preserve:

When summer ends, a whole lot of your favourite fruits also vanish from your eye sight and you will surely miss the season!! The best thing one can do is, prepare some jams or preserves and try to store this for future use.  This jackfruit preserve stays good for almost a year or more in the freezer. It is very handy when you want to make payasam for any festivals or any special occasions. Here is my recipe for homemade jackfruit preserve, which we make every year and use it for Prathamam, which is nothing but kheer or payasam from the preserve!!!

Ingredients:

Jack fruit – 1 big bowl (cleaned)

Jaggery – 2 blocks (I have used organic one)

Method:

  • Put little by little jack bulbs and make a smooth paste in a mixer grinder.
  • Take one thick bottomed kadai, put this paste and keep gas flame in a very low flame and cook for a while.

  • When it changes its colour from bright yellow to a pale colour and when you smell the cooked jackfruit flavour in the air, add jaggery and mix this in a regular interval.
  • After some time, it will turn into a light brown then to darkish colour and it will start to leave the sides of the kadai. Now it is the time to remove it from the fire.
  • Keep as it is and when it reaches room temperature; store it in an airtight container or a zip lock.
  • Keep it under refrigeration/ freezer.

  • You can do this in a microwave as well. Only thing, you should remove the glass bowl at regular intervals and give a stir and proceed as given above.

Note:

-You can use sugar or regular jaggery as well.

-Traditionally we use jaggery in our region.

Punarpuli Saaru aka Kokum Rasam:

To start with this wonder fruit, I should introduce its plant, benefit, procedure to preserve the outer skin, to rest of the world. Kokum is belonging to Guttiferae family, same as mangosteen and its botanical name is Garcinia Indica, is a fruit bearing plant only found in western Ghats and coastal southern India.

 (pic source : From, Vidya lakshmi of SAHAJA FARMS ) 

It is a summer fruit, which is widely used for juices or Rasam in our region to quench thirst as well as to balance body heat. It has so many health benefits as well. It is a natural healer for acidity.

It is a ritual in our native to dry the outer skin in summer months to preserve to use whenever it is needed. Fresh fruit of Kokum is often halved, discard the inner pulpy white part which is a fleshy coating of real seed to make Kokum butter, which is used in medicinal as well as cosmetic products as a raw material. Then outer dark maroon skin will be sun dried and when it becomes crispy, it’s stored in an air tight manner. During this process, we used to prepare fresh pulp to make juice and I used to love fresh juice from its inner pulp. It is much tastier than the outer dried skin juice.

The seed kernels which are coated with white flesh (fruit) has oil content, which is solid at room temperature. When I was young, our grand mom used to prepare kokum butter from these seeds and it used to be like a wax ball and she always used to keep this ball in hand’s reach to treat any accidental burns (that time, cooking was much more tedious and burning episodes were very frequent, due to fire wood cooking). She used to hold the ball against the fire for 2 min, oil used to start dripping and she used to apply this over the wound. She used to say, in this way, healing is very fast, and it acts as a coolant on burning wound as well. I have one kokum butter ball with me, which she has prepared almost 20 years back and when my kids were small, Amma has handed this wonder medicine to me by saying, keep this ball for emergency and it is still with me as a souvenir. ( Seen in below picture)

In urban dwellings, it is sold as a dried rind, dark purple, little sticky and shiny with curved edges. If you infuse these dried skins in water, it releases very nice colour. If dried skin is darker, you will get darkish pink and if it is little old and turned black, your dish will become dark and pale in colour. Taste wise it is tangy like tamarind and used exactly like tamarind in cooking to give tart taste.

If you want to prepare Rasam you need hardly 7 to 8 dried rind or if you want to add to any curry, you need very less, hardly 2 or 3 rinds according to the requirement. It is usually used, without any chopping.

Thanks for reading, I appreciate your patience. Now we will see the procedure of our traditional recipe for simple Rasam by using dried rind or kokum concentration.

Ingredients:

Dried Kokum – 7 to 8 (If you are using kokum extract or pulp, use 2 to 3 table spoons)

Onion – 1 big

Red chilli powder – 1 to 2 tea spoons

Jaggery – As needed

Salt

Seasoning:

Coconut oil – 1 table spoon

Mustard- 1 tea spoon

Red chilli – 1

Garlic – 8 to 10

Curry leaves – 1 spring

Method:

-Soak kokum in sufficient water for 1 to 2 hours.

-When you boil, add sliced onion, red chilli powder, salt, jaggery (I prefer little sweetish Rasam, so usually I add little more)

-When onion cooks, do seasoning.

-heat oil, splutter mustard, red chilli, curry leaves and add crushed garlic.

-When garlic turns brown, add this to Rasam and close the lid for 2 minutes.

-Serve hot with rice or drink as an appetizer.


Jack seed and Mangalore cucumber palya:

Jack seed is halasina beeja, which is a seed of jackfruit and most underrated protein rich nature’s gift to mankind. All thanks to our elders, who have gifted us with the knowledge of lots of combinations of ingredients, vegetables. One such combination is coloured cucumber which is also known as Mangalore cucumber/ sambar cucumber with jack seed.  It is an ultimate, tasty side dish from our region and I am eager to share this recipe with you all –

I normally preserve jack seeds in a frozen form and procedure is already shared in my blog as well.

Ingredients:

Coloured cucumber – ½ or 1

Fresh or Frozen jack seeds –2 fists full

Grated coconut – 3 table spoons

Turmeric – ½ tea spoon

Red chilli powder – 1 tea spoon

Salt- as needed

Jaggery – as needed

Seasoning:

Coconut oil – 1 table spoon

Mustard – 1 tea spoon

 Urad dal – 1 tea spoon

Cumin – ½ tea spoon

Red chilli -1

Curry leaves – 2 springs

Method:

-Wash Mangalore/Coloured/sambar cucumber.

-Chop off 2 ends, slice in to 4 pieces and remove inner core (seed part) and chop into thin slices. (see the picture)

-Check now for the taste. If it is bitter in taste, soak the pieces in plain water for 5 minutes.

-Discard the water and proceed.

-If cucumber tastes good, no need to soak in water and you can directly proceed in cooking.

-I normally crush and store the jack seeds. So, no need of chopping or crushing. If you have fresh seeds with you, please crush the seed by using hitting stone and remove outer stiff cover and use inner seed.

– Take one pressure pan or cooker, do seasoning. Heat oil, splutter mustard, add urad dal. When dal becomes light brown, add cumin, red chilli and curry leaves.

-Now add in crushed jack seeds, little water and cook for one whistle.

-When pressure releases, remove cooker lid and proceed to make palya.

-Switch on the gas, Add Red chilli powder, salt and jaggery, required amount of water and chopped cucumber pieces.

-Close the lid and cook this in a low flame, until cucumber is cooked or up to water drains.

-If water drains first, add some more water and make sure to cook cucumber.

Garnish with fresh grated coconut and mix, cook for 2 minutes and switch off the gas.

-Serve with hot rice and enjoy as a side dish.