Potato Sagu:

Potato Sagu is an ultimate combo for Rava idli, here in Bangalore. I came to know about Rava idli or Sagu only after coming to Bangalore, after my marriage. Earlier, we never found this combo in Mangalore. I like potato Sagu which is served with Rava idli in MTR hotel, Bangalore. It is here, that the invention of Rava idli happened, during the world war II. At that time, making of idli was so difficult, due to short supply of the rice, this is how they experimented with semolina to prepare idli and it is now history and Rava idli has become a staple diet of south Indians throughout the world.

Earlier I used to use MTR or Mayya’s Potato Sagu masala to this side dish to get a taste as close as their Sagu. But, now they have stopped the product. To replace it, I started using my own masala. 

My preparation goes like this-

Ingredients:

Potato – ½ kg

Onion – 2

Ginger – ½ “

Green chillies – 2

Tomato – 2

Coriander leaves – 2 table spoons

Salt

Sugar/ jaggery

Turmeric – ½ tea spoon

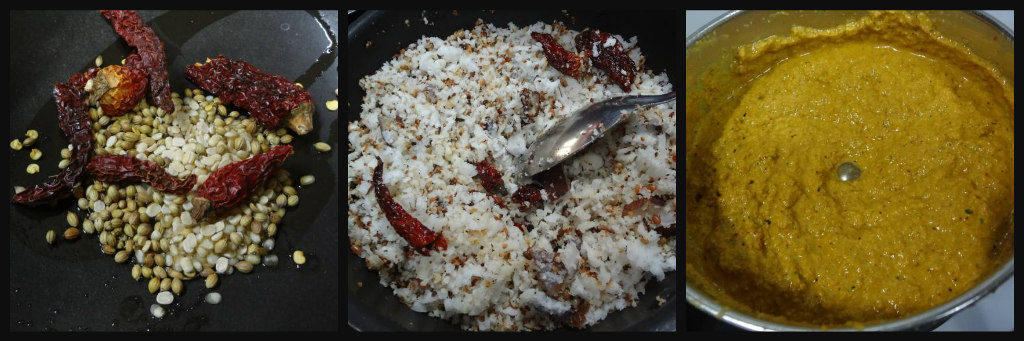
Sagu masala powder – 1 ½ to 2 tea spoons (Mixture of Puffed chana/ Putani powder, coriander powder, jeera powder, little garam masala and tamarind powder) 

Seasoning:

Cooking oil – 2 table spoons

Mustard – 1 tea spoon

Urad dal – 1 tea spoon

Chana dal – 1 tea spoon

Cumin – ½ tea spoon

Hing – one pinch

Curry leaves – 2 springs

Method:

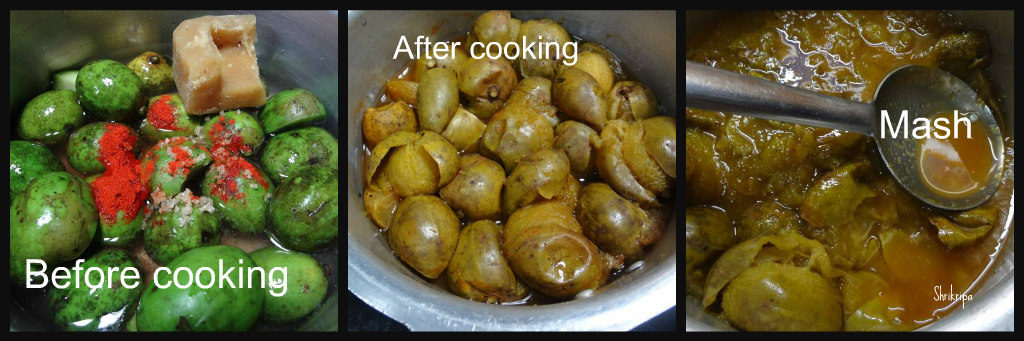
-Wash potato, cut it into half and cook in sufficient water for 2 whistles in a pressure cooker.

-When it is cool, remove skin, mash and keep aside.

-Chop onion, ginger, green chillies, tomatoes and coriander leaves.

-Take one deep pan, add oil for the seasoning, when it is hot, splutter mustard, fry urad dal and chana dal. Next add hing, cumin, curry leaves.

-Next- fry onion, green chillies, ginger. While frying add turmeric powder as well.

-When onion is light brown, add tomatoes, salt, sugar or jaggery, Sagu masala and fry until tomato is mushy.

-Add 2 to 3 cups of water and when it starts boiling, add mashed potato, coriander leaves and cook for 5 to 10 minutes or until it becomes a homogeneous mix in a low fire.

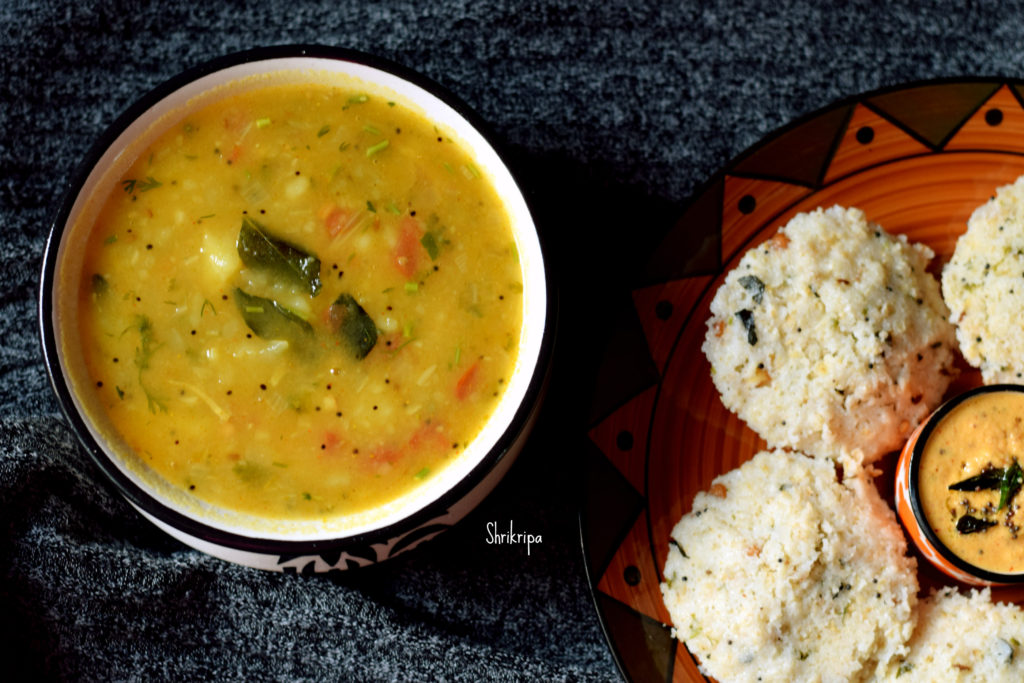
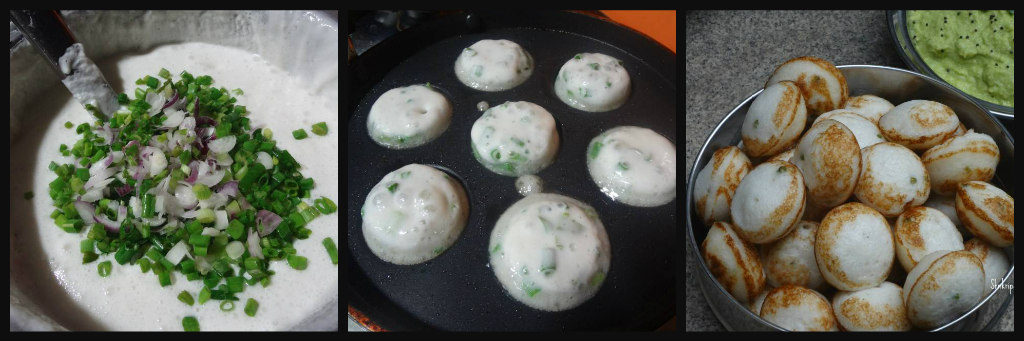
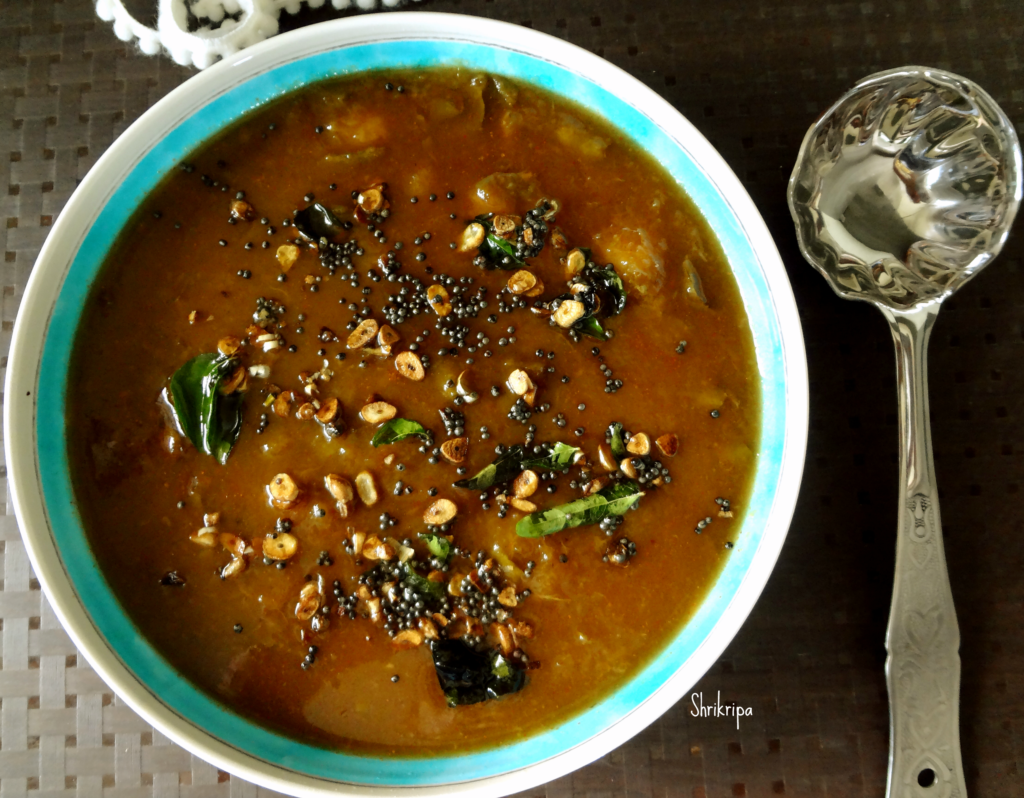
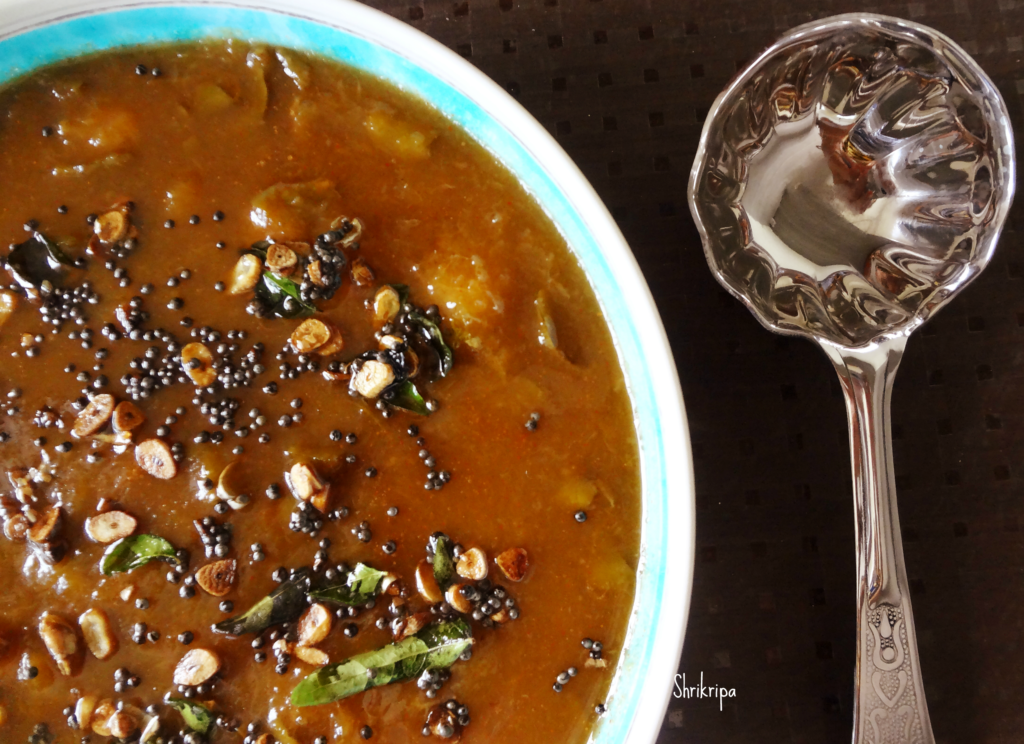
-Serve with Rava Idli Or Rava and Oats idli  as a dip.


Alasande Palya / Yard long beans dry curry:

Alasande aka yard long bean is very popular and one of the age old cultivated crops of Mangalore coast. It is tender, immature pods of black eye pea. In rainy season, most of the vegetable kitchen gardeners grow this super tasty veggie for day to day use.

Immature pods are one of the favourite food for little birds as well. It is a low calorie, high in fibre vegetable and tastes little sweetish and texture is little chewy and watery.

Alasande side dish is one of the very popular dishes during the festivities- either in weddings, festival cooking or day to day cooking. For day to day cooking, we normally toss this veggie with mild seasoning and for festivity cooking, we use coconut masala. Today I am going to share the recipe of my house hold which my family relishes whenever I prepare.

Ingredients:

Alasande / Yard long beans – 500 grams

Red chilli powder – ½ tea spoon

Turmeric – ½ tea spoon

Salt

Jaggery – 1 tea spoon

For seasoning:

Coconut oil – 1 table spoon

Mustard – 1 tea spoon

Urad dal – 1 tea spoon

Red chilli – 1 (optional)

Curry leaves – 1 spring

For Masala:

Coconut – ¼ cup

Roasted Byadagi Red chillies – 2 to 3

Cumin – 1 tea spoon

Tamarind – ½ tea spoon

Method:

-Wash, remove two ends of yard long beans and chop as required.

-Dry grind coconut with roasted chillies, cumin and tamarind for masala and keep aside.

-Now take one kadai, heat oil for seasoning, splutter mustard, add urad dal. If you are adding red chilli add that as well.

-When urad dal becomes red, add curry leaves, chopped beans, turmeric, salt, jaggery, red chilli powder and toss for two minutes.

-Add one small cup of water and cook until it is soft and firm.

-Add dry ground masala and mix everything. Keep it covered for two to three minutes and switch off the gas.

-Serve with hot rice or with thali as a side dish.


Paddu:

Paddu or Guliyappa is a very popular South Indian breakfast item. Which is nothing but Dosa batter or idli batter which is seasoned with some onion and poured and cooked in an appe pan, which normally has 7 or 9 small round molds. Traditionally, people use left over batter to make this delicacy to finish off the batter. But, personally I prefer to make fresh batter to make only this, because my family just loves this, and we enjoy our dose of guliyappa in any given point of time.

These super tasty roundels have many names in south Indian kitchens. In coastal region we call this as Guliyappa, In Bangalore, it is known as Paddu. In Tamilian house hold it is Kuzhi paniyaram, Telugu it is Gunta ponganalu, Malayalm it is Paniyaram. All the above which means that, a dish which is cooked in an appe pan.

My procedure goes like this-

Ingredients:

Dosa rice – 2cups

Urad dal – ½ cup

Poha – one fist full

Salt

Spring onion – as needed (onion and greens)

Coriander leaves – as needed

Ghee/ oil – for cooking

Method:

-Wash and soak rice, urad dal and poha. Soak for 2 to 3 hours.

-Grind this into smooth batter by adding salt.

-Consistency should be a little thicker than Dosa batter.

-Ferment this over night or according to your climatic conditions.

-Next day, add chopped coriander and spring onion and mix in.

-Heat appe or Paddu pan. When it is hot, pour ¼ tsp of ghee or oil.

-Pour the batter in each mold and close the lid and cook for a couple of minutes.

-Flip the side and cook upper side as well.

-Serve with chutney. We normally prefer Zucchini chutney as a side dish for Paddu.

-Repeat the process and enjoy your breakfast or brunch or dinner.

Note: If you want to make it vegan, use any vegetable oil and skip ghee.

Totapuri Mango Pickle:

Totapuri is a speciality of southern states of India. These mangoes are large in size, slender, oblong and has a prominent beak like pointed tip. The skin of the mango also tastes really good  and sweetish.

Totapuri pickle is unusual. Unlike other mangoes Totapuri is not that sour, usually used in salads, mango rice or raw mango jams. It is also known as Ginimoothi because of its pointed end. This pickle is not that hot and goes very well with curd rice or roti’s. I used to enjoy this pickle from my childhood and now my daughters also like this as much as I do. I learnt this recipe from one of my cousin sisters, who used to gift me a bottle of this pickle every year and hence has fond memories attached to it too.

Ingredient:

Raw Mango –  3 kgs (Totapuri variety works out well)

Sea Salt – 1 to 1 ¼ cup

For pickle Masala:

Dried red chillies – 50 (Byadagi variety)

Black pepper corns – 2 tea spoons

Mustard – ½ cup

Hing – peanut size

Sesame seed – 2 tea spoons

Turmeric – 3 tea spoons

Seasoning:

Sesame oil – 2 table spoons

Refined oil – 2 table spoons

Mustard – 1 table spoon

Curry leaves – 2 to 3 springs

Method:

-Wash and remove upper stalk, chop the mangos into small bite size pieces. Discard inner seed.

-In small tawa, dry roast crystal/sea salt until it becomes crisp and white in colour. Cool.

-Take one thick bottomed tawa, get it ready for seasoning. If you are accustomed with the taste of sesame oil, go ahead and use only sesame oil. Otherwise take how I have listed.

-Heat oil, splutter mustard, add curry leaves, fry for 2 minutes. Add Mango pieces and cook by mixing in between until skin becomes pale.

-Switch off and mix in dry roasted salt and keep aside for 3 to 4 hours or until it is cool.

-In the meantime, prepare for the pickle masala.

-Take the tawa, in which you have roasted the salt at the beginning.

-Dry roast one by one like this. First mustard, then sesame seed, next pepper corns, hing.

-Now take one tea spoon of oil and fry red chillies in a low flame until it is crisp. Cool it.

-When it is cool, add turmeric with these ingredients and make powder.

-At this time, mangoes will be ready, and water will be oozed out.

-Mix the powder with mango pieces. Fill the pickle into sterilized bottle and seal.

-After couple of days, you can start using this pickle.


-Store this in a refrigerator for longer shelf life.

-Enjoy with Curd rice, Roti or with any breakfast.


Hog Plum/Ambatekayi Gojju:

We call hog plum as “Amtekai” in Kannada and as “ambate” in our local language. In our region you will find 2 varieties of hog plums. One is Wild variety which is also known as Indian sour hog plum and the other one is known as grafted or Kashi Amtekai/ hog plum.  Grafted variety is nothing but Hog plums which we normally find in South America or South East Asia. Also known as Ambarella or Golden apple which belongs to the specie – spondias dulcis.

Wild variety is normally used in pickle making or as a souring agent in some of the traditional curries because of its sour taste. When it matures, seed becomes hard and skin becomes thin. Here I have used normal hog plum, which has a fibrous core and when it matures, skin will turn green to yellow and sweetish in taste. People use this as a fruit as well.

Gojju/ Gojji is an essential side dish of our community. Which is a semi solid, tamarind based, sweet and sour curry, which can be relished as it is with hot rice, or as an accompaniment with curd rice as well. Some of the gojjus taste good with Dosa or Idli as well.

Ingredients:

Hog plums – 7 to 8

Jaggery – 2 to 4 table spoons

Salt

Red chilli powder – 1 tea spoon

Seasoning:

Coconut Oil – 1 table spoon

Mustard – 1 tea spoon

Garlic cloves – 8 to 10 (sliced)

Curry leaves – 1 spring

Method:

-Wash and cook hog plums in sufficient water by adding salt, jaggery, red chilli powder in a pressure cooker.

-One whistle is more than enough for this veggie to cook.

-When it is cooked, outer skin layer will separate, inner flesh will become soft.

-Mash a little by using back of the serving spoon, to give a texture to the curry.

-Mix everything and check for salt, hot and sweet. Add whatever is needed.

-Curry should taste tangy, hot and sweet.

-Boil this and add seasoning.

-Heat oil, splutter mustard, add sliced garlic. When garlic becomes brown, add curry leaves and pour this over curry.

-Serve as a side dish with rice or curd rice.

Note:

-Usage of garlic is purely optional.


How to preserve Jack fruit Seed:

Yes!! You heard it right. I am using jackfruit seeds in my cooking all year round by preserving it in frozen form. It is rich in anti-oxidants, vitamins, minerals, calcium, potassium, carbohydrate and starch. So, when we eat the fruit and then throw away the seeds, you are discarding this power house of goodness.

In our region, people have been using jackfruit seeds in their traditional cooking for ages. After consuming the fruit, our elders used to apply some mud paste and used to pile it up in one corner of the veranda. In rainy season, they used to use these seeds as needed for cooking, by making Rasam, palya, sambar by mixing with some other vegetables or greens. They used to prepare some desserts as well.

I never used to like this when I was young, and never realised the importance of it’s goodness. After marriage, I started using these seeds in my cooking, because of my husband, who likes jack seed in some of our traditional recipes. I will post our favourite recipes in the coming days one by one.

Method:

-After consuming or using the fruit bulbs, Collect all the seeds.

-Remove outer slimy cover and discard.

-Wash the seeds and keep aside (to air dry) for 3 to 4 days.

-After 3 to 4 days, seed jacket will become brittle and it will be easier to peel now.

-Take one rough kitchen cloth and one stone pastel or pressing stone.

-Keep individual seed and hit hard. Outer jacket will break, and inner seed will crush.

-Collect all the crushed seeds and throw away all the outer jacket.

-Store the seeds in zip lock for future use and freeze it in a freezer compartment.

-This way, frozen seed will be ready and available to cook throughout the year, until next season.

Simple Bele saaru /Rasam:

This Rasam is a very good option, if one has to cook no onion and no garlic meal. Usually it is an option for us during any festivity or “No mood to cook” meal. Olden days usage of onion or garlic was a taboo in our community and our grand moms used to prepare this kind of Rasam, which we call as saaru in local language. My hubby has fond memories attached to this Rasam, which he used to relish as a small child in his grand mom’s place and he usually asks for it and calls this Rasam as Doddajji saaru (grandma’s saaru) to signify. It is a plain Rasam, with ginger and hing flavour. In our region, we see this Rasam in some of the temple meals as well. If it is ginger flavoured one, no Rasam powder will be used and Rasam will be yellow in colour, due to the addition of turmeric and dhal.

DSC_0002_Fotor

Ingredients:

Toor dal – 1 cup

Tomatoes – 3 to 4

Green chillies – 4 to 6

Hing – peanut sized

Ginger – ½ inch (slivered)

Curry leaves – 2 springs

Salt

Jaggery – ½ to 1 tea spoon

Turmeric – ½ tea spoon

Tamarind – 1 tea spoon

Coriander leaves – little (optional)

Seasoning:

Coconut oil or ghee – 1 table spoon

Mustard – 1 tea spoon

Red chilli – 1

Curry leaves – 1 spring

Method:

-Wash and cook toor dal in a pressure cooker, mash a little and keep aside.

-Soak tamarind, chop tomatoes, green chillies and ginger.

Ribbet collage

-Take one Rasam pot (I normally use clay pot) and take 3 to 4 cups of water, tomato, green chillies, ginger, hing, curry leaves, turmeric, salt and jaggery.

-Cook this until everything cooks properly.

-Now add toor dal and mashed soaked tamarind.

-Boil this and adjust the consistency and check for salt, ginger and green chilli. If needed adjust by adding extra.

-When it is boiled, add chopped coriander leaves.

Ribbet collage 1

-Season with oil or ghee by spluttering mustard, red chilli and curry leaves.

-Serve with hot rice .


Fresh muskmelon seed and Watermelon smoothie:

If you are calorie conscious or under restricted diet, this smoothie is especially for you. It is nutty flavoured, rich, creamy and at the same time, No sugar and Less in Calories. It is a “No guilt” smoothie for scorching heat.With Summer at its peak, we are one happy family who consumes lots of musk melon and water melon on every day basis. I usually feel very bad to discard power packed melon seeds into dustbin.

Muskmelon has lot to offer, fruit itself is fibre rich, vitamin rich and seeds which you usually throw it away is even more nutritious. Seeds are high in fibre, plant-based protein, minerals, calcium and Omega-3 and when you add this to prepare smoothies, it gives very smooth, creamy texture without adding any high calorie substance. It is very ideal for diabetic, weight loss or even for children.

Here I have added inner core (flesh and seed part) of one musk melon fruit to give thick texture as well as nutty taste and water melon chunks to give sweetish taste.

DSC_0049_Fotor

Ingredients:

Muskmelon inner core – from one muskmelon

Watermelon – one cup

Sea salt – ¼ tea spoon

Pepper powder – ¼ tea spoon

Method:

-Peel outer skin from one muskmelon, collect inner core with seed and proceed.

Ribbet collage

-I have not used fruit part. It can be consumed as you wish.

-Take water melon chunks.

-Take your juicer jar, put inner core of musk melon, water melon chunks, sea salt, pepper powder and churn.

– Sieve this liquid and discard the roughage and serve smoothie by adding a couple of ice cubes to beat the heat.


Gujje kadle gashi / Tender jackfruit and whole black chickpeas curry:

Tender jackfruit is an integral part of our traditional cooking. Till now I have shared a couple of recipes and today I am going to share one more tender jack recipe which is prepared by pairing it with protein rich black chickpea, which is also known as kala chana, black chana in India.

Tender jackfruit is a super food, which is high in vitamins, minerals and dietary fibers and at the same time, less in calories, salt and fats. Now a day, it is available in almost all parts of the globe as fresh or frozen.

This curry is double beneficial because of additional benefit by adding black chickpea. Which is also known as Bengal grams, Garbanzo beans or Kala chana which has darker skin and thick outer cover and has high roughage.

DSC07426_Fotor

Ingredients:

Tender jack or Gujje pieces – 1 bowl.

Black chick peas/chana – 1 cup

Salt

Jaggery – 1 tea spoon

Red chili powder – 1 tea spoon

Coconut oil – 1+2 tea spoon

Masala:

Grated Coconut – from half coconut

Coriander seeds – 1 tea spoon

Urad dal – 1 tea spoon

Methi – ¼ tea spoon

Hing – one pinch

Red chillies – 3 to 4

Tamarind – ½ tea spoon

Season:

Coconut oil – 1 tea spoon

Mustard – 1 tea spoon

Red chilli – 1 (optional)

Curry leaves – 1 or 2 springs

Method:

-Wash and soak Black chana overnight. Drain the soaked water the next morning.

-Take one pressure cooker, cook chana by adding sufficient water. It requires around 4 to 5 whistles.

Ribbet collage

-Add Tender jack pieces into cooked chana, if needed some water, salt, red chilli powder and jaggery and cook in an open fire, until jack pieces are soft.

-In the meantime, prepare masala:

-Take 1 tsp of coconut oil in a tawa, fry methi, add coriander, hing, urad dal, red chillies and fry until urad dal becomes red. Next add coconut and fry until it emits fragrance.

Ribbet collage 2

-Cool the mixture, add tamarind and grind into little rough paste by adding water.

-Add the ground masala into cooked veggie mixture, boil.

-Add seasoning, heat coconut oil, splutter mustard, add red chilli (optional), curry leaves into oil and pour the mixture over boiled curry.

DSC07427_Fotor

-After adding the seasoning, add 2 tsp of raw coconut oil and keep it covered until u serve. This is to get an authentic taste.


Mavinakai Chutney/ Raw Mango and Coconut chutney:

There are so many ways to make lip smacking good Mango chutney. This is traditional mango chutney from Mangalore, South of Karnataka and it is mostly ground to a thicker consistency and is also called as Gatti chutney, which means thick raw mango chutney and is served with Kanji (Brown rice gruel) and ghee. It is our comfort food.     DSC_0037_Fotor

Ingredients:

Grated Fresh coconut – 1 cup

Grated fresh green mango – ¼ cup

Green chillies – 2 to 3

Salt

Seasoning: Coconut oil, mustard, curry leaves.

Method:

-Put freshly grated coconut, grated green mango, green chillies and salt in a mixer grinder.

-Instead of green chillies, traditionally people use small bird eye chillies too. If you have that, you can use those chillies as well.

– Now blend the mixture in the mixer grinder coarsely, without adding any water. If juice from the raw mango is not sufficient, then add 1 to 2 tsp of water and grind to get this thick consistency.

-Prepare the seasoning and serve with Brown rice kanji and ghee.