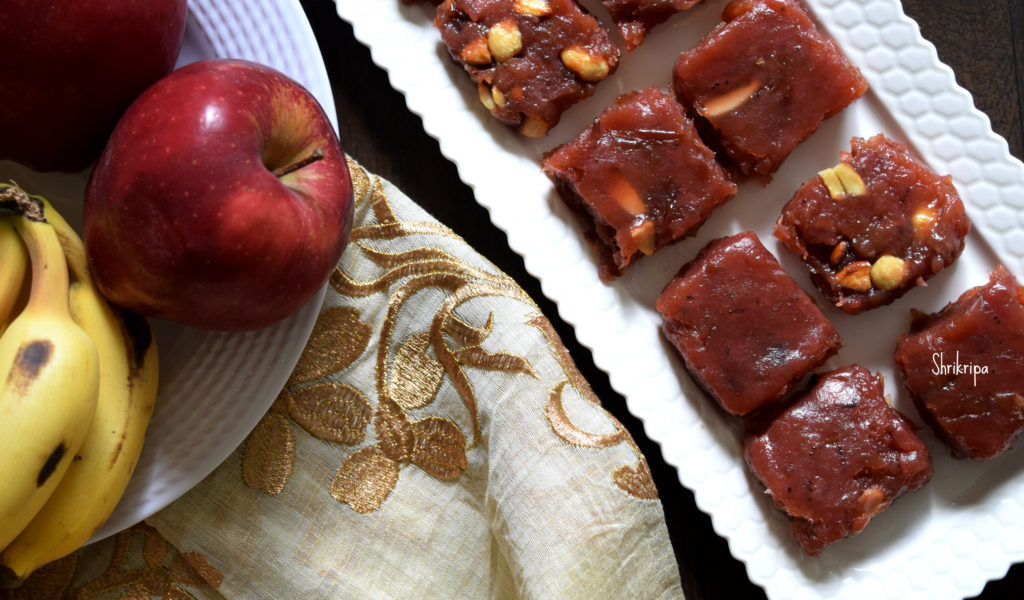
Apple – Banana Halwa (Microwave Method):

Traditionally halwa making takes a very long process and I have shared the recipe already.  You need a time and patience to attempt. When you make the same halwa with a less effort by using microwave, nothing like it. I do agree with the side effects of using microwave and personally I myself avoid using microwave many times.

This time, I wanted to finish off lot of over ripe bananas as well as tasteless apples and at the same time, I was pressed for time as well. That is how, I opted for this method and here is the procedure. I must tell you that, taste or texture wise there is no change or variation.

Here, I have not removed the outer skin of the apple and it was perfectly blended while cooking.
Ingredients:

Banana – ¾ kg (over ripe one)

Apple – ¾ kg (any variety)

Sugar – 2 cups

Ghee – 4 to 6 tsp

Cardamom – 1 tsp (powdered)

Cashew bits – optional

Method:

-Here I have used my LG Microwave and opted for Gajar halwa under Indian Cooking setting and proceeded. As I write the method, I would mention the timing, so that any one can make this halwa by using any Microwave.

-Chop Banana and apples (with skin) and put it in a glass bowl (microwave safe)

-In LG Microwave, when I opted for microwave IC1 = Gajar halwa and in one cycle it runs for 14 min.

-So, cook for 13 to 14 minutes at first. After first cycle, mix everything properly and keep it for 2nd cycle (again 13 to 14 minutes)

-Remove the bowl, add sugar and mix everything properly and keep it for 3rd cycle (again 13 to 14 Minutes)

-After taking out, add 4 tsp of ghee and mix everything and keep it for 4th cycle (again 13 to 14 minutes)

-Lastly add 2 tsp of ghee and keep it for 5th cycle (again 13 to 14min) and at this time, it appears as non-sticky and turns into a mass like structure.

-Over all it took me 1 hour and 10 minutes but in between my work, I did it whenever I pleased and finishes the work 😀

-Add in roasted cashew bits. If needed, please cook for some more minutes and spread the mixture in a ghee applied plate.

-After it cools down, maybe overnight, cut into pieces and store it in an air tight box. It stays good and shelf life is very long.

Note: You can use only banana as well.


Banana Halwa:

Banana or Plantain Halwa was an integral part of my childhood. Usually this Halwa is made by using Kerala big banana which is called as” Nendra variety” but in our home, we used to have lots of overripe bananas from our family farm. To finish off all those overripe small bananas (Kadali variety of Mangalore), amma used to make Halwa or Banana Preserve/ Berati all the time. It was a very regular sweet at our house hold. Today I will share this recipe to all our readers-      

Ingredients:

Over ripe banana – 22

Sugar – 1 bowl

Ghee – ½ to ¾ cup

Cashew nuts – 2 tbl sp.

Method:

-Put all the peeled bananas to mixer grinder and make a smooth paste. Measure this by using any bowl of your choice.

-If this paste is 3 cups in quantity take one cup of sugar in that same measurement cup. So, your ratio of banana paste and sugar will be 3:1.

-Fry cashew bits in a teaspoon of ghee and keep aside. Grease one plate with ghee and keep it ready.

-Take one thick bottomed kadai, put this paste and keep gas flame in a very low flame and cook for a while.

-When it changes its colour to milky white and then to a pale colour and when you smell the banana flavour in the air, add sugar and mix this in at a regular interval.

-Add ghee 2 table spoons at a time in-between while stirring. If you feel that the banana paste needs a little more ghee, add up to ¾ cup, some varieties of bananas need very less ghee and some need more.

-Now we will see, how we decide the quantity of ghee. While stirring if you feel that the mixture is a little dry and the bottom part becomes a little brown, keep adding it.

-If the ghee starts oozing at the sides, it is an indication to stop the addition of ghee.

-Now we will see how you know the doneness. It is very simple, keep on stirring until mixture leaves the sides of the kadai and ghee oozes out from the mixture.

-You can add cashew pieces at this stage or spread those pieces in a greased plate like me. After you are done with this, it is almost ready to shift to the plate.

-Before shifting I prefer to check, by taking one small peanut sized portion of the mixture and rolling it in-between your thumb and forefinger to make a small ball like structure. If it holds a ball like structure and does not stick to your finger, it is ready.

-Now remove from the flame, shift to a greased plate and pat this mixture evenly by using a flat, greased (apply some ghee) back of the spoon.

-Keep this aside for two or three hours to cool. Then cut this into the desired shape and store it in an airtight container.

-You can store this Halwa for a really long time (up to a month or two).