It is a Two in one bonanza—Yes!!!!
I always wondered how to get a pillowy soft kind of idli which is a speciality of Tamilnadu. In our coastal side, idli turns out soft but has a little grainy texture, not spongy which we get in all Tamilian eating joints. During one such discussion in our Foodie group, we asked to provide Tamilian style idli recipe with our ever energetic, multitalented uncle Senguttuvan. I really was not expecting this kind of response after one week. He and his wife literally took all the trouble and wrote step by step procedures with pictures, some tricks and notes. Added to that, there were a couple of video’s too. I was really overwhelmed and wanted to give its due credit by publishing this recipe in my blog after preparing it myself at home and we all loved it.
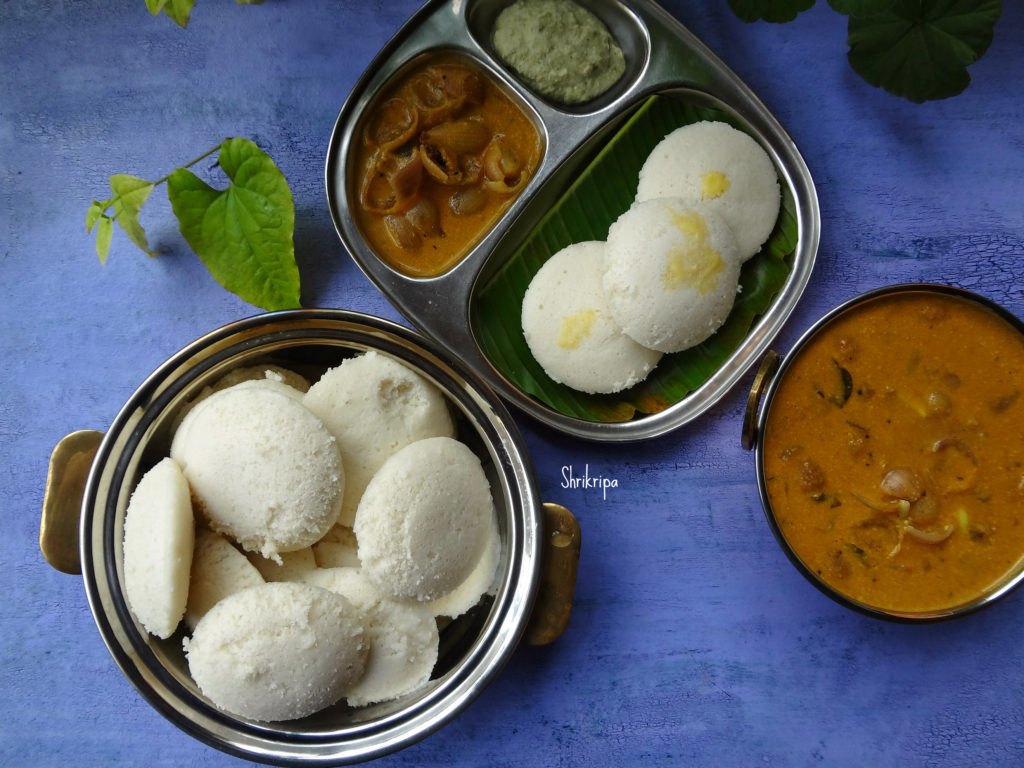
I tried his Idli recipe and paired it with another hit recipe of his Onion Garlic Kolumbu. It was a pair made in heaven kind of breakfast. I will post the Kolumbu recipe next and once again all thanks to Senguttuvan Subburathina and his wife Jayanthi Senguttuvan for this amazing recipe. Now, over to his words as it is and my pictures-
Here we go!
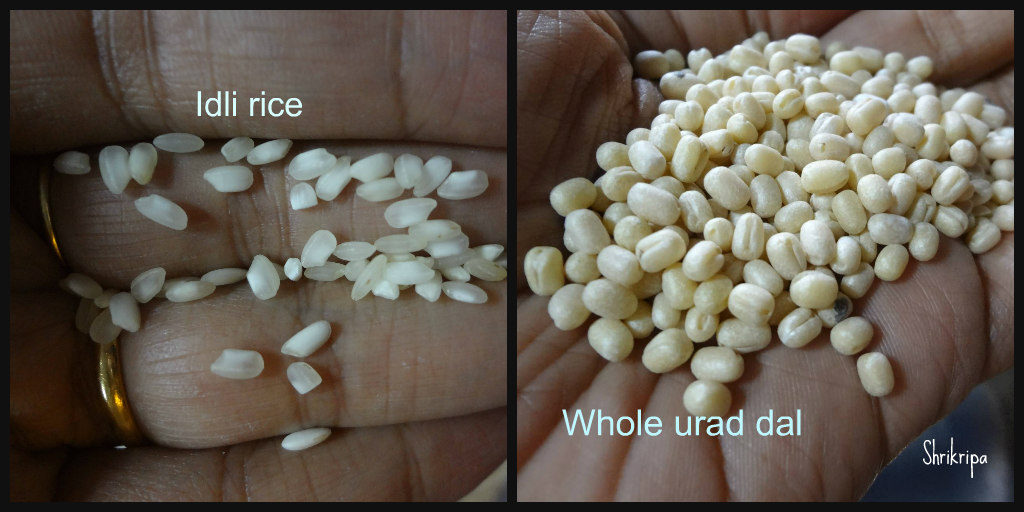
The selection of Rice is important. Boiled Rice (Idly rice) with patches of white will help in better softness of Idly.
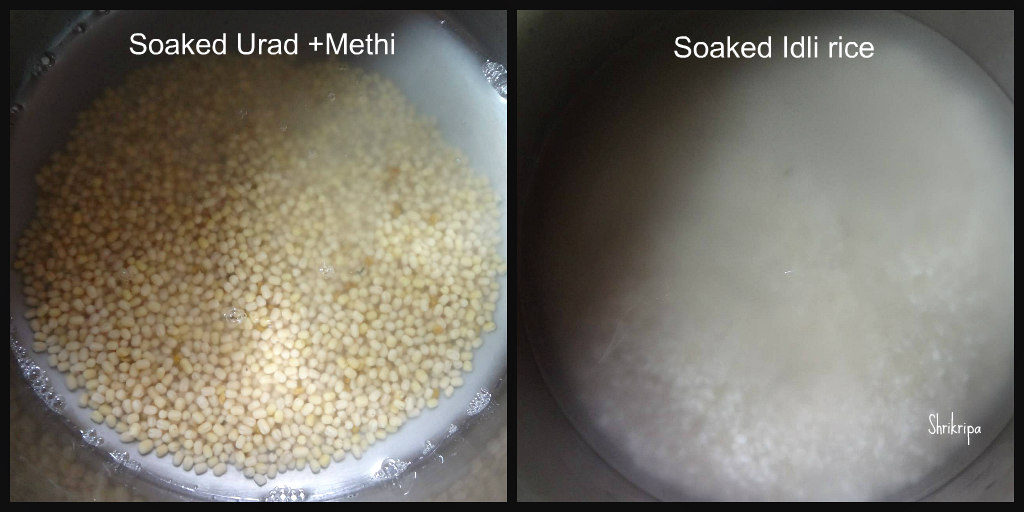
We use whole white Urad Dal. Not broken one. (why? This also help soft Idly they say. I am not sure)
Fenugreek (Methi /Menthya Seeds)
Salt to taste.
Water as required.
Only the above ingredients go into making of this Idly / Dosa batter.
Wash the Rice 2-3 times with water and soak in clear water for 2hrs.
Simultaneously, wash Urad Dal and Menthya seeds and soak in water.
THE RATIO IS – RICE 4:1 URAD DAL. One TeaSpoon of Menthya.
Use of wet grinder is recommended. Heat generated during use of Mixie / blender spoils the Batter making. Though ice water usage will minimize the effect in mixie.
First, Grind the Urad Dal first, using the same water in which it was soaked. Grind for 25 mins adding water little by little so that a soft thick fluffy batter consistency is reached.
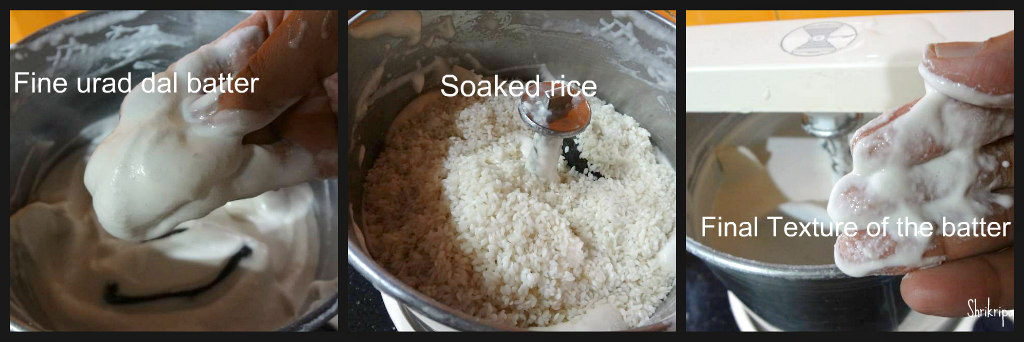
Transfer to a vessel and start grinding the Rice adding water little by little as you grind. About half an hour of grinding will give a little coarseness in batter. This thick batter is to be added to the Urad/ Fenugreek mixed batter.
Add required ROCKSALT (to taste) and mix well with hands. This is important. The good bacteria in hands help fermentation of batter. Take care to choose a vessel that will allow 25% raise in the height of batter after fermentation.
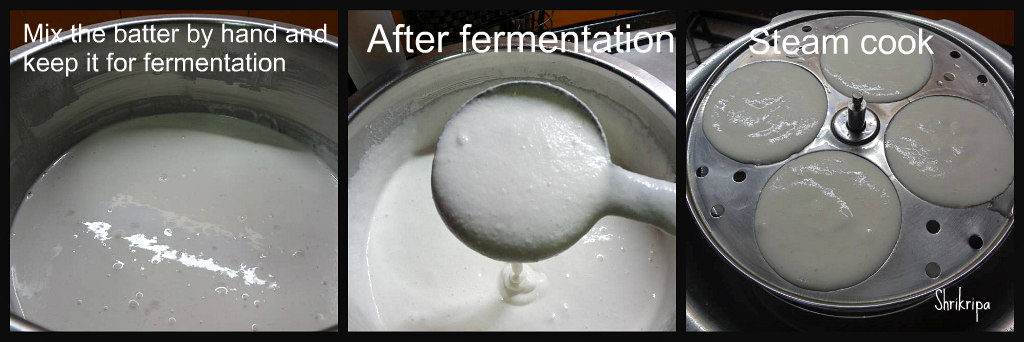
Normally, the batter is prepared by noon around 2pm. By night, around 8-9 pm, the batter is well fermented, for Chennai weather. In cold climate, it is recommended to switch the light on in OTG and keep it in, so that the warm light helps in faster fermentation.
At 9pm, when you find the batter well fermented, mix it well with ladle and close and keep refrigerated.
As and when required, take the small quantity of batter in a separate vessel and use that portion leaving the main portion of batter under constant refrigeration, so that it does not get further fermented.
The batter is ready for Idly / Dosa preparation the next day morning. Mix well and use for fresh fluffy Idly.
Use a drop of oil in each pit of Idly plate and spread oil so that Idly comes out smooth. We cook Idly in pressure cooker without placing the weight. It just takes 7 minutes to get fluffy Idlies cooked.
After removing the Idly plates from cooker allow a minute or two to cool down and remove the Idly for easy removal.

For Dosa preparation:
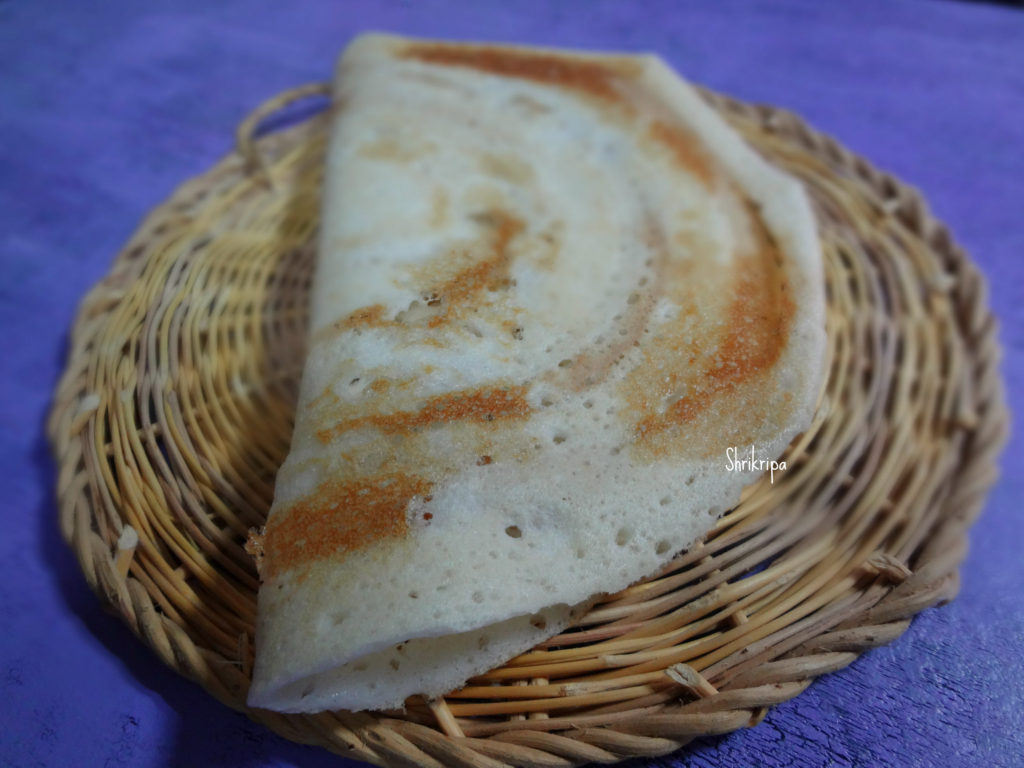
Remove small quantity of this batter to another vessel and add little water mix well and use. A thick Dosa or thin roast Dosa can be prepared with same batter.
Trust the above details help.
Note from Me:
-In Bangalore weather it takes more time to ferment. It took me almost 16 hours.
-I personally feel very lazy to remove urad dal after grinding. So, I add soaked rice and continue grinding as it is. It also works just fine.