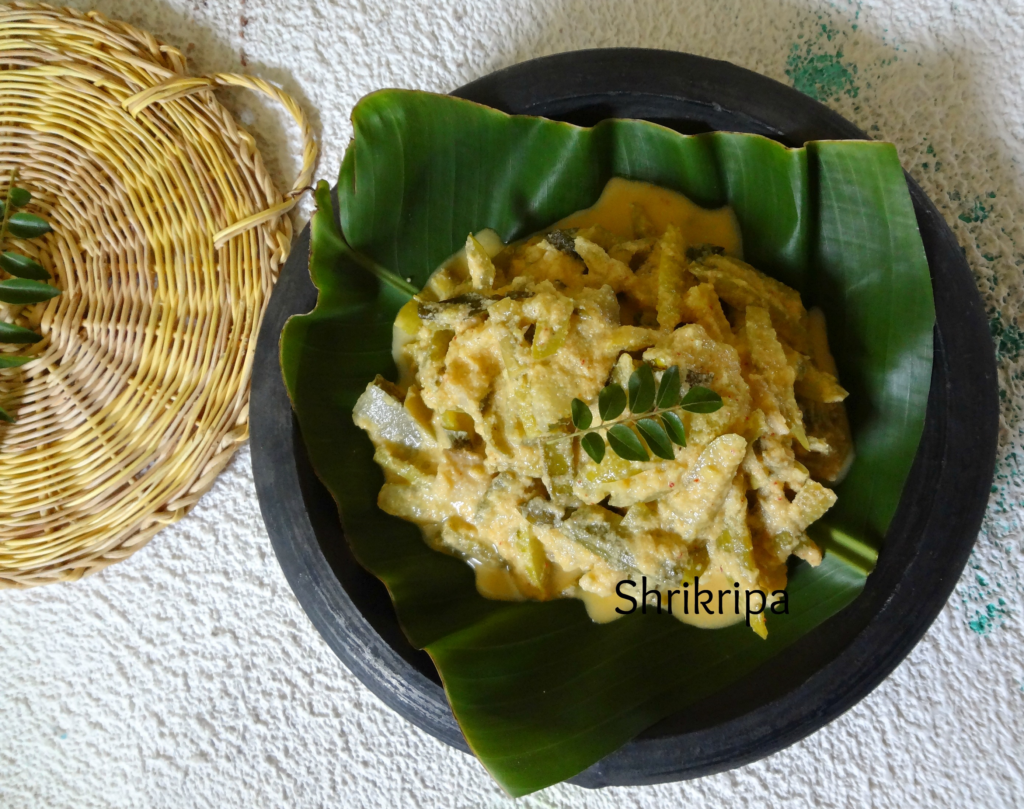
Bendekai Kayirasa / Ladies finger coconut curry:

Kayirasa is one of our almost extinct dishes, which can be seen only in our rural houses and found only in our community / homely recipe. It is coconut-based, slightly sweetish, and pairs well with hot boiled red rice or white rice.

Like Sambar, we always use a light green or purple coloured heirloom variety of Bhindi to make Kayirasa. I have never tried Kayirasa with any other types of Bhindi. It is my childhood favourite, and I used to ask my ajji / Grandmother to prepare whenever I visited her. Her preparation tasted like heaven, and I could never replicate that taste even if I used clay pot like her. Grandmothers are ultimate, and they have a magic wand in their hand to dish out such a delicious meal.  

Ingredient:

Bendekai / Ladies finger – ½ kg

Tamarind – big gooseberry size.

Salt

Jaggery

Red chilli powder – ½ tsp

Fresh coconut – 1 big bowl

Urad dal – 1 tablespoon

Dried red chillies – 3 to 4

Seasoning:

Coconut oil – 2 tsp

Mustard – 1 tsp

Red chilli – 1

Curry leaves – 1 to 2 springs

Method:

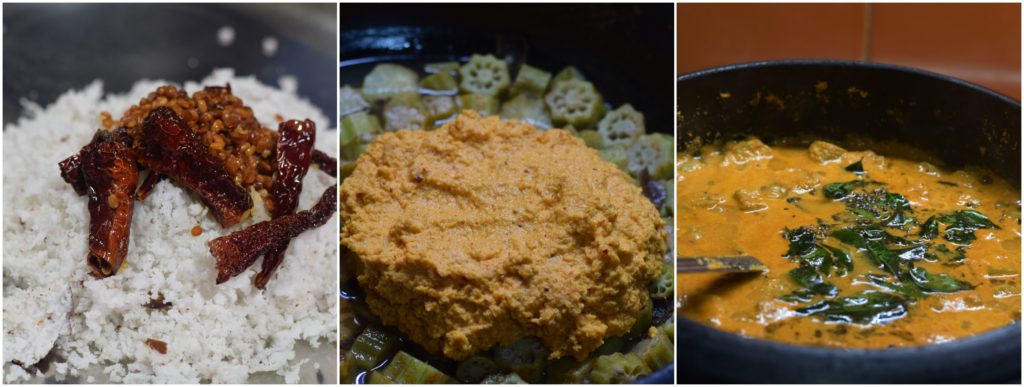
–Soak tamarind, boil with little added water, salt, jaggery, red chilli powder.

-When it starts boiling, add chopped Bhindi. Allow cooking on a low flame.

-To avoid sliminess,  don’t close the lid or put a spoon to mix while boiling Bhindi.

-In the meantime, prepare the masala: heat coconut oil, fry urad dal, red chillies. Grind into smooth paste by adding coconut and water.

-Add the ground masala to cooked veggie, boil nicely by adding sufficient water to adjust the consistency.

-Do the seasoning and serve with hot rice.


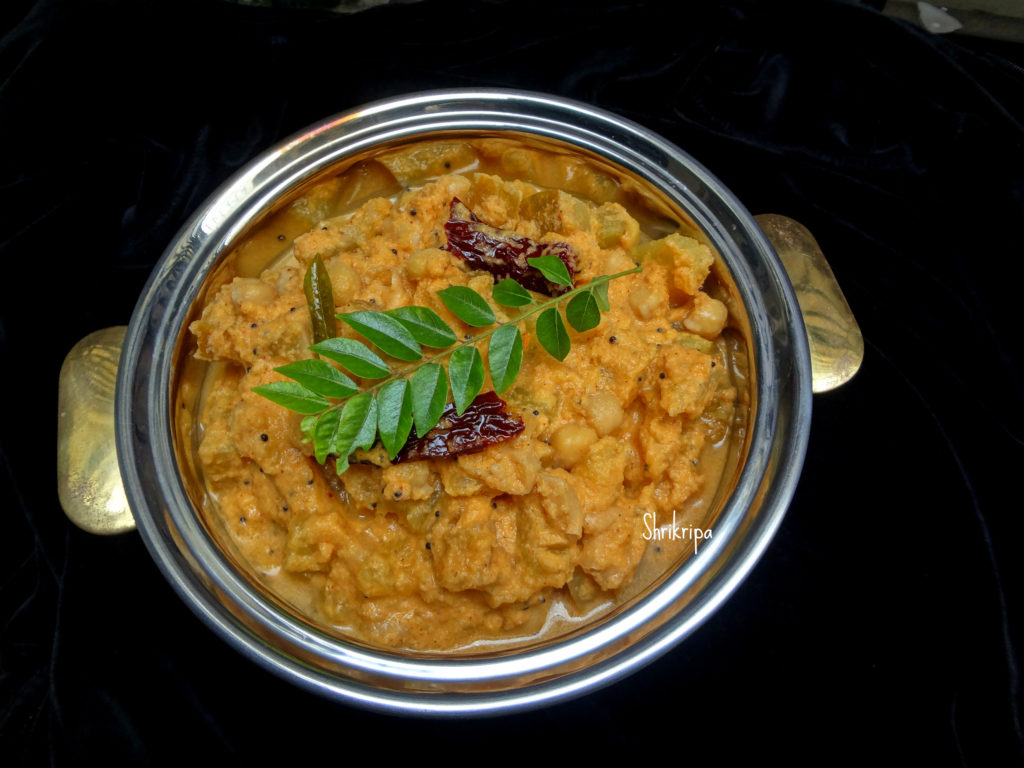
Pumpkin/Cheenikayi Kalasu:

Pumpkin Kalasu is a traditional recipe of our community. It is a semi solid, sweetish coconut based curry, which goes very well with hot rice or Chapati.

Usually we use tender, greenish sweet pumpkin for this curry, paired with white Kabuli chana.

Ingredients:

Green sweet pumpkin – ½

White chana – 1 cup

Coconut – 1 bowl

Cumin – 1 tsp

Red chilli – 1 to 2

Salt

Jaggery

Red chilli powder – ½ tsp

Seasoning:

Coconut oil – 1 tsp

Mustard – 1 tsp

Red chilli – 1

Curry leaves – 1 string

Method:

  • Soak white chana for 7 to 8 hours or overnight.
  • Cut pumpkin into half; remove inner soft pith and seed. Chop this into small pieces with skin intact.
  • Wash soaked chana, put fresh water and cook in a pressure cooker for 3 whistles.

  • When pressure relieves, open the lid and add chopped pumpkin, salt, red chilli powder and jaggery. If needed add little more water and cook until pumpkin is done.
  • Now grind coconut, cumin and red chilli into fine paste by adding required amount of water.
  • Add this masala to cooked veggie. Adjust the consistency by adding water. Consistency should be semi solid. Boil this and add seasoning.
  • For seasoning heat coconut oil, mustard, red chilli and curry leaves.
  • Enjoy this curry with hot rice or Chapati.


Mysorepak /Mysorepaka:

There are a lot of sweets which have originated from south Indian kitchens, even then Mysore Pak has a very special place in people’s hearts. Some like it very soft, ghee dripping melt in the mouth kind and some like little harder, porous and little grainy in texture.

Usually in the Mysore – Bangalore side, you will find softer version and In Mangalore we usually get latter one, with grainy texture.

I have received a couple of requests to update my version of Mysorepak recipe, which I prepare almost from past 25 years and it is our family and extended family member’s favourite sweet. My little niece who relishes it, and thinks it is the ultimate sweet, ends up having couple of pieces at one go. I usually wait to see her priceless expression while relishing her share of Mysorepak. This recipe yields firm, porous and grainy in texture with darkish inner and light colour on both the outer sides. Last week I prepared this sweet on my husband’s birthday and now sharing the recipe with you all.

Recipe goes like this-

Ingredients:

Besan /Bengal gram flour – 2 cups

Ghee – 3 cups

Sugar – 3 ¾ cups

Water – 1 cup

Cardamom powder – 1 to 2 tea spoons

Method:

-Take one baking tray or any deep wide vessel, apply ghee and keep aside.

-Take one vessel, pour ghee and keep it on the flame. When it becomes hot (before boiling), switch off the gas, add Besan to hot ghee, stir well and keep aside.

-Mixture should be uniform and without any lumps. I prefer to use wire whisk to do this.

-Next comes the main part.

-Take one thick bottomed kadai, add sugar, pour water and keep it on the flame, boil until it is frothy and reaches single thread consistency.

-During boiling, fire should be kept at low and you should stir in-between.

-When the consistency of the sugar is ready, add ghee mixed Besan and start stirring.

-Fire should be kept at low flame and you should continue stirring without removing your hand.

-After 10 to 15 minutes you will see the changes and mixture will become bubbly and shiny.

-Now it is the time to add cardamom powder and be vigilant. It would be ready in any moment from now.

-When it is done, mixture will leave the sides, base and sides of the vessel will become light brown or sometimes we see the ghee separating and oozing out from the bubbles. (these are the indications to remove)

-Now pour this mixture to a greased vessel, don’t touch or press after pouring, leave as it is.

-Cool it for about 5 min and mark the lines by using a sharp knife.

-Once it is completely cooled (it takes anywhere between 2 to 3 hours)

-Invert the plate on another plate or by keeping butter paper. It needs some knocking at the base because air bubbles would restrict the easy exit.

-Remove gently, break all the pieces and store it in an air tight container.

Your Mysorepak is ready to serve!

Note:

-Besan should be as fresh as possible. (do check the manufacturing date)

-When ghee is hot, you will hear couple of “tup” “tup” sound. That is the time you should mix in the Besan.

-Ghee shouldn’t boil.

-When sugar reaches single thread consistency, solution will start bubbling and rise upwards.

-Take a deep pan or baking tin or deep flat vessel to get long pieces and two tone colours.


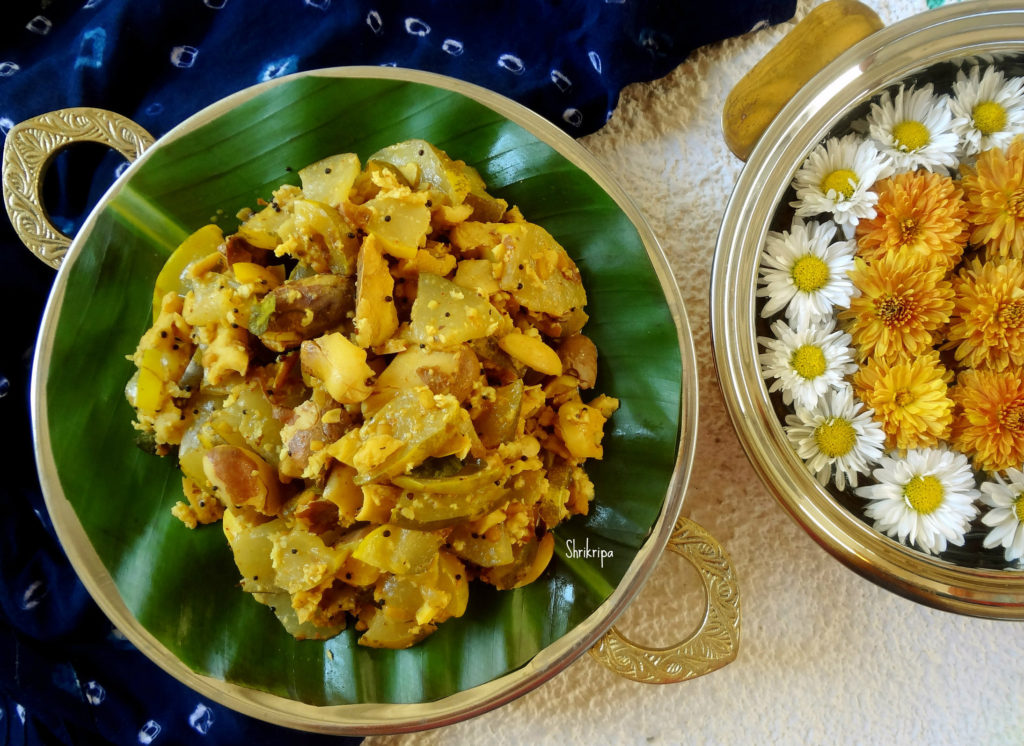
Jack seed and Mangalore cucumber palya:

Jack seed is halasina beeja, which is a seed of jackfruit and most underrated protein rich nature’s gift to mankind. All thanks to our elders, who have gifted us with the knowledge of lots of combinations of ingredients, vegetables. One such combination is coloured cucumber which is also known as Mangalore cucumber/ sambar cucumber with jack seed.  It is an ultimate, tasty side dish from our region and I am eager to share this recipe with you all –

I normally preserve jack seeds in a frozen form and procedure is already shared in my blog as well.

Ingredients:

Coloured cucumber – ½ or 1

Fresh or Frozen jack seeds –2 fists full

Grated coconut – 3 table spoons

Turmeric – ½ tea spoon

Red chilli powder – 1 tea spoon

Salt- as needed

Jaggery – as needed

Seasoning:

Coconut oil – 1 table spoon

Mustard – 1 tea spoon

 Urad dal – 1 tea spoon

Cumin – ½ tea spoon

Red chilli -1

Curry leaves – 2 springs

Method:

-Wash Mangalore/Coloured/sambar cucumber.

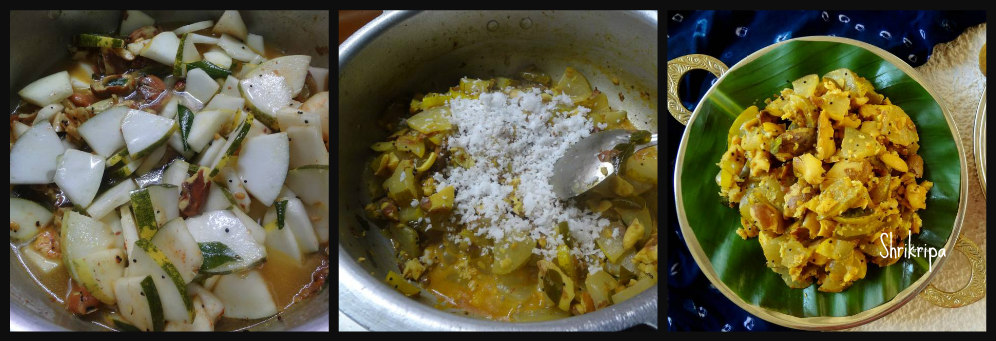
-Chop off 2 ends, slice in to 4 pieces and remove inner core (seed part) and chop into thin slices. (see the picture)

-Check now for the taste. If it is bitter in taste, soak the pieces in plain water for 5 minutes.

-Discard the water and proceed.

-If cucumber tastes good, no need to soak in water and you can directly proceed in cooking.

-I normally crush and store the jack seeds. So, no need of chopping or crushing. If you have fresh seeds with you, please crush the seed by using hitting stone and remove outer stiff cover and use inner seed.

– Take one pressure pan or cooker, do seasoning. Heat oil, splutter mustard, add urad dal. When dal becomes light brown, add cumin, red chilli and curry leaves.

-Now add in crushed jack seeds, little water and cook for one whistle.

-When pressure releases, remove cooker lid and proceed to make palya.

-Switch on the gas, Add Red chilli powder, salt and jaggery, required amount of water and chopped cucumber pieces.

-Close the lid and cook this in a low flame, until cucumber is cooked or up to water drains.

-If water drains first, add some more water and make sure to cook cucumber.

Garnish with fresh grated coconut and mix, cook for 2 minutes and switch off the gas.

-Serve with hot rice and enjoy as a side dish.

Neeru mavinakai Gojju/ Brined mango curd curry:

Neeru Mavinakai” is what we call brined mango, which is basically a firm fully grown, matured but un-ripened mango which is preserved in salt water. We usually relish this in the rainy season or in the off season by preparing some of our traditional dishes. I have shared how to preserve mangoes in my earlier post.  Today I am going to share one of our favourite simple curd curry, which we used to relish even in our childhood days. It is a simple curd curry, seasoned with curd chillies (known as majige menasu), curry leaves and garnished with chopped onions to give the extra zing.

DSC_4350_Fotor

Ingredients:

Preserved raw mangoes – 2

Curd – 1 cup

Coconut milk – 2 table spoons

Green chilli – 1 (chopped)

Onion – 1 (chopped)

For Seasoning;

Coconut oil – 1 table spoon

Mustard – 1 tea spoon

Curd chillies – 1 to 2 (chopped)

Urad dal – 1 tea spoon

Hing – ¼ tea spoon

Curry leaves – 1 spring

Method:

-Remove required number of mangoes from the brine water.

-Immerse these mangoes in fresh water for some time to reduce its salt content.

-Sometimes brined mangoes will be soft or hard. If it is soft, mash it and use.

Ribbet collage

-If it is very hard, cook for a couple of whistles in a cooker by adding little water and try to mash or grate.

-What I had was very hard, and I used it by grating.

-After this is done, mix in curd and coconut milk.

-If you don’t have coconut milk, you can use maggi or some other brand of coconut milk powder as well. (addition of coconut milk will reduce the tartness)

-Mix in chopped onion, green chilli.

-Do seasoning, heat coconut oil, put in mustard. When mustard starts to splutter, add in urad dal, Hing, chopped curd chillies and fry until chillies turns out dark brown.

– Add curry leaves to this hot mixture and add the seasoning over Gojju.

-Traditionally we enjoy this Gojju either with Boiled rice ganji (gruel) or with curd rice as an accompaniment.


Aviyal/Avial OR Avilu:

Aviyal is a mixed vegetable dish cooked in coconut gravy by adding some curd/yoghurt, Raw coconut oil and lots of curry leaves. It is an integral part of any festival cooking and It is believed that Bhima, one of the Pandava’s, invented this dish, during their exile period. Avial is a must dish during Onam Sadhya in Kerala. Aviyal is one of the favorite dishes of my family. I learnt this recipe from my mom-in-law. This is how we do this recipe in our family.   

pic mainIngredients:

Ivy gourd – 250gms.

Brinjal – 1

Snake gourd -1

Raw banana -1

Yam -250 grams.

Ridge gourd-1

Yard long beans -250 grams.

Bitter gourd -1

Coloured cucumber – 1

Raw mango-1 or Hog plum -4

Fresh grated Coconut – From one coconut.

Butter milk – 1 cup

Coconut oil – 6 tsp.

Jeera/cumin -1 tsp.

Dry red chilli – 2

Green chilli -4 to 5

Red chilli powder – 1tsp.

Turmeric Powder – 1tsp.

Curry Leaves- 5 springs.

Salt 

Procedure:

1. Cut all the above-mentioned vegetables in a matchstick manner (slightly big pieces).     collage 1     

2. Take all the vegetables and slit green chilies in a heavy bottomed vessel. To this add little red chilli powder, turmeric powder, salt and little water and cook till the veggies are done.                           

3. In the meantime, prepare coconut paste by adding grated coconut, jeera, dry red chilli in a mixer jar. Add little water, grind and keep it aside.

4.When veggies are cooked add this coconut paste along with butter milk. Mix nicely.

5.To this mixture add lot of curry leaves and pour raw coconut oil. Press everything using back of the ladle, close tightly using a plate and continue cooking till it boils nicely.                            

6.Once it starts boiling, switch-off the gas and delicious avial is ready to serve.

7. You can enjoy this Avial with rice, roti or Neer Dosa.                  

 NOTE: -Try to add all the mentioned vegetables as much as possible.

            – Usage of coconut oil will give the authentic taste.