Ragi Rotti:

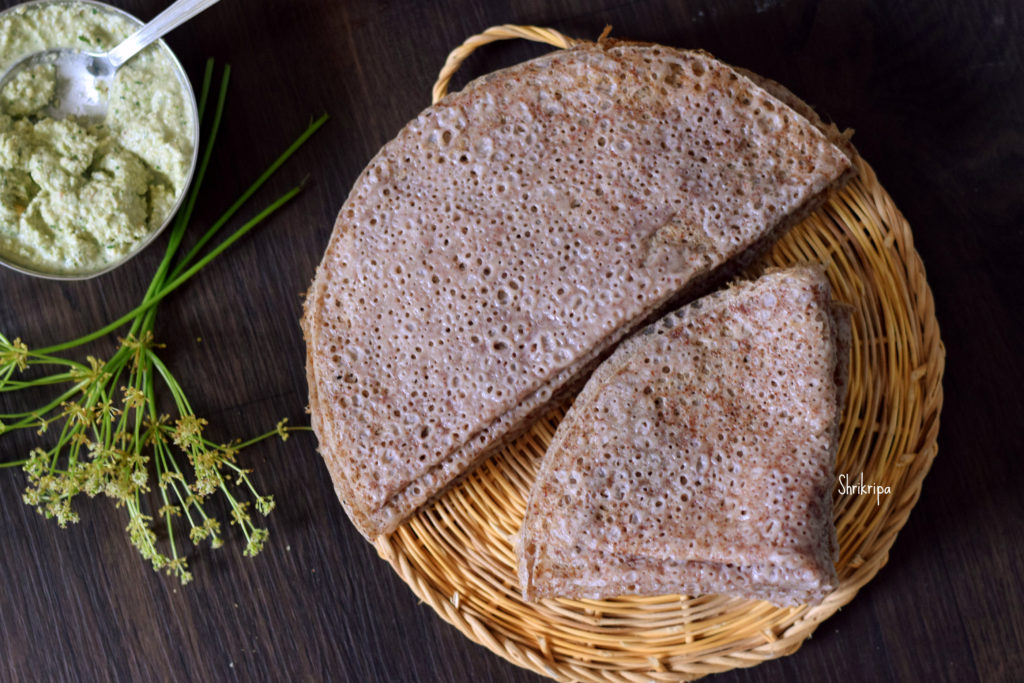
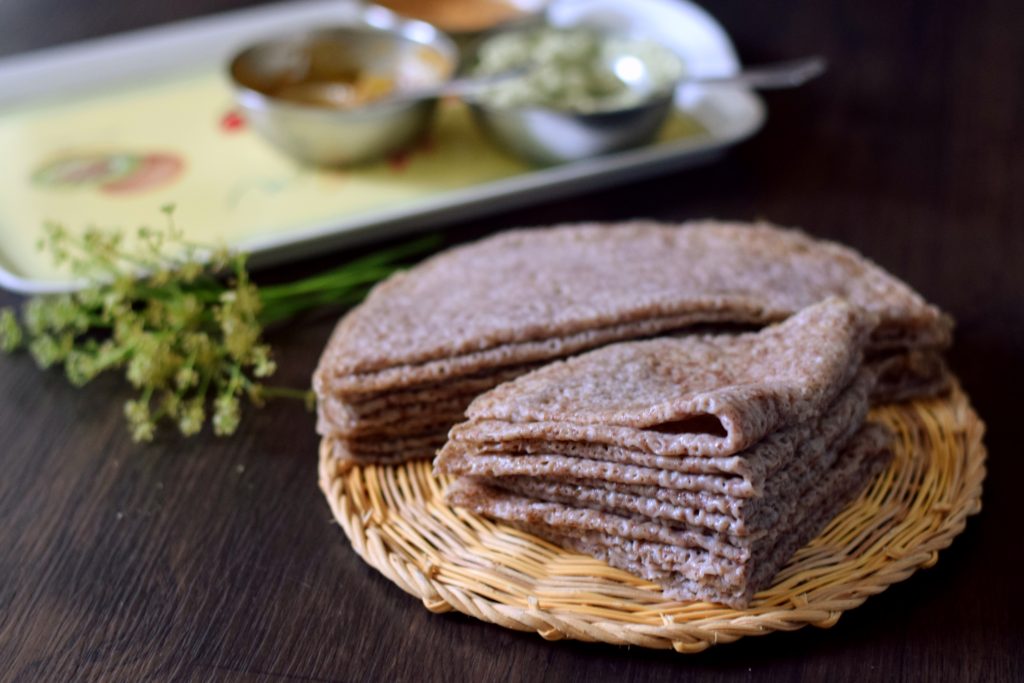
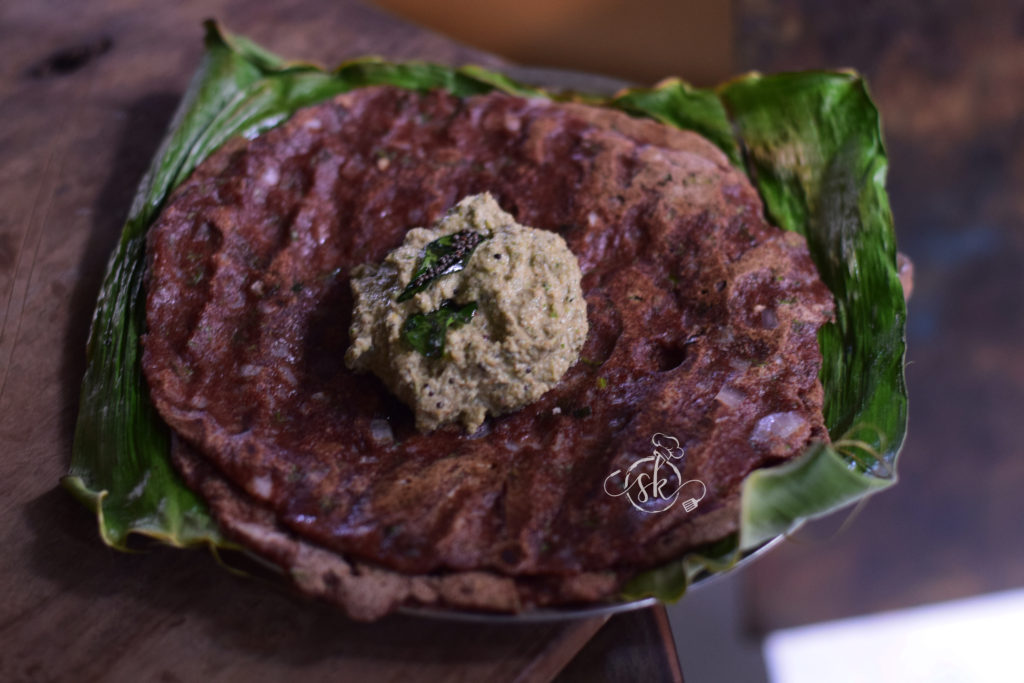
Ragi rotti, either you love it or hate it. It is one of the healthiest meals in the Mysore-Bangalore region. Unlike a dosa, where the fermented batter is poured and swirled, we pat the pliable batter by hand.

Even though it was a part of the rural part of Karnataka or in traditional cooking, it has now got its due credit by being considered “Superfood”, diabetic-friendly, calcium-rich, gluten-free, and what not!

Ragi rotti with peanut/Huchellu(Niger seeds) chutney is a healthy and authentic breakfast in Bangalore.

The Rotti and chutney, which I learnt from a couple of my friends, then adapted to make my version, according to my family requirement is here,

Ingredient:

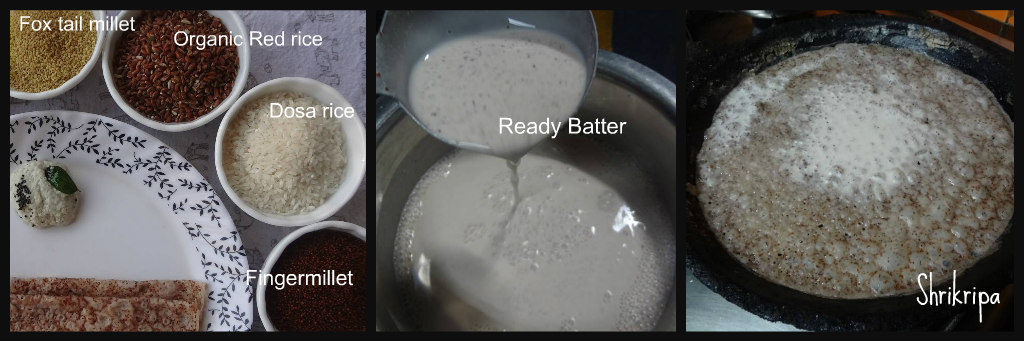
Ragi/ finger millet flour – 2 to 3 cups

Cooked rice – ½ cup

Grated coconut – ¼ cup (optional)

Chopped onions – 2 to 3 (medium size)

Chopped green chillies – 2 to 3

Chopped coriander leaves – ½ cup

Chopped Curry leaves – 2 tbl sp

Chopped pudina – 2 tbl sp (optional)

Salt

Hot water – as needed.

Method:

-Take one wide steel bowl, dry mix everything from ragi flour, cooked rice, chopped green chillies, onions, coriander, curry leaves, pudina, coconut gratings and salt.

-Make a pliable dough by adding sufficient boiling hot water.Keep it aside for 5 to 10 minutes to absorb the seasoning and soak.

-When you want to make rotti, take one piece of banana leaf or butter paper.

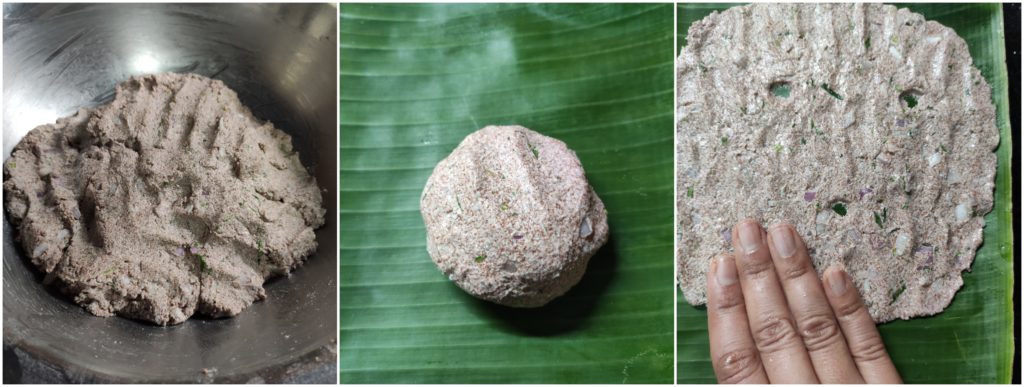
-Take a little rotti dough in your moist hand, and start patting in a circular motion by wetting your hand in the water now and then.

-Make 3 or 4 holes here and there if you want the crispier version. Sprinkle one teaspoon of oil over this patted rotti and keep it ready.

-Heat iron skillet and cook oil sprinkled rotti by putting upside down on it. After 2 to 3 minutes, peel off a banana leaf or butter paper.

-Sprinkle little oil over it and flip. Cook and serve hot with peanut chutney or Huchellu chutney.

Note:

-Keep one bowl of water at a reachable distance to dip your hand in-between.

– wetting your hand will help avoid the dough sticking to your fingers while patting.


Sprouted Ragi Idli:

We all know, Ragi is extremely healthy plant-based grain, which is fibre rich, calcium rich and what not? It is a new age “Super food” which was earlier considered as a staple, poor man’s food, or farmer’s diet.

Ragi also known as finger millet or Nachni. Interesting part is, when we sprout the ragi, its nutritional benefits increases 10 folds.

Soaking and sprouting ragi is easy to digest, high in calcium, protein, low in glycaemic index as well as high in vitamin B12, which is a boon to vegetarians. Ragi has the natural property to balance sugar levels in our body, hence it is an extremely  good option for all the age groups, including diabetics.

 Some people do not like ragi for varied reasons, it may be due to its bland taste or something else. If that is the case, one can try to sneak in Ragi in various forms, combining with the other grains in cooking or while baking.

Here, I have tried to make sprouted Ragi idli with mixing rice. When it is combined with sambar or chutney it tastes delicious and my family likes it a lot.

Preparation goes like this-

Ingredients:

Whole Ragi -1 cup

Idli rice – 2 cups ( you can use normal rice as well)

Urad dal – 1 cup

Poha – 1 cup (loosely packed)

Salt

Method:

-Wash Ragi, soak overnight, drain and keep aside to sprout, In Bangalore weather it takes almost a day or day and a half. After sprouting it swells and becomes 1 ½ cup.

-Next day, wash , soak  Idli rice in one vessel. In another vessel, Urad dal and poha. Soak for 3 to 4 hrs.

-According to your weather, opt the timing to grind. Ragi batter ferments little quick, compared to normal idli batter. SO, keep that in mind as well.

-I normally opt for a wet grinder to make idli or dosa batter.

-While grinding, first grind urad dal into fine batter, then add sprouted ragi, it takes little longer to grind. While halfway through add soaked idli rice, salt and grind the batter into small rava consistency.

-Remove from the wet grinder, adjust the consistency of the batter, mix nicely, and keep aside to ferment.

-Next day morning, steam idlies like a Regular idli and enjoy with little hot coconut chutney or any vegetable sambar.

Healthy “Brown” Neer Dosa:

Usually Neer dosa is made from using only white Dosa rice and it contains only carbohydrate and recipe is already shared and it is here

Couple of years back, when I was thinking of including millets in our regular neerdosa to make a healthier version, dosa used to turn out hard and crispy and I was not at all satisfied with the result. After couple of trial and errors, addition and deletion of ingredients, I got this soft and smooth textured neer dosa like the regular white one and henceforth it is one of our regular breakfast items and we named this as “Brown Neer Dosa”.

How I included these many items? As I mentioned above, I wanted to make soft neerdosa without any compromise on taste. Usually when we add millet in Dosa batter, Dosa becomes little hard and brittle. So, I thought of adding Whole Ragi to give softness with Fox tail millet.

Here I have added Ragi, Organic red unpolished rice with normal white rice to enhance the value, and fox tail millet. Instead of fox tail millet, one can use any other millet as well.

It is an excellent breakfast option for Toddler’s, weight watchers, diabetic diet or low carb diet as well as tiffin box options. It is very soft, easy to chew, digestible and at the same time filled with nutrients and fibre apart from carbohydrates. It doesn’t need any fermentation or planning. Soak in the night, grind and make it in the morning in a jiffy.

Recipe goes like this-

Ingredients:

White Dosa rice – 1 cup

Whole Ragi / finger millet – ½ cup

Red organic unpolished rice – ½ cup

Fox tail millet -1 cup

Salt

Method:

-Measure everything and put it in one bowl, wash twice and soak this in water for 2 to 3 hours or during the previous night like me.

-Next morning, grind this soaked rice into fine paste with water (I use soaked water while grinding, it gives nice aroma for the Dosa) and salt as per requirement.

-Make batter into pourable consistency like this (refer a picture) and check for the salt.

-Now keep Iron griddle for heat.

-When it is ready, apply oil like this.

-Pour one serving spoon of batter like how we make Rawa Dosa, you can see it in the picture below.

-Now close the lid by keeping the gas on full flame.

-After two minutes, remove the lid and keep the gas in simmer the edges of the Dosa rise a little, like this.

-Now flip this Dosa on the plate, leave for 2 minutes, then fold like this.

– Now keep repeating this with the remaining batter and stack one over the other or take one big plate and stalk one opposite another alternately.

-Serve these Dosa with coconut and grated jaggery mixture or coconut chutney.


Walnut – Chocolate chip Coffee Cake:

Coffee flavoured cake happened by chance. I had some unused Nescafe instant coffee and wanted to finish it ASAP. So, I thought of baking a cake. It is made up of healthy flour and a very good option as a snack.

While getting ready to assemble everything, I thought of adding chocolate chip and walnut as an attraction to kids and it worked out very well with finger millet or Ragi flour as well. Now we will see how I proceeded with the ingredients.

DSC06113_Fotor

Ingredients:

Whole wheat Flour – 1 cup

Ragi/ Finger millet flour – 1 cup

Baking soda – ½ tea spoon

Baking powder – ½ tea spoon

Salt – ¼ tea spoon

Walnuts – ½ cup

Choco chip – ½ cup

Butter – 100 grams

Eggs – 2

Sugar – 1 ½ cup

Hot milk – 1 cup

Instant Coffee powder – 1 to 1 ½ table spoon

Hot water – ¼ cup (you can take little less than ¼ cup)

Method:

-Pre heat oven at 180°C, line a baking tray with the butter paper.

-Take one bowl and mix all the dry ingredients like, flour, baking soda, baking powder, salt, walnuts and Choco -chips.

-In another bowl, beat melted butter, eggs, sugar, milk by adding one by one respectively.

Ribbet collage 1

-Make dark coffee by mixing powder and water. Mix in the liquid and beat.

-Now wet mix is also ready.

-Pour this wet mixture to dry ingredients and fold the batter by using any spatula.

-Pour the batter in lined baking tray and keep this for baking until done.

Ribbet collage 2

-It takes anywhere between 40 to 50 minutes.

-Before removing, check with a knife by inserting, in the baked cake.

-Knife should come out clean.

-Remove the cake, cool before cutting, and serve.

DSC06109_Fotor

Note: For the Eggless Version, use 1/2 cup of flax gel and you can refer my earlier post for the preparation.

Protein rich Millet Health Mix:

Millet health mix is a wholesome breakfast solution for people who leave their home very early in the morning and yet they can get goodness of wholefood by preparing quick porridge. Once the powder is ready, it is super easy and quick to prepare and consume. One can even prepare this drink and carry it in their bag and have it at their convenience as well.

Health benefits of millets and sprouts are numerous. They are filled with nutrients, vitamins and minerals. It really boosts immune system and overall health of human body.

I prepare this porridge specially for my husband, who started following Naturopathic diet after staying and enjoying this simple diet in a Naturopathic centre. Gradually my niece who leaves home by 6:45 AM from home, started carrying this drink as her mid-morning “meal”. It is very tasty, and at the same time, healthy, filling and nutritious too.

DSC03935_Fotor

At first, we will prepare the powder and the procedure goes like this-

Ingredients to sprouts and Roast:

Whole wheat – 500 grams

Finger millet / Ragi – 500 grams

Pearl millet/ Bajra – 100 to 150 grams

Green gram / whole moong – 250 grams

Black Chana – 250 grams

Ingredients Only to roast:

Fox tail millet – 50 grams

Sorghum / Jowar – 50 grams

Organic Red rice – 50 – 100 grams

Sago – 100 grams

Roasted Chana – 50 to 100 grams

Almonds – 100 grams

Flax seed – 25 grams

Other ingredients:

Cardamom – 10 (whole)

Method:

-First wash all the ingredients under “Ingredients to sprouts” one by one.

Ribbet collage 1

-Soak all these for 6 to 8 hours or Overnight.

-Drain and keep it covered to germinate.

-Next day morning, spread these on a clean cloth separately, and dry under partial or direct sunlight.

-It takes 2 to 3 days to perfectly dry.

-Now you can start roasting all these dried items one by one, as well as ingredients under “Only to roast”.

-After roasting each ingredient, spread this on a newspaper or clean cloth and cool.

-Add cardamom.

– Powder this mixture in a flour mill.

Ribbet collage 2

-Store this ready flour in an air tight container and use as needed.

How to make the porridge:

I make it in two ways. One is plain and another one is with oats.

For the plain one:

Ribbet collage 3

Take 4 spoons of porridge powder, add 450 ml of water, or as much as you want, according to the required consistency, and boil until it is cooked properly.

At that time, mixture will become glossy.

My husband likes this porridge with a little rock salt and a tinge of sweet (usually I add sugar free Natura)

You can either add plain sugar or Jaggery or brown unrefined sugar as well.

With Oats:

DSC03932_Fotor

Take 2 spoons of porridge powder, 2 spoons of Oats and proceed with the above procedure.