Guava Cheese/ Perad/halwa :

When the neighbour comes and hands me a big bag full of substantial sized overripe guavas, I knew, it is going to be a strenuous task. I need to deal with my mindset of ‘no wastage.’ First thing, came to my mind was my favourite Guava cheese.

When I was reading about the guava cheese, its origin, it traces back to Portuguese settlers in Brazil where it’s known as Goiabada. I am guessing that is how this recipe landed with them in Goa and is known as Perad/Peraad.

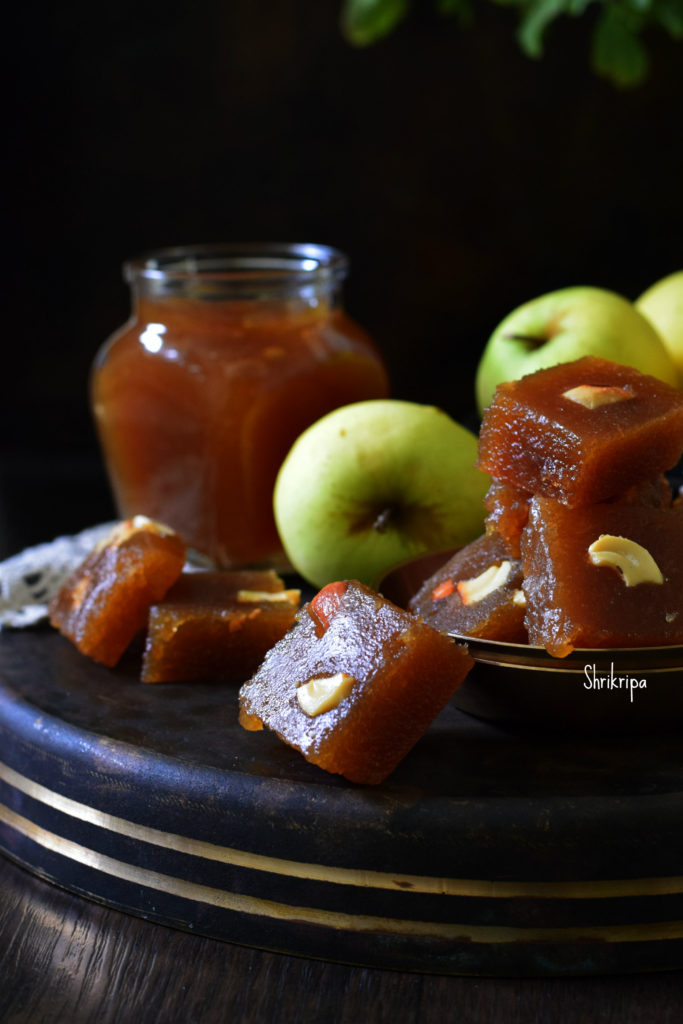
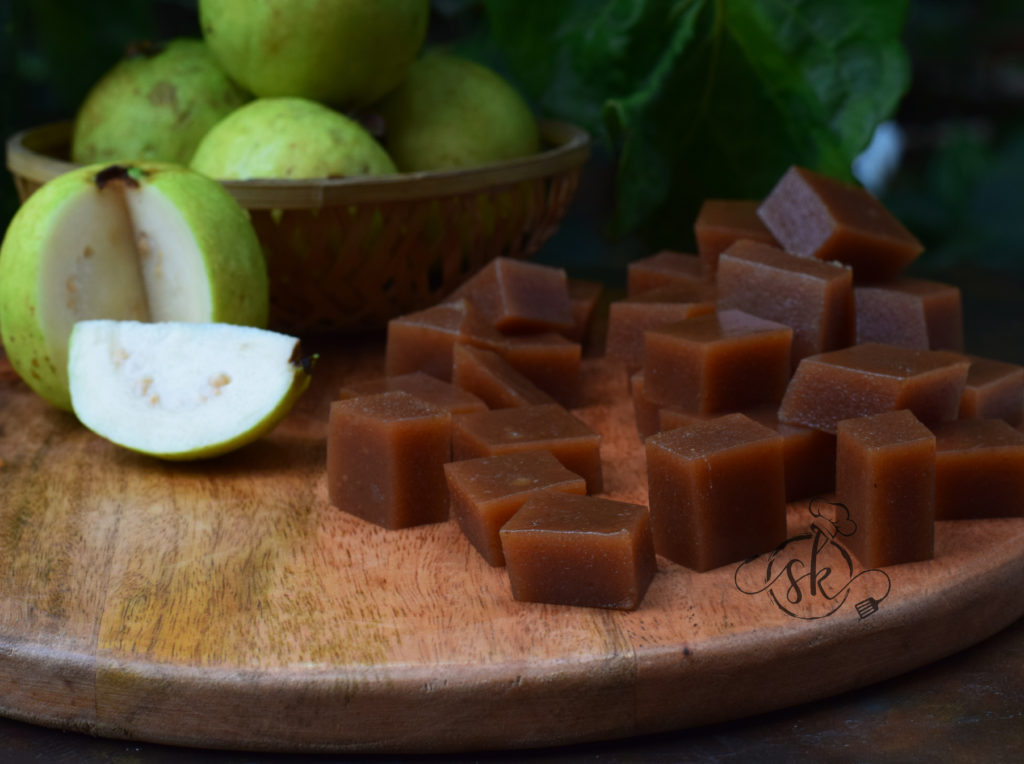
In simple terms, guava cheese is nothing but guava halwa. It doesn’t taste like cheese. Its texture is something you can easily bite into, yet is slightly chewy, somewhat like our Banana halwa, with a grainy texture, of course with added guava taste. Colour of the cheese depends on the variety of the Guava. If it is white, the colour turns our light brown, like mine. I usually mix a half red and half white variety of Guava to get beautiful hue.

Ingredients:

Overripe Guava – 2kgs

Sugar – 800 grams to 1 kg (acc to your palette)

Salt – ½ tsp

Butter – 3 tablespoons

Lemon juice -1 tablespoon 

Method:

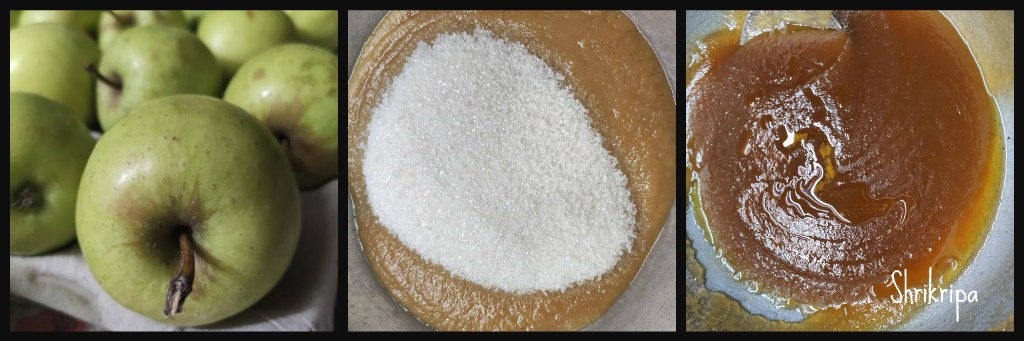
-Wash, chop the fruit into quarters—Cook with sufficient water for two whistles, cool.

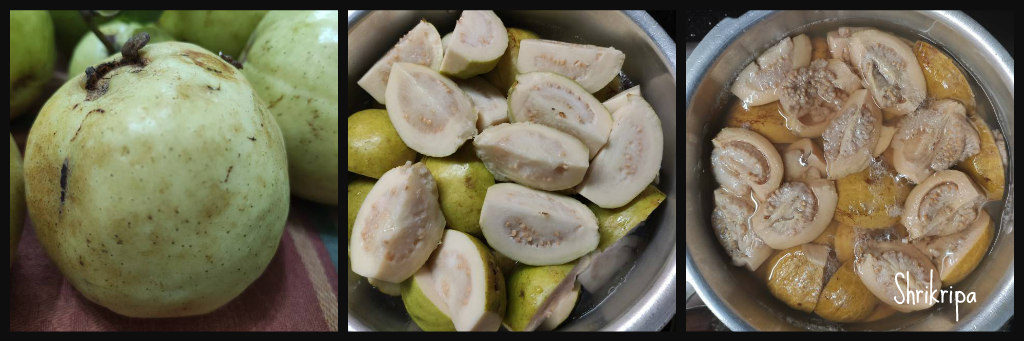
-Pulse it in a mixer jar along with cooked water, sieve the Puree, separate the seed and its roughage.

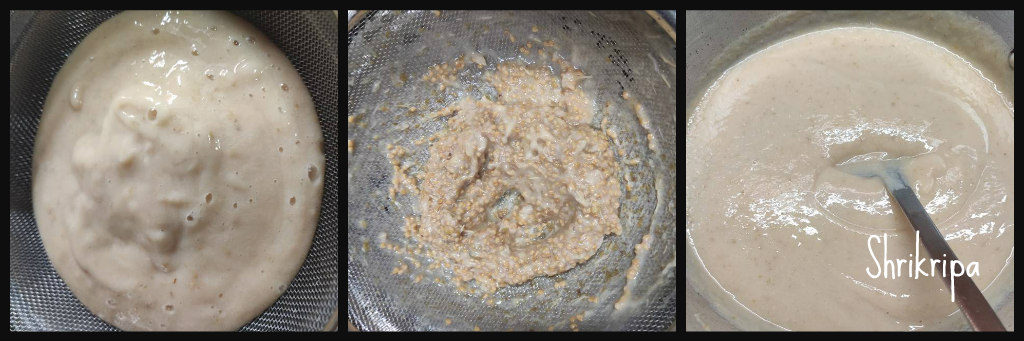
-Weigh the pulp. For 2 kgs of pulp, I have taken 800 grams of sugar. You can take up to one kg if you prefer sweeter.

-Take one thick bottomed Kadai, add the pulp and boil for 20 minutes or until it starts boiling. Allow 10 minutes more to boil and add sugar and salt, continue to cook in a low flame.

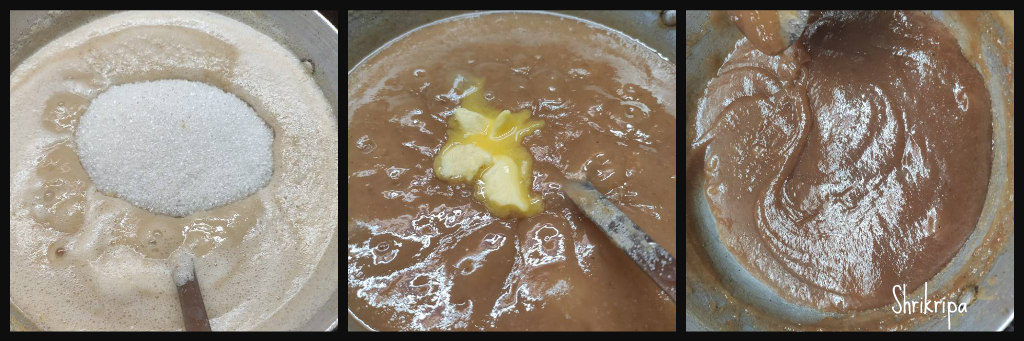
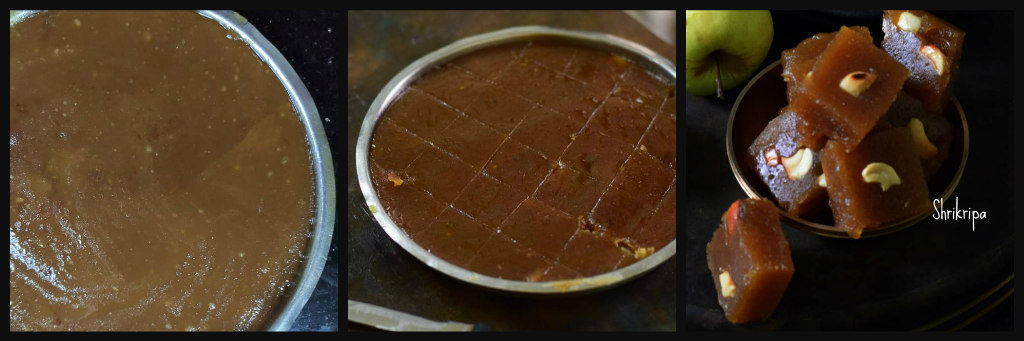
-When the mixture turns pinkish brown add butter and proceeds to cook further. When it starts leaving the sides, add lemon juice, cook ten more minutes.

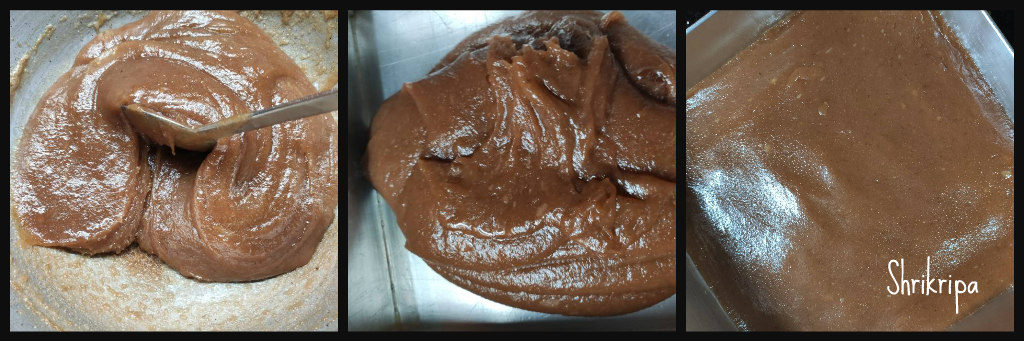
-Remove the mixture to the greased plate, leave 4 to 6 hours and then cut.

-Stays good for 3 to 5 months without any problem, at room temperature, stored in an airtight container.


Apple Halwa

Yesterday, while preparing Apple jam, my Research oriented husband came in and asked me what I was doing, I said – Apple jam , planning to finish the stock which we bought couple of weeks back

He said, “why not halwa?” I was like 🙄🤔

Then, I changed my mind and took my share of  jam when it was done. Proceeded to make Halwa with the remaining quantity, by adding little ghee in-between at a regular interval.

Surprisingly, it turned out super delicious and here I am presenting my end result which was experimental.

Here I have used fruit as a whole /with skin. Normally Apple turns out sour when you cook /boil . To avoid the sour taste, normally I bake it until it is done, then grind into a puree, sieved, and proceed to make jam then halwa with the added mild cinnamon flavour. One can add cardamom as well. Sugar can be replaced with an organic jaggery as well. Even though I have not tried with the jaggery, my friend Aruna has tried with the jaggery and result was just amazing, which was deep brown in colour.

Ingredients:

Golden yellow Apple – 1 kg (Any variety would do)

 Sugar – ¾ kg

Ghee – ½ to ¾ cup

Cinnamon or Cardamom – 1 or 2 pinches

Method:

-Wash Apples, dice ,remove seed part and arrange in a baking dish. For Initial preparation, please refer here

-Bake this in a 170°C pre-heated oven for 15 minutes at first.

-Remove, flip those apple pieces, and continue further 15 minutes.

-After 30 minutes, check the doneness. If it is soft, well cooked ,remove it.

-If it is not done, bake for further 5 or 10 minutes.

-When it is cool, add a little water and churn in a juicer by adding 1 or 2 cups of water.

-Sieve ,discard the roughage ( fibre as well as outer skin remains)

-Put this pulp in a thick bottomed kadai, add sugar,  cook until it turns into little thick and turns into mass.

-Add ghee 2 tablespoons at a time in-between while stirring. If you feel that the Apple puree  needs a little more ghee, add up to ¾ cup, some varieties of Apple need very less ghee and some need more.

-Now we will see, how we decide the quantity of ghee. While stirring if you feel that the mixture is a little dry and the bottom part becomes a little brown, keep adding it. If the ghee starts oozing at the sides, it is an indication to stop the addition of ghee.        


-Now we will see how you know the doneness. It is quite simple, keep on stirring until mixture leaves the sides of the kadai and ghee oozes out from the mixture. You can add cashew pieces at this stage or spread those pieces in a greased plate like me.

-After you are done with this, it is almost ready to shift to the plate. Before shifting I prefer to check, by taking one small peanut sized portion of the mixture and rolling it in-between my thumb and forefinger to make a small ball like structure. If it holds a ball like structure and does not stick to your finger, it is ready.

-Now remove from the flame, shift to a greased plate, and pat this mixture evenly by using a flat, greased (apply some ghee) back of the spoon.       


-Keep this aside for two or three hours to cool. Then cut this into the desired shape and store it in an airtight container.

-You can store this Halwa for a really long time (up to a month or two).