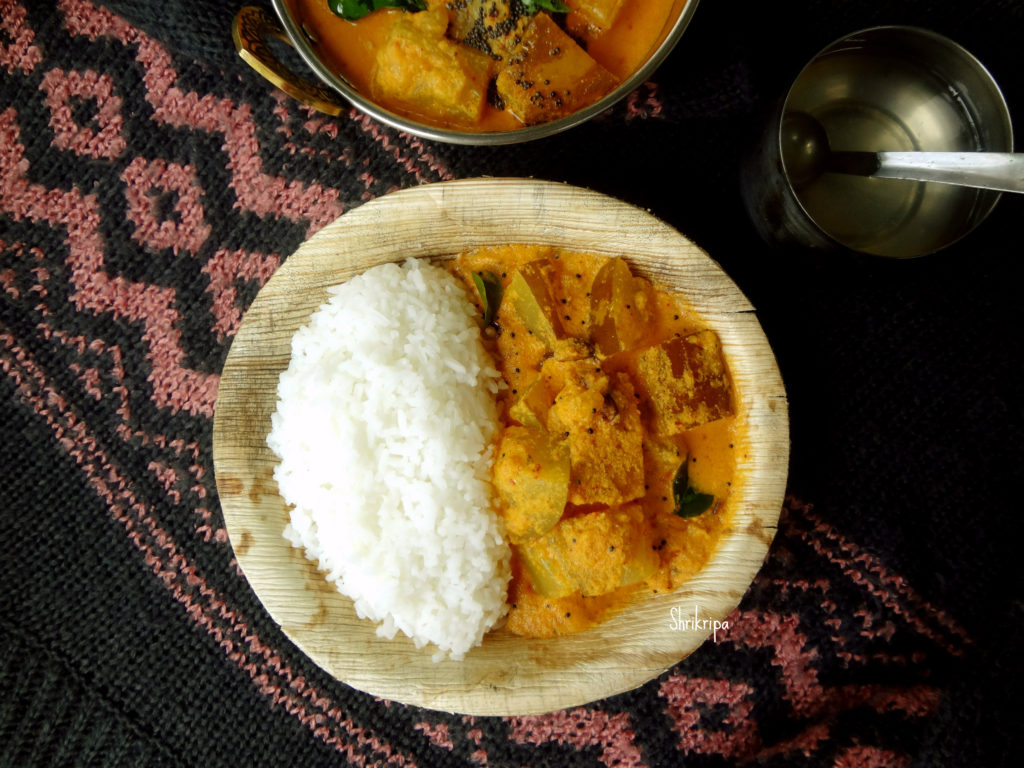
Neeru mavinakai Gojju/ Brined mango curd curry:

Neeru Mavinakai” is what we call brined mango, which is basically a firm fully grown, matured but un-ripened mango which is preserved in salt water. We usually relish this in the rainy season or in the off season by preparing some of our traditional dishes. I have shared how to preserve mangoes in my earlier post.  Today I am going to share one of our favourite simple curd curry, which we used to relish even in our childhood days. It is a simple curd curry, seasoned with curd chillies (known as majige menasu), curry leaves and garnished with chopped onions to give the extra zing.
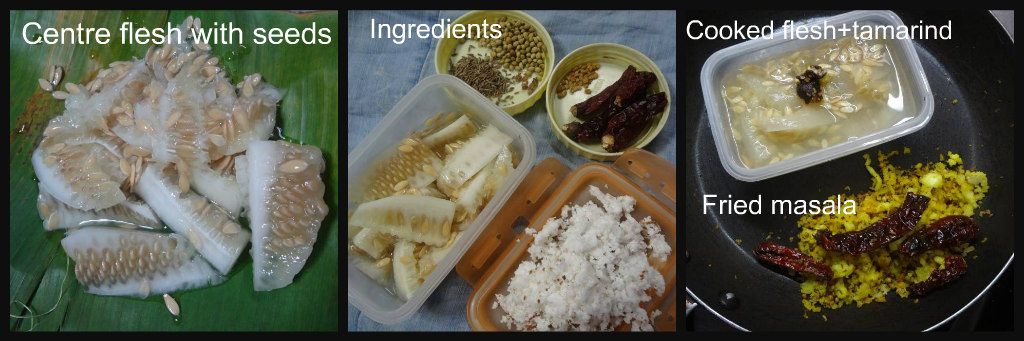
DSC_4350_Fotor

Ingredients:

Preserved raw mangoes – 2

Curd – 1 cup

Coconut milk – 2 table spoons

Green chilli – 1 (chopped)

Onion – 1 (chopped)

For Seasoning;

Coconut oil – 1 table spoon

Mustard – 1 tea spoon

Curd chillies – 1 to 2 (chopped)

Urad dal – 1 tea spoon

Hing – ¼ tea spoon

Curry leaves – 1 spring

Method:

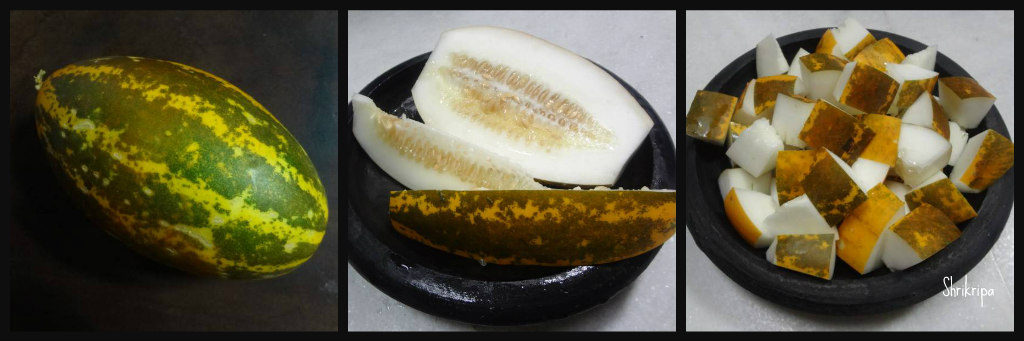
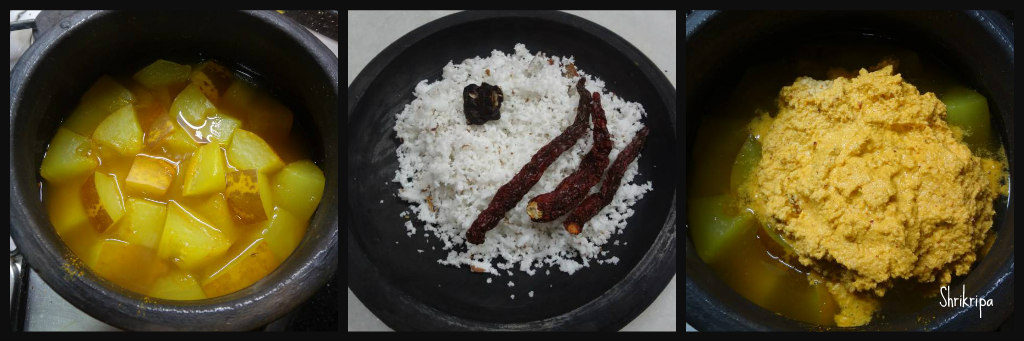
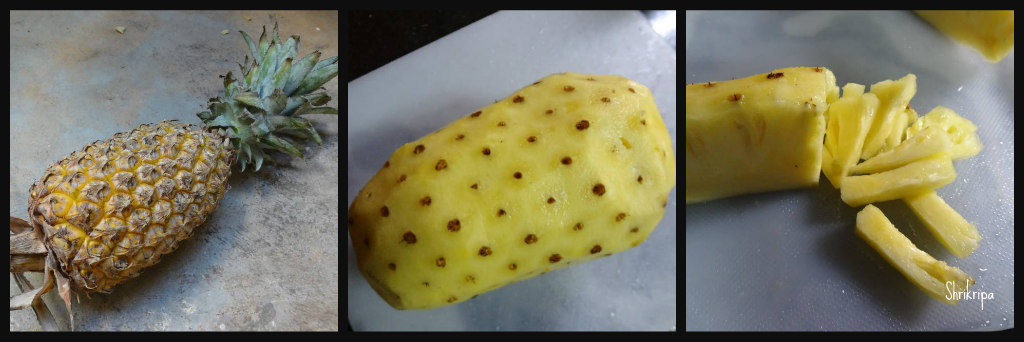
-Remove required number of mangoes from the brine water.

-Immerse these mangoes in fresh water for some time to reduce its salt content.

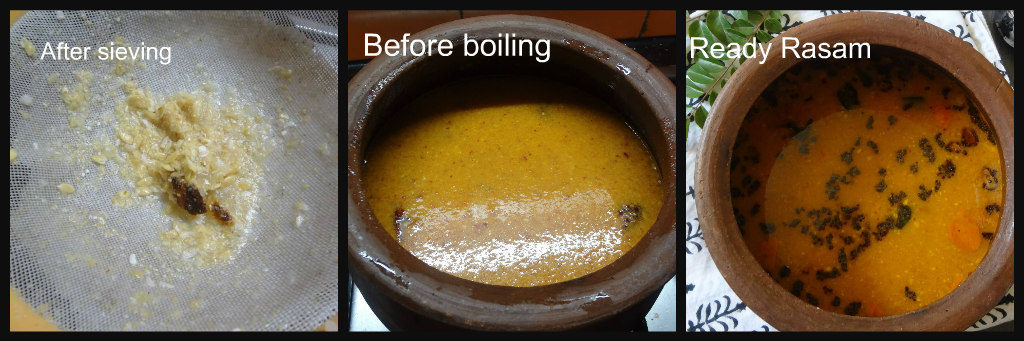
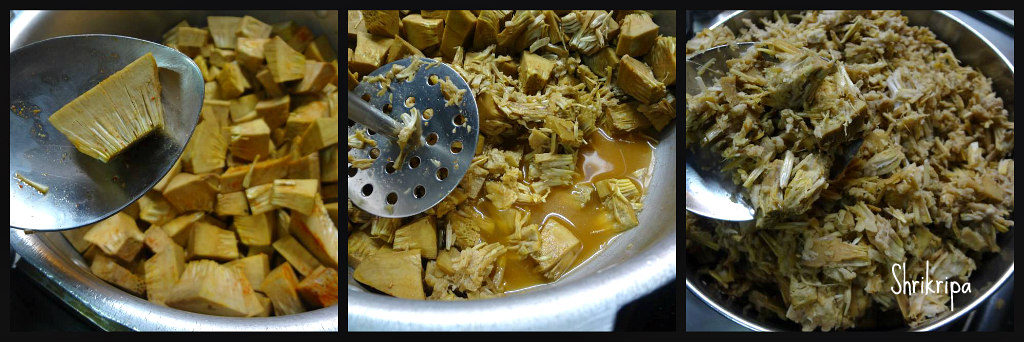
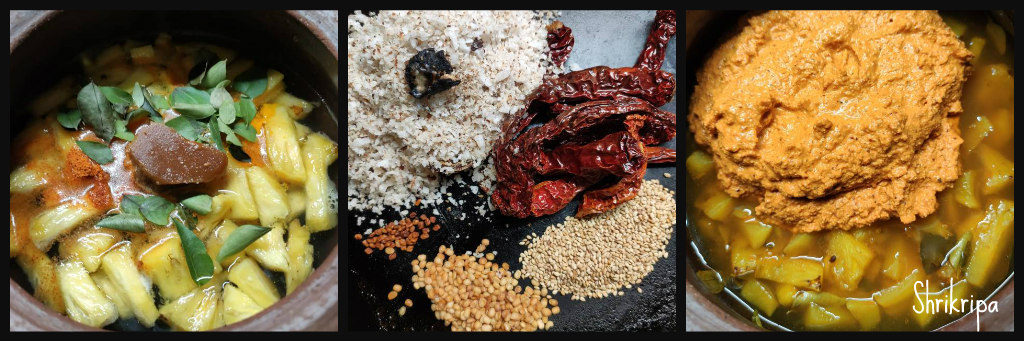
-Sometimes brined mangoes will be soft or hard. If it is soft, mash it and use.

Ribbet collage

-If it is very hard, cook for a couple of whistles in a cooker by adding little water and try to mash or grate.

-What I had was very hard, and I used it by grating.

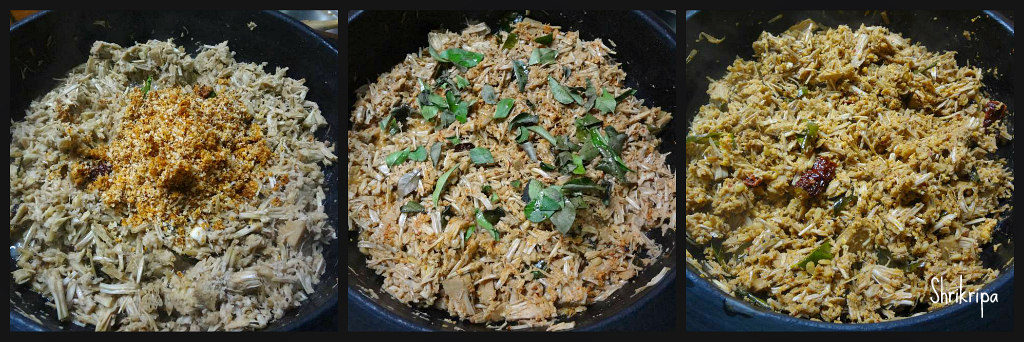
-After this is done, mix in curd and coconut milk.

-If you don’t have coconut milk, you can use maggi or some other brand of coconut milk powder as well. (addition of coconut milk will reduce the tartness)

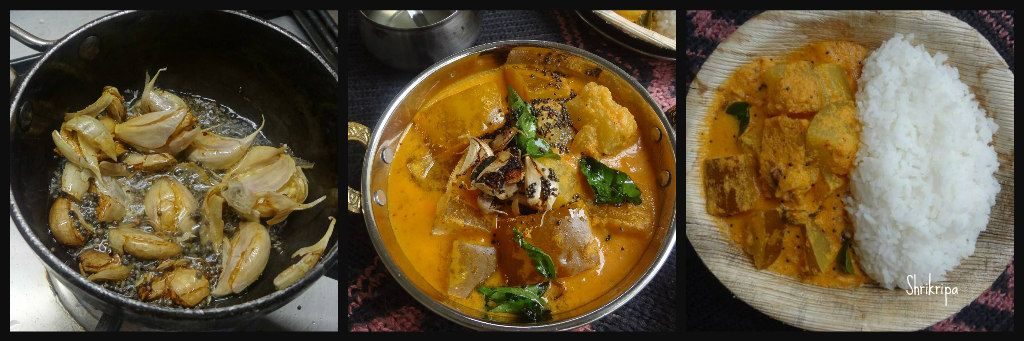
-Mix in chopped onion, green chilli.

-Do seasoning, heat coconut oil, put in mustard. When mustard starts to splutter, add in urad dal, Hing, chopped curd chillies and fry until chillies turns out dark brown.

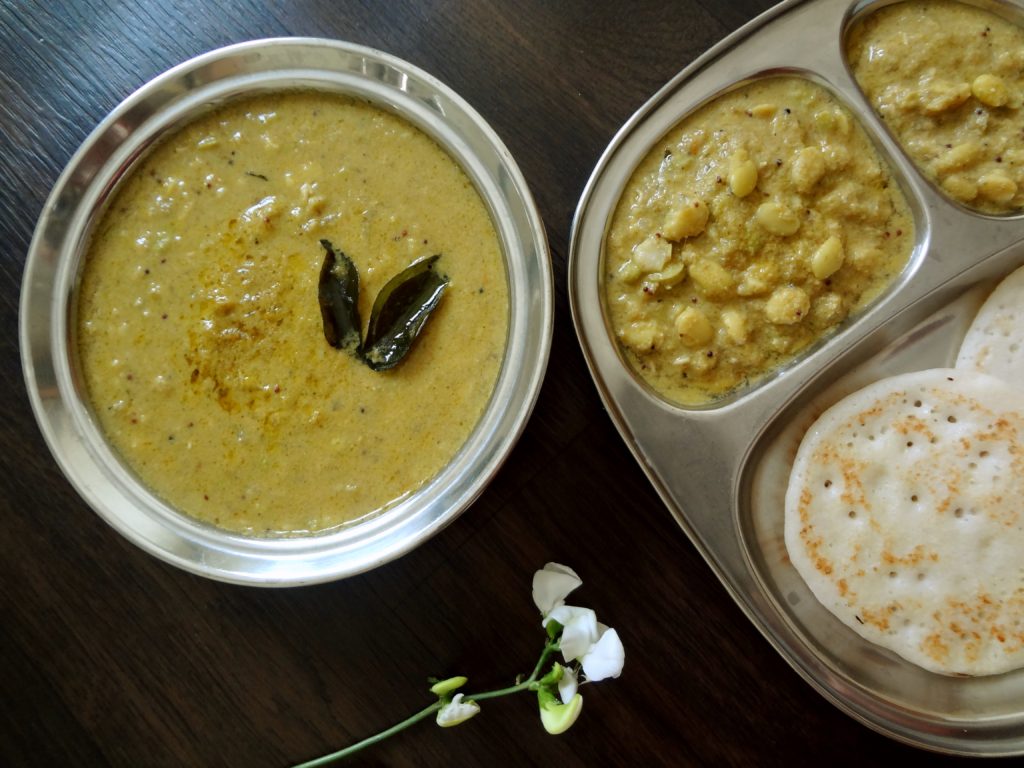
– Add curry leaves to this hot mixture and add the seasoning over Gojju.

-Traditionally we enjoy this Gojju either with Boiled rice ganji (gruel) or with curd rice as an accompaniment.


Coloured Cucumber Seeds Rasam:

Coloured or Mangalore cucumber has fleshy interior centre part, which has jelly like watery fleshy part with edible seeds. Which are rich minerals and rich in nutrition. Traditionally we call this Rasam as Sauthe kai beeja da saaru. Literal translation of this is, sauthe kai beeja means cucumber seed, saaru is Rasam, which is watery in texture and consumed as an appetizer or with hot rice during summer season to maintain our body temperature.

Before using the core, check the fleshy part for bitterness. If it has bitterness, discard and don’t use in cooking. If you find core part to be flavourful or without bitterness, go ahead and use it in your cooking to enrich your body, like our elders did.

DSC03506_Fotor

How to make this traditional goodness –

Ingredients:

Fleshy seeded part – of one coloured cucumber

Coriander seeds – 1 table spoon

Cumin seeds – 1 tea spoon

Hing – peanut size

Fenugreek seeds – ¼ tea spoon

Red chillies – 4 t0 5

Turmeric – ½ tea spoon

Coconut – ½ cup (grated)

Tamarind – ½ to 1 tea spoon

Coconut oil – 1 tea spoon

Salt – as needed

Jaggery – ½ tea spoon (optional)

For Seasoning:

Coconut oil – 1 tea spoon

Mustard – 1 tea spoon

Red chilli – 1

Curry leaves – 1 spring

Method:

-Collect seed coated flesh part of one coloured cucumber.

-Cook this in a small cooker for one whistle (cooking will help in extracting the pulp) and cool.

Ribbet collage 1

-Grind cooked pulp by adding one cup of water and tamarind and collect the liquid by sieving.

-Grind the roughage one more time, by adding one more cup of water and sieve once more.

Ribbet collage 2

-Discard the remaining roughage if any.

-Now prepare masala by heating oil. Add fenugreek at first.

-When it becomes light brown, add coriander, cumin, hing, red chillies and fry until fenugreek becomes dark and coriander becomes light brown.

-Add coconut, turmeric and fry for two minutes or until you get nice aroma.

-Cool this roasted masala and grind into smooth paste by adding sufficient water.

-Add the masala to extracted cucumber seed water.

-Adjust the consistency, add salt, jaggery and boil the Rasam.

-Add seasoning, heat oil, add mustard, red chilli.

-When mustard starts spluttering, add curry leaves and add the seasoning to boiled Rasam and close the lid.

-Serve this as an appetiser or with hot rice with a couple of papads.


Mangalore Cucumber curry:

Traditionally we call this Sauthe kai Huli menasina Kodilu/Koddel. The literal translation of this is, Sauthe kai means sambar cucumber, Huli is tamarind, menasu is chilli, koddel is sambar or curry. It is sambar cucumber or coloured cucumber curry with a raw masala of fresh coconut flavoured with non-roasted masala.

Here we only use fresh coconut, Byadagi red chillies, tamarind as the main ingredient, and after boiling, seasoned with curry leaves, roasted garlic by using coconut oil.

To get an authentic taste, one should use coconut oil and freshly grated coconut for this curry.

DSC03963_Fotor

Now we will see the recipe part.

Ingredients:

Coloured cucumber – 1

Salt

Red chilli powder – 1 teaspoon

Fresh coconut – 1 bowl

Red Byadagi chillies – 2 to 3

Tamarind – gooseberry size

Turmeric powder – ½ teaspoon

For seasoning:

Coconut oil – 1 tablespoon

Mustard – 1 teaspoon

Red chilli – 1

Curry leaves – 2 springs

Garlic – 10 cloves (crushed)

Method:

-Wash Mangalore/Coloured/sambar cucumber.

Chop off two ends, slice into four pieces, remove the inner core (seed part), and chop into bite-sized pieces.

Ribbet collage 1

-Check now for the taste. If it is bitter, soak the pieces in plain water for 5 minutes.

-Discard the water and proceed. If cucumber tastes good, there is no need to soak in water, and you can directly proceed with cooking.

-Cook these pieces in a sufficient amount of water. Add salt and red chilli powder as well.

Ribbet collage 2

-In the meantime, grind masala by putting coconut, tamarind, red chillies and turmeric.

-When cucumber cooks well, add ground masala, adjust the consistency and boil.

-When the mixture boils nicely, switch off the gas.

-Prepare seasoning, heat oil, splutter mustard, add garlic, red chilli, curry leaves.

Ribbet collage 3

-When garlic becomes deep brown, add the seasoning over boiled gravy.

-Keep this closed for a while before serving to absorb all the flavours.

-Serve with hot rice.

One more variation of this curry is by adding –Turkey berry.

To know about the Turkey berry, you can click the link HERE.  

The method is straightforward. Crush those washed turkey berries/ Kudane, put them in water, rinse them a couple of times, and remove the seeds as much as possible; in this way, the tartness of the berries vanishes. Keep as it is and follow the above procedure to make Cucumber curry.

-When cucumber cooks partially, add those washed and cleaned berries and cook further. Then, add freshly ground masala and curry by following the above description.

Note:

To maintain authentic taste,

-use fresh coconut, Coconut oil.

-Retain the outer skin of garlic and crush.

-Inner core or seed is used in a couple of recipes.

-One is Chutney, and the other one is Rasam. I will update ASAP.


Plantain / Banana Flower Chutney:

We call Coconut tree as a Kalpavriksha. In my opinion Banana plant also should come under this category, because almost every part of the banana plant is used in some way or the other.

The leaves, flowers, fruits, stem, stem fibre etc. Nothing is wasted over here, and it is very useful in many ways.

The male banana flower is purple coloured, dome shaped, and can be seen hanging at the bottom of every fruit bunch. In banana plant, female flowers appear first and appear as a hand like structure in clusters. These female flowers will develop as the real fruit, which we normally eat, and male flowers will remain intact in layers of purplish outer bracts.

After fruit matures, we harvest the fruit and use the male flower that we see at the end of the fruit bunch in cooking. It is loaded with fibre, anti-oxidants, iron, potassium, calcium, vitamins and all other minerals. Flower is used mainly to treat constipation and anaemia in villages of our native in and around Mangalore.

This Chutney recipe is handed down to me by my amma (mother), and I used to relish this from my childhood. It is a perfect combination with hot rice, topped with fresh home-made ghee. We can feed this to small toddlers as well.

DSC04353_Fotor main

Ingredients:

Banana flower – 1

Cumin – 1 tea spoon

Pepper – 1 tea spoon

Tamarind – ½ tea spoon

Salt

Water – 1 bowl

Curd – 1 serving spoon

Grated coconut – 1 cup

For Seasoning:

Ghee – 1 table spoon

Cumin – ½ teaspoon

Curry leaves – 1 spring

Method:

-Wash banana flower from outside and remove outer purple bract (remove 2 layers) and discard.

Ribbet collage 1

-Now take one bowl of water with 1 serving spoon of curd and mix and keep it ready. (This water will avoid decolouration of the chopping’s)

-Start chopping banana flower from the tip (refer picture)

Ribbet collage 2

-Keep on adding chopped part to curd water.

-While chopping, whenever outer shell opens by itself, discard that and proceed chopping.

– After chopping is done, drain the curd water and collect the banana flower chopping’s.

-Take one vessel, add chopping’s, salt, pepper, cumin, tamarind, 1 cup water and cook.

Ribbet collage 3

-When it is done, remove from the fire and cool.

-Add coconut, required amount of water and grind the content.

-Now take one tawa, add ghee, cumin, curry leaves and pour the ground mixture and boil.

DSC04355_Fotor main 1

-This chutney will stay good for a couple of days under refrigeration and can be served either with hot rotis or with rice.


Gujje palya/ Tender jackfruit Subzi:

Gujje is nothing but tender jackfruit. We Mangalore people start using Gujje from its very tender form. This particular recipe is for very tender means even before its formation of eyes (seed) and known as “Guddhi palya” as it is prepared after crushing. We will see how to prepare this in a traditional way.        

DSC06083_Fotor

Ingredient:

Tender jackfruit – 1

Mustard- 1 tsp.

Black gram dal – 1 tsp.

Red chilli – 1 (for seasoning)

Curry leaves – 4 springs

Coconut oil – 4 tsp.

Red chilli powder – 1 tsp.

Turmeric – ½ tsp.

Tamarind – ½ tsp.

Salt and jaggery – for taste.

Grated coconut – 3 tbl sp.

Methi seeds – ½ tsp(roasted)

Red chilli – 2 to 3 (roasted)

Method:

  • Remove outer thorny skin and centre core. Cut the inner pith into one-inch cubes. Immerse in water for 10 minutes. Drain and keep aside.
  • Take one thick-bottomed kadai or pressure cooker. I usually prefer one whistle a pressure cooker. This method fastens the procedure.
  • Put chopped jack pieces, salt, tamarind, jaggery, red chilli powder, turmeric. Now add a cup of water and cook until one whistle.

Ribbet collage 1

  • When it becomes cool, remove the cooker lid.
  • Mash the cooked jack a little so that all the segments of the jack pieces will open, and it will help to enhance the taste and structure of the palya.
  • Dry grind coconut, roasted methi and red chilli into rough powder and add.

Ribbet collage 2

  • Now check for the seasoning and cook until any remaining water is dried and the masala cooks and coats well.
  • Garnish with curry leaves, two tsp. Take raw coconut oil, keep it closed, and cook for a while so the coconut and curry leaves’ flavours will spread to give a very authentic “homely” flavour.
  • Season it by heating coconut oil and adding mustard. When it splits, add Urad dal, red chilli and curry leaves and pour over the ready palya/sabzi.
  • This palya will taste great with ghee and hot rice or as a side dish with Rasam rice.


Paramanna/ Pindi payasam:

Pindi payasam is nothing but our traditional rice kheer without adding any milk or coconut milk, which is usually offered to god as a Naivedyam and served as a prasadam at any pooja. It is considered as a favourite of goddess Devi. When I look back and think, Pandan leaves were widely used in our region(Mangalore) as well. One can make this payasam even without adding Pandan leaves.

pic main

Pandan leaves are known as gandhasaale ele in our Mangalore region.
Gandhasaale rice is a traditional, flavoured and scented rice variety of Karnataka and Kerala, cultivated in small pockets. Gandhasaale rice is the best rice for meals, Pulav, payasam and other eatables. The Gandhasaale rice is known especially for its rich aroma. It is also called Kerala’s basmati.
In our native, to get aroma of “gandhasaale” in ordinary rice, my grand mom used to put these leaves in, while cooking the rice. Pandan (Scientific Name: Pandanus, also known as screw pine or palm pine) is a herbaceous tropical plant that grows in Southeast-Asia. In Chinese, it is known as ‘fragrant plant’ because of its unique, sweet aroma. The cultivated plant features upright bright green leaves, and it’s the leaves that are used for cooking up many Thai and Southeast-Asian dishes. Pandan is also made into a paste that is used in cakes and desserts, much the way we use vanilla flavouring in the Western cuisine. However, in addition to flavour, Pandan paste also instil foods with a bright green colour. Some Thai and Malayan desserts which I have tasted are Pandan baked cake, Pandan jelly and Pandan sticky rice in Malaysia. Personally, I dint like it much because of its overpowering fragrance and felt that, like my ajji (grand mom), one should use one or 2 leaves to get that perfect blend.

DSC05949_Fotor

Ingredients:

White rice – 1 cup (I have used small grain rice)

Grated jaggery – 1 cup

Ghee – 2to 3 table spoons

Coconut – 2 table spoons (grated)

Cardamom powder – 1 tea spoon

Pandan leaves – 2

Cashew bits – as needed

Method:

-Wash rice, Pandan leaves. Soak rice for 10 minutes.

-Boil 2 to 3 cups of water, add rice, Pandan leaves and cook until it is done.

Ribbet collage 1

-After cooking, remove Pandan leaves.

-In the meantime, take one cup of water, boil, add jaggery and melt.

-Sieve this solution and remove all the impurities.

-Add this solution to cooked rice and boil.

-When the mixture becomes thick, add ghee and mix nicely.

Ribbet collage 2

-Lastly add coconut, cardamom powder and give a stir for 2 to 3 minutes or until it becomes like a creamy mass.

-Roast cashew bits in a little ghee and garnish.

-If you want to offer this to god, do that and then serve. Other wise serve hot and enjoy this delicacy.


Fresh Pigeon pea and Methi Pulav:

Winter is that time of the year, where you can relish all the fresh produce from the bean family. One such bean is Thogari kayi/Fresh Tuvar/Pigeon peas. These are beautiful green pearls with maroon spots all over them and we can make so many varieties of dishes from them. This rice dish is a very easy, one pot meal which has the goodness of Tuvar dal, methi leaves with coconut flavour which will enhance the flavour of the dish to another level.

DSC05585_Fotor

Recipe goes like this-

Ingredients:

Rice – 3 cups

Onion – 2

Fresh Pigeon peas – 1 cup

Fresh methi leaves – 1 small bundle

Veggies of your choice – 1 cup (French beans, carrot)

Ghee /oil – 2 to 3 table spoons

Bay leaves -2

Cumin – 1 tea spoon

Mace – 1

Marathi moggu – 2

To grind: Little coriander leaves, Cinnamon one stick,3 to 4 green chillies and 1-inch ginger.

Coconut milk – 1 cup

Lemon –  ½

Salt

Method:

-At first take a fresh Tuvar bean pod, remove outer thick green skin and separate the green bean with the beautiful red spots. Collect all the shelled beans.

Ribbet collage 1

-Wash rice and soak for 10 minutes, drain and keep aside.

-Chop onions, methi leaves and vegetables of your choice.

-Grind a paste of coriander leaves, cinnamon, green chillies and ginger by adding little water and keep.

-Take one cooker, add oil and ghee or only ghee. Drop whole masalas like bay leaves, cumin and mace.

Ribbet collage 2

-Fry onions until brown and add methi leaves, fresh tuvar, chopped veggies and fry until it wilts.

-Add salt, ground masala and fry for 2 minutes and add drained rice and fry for a minute.

Ribbet collage 3

-Add coconut milk and 5 cups of water, juice of half lemon, boil, close the lid and cook until one whistle and 2 minutes into simmer.

DSC05591_Fotor

-Serve with any kind of raita.


Energy cake:

This energy filled cake has millets, oats, coconut flour. Usually after extracting coconut milk from the fresh coconut, the residue that remains will go into the trash. Coconut residue is very high in fibre. It is much healthier than wheat bran or oats bran. I usually collect this residue, after extracting the milk for any south Indian kheer, and use it in my baking as it is, by storing it under refrigeration for a couple of days.

This energy bar is a little softer than a normal crunchy bar. So, I named it as Energy cake. Shelf life is any where between 2 to 3 days at room temperature, Up to 10 days under refrigeration. If it was under refrigeration, please re-heat to get soft texture.

DSC05271_Fotor

Ingredients:

Oats – 1 cup

Mix millet flour – 1 cup

Coconut residue – ¾ to 1 cup (You can use coconut flour or desiccated coconut as well)

Brown Sugar – ¾ cup

Butter – 100 grams

Honey – 2 table spoons

Milk – ¼ cup

Cooking soda – ½ tea spoon

Vanilla essence – 1 tea spoon

Choco chip and almond flakes – to garnish

Method:

-Pre-heat oven, line a baking tray.

-In one bowl, combine oats, 2 flours and mix thoroughly.

Ribbet collage 1

-Take one sauce pan, heat butter and sugar. When sugar melts, switch off.

-Add in honey, milk,vanilla and cooking soda and mix.

-Pour the frothy wet mixture over oat and flour mixture and fold the batter.

Ribbet collage 2

-Batter will be a little thick and heavy. Pour the mixture and spread evenly on a lined baking tray.

-Garnish with Choco chips and almond flakes and press a little.

Ribbet collage 3

-Bake this in a pre-heated oven at 180 C for about 25 to 30 minutes or until done.

-Cool, cut into pieces and serve as a snack or a breakfast bar.


Pineapple Menaskai/ Gojju:

Menaskai/Menaskayi is one of our coastal specialities, which is a hot, sweet and sour, sesame flavoured coconut-based curry. Normally made with bitter or tangy things like Bitter gourd, raw mango, wild mango or pineapple. We even prepare by mixing Bitter gourd and raw mango as well. It is a common dish in any of our elaborate menus for festivities, usually served on a plantain leaf, like poojas or weddings. This same curry is prepared in a little different way in other parts of Karnataka and known as “Gojju”.

Here, the main trick is-balancing of all the flavours.

If you are preparing with sour vegetable or fruit, there is no need to add additional tamarind. For example, if you are preparing raw mango or mixture of bitter gourd and raw mango Menaskai, there is no need to add tamarind. If you are using pineapple, tamarind should be added.

Here I have used pineapple and the procedure goes like this-

Ingredients:

Pineapple – 1/2 (chopped into bits)

Raw mango – 1/4 (chopped into bits)

Tamarind – gooseberry size (if the mango is not available)

Jaggery – as needed

Salt

Green chillies – 2 (slit)

For masala:

Fresh Coconut gratings – 1 to 1 ½ cups

Methi seeds – 1/4 tsp

Urad dal – 2 teaspoons

Sesame seeds – 2 teaspoons (U can use black or white)

Dried red chillies – 8 – 10 (we use Byadagi variety)

Coconut oil – 2 to 3 teaspoons (1 for roasting + 1 for seasoning + 1 tsp to garnish)

Mustard – 1 tsp

Dried red chilli -1

Curry leaves – 2 springs

Method:

-Clean pineapple by removing the outer skin, chop into bite-size pieces.

Ribbet collage 1

-Cook pineapple pieces and mango pieces or tamarind with little water, turmeric, salt, jaggery, green chillies and curry leaves.

-Dry roast sesame seeds. Now fry all the masalas for grinding. First heat 1 tsp of oil, put methi(fenugreek) seeds. When it is light brown, add all the other ingredients like urad dal,  red chillies and fry until urad dal is light brown. Now it is the time to put coconut and fry further for 2 minutes or until you smell the nice aroma.

-Cool the mixture, grind into a paste by adding sesame seeds and sufficient water as well.

-Add this paste to the cooked pineapple, check for salt and jaggery. Adjust the consistency by adding water and boil nicely in a simmer for 5 to 10 minutes.

-After boiling, add 1 tsp of raw coconut oil as well as the seasoning with coconut oil, mustard, red chilli and curry leaves. Close the lid and leave it to soak all the masalas for half an hour.

-Serve with hot rice.

Note:

-After boiling, the gravy should be a little thicker than normal sambar.

-Taste should be sweet, sour, hot. So adjust the addition of jaggery accordingly.

– We usually relish this dish the next day of preparation, usually with Neer Dosa or chapati/Roti. 😊


Hitikida avarekalu/ Deskinned Hyacinth bean curry:

Avarekai has many names like Lablab or Hyacinth bean.

Avarekai is an integral part of every household of native Bangalore or Mysore region during every winter. People wait for its arrival. Winter special lima bean is called “Sogadavare” and it has double the aroma of what we get normally throughout the year.

DSC05495_Fotor

Initially I used to struggle with avarekai recipes and never used to get that authentic touch. Now over the years, I have mastered this authentic, tasty curry and my family started liking it and we do enjoy our share of this traditional curry with soft dosas.

If you are using fresh beans, it is a little time-consuming process. During the season we even get the deskinned ones. If you have frozen beans, curry making is an easy task.

At first, we will see the procedure of de skinning –

-At first take a fresh bean pod, remove outer thick green skin and separate the light yellowish green bean. Collect all the shelled beans, soak it in water for 3   to 4 hours.

Ribbet collage 1

 Now starts your time consuming real exercise. Dip your hand in water, remove soaked beans and start deskinning by keeping the bean in between your thumb finger and fore finger and press a little, you will see the transparent outer skin would flip and inner bean will come out. Continue the exercise until it is done and collect deskinned “Hitikida bele” and proceed to make very tasty curry.

Ribbet collage 2

Now we will see the procedure of “Hitikida bele saaru” /Curry

Ingredient-

Deskinned Avarekai – 1 big bowl

Onion – 1 for seasoning

Oil – 3 table spoons

Ghee – 2 tea spoons

Mustard – 1 tea spoon

Curry leaves – 2 springs

Green chillies – 4 (3 for grinding + 1 for seasoning)

Garlic – 8 cloves (4 for grinding + 4 for seasoning)

Coconut – 2 cups

Tamarind – marble size

 Coriander seeds – 2 tea spoons

Cumin – ½ tea spoon

Cinnamon – ½ inch

Clove – 2

Ginger – ½ inch piece

Coriander leaves – ½ cup

Method:

-Cook avarekai with required amount of water and salt. You can opt for a cooker or an open vessel. Slow coking gives a better result for this curry.

– Next is the masala preparation. Fry Coriander, cumin, cinnamon, cloves. When coriander becomes light brown, add garlic, ginger, green chillies, coriander leaves,tamarind and coconut and fry until it emits a nice aroma.

Ribbet collage 3

-Switch off the gas, cool the content and grind this in to a smooth paste by adding required amount of water.

-Now do the seasoning, heat oil, splutter mustard, curry leaves, garlic, green chilli, chopped onion and fry until onion becomes light brown.

Ribbet collage 4

-Add ground masala paste and fry for a couple of minutes. Add cooked avarekai and add enough water.

-At this time, consistency of the curry should be a little watery, as cooking proceeds and after some resting time, it becomes thick and becomes perfect.

Ribbet collage 5

-Boil this mixture until you see a thin creamy layer at the top.

-Switch off and pour 2 tea spoons of ghee, give one mix and close the lid. Rest this for some time, and serve with dosas, chapati’s or plain rice or jeera rice.

DSC05491_Fotor

Note:

-I usually prepare this curry in the night, and re heat and serve with dosas in the morning.

-In this way, it absorbs all the flavours and sets properly.