Salted jackfruit Vada / Sole vade:

Sole , uppad pachir , uppinalli hakida halasinakai , these are all different names of salted / brined jackfruit. Which is basically a firm fully grown, matured but un-ripened jackfruit which is preserved in salt water. We usually relish this in the rainy season or in the off season by preparing some of our traditional dishes.

Salting the jackfruit, side by side preparing the chips is part of our childhood memories – sort of a preparation for rainy season. Which used to be a family affair and real fun altogether. Now a days, if I need to do something, either ask mom or buy it locally from Mangalore stores . Last weekend got a fistful of brined jack from my sister in law and made this age old / my grand mom’s recipe. Which I used to relish during my childhood. Just before the process of putting the fresh ones, there used to be a process of cleaning and sterilising the porcelain jars or Barani.  Which used to include, the process of emptying last year’s stock as well 😀 . So, all these delicacies used to be a result of such operations 😉 . You can call this as Salted jackfruit Vada or thattai or Nippattu. We hardly need any preparation for this delicacy. Curry leaves is the main flavour over here.

Ingredients:

Salted / brined jack – around 2 fistfuls

Rice flour – around ½ cup

Cumin – 1 to 2 tsp

Chopped green chillies – 2

Chopped curry leaves – around ½ cup

If needed – little salt.

Oil – to deep fry

Method:

-Soak salted jack in a big bowl of water. Wash couple of times to remove excess salt.

-If salt is excess, sometimes it needs little extra soaking time in fresh water.

-Squeeze and as much as possible, drain the water and grind jackfruit pieces in a mixer jar.

-After grinding into smooth paste, add cumin, chopped green chillies, curry leaves, and mix it nicely.

-Now, take required amount of rice flour and make a pliable dough.

-Check for the salt, if needed add and adjust.

-Take one small piece of banana leaf or  butter paper. Pat small Vada.

-Heat oil and deep fry like any other deep-fried savouries. Enjoy with your evening tea or coffee.


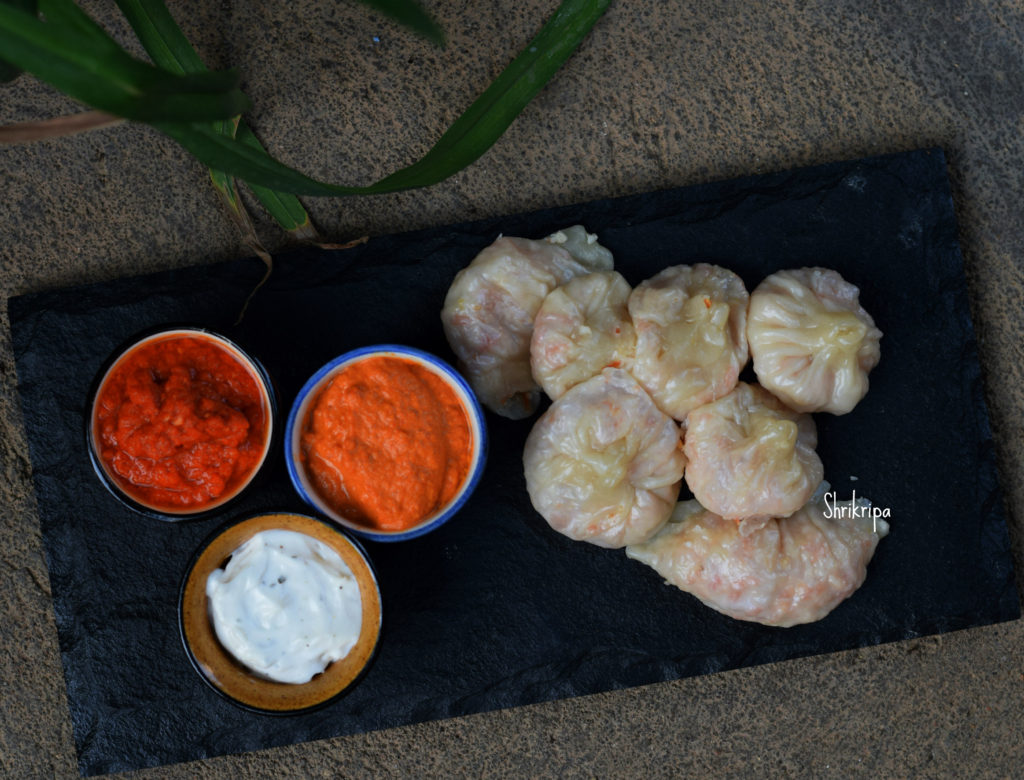
Veg Momo With Chilli and Peanut Chutney:

Should I say, Momo’s are everyone’s favourite or teenager’s favourite 😉 .

 If you have teens at your house, you can relate to me 😀 . Yes, it is the easiest, cheapest and tummy filling, in their language, it is healthy too 😉 . My daughters were missing their friend group as well as their usual outing to eat Momos with 3 dipping sauces 😀  I had the recipe of Momo as well as an easy chutney recipe ,which I had noted down during our Gangtok trip from a couple of local people there.

Tried my hand at an elaborate procedure and felt happy to see a happy face as well.

You can prepare chutney in the beginning and keep it ready, before making momos.

For Momo: It gives around 15 momos

At First: Outer covering/Dough:

Ingredients:

All-purpose flour – 1 cup

Salt

Oil – 2 sp

Water – to bind.

Method:

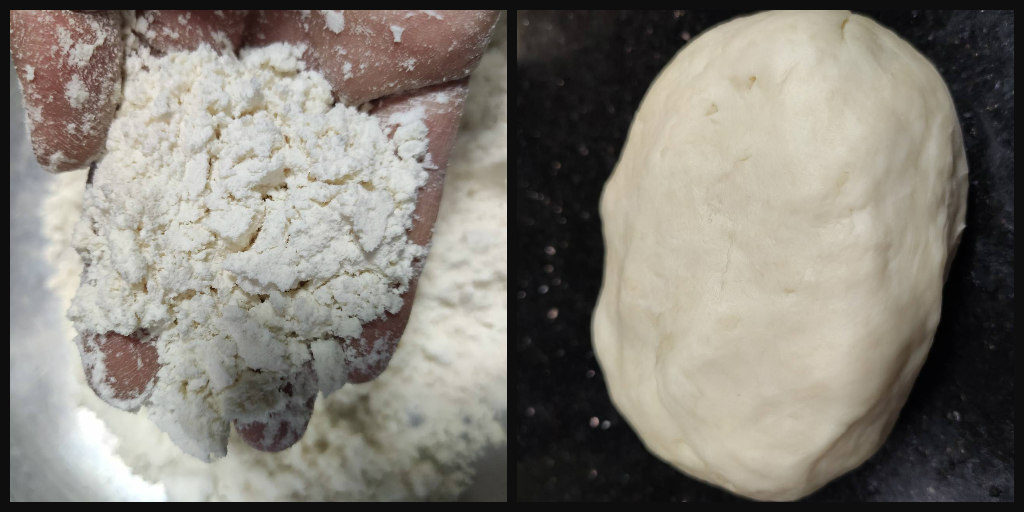
-Take a flour, add salt, oil. Rub for a while and make a pliable dough. Cover with a wet towel and keep it for rest, while preparing stuffing.

Second: Inner stuffing:

Ingredients:

Cabbage – 1 cup (grated)

Carrot – ½ to 1 cup (grated)

Onion – 1 (chopped)

Ginger – 1 tsp (grated)

Salt

Method:

-Mix everything, keep aside for 5 minutes. Drain all the water, which oozes out by holding/ placing in your palm , folding, and squeezing properly.

-Drain the liquid and keep it ready.

Final step: Folding and steaming

-Take ready dough, take a small portion , make a ball, apply little oil to flat surface as well as to wooden roller.

-Prepare a small disc by rolling, place a little filling at the centre. You can then either close it by folding like how I did . (Lift one side make pleats and fold to the other half and seal the edges OR gather all around and close it at the centre top like a cone.)

-Prepared Momos  should be under wet towels to avoid any dehydration.

-After making some , you can start to steam, by placing it in an idli /Momo steamer. Line the steamer either by spreading banana leaf, parchment paper/ butter paper or by oiling.

-Steam for 10 minutes and serve with any kind of chutney or sauce.

Now we would see how to make,

Hot chilli Chutney and Peanut Chutney to go with steamed momos:

It is sort of a one by two preparation. At first, we are going to make chilli chutney, divide into half and add roasted peanut to one half, grind and make really tasty additional dish.

For Chilli Chutney:

Tomatoes – 4

Red Byadagi chilli – 4 to 5

Garlic cloves – 5 to 6

Roasted sesame seeds – 2 tablespoons

Salt

Method:

-Take a half cup of water, boil and add red chilli, halved tomato, and boil for 2 more minutes.

-Remove outer skin from the tomato , cool.

-Take a mixer jar, powdered sesame, add peeled tomato, cooled red chilli with water, salt and grind smooth.

-It is our Hot Chilli chutney.

For Peanut Chutney:

Roast fistful of peanuts, cool and powder it. Add half the quantity of chilli chutney , little salt, and grind into paste. Voila!!! Your two sides are ready to indulge .

If you like Mayonnaise ,fill the third cup and indulge 😊

Note:

Don’t discard  the vegetable water, which can be used while kneading the dough for any kind of roti’s. 

If you want to serve these momo’s to any kind of parties, prepare before hand, keep inside the fridge /freeze, steam on that day, before serving.

Chibud Harshale/ Mash melon Rasayana:

Chibud is a variety of Melon which is oblong and larger in size, normally found in various parts of India. Known by many names like chibbada, Chiber, Mash melon, Cucumis melo.

It belongs to the melon family; outer skin is like coloured cucumber and taste is bland and fleshy. Normally used in a raw uncooked form by making juice, lassi, salad or coconut milk or plain milk laden Rasayana as well as Poha added Rasayana. which is a snack by itself and considered as a Vrat/ fasting Food.

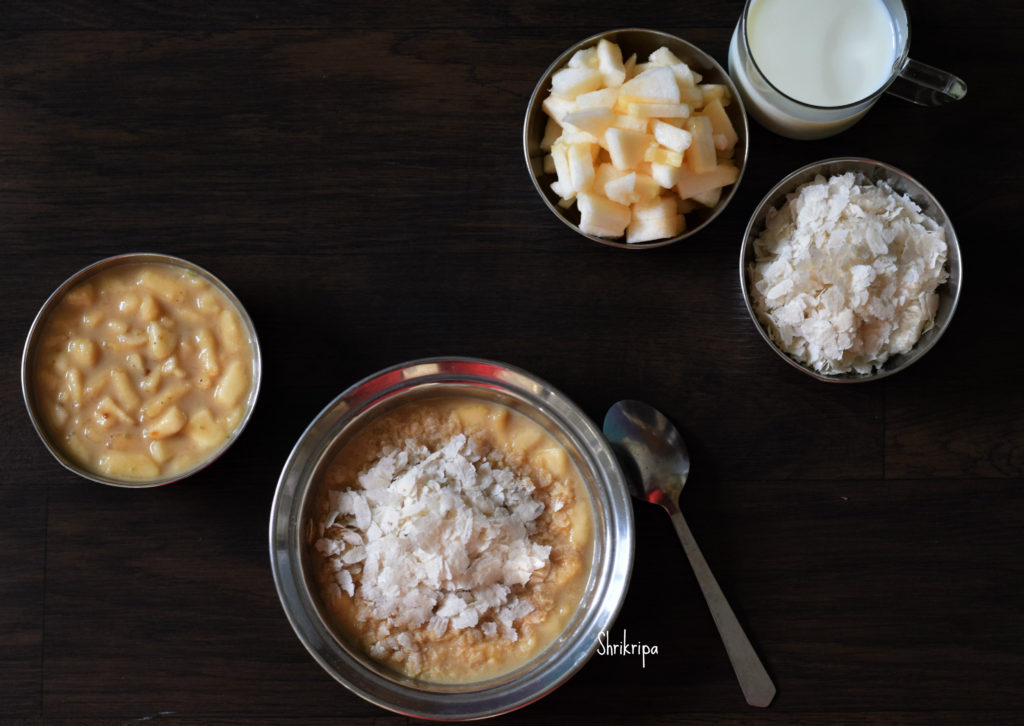
Just few days back, when I was returning from Karkal, found this fruit after a long time and picked up and relished with family by making Poha added Chilled Rasayana in this summer Heat.

If you want to try this recipe, you can use over ripe musk melons or Banana and proceed.

Ingredients:

Chibud melon – 1

Grated jaggery – as required

Coconut milk / plain milk – 1 to 2 cups

Cardamom powder – 1 tsp

Poha – little

Method:

-Chop Chibud melon into small chunks by removing outer skin as well as centre core.

-Mix in jaggery powder, cardamom powder and mix nicely.

-After mixing jaggery, it melts a little. If you are serving it chilled, refrigerate it.

-While serving, mix in coconut milk or plain milk according to your choice.

-Add little poha and serve as a cool snack.

Peanut Cookies with Millet :

When I was trying out some recipes for 2019 Millet calendar, I dished out a couple of recipes, which had turned out super tasty, and at the same time, healthy too.

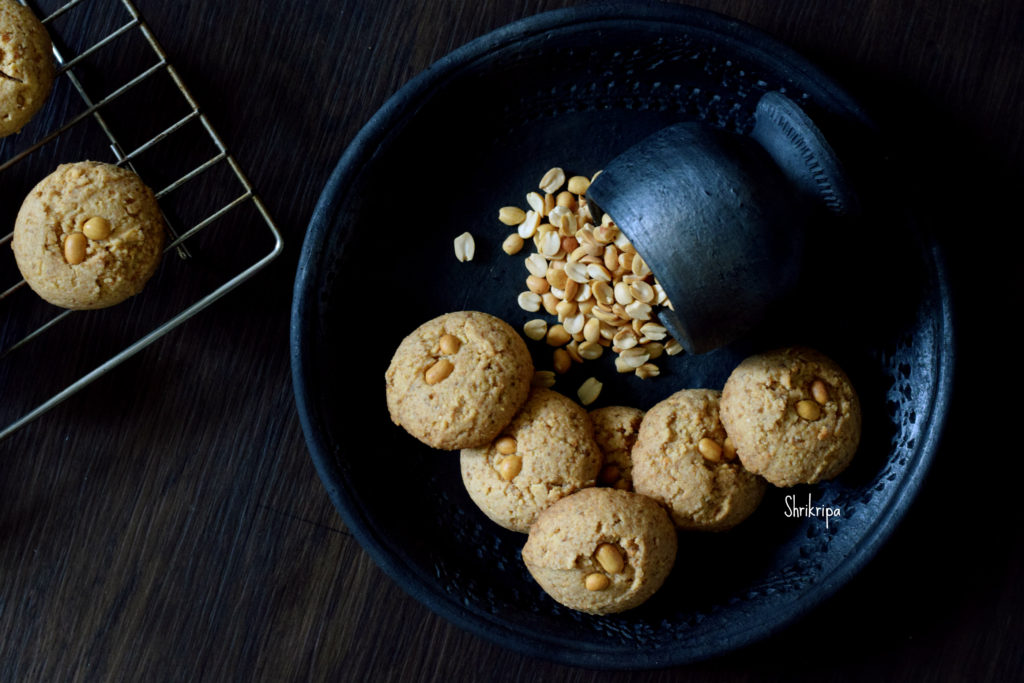
Here, I have used Samai rice which is known as Little millet in English. I had some little millet flour and made fresh Peanut powder at home and proceeded. It had turned out super delicious as well as creamy/buttery, and at the same time crunchy on the outside.

Ingredients:

Samai flour/ any millet flour – 1 cup

Whole wheat flour – ¼ cup

Peanuts – 1 ½ cup (roasted)

Powdered Sugar or Jaggery – ½ cup

Salt – ½ tsp

Butter – 100 grams

Method:

-Grind peanut in a mixer jar as fine as possible.

-Take one bowl, cream butter and sugar, salt. Add flours, powdered peanut and make a dough.

– Make a uniform sized ball, arrange in a lined baking tray.

– Bake this for 12 to 14 minutes in a pre-heated oven at 170 C.

-When it is done, remove carefully and cool. Store this in an airtight container.

Cranberry and White chocolate cookies:

It is an easy, eggless, one bowl recipe. No baking powder or soda in it. To increase the protein quotient, I have added little moong ( green gram dal) flour as well. These white chocolate cranberry soft, chewy , flavourful cookies are so simple and so addictive! 😀

Cranberries and white chocolate make the best Christmas coloured cookie. You can see one more green gram flour/ gluten free cookie over here .

Ingredients:

All-purpose flour – 3/4cup

Green gram/ Moong dal flour – ¼ cup

Butter – 100 grams

Sugar – ½ cup (powdered)

Dried cranberry – ¼ cup

White chocolate chips – ¼ cup

Method:

-Mix All purpose flour and moong dal flour and keep it ready.

-Beat butter and sugar until fluffy and soft, either by using hand or food processor.

-Now add flour and mix until u gets uniform mass. Add in white chocolate chips and dried cranberries and make a dough.

-Now take one cling film sheet and keep this dough over it, on a flat surface and make squarish or round log, maintain uniform shape and cover with wrapping. Keep it under refrigeration for an hour.

-Now take your baking tray and line with a butter paper.

-After one hour, remove this dough from the fridge and unwrap the Clingfilm cover, make slices of ½” thickness and arrange these pieces in a lined baking tray.

-Bake in a pre-heated oven at 170°C for 14 to 18 minutes.

-Cool this on a wire rack and store this in an airtight container.

-My family just loved it and hope you also like it as much as we did.

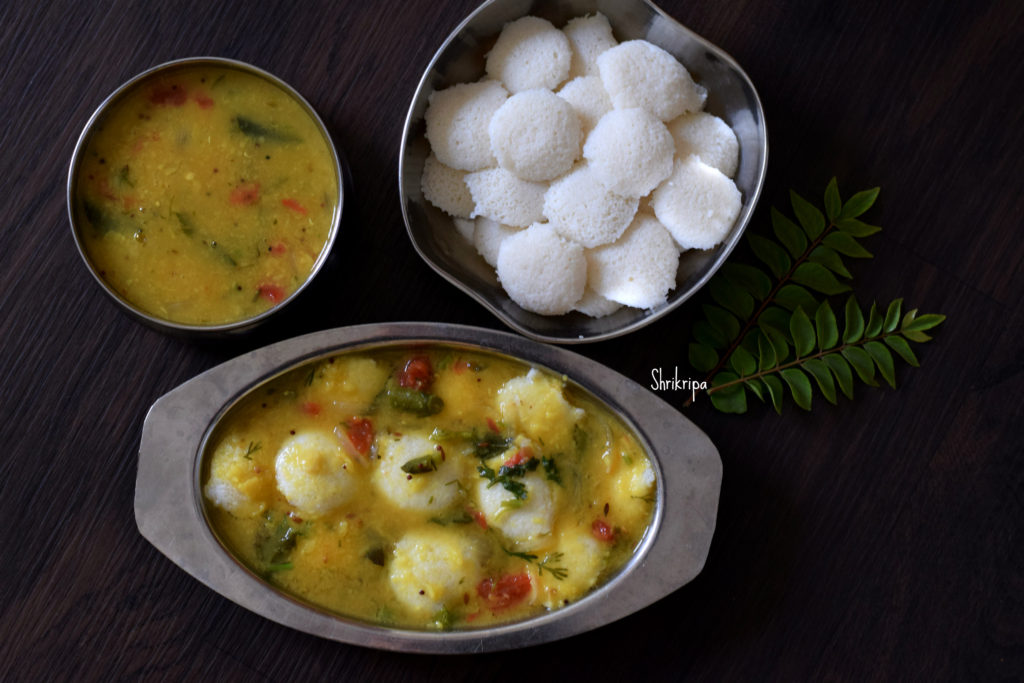
Idli soup /Side dish for Idlies :

Idli dunked in hot dhal is known as Idli soup. Which is an ideal breakfast, especially when you are not well and craving for a soothing meal. It is one of our favourites too.

Here dhal is made by mixing Toor as well as Green gram / moong dal.

Ingredients:

Toor dal – ¾ cup

Moong dal – ¼ cup

Turmeric – ½ tsp

Ghee – 1 tablespoon

Mustard – 1 tsp

Cumin – ½ tsp

Hing – ¼ tsp

Curry leaves – 1 spring

Ginger julienne – 1 tsp

Green chillies – 2 to 4

Onion – 1 Small ( chopped )

Tomato – 1 small (chopped)

Lemon – (optional)

Method:

-Wash both the dals, cook by adding turmeric and water, mash and keep aside.

-Do seasoning: Heat ghee, splutter mustard, cumin, hing, curry leaves, green chillies, ginger, onion  and fry for a while.

-Add chopped tomato and fry further. Add mashed dhal, sufficient water ,salt, boil for a while.

-Garnish with coriander as well as little lime juice and serve with idlies .

Note:

-This dhal should be a little thin in consistency.

-Dunk idlies with soup and enjoy.


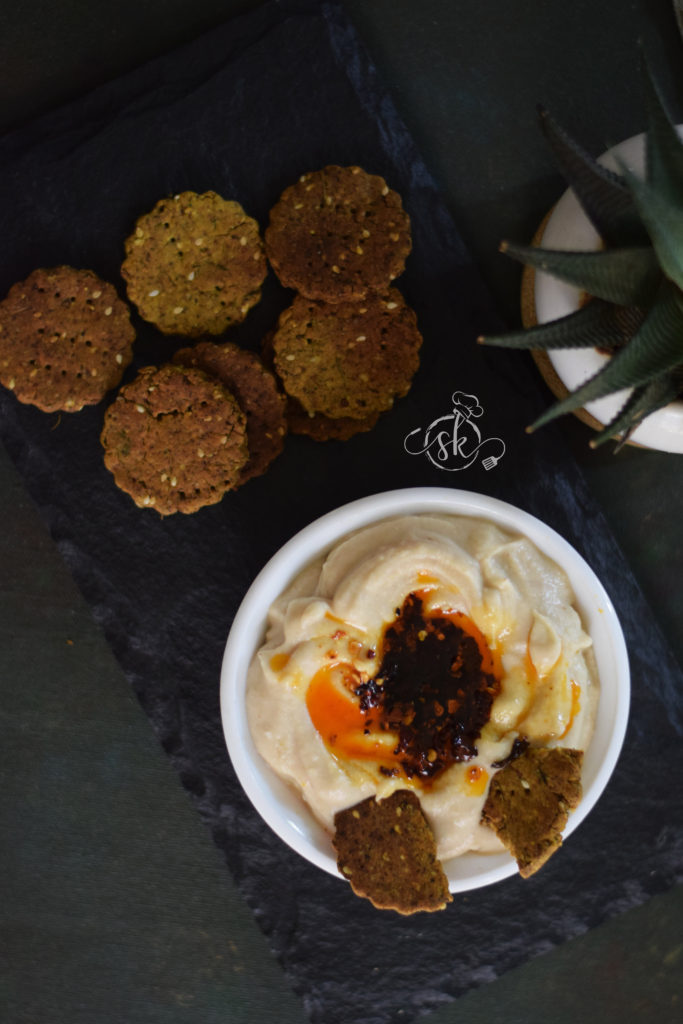
Baked Cracker by using Ghee Residue:

By now, you would know about my love towards brown sediment which is known as ghee residue. Ghee residue is a moist, brown coloured by-product formed after preparing ghee from white butter.

Ghee residue is a rich source of essential fatty acids, natural antioxidants and proteins.

I have shared my experiments with ghee residue earlier. It all started by trying simple tea cake ,then chocolate cake  then apple -cinnamon cake and by trying chocolate chip cookies.

This time I did try some savoury version, and everyone liked it and it turned out pretty well.

You can use whole wheat flour and oats or a mixture of any flour of your choice.

Ingredients:

Ghee residue – 2 -3  tablespoons

Curd -2 tbl spoons

Water – 4 tbl spoons

Jaggery or sugar – Acc to the taste

Mixed spice powder – 1 tbl spoon (pepper-cinnamon-ginger)

Salt

Whole wheat flour – 1 cup

Powdered Oats – 2 tbl spoons

Rice flour – 2 tbl spoons

Kasuri methi – 1 tbl spoon

Turmeric – 1/2 tsp

White sesame seed – 1 tsp

Method:

 -Take the ghee -residue and all the dry ingredients and mix everything properly. Add curd and sufficient water to make a pliable dough. 

-keep the dough covered, and rest for 30 minutes.

-After 30 minutes, take a small portion, make a ball and roll like thin roti /chapati, cut this by using a cookie cutter or pizza cutter.

-Bake in a pre-heated oven at 170 -180 °C for 20 – 30 minutes.

-After cooling for some time, take out it would turn crispy and enjoy it with a cup of coffee or tea.

-Store it in an airtight container. It stays good for many days, and it is an excellent snack for growing up kids as well.


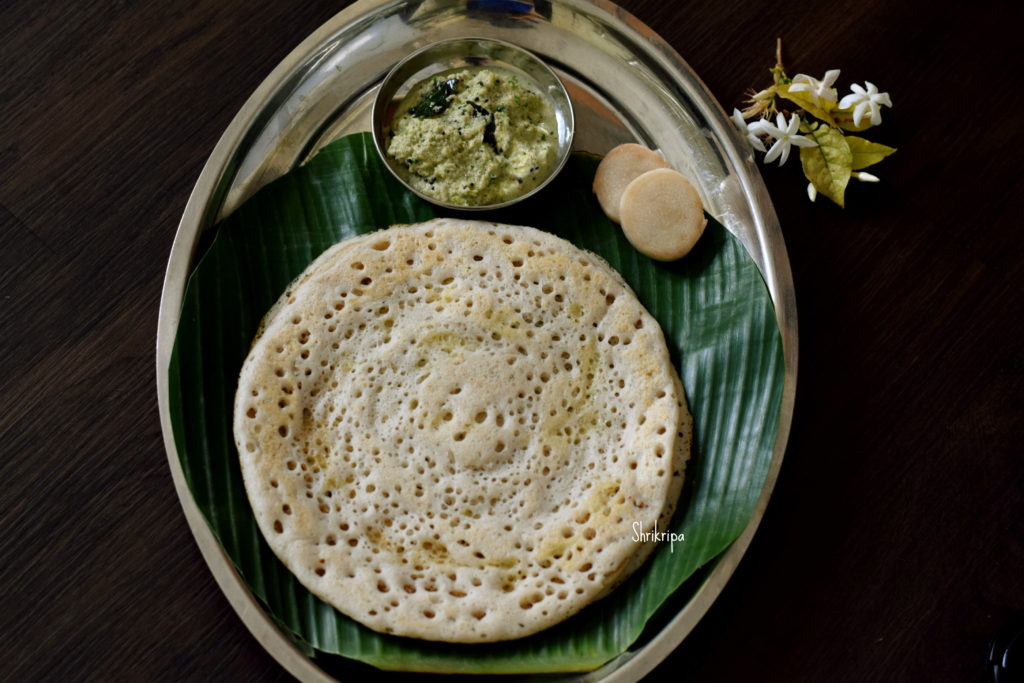
Plantain stem dosa / Bale dandina dosey:

Every part of the banana plant has its own benefits to our health. Banana stem is one such thing, which is high in fibre and filled with nutritious water. It is very good for Human gut as well as kidney.

The juice of the banana stem helps in flushing out of toxins as well as to prevent kidney stone formation as well. Overall it acts as a healing food for human body. In coastal Karnataka, we do use plantain stem or flower in various recipes. Today I am going to share our traditional Dosa recipe and previously I have shared Raw salad as well as Rasam recipe.

Plantain stem dosa turns out porous, soft as well as crispy and goes very well with any side dish of your choice.

Ingredients:

Dosa rice – 2 cups

Urad dal – ¼ cup

Methi seeds – 1 tablespoon

Banana/ plantain stem – 2 cups

Salt

Method:

-Wash , soak dosa rice, urad dal, methi in water for 2 to 3 hours.

-Chop Banana stem as I have shown in the picture below.

-Grind soaked rice and chopped plantain stem pieces by adding sufficient salt into smooth paste.

-Ferment overnight or 8 – 10 hours. Next day prepare Dosa .

-If you like crisp roasted one, spread as thin as possible on heated iron griddle.

-Serve with coconut chutney or any other curry.


Halasina hannina Guliyappa/ Jackfruit Paddu:

Jackfruit is an integral part of our kitchen during the Summer months. In our native, it is an everyday affair to make something or the other out of home-grown huge jack fruits. A lot of family bonding happens during its chopping, separating the fruit bulbs and cleaning. After cleaning, it is time to think about what to make? One says Dosa, other one Kottige or Guliyappa. Even after making all these delicacies if it is in excess, then it is time to make Berati and preserve it for a long.

Guliyappa is usually an instant thing if the rice has been soaked and ready. But I like Paddu out of fermented batter. Let us see how I make it.

Ingredients:

Dosa rice – 2 cups

Jackfruit – 1 big bowl

Coconut – 1 small bowl

Jaggery – I piece (according to taste) Or Jaggery Syrup as needed.

Salt

Method:

-Wash, soak Dosa rice in water for 3 to 4 hours. Clean jack fruit bulbs by removing fibre and seed.

– Drain the water, grind Rice, jaggery ( I would suggest using jaggery syrup), salt, coconut and chopped jackfruit with adding minimal water.

-The batter should be a little coarse, and the consistency should be like idli batter (should neither thick nor thin)

-Allow fermenting overnight in cold weather, or 2 to 3 hrs is enough.

-Heat Appe or Paddu pan. When it is hot, pour ¼ tsp of ghee or oil.

-Pour the batter into each mould, close the lid, and cook for a few minutes.

-Flip the side and cook the upper side as well.

-Serve with chutney. We normally prefer Ginger and coconut chutney as a side dish for jackfruit items.

-Repeat the process and enjoy your breakfast or brunch or dinner.

Note:

For ginger chutney: Fry red chillies with little oil and grind this with coconut, salt, tamarind, and a piece of ginger.

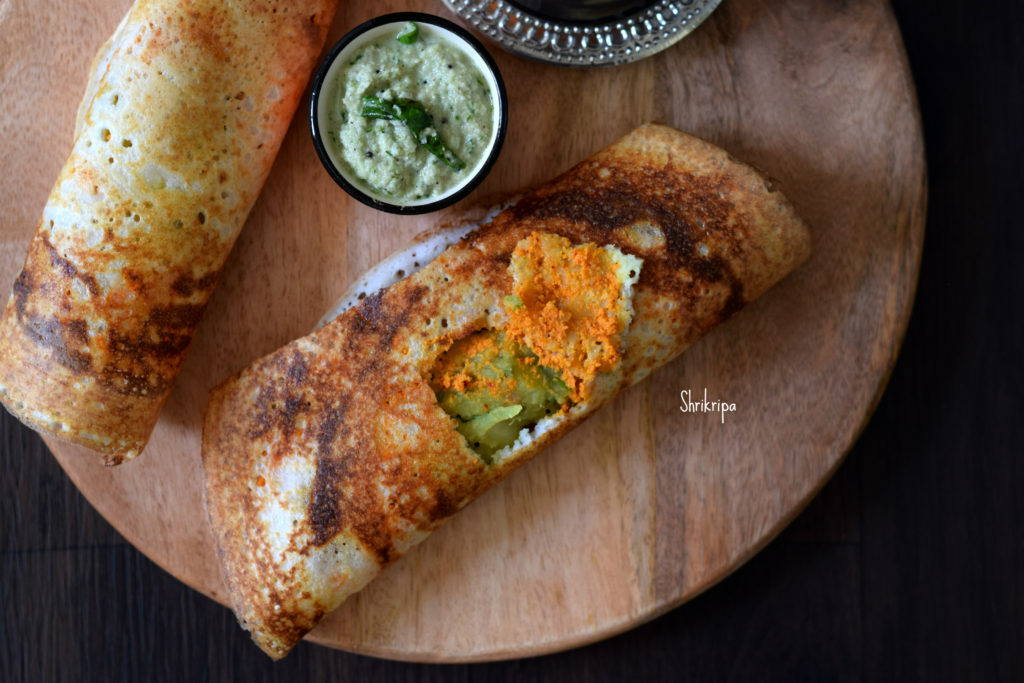
Masala Dosa:

Who doesn’t love Masala Dosa? It is an absolute favourite in our family.

A properly made crisp Dosa is very delicious if the batter is perfectly fermented with little sour flavour and correct consistency.

Normally Masala Dosa can be served either by applying Red chutney or Green chutney.

Red chutney what I make is not very hot and made with only chillies. It is coconut-based garlic flavoured chutney.

In other hand, green chutney smeared Dosa is something I relish in Hotel MTR outlet in Bangalore. I tried to replicate the taste at home, and it is once again a coconut chutney, which is flavoured by coriander leaves.

In our coastal region, you never get to see red chutney applied Masala dosas. It is normal paper plain Dosa with bhaji at the centre and rolled like a paper roll and served with the watery ginger chutney and sambar as an accompaniment.

In our house we normally make red chutney and apply and enjoy garlicky flavoured chutney with aloo masala.
First, we will see How to make Dosa Batter:

Ingredient:

Dosa rice -1 cup

Idly rice -1 cup

Urad dal – ½ cup

Bengal gram/Chana dal – 1 tbl sp

Fenugreek/methi seeds – 1 tsp.

Beaten rice – ¼ cup

  Method:

-Wash all these ingredients couple of times.

-Soak this in a sufficient water (washed rice and dal should submerge) for 3 to 4 hours. Drain water from the rice and keep aside. This water is used while grinding according to the requirement. Grind soaked rice –dal mixture by adding salt in to a very fine /smooth batter by using wet grinder or Mixer grinder. I prefer Wet grinder and it certainly gives much finer, perfect batter. After removing the batter adjust the consistency by mixing properly. Now keep this ground batter for fermentation in a big vessel, so that it will allow room for puffed/fermented batter. It will take anywhere between 8 to 16 hours (according to the outside weather)

Note: In Bangalore I usually soak my lentils around morning, grinding happens around afternoon 2 to 3 pm and until next morning I keep the batter for fermentation. This is how I get my perfectly fermented batter. 

Potato Bhaji/ filling:

Ingredients:

Potato – 6 big

Onion – 3 big

Green chilli – 2 to 3

Grated ginger – ½ “

Turmeric – ½ tsp.

Salt

Seasoning: Coconut oil -2 tbl sp, mustard- 1tsp, Urad dal -1 tsp., chana dal-1 tsp, Cumin seeds – ½ tsp, hing – ¼ tsp, Red chilli -1, curry leaves -2 springs.

Chopped coriander leaves for garnishing.

 Method:

-Wash potato cut in to half and put this in a cooker with sufficient water. Cook for two whistles. Cool, remove outer skin, mash and keep aside.

-Slice onion and slit green chillies.

-Take one kadai, add coconut oil, mustard, when it starts to splutter, add cumin, hing, Urad dal, chana dal, red chilli. When dal becomes red add Curry leaves, slit green chillies and onions.

-Add turmeric and fry onions till it becomes light brown.

-Now add one to two cups of water, add salt.

-When water starts boiling add mashed potato and mix nicely. Check for the seasoning and close the lid and cook for a while until it becomes homogenised and water drains.

-Switch off the gas and garnish with chopped coriander leaves.


Red Chutney: It is garlic flavoured very thick coconut chutney.
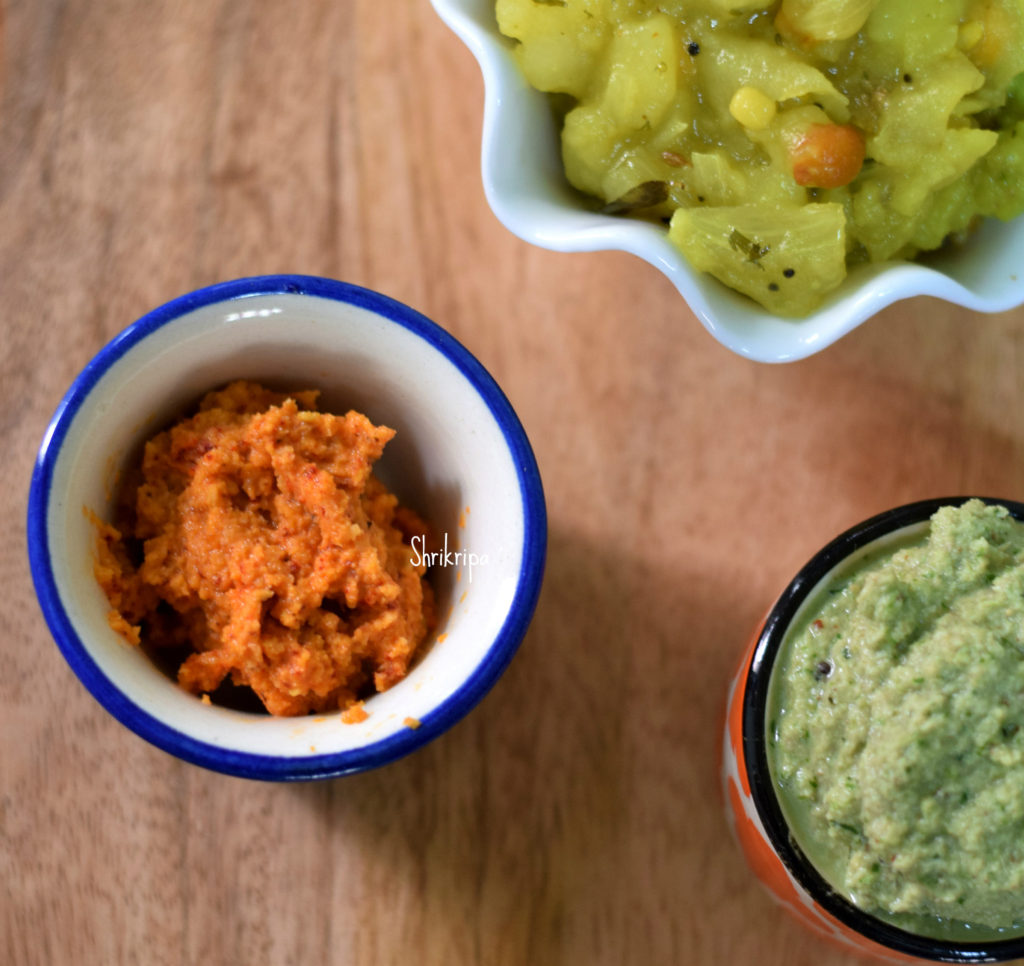
Ingredients:

Grated fresh coconut – 1 cup

Red chilli – 2

Garlic cloves -7 to 8

Tamarind – ¼ tsp.

Salt

Method: Roast Red chillies by putting ¼ tsp of oil.

Put all the ingredients together in a mixer jar, dry grind at first and then put very little water and make very thick consistency. This chutney is used for applying over the Dosa while making.


Green chutney: This chutney can be smeared as well as served as an accompaniment with Dosa. If you are smearing, keep the consistency little thick and if you are serving as a side, you can add little water and make it thin.

Ingredient:

Grated fresh coconut – 1 cup

Roasted gram/ puffed gram – ½ cup (putani or Hurigadale)

Green chillies – 3 to 4

Tamarind – little

Sugar – ½ tsp

Salt

Coriander leaves – 1 small cup

Curry leaves – 1 spring

Method:

Fist grind coconut, puffed gram, salt, tamarind by adding little water. Then add chopped coriander and curry leaves and churn a little and add seasoning with mustard and curry leaves.


White Coconut Chutney: This is served as a side dish and usually with ginger flavour.

Ingredients:

Fresh grated coconut – 1 cup

Green chilli – 1 or 2

Tamarind – ¼ tsp.

Salt

Ginger – ½ “     

Method: Grind all these by putting sufficient water and adjust the consistency. Do seasoning by putting coconut oil, mustard, red chilli and curry leaves.


How to Prepare Masala Dosa:

Now everything is ready, and we can proceed with our preparation.

-Keep the Dosa griddle over the gas stove for heating. You can use Iron griddle or Non-stick one.

-Nicely mix fermented Dosa batter and check for the consistency. If it is thick add ½ cup of water and adjust and keep it ready.

-When Dosa tawa becomes hot, pour one serving spoon of Dosa batter, move spatula in to a circular motion and spread the batter.

-sprinkle little ghee /butter/oil and cook until it is little brown in a low flame.

-when it is light brown spread Red garlic chutney or Thick green chutney at the centre of the Dosa in a circular motion and keep one serving spoon of potato filling at the centre and fold.        

-Now serve this ready Masala Dosa with White coconut chutney and Enjoy.