Ubbu Rotti : ( In a Traditional way)

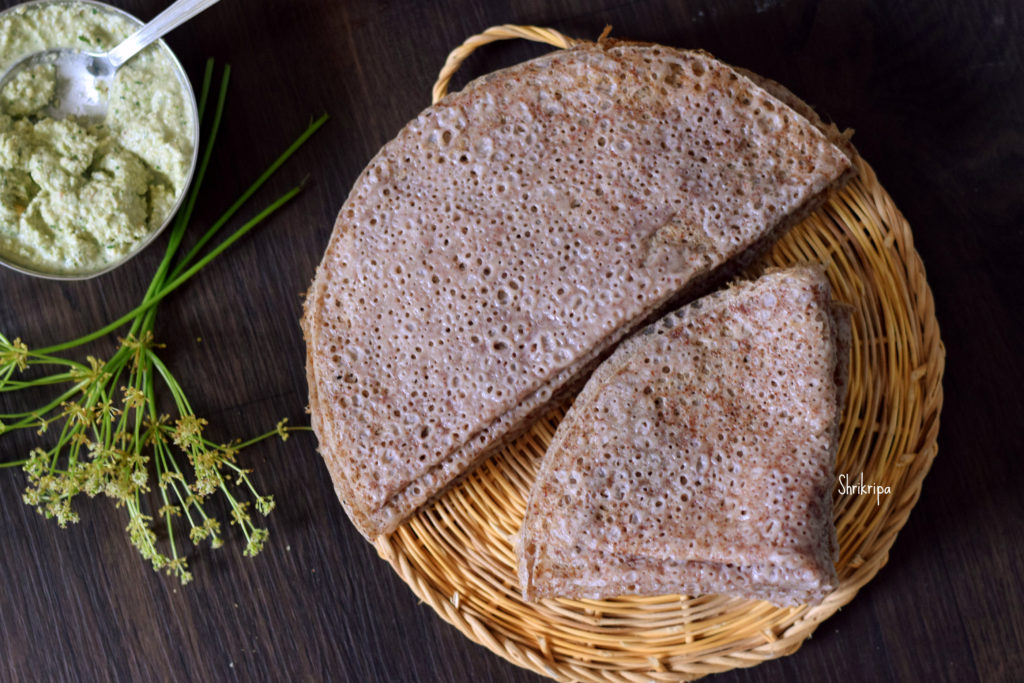
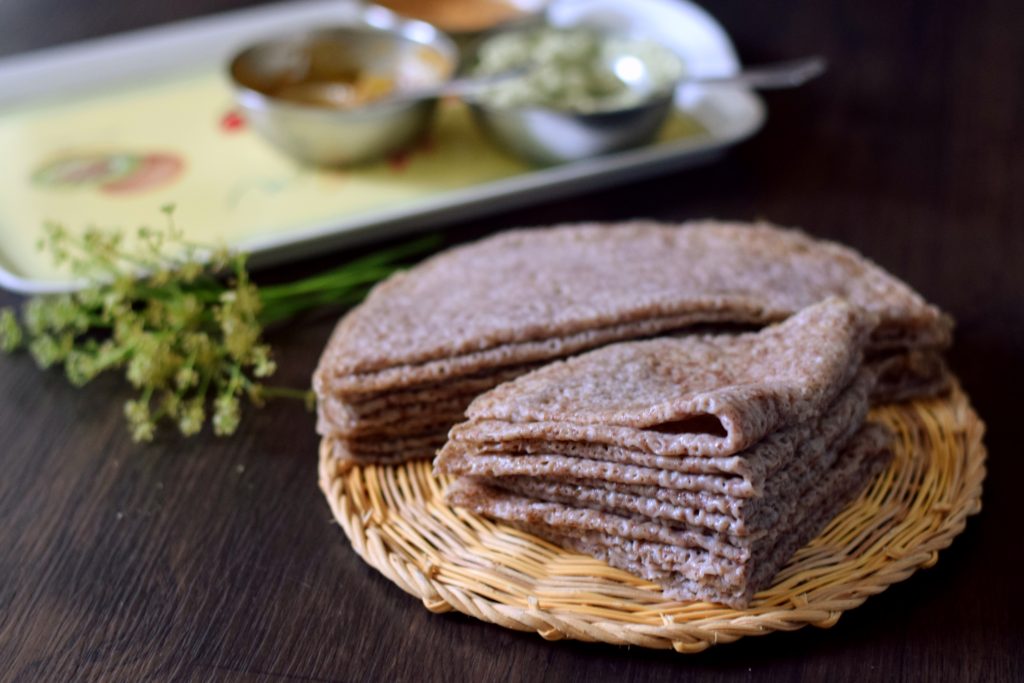
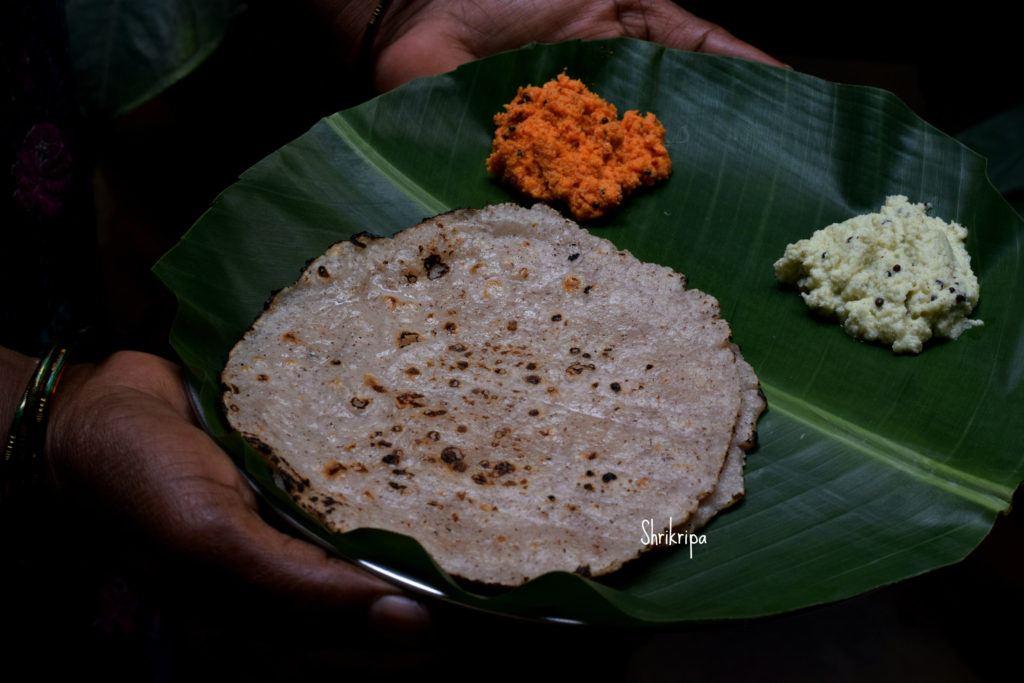
Made Ubbu Rotti for today’s lunch, one of the most laborious and very tasty dishes of south canara region. It is a simple rice flat bread and made by soaking Red rice. This is an age old, gluten free and healthy flat bread.

Ubbu Rotti is made as well as served in different styles. Each household has their own method even though the basic ingredient is the same Red rice which is also known as boiled rice or Kerala Matta rice.

In our household we make the Rotti by soaking Red rice and Idli rice in hot water and ground to smooth batter with salt. The ready batter is then cooked on a low heat to make a dough. Then it is pressed into discs by keeping in-between the two plantation leaves. In our native, people use clay tawa to cook the roti. I normally use my Iron Roti tawa. After cooking on both the sides, normally in villages, we put it on “Kenda” (hot burning firewood) to puff up nicely. Here I normally use direct gas flame to do the same. It is low in calorie as well as very healthy and tasty.

While serving, some families prefer chutney and some Malabar spinach gravy. It depends on one’s family preference. In our household, my Mom used to serve Garlic or Onion chutney and Mom -in -law used to serve with Raw mango chutney.

I have mentioned that it is laborious at the beginning itself. You must be thinking by now, why? It is very simple and straight forward and sounds easy as well. I am telling you, it is one of the most difficult recipes to master! Because it needs a lot of patience and time. Roti cooks really slow and vanishes very fast as well 😉 Once you get a hold of it, you can make it very easily. So, if you attempt and practice you will get the hang of it and can make easily.
Ingredients:

Boiled rice – 1 cup

Idli rice – 1 cup

Salt

Coconut oil – to apply

Method:

-Wash rice and soak it for one to two hours by adding hot boiling water and close the lid.

-Grind into smooth batter by adding enough water.

-Cook the batter( I normally add 1 tsp of coconut oil to batter to enhance the taste)  until it forms a dough consistency.

-Take out and cool a little and start making the discs.

-Take small banana leaves, wash and keep it ready as well as a roti presser or two wooden planks to press.

-Take a big lemon size dough and knead a little and form a round shape.

-Take one banana leaf, place it on a roti presser. Place the dough roundel over it and close it with another leaf and press the presser. If you are using plank, do it exactly like this by using the plank.

-Heat the griddle, place the discs (including banana leaf) over the hot iron griddle. Cook in a medium heat.

-Flip the sides couple of times, when roti cooks, leaf will become loose and at that moment, remove the leaf and discard it.

-continue to cook the roti, until you see the light brown spots. Now it is the time to place it on the direct fire and do it. Some would puff, some would not or partially puff.

-That is it. Remove, apply some coconut oil and enjoy with Onion/garlic chutney or Raw mango chutney or Malabar spinach curry.



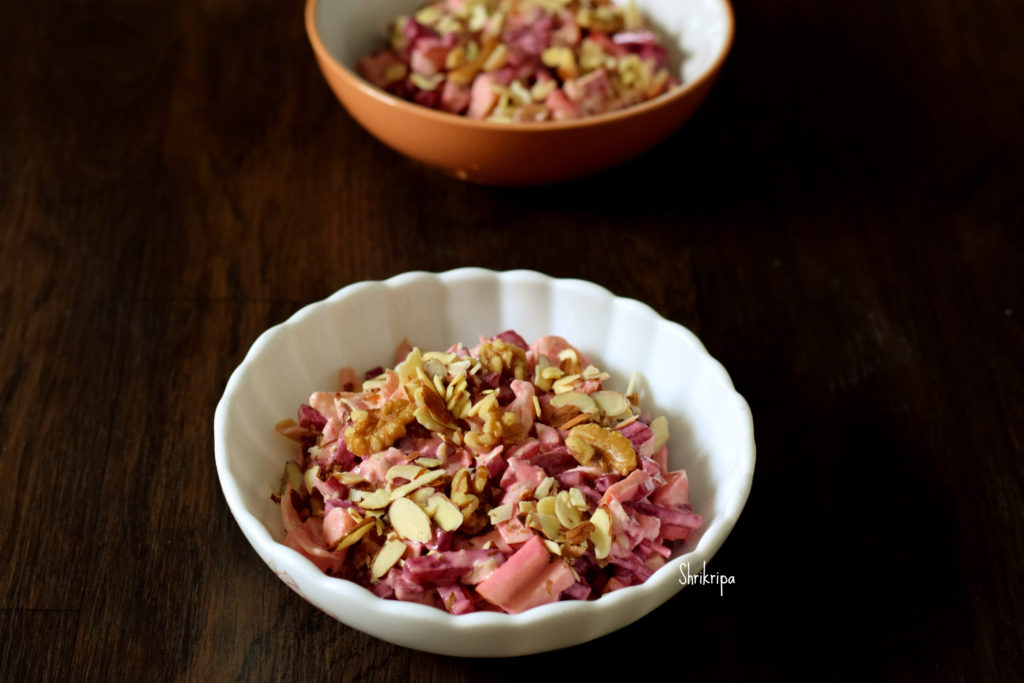
Beet and apple salad:

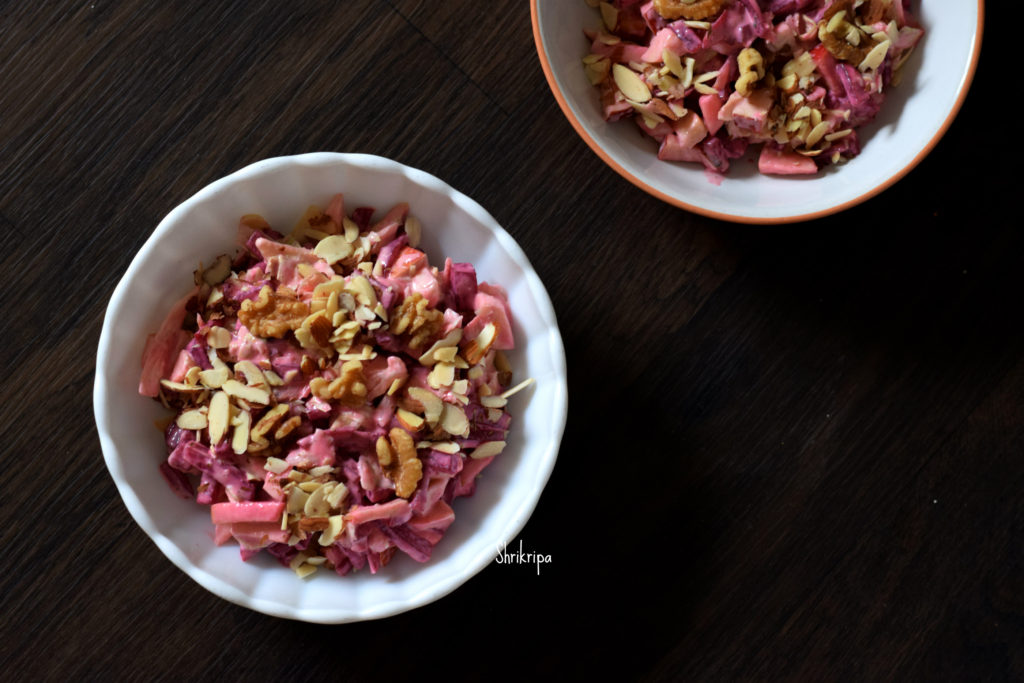
Low calorie eye pleasing, wholesome salad . This is a very light and tasty salad and at the same time, crunchy and healthy too. This salad gets its pink colour from boiled beetroot. Dressing is very light with the usage of hung curd in it. It is a complete meal by itself with loaded nutrients.

Ingredients:

Beetroot – 1 big.

Apples – 2

Lettuce – 6 -8 leaves

Vinegar – 1 tb Sp.

Dressing: Hung curd – 1 cup , mayonnaise – 2 tb spoon ,garlic salt ,sugar -1 tsp ,English mustard – 1 tsp.

Garnish : roasted nuts of your choice

Method:

-Wash beetroot , peel outer skin and chop it into finger shaped pieces. Take one cooker and put some water and cook . After one whistle ,switch off ,cool and drain and mix vinegar to this and keep this  atleast for 2 hrs in the fridge.

-When you want to prepare salad , mix all the ingredients listed under dressing and keep it ready.

-Chop Apple . Make lettuce strips and add this to prepared dressing ,add in marinated beet too and mix.         


-While serving ,garnish with roasted walnuts/pine nuts or any other nuts of your choice and enjoy.


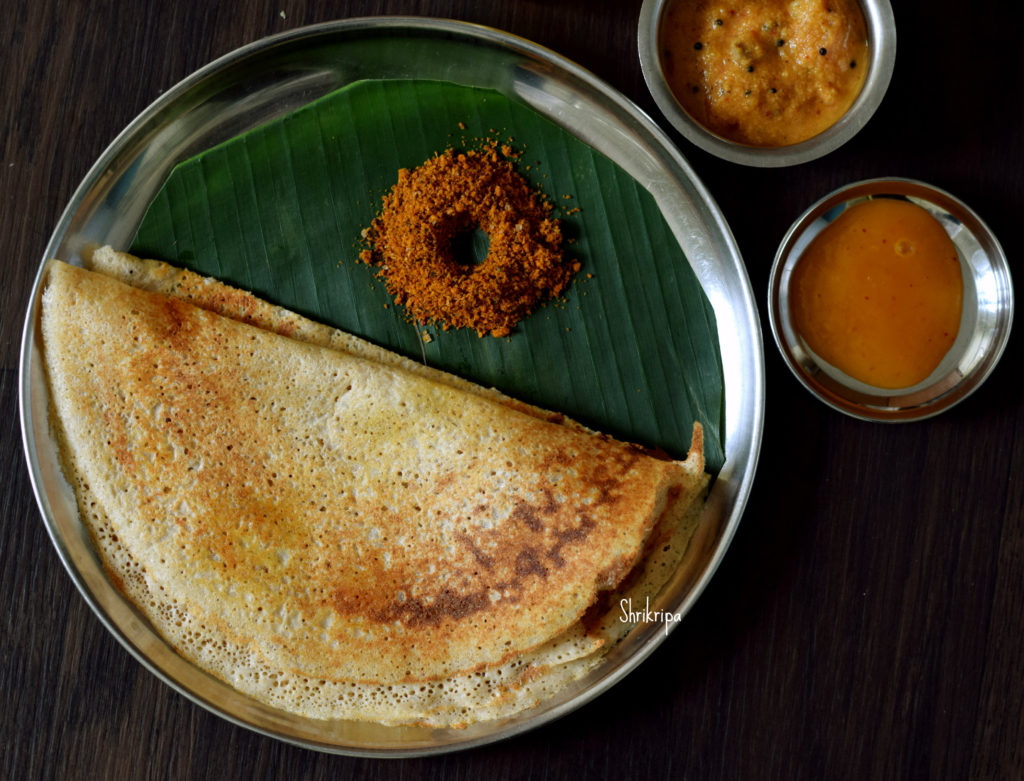
Steel cut Oats and lentil Dosa:

It is a no rice urad dal Dosa. I have used Steel cut oats  or broken Oats instead of rice and avoided rice fully in this batter. These oats are considered as cut pieces of original grain. It is healthy compared to quick cooking oats. It takes much longer time to cook but when it is soaked and ground, almost tastes like rice and you can’t figure out the difference. This is Gluten free, high in fibre, protein and iron. It is low in glycaemic index.

I have bought Kosh broken oats to try out my experiment and it is whole oat grains cut into smaller pieces. It looks like broken wheat. When it is cooked, tastes like our broken wheat with outer thick skin with nutty taste. Loaded with insoluble fibre which helps in our gut health as well. Because of its low glycaemic property, it is a very good option for diabetic people and its fibre level will help to keep them full for longer hours.

I have used my regular plain Dosa batter recipe. I simply avoided rice and added broken oats.

Ingredients:

Steel cut Oats – 2 cups

Urad dal – ½ cup

Methi – 1 tea spoon

Chana dal – 2 table spoons

Poha – 1 fist full (optional)

Salt

Method:

-Wash oats, urad dal, methi, chana dal twice and soak this with poha (if you are using) for 3 to 4 hours.

-Grind this soaked ingredient by adding soaked water little by little with added salt.

-Ferment this batter over night or 8 to 10 hours according to the climatic condition.

-When it is ready, mix nicely, adjust the consistency of the batter and start making dosas by heating iron griddle.

-Take one ladle spoon of batter, spread into thin Dosa, pour oil or ghee and roast on one side, then flip and cook the other side, remove and serve with chutney or sambar.

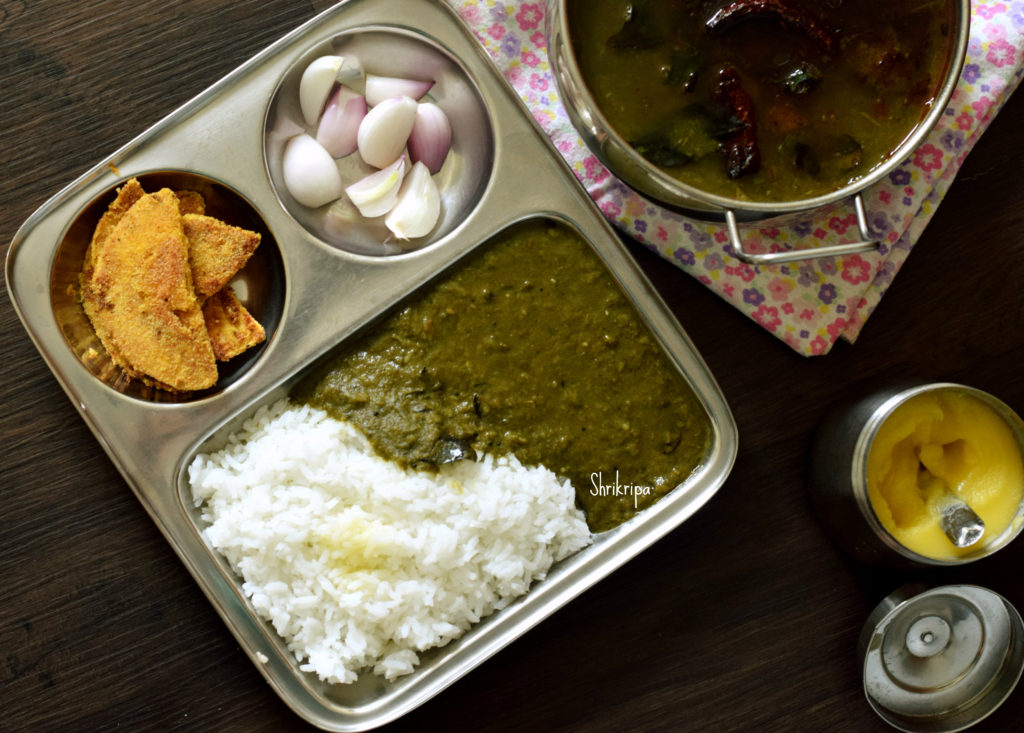
Massoppu by using Anne Soppu / Water spinach:

Massoppu is nothing but mashed greens with cooked lentils, which is the staple food of Bangalore- Mysore region and is an excellent accompaniment with either Ragi balls or rice. Usually Massoppu is prepared with mixed greens, which is available throughout the year.

We all know the fact that leafy greens are source of iron, calcium, vitamins, antioxidants and fibre and it is the best gift of nature.  Apart from the regular greens we sometimes find unique, seasonal, never seen greens with local soppu/ green vendors in the early morning hours, when they visit our locality. Only few people know the usage of local, seasonal edible greens which was consumed in rural India for centuries. These super foods are sold only in the hand pushed carts in our cities and sadly not at all available in modern super stores.

 Anne soppu comes under such category. After staying in Bangalore for 20 long years I had never seen this green and when I came across it this last week, asked my soppu vendor. He said, it is Anne soppu and is very tasty. Then comes my right hand, house help who grew up in rural Bangalore and knows every green which grows locally. She said, not only is it tasty, but also very nutritious.

According to her, Anne soppu grows wild, like a weed in between paddy or Finger millet/ Ragi fields during monsoon. It has long, arrow shaped leaves and crunchy, hollow stem which breaks very easily, while bending. It is known as Water spinach in English and Kalmi saag in West Bengal. Here is her recipe, which I made and relished and dedicating this post of mine to her.

How I proceeded with is –

Ingredients:

Toor dal – 1 cup

Anne soppu – 4 small bundles

Onion – 1

Garlic- 1 whole

Green chillies – 5 to 6

Tomatoes – 4

salt

For Seasoning –

Oil / ghee – 1 table spoon

Mustard – 1 tsp

Cumin – 1 tsp

Hing – ¼ tsp

Red chilli – 2

Curry leaves – 1 string

Method:

-Greens are like this-

-Clean the greens by discarding thick stem portions by hand.

-Wash and keep aside.

-Wash toor dal, chop onions, tomatoes.

-Take one pressure cooker, shift washed dal and pour water till just above the dal.

-Now place tomatoes, green chillies, onion, garlic, washed greens, salt and cook for 2 to 3 whistles.

-When pressure relieves, churn roughly in a hand blender or hand-held churner.

-Adjust the consistency of dal by adding water and adjust the salt and boil once.


-Now do seasoning by heating oil or ghee, splutter mustard, cumin, hing, red chilli and curry leaves and pour over boiled dal.

-Enjoy with hot rice and raw onions or with any sort of papads or tawa fries like me 😊


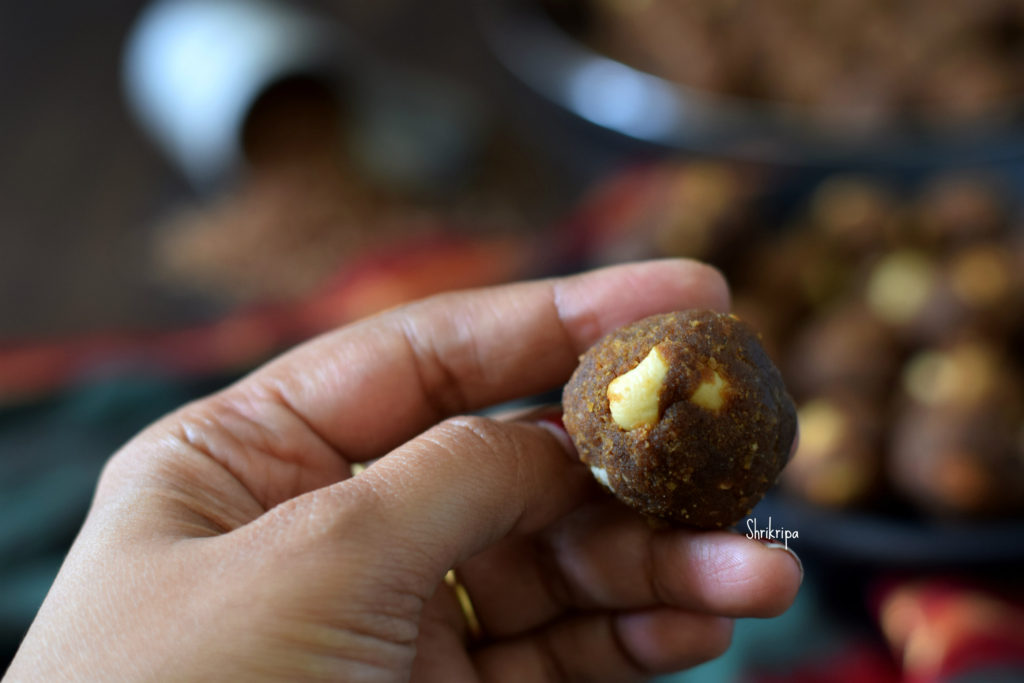
Thambittu Unde / Brown Rice Laddu:

Brown rice laddu is also known as “Thambittu unde” in our coastal region of Karnataka. It is an age-old recipe of my aunt’s family. This tasty laddu is very dear to my heart, which I used to relish whenever I visited my maternal uncles place.

Brown rice, also known as boiled rice/matta rice/Kerala rice is very healthy and packed with many nutrients, at the same time it is gluten free and you can have it without any hesitation. It requires very minimum ingredients but tastes heavenly.

Now we will see the procedure –

Ingredients:

Brown rice /matta rice – 500 grams.

Fresh Coconut – 1 (grated)

Jaggery – 500 grams (used organic, hence the colour is dark)

Ghee – 50 -100 ml

Cardamom powder – 1 tsp.

Cashew bits – ½ to 1 cup

Method:

-Wash rice once or twice, drain completely and Spread this on a clean cloth and let it air dry. It takes one to two hours. After one to two hours, check the moisture.

-If it is completely dry while handling, it is ready to use.

-Heat one thick bottomed wok/vessel, add dried rice little by little and roast, it will pop a little and texture will become brittle and little puffy.

-Do this procedure in 3 to 4 batches and cool.

-When it cools down, make powder either in a mixer jar or nearby flour mill. Sieve this powder and keep aside.

-Now dry roast grated coconut until it emits fragrance. Keep aside. (you can use mixer jar and pulse once or twice to get uniform tiny gratings. This would help in uniform roasting)

-Boil jaggery by putting one cup of water. When it melts sieve this solution to remove any impurities.

-Take this liquid and boil further till it reaches one thread consistency. At this stage you will hear “Tup” “Tup” bubbling sound too (this is the clue which I have received from the elders)

-When it reaches one thread consistency, mix in roasted coconut gratings, ghee, roasted cashew bits, rice powder and cardamom powder.

-Mix nicely. At this stage mixture will be too wet to handle. So, keep aside for half to one hour, till mixture becomes little dry and ready to handle.

-When you feel it is ready, take a small amount in a hand and make laddu and keep aside.

-When all the mixture gets over and you have finished the process, store these laddu’s in an airtight container. This laddu stays good for long even in room temperature.


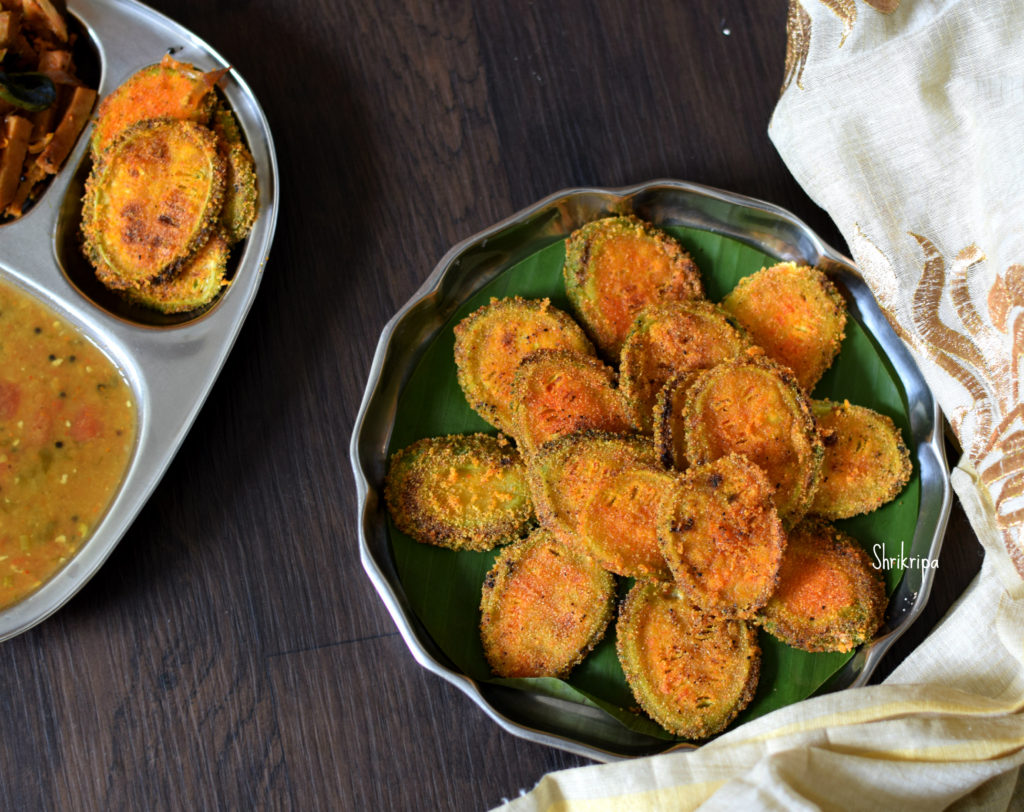
Kantola Tawa Fry:

Kantola has many names like Spine gourd, Teasel Gourd, phagila, Mada hagala, locally we call this as “Kaadu peere” in Mangalore. Kantola is one of the famous and nutritious vegetable of coastal region and some Eastern parts of states. This monsoon vegetable is loved by all. This resembles a bitter gourd in structure, but not in taste. It is a crunchy mild flavoured vegetable.  It is a great health food as it is rich in proteins, iron and anti-oxidants and low in calories. It is high in fibre too.       

In my family, we usually relish this in tawa fry form. Let’s see how I do this.

Ingredients:

Kantola: 5 to 6

Salt to taste

Red chilli powder – ½ tsp

Turmeric – ½ tsp

Asafoetida / hing powder – ¼ tea spoon

Coconut oil – to shallow fry

Ingredients for outer cover:

Chiroti/fine rawa – 1 small cup

Rice flour – 1 table spoon

Salt

Asafoetida  powder – ¼ to ½ tsp.

Red chilli powder – 1 tsp

Method:

-Wash Kantola and slice them into a very thin slices. Don’t remove outer skin or inner seeds. Use as it is.

– Sprinkle salt, red chilli powder, hing, turmeric on these slices and mix this nicely by using your hand and   keep aside for 10 to 15 minutes to marinate.

-While marinating it will leave some water and it helps to hold outer coating.

 – Now take one bowl, dry mix all the ingredients like fine rawa, rice flour,salt, asafoetida, red chilli powder, for outer cover.don’t add any water.

– Now take each marinated Kantola piece and roll both the sides over rawa mix, keep aside after coating one by one.     

-Take one iron Dosa tawa ,heat it ,keep 6 to 7 coated pieces over it and pour one or two teaspoon of coconut oil and fry nicely on one side.

-After some time, flip the side, once again pour one tsp of coconut oil and fry this side too.

– After frying both the sides, serve this as a side dish with dhal -rice, Rasam –rice or curd- rice.

  Note: You should use coconut oil and more asafoetida to get authentic taste.


Healthy “Brown” Neer Dosa:

Usually Neer dosa is made from using only white Dosa rice and it contains only carbohydrate and recipe is already shared and it is here

Couple of years back, when I was thinking of including millets in our regular neerdosa to make a healthier version, dosa used to turn out hard and crispy and I was not at all satisfied with the result. After couple of trial and errors, addition and deletion of ingredients, I got this soft and smooth textured neer dosa like the regular white one and henceforth it is one of our regular breakfast items and we named this as “Brown Neer Dosa”.

How I included these many items? As I mentioned above, I wanted to make soft neerdosa without any compromise on taste. Usually when we add millet in Dosa batter, Dosa becomes little hard and brittle. So, I thought of adding Whole Ragi to give softness with Fox tail millet.

Here I have added Ragi, Organic red unpolished rice with normal white rice to enhance the value, and fox tail millet. Instead of fox tail millet, one can use any other millet as well.

It is an excellent breakfast option for Toddler’s, weight watchers, diabetic diet or low carb diet as well as tiffin box options. It is very soft, easy to chew, digestible and at the same time filled with nutrients and fibre apart from carbohydrates. It doesn’t need any fermentation or planning. Soak in the night, grind and make it in the morning in a jiffy.

Recipe goes like this-

Ingredients:

White Dosa rice – 1 cup

Whole Ragi / finger millet – ½ cup

Red organic unpolished rice – ½ cup

Fox tail millet -1 cup

Salt

Method:

-Measure everything and put it in one bowl, wash twice and soak this in water for 2 to 3 hours or during the previous night like me.

-Next morning, grind this soaked rice into fine paste with water (I use soaked water while grinding, it gives nice aroma for the Dosa) and salt as per requirement.

-Make batter into pourable consistency like this (refer a picture) and check for the salt.

-Now keep Iron griddle for heat.

-When it is ready, apply oil like this.

-Pour one serving spoon of batter like how we make Rawa Dosa, you can see it in the picture below.

-Now close the lid by keeping the gas on full flame.

-After two minutes, remove the lid and keep the gas in simmer the edges of the Dosa rise a little, like this.

-Now flip this Dosa on the plate, leave for 2 minutes, then fold like this.

– Now keep repeating this with the remaining batter and stack one over the other or take one big plate and stalk one opposite another alternately.

-Serve these Dosa with coconut and grated jaggery mixture or coconut chutney.


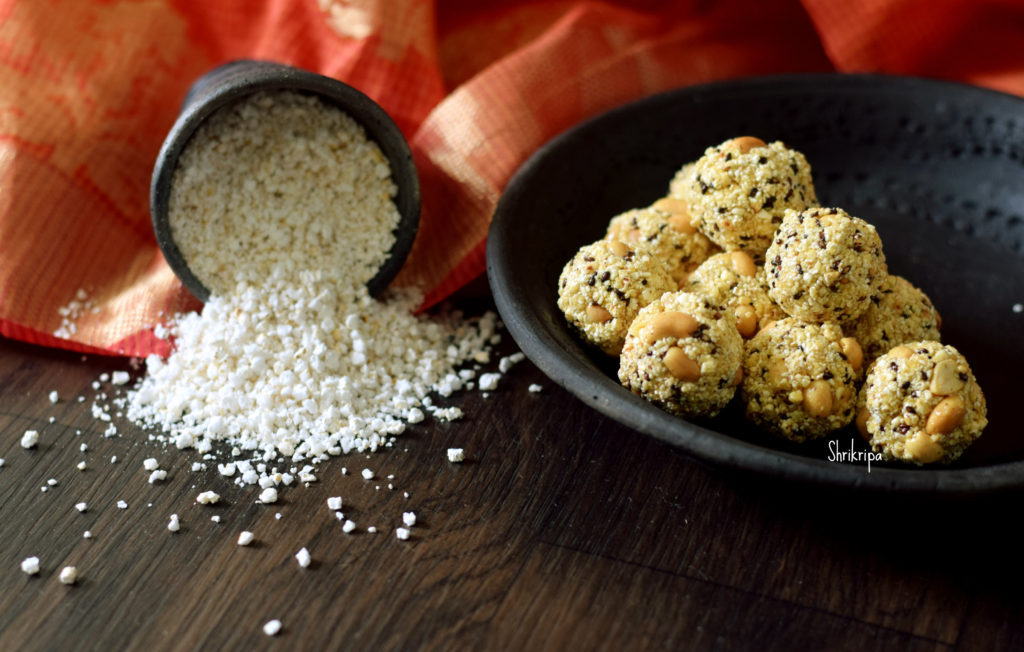
Aralu laddu / Puffed Paddy snow ball:

Aralu, Hodalu or Puffed paddy is made by roasting paddy itself. Usually we see puffed rice in the market. Puffed paddy is very rare to find nowadays. It has a very important role in any divine occasions like marriage, Ganapathi havan, Nag Panchami or chauthi festivals in our region.

Normally we don’t eat rice preparations during vrath (fasting) and Aralu fits the bill. Aralu or puffed paddy is prepared by roasting the paddy in an iron tawa. Usually in villages, they do it in an open air. Normally, in open air, wood fire setting will be laid, iron tawa is heated uniformly by putting little sand into it. When sand becomes hot, fist full of dried paddy would be dropped and tossed regularly until paddy puffs and bursts into white popped rice. It is not cooked or done by using water and it is done by roasting. That is the reason it is considered as Pure /auspicious thing and used in prasadam or any divine purposes.

We can make this and use as a regular energy ball as well. It has all the goodness that our body needs. It fits the bill as #eatlocal #healthy #natural #ironrich #fibrerich #refinedfree #holistic #glutenfree #healthysnack #kidfriendly as well.

We normally get puffed paddy in two forms. Either whole or powdered.

Here in this laddu, I have used powdered form. If you have whole paddy, nothing to worry. Make powder by using mixer jar and use it.
I have used chikki jaggery which is also known as Antu bella. One can use normal jaggery as well.

Ingredients:

Powdered puffed paddy – 1 ½ cup

Jaggery – ½ cup (I have used chikki jaggery)

Black Sesame – 2 tea spoons

Broken peanuts – 3 to 4 table spoons

Ghee – 2 table spoons

Water – 2 table spoons

Cardamom powder – ½ to 1 tea spoon

Method:

-Clean puffed paddy powder, by removing any leftover paddy husks and keep it ready.

-Dry roast peanuts, remove outer skin and make it into halves or use roasted and halved peanuts itself.

-Dry roast sesame seeds as well.

-Dilute jaggery in water by boiling. When jaggery melts, sieve and collect. In this way, we can discard the impurities from the jaggery.

-Take one thick bottomed kadai, add jaggery solution, 1 table spoon of ghee and boil until it reaches one thread consistency.

-If you are confused with this stage, take one small tumbler, filled with water. Drop the jaggery mixture and see. If jaggery becomes hard when it drops, and you can make a ball when you press and rotate it by placing in between your thumb and forefinger.

-Mix in puffed paddy powder, roasted sesame, peanut halves, cardamom powder, remaining one table spoon of ghee and mix everything.

-Switch off the gas.

– Apply little ghee on your palm and start making roundels. Sometimes, In-between If it cools down completely, it doesn’t bind, and you can keep the vessel on fire, re heat a little and proceed and finish off the mixture by making roundels.


Instant Stuffed Brinjal:

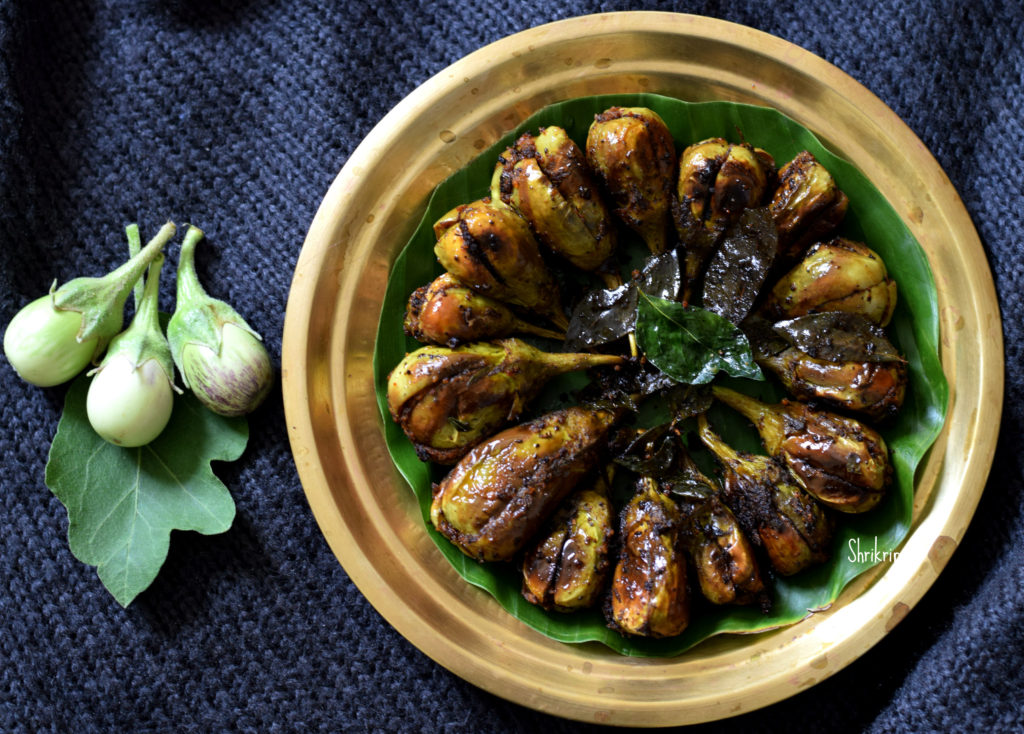
Tiny brinjals are very delicious in dry curries as well as in gravies. When I have plenty of home grown organic brinjals, I normally make this quick dish, which can be handy as well as tasty when you are super lazy to cook. If chutney powder (any chutney powder will do) is around, within no time you will be able to make this delicious dish. It can be relished as a starter, side dish or with curd rice.

Ingredients:

Tiny Brinjals – 12

Garlic Chutney powder – 2 to 3 table spoons

Hucchellu/ gurellu or Nigella seed powder – 1 tea spoon (optional)

Red chilli powder – 1 tea spoon

Amchur powder – ½ tea spoon

Salt

Turmeric – ½ tea spoon

Cooking oil – 2 tea spoons

Method:

-Hucchellu powder is purely optional. If you have roasted Hucchellu powder, use it.

-Take one bowl, mix chutney powder, gurellu powder, salt, turmeric, red chilli powder, amchur powder, salt.

-Wash brinjal, make 2 slits (+ shape) and fill this mixture and keep aside. If any mixture is remaining, keep aside.

-Take one kadai, add oil. When oil becomes hot, add masala filled brinjals and toss for couple of minutes.

-Sprinkle little (1 table spoon) water and close the lid and cook in a low flame.

-Once again sprinkle water in between and cook until brinjal shrinks and cooks properly.

-Lastly, sprinkle remaining masala mixture, give one stir and serve as you wish.


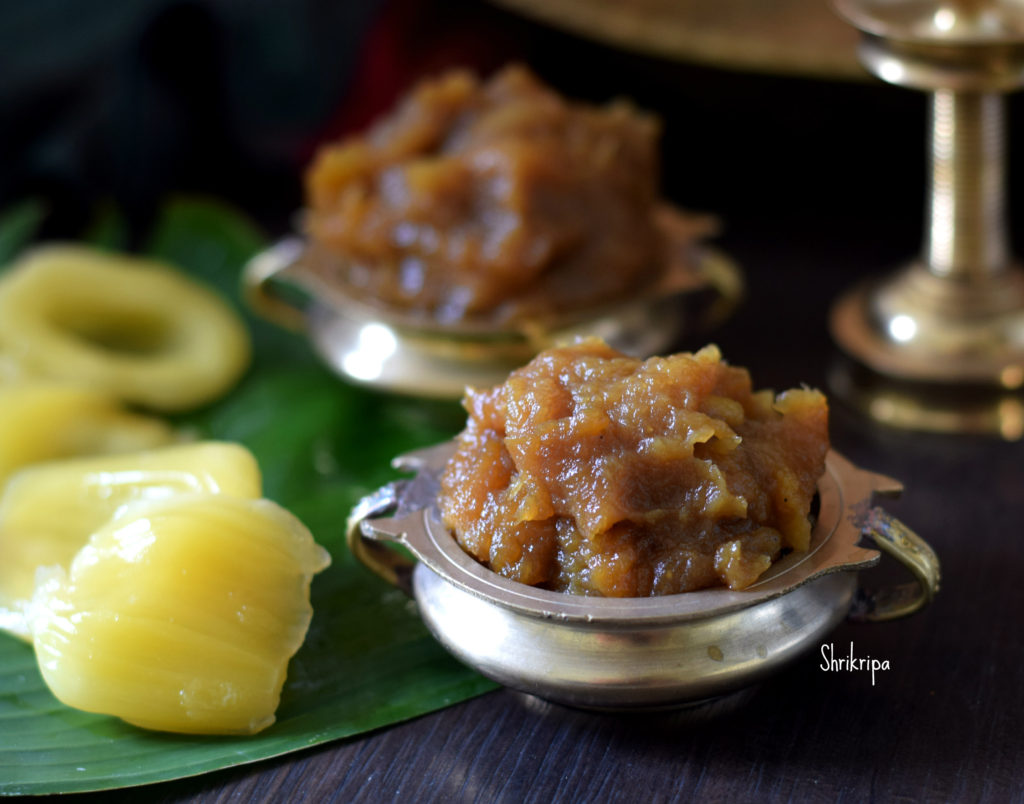
Halasina Hannina Berati / Jackfruit Preserve:

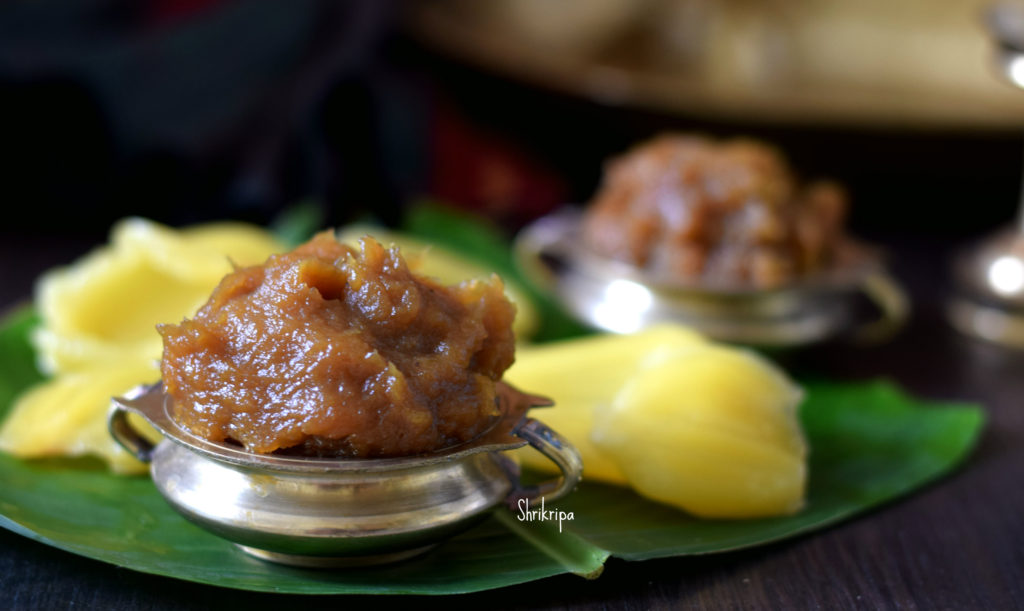
When summer ends, a whole lot of your favourite fruits also vanish from your eye sight and you will surely miss the season!! The best thing one can do is, prepare some jams or preserves and try to store this for future use.  This jackfruit preserve stays good for almost a year or more in the freezer. It is very handy when you want to make payasam for any festivals or any special occasions. Here is my recipe for homemade jackfruit preserve, which we make every year and use it for Prathamam, which is nothing but kheer or payasam from the preserve!!!

Ingredients:

Jack fruit – 1 big bowl (cleaned)

Jaggery – 2 blocks (I have used organic one)

Method:

  • Put little by little jack bulbs and make a smooth paste in a mixer grinder.
  • Take one thick bottomed kadai, put this paste and keep gas flame in a very low flame and cook for a while.

  • When it changes its colour from bright yellow to a pale colour and when you smell the cooked jackfruit flavour in the air, add jaggery and mix this in a regular interval.
  • After some time, it will turn into a light brown then to darkish colour and it will start to leave the sides of the kadai. Now it is the time to remove it from the fire.
  • Keep as it is and when it reaches room temperature; store it in an airtight container or a zip lock.
  • Keep it under refrigeration/ freezer.

  • You can do this in a microwave as well. Only thing, you should remove the glass bowl at regular intervals and give a stir and proceed as given above.

Note:

-You can use sugar or regular jaggery as well.

-Traditionally we use jaggery in our region.