Plantain / Banana Flower Chutney:

We call Coconut tree as a Kalpavriksha. In my opinion Banana plant also should come under this category, because almost every part of the banana plant is used in some way or the other.

The leaves, flowers, fruits, stem, stem fibre etc. Nothing is wasted over here, and it is very useful in many ways.

The male banana flower is purple coloured, dome shaped, and can be seen hanging at the bottom of every fruit bunch. In banana plant, female flowers appear first and appear as a hand like structure in clusters. These female flowers will develop as the real fruit, which we normally eat, and male flowers will remain intact in layers of purplish outer bracts.

After fruit matures, we harvest the fruit and use the male flower that we see at the end of the fruit bunch in cooking. It is loaded with fibre, anti-oxidants, iron, potassium, calcium, vitamins and all other minerals. Flower is used mainly to treat constipation and anaemia in villages of our native in and around Mangalore.

This Chutney recipe is handed down to me by my amma (mother), and I used to relish this from my childhood. It is a perfect combination with hot rice, topped with fresh home-made ghee. We can feed this to small toddlers as well.

DSC04353_Fotor main

Ingredients:

Banana flower – 1

Cumin – 1 tea spoon

Pepper – 1 tea spoon

Tamarind – ½ tea spoon

Salt

Water – 1 bowl

Curd – 1 serving spoon

Grated coconut – 1 cup

For Seasoning:

Ghee – 1 table spoon

Cumin – ½ teaspoon

Curry leaves – 1 spring

Method:

-Wash banana flower from outside and remove outer purple bract (remove 2 layers) and discard.

Ribbet collage 1

-Now take one bowl of water with 1 serving spoon of curd and mix and keep it ready. (This water will avoid decolouration of the chopping’s)

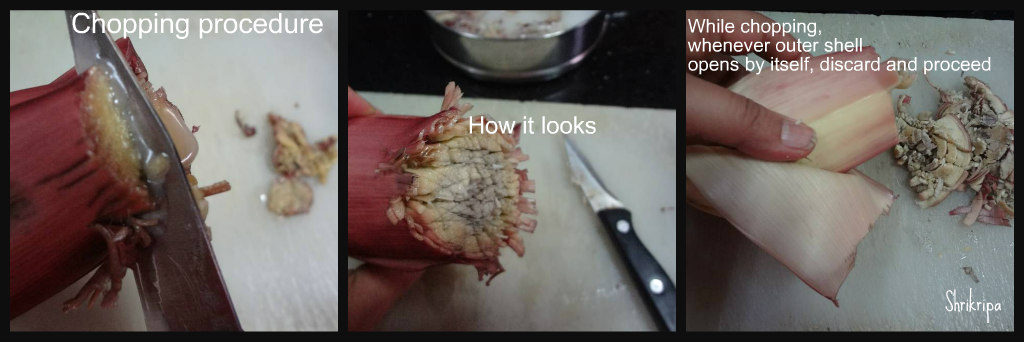
-Start chopping banana flower from the tip (refer picture)
Ribbet collage 2

-Keep on adding chopped part to curd water.

-While chopping, whenever outer shell opens by itself, discard that and proceed chopping.

– After chopping is done, drain the curd water and collect the banana flower chopping’s.

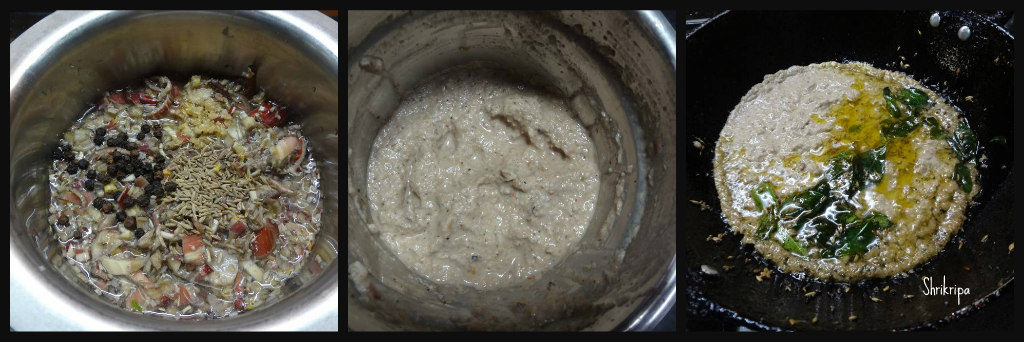
-Take one vessel, add chopping’s, salt, pepper, cumin, tamarind, 1 cup water and cook.
Ribbet collage 3

-When it is done, remove from the fire and cool.

-Add coconut, required amount of water and grind the content.

-Now take one tawa, add ghee, cumin, curry leaves and pour the ground mixture and boil.
DSC04355_Fotor main 1

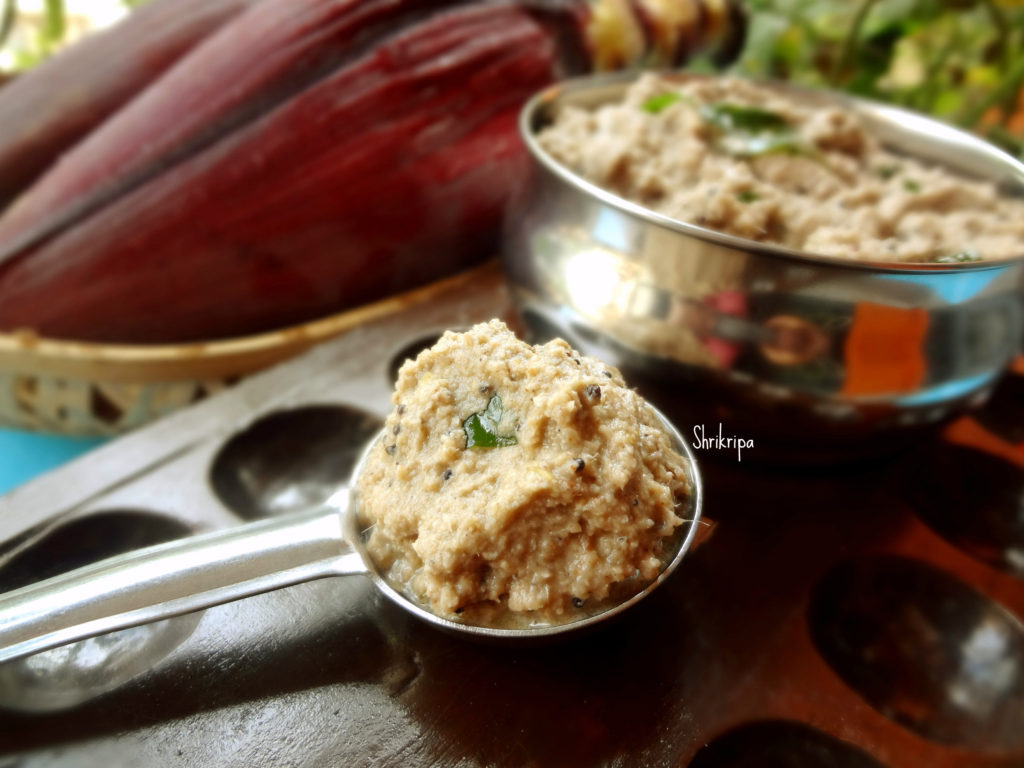
-This chutney will stay good for a couple of days under refrigeration and can be served either with hot rotis or with rice.

 

Protein rich Millet Health Mix:

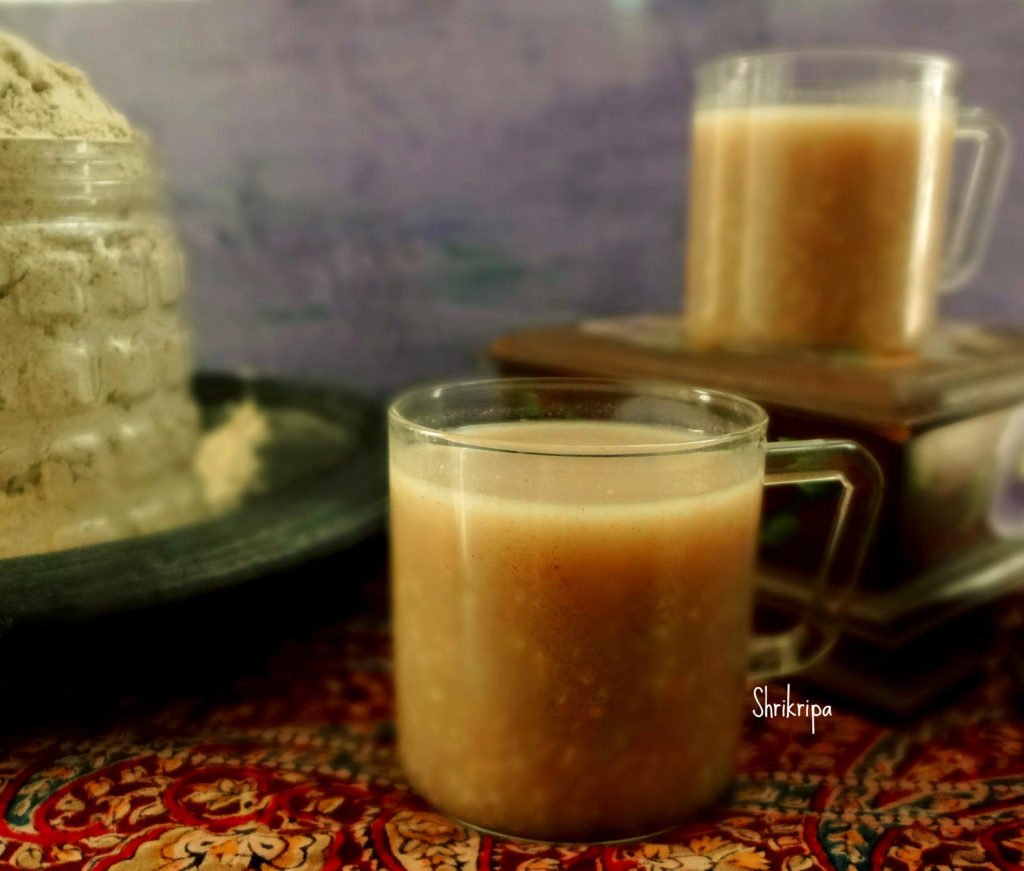
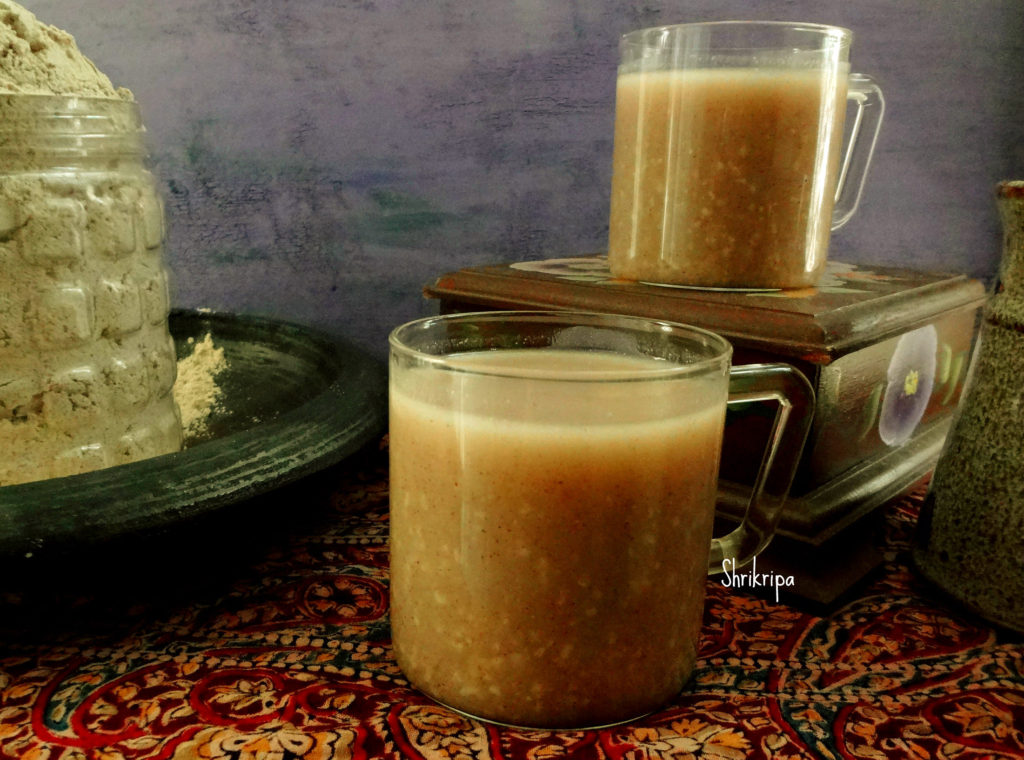
Millet health mix is a wholesome breakfast solution for people who leave their home very early in the morning and yet they can get goodness of wholefood by preparing quick porridge. Once the powder is ready, it is super easy and quick to prepare and consume. One can even prepare this drink and carry it in their bag and have it at their convenience as well.

Health benefits of millets and sprouts are numerous. They are filled with nutrients, vitamins and minerals. It really boosts immune system and overall health of human body.

I prepare this porridge specially for my husband, who started following Naturopathic diet after staying and enjoying this simple diet in a Naturopathic centre. Gradually my niece who leaves home by 6:45 AM from home, started carrying this drink as her mid-morning “meal”. It is very tasty, and at the same time, healthy, filling and nutritious too.

DSC03935_Fotor

At first, we will prepare the powder and the procedure goes like this-

Ingredients to sprouts and Roast:

Whole wheat – 500 grams

Finger millet / Ragi – 500 grams

Pearl millet/ Bajra – 100 to 150 grams

Green gram / whole moong – 250 grams

Black Chana – 250 grams

Ingredients Only to roast:

Fox tail millet – 50 grams

Sorghum / Jowar – 50 grams

Organic Red rice – 50 – 100 grams

Sago – 100 grams

Roasted Chana – 50 to 100 grams

Almonds – 100 grams

Flax seed – 25 grams

Other ingredients:

Cardamom – 10 (whole)

Method:

-First wash all the ingredients under “Ingredients to sprouts” one by one.

Ribbet collage 1

-Soak all these for 6 to 8 hours or Overnight.

-Drain and keep it covered to germinate.

-Next day morning, spread these on a clean cloth separately, and dry under partial or direct sunlight.

-It takes 2 to 3 days to perfectly dry.

-Now you can start roasting all these dried items one by one, as well as ingredients under “Only to roast”.

-After roasting each ingredient, spread this on a newspaper or clean cloth and cool.

-Add cardamom.

– Powder this mixture in a flour mill.

Ribbet collage 2

-Store this ready flour in an air tight container and use as needed.

How to make the porridge:

I make it in two ways. One is plain and another one is with oats.

For the plain one:

Ribbet collage 3

Take 4 spoons of porridge powder, add 450 ml of water, or as much as you want, according to the required consistency, and boil until it is cooked properly.

At that time, mixture will become glossy.

My husband likes this porridge with a little rock salt and a tinge of sweet (usually I add sugar free Natura)

You can either add plain sugar or Jaggery or brown unrefined sugar as well.

With Oats:

DSC03932_Fotor

Take 2 spoons of porridge powder, 2 spoons of Oats and proceed with the above procedure.

Steamed rice with Hot and sour vegetables:

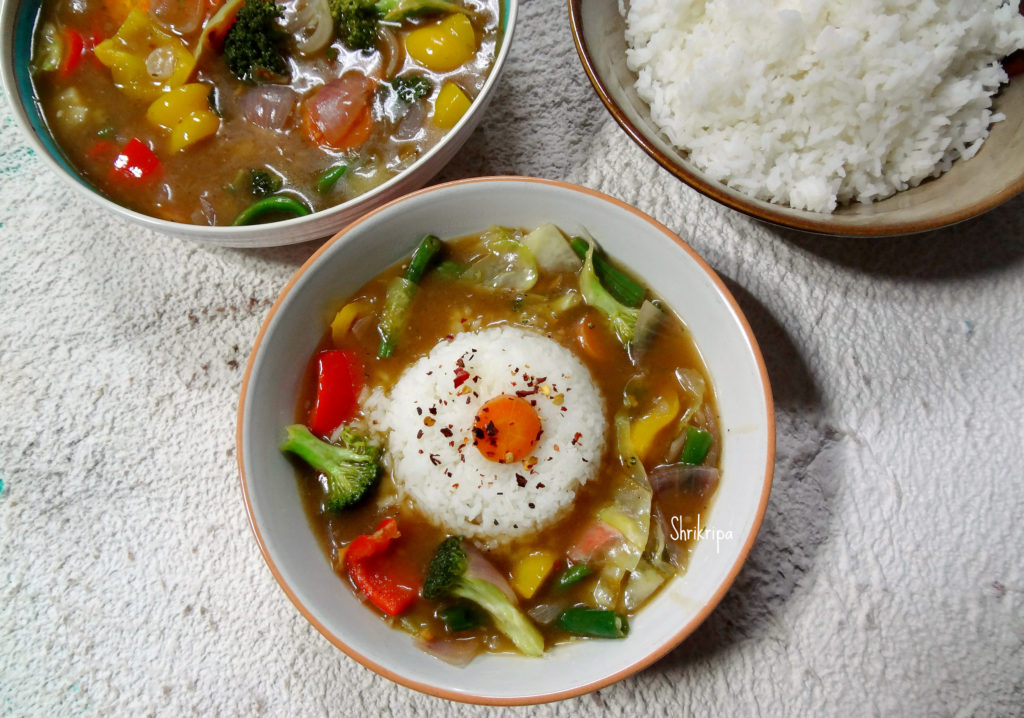
Hot and sour veggies with some steamed rice works perfect for a winter night dinner. It is light, filling at the same time, very nutritious and tasty as well. It doesn’t need any major preparation and I love making it on winter nights when we need a tongue tickling hearty dinner.

It is very simple, usually I use some chunks of veggies which is tossed with chunks of onion and simmered with one packet of hot and sour soup powder with sufficient water. Yes!! It is such a simple affair. While serving I usually take a couple of spoons of cooked rice as well.

This quantity suffices for a 4-member family.

DSC05442_Fotor

How I make –

Ingredients:

Onion – 1 big

Green chilli – 1

Veggies – 1 bowl (veggie pieces in byte sizes)

Garlic salt or chopped fresh garlic – little

Oil – 1 table spoon

Hot and Sour Veg soup – 1 pack (Knorr Or Maggi brand)

Basil or Lemon grass – for an additional flavour (optional)

Method:

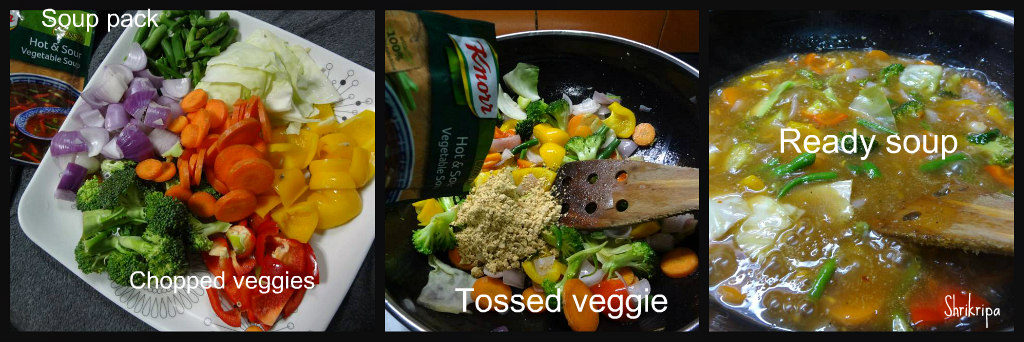
-Chop vegetables and onions into chunk size. Slit green chilli. If you are using garlic, chop that as well.

Ribbet collage 1

-I usually prefer French beans, carrot, broccoli or cauliflower, capsicum, cabbage or lettuce.

-Take one big wok, pour oil, when it is hot, if you are using garlic, add garlic, green chilli, onion and fry for a minute.

-If you want to use basil or lemon grass, add now.

-Add vegetable chunks and toss. If you are using garlic salt, add it now, otherwise you can also add plain salt.

-When veggies wilts, add one pack of soup powder and mix.

-Add 4 cups or more of water to adjust the consistency.

-Boil until gravy cooks up and becomes shiny.

DSC05438_Fotor

-Serve with plain steamed or cooked rice.


Cucumber Chutney:

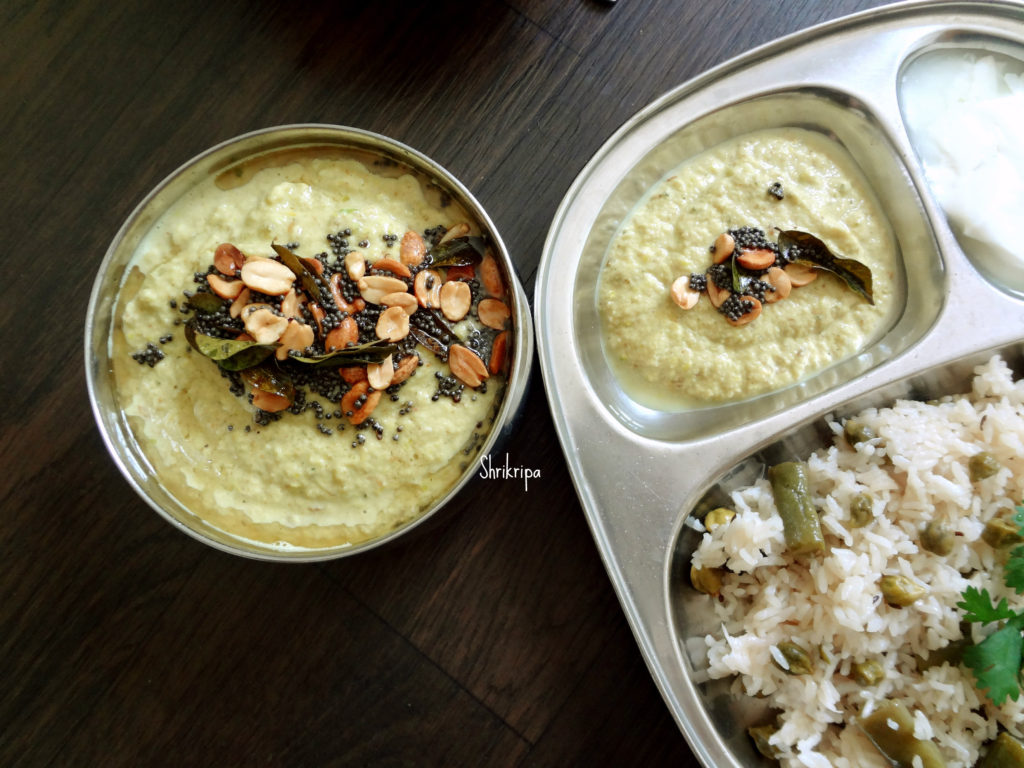
When I saw this chutney recipe in our Facebook Foodie group, I was attracted mainly because of the veggie. One of my daughters loves cucumber and I tried this recipe by pairing it with very mild flavoured Fresh chick peas Pulav. It was a pair made in heaven, and everyone liked this chutney, not only with the Pulav, but also with rice, Dosa or chapati. 

This recipe is by Jayanth Desai one of our Foodie member and all thanks to him for sharing this flavourful chutney of North Karnataka region.

DSC05898_Fotor

Ingredients:

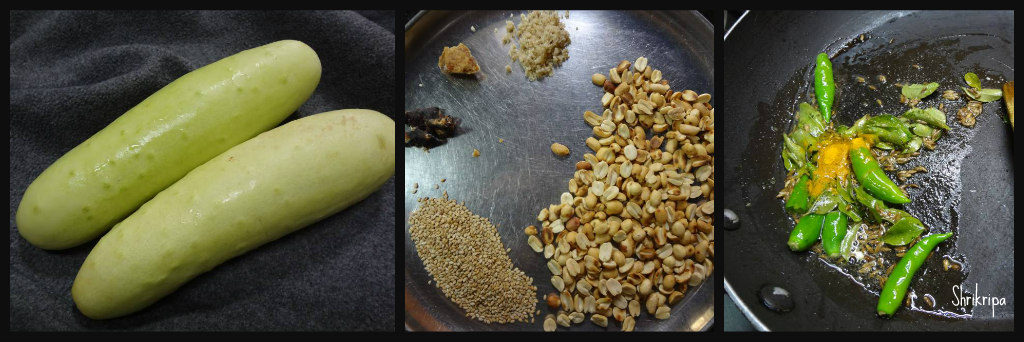
Cucumber – 2 (grated)

Green chillies – 3 to 4

Curry leaves – 2 strings

Turmeric – ½ tea spoon

Oil – 1 table spoon

Hing – ¼ tea spoon

Cumin – 1 tea spoon

Peanuts – 5 tea spoons

Sesame seeds – 2 tea spoons

Tamarind – gooseberry size

Jaggery – small piece

Salt

Seasoning:

Oil – 1 tea spoon

Mustard – ½ tea spoon

Peanut – 1 tea spoon

Method:

-Dry roast sesame seeds until it splutters.

-Dry roast peanuts. Keep aside.

Ribbet collage 1

-In the same pan, heat oil, add hing, cumin, curry leaves, green chillies and fry for a minute.

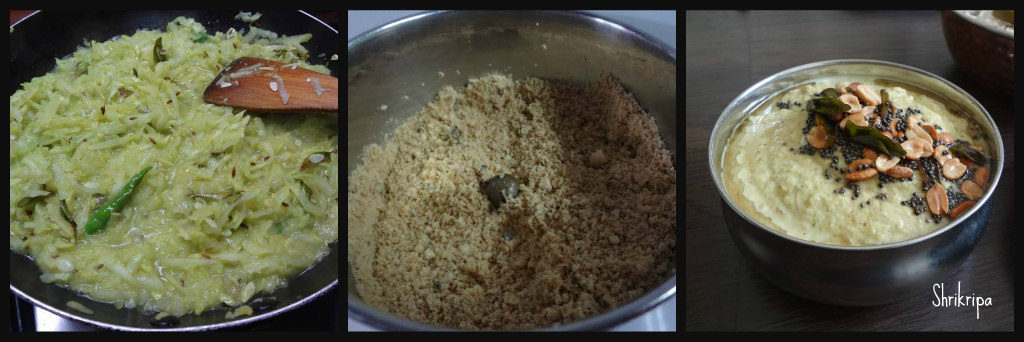
-Add grated cucumber, turmeric and fry until cucumber changes in colour and cooks.

Ribbet collage 2

-Cool the mixture.

– Take one mixer jar, add roasted sesame, peanuts and make powder.

-To this, add cooled cucumber mixture, jaggery, tamarind and salt.

– If necessary, add very little water and blend into smooth paste.

-Do seasoning by heating little oil, mustard and peanuts.

-Serve as you wish.


Energy cake:

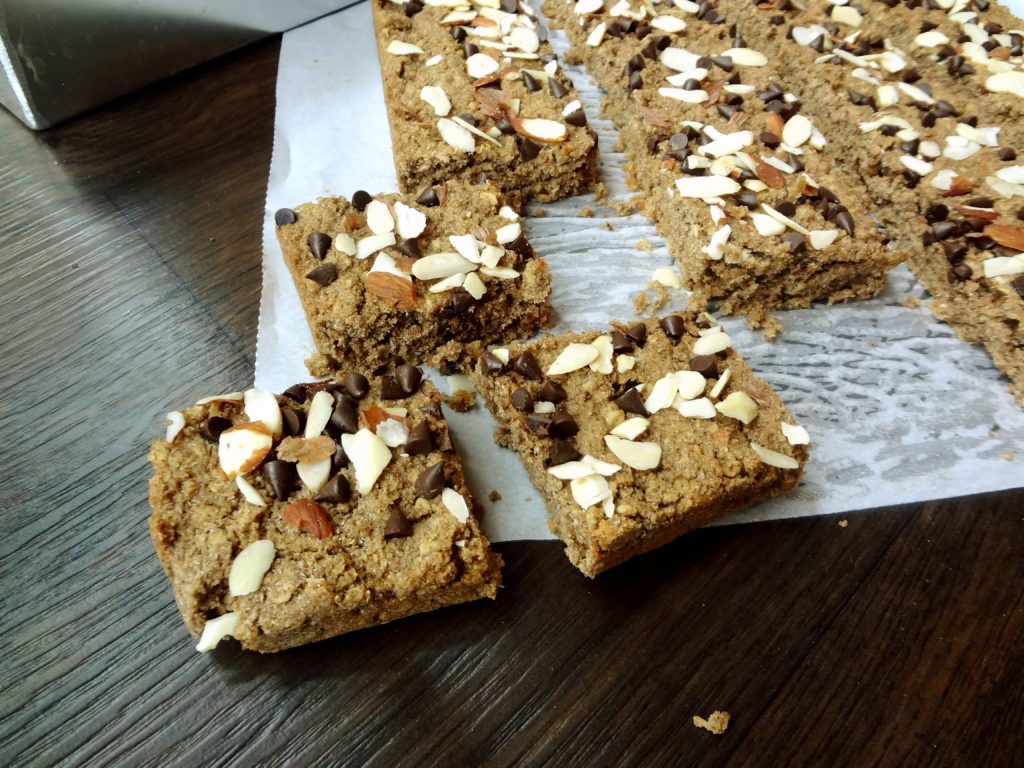
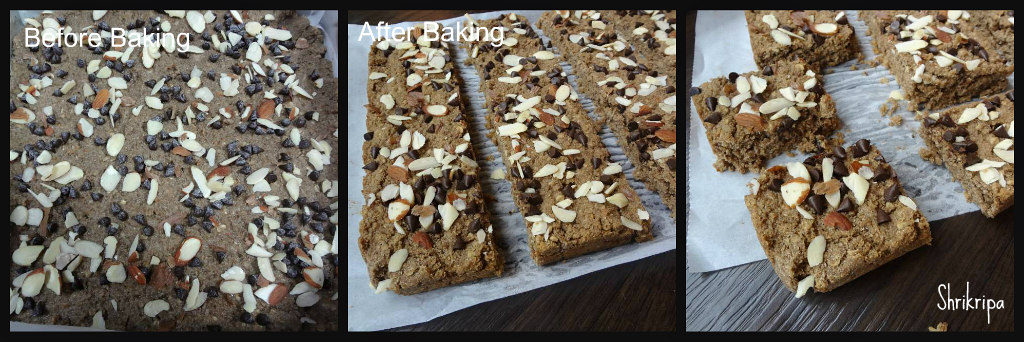
This energy filled cake has millets, oats, coconut flour. Usually after extracting coconut milk from the fresh coconut, the residue that remains will go into the trash. Coconut residue is very high in fibre. It is much healthier than wheat bran or oats bran. I usually collect this residue, after extracting the milk for any south Indian kheer, and use it in my baking as it is, by storing it under refrigeration for a couple of days.

This energy bar is a little softer than a normal crunchy bar. So, I named it as Energy cake. Shelf life is any where between 2 to 3 days at room temperature, Up to 10 days under refrigeration. If it was under refrigeration, please re-heat to get soft texture.

DSC05271_Fotor

Ingredients:

Oats – 1 cup

Mix millet flour – 1 cup

Coconut residue – ¾ to 1 cup (You can use coconut flour or desiccated coconut as well)

Brown Sugar – ¾ cup

Butter – 100 grams

Honey – 2 table spoons

Milk – ¼ cup

Cooking soda – ½ tea spoon

Vanilla essence – 1 tea spoon

Choco chip and almond flakes – to garnish

Method:

-Pre-heat oven, line a baking tray.

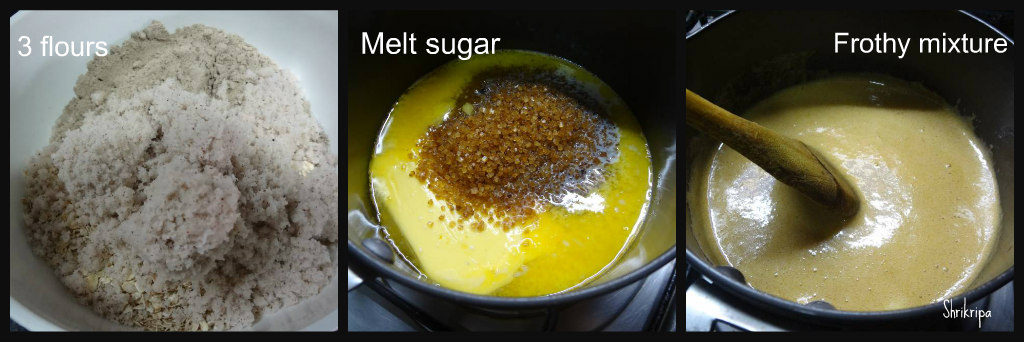
-In one bowl, combine oats, 2 flours and mix thoroughly.

Ribbet collage 1

-Take one sauce pan, heat butter and sugar. When sugar melts, switch off.

-Add in honey, milk,vanilla and cooking soda and mix.

-Pour the frothy wet mixture over oat and flour mixture and fold the batter.

Ribbet collage 2

-Batter will be a little thick and heavy. Pour the mixture and spread evenly on a lined baking tray.

-Garnish with Choco chips and almond flakes and press a little.

Ribbet collage 3

-Bake this in a pre-heated oven at 180 C for about 25 to 30 minutes or until done.

-Cool, cut into pieces and serve as a snack or a breakfast bar.


Soppavare/Winged beans stir-fry:

Soppavare name itself is very much nostalgic. We had a widespread vine in our front yard and we used to relish a whole lot of Mangalorean traditional recipes in our childhood days.

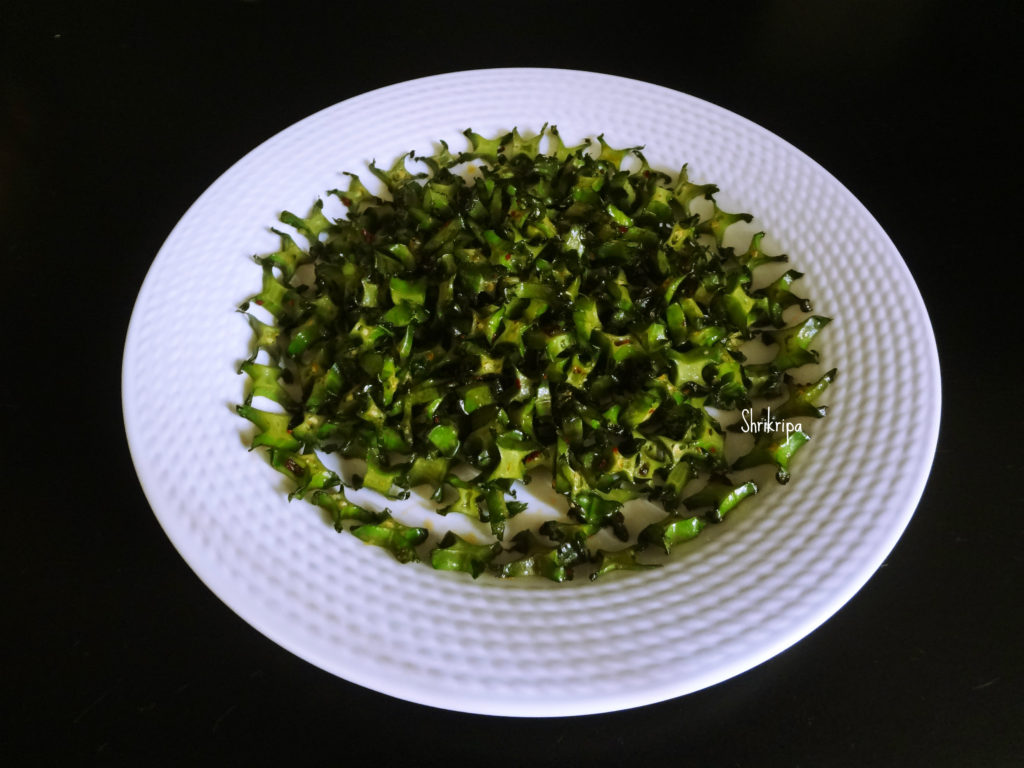
Winged bean is a nutritionally very rich, tropical vine, which needs warm weather, but in the winter season. Almost all parts of the plant are edible, and vine produces unique shaped bean with four-winged edges.

It is rich in vitamins, minerals and many nutrients. When it is cooked, bean has nutty flavour and is consumed in many forms from salad to stir fries or in a form of curry.

My family relishes on this simple stir-fried salad with this simple seasoning.

DSC05152_Fotor 1

Ingredients:

Winged beans – 10 -15

Olive oil – 2 tsp

Garlic salt – 1 tsp

Chilli flakes – ½ – 1 tsp

Method:

Ribbet collage 1

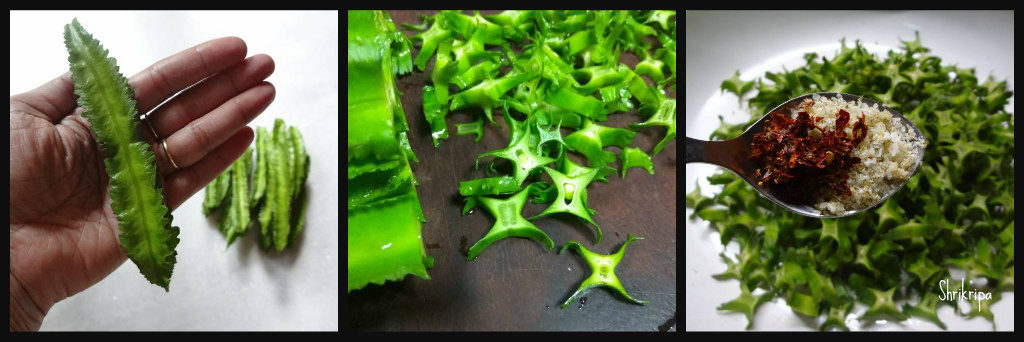
  • Wash and slice the beans.
  • Heat one non-stick tawa add olive oil, add chopped beans, garlic salt and red chilli flakes.
  • Stir fry for a while and serve as it is or with curd rice or as you wish.

Mixed millet Masala Cookies:

Millets are a very good alternative to normal All-purpose flour or whole wheat flour in gluten free baking. You can’t even recognize the core ingredient. It is gluten free as well as high in nutritional value too.

When I was trying out some recipes for the 2017 Millet calendar, I dished out a couple of recipes, which had turned out super tasty, and at the same time, healthy, filling and as an alternate snack for kid’s tiffin boxes as well.

I tried pizza based seasoning in this cookie recipe and it tasted super delicious.

pic main

Ingredients:

Mixed Millet flour – 1 cup

Butter – 50 grams

Sugar – 2 table spoons

Salt – ½ teaspoon

Baking powder – ½ teaspoon

Baking soda – ½ teaspoon

Curd – 2 table spoons

Pizza seasoning or Oregano – 1 tea spoon

Chilli flakes – 1 tea spoon

Cumin – 1 tea spoon

Grated cheese – to decorate.

Method:

  • Mix flour, salt, baking powder, baking soda, pizza seasoning, chilli flakes and cumin and keep aside.
  • Now beat butter and sugar until it becomes fluffy and creamy. Add in curd and beat once again.
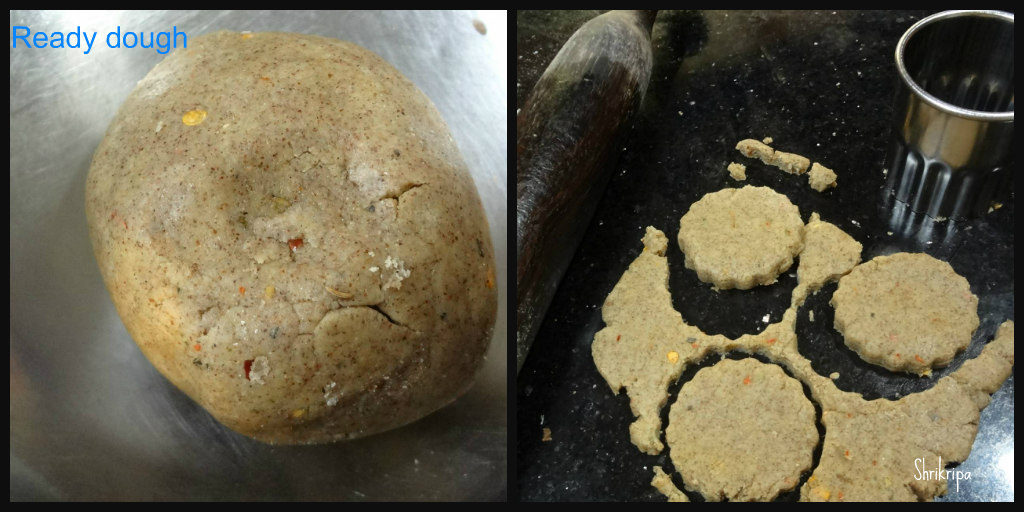
  • Mix in flour mixture and bind all the ingredients together, the resultant dough will be like Chapati dough.

Ribbet collage 1

  • Take dough little by little, roll it into half inch thickness and take a cookie cutter and cut.
  • Arrange this in a lined baking tray.
  • Sprinkle grated cheese on top.
  • Bake this in a pre-heated oven at 170 ºC for 10 to 12 minutes.

pic 2

Note:

  • Here mixed millet flour is store bought pre- mixed flour.
  • Alternately one can mix two to three millet flours and make their own flour or use all purpose flour as well.


Tamilnadu Style Idli and Dosa Batter:

It is a Two in one bonanza—Yes!!!!

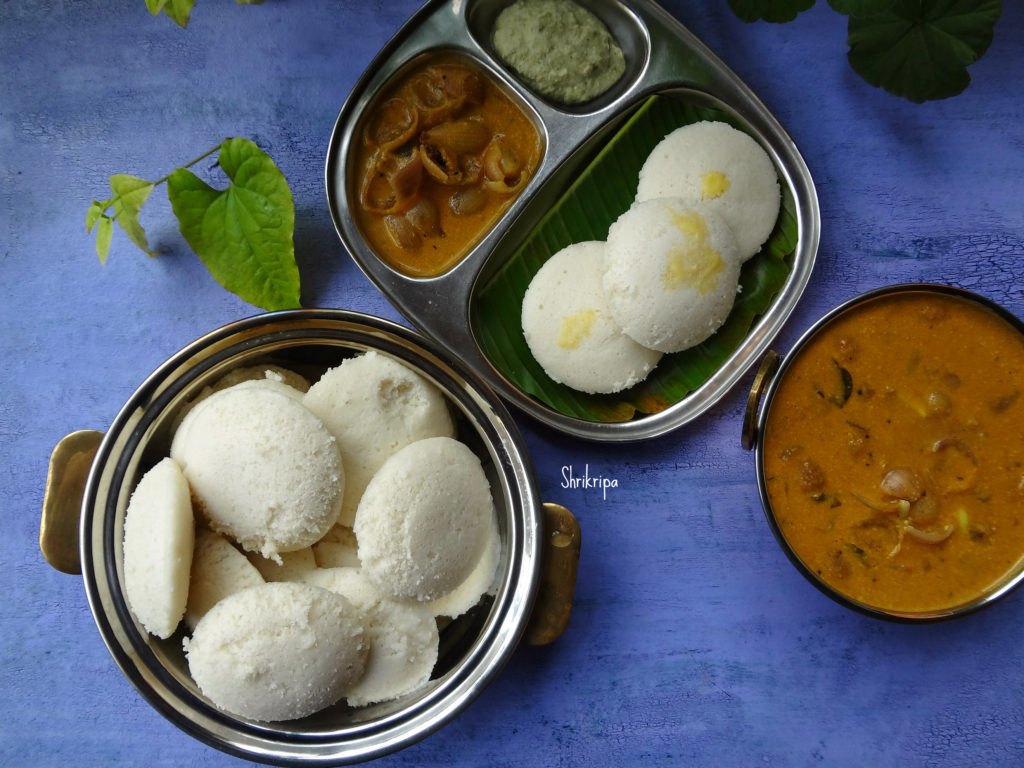
I always wondered how to get a pillowy soft kind of idli which is a speciality of Tamilnadu. In our coastal side, idli turns out soft but has a little grainy texture, not spongy which we get in all Tamilian eating joints. During one such discussion in our Foodie group, we asked to provide Tamilian style idli recipe with our ever energetic, multitalented uncle Senguttuvan. I really was not expecting this kind of response after one week. He and his wife literally took all the trouble and wrote step by step procedures with pictures, some tricks and notes. Added to that, there were a couple of video’s too. I was really overwhelmed and wanted to give its due credit by publishing this recipe in my blog after preparing it myself at home and we all loved it.

pic main

I tried his Idli recipe and paired it with another hit recipe of his Onion Garlic Kolumbu. It was a pair made in heaven kind of breakfast. I will post the Kolumbu recipe next and once again all thanks to Senguttuvan Subburathina and his wife Jayanthi Senguttuvan for this amazing recipe. Now, over to his words as it is and my pictures-

Here we go!

Ribbet collage 1

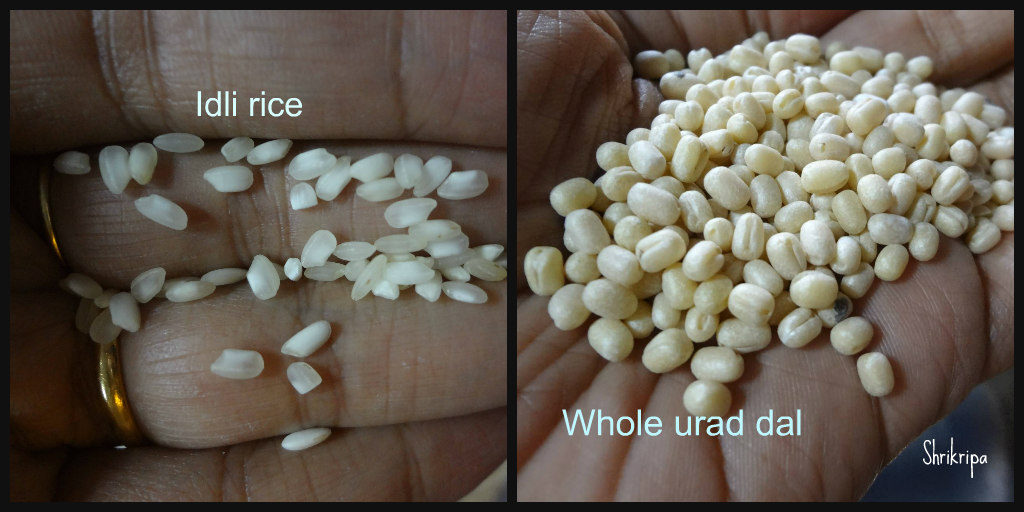
The selection of Rice is important. Boiled Rice (Idly rice) with patches of white will help in better softness of Idly.

We use whole white Urad Dal. Not broken one. (why? This also help soft Idly they say. I am not sure)

Fenugreek (Methi /Menthya Seeds)

Salt to taste.

Water as required.

Only the above ingredients go into making of this Idly / Dosa batter.

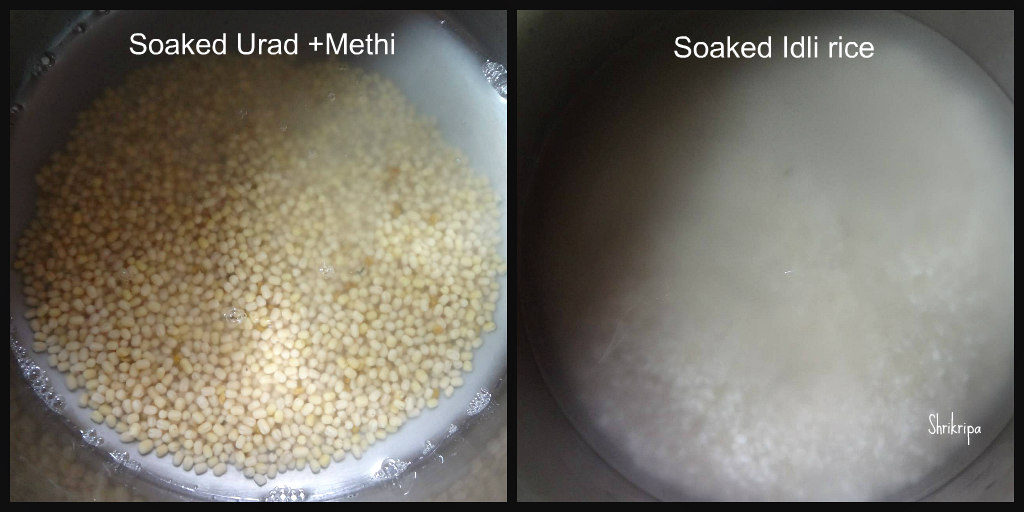
Wash the Rice 2-3 times with water and soak in clear water for 2hrs.
Simultaneously, wash Urad Dal and Menthya seeds and soak in water.

Ribbet collage 2

THE RATIO IS – RICE 4:1 URAD DAL. One TeaSpoon of Menthya.

Use of wet grinder is recommended. Heat generated during use of Mixie / blender spoils the Batter making. Though ice water usage will minimize the effect in mixie.

First, Grind the Urad Dal first, using the same water in which it was soaked. Grind for 25 mins adding water little by little so that a soft thick fluffy batter consistency is reached.

Ribbet collage 3

Transfer to a vessel and start grinding the Rice adding water little by little as you grind. About half an hour of grinding will give a little coarseness in batter. This thick batter is to be added to the Urad/ Fenugreek mixed batter.

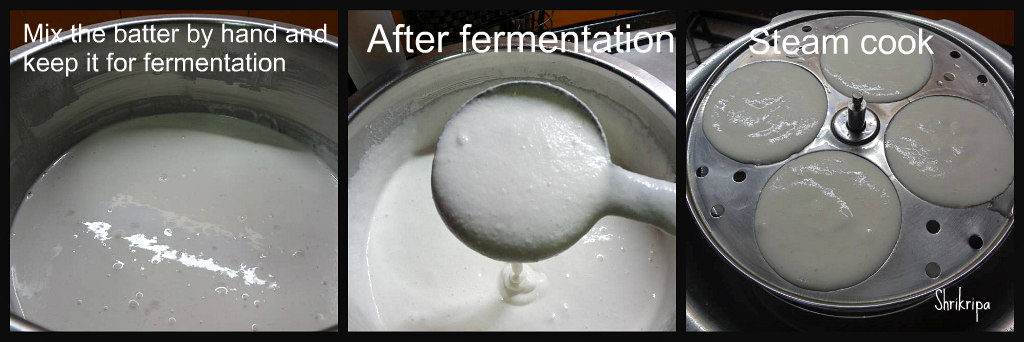
Add required ROCKSALT (to taste) and mix well with hands. This is important. The good bacteria in hands help fermentation of batter. Take care to choose a vessel that will allow 25% raise in the height of batter after fermentation.

Ribbet collage 4

Normally, the batter is prepared by noon around 2pm. By night, around 8-9 pm, the batter is well fermented, for Chennai weather. In cold climate, it is recommended to switch the light on in OTG and keep it in, so that the warm light helps in faster fermentation.

At 9pm, when you find the batter well fermented, mix it well with ladle and close and keep refrigerated.

As and when required, take the small quantity of batter in a separate vessel and use that portion leaving the main portion of batter under constant refrigeration, so that it does not get further fermented.

The batter is ready for Idly / Dosa preparation the next day morning. Mix well and use for fresh fluffy Idly.

Use a drop of oil in each pit of Idly plate and spread oil so that Idly comes out smooth. We cook Idly in pressure cooker without placing the weight. It just takes 7 minutes to get fluffy Idlies cooked.

After removing the Idly plates from cooker allow a minute or two to cool down and remove the Idly for easy removal.

Ribbet collage 5

For Dosa preparation:

dosa main
Remove small quantity of this batter to another vessel and add little water mix well and use. A thick Dosa or thin roast Dosa can be prepared with same batter.

Trust the above details help.

Note from Me:

-In Bangalore weather it takes more time to ferment. It took me almost 16 hours.

-I personally feel very lazy to remove urad dal after grinding. So, I add soaked rice and continue grinding as it is. It also works just fine.

Neer Dosa:

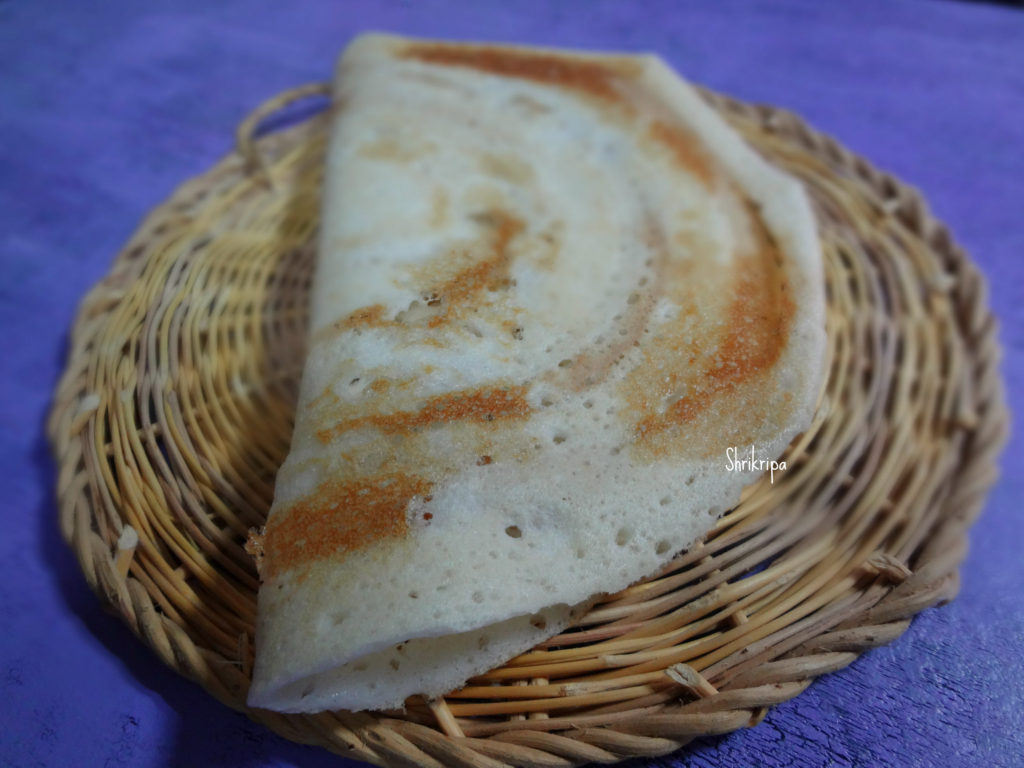
Hi all! Today I’m posting a south Karnataka special- Neer Dosa! Its literal translation to English is watery Dosa and we call this as “Thellavu”. It is soft lace like and many people enjoy this Dosa. Friends always want to have this Dosa when they visit our home and it is a joy to prepare and eat. Everyone keeps asking for the recipe and I thought I would post it. So, here’s how you make this simple, soft and delicious Dosa. This Dosa stays fresh for hours and very good option for tiffin boxes or gatherings. One can prepare in advance and keep it in a hot box.


Ingredients needed:

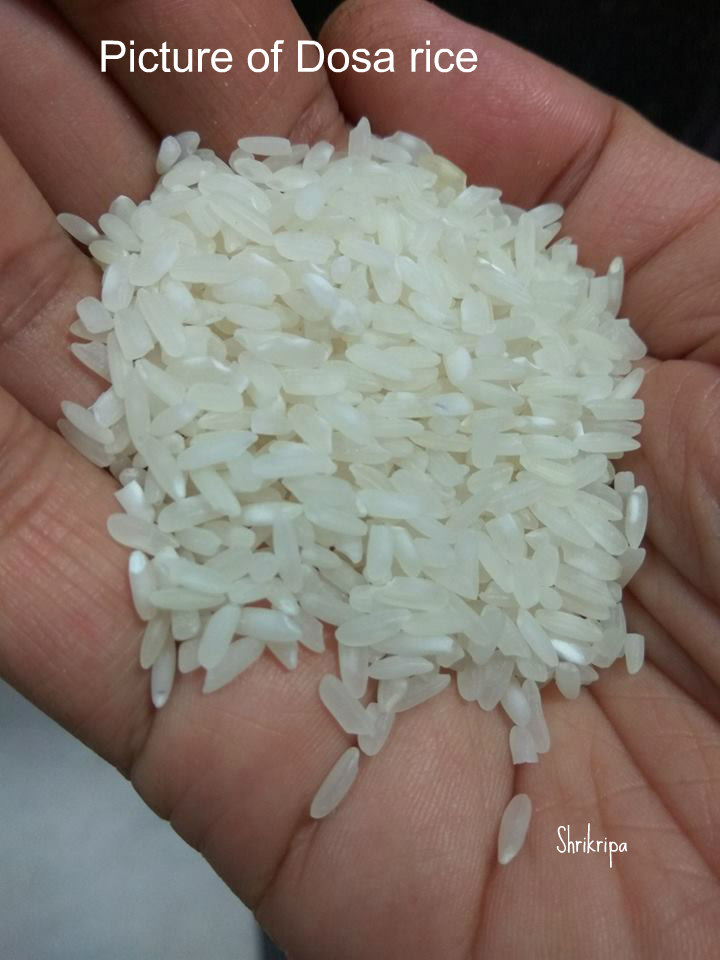
Dosa rice -2 cups

Salt

Iron griddle /tawa.

Method:

  • Wash and soak Dosa rice at night or 2 to 3-hour soaking is needed.

dosa rice

  • In the morning grind this soaked rice into fine paste with water (I use soaked water while grinding, it gives nice aroma for the Dosa) and salt as per requirement.
  • Make batter into pourable consistency like this and check for the salt.

Ribbet collage 1

  • Now keep Iron griddle for heat.
  • When it is ready, apply oil like this.
  • Pour one serving spoon of batter like how we make Rawa Dosa, you can see it in the picture above.
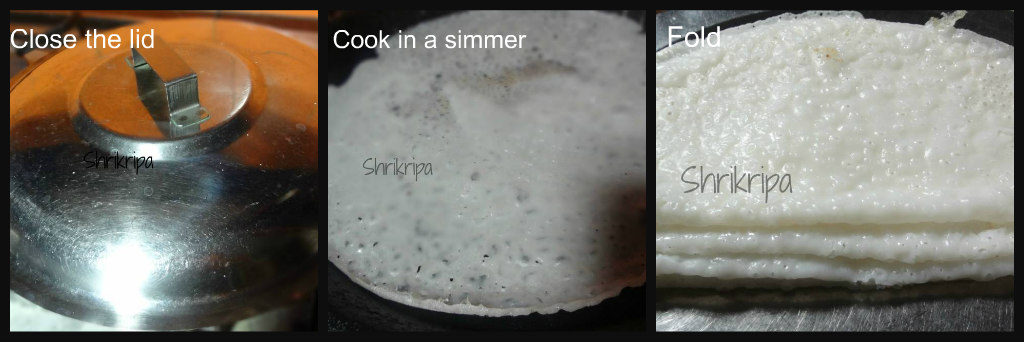
  • Now close the lid by keeping the gas on full flame.

Ribbet collage 2

  • After two minutes, remove the lid and keep the gas in simmer the edges of the Dosa rise a little(See in 2nd picture “cook in a simmer”)
  • Now flip this Dosa on the plate, leave for 2 minutes, then fold (upper shiny part will stay upwards) 
  • Now keep repeating this with the remaining batter and stack one over the other or take one big plate and stalk one opposite another alternately.
  • This type of folding will help to keep Dosa without sticking to one another.

neer dosa 7

  • Serve these Dosa with coconut and grated jaggery mixture or coconut chutney. People even enjoy Neer Dosa with Egg curry or Chicken curry as well.

Note:

  • Use soaked water while grinding.
  • If you are using any other variety of rice,please add half cup of fresh coconut to give softness to Dosa.

Spaghetti squash palya/stir-fry:

Spaghetti squash is oblong shaped spring vegetable. Like any other squash it has creamy yellow outer hard skin and inner core and seed part. It is rich in vitamins, rich in antioxidants and low in carbohydrate. Hence it is loved by weight watchers and one can enjoy this super magical veggie in many forms after baking it for a half an hour. After initial baking/cooking ,inner flesh tends to become thread like texture and which can be enjoyed in many ways as salads, as substitution for noodles etc.

I wanted to try this vegetable from so long. In my recent visit to USA, I asked my sister to bring this veggie when I was at her place. She did struggle a lot to find this vegetable in the Summer and finally managed to find one and handed it over to me. I knew it was extensively used as a substitute to noodles in salads, hence I wanted to incorporate it in our south Indian cooking and tried simple palya and it tasted great with rice and Rasam.

palya 2

Ingredients:

Spaghetti squash – 1

Red chilli powder – 1 tea spoon

Salt

Turmeric – ½ tea spoon

Jaggery – 1 tea spoon

Grated fresh coconut – 2 table spoons

Seasoning:

Coconut oil – 1 table spoon

Mustard – 1 tea spoon

Urad dal – 1 tea spoon

Cumin – ½ tea spoon

Red chilli -1 (broken in to half)

Curry leaves – 1 spring

Method:

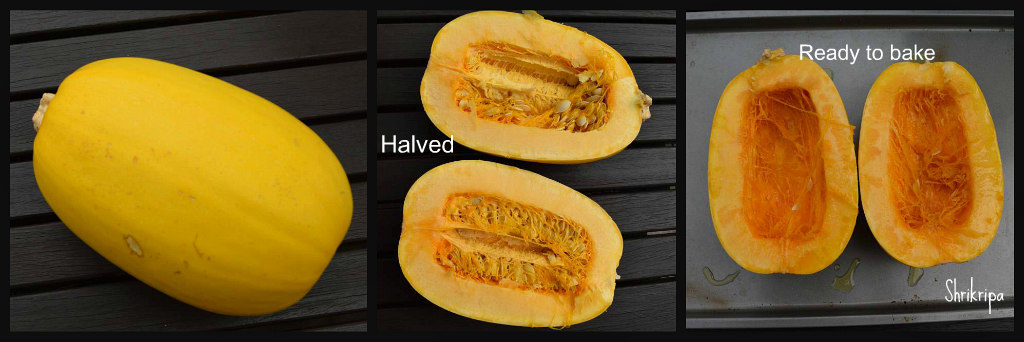
How to remove or prepare spaghetti, out of squash before making palya-

Ribbet collage 1

If you have not used spaghetti squash before, there are couple of things one should know. First you should cut this veggie into half lengthwise and carefully remove the seeds and attached fibre. Place these two pieces on a lined cookie sheet or any baking tray. Next spray some olive oil or any other vegetable oil and bake this in a pre-heated oven for 30-40 minutes at 180 ®C or until it is cooked and water oozes and accumulates at the centre hollow region.

Ribbet collage 2

Next, remove from the oven, cool a bit. Take one fork and scrape all over and see the magic. Yup!!! You will see lots of noodle like strands and collect all these and keep it ready for further cooking.

How to make Palya:

-Take one kadai/wok add oil and heat. Splutter mustard, add urad dal, cumin, red chilli.

Ribbet collage 3

-When urad dal becomes light brown, add curry leaves, collected spaghetti squash strands, salt, jaggery, red chilli powder and little water.

-Cook until veggie absorbs all the flavours and water dries up. Garnish with coconut gratings.

palya 3

-Serve with rice or roti.