Air potato French fry:

The trial of French fries by using Air potato was the best decision. It turned out super delicious and got a demand again and again from my family. If you caught hold of Air potato, don’t hesitate to try this out.

If you are new to the usage of Air potato, please go through my detailed description regarding the aerial tuber, how to cook etc., in “Understanding the roots and tubers.” And go down until Tubers, and you would find the Air potato under Number 8, and it is HERE. If you want to try the soup recipe, you can check my Air potato soup recipe over HERE.

Ingredients:

Air potato – 2

Corn flour – 1 – 2 tablespoons

Salt -to taste

Pepper -to taste

Red chilli powder – to taste

Oil – to deep fry

Method:

-Peel the outer skin, slice into ½ inch thickness, cut into fingers.

-Wash a couple of times, drain by spreading it on a kitchen towel.

-Heat oil, deep fry for a couple of minutes, remove, spread in a tissue, drain all the oil as much as possible.

-Sprinkle cornflour, coat nicely and keep this in a freezer for 30 minutes.

-Once again, deep fry until it is slightly brown, remove.

– Sprinkle salt, red chilli powder, pepper and serve with tomato ketchup.

Air potato onion soup:

I am fortunate enough to experiment with this rare tuber for Roots and Tubers 2020 calendar project—by Sahaja Samrudha noble cause of supporting farmers and introducing all the nutritious and most ignored products to the community at large.

Who doesn’t love soup? That too in winter months. This Air Potato onion soup recipe is earthy, delicious, healthy and soothing to our souls.

It uses simple everyday ingredients. In place of Air potato, one can use our regular potato. It doesn’t use fresh cream, so it is excellent for people with a sensitive gut. It is easily adaptable to make vegetarian or vegan.

If you are new to the usage of Air potato, please go through my detailed description regarding the aerial tuber, how to cook etc., in “Understanding the roots and tubers.” And go down until Tubers, and you would find the Air potato under Number 8, and it is HERE

Ingredient:

Air potato – 2 

Spring onion – 3 to 4 springs

Sweet corn – 2 tablespoons

Butter – 1 tablespoon

Garlic – 3 cloves

Seasoning – oregano or any preferred choice of yours.

Pepper powder – ½ tsp

Method:

-Peel potato, dice. Chop spring onion.

-Heat butter, sauté Spring onion and garlic, add potato, sweet corn and fry for a while.

-Add salt, preferred herbs as a seasoning, pepper and mix everything. Add sufficient water and cook.

-Churn the content, adjust the consistency by adding water. Boil, adjust the seasoning and serve.

Taro Root/ Arbi Fry:

A perfect side dish to enjoy with humble curd rice or Rasam rice. It is flavourful, healthy, and easy to make a side dish.

Now prepare the Taro root or Arbi;  if you are new to the usage of Arbi, please go through my detailed description of handling Arbi, how to cook etc., in “Understanding the roots and tubers.” And go down until Tubers, and you would find the Taro/Arbi under Number 7, and it is HERE.

Now, the procedure for Arbi Fry:

Ingredients:

Arbi root – ¼ kg

Salt – as needed

Turmeric – ½ tsp

Red chilli powder – 1tsp

Tamarind powder or paste – ½ tsp

Coriander powder – ½  – 1 tsp

Hing – one pinch

Garam masala powder – ½ – 1 tsp

Curry leaves – 1 – 2 springs

Oil – 2 – 3 tablespoons

Rice flour – 1 to 2 tablespoons

Method:

-Wash the Arbi root, cook for one whistle in a pressure cooker. Peel the skin and slice it ( ½ inch thick pieces).

-Take one bowl, put these slices, all the masalas from salt to garam masala from the ingredient list. Let it sit for half an hour to 1 hour.

-Take one iron skillet, heat oil, put curry leaves, then marinate taro, toss-up and down in a slow flame.

When it is slightly crisp, sprinkle some rice flour and toss further and enjoy with your meal to make it crispier.

Tips: For example, while roasting Arbi, adding little rice flour when 3/4 is done gives it a crisp texture and does not get sticky and mushy. And the necessity to use excess oil also does not arise, thus making it healthier.


Mullu Sauthe Guliyappa / Cucumber Appe:

Like Kendathadya, this is one more recipe, which I love and cherish the fond memories of my childhood. This recipe is usually made with heirloom cucumber of our region, which is flavorful and watery compared to commercially available salad cucumber.

Ajji, my maternal grandma or my aunt used to prepare this dish for the evening snack. It used to be real fun, sitting in front of the wood fire, chatting with ajji, holding the plate full of two types of Guliyappa. One is the sweeter version with added jaggery, and the other is savoury, with added onion, chilli, and curry leaves. It is pure bliss, and we never recreate the moment of such a warm, comfortable atmosphere in today’s world.

Now, we would see the procedure of making Sweet and Savory version –

Ingredients:

Dosa rice – 1 + 1 cup

Cucumber – 1 Big

Fresh grated Coconut – ½ + ½ cup

Salt

Jaggery – ½ cup (grated)

Onion – 1 medium

Curry leaves

Green chilli

Method:

-Wash, Soak rice in two bowls separately for 3 to 4 hours. Drain soaked water before grinding. (We are using an oozed water out of cucumber for grinding rice)

-Make jaggery syrup by boiling grated jaggery with very little water, sieve the liquid to remove all the impurities.

-Take one big cucumber, peel the skin, make halves, remove the inner core and seeds and grate it. Mix salt to the gratings, leave aside for 5 minutes.

When cucumber oozes its water, strain it through a sieve by extracting all oozed water and collecting it for grinding rice.

-Now, grind the batter for a sweeter version, take one set of drained rice, add ½ cup of Coconut, jaggery syrup, required amount of cucumber water and grind into not so smooth batter.

-To this batter, add tightly packed one cup of cucumber gratings and whip the mixer grinder to mix it thoroughly with the batter.

-Remove this batter to one vessel and allow to rest for 2 to 3 hours. (Resting the batter would help to make Guliyappa softer and flavorful)

-Now, it is time to make batter for the Savory version. Grind the same as the sweet version without adding jaggery. After adding and mixing the cucumber gratings, add chopped onion, green chilli and curry leaves.

-Remove this batter to one vessel and allow to rest for 2 to 3 hours. (Resting the batter would help to make Guliyappa softer and flavorful)

-After the resting period, heat the Appe/ Paddu pan, pour little ghee into each mould. When the paddu pan is hot, pour the batter, cook in a low flame, turn around, cook both sides properly, and enjoy the flavourful and delicious Sweet and Savoury Cucumber Guliyappa.


Milk Noodles: Instant noodles with coconut milk

As I always say, learning is an ongoing process. This particular recipe, which I learnt from my daughter. Yes! You heard it right 😀 Here, she has used coconut milk powder, which is an easy option for a hostller.

Instant noodles can be a super tasty, comforting meal by themselves if we consider replacing it with a little healthier option by opting for millet noodles and some tossed veggies. When I heard milk and the explanation of the recipe, I was a little hesitant. After tasting it, I can tell you; it was creamy and delicious. I felt the addition of curry leaves and coconut milk was a game-changer.

Here, I have used Instant Millet based noodles. One can opt for any preferred noodle and its masala for this recipe.

Ingredients:

A small pack of instant noodles – 1 ( with masala)

Onion – 1 ( slightly bigger pieces)

Garlic – ½ tsp (chopped)

Ginger – ½ tsp (chopped)

Green chilli – 1 (sliced)

Curry leaves – 2 springs

Coconut milk/powder– 1 sachet or as required

Chopped veggies – of your choice ( I used Carrot, green peas)

Turmeric – ½ tsp

Coriander powder – ½ tsp

black pepper powder – if needed ( optional)

Garam masala – ½ tsp

Sugar – to enhance the taste ( to balance)

Method:

-Take one tawa, heat a tbl spoon of oil, when it is hot, season with lots of curry leaves.

-Then, add chopped onion, green chilli, garlic, ginger fry for 2 min.

-Add turmeric, coriander powder, salt and add chopped veggies and green peas.

-Fry all these until veggies wilts. Add 2 cups of water, ready Maggi masala, and adjust the salt.

-Now, drop those noodle blocks, cook. When it is almost done, add coconut milk or coconut milk powder, add water to adjust the consistency.

-if you want some more zing, sprinkle a little pepper powder and serve.


Bassaru Palya :

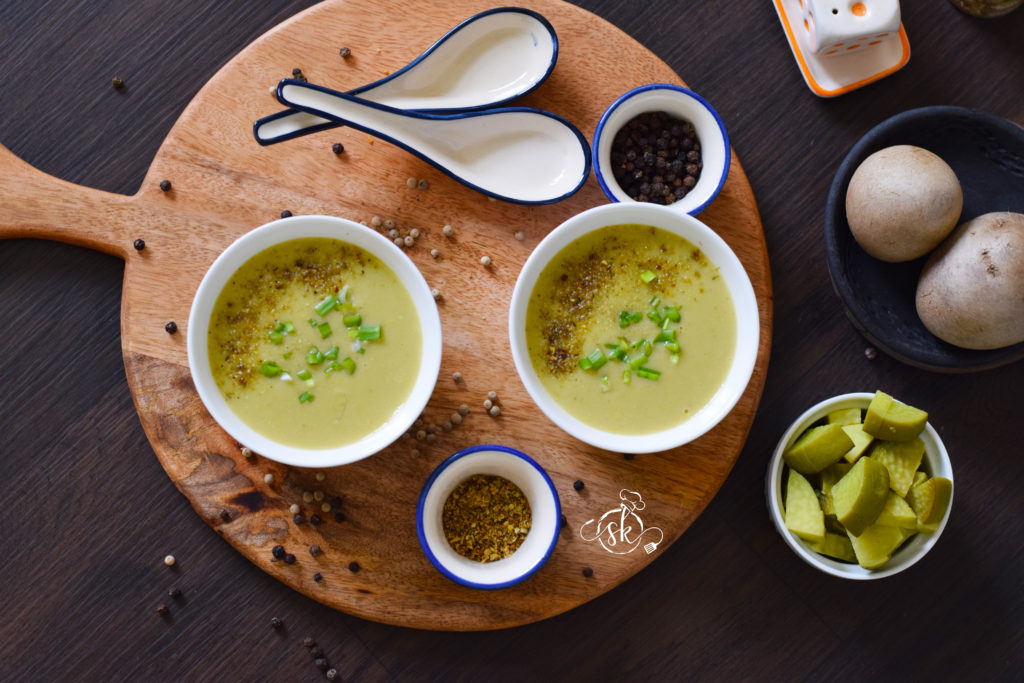
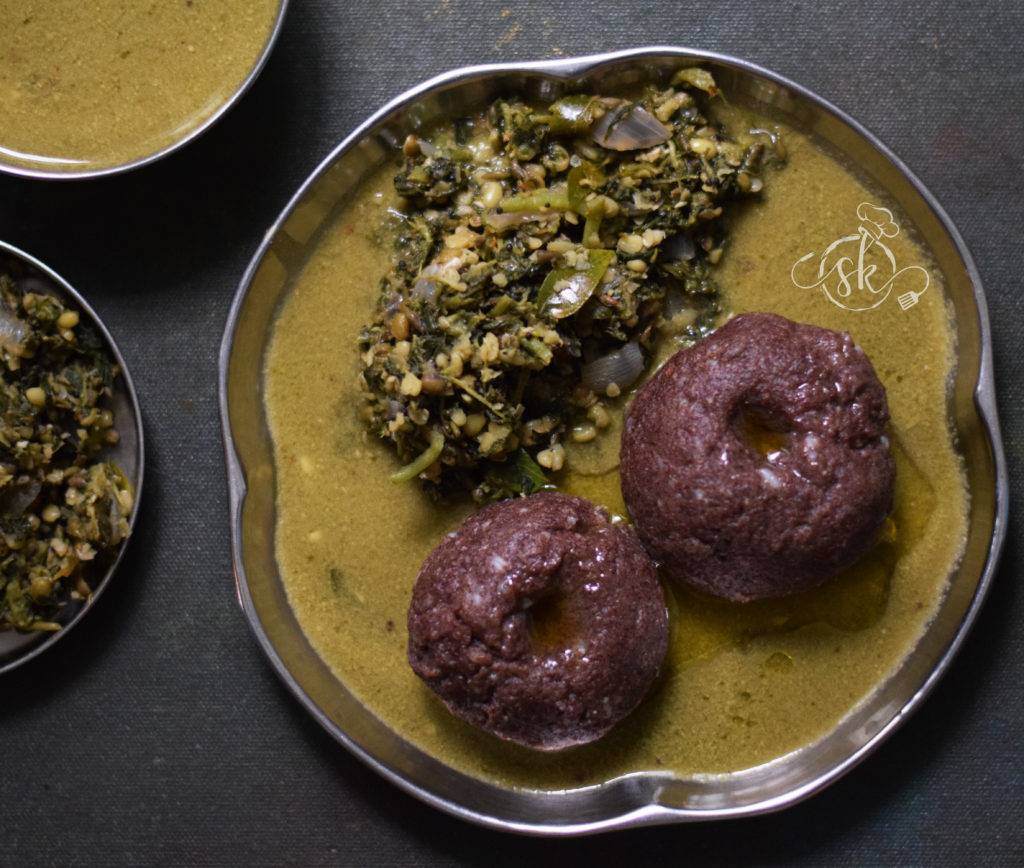
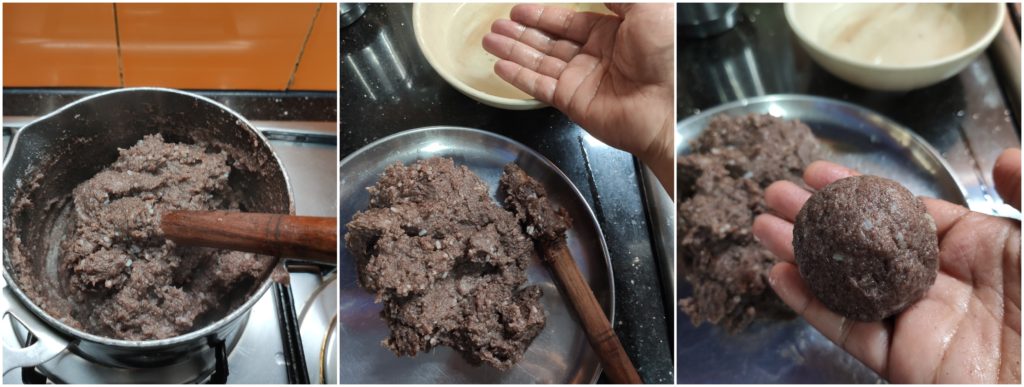
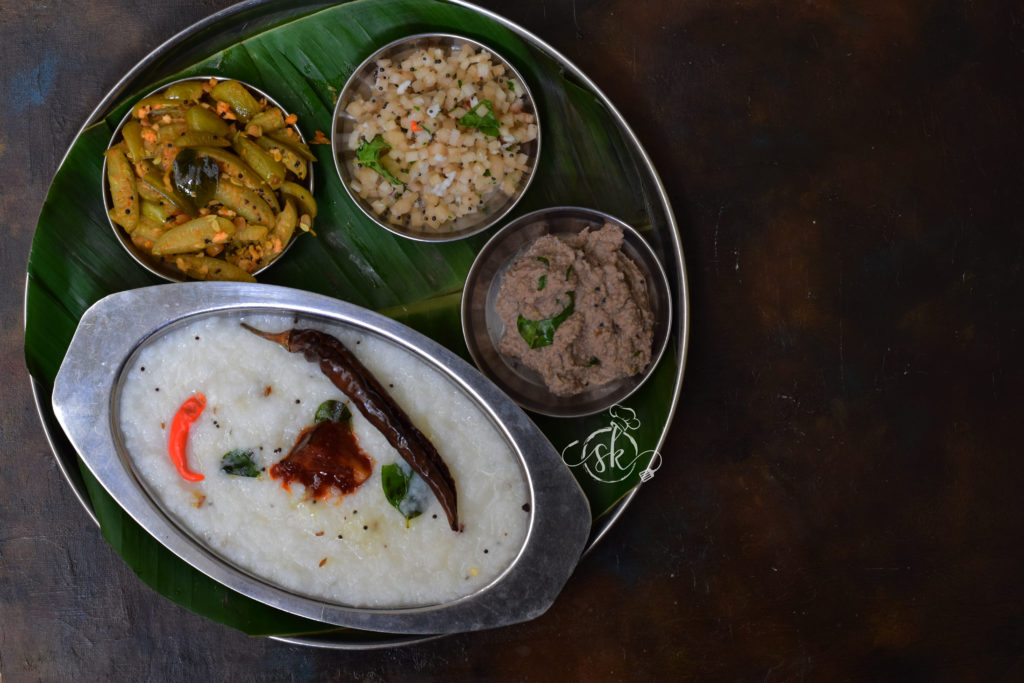
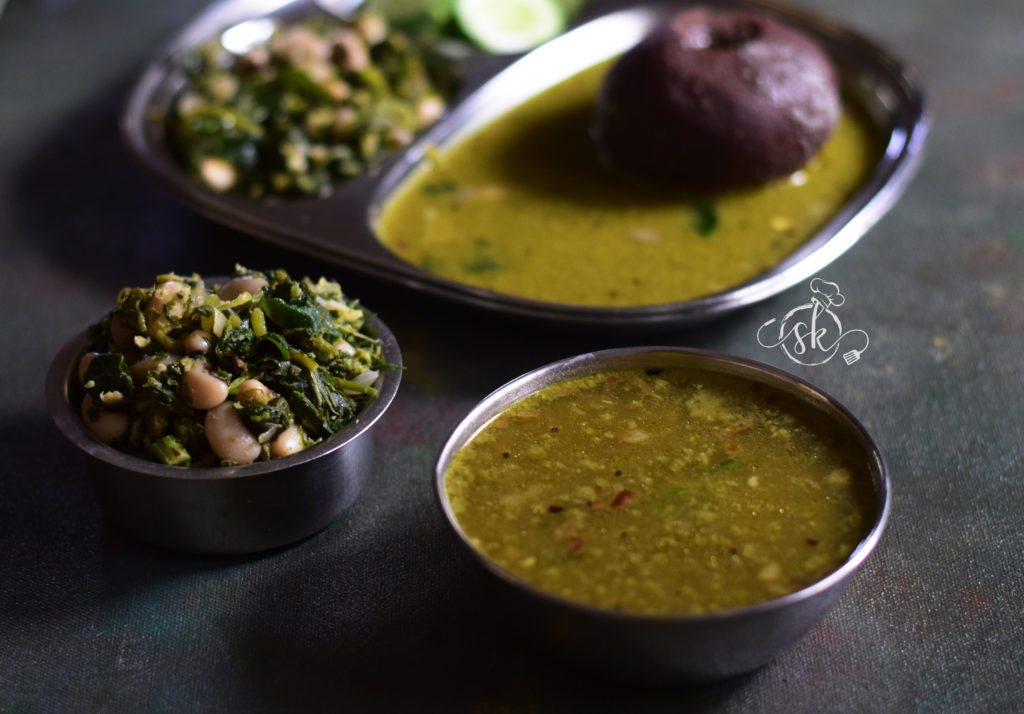
Now, what is bassaru? The literal transition of bassaru is Basida (drained) saru (Curry) in the Kannada language.  Here, we cook the legumes or dals and the choice of greens or veggies in an open vessel with little more water than the required amount to cook. When the cooking process ends, drain the water (stock) and use it for gravy by adding ground masala. Cooked veggies would turn into the dry curry with added seasoning. They are usually served with Ragi Mudde (finger millet balls) or Rice, topped with ghee with chopped onions or papads as an add-on. Bassaru is a staple affair in Bangalore, Mysore, Mandya, Hassan, Kolar, Tumkur region of Karnataka.

Bassaru Can be prepared using either Toor dal, Sprouted green gram, soaked black eye peas (karamani or Alasandekalu) or Sprouted horse gram etc. for protein ( also as a thickening agent to the curry)

If you prefer Greens, you can use the choice of greens except for fenugreek or Methi leaves.

If you don’t prefer greens, you can opt for any veggies such as French Beans, Ridge gourd, Cabbage etc.

Bassaru can be prepared in various ways, and each family has their method. Here, I am sharing how I make it and relish our Mudde Oota.

Ingredients for Saru:

Black eye bean – 1 cup (overnight soaked)

Chopped greens – 1 bowl

Salt

Green chillies – 4 to 5

Onion – ½ (chopped)

Garlic – 5 – 8

Curry leaves – 4 leaves

Coriander – 1 tsp

Cumin – ½ tsp

Coriander leaves – 1 tablespoon (chopped)

Coconut – 1 tablespoon

Tamarind – 1 tsp

For seasoning:

Oil – 1 tbl spoon

Mustard – 1tsp

Onion – ½ (chopped)

Curry leaves – 1 spring

Method:

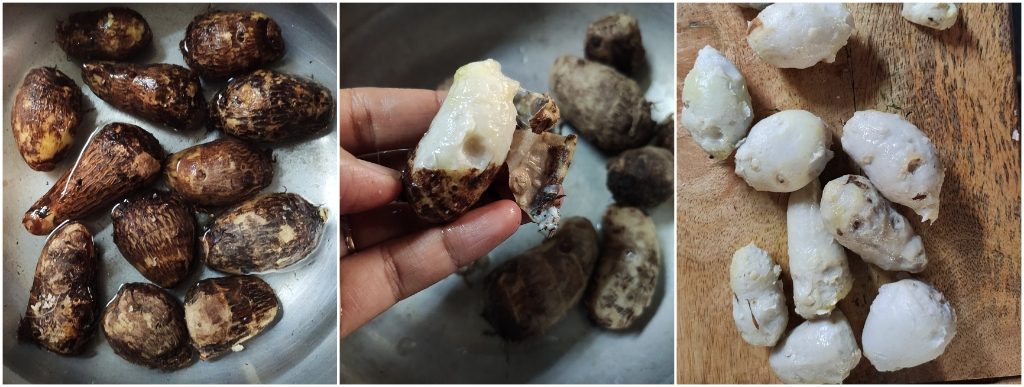
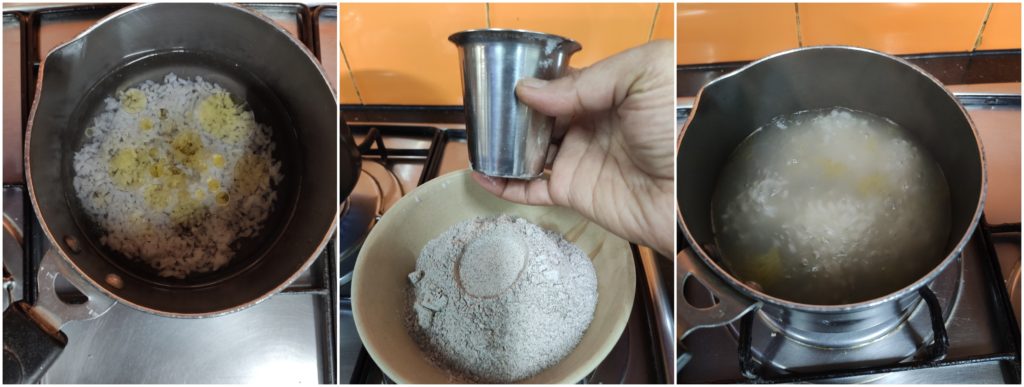
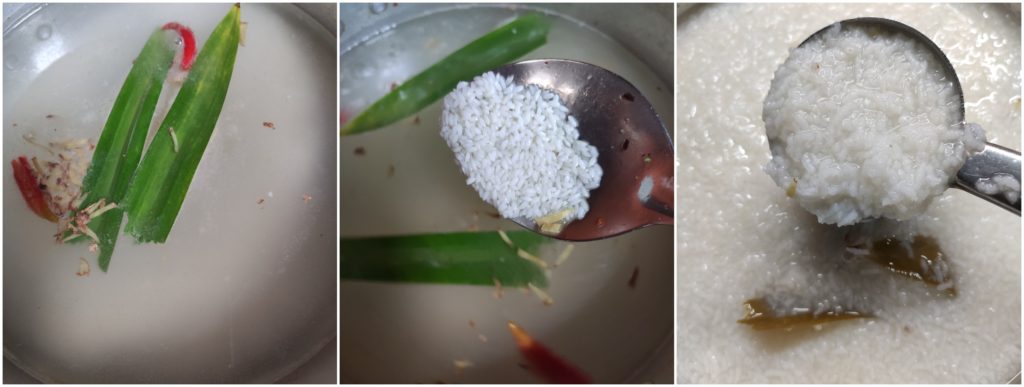
-Take one vessel, cook soaked bean. When it is half done, add chopped greens, salt and a pinch of jaggery (it is purely optional) and cook further.

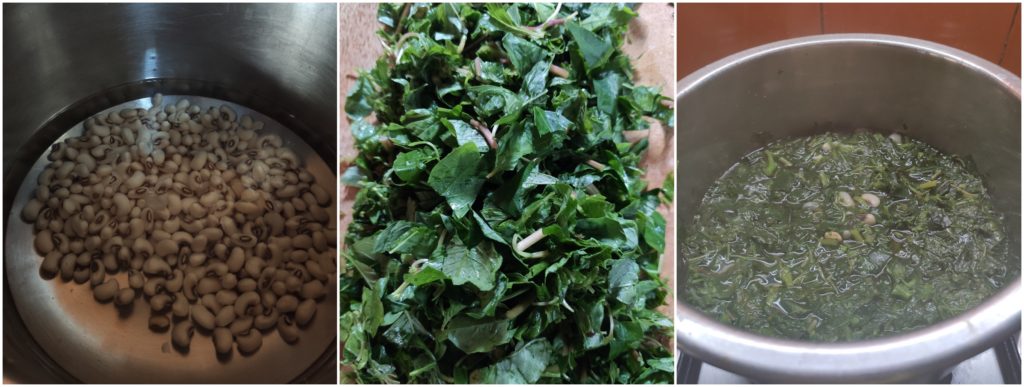
-When beans and greens are perfectly cooked and done, drain the stock, collect the water and keep it ready. (take out one serving spoon of cooked legume to grind the masala).

-At first, we would prepare the masala.

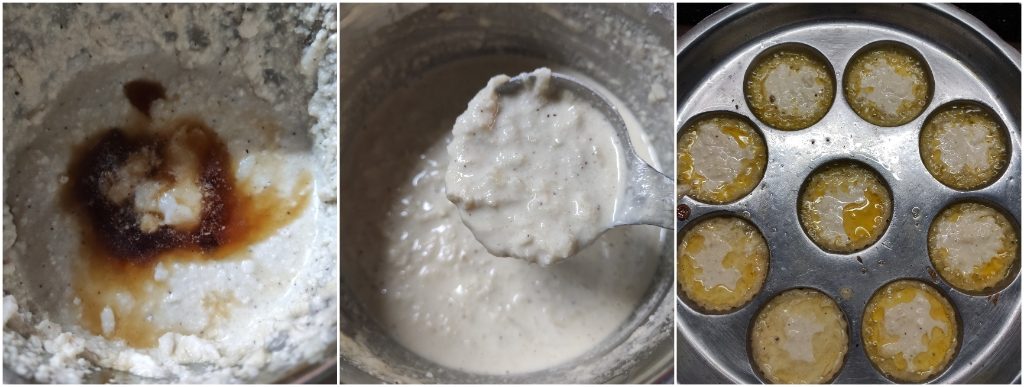
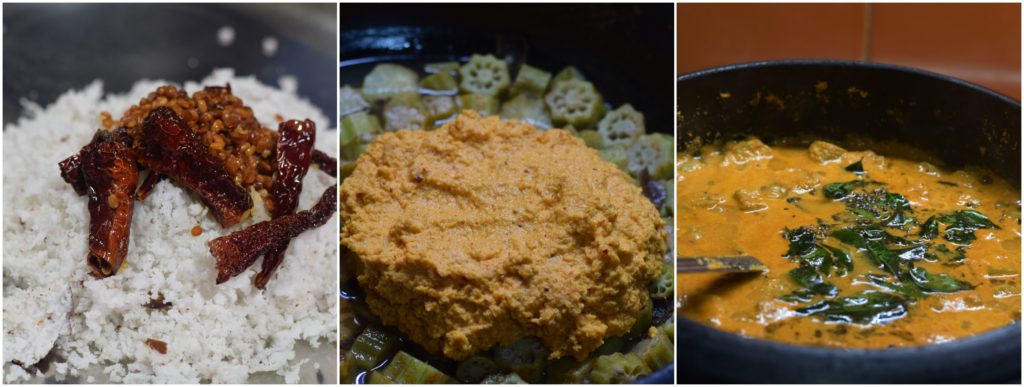
-First, heat 1 tsp of oil, add coriander, cumin, curry leaves, green chillies, onion, garlic and fry until onion becomes translucent. Switch off the gas. Add in chopped coriander, coconut, tamarind and mix everything.

-When fried content is cooled, grind it into a smooth paste by adding one serving spoon of cooked legume by adding a little water.

-Now, reserve little ground masala in the mixer jar ( to make palya) and proceed to make saru.

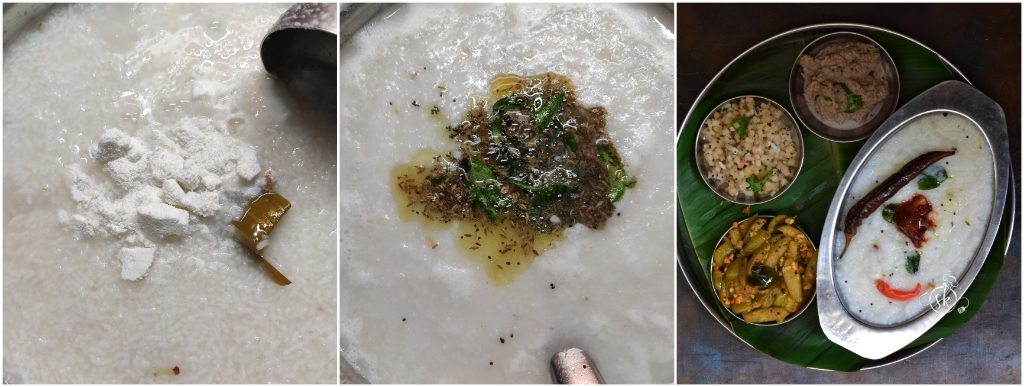
-Take one vessel, mix drained water/stock, ground masala, adjust the consistency, check for the salt, boil until it is frothy.

-Do seasoning, heat oil, splutter mustard, add curry leaves, chopped onion and fry until light brown. Add it to boiled bassaru.

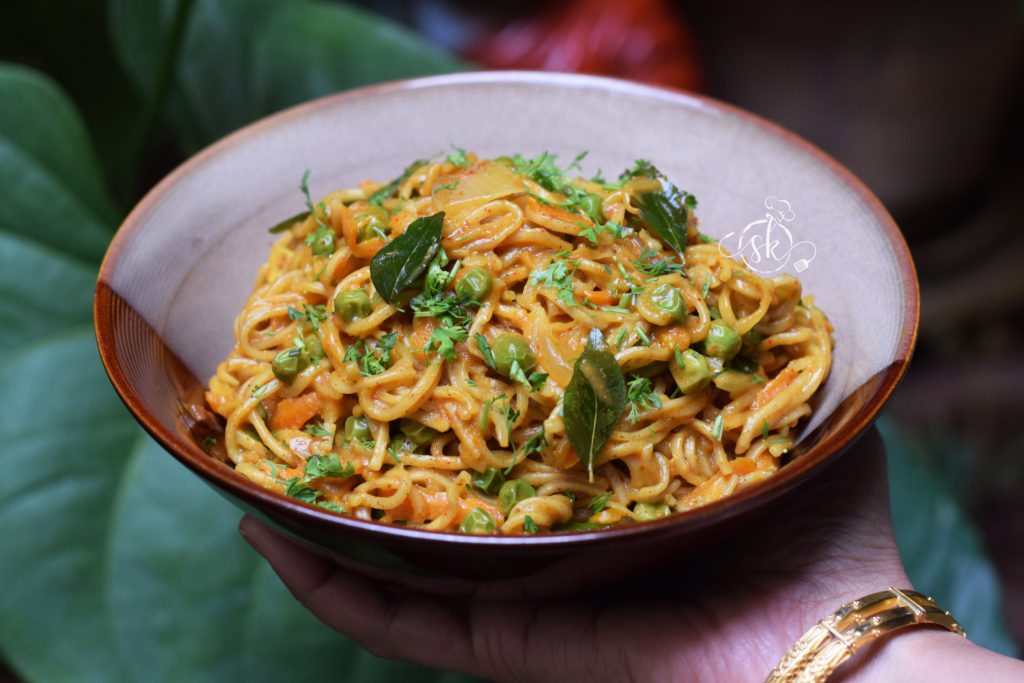
Now we would see the procedure of palya:

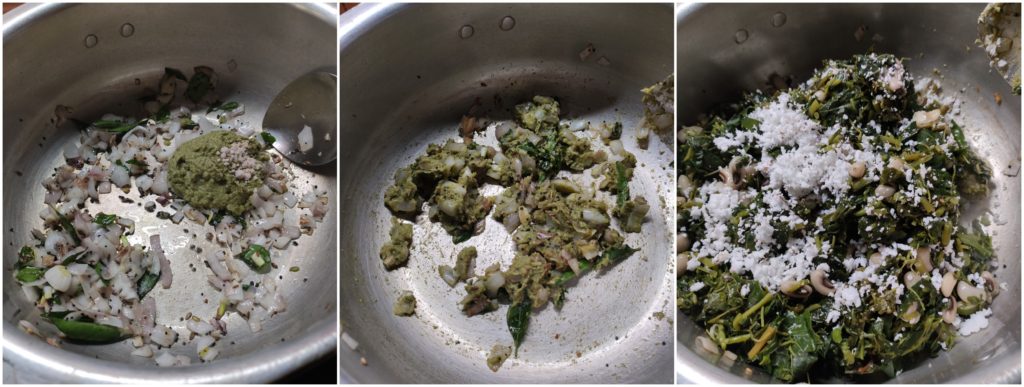
-Take one tawa, heat oil, splutter mustard, add curry leaves, chunks of onion, fry until it is translucent. -Add reserved ground masala, fry for 2 minutes. Now, add cooked and drained legumes and greens.

-Check for the salt, seasoning, garnish with freshly grated coconut and mix everything and enjoy with ragi mudde or Rice.

Note:

-Please cook legumes or dals in an open cooking method. Don’t use the pressure cooker. It indeed makes it mushier and soggier.


Ragi Mudde/ Finger millet balls:

Ragi Mudde is a Humble, day to day meal of Hassan, Bengaluru, Mysuru, Tumkur, Kolar region of Karnataka. As a coastal girl, I never used to like Ragi Mudde earlier. As time passed, I learnt to make perfect; please read as “suitable to our palate” mudde and tasty Bassaru palya to go with it. It is one of our family favourites too.

Ragi Mudde is rich in calcium, well balanced, wholesome, healthy food. Perfect meal for elderly, diabetics, weight watchers.

Making of mudde is a real art. It needs little patience and perseverance. Like preparation, eating is also a tactic. Instead of chewing, Ghee laden mudde should be swallowed by dipping it in veg or non-veg curry.

Mudde can be prepared in various ways, and each family has their method. Here, I am sharing how I make it.

Ingredients:

Finger millet / Ragi flour – 1 cup

Water – 2cups

Salt – one pinch( optional)

Cooked rice – 1 or 2 tbl spoons

Ghee – 1 tsp

Method:

-Take one saucepan or thick vessel, heat water by adding salt, ghee, rice.

-When water starts boiling well, keep it in a simmer, add ragi flour and keep one wooden spoon or steel spoon and close the vessel with leaving a gap to allow to escape steam.

-After 5 min, you could smell the cooked ragi. At this juncture, open the lid, start to move the spoon in a circular motion to cook further until you feel the dough doesn’t stick to your finger while checking and the aroma of cooked ragi fills the nostrils. It takes a reasonable amount of time ( from 5 to 10 min)

When ready, transfer the cooked dough to a wooden chopping plank or a wet steel plate. Immerse your hand in a bowl of water, start making the required sized ball by pinching the main dough.

-If you are serving immediately while serving, add ghee and serve. Otherwise, reserve all the balls in a hot box.

Note: -The colour of the Mudde depends on the Ragi flour. 

-For the vegan version, omit ghee and use any vegetable oil.


Kayi Ganji: Coconut Flavoured Rice porridge

It is my go-to recipe for a lazy, Simple, soulful meal on weekends or rainy/winter evenings. This recipe of Kayi Ganji is not our traditional recipe. My way of making a one-pot meal is by mixing my mom’s Theli saru, nothing but rice starch Rasam and rice.

 Amma used to make fantastic ginger flavoured Rasam by using drained rice starch of cooked rice. We sisters used to enjoy Hot white rice with Amma’s theli saaru and pickle a lot. Hence, I introduced those two aspects in a single one-pot meal, and the recipe is here.

Here, one can use freshly extracted coconut milk as well as instant coconut milk powder. Freshly extracted milk does taste out of this world, and for sure, there is no comparison in taste. When you are sick and have no mood to cook, it is a soothing and relaxing one-pot meal option.

The procedure is simple-

Ingredients:

Rice – 1 cup

Water – 4 cups

Salt

Green chillies – 1 or 2

Ginger – ½ inch (julienne)

Coconut milk or powder – according to the taste

Seasoning: Ghee/coconut oil, mustard, cumin and curry leaves.

Method:

-Wash rice, boil water in an open vessel or a cooker. Add rice, slit green chilli, ginger, salt and cook.

-Here, the rice should become mushy. If it is the cooker, switch it off after 3rd whistle.

-Open the lid, add coconut milk, adjust the consistency by adding more water.

-Boil for 2 minutes and switch off.

-Do seasoning by heating ghee or oil, splutter mustard, cumin, and curry leaves. Pour it over the rice and mix everything and serve. You can enjoy it with any side dish or plain pickle.

-You can garnish with chopped coriander as well as lemon juice (completely optional)

Note: I have added one pandan leaf to enhance the flavour. It is entirely optional.


Bendekai Kayirasa / Ladies finger coconut curry:

Kayirasa is one of our almost extinct dishes, which can be seen only in our rural houses and found only in our community / homely recipe. It is coconut-based, slightly sweetish, and pairs well with hot boiled red rice or white rice.

Like Sambar, we always use a light green or purple coloured heirloom variety of Bhindi to make Kayirasa. I have never tried Kayirasa with any other types of Bhindi. It is my childhood favourite, and I used to ask my ajji / Grandmother to prepare whenever I visited her. Her preparation tasted like heaven, and I could never replicate that taste even if I used clay pot like her. Grandmothers are ultimate, and they have a magic wand in their hand to dish out such a delicious meal.  

Ingredient:

Bendekai / Ladies finger – ½ kg

Tamarind – big gooseberry size.

Salt

Jaggery

Red chilli powder – ½ tsp

Fresh coconut – 1 big bowl

Urad dal – 1 tablespoon

Dried red chillies – 3 to 4

Seasoning:

Coconut oil – 2 tsp

Mustard – 1 tsp

Red chilli – 1

Curry leaves – 1 to 2 springs

Method:

–Soak tamarind, boil with little added water, salt, jaggery, red chilli powder.

-When it starts boiling, add chopped Bhindi. Allow cooking on a low flame.

-To avoid sliminess,  don’t close the lid or put a spoon to mix while boiling Bhindi.

-In the meantime, prepare the masala: heat coconut oil, fry urad dal, red chillies. Grind into smooth paste by adding coconut and water.

-Add the ground masala to cooked veggie, boil nicely by adding sufficient water to adjust the consistency.

-Do the seasoning and serve with hot rice.


Eggless Chocolate Banana Cake:

After trying my hand in Homemade Pure Cocoa powder, I thought of using Cocoa powder in several recipes; I first wanted to include it in my all-time favourite banana cake. It is an ideal recipe to finish off overripe bananas and the perfect tea time snack for anyone, including small kids. The cake, which has whole wheat flour, natural cocoa, natural vanilla as well as milk. If you want to make it vegan, replace it with vegan milk and proceed to bake.

Let us see how I have done it –

Ingredients:

Whole Wheat flour – 1 1/3 cup ( I took 1 cup of whole wheat flour + 1/3 cup of Emmer wheat flour)

Fresh/Desiccated coconut – 2 tbl sp

Baking soda – 1 tsp

Baking powder – 1 tsp

Salt – ¼ tsp

Milk – ¾ cup

Coffee powder – 1 tsp

Pure Cocoa powder – ½ cup (unsweetened cocoa powder)

Brown Sugar – ½ cup

Oil – 1/3 cup

Vanilla – 1 tsp (I have used pure powdered vanilla)

Bananas – 2 ( ½ to ¾ cup of pulp)

Chocolate chip or Cocoa nibs – 3 tbl sp

Method:

-Mix dry ingredients like flour, baking soda, baking powder, salt, desiccated coconut in a bowl and keep aside.

-In a saucepan, heat milk, mix in cocoa, coffee powder and make a concoction. Add in vanilla, Sugar and oil one by one. Beat well.

-Next, make a puree of banana and mix in, beat well. Now, the wet ingredient is ready.

-Fold in dry ingredient to wet ingredient. Don’t over mix.

-Pour the mixture into a lined loaf pan, top it with the choco-chip or cocoa nibs and bake at 180°C preheated oven for 40 minutes or until it is done.

-Take out, cool the cake and slice it and enjoy. It stays good for 3 to 4 days under refrigeration.

-Reheat the cake for 30sec in the microwave and enjoy with a cup of coffee or tea.