Eggless Chocolate Banana Cake:

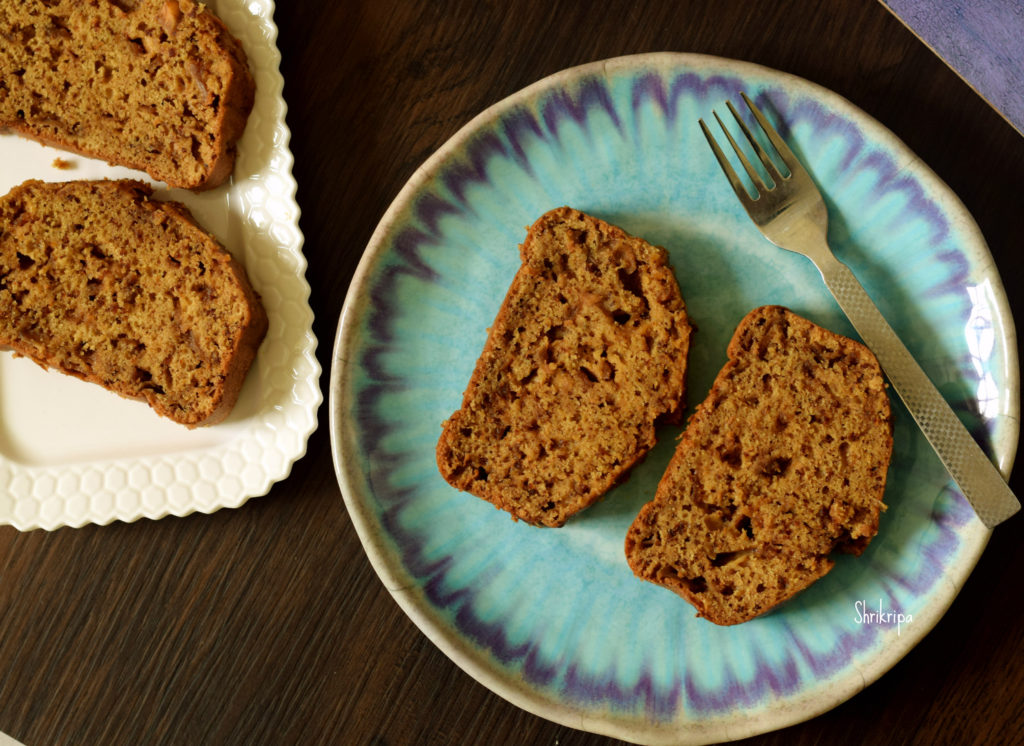
After trying my hand in Homemade Pure Cocoa powder, I thought of using Cocoa powder in several recipes; I first wanted to include it in my all-time favourite banana cake. It is an ideal recipe to finish off overripe bananas and the perfect tea time snack for anyone, including small kids. The cake, which has whole wheat flour, natural cocoa, natural vanilla as well as milk. If you want to make it vegan, replace it with vegan milk and proceed to bake.

Let us see how I have done it –

Ingredients:

Whole Wheat flour – 1 1/3 cup ( I took 1 cup of whole wheat flour + 1/3 cup of Emmer wheat flour)

Fresh/Desiccated coconut – 2 tbl sp

Baking soda – 1 tsp

Baking powder – 1 tsp

Salt – ¼ tsp

Milk – ¾ cup

Coffee powder – 1 tsp

Pure Cocoa powder – ½ cup (unsweetened cocoa powder)

Brown Sugar – ½ cup

Oil – 1/3 cup

Vanilla – 1 tsp (I have used pure powdered vanilla)

Bananas – 2 ( ½ to ¾ cup of pulp)

Chocolate chip or Cocoa nibs – 3 tbl sp

Method:

-Mix dry ingredients like flour, baking soda, baking powder, salt, desiccated coconut in a bowl and keep aside.

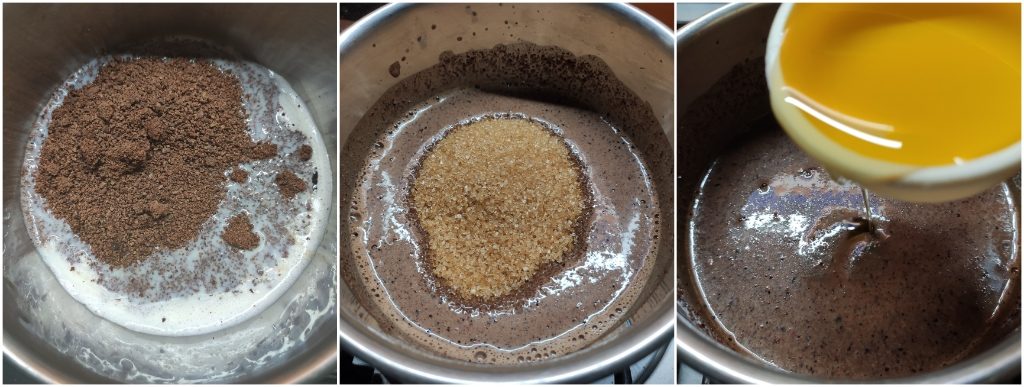
-In a saucepan, heat milk, mix in cocoa, coffee powder and make a concoction. Add in vanilla, Sugar and oil one by one. Beat well.

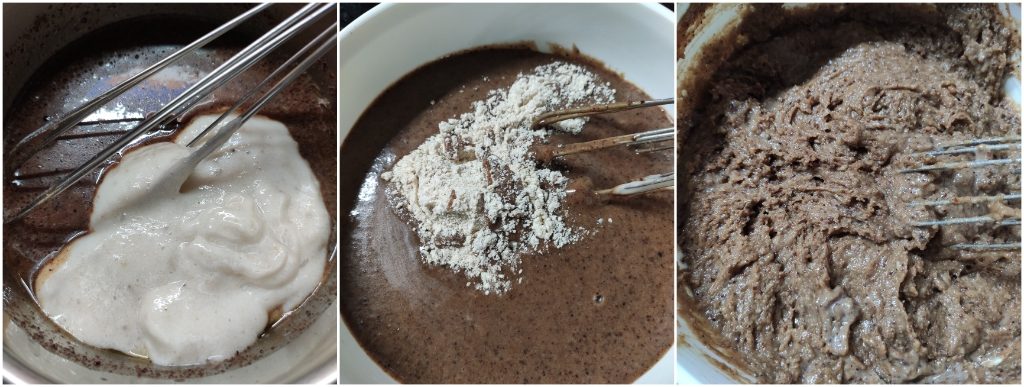
-Next, make a puree of banana and mix in, beat well. Now, the wet ingredient is ready.

-Fold in dry ingredient to wet ingredient. Don’t over mix.

-Pour the mixture into a lined loaf pan, top it with the choco-chip or cocoa nibs and bake at 180°C preheated oven for 40 minutes or until it is done.

-Take out, cool the cake and slice it and enjoy. It stays good for 3 to 4 days under refrigeration.

-Reheat the cake for 30sec in the microwave and enjoy with a cup of coffee or tea.

Almond Vanilla cake :

Hey, Anushree here! This is my second guest post on my mom’s blog ( My first one was a red velvet cake, if you haven’t checked that out, click right here).

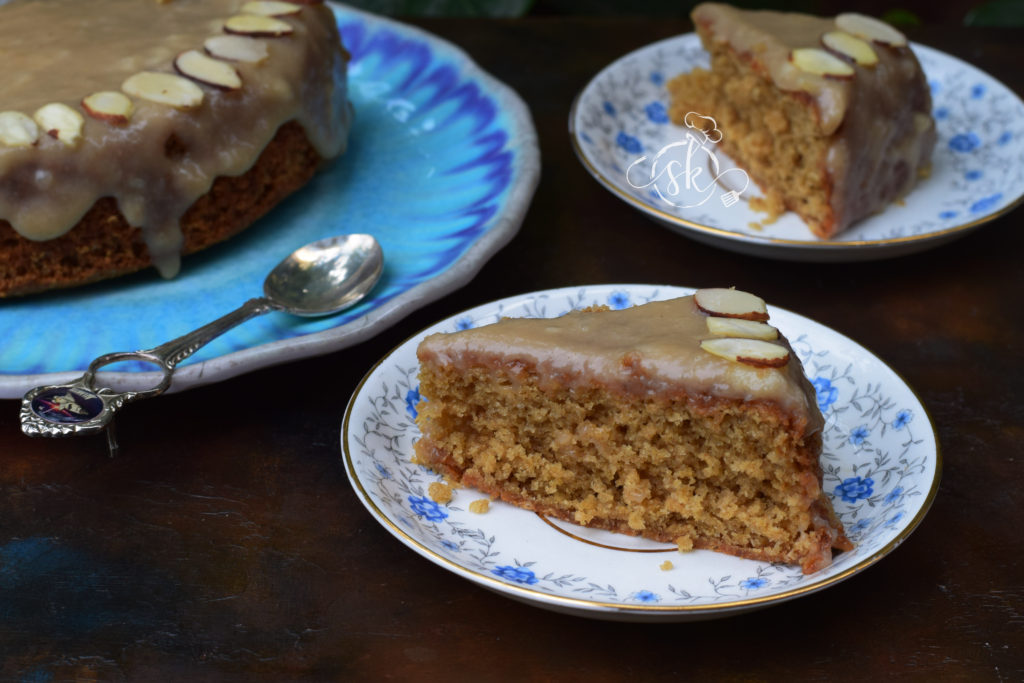
So, it is my parents as well as my mom’s Blog anniversary today, and since my sister and I are home, and the world has come to a pause (pretty much), I thought it would be a good idea to make something for their special day. My mom doesn’t like chocolate much and loves milder flavours. My dad pretty much loves all desserts, so I decided to make a healthy, and yummy almond and vanilla cake, with a glaze instead of frosting as we aren’t too fond of the cream icing. So, while frosting, instead of new age cream cheese, I have opted for an original Ermine icing, which is also known as boiled milk frosting. Here, instead of All-purpose flour, I have used a mixture of  Almond flour, oats flour, and whole wheat flour.

Ingredients:

For the cake:

Almond flour/ meal – ½ cup

Whole wheat flour – ½ cup

Oats flour – ½ cup

Sugar -¾ cup 

Baking powder -1/2 tsp

Baking soda- ½ tsp

Salt – ¼ tsp

Butter – 2 tablespoons

Curd – ½ cup

Egg – 1

Vanilla essence – 1 tsp

For the Glaze:

Milk – 1 cup

Almond flour – 5 tablespoons

Arrowroot powder – 1 tablespoon

Butter – 50 grams

Sugar – ½ cup

Vanilla – 1 tsp

Slivered Almonds – As needed

Method:

To Bake the cake:

-Preheat oven for 180° C . Line the baking tray and keep it ready.

-Measure every ingredient and keep it ready. Melt butter and keep aside.

-Take one glass bowl, beat egg, then sugar, melted butter, curd, vanilla beat everything until it is well mixed and keep aside.

-Now take one more bowl, put all the dry ingredients, all the three flours, salt and baking soda, baking powder. Sieve a couple of times or dry whisk and keep it ready.

–Pour the previously prepared wet mixture to dry ingredients and fold the batter by using any spatula.

-Pour the batter in the lined baking tray and keep this for baking for 40 -50  minutes or until done.

-Before removing, check with a knife by inserting, in the baked cake. It should come out clean.

-Cool the cake completely before doing the frosting part.

Method for Frosting:

-Take milk, Almond flour, and Arrowroot powder in a saucepan. Boil the mixture until it is cooks and becomes creamy.

-Switch off the flame, add in butter, sugar, and vanilla, mix well. Cool the mixture and keep it in the fridge to cool further making it thicker. ( I have not kept it in the fridge)

-Now, slice the cake, make a 2-equal slice, Apply the frosting on the first layer and cover it with the second slice.

-Now pour the frosting on the top, we like the sauce texture and left it like that.

-Decorate the cake with slivered almonds and serve and enjoy with the family <3

Coconut Flour and Buck wheat Chocolate chip cookies:

In my earlier posts I have discussed regarding homemade coconut flour as well as  eggless coconut flour cookie with chocolate chip.

One thing we must keep in our minds while using coconut flour is, do not underestimate its absorption power by seeing its light and airy texture. It absorbs moisture like a sponge. What I learnt from my previous experience is, it needs almost equal amount of moisture content as flour volume.

Here I have tried with egg as well as without egg by adding  flax gel as an egg replacer, mainly because of its gel like texture. Coconut flour does not have any holding capacity, so thought of using flax gel.

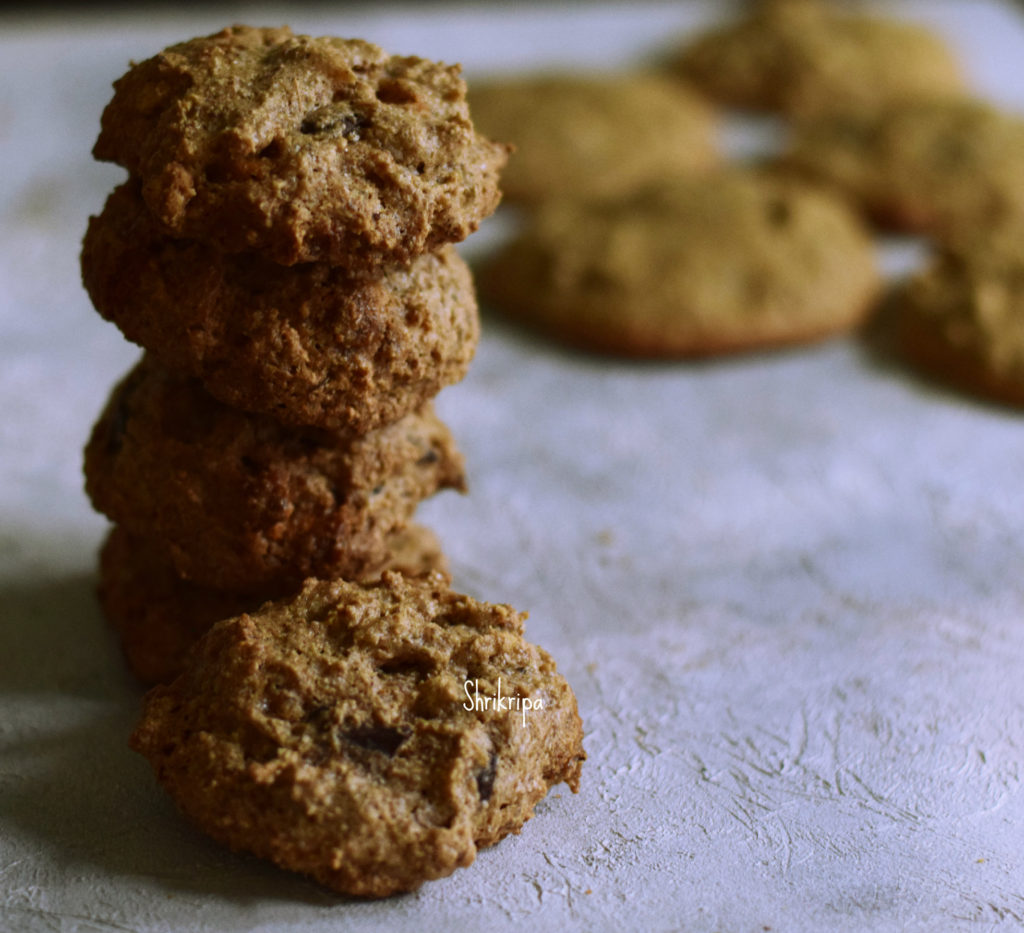
In this experiment I have taken equal amount of coconut flour and buck wheat flour ( I did try with millet flour as well)  it did absorb the liquid, swell and gave me Eleven  cookies 😊 More than everything, this was interesting!! Baking Coconut Flour by adding millet/ buck wheat flour . This was a little experiment, and the results were not bad at all! I got the big thumbs up from my twins.

Let us see the procedure for With Egg Version –

Ingredients:

Coconut flour – ½ cup

Millet/ Buck wheat flour – ½ cup

Choco chip – ¼ to ½ cup

Pink salt – ¼ teaspoon ( you can use normal salt as well)

Cinnamon powder – ½ tsp

Cooking soda  + baking powder – ¼ tsp ( 1/8th  tsp  each)

Eggs – 2

Ghee – 2 tablespoons

Vanilla – ½  teaspoon

Organic Natural brown sugar – ½ cup (you can use normal sugar or jaggery as well)

Method:

-take one bowl, add all the dry ingredients: Both the flours, salt, cinnamon powder, cooking soda, baking powder and Choco chip. Mix everything and keep it aside.

-Beat the egg , add vanilla, sugar, and ghee. Beat everything until you see a bubbly texture.

– Pour wet mix into dry ingredient and fold everything and prepare a dough. It would be sticky and wet.

-Keep this in a refrigerator at least for a half an hour. By this time, coconut flour would absorb the moisture and batter would be perfect to scoop out.

-Pre heat oven at 170 °C. Line the baking tray with the butter paper.

-Scoop out the mix by using ice cream scooper and arrange in a lined baking tray.

-Bake this in a pre-heated oven for 15 to 20 minutes.

-Do not touch while removing, it will be incredibly soft. Remove the tray and cool as it is.

-After cooling, it will harden a bit. After it cools down completely, store it in an airtight container.

– These cookies are slightly crunchier at outer circle, soft and chewy at the centre.

– It becomes a little harder and firmer the next day .

For Without Egg Version:

For Egg less version, please use any egg replacer or 

Flax gel: The basic ratio is 2 ½ tsp of flax seed powder and three tablespoons of  hot water  and then you simply whisk in the mixture until it becomes gelatinous  to replace one egg.

-Here, after mixing the wet and dry mixture, you can directly proceed to baking. No need to keep it in the fridge. Dough is less liquid, compared to the with egg version.

-Cookies turn out much more heavy and crunchier than the with egg version. Does not spread while baking. It holds the shape very nicely.

Red velvet Cake :

Hey, this is Anushree here and this is my first guest post on my mom’s blog! I have been home from college for a few days now and thought I’d make something special as Christmas is coming up and my sister is coming back from college in 2 days! So, I decided to make a Red velvet cake.

Yes! You heard it right. It is not deep red in colour but filled with healthy ingredients. It is No Artificial colour and No All-purpose flour recipe. And to pull this off, I obviously needed some assistance from an expert in healthy cooking, who happens to be my mom, so that worked out great for me!

In olden days, Red velvet cake was made with All-purpose flour and Beets. Here I have used Mixed healthy flour ( Amaranth , Red rice and Almond flour) with beetroot. So, it is not a white cake with red dye.

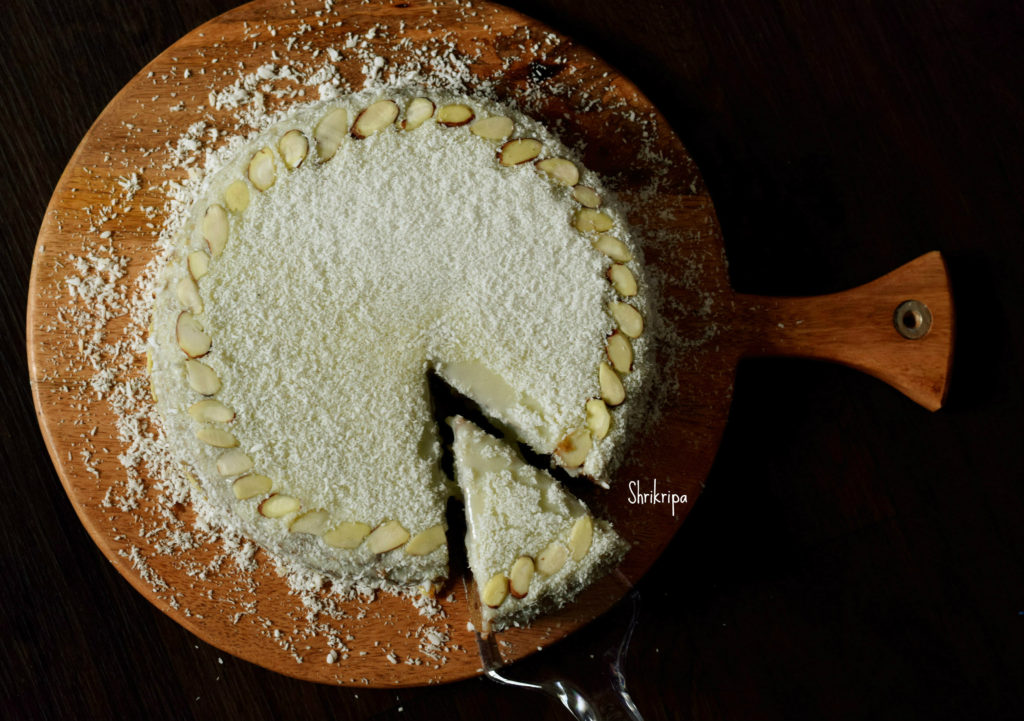
While frosting, instead of new age cream cheese, I have opted for an original Ermine icing , which is also known as boiled milk frosting. Here, instead of All-purpose flour I have used mixture of  Almond flour and Arrowroot powder with milk to attain a creamy and flowy texture.

Here is my recipe- Fits for 9” spring foam pan.

Ingredient:

For the Cake:

Beetroot – 1 (small,  to get 3 tablespoons of puree)

Amaranth flour – 1cup

Brown rice flour – 1cup

Almond flour – ½ cup

Cocoa powder – 1 tablespoon

Cooking soda – 1 tsp

Salt – ¼ tsp

Eggs – 2

Brown Sugar – 1 ½ cup

Butter – 200 grams

Vanilla – 1 tsp

Buttermilk – 1 ¼ cup

For the Frosting:

Milk – 1 cup

Almond flour – 5 tablespoons

Arrowroot powder – 1 tablespoon

Butter – 50 grams

Sugar – ½ cup

Vanilla – 1 tsp

Desiccated coconut – as needed

Slivered Almonds – As needed

Method:

To Bake the cake:

-Pre heat oven for 180° C . Line the baking tray and keep it ready.

-Cook Beetroot in a pressure pan for 2 to 3 whistles, peel the skin and grate.

-Measure every ingredient and keep it ready. Melt butter and keep aside.

-Take a mixer jar, make a paste of grated beet with ¼ cup of buttermilk ,which we have kept for the batter preparation.

-Take one glass bowl, beat eggs, then sugar, melted butter ,pureed beetroot, vanilla and lastly one cup of buttermilk.

-Beat everything until it is well mixed and keep aside.

-Now take one more bowl, put all the dry ingredients, all the three flours, cocoa powder, salt and cooking soda. Sieve couple of times or dry whisk and keep it ready.

–Pour the previously prepared wet mixture to dry ingredients and fold the batter by using any spatula.

-Pour the batter in lined baking tray and keep this for baking for 40 -50  minutes or until done.

-Before removing, check with a knife by inserting, in the baked cake. It should come out clean.

-Cool the cake completely before doing the frosting part.

Method for Frosting:

-Take milk ,Almond flour and Arrowroot powder in a saucepan. Boil the mixture until it is cooks and becomes creamy.

-Switch off the flame, add in butter ,sugar and Vanilla, mix well. Cool the mixture and keep it in the fridge to cool further making it more solid. ( I have not kept in the fridge)

-Now, slice the cake, make a 2-equal slice, Apply the frosting on first layer and cover it with the second slice.

-Now pour frosting on the top, as well as apply at the sides as well. Take desiccated coconut and dust at the top as well as at the sides.

-Decorate the cake with slivered almonds and serve and enjoy with the family <3

Note: 

For Egg less version, please use any egg replacer or 

Flax gel:The basic ratio is 2 ½ tsp of flax seed powder and three tablespoons of  hot water  and then you simply whisk in the mixture until it becomes gelatinous  to replace one egg.

Whole wheat Jaggery Tea Cake:

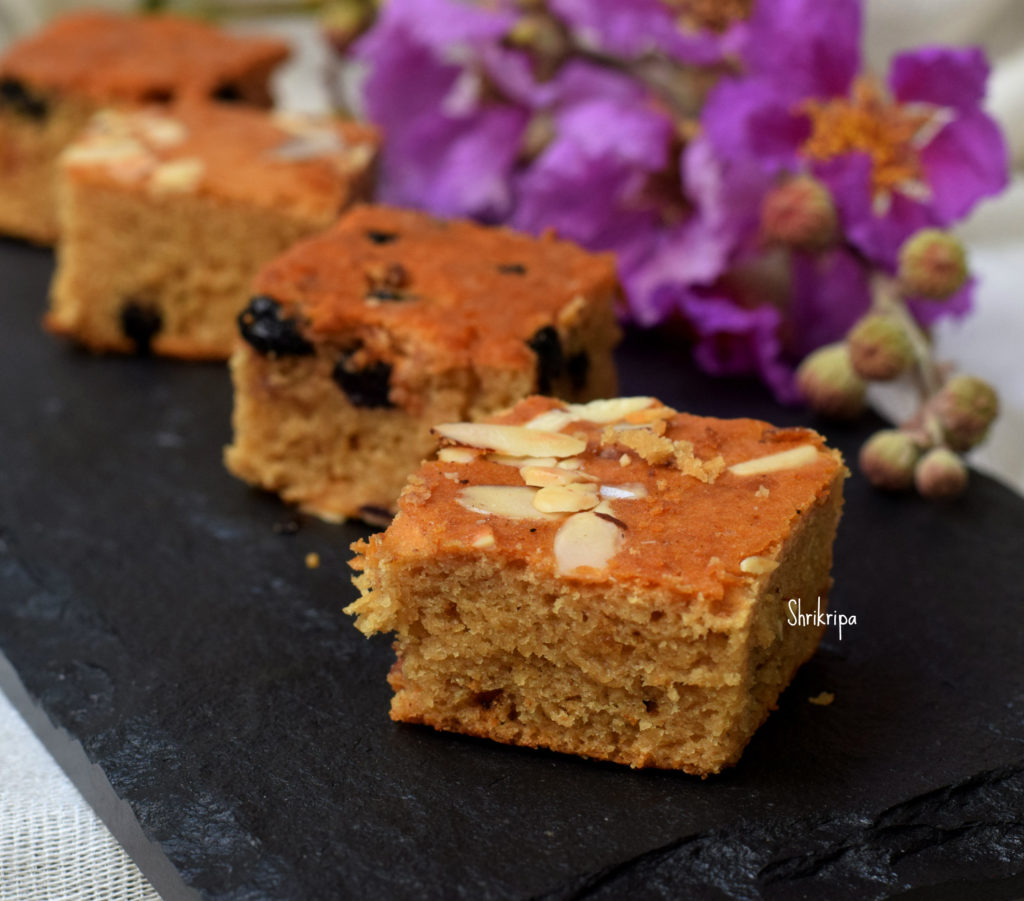
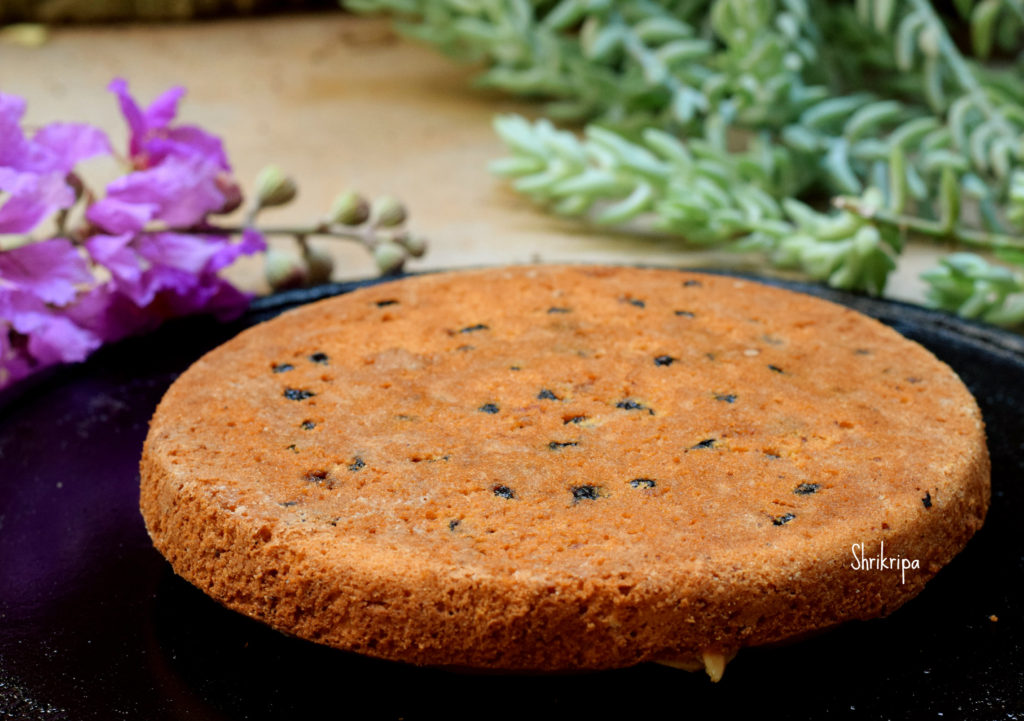
It is a “Hot milk cake” which I have tried by adding Whole wheat, Jaggery powder, dried blackberries (optional) with added cardamom flavour. It turned out to be really soft, mild in sweet and was perfect with a hot cup of coffee or tea. It is a perfect choice for kids snack boxes or as a healthy eggless bake.

How I made-

Ingredients:

Whole wheat flour – 1 cup

Cardamom powder – ½ tsp

Baking powder – 1 tsp

Salt – ¼ tsp

Dried Black currant – 2 tablespoons (optional)

Milk – ½ litre

Jaggery powder – ¾ to 1 cup ( I have added ¾ cup)

Butter – 50 grams

Method:

-Heat milk and reduce into almost half by boiling it in a low flame.

-When it is done, remove from the flame, add in butter.

-When butter melts, add in jaggery powder and mix thoroughly and keep aside. It is our wet mixture.

-Now, take one dry bowl, mix all the dry ingredients- whole wheat flour, salt, baking powder, cardamom powder, and dry whisk by using whisker or sieve couple of times.

-To this dry flour, add in dried black berries and mix. Add this dry ingredient to wet mixture and fold everything well and bake in a pre-heated oven at 180°C for 30 to 40 minutes or until done.


Spinach Surprise- Pasta with Spinach and Paneer

 Spinach Surprise is an Italian Pasta dish, which I prepare for my daughters and it is one of their favourite pasta dishes, which is a one pot filling, healthy meal.

 In this dish, I normally put 3 layers and then bake it and serve with seasoned bread or garlic bread.

In this, first layer would comprise of spinach pockets, with seasoned paneer filling.

Second layer is Pasta with white sauce and third and final layer is Grated cheese mixed with bread crumbs and a dollop of butter here and there. After baking, I normally serve this with seasoned bread or garlic bread with some tossed and seasoned veggies at the side.

It is a wholesome homemade pasta and comparatively low in calorie as well.

We will see, how I prepare-

Ingredients:

 For 1st layer / Spinach pockets with Paneer filling:

Large spinach leaves – 20 -22

Paneer/Cottage cheese – 100 grams, grated
Butter – 1 – 2 tsp
Onion – 1 small
Green Chilli – 2, minced
Red Chilli flakes – 1/4 tsp
Salt to taste

For 2nd Layer / Pasta in White sauce:

Pasta – 1 cup
Butter – 2 tbsp
whole wheat flour – 2 – 4 Tbsp
Milk – 2 – 4 cups

Grated cheese – 2 table spoons
Garlic salt (if you don’t have garlic salt, add chopped garlic and salt)

Oregano

Red chilli flakes

If u want to add any vegetables, you can add, or you can make only white sauce as well.

For 3rd and Final layer:

Bread crumbs – 2 table spoons

Grated cheese – 4 table spoons

Method:

For the 1 st layer / Spinach pockets with Paneer filling:

-Blanch spinach in boiling water, drain, pass through cold tap water and keep aside.

-Grate paneer, chop onion, green chillies.

– Take one tawa, heat butter, fry onion, green chilli, sprinkle some garlic salt, chilli flakes and switch off. Mix in grated paneer.

-Fill this mixture in spinach leaves, fold or roll like a mat and make a pocket.

-Place all this ready paneer filled spinach pockets in a baking dish.

For 2nd Layer / Pasta in White sauce:

-Cook pasta in enough water, drain and keep it ready.

-Take one tawa, melt butter over low flame, fry whole wheat flour until it turns light brown.

-Switch off the gas, add milk slowly while stirring and make a uniform mixture.

-Heat this mixture and boil. When it reaches the required consistency, add in cooked and drained pasta, garlic salt, oregano, red chilli flakes and grated cheese.

-Pour this over spinach pockets and it is our 2nd layer.

-While pouring, it should be little runny, after baking, it would turn out perfect.

Now comes the 3rd and Final layer:

-Mix grated cheese, bread crumbs and sprinkle all over. It should cover uniformly.

-Sprinkle a dollop of butter here and there (I have grated cold butter)

Bake this in a pre-heated oven for 10 – 15 minutes at 180 °C or until light brown and serve as it is or with seasoned bread toast.

How to season a bread:

-Mix one table spoon of butter, one to two table spoons of Hot and sweet tomato sauce or ketch up, 1 tea spoon of oregano.

-Apply this mixture over sliced bread and bake this in a pre heated oven for 5 minutes or roast it on a hot tawa on a stove top.

How to make tossed vegetable side dish:

-Take whatever vegetables you want to include. Dice one onion.

-Blanch beans and drain.

-Now take one tawa, heat some olive oil, drop onions fry for a while.

-Now add all the veggies (I have taken beans, carrots, zucchini, winged beans) and toss for a couple of minutes.

-Add seasoning like garlic salt, red chilli flakes and oregano and serve.

Ghee Residue Apple-Cinnamon Tea cake:

Ghee residue is a moist, brown coloured, by-product formed after preparing ghee from white butter. It is a rich source of essential fatty acids, anti-oxidants and proteins.

As of now, you will know my love towards this sediment and I usually make it a point to prepare any tea cakes after making fresh homemade ghee. Usually I play with the ingredient and flavours in these cakes. Already I have Egg less Tea cake and Chocolate cake in my blog.
This time, I included cinnamon flavour in my cake by using chopped fresh apple. I have used tasteless mini apples which I took in the market for its attractive size and colour, turned out to be a tasteless apple, after cutting 😉 

Now we will see how to make this,

Ingredients:

Apples – 1 cup (chopped)

Ghee residue  – 2 to 3 table spoons

Sugar – ½ cup

Organic jaggery powder – ½ cup

All purpose flour – 1 cup

Whole wheat flour – 1 cup

Cinnamon – 1/2 tea spoon

Eggs –  2 (beaten)

Water – 1 cup

Cooking soda – 1 tsp or little less.

Method:

– Wash all the apples and chop it into tiny pieces. No need to remove the peel.

-Grease the baking tray (you can use bread tin as well). Line this with butter paper, keep it ready.

–In another bowl, dry mix All purpose flour, whole wheat flour, cinnamon powder and keep aside.

-Take vessel in which you prepare ghee. There will be 2-3 table spoon ghee residues.

-To this add water, chopped apples, sugar, jaggery and heat it until sugar dissolves. Switch off and cool.

-Add cooking soda and keep aside at least for 20 min.

– After it cools, add beaten eggs and mix nicely.                        

-Now fold in flour mixture, mix gently and pour this batter to a greased and lined baking vessel.                                           

-Bake this in a pre- heated oven for 35 -40 min or until done at 180 C.

-If you want to check its doneness, use tooth pick or knife. Insert this, if it comes out clean, remove the tin, keep it outside.

-After some time, remove butter paper and cool further.                  

-When it reaches room temperature, you can slice it or cut according to your wish and enjoy with cup of coffee or tea.

Note:

-You can use only All-purpose flour or mixture of any flour.

-You can use only sugar, Jaggery or mixture of both.

-If you like it sweeter, please increase the quantity of sweet by adding ¼ cup more of sugar or jaggery.


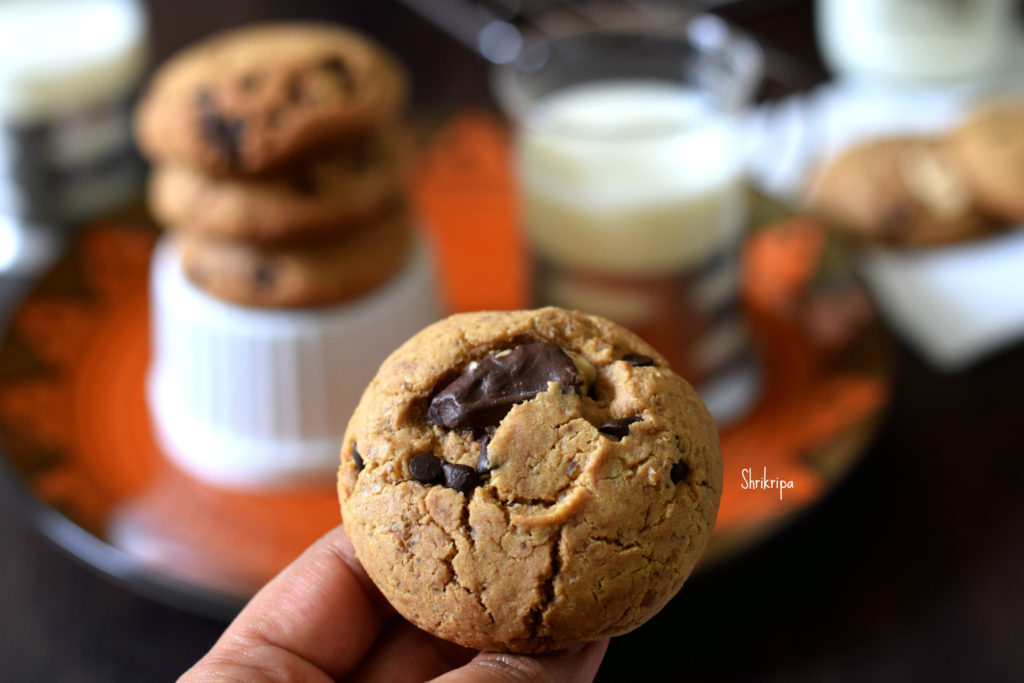
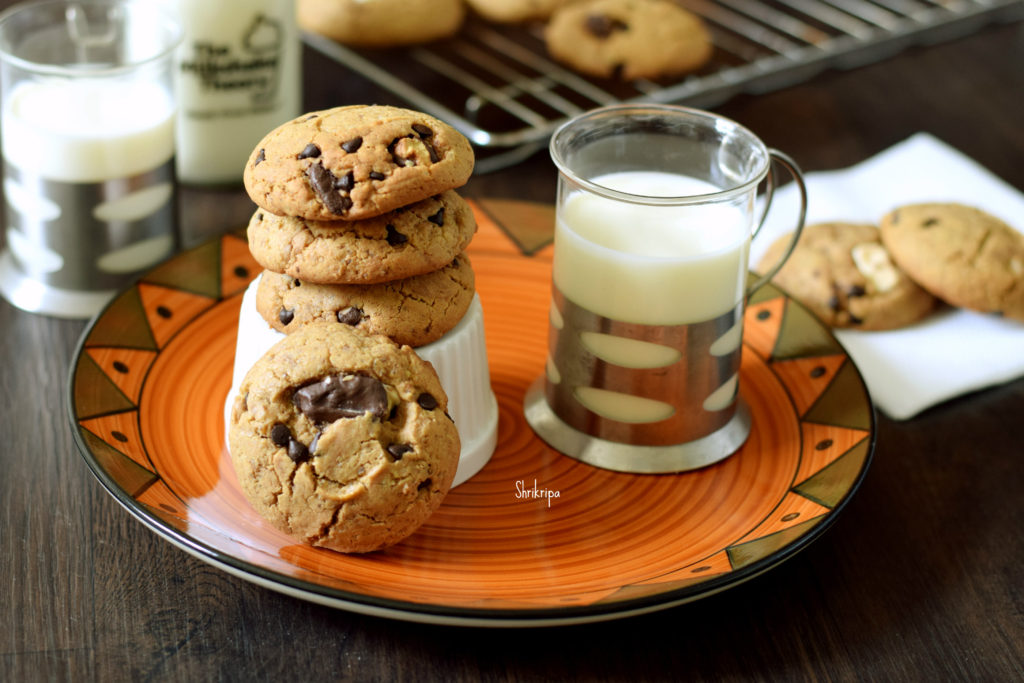
Chocolate chip Cookies:

Who doesn’t like Choco chip cookie? Let alone like, it is very difficult to resist. If it is guilt free, it is an added boon to relish these beauties. I usually don’t encourage my kids to have non-healthy stuff. It is the main reason I developed this recipe with lot of care.

It is a crunchy from the outside and soft from the inside kind of cookie. It has a whole wheat as well as protein rich Roasted gram powder, which is very nutritious and known as Sattu in India. Sattu is a powder form of roasted gram or Bengal gram or hurigadale in kannada. Added to this, I have added clarified butter/ ghee and ghee residue as well. To give more chocolatey appearance, added Choco chunks as well as chopped cooking chocolate.

How I proceeded is –

Ingredients:

Whole wheat flour – 1 cup

Roasted gram flour/ Sattu – ½ cup

Baking soda –  1 tea spoon

Sea salt – ½ tea spoon

Choco chip – ½ cup

Chopped chocolates – ½ cup

Ghee – ½ cup

Ghee residue – 2 table spoon (optional)

White sugar – ½ cup

Brown sugar – ½ cup

Eggs – 2

Vanilla extract – 1 tea spoon

Instant coffee powder – 1tea spoon

Method:

-Pre heat Oven at 180 °C, Line the baking tray with the butter paper.

-Take one bowl, dry whisk all the dry ingredients starting from Whole wheat flour, Sattu flour, Baking soda, sea salt, and Choco chips and chunks.

-In a Food processor or in another bowl, beat sugar, ghee and ghee residue first.

– Add in egg, vanilla, coffee and beat until it is frothy.

-Now pour this liquid over dry ingredient and mix by using spatula or clean hand.

– Scoop out the dough and place over the lined cookie sheet.

-Bake this in a pre-heated oven for 15 minutes or until done.

-When it is done, take out, cool a little and then store this in an air tight container.

-This yielded 18 big size cookies for me.

NOTE:

-Alternatively you can use only All purpose flour or whole wheat flour as well.

-Ghee residue is a moist, brown coloured by-product formed after preparing ghee from white butter.


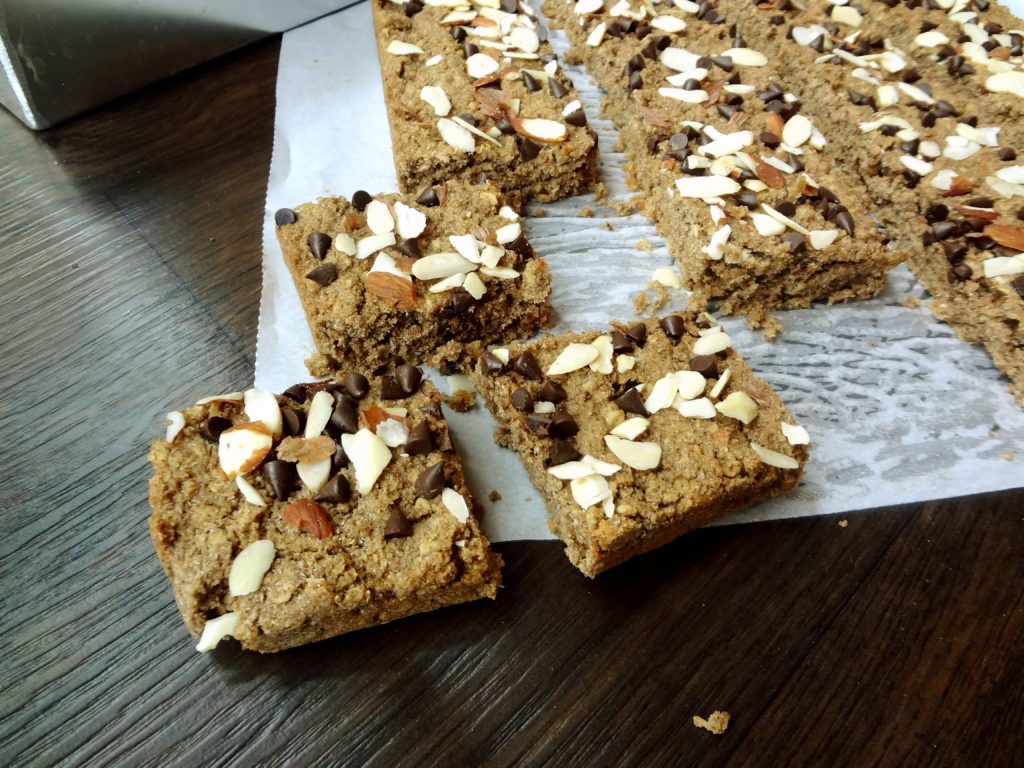
Energy cake:

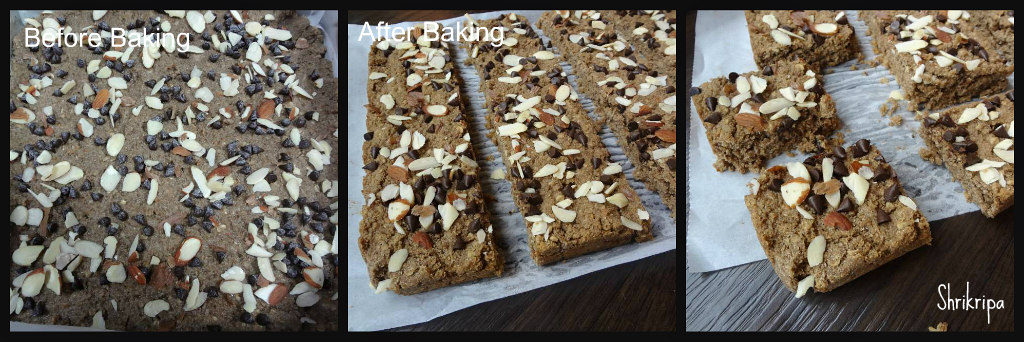
This energy filled cake has millets, oats, coconut flour. Usually after extracting coconut milk from the fresh coconut, the residue that remains will go into the trash. Coconut residue is very high in fibre. It is much healthier than wheat bran or oats bran. I usually collect this residue, after extracting the milk for any south Indian kheer, and use it in my baking as it is, by storing it under refrigeration for a couple of days.

This energy bar is a little softer than a normal crunchy bar. So, I named it as Energy cake. Shelf life is any where between 2 to 3 days at room temperature, Up to 10 days under refrigeration. If it was under refrigeration, please re-heat to get soft texture.

DSC05271_Fotor

Ingredients:

Oats – 1 cup

Mix millet flour – 1 cup

Coconut residue – ¾ to 1 cup (You can use coconut flour or desiccated coconut as well)

Brown Sugar – ¾ cup

Butter – 100 grams

Honey – 2 table spoons

Milk – ¼ cup

Cooking soda – ½ tea spoon

Vanilla essence – 1 tea spoon

Choco chip and almond flakes – to garnish

Method:

-Pre-heat oven, line a baking tray.

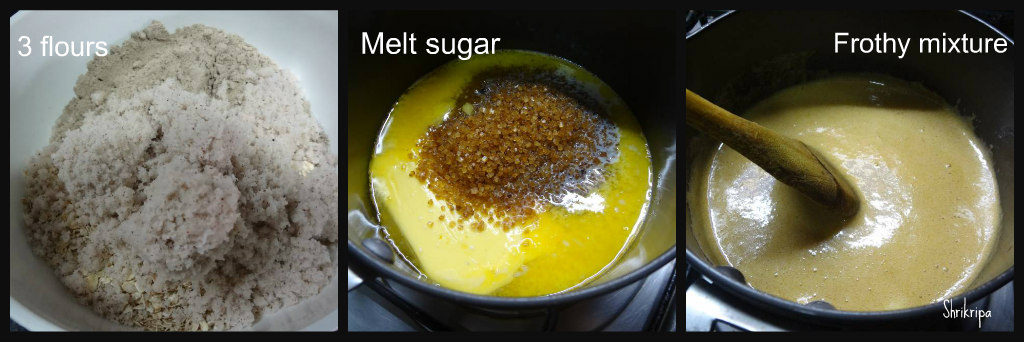
-In one bowl, combine oats, 2 flours and mix thoroughly.

Ribbet collage 1

-Take one sauce pan, heat butter and sugar. When sugar melts, switch off.

-Add in honey, milk,vanilla and cooking soda and mix.

-Pour the frothy wet mixture over oat and flour mixture and fold the batter.

Ribbet collage 2

-Batter will be a little thick and heavy. Pour the mixture and spread evenly on a lined baking tray.

-Garnish with Choco chips and almond flakes and press a little.

Ribbet collage 3

-Bake this in a pre-heated oven at 180 C for about 25 to 30 minutes or until done.

-Cool, cut into pieces and serve as a snack or a breakfast bar.