Bannangayi Dosey /tender (young) coconut Dosa:

When I was a little girl, my mom used to work, and I used to spend the summer vacation at my grandparents’ house. I used to enjoy at the farm house by having an unlimited supply of Mangoes, tender coconut, pineapples etc.

There used to be abundant supply of fallen young coconuts, also called ‘bannangayi’ which have much harder flesh than what we get in the normal tender coconut carts over.

My aunt used to make a very tasty Dosa out of this and we used to relish this along with chutney and Jaggery syrup topped with homemade ghee.

Yesterday, when we had tender coconuts here in Bangalore, inner pulp was very thick and couldn’t eat. So, I thought about Dosa and prepared this after ages. It was such a nostalgic moment for me. Let us see how to make this tasty Dosa.
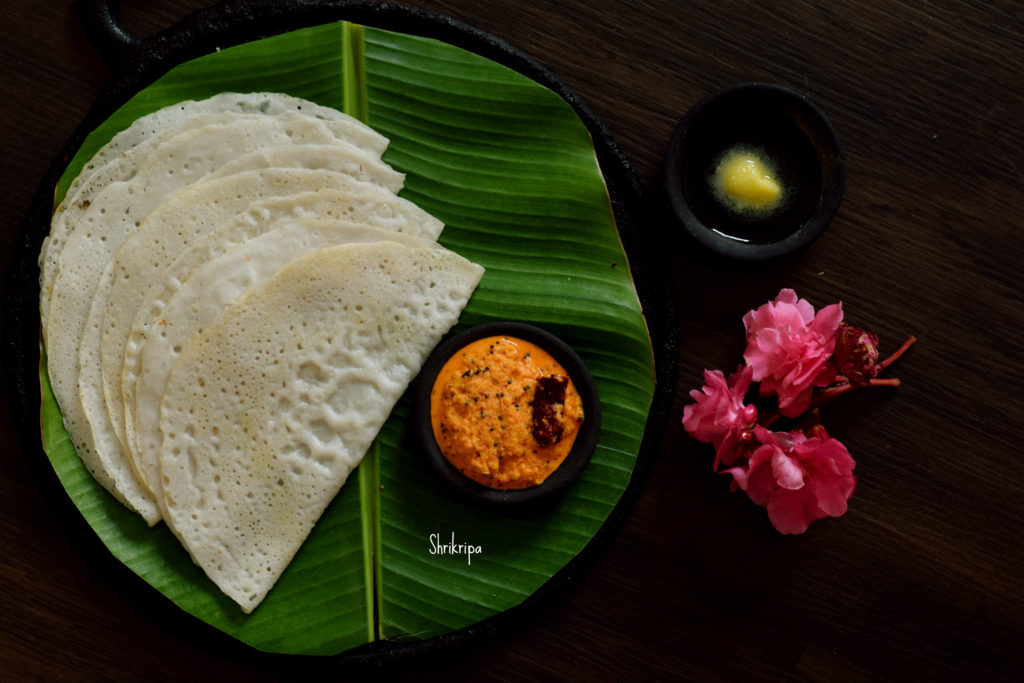
Ingredients:

Tender coconut – 1

Dosa rice – 2 cups

Salt

Method:

-wash and soak Dosa rice for 3 to 4 hours.

-Grate or chop tender /young coconut and keep aside.        


-Grind soaked rice with grated young coconut by adding little water and salt and make smooth paste. This batter must be like our regular Dosa batter and there is no need of fermentation.                           

-You can make use of this batter straight away. Usually we prepare this batter in the morning itself.

-If you want to prepare this batter in the evening, to make the Dosa in the morning, you can store the batter in the refrigerator.

-To prepare Dosa, heat iron Dosa tawa. When it is hot, don’t apply any oil. You can pour one serving spoon of batter and make Dosa like our regular Dosa. Pour ½ tsp of ghee and Close the lid.     
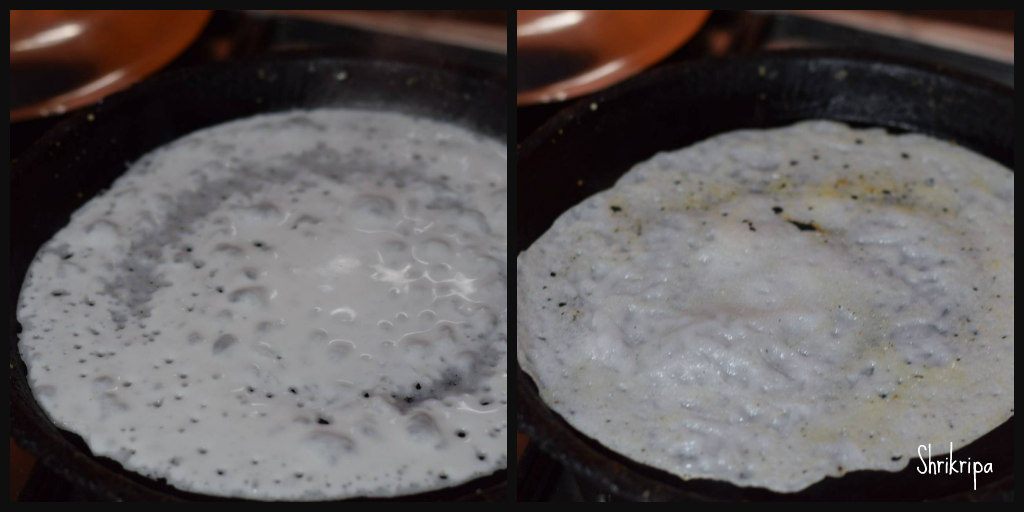
             

When it shows little brownish spots here and there, flip the side, cook upper side and serve with Coconut and onion chutney , jaggery syrup which is topped with ghee or honey.

 

Aralu laddu / Puffed Paddy snow ball:

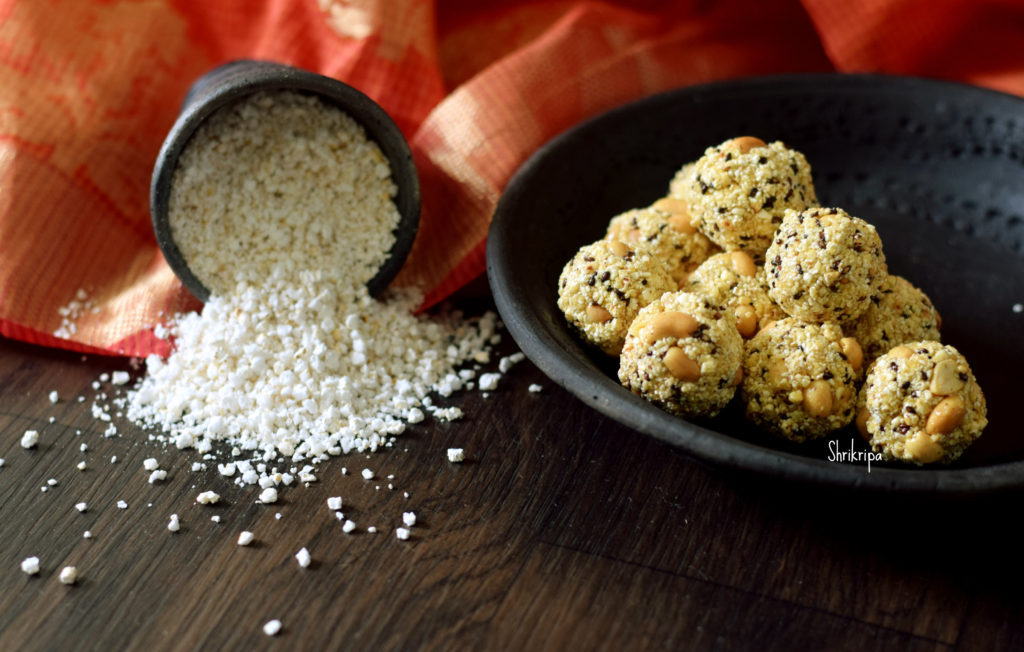
Aralu, Hodalu or Puffed paddy is made by roasting paddy itself. Usually we see puffed rice in the market. Puffed paddy is very rare to find nowadays. It has a very important role in any divine occasions like marriage, Ganapathi havan, Nag Panchami or chauthi festivals in our region.

Normally we don’t eat rice preparations during vrath (fasting) and Aralu fits the bill. Aralu or puffed paddy is prepared by roasting the paddy in an iron tawa. Usually in villages, they do it in an open air. Normally, in open air, wood fire setting will be laid, iron tawa is heated uniformly by putting little sand into it. When sand becomes hot, fist full of dried paddy would be dropped and tossed regularly until paddy puffs and bursts into white popped rice. It is not cooked or done by using water and it is done by roasting. That is the reason it is considered as Pure /auspicious thing and used in prasadam or any divine purposes.

We can make this and use as a regular energy ball as well. It has all the goodness that our body needs. It fits the bill as #eatlocal #healthy #natural #ironrich #fibrerich #refinedfree #holistic #glutenfree #healthysnack #kidfriendly as well.

We normally get puffed paddy in two forms. Either whole or powdered.

Here in this laddu, I have used powdered form. If you have whole paddy, nothing to worry. Make powder by using mixer jar and use it.
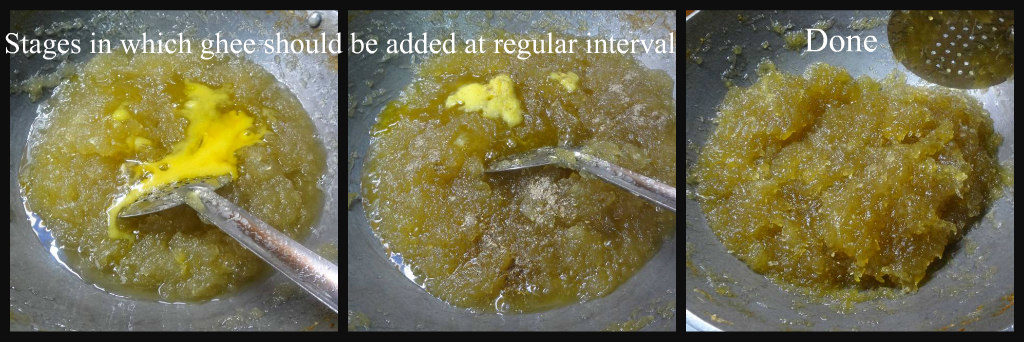
I have used chikki jaggery which is also known as Antu bella. One can use normal jaggery as well.

Ingredients:

Powdered puffed paddy – 1 ½ cup

Jaggery – ½ cup (I have used chikki jaggery)

Black Sesame – 2 tea spoons

Broken peanuts – 3 to 4 table spoons

Ghee – 2 table spoons

Water – 2 table spoons

Cardamom powder – ½ to 1 tea spoon

Method:

-Clean puffed paddy powder, by removing any leftover paddy husks and keep it ready.

-Dry roast peanuts, remove outer skin and make it into halves or use roasted and halved peanuts itself.

-Dry roast sesame seeds as well.

-Dilute jaggery in water by boiling. When jaggery melts, sieve and collect. In this way, we can discard the impurities from the jaggery.

-Take one thick bottomed kadai, add jaggery solution, 1 table spoon of ghee and boil until it reaches one thread consistency.

-If you are confused with this stage, take one small tumbler, filled with water. Drop the jaggery mixture and see. If jaggery becomes hard when it drops, and you can make a ball when you press and rotate it by placing in between your thumb and forefinger.

-Mix in puffed paddy powder, roasted sesame, peanut halves, cardamom powder, remaining one table spoon of ghee and mix everything.

-Switch off the gas.

– Apply little ghee on your palm and start making roundels. Sometimes, In-between If it cools down completely, it doesn’t bind, and you can keep the vessel on fire, re heat a little and proceed and finish off the mixture by making roundels.


Karkali / Arbi leaves Chutney:

Monsoon is the time, we relish our dose of colocasia leaves, which is known as “Kesavu” in Kannada. Coastal people relish Pathrode, which is a rice batter smeared steam cooked rolls. Apart from this we usually relish its chutney and with mix veg curry as well. It goes very well with hot rice with a dollop of ghee or coconut oil.

Colocasia leaves has many names in India. It is known as Taro leaves, Arbi leaves, pathra leaves, Alu chi bhaji, kesavina ele and so on. Every state has its own speciality with this iron rich leaves. Because it tends to get itchy, we need to add sufficient amount of tamarind and it should get balanced with the taste.

If you learn the trick of this, half the battle is won, and you can master the art of cooking this leaf for sure. In our traditional preparation, we do use bird eye chilli for this chutney and if you don’t have access, you can use normal green chilli as well.

How to make this flavourful chutney:

Ingredients:

Arbi leaves – 12 to 14

Bird eye chillies – 8 -10 (if green chilli use 4 to 6)

Salt

Tamarind powder or tamarind – 1 ½ tea spoon

Garlic – 8- 10 cloves

Seasoning:

Coconut oil – 3 table spoons

Mustard – 1 tea spoon

Curry leaves – 1 spring

Chopped garlic – 4 to 5

Dried Red chilli – 1 (optional)

Method:

-Wash Arbi leaves as well as its stem and bird eye chillies.

-Chop leaves and stem.

-Take one cooker, add chopped leaves, stem, chillies, garlic, tamarind, salt and cup of water.

-Cook for 2 whistles, when it is cool, grind the content into smooth paste.

-Prepare seasoning, heat oil, splutter mustard, add curry leaves and chopped garlic and fry.

-To this seasoning, pour the ground mixture and boil it nicely.

-Serve this with hot rice and ghee or coconut oil.


Kendathadya/ Baked Cucumber-Rice cake:

Every adult has a nostalgic dish from their childhood. I have a “secret” love for this dish because of fond memories of my maternal Ajji (grandmother), who used to pamper me to the core and prepare many such dishes by using the fresh produce that she grew in her kitchen garden.

Kendathadya is a traditional recipe of our Coastal Karnataka region, a special baked dish made by putting “Kenda” (hot burning firewood) on top and at the bottom of the earthen pot or thick metal vessel. Creating an oven affects burning firewood at the top and bottom of the closed vessel containing the batter.

Here, Cucumber used is our heirloom (local) variety, known as Mullu southe, which is light in colour, watery, and flavourful. Soaked rice is mixed with grated Cucumber, jaggery syrup, and fresh coconut to make a flavorful cake with homemade ghee. 

In modern life, we don’t have access to traditional firewood chulha. So, I make this age-old recipe in my OTG and satisfy my craving year after year and relive my childhood while having it.

Ingredient:

Raw Rice/Dosa rice – 1 cup

Cooked rice – 1 serving spoon. ( Red boiled rice or white rice)

Well grown Cucumber – 2 cups (grated)

Coconut – ½ cup (fresh, grated)

Jaggery – ¾ cup (grated)

Cardamom powder – 1 tsp

Ghee –2 to 3 tbl spoons

Salt – as needed

Eno or Cooking soda – 1 tsp

Method:

-Wash and soak the rice for 3 to 4 hours.

-Make jaggery syrup by adding ¼ cup of water to the grated jaggery, boil until its raw smell goes away, strain the liquid and keep it ready.

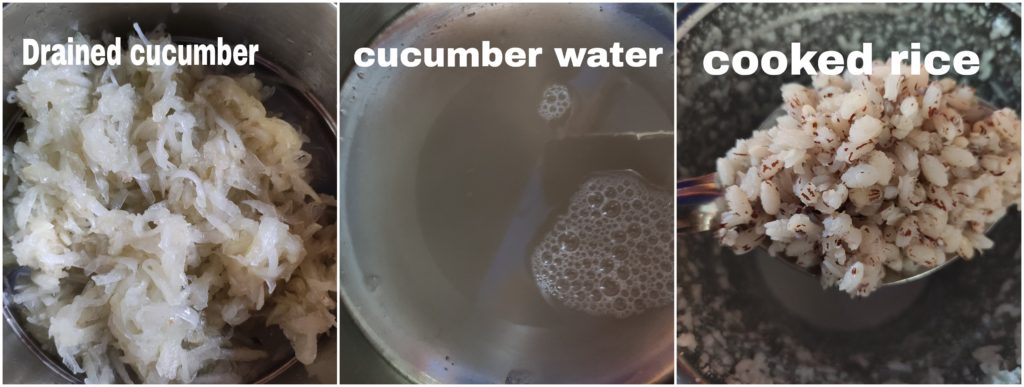
-Peel the outer skin, make halves, remove the seeded inner core. Grate it. Mix salt and allow the Cucumber to release its water.

-Drain the water from the soaked rice and discard.

-Collect water from grated Cucumber by sieving it in a strainer and using it for grinding as needed.

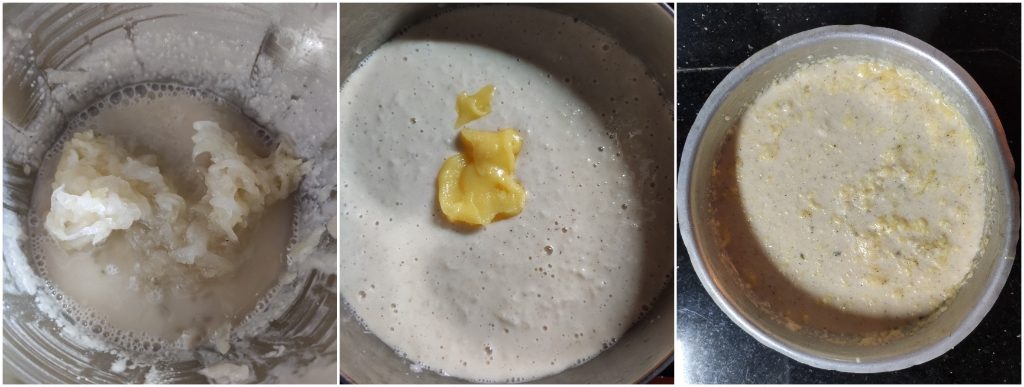
-Grind drained rice into a slightly coarse paste by adding collected water from the Cucumber, cooked rice, grated coconut, jaggery syrup.

-At the last round, add grated Cucumber and whip once and remove. Add ghee, Eno fruit salt and give a nice whip. The batter should not be too runny or too thick.

-Pour this into greased, lined baking tin and bake this in a pre-heated oven at 180C for 40 to 50 minutes, and a knife comes out clean when you insert it into the baking cake.

-Serve Hot with a drop of ghee.

Note:

– Addition of Eno fruit salt is optional. If you wish for a softer and lighter cake, add Eno or cooking soda.

-Without Eno, it turns out to be a firm and dense cake. I sometimes don’t add Eno and enjoy my dense cake to relive my memories of Ajji.

Kashaya / Herbal drink:

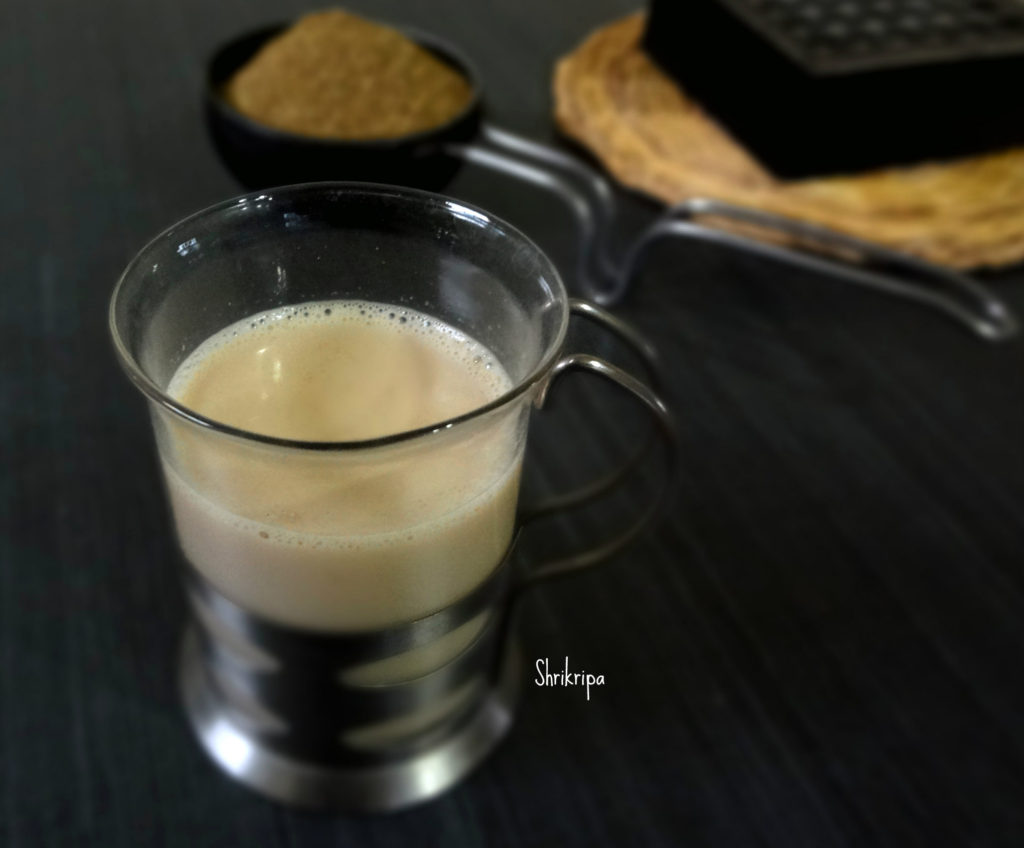
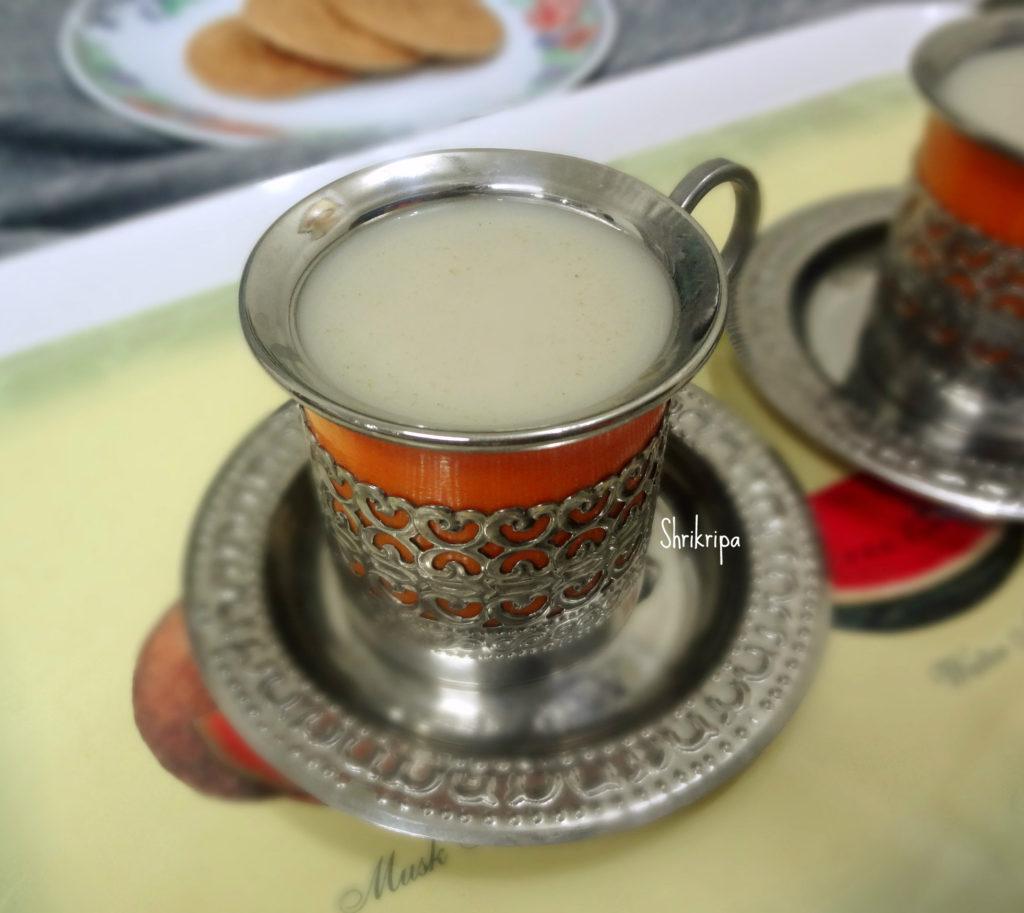
Kashaya is a herbal drink; unlike tea or Coffee, it is a decoction of a group of herbs used in our day-to-day cooking. This recipe is my dad’s favourite one, and we have followed this recipe for ages. Kashaya is an alternative drink for people who don’t want to consume Coffee or tea due to various reasons like acidity etc. It has multiple health benefits too.   


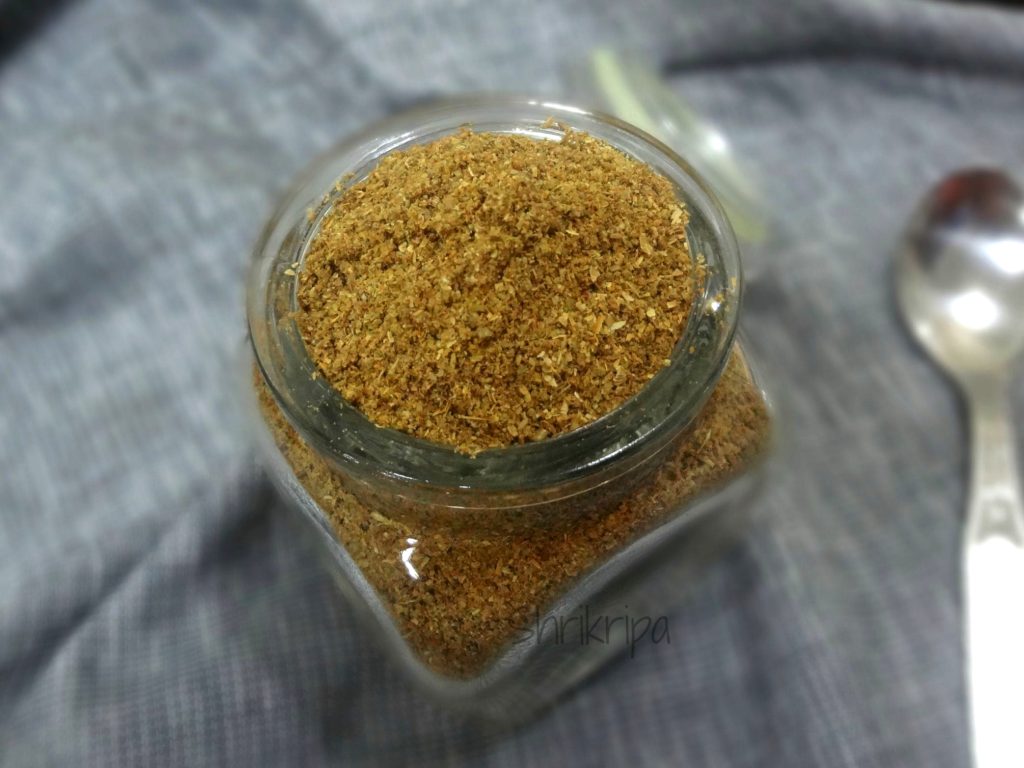
I usually prepare this powder and keep it as an alternative drink to tea or Coffee and usually prefer this in monsoon season.

To prepare Kashaya powder:

Ingredients:

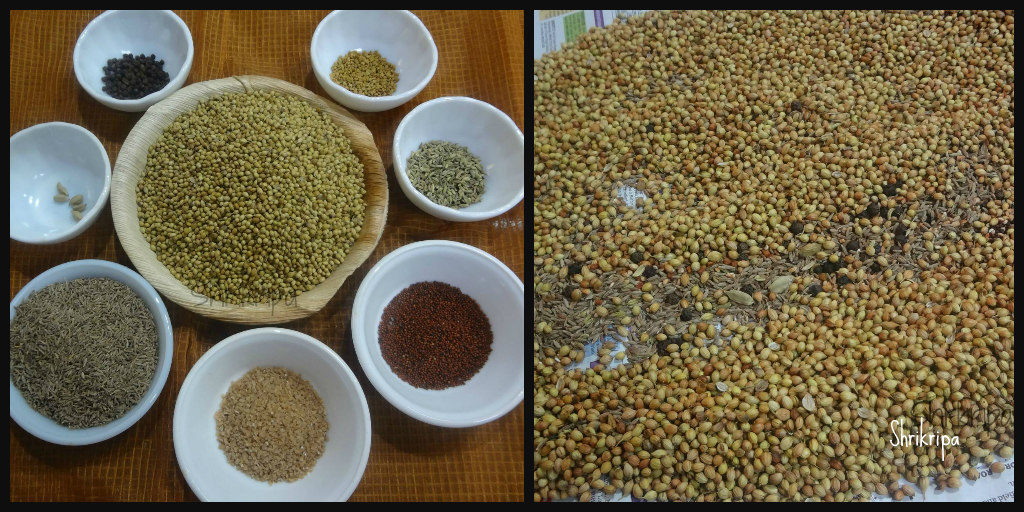
Coriander seed – 200 grams.

Cumin – 100 grams

Fenugreek seeds – 2 tsp.

Fennel seed /saunf – 2 tbl sp

Whole wheat /broken wheat – 3 tbl sp

Finger millet /Ragi  OR Whole Moong – 2 tbl sp

Black pepper – 2 tsp.

Cardamom – 5

Method:

-Measure everything and keep it ready.

-Slowly dry roast everything one by one till it emits an aroma.

-Spread these roasted items on paper and cool.  

-Now take one dry mixer grinder jar and powder this.                 

-Cool completely and store this powder in an airtight container.             

To prepare Kashaya:

Ingredients:

Water – ¾ cup

Kashaya powder – 1 tsp

Sugar or jaggery – as required

Milk – ¼  to ½ cup

Method:

-Boil water by adding Kashaya powder and sugar or jaggery.

-After boiling it for 2 to 3 minutes, add milk and remove it from the flame.

-Sieve the mixture and enjoy your herbal drink or Kashaya.

NOTE: You can omit whole wheat and replace it with the Whole moong or add moong as an additional ingredient. 

Pumpkin Flower Tawa fry:

Pumpkin flower is bright yellow coloured, which is loaded with essential nutrients, minerals and used in a different cuisine around the world and considered as a rare delicacy in a gourmet cuisine as well. 

Pumpkin plant bears male as well as female flowers separately. Usually Male flowers appears initially, and female flower is a rarity. These flowers last only for a day and wither by the evening. That is the reason why we see only Male flower in cooking. It has a main role in pollination and after that it will wither, and female flower will grow as a Pumpkin. If you have a doubt in distinguishing between male and female flowers, male has only a long stalk and the female has a round green, big swollen structure(ovary) at the base of the petals.

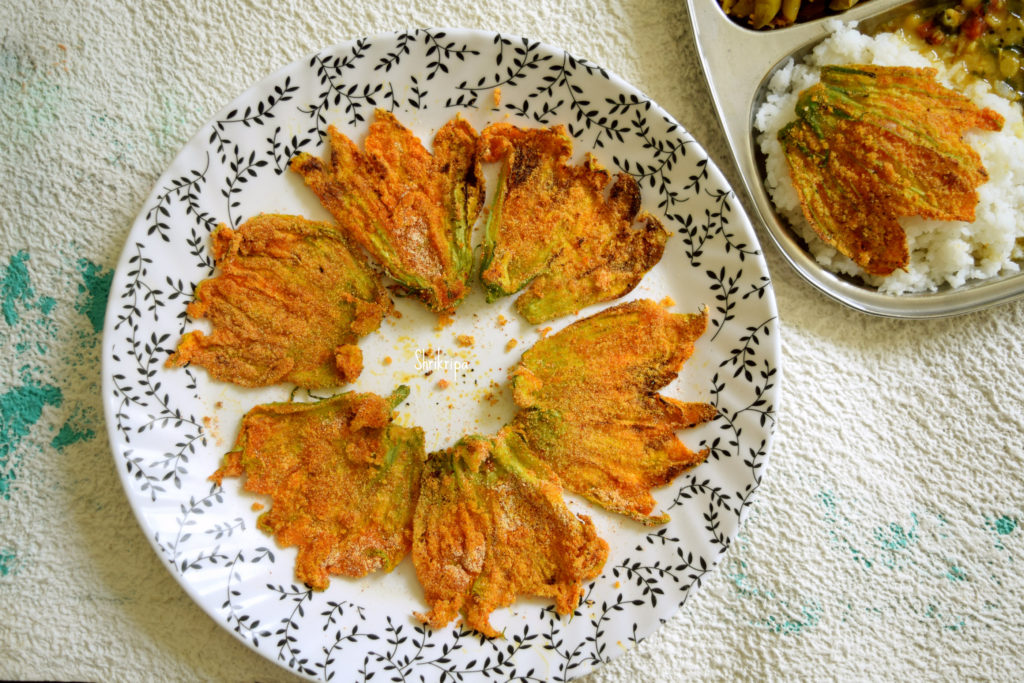
Pumpkin flowers are used either in a raw, tossed, pan fried, cooked forms in various recipes and it is found occasionally in salads, soups or batter fried. Here I am showing Mangalore style tawa fry in which pumpkin flower will be coated with seasoned fine semolina and tawa roasted by drizzling some coconut oil to give coastal touch.

If you have Pumpkin, squash or Zucchini plant in your garden, collect all the male flowers and make this and enjoy your meal. You can collect the fresh flowers every day and store it in an air tight box for 3 to 4 days and utilise in your cooking.

DSC_4222_Fotor main

This is how I make-

Ingredients:

Pumpkin flowers – 5 to 6

Fine semolina – 1 small cup (chiroti rawa)

Salt

Hing – ¼ tea spoon

Turmeric powder – ½ tea spoon

Red chilli powder – 1 tea spoon

Coconut oil – as needed

Method:

-Wash flower, give one fine slit at the bottom of the flower and cut open.

-Remove stamen.

Ribbet collage 1

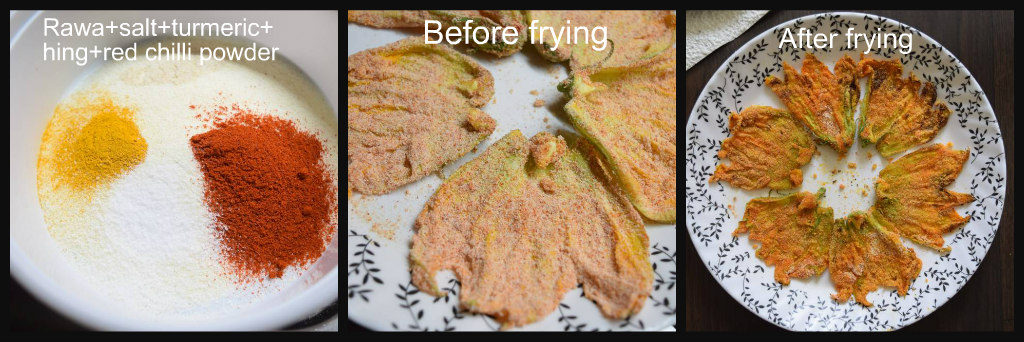
-Dry mix all seasoning items from rawa, salt, red chilli powder, turmeric powder and hing.

-Take each flower and coat with the seasoning, by rolling.

-Heat iron tawa/ griddle, place all these coated flowers.

Ribbet collage 2

-Roast these by using sufficient coconut oil on both the sides.

-Serve these with hot rice and Rasam or dhal.


Pineapple Menaskai/ Gojju:

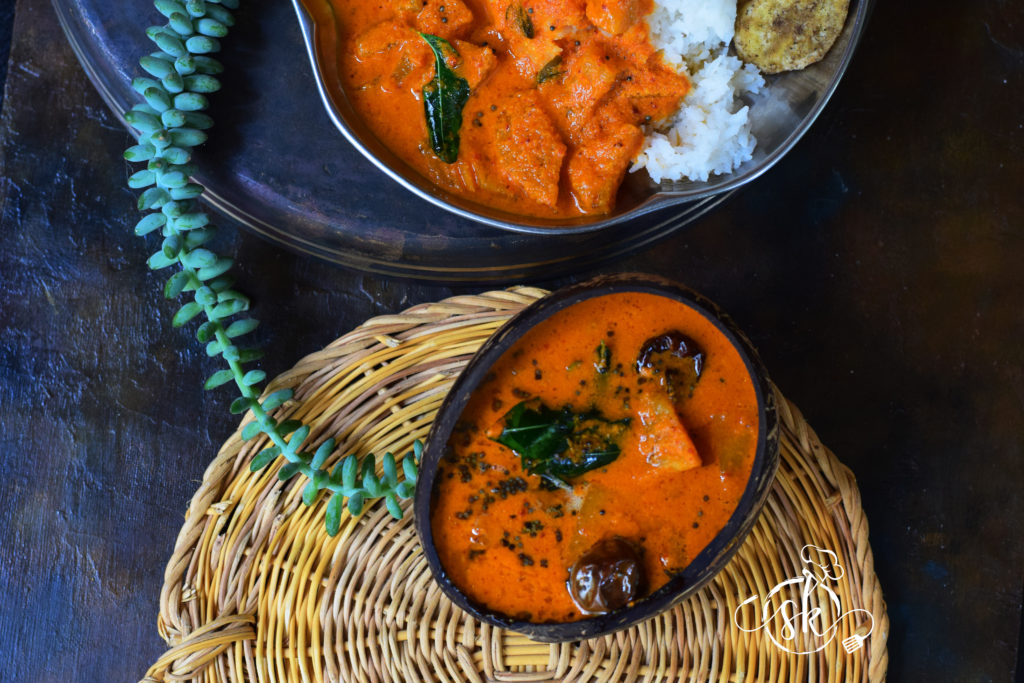
Menaskai/Menaskayi is one of our coastal specialities, which is a hot, sweet and sour, sesame flavoured coconut-based curry. Normally made with bitter or tangy things like Bitter gourd, raw mango, wild mango or pineapple. We even prepare by mixing Bitter gourd and raw mango as well. It is a common dish in any of our elaborate menus for festivities, usually served on a plantain leaf, like poojas or weddings. This same curry is prepared in a little different way in other parts of Karnataka and known as “Gojju”.

Here, the main trick is-balancing of all the flavours.

If you are preparing with sour vegetable or fruit, there is no need to add additional tamarind. For example, if you are preparing raw mango or mixture of bitter gourd and raw mango Menaskai, there is no need to add tamarind. If you are using pineapple, tamarind should be added.

Here I have used pineapple and the procedure goes like this-

Ingredients:

Pineapple – 1/2 (chopped into bits)

Raw mango – 1/4 (chopped into bits)

Tamarind – gooseberry size (if the mango is not available)

Jaggery – as needed

Salt

Green chillies – 2 (slit)

For masala:

Fresh Coconut gratings – 1 to 1 ½ cups

Methi seeds – 1/4 tsp

Urad dal – 2 teaspoons

Sesame seeds – 2 teaspoons (U can use black or white)

Dried red chillies – 8 – 10 (we use Byadagi variety)

Coconut oil – 2 to 3 teaspoons (1 for roasting + 1 for seasoning + 1 tsp to garnish)

Mustard – 1 tsp

Dried red chilli -1

Curry leaves – 2 springs

Method:

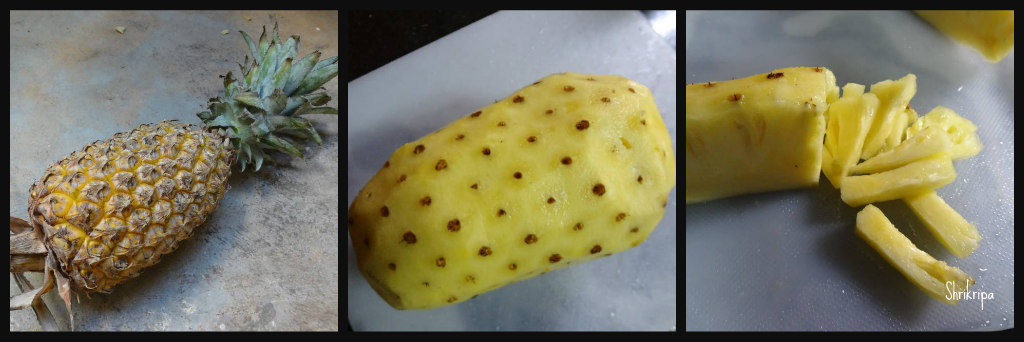
-Clean pineapple by removing the outer skin, chop into bite-size pieces.

Ribbet collage 1

-Cook pineapple pieces and mango pieces or tamarind with little water, turmeric, salt, jaggery, green chillies and curry leaves.

-Dry roast sesame seeds. Now fry all the masalas for grinding. First heat 1 tsp of oil, put methi(fenugreek) seeds. When it is light brown, add all the other ingredients like urad dal,  red chillies and fry until urad dal is light brown. Now it is the time to put coconut and fry further for 2 minutes or until you smell the nice aroma.

-Cool the mixture, grind into a paste by adding sesame seeds and sufficient water as well.

-Add this paste to the cooked pineapple, check for salt and jaggery. Adjust the consistency by adding water and boil nicely in a simmer for 5 to 10 minutes.

-After boiling, add 1 tsp of raw coconut oil as well as the seasoning with coconut oil, mustard, red chilli and curry leaves. Close the lid and leave it to soak all the masalas for half an hour.

-Serve with hot rice.

Note:

-After boiling, the gravy should be a little thicker than normal sambar.

-Taste should be sweet, sour, hot. So adjust the addition of jaggery accordingly.

– We usually relish this dish the next day of preparation, usually with Neer Dosa or chapati/Roti. 😊


Hitikida avarekalu/ Deskinned Hyacinth bean curry:

Avarekai has many names like Lablab or Hyacinth bean.

Avarekai is an integral part of every household of native Bangalore or Mysore region during every winter. People wait for its arrival. Winter special lima bean is called “Sogadavare” and it has double the aroma of what we get normally throughout the year.

DSC05495_Fotor

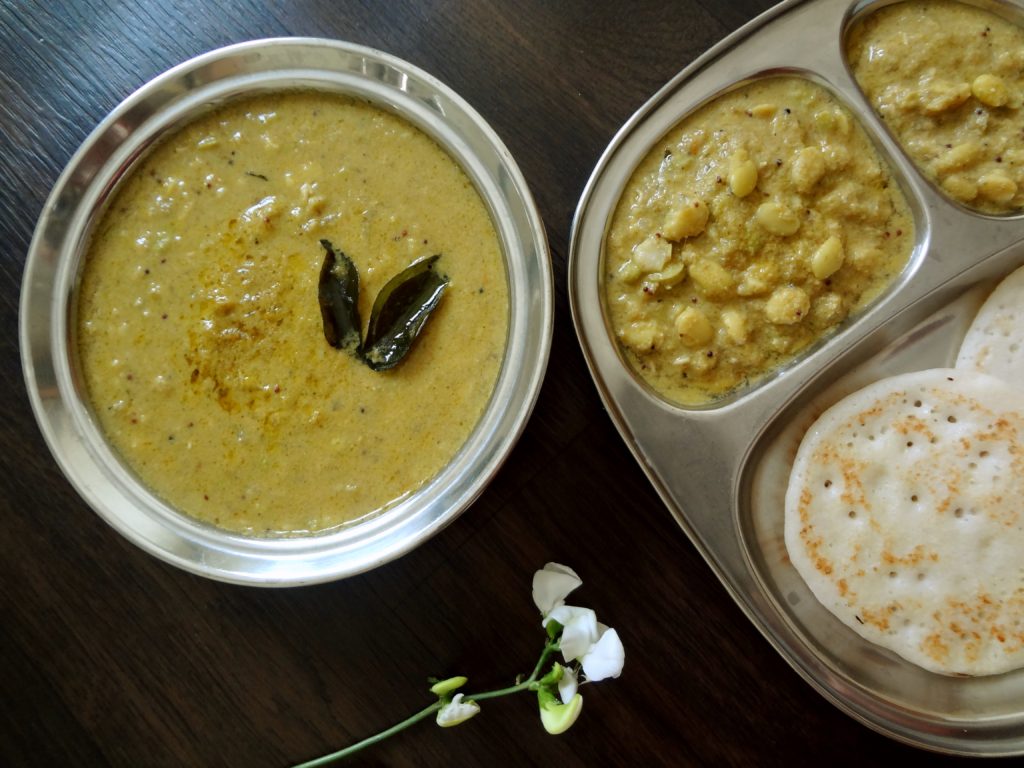
Initially I used to struggle with avarekai recipes and never used to get that authentic touch. Now over the years, I have mastered this authentic, tasty curry and my family started liking it and we do enjoy our share of this traditional curry with soft dosas.

If you are using fresh beans, it is a little time-consuming process. During the season we even get the deskinned ones. If you have frozen beans, curry making is an easy task.

At first, we will see the procedure of de skinning –

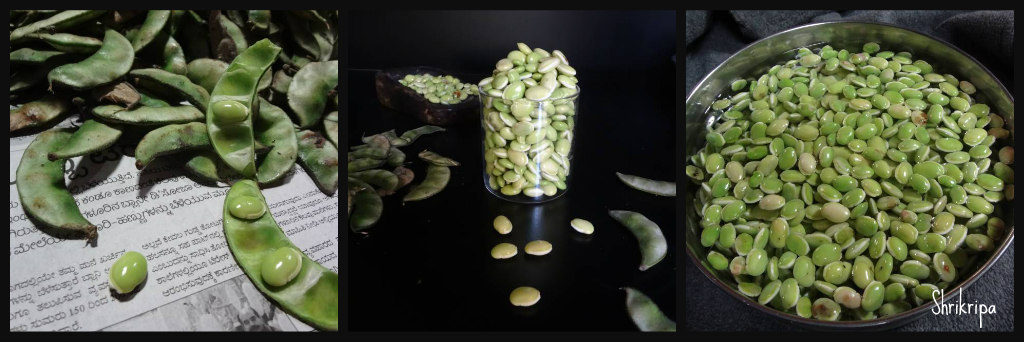
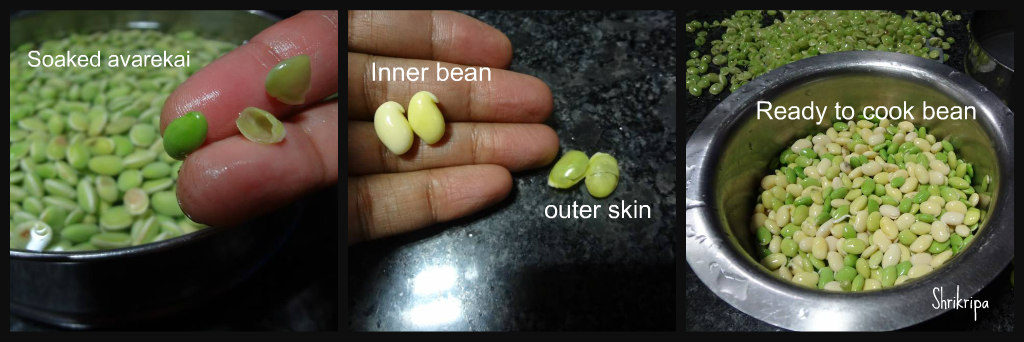
-At first take a fresh bean pod, remove outer thick green skin and separate the light yellowish green bean. Collect all the shelled beans, soak it in water for 3   to 4 hours.

Ribbet collage 1

 Now starts your time consuming real exercise. Dip your hand in water, remove soaked beans and start deskinning by keeping the bean in between your thumb finger and fore finger and press a little, you will see the transparent outer skin would flip and inner bean will come out. Continue the exercise until it is done and collect deskinned “Hitikida bele” and proceed to make very tasty curry.

Ribbet collage 2

Now we will see the procedure of “Hitikida bele saaru” /Curry

Ingredient-

Deskinned Avarekai – 1 big bowl

Onion – 1 for seasoning

Oil – 3 table spoons

Ghee – 2 tea spoons

Mustard – 1 tea spoon

Curry leaves – 2 springs

Green chillies – 4 (3 for grinding + 1 for seasoning)

Garlic – 8 cloves (4 for grinding + 4 for seasoning)

Coconut – 2 cups

Tamarind – marble size

 Coriander seeds – 2 tea spoons

Cumin – ½ tea spoon

Cinnamon – ½ inch

Clove – 2

Ginger – ½ inch piece

Coriander leaves – ½ cup

Method:

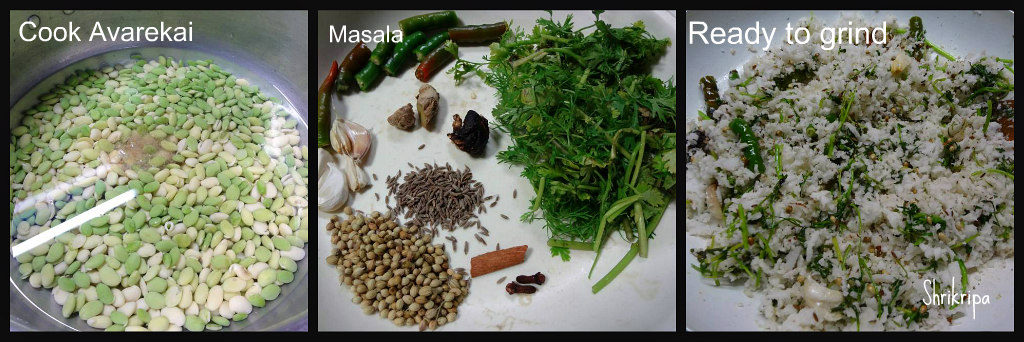
-Cook avarekai with required amount of water and salt. You can opt for a cooker or an open vessel. Slow coking gives a better result for this curry.

– Next is the masala preparation. Fry Coriander, cumin, cinnamon, cloves. When coriander becomes light brown, add garlic, ginger, green chillies, coriander leaves,tamarind and coconut and fry until it emits a nice aroma.

Ribbet collage 3

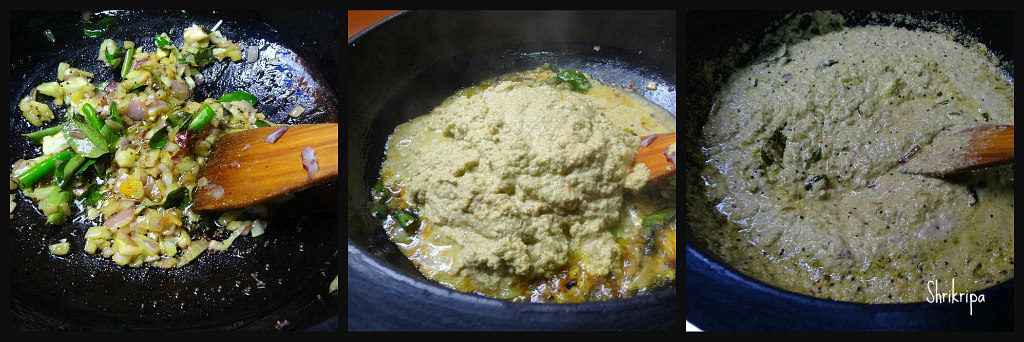
-Switch off the gas, cool the content and grind this in to a smooth paste by adding required amount of water.

-Now do the seasoning, heat oil, splutter mustard, curry leaves, garlic, green chilli, chopped onion and fry until onion becomes light brown.

Ribbet collage 4

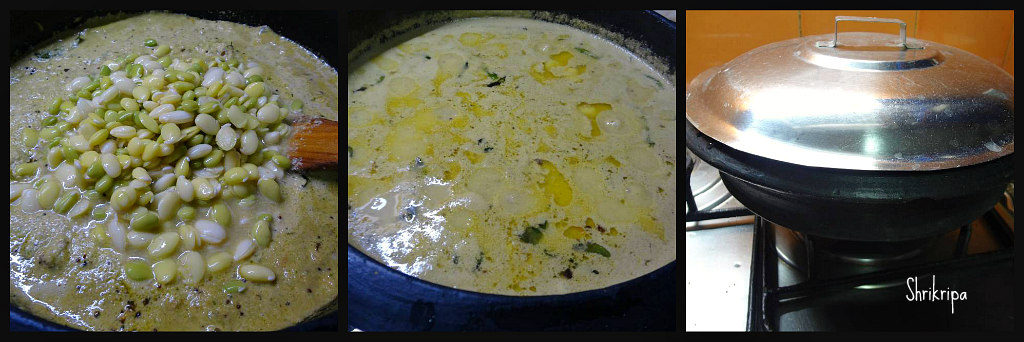
-Add ground masala paste and fry for a couple of minutes. Add cooked avarekai and add enough water.

-At this time, consistency of the curry should be a little watery, as cooking proceeds and after some resting time, it becomes thick and becomes perfect.

Ribbet collage 5

-Boil this mixture until you see a thin creamy layer at the top.

-Switch off and pour 2 tea spoons of ghee, give one mix and close the lid. Rest this for some time, and serve with dosas, chapati’s or plain rice or jeera rice.

DSC05491_Fotor

Note:

-I usually prepare this curry in the night, and re heat and serve with dosas in the morning.

-In this way, it absorbs all the flavours and sets properly.


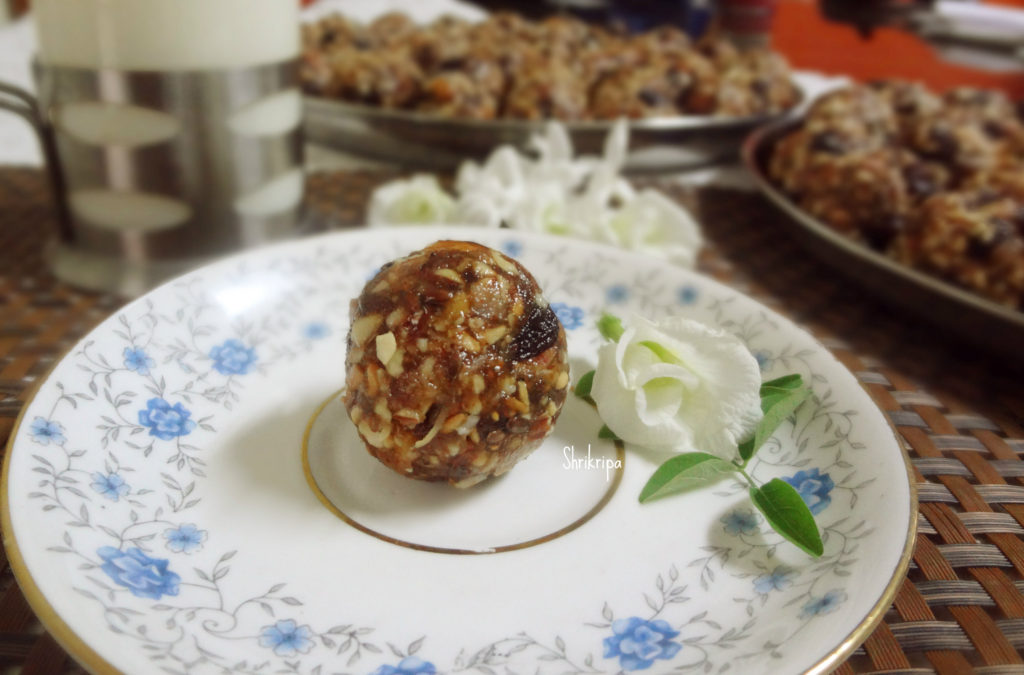
Antinunde /Dry fruit laddu with edible gum:

Antinunde aka dry fruits laddu with edible gum is a super food for everyone, especially new moms or girls in their puberty, especially after their first cycle of menstruation. I came to know about this super food through my close friend’s mom, Chandu aunty.

According to her, if you are using it for a girl, after her first cycle. Traditionally it is a practice that, 5th day onwards girl should consume a little amount of ghee, small piece of copra (which is dried coconut) followed by one dry fruit laddu and a cup of milk for continuous 48 days. It is believed that, all the combined nutrition of dry fruits, edible gum and milk will take care of her and retain the calcium, iron and much needed supplements through the natural form.

If you are using after delivery, for a new mom as a postpartum supplement, method will be slightly different and here we should take care of the new born baby’s health as well. In this case, lady should consume, 1 spoon of postpartum lehya (which is a mixture of so many ayurvedic natural medicines) followed with little ghee, piece of dry coconut, one laddu and a glass of milk from 11th day onwards until 3rd month. Initial 1 ½ months content of the sesame should be more (for example 1 cup) other than this one should use ½ tsp of ajwain as well and after 2nd half one should decrease the quantity of sesame to half and quantity of the dried dates and edible gum should be more to pass on the supplements to the baby as well.

Other than these two instances, one can enjoy these delicious laddu at any given point of time with a whole lot of goodness. I will show you how I prepare this for a regular use –

DSC08344_Fotor 1

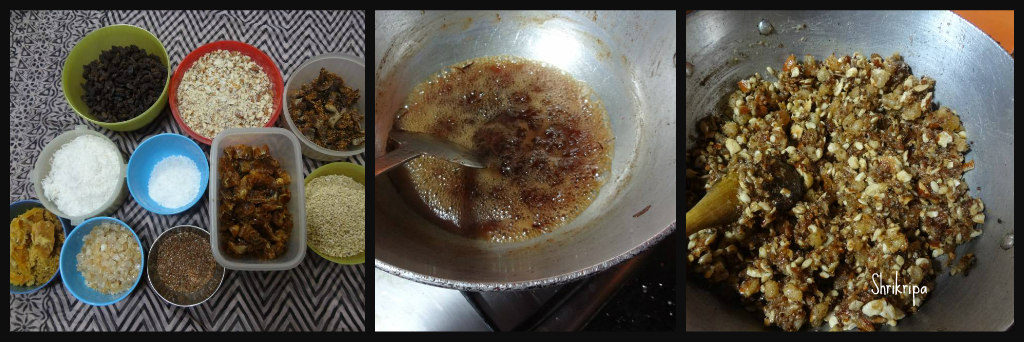
Ingredients:

Dates – 300 grams

Almonds – 100 grams

Cashew – 50 grams

Raisins – 50 grams

Fig – 50 grams (optional)

Melon seeds – 50 grams (optional)

Flax seeds – 25 grams (optional)

Desiccated coconut – 50 grams

Edible gum – 40 to 50 grams

Jaggery – 100 grams

Saffron – 10 strings

Nutmeg – 1 pinch (grated)

Cloves – 4

Ghee – 2 to 3 table spoons

Method:

-Chop dates and dry grind this in a small jar of the mixer grinder.

-Chop almonds and cashews 

-Dry roast saffron then coconut powder for 3-4 minutes, till you get a nice aroma.

-Dry roast flax seed.

-Heat one teaspoon of ghee and fry one by one, cloves, almond, cashew, melon seed and raisins.

-Put one more teaspoon of ghee to same tawa, fry those edible gum crystals, until it pops up and becomes fluffy.

Ribbet collage 2

-Make powder of this by using mixer jar and keep aside.

-Lastly, fry those chopped or churned dates and add all these items together in a bowl and keep aside.

-Now take jaggery in a small vessel and take ½ a cup of water, boil and sieve this to remove any impurities.

-Put this sieved liquid in a thick tawa, in which we have fried all those dry fruits.

Ribbet collage 1

-Boil this until it reaches one thread consistency. Switch off the gas.

-Mix in all those fried items, nutmeg powder, saffron and mix nicely.

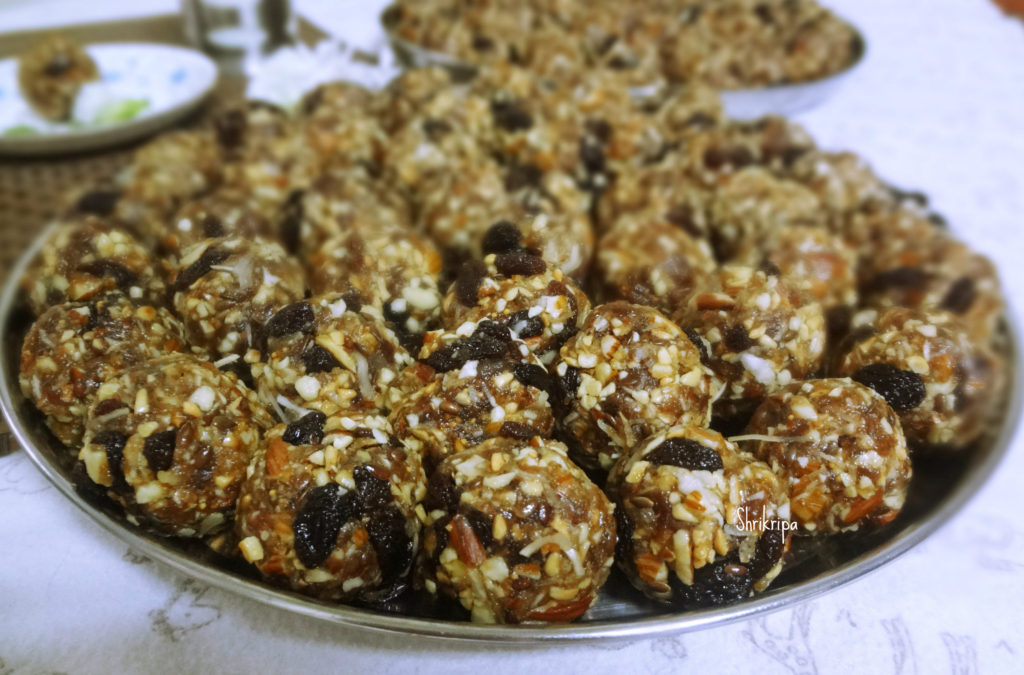
-Rub your hand with little ghee and start to make laddu’s. 

DSC08333_Fotor 2

-Eat one laddu a day and enjoy.

Note:

  • Ratio of dry fruits and jaggery is 600 Grams:150 grams. If Fig is added, you can reduce a little.
  • I normally use normal dates, traditionally they use dried dates.
  • Instead of dry coconut (copra) I have used desiccated coconut.
  • One can use palm jaggery while making it for a new mom or use palm jaggery half and regular jaggery half.
  • My kids don’t like either poppy seeds or sesame seeds, instead I have added Melon seeds and flax seeds.
  • I normally add sugar candy crystals to enhance the crunchiness.

Kashi Halwa – Ash gourd Halwa:

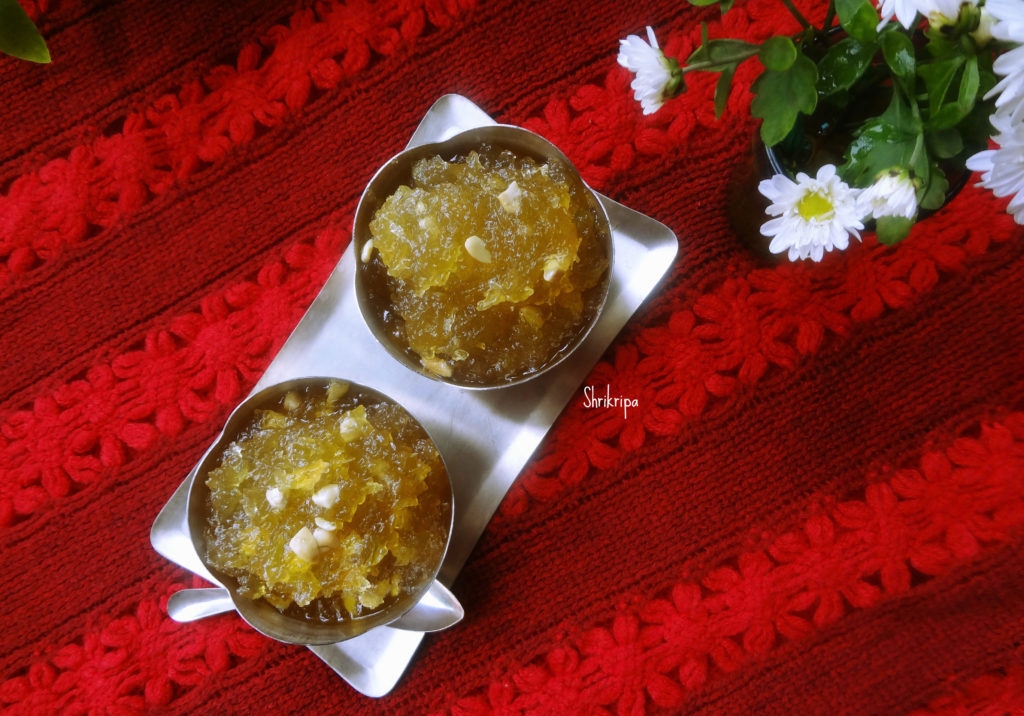
Ash gourd halwa is very popular in Coastal belt of South Canara region. It has many names like Kushmanda halwa, Dumroot,Kumbalakai halwa or Kashi halwa. All names are one and the same. Basically, grated Ash gourd is cooked until its water evaporates, further cooked with sugar and some ghee and flavoured with cardamom. Which is a very laborious job, but once you taste it, you will never regret making it.

halwa main

We will see how to prepare this tasty dessert –

Grated Ash gourd – 3 cups (tightly packed)

Sugar – 1 ½ cup

Ghee – ½ to ¾ cup

Salt – a pinch

Cardamom powder – 1 tea spoon

Roasted Cashew nut pieces – ½ cup (as needed)

Method:

-Wash Ash gourd, peel outer skin and remove inner core with seeded part. (Core part can be used to make Sweet Dosa or Plain Dosa batter)

Ribbet collage 1

-Grate ash gourd and collect gratings and water which is oozing out while grating.

-Put all this in a thick wok and keep it in a fire. Cook until water dries up.

Ribbet collage 2

-When water dries up, add salt, enough sugar, and cook. Once again you will see lots of liquid.

-Don’t worry, mix in-between and wait until it is dries up. Now it is time to start adding ghee at intervals.

Ribbet collage 3

– Now onwards it needs continuous stirring and in-between add 2 table spoons of ghee at a time.

-Keep on stirring until mixture leaves the sides and becomes like a mass.

– When it is done, you will notice three things. When you flip the mixture from the bottom, you will notice little whitish parts (like roasted), when you drop the mixture it will not stick to the spoon and drop like a mass and ghee oozing out at the edges.

Ribbet collage 4

-This is when it is perfectly done and time to add Roasted cashew nut pieces, cardamom powder mix thoroughly and switch off the gas .

Ribbet collage 5

Now leave this ready Halwa to cool or Serve Hot.

-When it attains a room temperature, store this in an air tight container.