Thondekai melara / Ivy gourd Kayi huli:

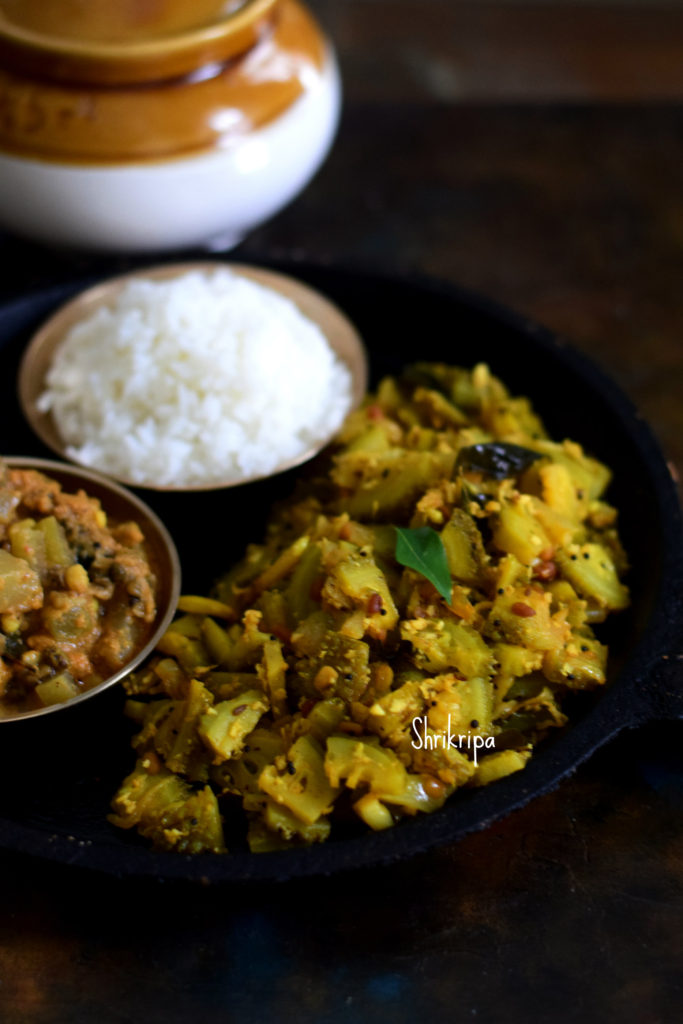
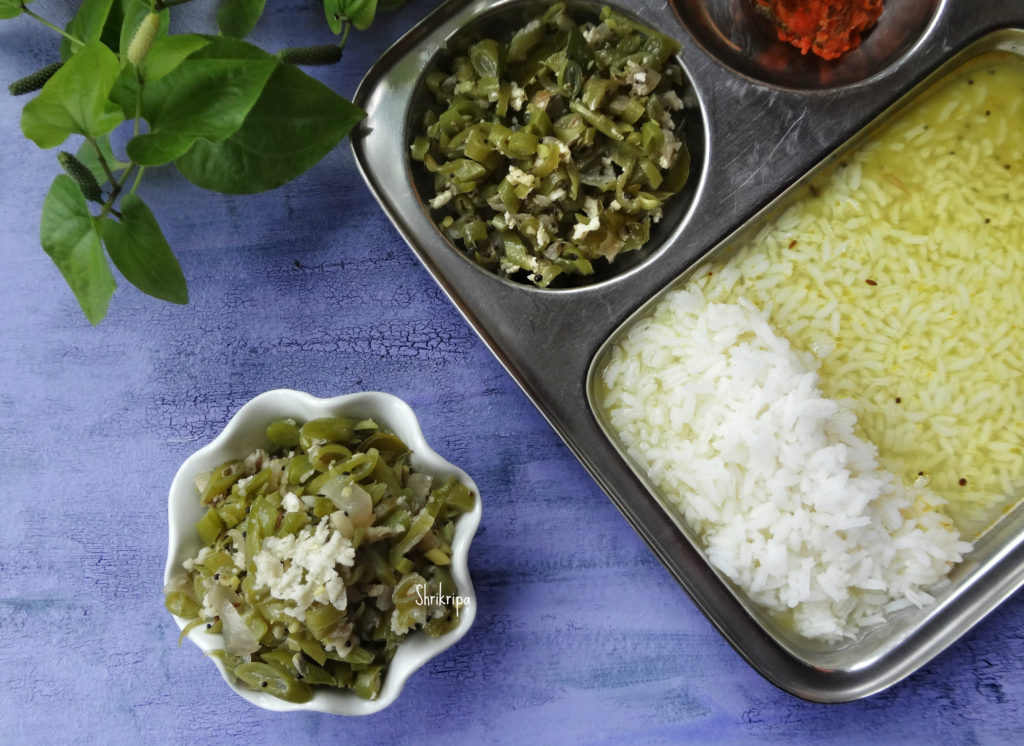
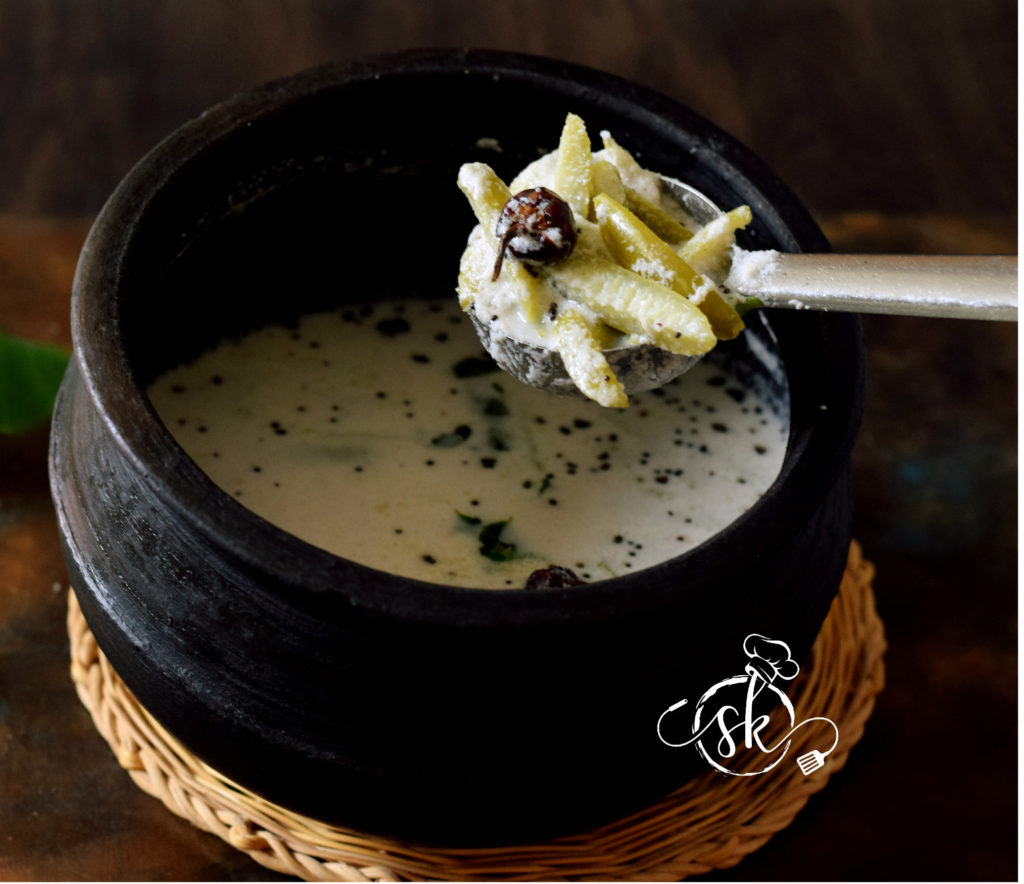
Melara is one of our  specialities, only found in our community and must in our functions or any festivity.  Melara has different names according to the region from which we belong to such as Kayi Huli / Majjige Huli. This post was long due and glad to be able to post at least now.

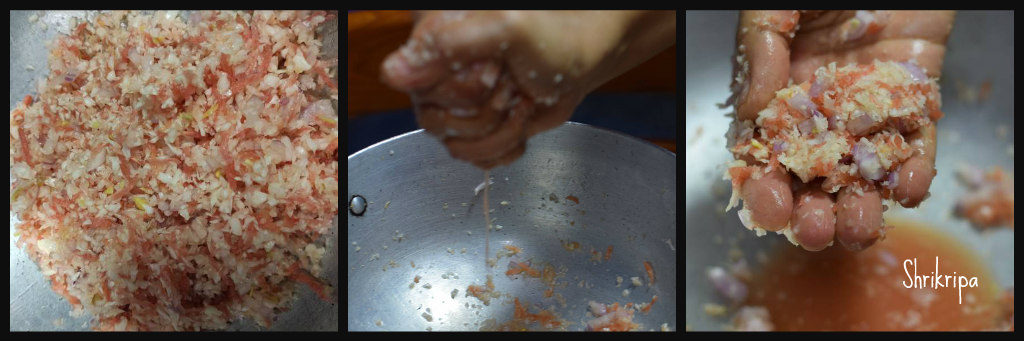
Kayi is nothing but Coconut. Here, fresh coconut ( which is known as Hasi kayi/ not dried/should be filled with coconut water, not dehydrated one)  is ground without any masala and added to cooked veggie , lastly one serving spoon of slightly sour buttermilk or beaten curd has been added and seasoned.

Melara can be done with extremely limited choices of vegetables. Well known  suitable vegetables which can be used in this curry are, Ivy gourd, Tender Mangalore coloured cucumber( which should be green and white) , Ivy gourd and Mangalore cucumber mixed together, Yam alone or with White Kabuli Chana , Bread fruit ,Giant Taro alone or with White Kabuli chana, White Bitter gourd , Red  Amaranth greens, yard long beans, brined raw jackfruit etc are some of our traditional “qualified” vegetables  to cook melara.

As time passes by, even this list has some additional English vegetables 😉 (Yes! Other than our native veggies are known by this name)  like Raw green tomato, Capsicum, potato, and beans)

Now we would move towards the recipe –

Ingredients:

Ivy gourd – 500 grams ( Or Vegetable of your choice)

Green chillies – 2

Salt

Grated fresh coconut – from ½ to ¾ coconut 

Thick buttermilk – 1 serving spoon

Coconut oil – 2 tsp

Mustard – 1 tsp

Red chilli -1

Curry leaves – 1 string

Method:

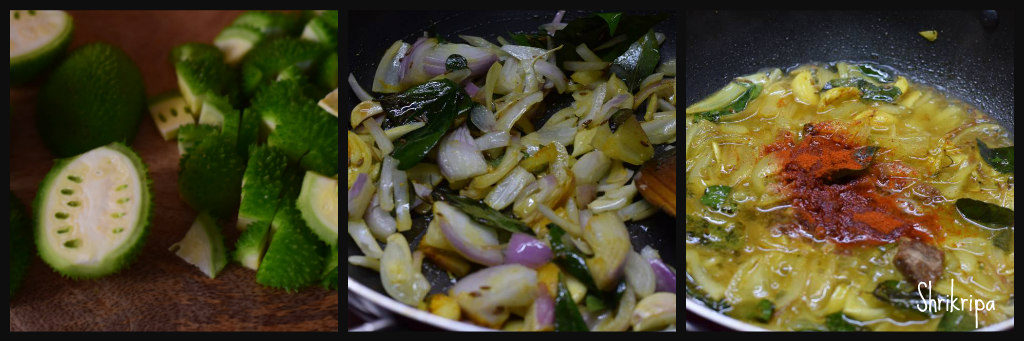
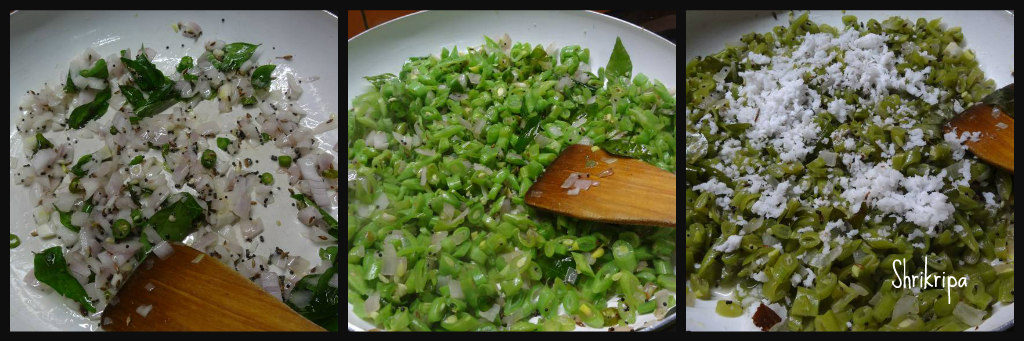
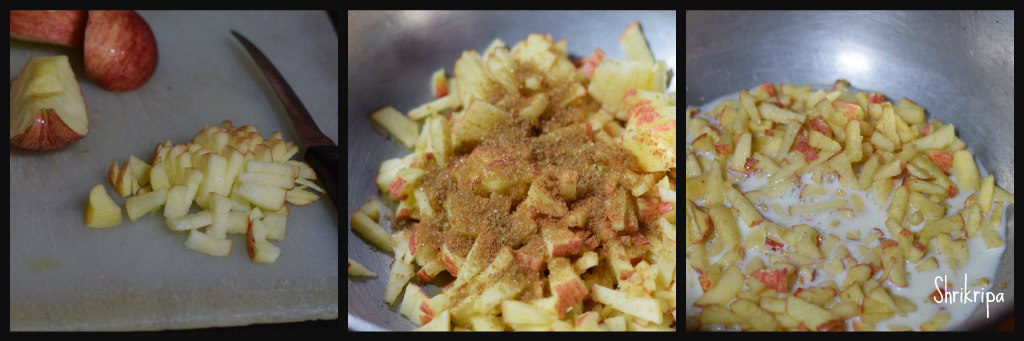
-Wash ivy gourd ,chop into 4 pieces lengthwise. Cook with just enough water to immerse, by adding salt, slit green chillies.

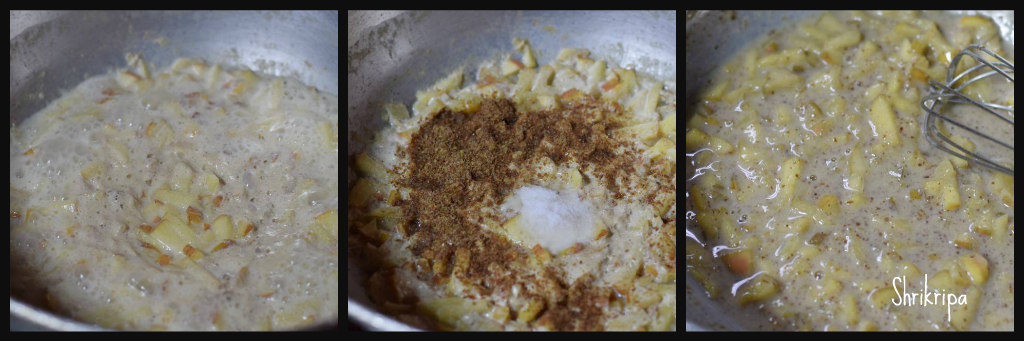
-Make a really fine paste of fresh grated coconut. When veggie cooks, add this ground masala, adjust the consistency and boil for 2 minutes.

-Add buttermilk or beaten curd and when it starts to boil, switch off.

-Prepare seasoning, heat oil, splutter mustard, add red chilli and curry leaves fry and pour over melara.


Apple Halwa

Yesterday, while preparing Apple jam, my Research oriented husband came in and asked me what I was doing, I said – Apple jam , planning to finish the stock which we bought couple of weeks back

He said, “why not halwa?” I was like 🙄🤔

Then, I changed my mind and took my share of  jam when it was done. Proceeded to make Halwa with the remaining quantity, by adding little ghee in-between at a regular interval.

Surprisingly, it turned out super delicious and here I am presenting my end result which was experimental.

Here I have used fruit as a whole /with skin. Normally Apple turns out sour when you cook /boil . To avoid the sour taste, normally I bake it until it is done, then grind into a puree, sieved, and proceed to make jam then halwa with the added mild cinnamon flavour. One can add cardamom as well. Sugar can be replaced with an organic jaggery as well. Even though I have not tried with the jaggery, my friend Aruna has tried with the jaggery and result was just amazing, which was deep brown in colour.

Ingredients:

Golden yellow Apple – 1 kg (Any variety would do)

 Sugar – ¾ kg

Ghee – ½ to ¾ cup

Cinnamon or Cardamom – 1 or 2 pinches

Method:

-Wash Apples, dice ,remove seed part and arrange in a baking dish. For Initial preparation, please refer here

-Bake this in a 170°C pre-heated oven for 15 minutes at first.

-Remove, flip those apple pieces, and continue further 15 minutes.

-After 30 minutes, check the doneness. If it is soft, well cooked ,remove it.

-If it is not done, bake for further 5 or 10 minutes.

-When it is cool, add a little water and churn in a juicer by adding 1 or 2 cups of water.

-Sieve ,discard the roughage ( fibre as well as outer skin remains)

-Put this pulp in a thick bottomed kadai, add sugar,  cook until it turns into little thick and turns into mass.

-Add ghee 2 tablespoons at a time in-between while stirring. If you feel that the Apple puree  needs a little more ghee, add up to ¾ cup, some varieties of Apple need very less ghee and some need more.

-Now we will see, how we decide the quantity of ghee. While stirring if you feel that the mixture is a little dry and the bottom part becomes a little brown, keep adding it. If the ghee starts oozing at the sides, it is an indication to stop the addition of ghee.        


-Now we will see how you know the doneness. It is quite simple, keep on stirring until mixture leaves the sides of the kadai and ghee oozes out from the mixture. You can add cashew pieces at this stage or spread those pieces in a greased plate like me.

-After you are done with this, it is almost ready to shift to the plate. Before shifting I prefer to check, by taking one small peanut sized portion of the mixture and rolling it in-between my thumb and forefinger to make a small ball like structure. If it holds a ball like structure and does not stick to your finger, it is ready.

-Now remove from the flame, shift to a greased plate, and pat this mixture evenly by using a flat, greased (apply some ghee) back of the spoon.       


-Keep this aside for two or three hours to cool. Then cut this into the desired shape and store it in an airtight container.

-You can store this Halwa for a really long time (up to a month or two).


Carrot Greens Thepla:

Usually carrot tops are chopped off and discarded. I do not get carrot tops very frequently and if I get the greens, I normally make 3 batches, while cleaning the greens. Tender, medium and dark green, almost woody.

Tender one would go to Roti or any saag. Medium one would go to dhal . 3rd batch would go to vegetable stock. If you are worried about carrot greens edibility status, no need to worry on that aspect. Yes! It is safe and absolutely edible.

Only concern is its taste. It has its own, slight bitter taste with astringent after effect due to its high Potassium content. It has more beta carotene than the actual carrot root as well as fibre rich. So, it is time to rethink before trashing these super nutritious greens and we need to act smartly to include all this goodness in our diet, at least occasionally.

We would jump into the details of these tasty thepla’s –

Ingredients:

Whole wheat flour – 2 to 3 cups

Chopped tender greens – 1 cup

Salt

Oil or ghee – 2 tsp

Sesame seeds – 2 tsp

Carom seeds – 1 tsp

Turmeric – ½ tsp

Red chilli powder – 1 tsp

Garam masala – ½ tsp

Method:

-Take everything , mix nicely. Add sufficient water and make a pliable dough.

-Keep it aside for half an hour, to rest by closing it.

–Now take lemon sized chapati dough in hand, roll this ball by using a roller, like regular chapati.

-Cook both the sides by using either oil, ghee, or butter.

-Serve with sweetened curd or pickle.


Almond Cashew Mawa Burfi:

Who does not love Almond or Kaju Katli? Here I have combined the much loved two raw materials,  with milk solid/ khoya, to give a melt in a mouth Indian dessert, In the form of burfi.

Almond cashew mawa Barfi is a super delicious, easy to make, melt in mouth Indian sweet or fudge recipe. A perfect sweet to make on any special occasion! Or festive time.

Ingredients:

Almond – ¾ cup

Cashew –  1/3 cup

Khoya /mawa – ½ cup / 100 grams ( unsweetened)

Sugar – 1 ½ cup

Water – ½ cup

Ghee – ¼ cup

Saffron – 10 – 12 strands

Method:

-Heat a cup of water, soak almond and cashew. Close the lid and keep it for 2 hours.

-After two hours, peel the almonds, drain the water, spread these on kitchen towel to remove extra moisture.

-Grind them in a small mixer jar, by using pulse option by giving intervals for mixing in between to get a smooth paste. Grease one steel plate and keep it ready as well.

-Now, take one thick kadai, pour sugar, water, and boil until it reaches one thread consistency. It takes hardly 5 minutes, after initial boil.

-Add in Almond, cashew paste, after it melts and forms a homogeneous mix, add in grated Mawa.

-Stir everything in a low fire, without leaving hand. While stirring, add a tsp of ghee at regular interval and add saffron strands as well.

-When mixture leaves the sides, as well as thickens, check for the doneness. Take out little mixture, hold a small quantity, in between your thumb and forefinger, try to make a ball. Formed ball should shine as well as should not stick to your finger.

-If it passes the test, switch off the gas, and keep stirring for another 5 to 7 minutes, if any ghee is remaining, pour in between stirring.

 -Take the greased plate, pour the mixture, and spread evenly and leave it for 10 minutes. Mark the line and keep it aside for cooling. After cooling, take out pieces, store it in an airtight box.


Kantola Palya / Subzi/ dry curry:

Kantola has many names like Spine gourd, Teasel Gourd, phagila, Mada hagala, locally we call this as “Kaadu peere” in Mangalore. Kantola is one of the famous and nutritious vegetable of coastal region and some Eastern parts of states. This monsoon vegetable is loved by all. This resembles a bitter gourd in structure, but not in taste. It is a crunchy mild flavoured vegetable.  It is a great health food as it is rich in proteins, Iron, and antioxidants and low in calories. It is high in fibre too.                  

In my family, we usually relish this in two ways. One is crunchy,  tawa fry form or as a palya. I make palya in two ways. One is garnished with  fresh coconut. Other one is  with coconut, along with little crushed roasted peanut. Both side dishes tastes equally good.

Ingredients:

Kantola – 500 grams

Onion – 1

Garlic – 7 to8

Turmeric – 1 tsp

Tamarind – small gooseberry size.

Red chilli powder – 1 to 2 tsp

Salt – to taste

Jaggery –  to taste

Fresh Coconut – to garnish

For seasoning: Coconut/ Vegetable oil, Mustard, urad dal, chana dal, cumin , curry leaves.

Method:

-Wash Kantola, chop into small slices. Chop onion and crush garlic. Soak tamarind in a cup of water.

– Take one kadai, heat oil, splutter mustard, add urad and chana dal. Fry until it turns red. Add cumin and curry leaves as well as crushed garlic.

-Add chopped onion, add turmeric, fry until onion turns transparent. Add tamarind water, red chilli powder, salt, jaggery.

-When it starts boiling, add chopped Kantola and mix everything , close the lid, and cook in a low flame.

-After water drains, Kantola turns soft, garnish with coconut or coconut as well as crushed roasted peanuts.

Mix everything and cook further 3 more minutes and switch off. Serve as a side dish with rice or roti.


Tri colour Capsicum Rice :

Capsicum flavoured one pot rice item, with added richness by coconut milk as well as lots of curry leaves and goes very well with any side dish of your choice. It is an absolute favourite at our office potlucks or any parties. It is rich in taste ,easy to make and nutritious too. I normally serve this with simple dhal fry .

I normally Use Basmati rice or small grain Jeera samba rice to make rice and all the three colours of capsicums.

Ingredients:

 Basmati rice – 2 cups

Onion – 1 big (sliced)

Green chilli – 1 (slit)

Ginger garlic paste – 1tsp

Ghee + Oil – 1 + 1 tablespoon

Bay leaves – 2

Cardamom – 2

Cinnamon – 1”

Clove – 2

Coconut milk powder – 2 tablespoons (I normally use Maggi brand)

To Garnish:

Red, Green and yellow capsicum – 1 each

Ghee or Oil – 2 tablespoons

Cumin – 1 tsp

Curry leaves – 2 springs

Green chilli – 1 (slit )

Method:

-Wash ,soak rice for 10 minutes and drain.

-Take one cooker, add ghee and oil, Bay leaves, cinnamon,  clove and cardamom.

-Add sliced onion, green chilli and fry until it is golden. Continue frying with adding ginger garlic paste.

– Add drained rice, coconut milk powder ,4 cups of water ,salt and cook for one whistle ,keep it in a simmer for 3 minutes and switch off. 

To Prepare capsicum garnishing – dice all the three-coloured capsicum.

-Heat ghee, cumin ,curry leaves and slit green chilli and fry.

-Add capsicum ,toss for a while and sprinkle some salt and when it is done, add the ready rice and mix with a light hand and serve with your favourite side dish or simple dhal fry.

Beans Palya:

Fresh French beans are really tasty and loaded with high fibre and nutrients. One of my twin daughters doesn’t like beans in any form and it is very tedious to make her eat this veggie. Whenever I want to cook this veggie, I surely reach out to this fool proof recipe of my mom, which is really simple with very minimal ingredients, at the same time, full of flavours of green chilli and onions. This Subzi tastes good with rice or roti.

Ingredients:

French beans – ½ kg

Onion – 1 or 2 (medium)

Green chillies – 2

Salt – as needed

Jaggery -as needed

Fresh grated coconut – 2 table spoons

Seasoning:

Coconut oil – 1 table spoon

Mustard – 1 tea spoon

Urad dal – 1 tea spoon

Cumin – ½ tea spoon

Curry leaves – 2 springs.

Method:

-Wash, remove fibre from both sides by breaking both the tops of French beans.

-Hold fistful of beans in your left hand and chop uniformly.

-Chop onions and green chilli.

-Take one thick kadai or wok, do seasoning. Heat oil, splutter mustard, add urad dal, cumin.

-When urad dal becomes red, add curry leaves, onion and green chillies and fry for a while until onion becomes transparent and glossy.

-Next add chopped beans, salt, jaggery and toss for two minutes.

-Add one cup of water, close the lid and cook this in a low fire.

-When water evaporates, if beans are yet to cook, add little extra water and cook further.

-When it is done, garnish with fresh coconut and mix this mixture. Cook further for 2 minutes and enjoy this super delicious, simple palya/ Subzi either with hot rice, Rasam or with chapati/Roti.


Vegan/ Vegetarian Thai Massaman Curry:

Massaman curry, is a wholesome, flavourful ,peanut based Thai curry. It originated from the south part of Thailand, near Malaysia. It has Red fresh masala, which includes Red chilli, whole spices, lemon grass, galangal and roasted peanuts to give a creamy texture as well as the richness of coconut flavour by adding coconut milk.

Massaman curry pairs really well with small grain rice either steamed, normal or flavoured one.

Vegetables which I have used are Broccoli, beans, capsicum and carrots. Since the lock down, I am not finding all the options due to my restricted outing. Hence, it is also proved as a non-fussy curry 😉

How I made:

For homemade Massaman Curry paste: (For single use/Serves 4)

Dried red chilli – 3 to 4 (According to the required hotness)

Whole coriander – 1 tablespoon

Cumin – ¾ tsp

Cinnamon – 1” piece

Clove – 3

Whole black pepper corns – 4

Galangal – 1” piece (you can substitute with ginger as well) 

Lemon grass bulbs – 2

Garlic cloves – 3

Shallot/ tiny onion – 1

Lemon rind – From 1 small lemon

Soy sauce – 1 tablespoon

Maple syrup / jaggery syrup – 1 tablespoon

Juice of lemon – from 1 small lemon

Roasted peanuts – ½  to ¾ cup

Method:

-Take ½ cup of water, boil and add broken red chillies , close and keep aside to soak.

-Dry roast Coriander ,cumin, whole pepper corns, clove, cinnamon until it changes colour and you feel the aroma.

-Dry roast peanuts and keep aside.

-Grate lemon rind, make it half, take out the juice from the same lemon and keep it ready.

-Slice shallot,  lemon grass bulbs, galangal ( I had my home-grown harvest, sliced and frozen)

-Now, take one mixer jar, powder peanuts, add roasted masala, soaked chilli with water, lemon rind, lemon juice, maple syrup, soy sauce, shallot ,lemon grass ,galangal and make a fine paste. Now you have a fresh homemade curry paste with you 😀

Next Comes the Easy part:

For Vegetable Massaman Curry:

Ingredients:

Massaman Curry paste – Whatever you have prepared and kept.

Vegetables of your choice – 1 bowl (Broccoli, beans, carrot, capsicum)

Shallot – 1 (sliced)

Oil – 1 tablespoon

Salt

Coconut milk –1- 1 ½  cup fresh or 1 tetra pack or 1 coconut milk powder sachet.

Method:

-Take one wok, heat oil, fry sliced onion, add washed ,cleaned veggies and fry for a while.

-Add salt and when vegetables start wilting, add prepared curry paste mix everything and fry for 2 minutes.

-Add sufficient water, allow to boil , adjust salt. Lastly add coconut milk and allow to boil once and switch off.

-Serve with choice of rice you wish to have. I normally make small grain flavoured steamed rice.


Veg Momo With Chilli and Peanut Chutney:

Should I say, Momo’s are everyone’s favourite or teenager’s favourite 😉 .

 If you have teens at your house, you can relate to me 😀 . Yes, it is the easiest, cheapest and tummy filling, in their language, it is healthy too 😉 . My daughters were missing their friend group as well as their usual outing to eat Momos with 3 dipping sauces 😀  I had the recipe of Momo as well as an easy chutney recipe ,which I had noted down during our Gangtok trip from a couple of local people there.

Tried my hand at an elaborate procedure and felt happy to see a happy face as well.

You can prepare chutney in the beginning and keep it ready, before making momos.

For Momo: It gives around 15 momos

At First: Outer covering/Dough:

Ingredients:

All-purpose flour – 1 cup

Salt

Oil – 2 sp

Water – to bind.

Method:

-Take a flour, add salt, oil. Rub for a while and make a pliable dough. Cover with a wet towel and keep it for rest, while preparing stuffing.

Second: Inner stuffing:

Ingredients:

Cabbage – 1 cup (grated)

Carrot – ½ to 1 cup (grated)

Onion – 1 (chopped)

Ginger – 1 tsp (grated)

Salt

Method:

-Mix everything, keep aside for 5 minutes. Drain all the water, which oozes out by holding/ placing in your palm , folding, and squeezing properly.

-Drain the liquid and keep it ready.

Final step: Folding and steaming

-Take ready dough, take a small portion , make a ball, apply little oil to flat surface as well as to wooden roller.

-Prepare a small disc by rolling, place a little filling at the centre. You can then either close it by folding like how I did . (Lift one side make pleats and fold to the other half and seal the edges OR gather all around and close it at the centre top like a cone.)

-Prepared Momos  should be under wet towels to avoid any dehydration.

-After making some , you can start to steam, by placing it in an idli /Momo steamer. Line the steamer either by spreading banana leaf, parchment paper/ butter paper or by oiling.

-Steam for 10 minutes and serve with any kind of chutney or sauce.

Now we would see how to make,

Hot chilli Chutney and Peanut Chutney to go with steamed momos:

It is sort of a one by two preparation. At first, we are going to make chilli chutney, divide into half and add roasted peanut to one half, grind and make really tasty additional dish.

For Chilli Chutney:

Tomatoes – 4

Red Byadagi chilli – 4 to 5

Garlic cloves – 5 to 6

Roasted sesame seeds – 2 tablespoons

Salt

Method:

-Take a half cup of water, boil and add red chilli, halved tomato, and boil for 2 more minutes.

-Remove outer skin from the tomato , cool.

-Take a mixer jar, powdered sesame, add peeled tomato, cooled red chilli with water, salt and grind smooth.

-It is our Hot Chilli chutney.

For Peanut Chutney:

Roast fistful of peanuts, cool and powder it. Add half the quantity of chilli chutney , little salt, and grind into paste. Voila!!! Your two sides are ready to indulge .

If you like Mayonnaise ,fill the third cup and indulge 😊

Note:

Don’t discard  the vegetable water, which can be used while kneading the dough for any kind of roti’s. 

If you want to serve these momo’s to any kind of parties, prepare before hand, keep inside the fridge /freeze, steam on that day, before serving.

Apple Pie Pancake:

Pancakes are always a boon to our busy morning schedule or during the weekend brunch. When you are locked down at home, due to our recent Corona virus scenario, it is an ideal thing to use the ingredients that are available in your pantry to make filling healthy meal than to prepare apple pie, by rolling, filling and baking, this pancake is the perfect answer for your Apple pie craving and a much more healthier option due to the usage of varieties of healthy flours, as it has room for addition or deletion of flours and choice is yours.

Here I have used ground oats, whole wheat and brown rice flour with caramelised apples as well as with the goodness of flax seed to give extra fluffiness without adding any eggs. So, it is eggless too.

If you want to make gluten free version, replace the whole wheat flour and add any flour of your choice. I love this cinnamon flavoured pancake ,which is a perfect variation of the classic dessert and tastes really yum! With Maple syrup.

How I made: For 4 people

Ingredients:

Apples – 1 or 2 (chopped)

Salt 

Jaggery – 2 tsp

Cooking soda – ¾ tsp

Flax seed powder – 1 tsp

Cinnamon powder – ½ tsp

Milk – 1 cup

Oats – 1 cup ( powdered)

Whole wheat flour – ½ cup

Red rice flour – ½ cup

Method:

-Mix Apple, jaggery , cinnamon and keep aside for 5 minutes. Add milk and cook until apple cooks and becomes soft.

-Switch off ,leave aside for 5 minutes. Add in cooking soda, flax seed powder and mix vigorously until it is frothy.

-Add all the flours ,salt, water to make a batter pourable consistency.

-Heat tawa, when it is hot, pour a ladle of batter, sprinkle some ghee or butter, cook in a low flame.

-When it is almost cooked, flip and roast the other side. Serve with maple syrup and enjoy.