Mangalore Buns:

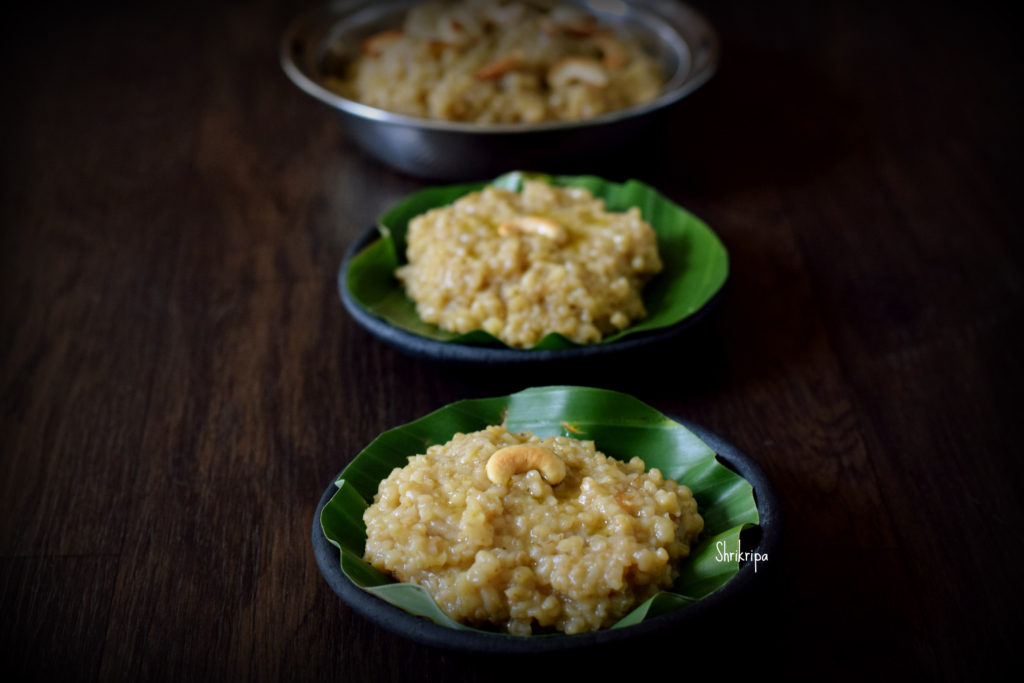
Mangalore Buns is a mildly sweet, deep-fried poori which has a honeycomb texture inside.  It is pure bliss to have this super tasty breakfast occasionally. The main ingredient of this delicacy is Banana and curd. That is the reason it has the fragrance, a little sour, melt-in-a-mouth texture and a sweetish taste.

In Mangalore, each hotel in any nook and corner will offer this super yummy dish throughout the day as a snack. Usually, they serve this with coconut chutney or super thin dhal which is called Thovve.

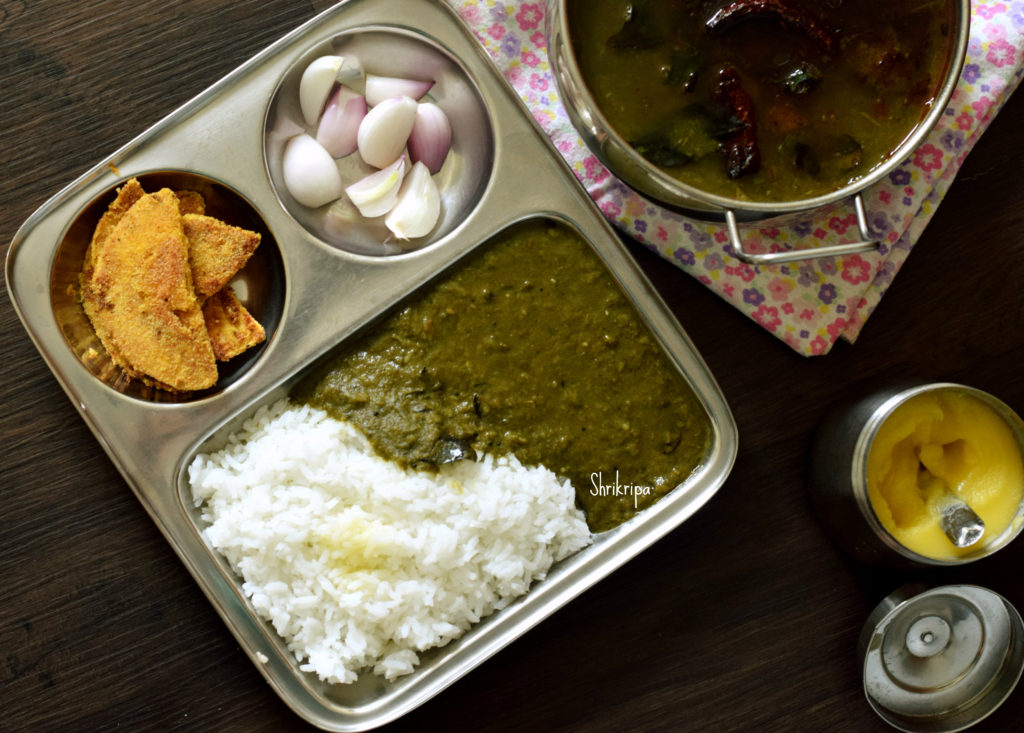
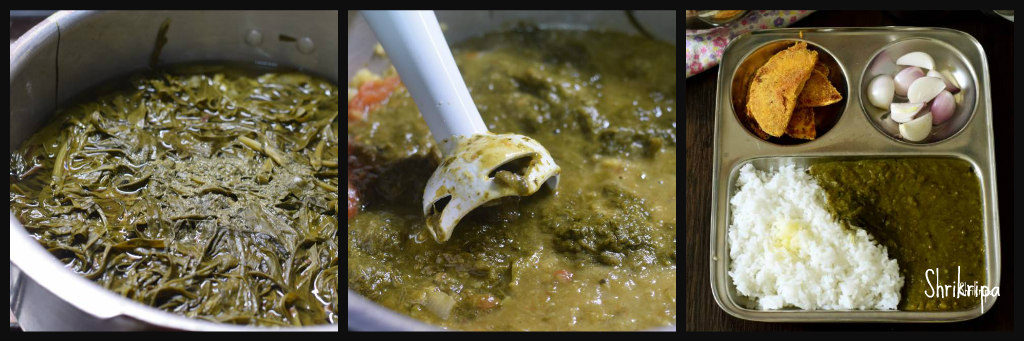
In our household, we relish this with Thovve. Thovve is nothing but cooked Toor dal boiled with slit green chillies, lots of asafoetida/hing and salt and seasoned with coconut oil or ghee, mustard and curry leaves.

Usually, buns are prepared by using all-purpose flour, but I normally make this by using whole wheat as a healthy choice.

Ingredients:

Whole wheat flour – 3 to 4 cups

Curd – ½ cup

Sugar – 6 to 7 teaspoons

Salt – 1tsp

Cooking soda – 1 teaspoon.

Bananas – 4 (small variety)

Cumin seed – 1 tablespoon.

Coconut oil – 2 teaspoons.

Oil- to fry

Method:

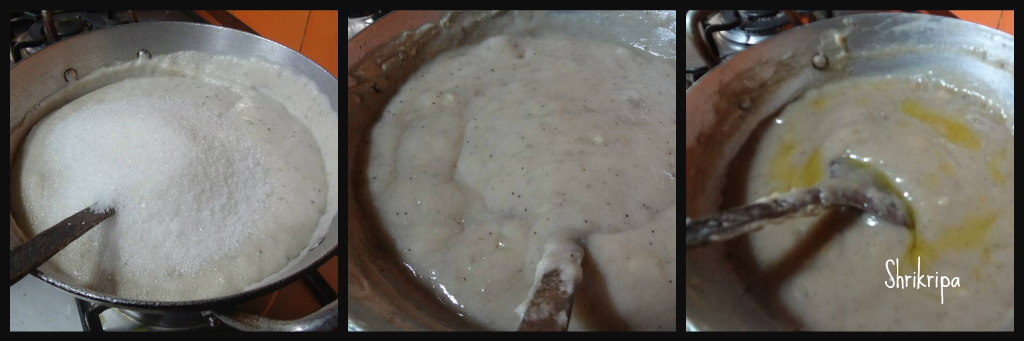
-Take one mixing bowl; pour in curd, sugar, salt, and cooking soda. Mix nicely in a circular motion by using your hand.

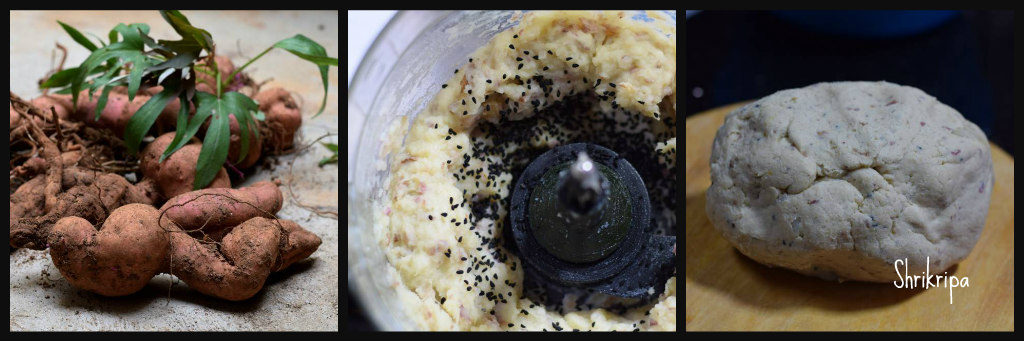
-When sugar dissolves, add in bananas and mash or add mashed bananas. Now add cumin.

-Starts making the dough by adding Whole wheat flour or All-purpose flour or half and half, however you prefer.

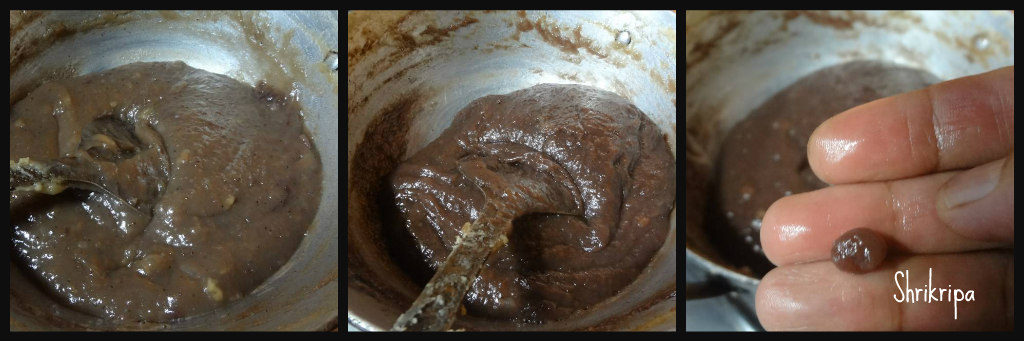
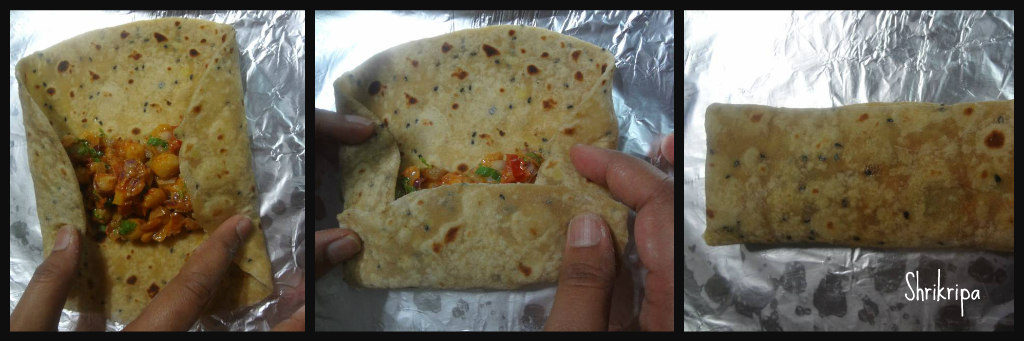
-Dough should be a little sticky, hope you are clear over here, if not please refer to the above picture and refer to my fingers.

-At this stage, pour in coconut oil and coat this on the outer side of the dough. Now keep this oil-applied dough in a bigger container or in that same vessel by closing the lid.

-It should ferment, rise and becomes double. It will take almost 7 to 8 hours in normal weather. In cold areas, even more, time is needed. I keep it for almost 20 hours rising in Bangalore weather.

-Next day morning, Keep oil in a thick Kadai for heating. When it becomes hot, take the fermented dough and keep it ready.

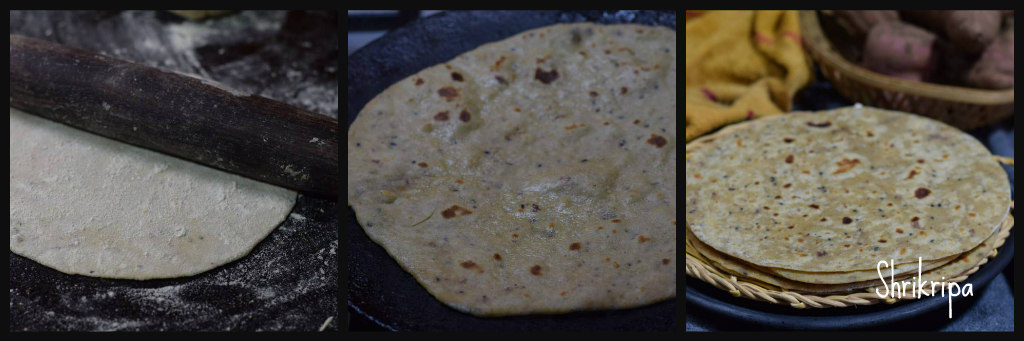
-Don’t mix or knead the dough. Take a small amount of dough, make this into a ball and roll the ball into discs with thickness as shown, by applying flour while rolling. (please refer to the above picture).

-Check the oil, if it is hot start frying buns.

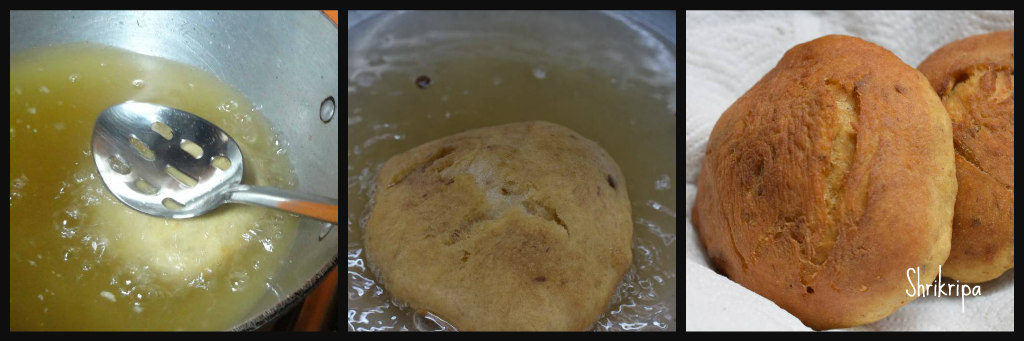
-Slip the rolled disc into hot oil, when it comes up, immediately starts pressing from the back of the frying spoon. (please refer the picture no. 1) Now disc will fluff (No. 2) and fry nicely on both sides.

-Serve these fluffy and soft buns either with Thovve or coconut chutney.


Broken wheat Huggi:

Huggi is a very popular, semi solid dessert of North Karnataka and each house has its own method. It is a sort of homely recipe and you would not find in any restaurant. Broken wheat is known as Godhi nucchu in Kannada language. I learnt Some of my favourite North Karnataka recipes from my previous neighbour aunty, who hails from Solapur near Gulbarga. I used to enjoy whatever she used to offer, starting from simple triangle chapati, obbattu, obbattu saru, chapparadavarekai palya, chavlikai palya and khara byale saru to Godhi nucchina Huggi, which she used to offer to God, every Friday evening and used to offer as a prasadam to us.

Aunty used to use hardly 3 ingredients and it used to taste divine. It is no coconut dessert and you can feel the texture of wheat as well as flavour. Preparation is very quick and simple and needs hardly any pre-preparation.

Recipe goes like this-

Ingredients:

Broken wheat – 1 cup

Jaggery – ¾ cup

Salt – ¼ tsp

Ghee – ¼ cup

Cardamom powder – 1 tsp

Cashew pieces – Roasted (Optional)

Method:

-Wash broken wheat twice. Cook with 3 cups of water and a pinch of salt for 2 to 3 whistles.

-Mean time, heat jaggery by adding ½ cup of water. Strain the liquid and remove the impurities.

-Add strained jaggery syrup to cooked wheat and cook further at a very low temperature.

-When raw smell of jaggery vanishes, add ghee and cook further by mixing in between.

-Lastly when mixture becomes like a mass, add cardamom powder, garnish with roasted cashew and serve.

Indian broad beans with ground nut:

It is a very tasty vegetable and is known as Chikdikayi, chapparadavare or Indian broad beans. This subzi/dry curry is one of our favourite and whoever tastes this subzi, usually asks for the recipe. So, I thought of sharing this recipe in my blog as well. I learnt this from our family friend who hails from Gulbarga, Northern part of Karnataka.

How it is made –

Ingredients:

Indian broad beans – 500 Gms

Garlic – 10 -12 cloves

Red chilli powder – 1 to 2 tsp.

Salt

Crushed roasted groundnut – ½ cup

Oil- 2 tbl sp.

Method:

-Remove both side’s fibre and slit open, to see. Slit at the centre and keep aside.

-Now keep one pot of water for boiling, add little salt to it. When it starts boiling, add broad beans including bean as well.

-When it changes colour, drain the water and keep aside.

– Keep one thick bottomed kadai, put oil. When oil becomes hot, add crushed garlic and fry a little. Now add cooked and drained beans.

-Add sufficient amount of salt and red chilli powder and mix nicely. Cook until oil leaves from the sides.

-Now add crushed or roughly powdered ground nut and mix for a while.

-Serve with Chapati/phulka’s or rice.

Note: I usually add ready ground nut chutney powder (which has red chilli powder, salt and garlic)

If you are using chutney powder like me, decrease the amount of salt and red chilli powder while adding at the beginning.


Chole Bhature (Chana Bhatura) and Alu subzi:

Do I need to introduce every one’s favourite dish? It is basically a deep-fried bread with the fermented / proofed flour dough which Is served with semi dried chick pea curry and potato dry Subzi. This is how we eat or were introduced to this loved-by-all dish.

To prepare we need –

For Chole:

Ingredients:

Chana / white chickpea – 1 cup (soaked and swelled)

Black salt – 1 table spoon

Amla powder / Anardana powder – 1 tea spoon

Oil – 1 table spoon

Ghee – 1 table spoon + 1 tea spoon

Onion – 1 (chopped)

Green chilli – 1 (slit)

Ginger – ½ inch (sliced)

Garlic – 4 (crushed)

Tomatoes – 2 (chopped)

Turmeric – 1 ½ tea spoon

Red chilli powder – 1 tea spoon

Coriander powder – 2 tea spoons

Cumin powder – 1 tea spoon

Garam masala – 1 ½ tea spoon

Kasuri methi – 1 table spoon

Salt

Coriander leaves – chopped

Method:

-Cook soaked chana with enough water, black salt and amla powder. It would take any where between 5 to 6 whistles in the pressure cooker.

-Take one tawa, Heat oil and 1 table spoon of ghee. Add onion, green chilli, garlic and ginger fry until it is transparent and light brown.

-Add in all the masalas, from turmeric to Kasuri methi and salt fry for a while. Add tomato, continue frying until tomato wilts. If needed sprinkle some cooked water from the chana and cook tomato well.

-Cool this mixture and grind this into a smooth paste by adding ladle of cooked chana as well. (it would help gravy to thicken)

-Now mix in this paste with cooked chana and start boiling until oil oozes out and garnish with chopped coriander leaves and 1 tea spoon of ghee.

 Now we will move towards Bhature / Bhatura :

Ingredients:

Whole wheat – 2 ½ cups

Maida – 1 cup

Chiroti Rava – 1 cup

Curd – ½ cup

Water – ½ cup

Salt

Sugar – 1 tea spoon

Yeast – 1 tea spoon

Oil – 2 tea spoons

Method:

-Take Luke warm water- mix in curd, sugar, salt and yeast. Close the lid and wait until it proofs and bubbles.

-Dry mix all the flours or you can take only Maida as well. Make a dough by using yeast water and apply an oil and keep aside for 2 to 3 hours or until doubles the volume.

-When it is ready or time to serve, roll a small disc and deep fry.

Now one more dish, which is purely an optional item:

Alu Subzi / potato dry:

Ingredient:

Potatoes – 5 to 6

Mustard oil – 2 table spoons

Sun flower oil – 2 table spoons

Cumin – 1 tea spoon

Turmeric – ½ tsp

Coriander powder – 1 to 2 tsp

Red chilli powder – 1 to 2 tsps.

Amchur powder – 1 tsp

Garam masala – 1 tsp

Little Subzi masala – 1 tsp (optional)

Sugar – 1 pinch

Salt

Coriander leaves – chopped (to garnish)

Method:

-Cook potato in pressure cooker for 1 whistle. Peel the skin and dice.

-Take one tawa, heat oil, cumin, diced potatoes, all the powders and fry until masala is coated and becomes little crispy.

Garnish with coriander greens.

For deep fried chillies and Onions :

I normally slit the chillies, put a drop of lemon and salt inside and marinate. While frying bhature, deep fry and serve.

Half the onion, slice width wise and separate the layers by hand and sprinkle some salt and chopped coriander.

While plating, place Bhature, chana , potato, little onions and one chilli and serve with love 😊


Banana Halwa:

Banana or Plantain Halwa was an integral part of my childhood. Usually this Halwa is made by using Kerala big banana which is called as” Nendra variety” but in our home, we used to have lots of overripe bananas from our family farm. To finish off all those overripe small bananas (Kadali variety of Mangalore), amma used to make Halwa or Banana Preserve/ Berati all the time. It was a very regular sweet at our house hold. Today I will share this recipe to all our readers-      

Ingredients:

Over ripe banana – 22

Sugar – 1 bowl

Ghee – ½ to ¾ cup

Cashew nuts – 2 tbl sp.

Method:

-Put all the peeled bananas to mixer grinder and make a smooth paste. Measure this by using any bowl of your choice.

-If this paste is 3 cups in quantity take one cup of sugar in that same measurement cup. So, your ratio of banana paste and sugar will be 3:1.

-Fry cashew bits in a teaspoon of ghee and keep aside. Grease one plate with ghee and keep it ready.

-Take one thick bottomed kadai, put this paste and keep gas flame in a very low flame and cook for a while.

-When it changes its colour to milky white and then to a pale colour and when you smell the banana flavour in the air, add sugar and mix this in at a regular interval.

-Add ghee 2 table spoons at a time in-between while stirring. If you feel that the banana paste needs a little more ghee, add up to ¾ cup, some varieties of bananas need very less ghee and some need more.

-Now we will see, how we decide the quantity of ghee. While stirring if you feel that the mixture is a little dry and the bottom part becomes a little brown, keep adding it.

-If the ghee starts oozing at the sides, it is an indication to stop the addition of ghee.

-Now we will see how you know the doneness. It is very simple, keep on stirring until mixture leaves the sides of the kadai and ghee oozes out from the mixture.

-You can add cashew pieces at this stage or spread those pieces in a greased plate like me. After you are done with this, it is almost ready to shift to the plate.

-Before shifting I prefer to check, by taking one small peanut sized portion of the mixture and rolling it in-between your thumb and forefinger to make a small ball like structure. If it holds a ball like structure and does not stick to your finger, it is ready.

-Now remove from the flame, shift to a greased plate and pat this mixture evenly by using a flat, greased (apply some ghee) back of the spoon.

-Keep this aside for two or three hours to cool. Then cut this into the desired shape and store it in an airtight container.

-You can store this Halwa for a really long time (up to a month or two).


Pumpkin/Cheenikayi Kalasu:

Pumpkin Kalasu is a traditional recipe of our community. It is a semi solid, sweetish coconut based curry, which goes very well with hot rice or Chapati.

Usually we use tender, greenish sweet pumpkin for this curry, paired with white Kabuli chana.

Ingredients:

Green sweet pumpkin – ½

White chana – 1 cup

Coconut – 1 bowl

Cumin – 1 tsp

Red chilli – 1 to 2

Salt

Jaggery

Red chilli powder – ½ tsp

Seasoning:

Coconut oil – 1 tsp

Mustard – 1 tsp

Red chilli – 1

Curry leaves – 1 string

Method:

  • Soak white chana for 7 to 8 hours or overnight.
  • Cut pumpkin into half; remove inner soft pith and seed. Chop this into small pieces with skin intact.
  • Wash soaked chana, put fresh water and cook in a pressure cooker for 3 whistles.

  • When pressure relieves, open the lid and add chopped pumpkin, salt, red chilli powder and jaggery. If needed add little more water and cook until pumpkin is done.
  • Now grind coconut, cumin and red chilli into fine paste by adding required amount of water.
  • Add this masala to cooked veggie. Adjust the consistency by adding water. Consistency should be semi solid. Boil this and add seasoning.
  • For seasoning heat coconut oil, mustard, red chilli and curry leaves.
  • Enjoy this curry with hot rice or Chapati.


Massoppu by using Anne Soppu / Water spinach:

Massoppu is nothing but mashed greens with cooked lentils, which is the staple food of Bangalore- Mysore region and is an excellent accompaniment with either Ragi balls or rice. Usually Massoppu is prepared with mixed greens, which is available throughout the year.

We all know the fact that leafy greens are source of iron, calcium, vitamins, antioxidants and fibre and it is the best gift of nature.  Apart from the regular greens we sometimes find unique, seasonal, never seen greens with local soppu/ green vendors in the early morning hours, when they visit our locality. Only few people know the usage of local, seasonal edible greens which was consumed in rural India for centuries. These super foods are sold only in the hand pushed carts in our cities and sadly not at all available in modern super stores.

 Anne soppu comes under such category. After staying in Bangalore for 20 long years I had never seen this green and when I came across it this last week, asked my soppu vendor. He said, it is Anne soppu and is very tasty. Then comes my right hand, house help who grew up in rural Bangalore and knows every green which grows locally. She said, not only is it tasty, but also very nutritious.

According to her, Anne soppu grows wild, like a weed in between paddy or Finger millet/ Ragi fields during monsoon. It has long, arrow shaped leaves and crunchy, hollow stem which breaks very easily, while bending. It is known as Water spinach in English and Kalmi saag in West Bengal. Here is her recipe, which I made and relished and dedicating this post of mine to her.

How I proceeded with is –

Ingredients:

Toor dal – 1 cup

Anne soppu – 4 small bundles

Onion – 1

Garlic- 1 whole

Green chillies – 5 to 6

Tomatoes – 4

salt

For Seasoning –

Oil / ghee – 1 table spoon

Mustard – 1 tsp

Cumin – 1 tsp

Hing – ¼ tsp

Red chilli – 2

Curry leaves – 1 string

Method:

-Greens are like this-

-Clean the greens by discarding thick stem portions by hand.

-Wash and keep aside.

-Wash toor dal, chop onions, tomatoes.

-Take one pressure cooker, shift washed dal and pour water till just above the dal.

-Now place tomatoes, green chillies, onion, garlic, washed greens, salt and cook for 2 to 3 whistles.

-When pressure relieves, churn roughly in a hand blender or hand-held churner.

-Adjust the consistency of dal by adding water and adjust the salt and boil once.


-Now do seasoning by heating oil or ghee, splutter mustard, cumin, hing, red chilli and curry leaves and pour over boiled dal.

-Enjoy with hot rice and raw onions or with any sort of papads or tawa fries like me 😊


Chapati Roll /Kati roll (with White Chana):

Rolls are very easy to have, when you are on the move. Kati roll is a generic name for any kind of rolls. This is a famous Indian street food, which is originated from Calcutta.  in its original form, Skewer roasted kebab was placed and wrapped with a roti. Over the years, many variants have evolved and any filling either veg or non-veg all of which now comes under this category and called as Kati roll with the name of the filling attached with it. Hence, we can call this roll as Chana Kati roll 😉

It is another easy, healthy, nutritious and tasty recipe. This recipe is well balanced with the required amount of carbohydrate, protein, fiber and fat. Easy to prepare and eat for busy people and for school going kids. Here I have used Sweet Potato roti to enhance the nutrition. You can use plain roti as well.

Ingredients:

Ready Roti’s – 6 to 8 (sweet potato roti or plain roti)

For the filling:

White chick peas/Kabuli chana – 1 cup

Onion – 1 (chopped)

Tomato – 1 Chopped

Ginger garlic paste – 1 tsp.

Cumin seeds -1 tsp

Red chilli powder – 1 tsp.

Cumin powder – ½ tsp.

Garam masala – ½ tsp.

Coconut milk powder – 3 tsp. (I use Maggi coconut milk powder)

Turmeric powder – ¼ tsp.

salt to taste

 Oil – 1Tblsp.

For the topping:

 Onion chopped – ½

Coriander leaves- chopped

Salt pinch

Lemon – half

Method:

-Soak Chana at night or 7 to 8 hours. Cook with salt and required amount of water. Drain and keep aside.

Now to prepare the stuffing:

Take one Tawa and put 2 tsp. of oil, cumin and chopped onion. Sauté till it is done. Sprinkle little turmeric, add ginger garlic paste, fry till raw smell disappears.

-Now add tomato, and all the powders (red chilli, garam masala, cumin, salt), add cooked chana, coconut milk powder and sprinkle water (2 to 3 tbsps.)

-Mash a little and when it starts boiling and masala coats well, remove from the flame.

How to assemble:

-Mix all the ingredients from the Topping together (onion, chopped coriander leaves, salt, lemon juice) and keep the mixture aside.

-I normally make little bigger, elongated Roti’s (not round) for rolls.

-When Roti, Filling mixture, everything becomes cool, take one aluminium foil and keep one Roti over it.

-Spread the prepared Chana at one end, sprinkle onion topping.

-Now comes the folding part. You can roll in two methods.

-One is straight away, roll and both the ends can be sealed by folding aluminium foil.


-Second method is, Fold at each end of the roti, then roll like a mat.

-In this way, roll is automatically sealed by itself and here you can avoid usage of an Aluminium foil and can carry directly in a Lunch box.


Sweet Potato Roti / Chapati:

Today I am going to share one among my family’s favourite dishes, Sweet potato Parata/ roti. Sweet potato is a large starch, tuberous root vegetable. This tuber is not only readily available and very versatile but also contains vitamin B6, Vitamin C, Vitamin D, minerals like magnesium, iron and potassium along with beta carotene. When It is home grown, the joy doubles. It is an awesome tiffin box option for school going kids as well. I normally use these roti’s for preparing rolls, which stays fresh, soft for longer duration and enhances the taste of the roll with its natural sweetness. 

Ingredient:

Sweet potato – 2

Whole wheat powder – as needed

Kalonji / Onion Seed – 1 Tsp.

Milk – ½ cup

Oil – 2tsp

Salt – to taste

Method:

  • Boil sweet potato, remove skin and mash the flesh in a bowl or a food processor.

  • To this add onion seed, salt, milk, oil, along with whole wheat powder by adding little by little water prepare dough.
  • Take enough dough and prepare roti, just like our regular roti.

      Note: You can add flaxseed powder while making dough to enhance the nutritional value of this Roti.

Vegetable Pulav (Bangalore Style):

Vegetable Pulav is very versatile and made in many ways. Each house or family has their own favourite recipes. But this one is found in any small darshini or small eateries in Bangalore. It is a native Bangalore style Pulav which is green in colour due to the usage of Pudina and coriander leaves. It is fried with onion and other masalas and ground to paste. Selection of the vegetable is also unique. With other vegetables, Knol khol, double beans as an added attraction, when compared to normal Pulav. Added to all this, we find deep fried bread croutons.  

Ingredients:

Basmati rice – 3 cups (small steel tumbler)

Beans – 10

Carrot – 1

Knol khol – 2

Green peas – ¾ cup

Double beans – ¾ cup

Lemon – 1

Bread slices – 3

For Masala: (please refer the picture)

Oil – 2 table spoons

Cinnamon – 4 to 5 small pieces

Clove – 4

Cardamom – 2

Black pepper – 10 to 15

Cumin – 1 table spoon

Onion – 2 (medium)

Green chillies – 5 to 8

Ginger – 2-inch piece

Garlic – 12 to 14

Mint / Pudina leaves – 1 fist full

Coriander leaves – 1 fist full

Fresh Coconut – 1 small cup

Seasoning:

Oil – 8 to 10 table spoons

Cumin – 1 tea spoon

Bay leaves – 3 half pieces

Marathi moggu – 2

Star anise – 2

Method:

-Wash rice a couple of times, soak and keep aside.

-Wash pudina, coriander leaves, Chop veggies, onions etc. If you are adding double beans and green Peas keep it ready.

-Now prepare ground masala: Take everything under masala and keep it ready by washing or chopping.

-Take one wok, heat oil, drop all the dry spices from cinnamon to cumin.

-Fry onions, garlic, ginger, green chillies when onion becomes transparent add pudina and coriander.

-Fry until it wilts. Add coconut and fry for 2 minutes and switch off the gas.

-Cool, grind into paste by adding very minimum water. Keep aside.

-Now we would move towards the main preparation. It is the time to drain the soaking rice.

-Take one pressure cooker, pour oil for the seasoning, drop all the dry spices from cumin to star anise, fry for 2 minutes.

-Now put all the veggies, green peas, double beans and fry nicely until raw smell vanishes and all the pieces coats with the oil.

-Next comes the turn of adding ground green masala and salt. Fry nicely and lastly add drained rice and fry for couple of minutes.

-Add water (I normally add 1: 2 for Basmati rice or Sona masuri rice) If you are using small grain (Jeera rice) Use 1: 1 ½ ratio for water. Here 1 is rice and 2 or 1 ½ is water.

-Use rice measured cup for water measurement.

-Check for salt and squeeze lemon and close the lid. Cook for 1 whistle and keep it in a simmer for 2 to 3 minutes.

-During this time, we can prepare bread croutons. Usually bread pieces will be deep fried, drained and added.

But, I normally avoid deep frying and make it like this.

-Take one tawa, drop couple of spoons of ghee or oil, when it is hot, drop the bread pieces and fry for 2 to 4 minutes, until all the bread pieces coats partially and half roasted.

-Now switch off the gas, spread those bread pieces in a baking dish, bake for 20 minutes or until it is crisp in a pre-heated oven or convection microwave at 170-degree C.

-When Pressure relieves, open the cooker lid and mix in bread croutons and mix well. Close the lid and leave for some time to soak all these bread pieces to absorb the aroma.

-Then serve with Onion raita at the side.