Avalakkki/Poha Chiwda:

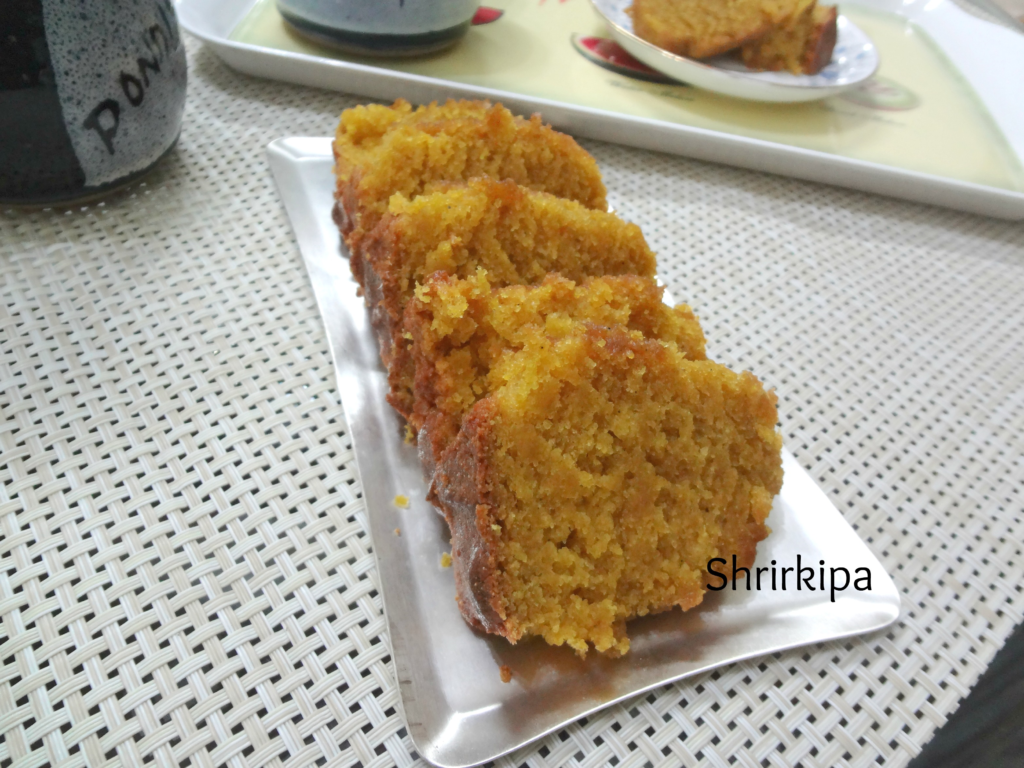
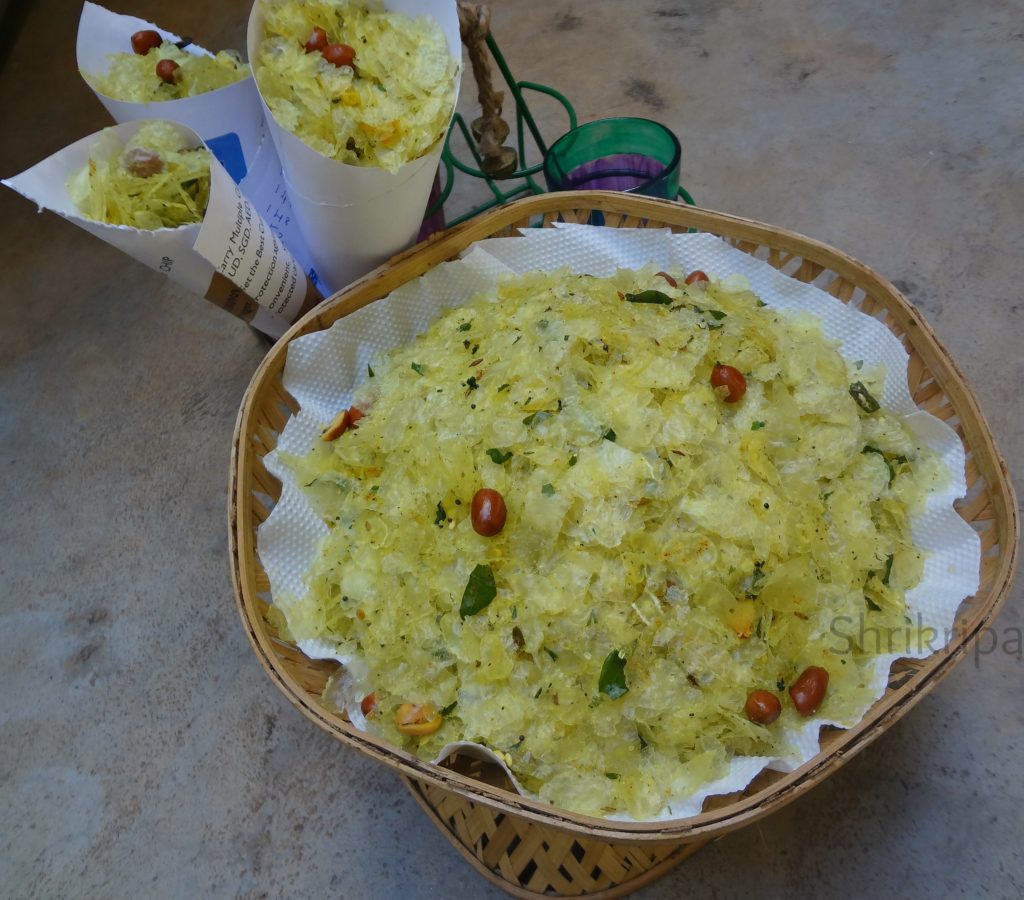
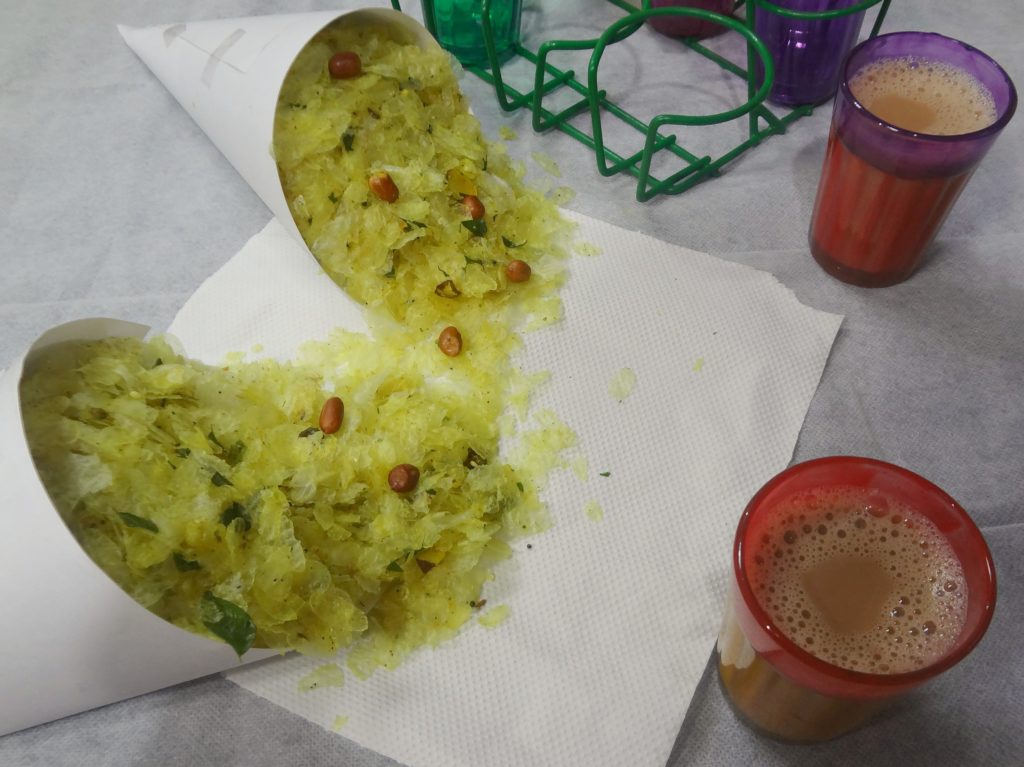
Chiwda or Chivda is an integral part of Diwali festival. It is nothing but savoury rice flakes or Poha. This is not the usual deep fried one. It is a melt in the mouth kind, is very low in calories and is a light snack. My mom used to make this with Nylon Poha or super thin Poha.

Chiwda main

This is how my mom used to make it-
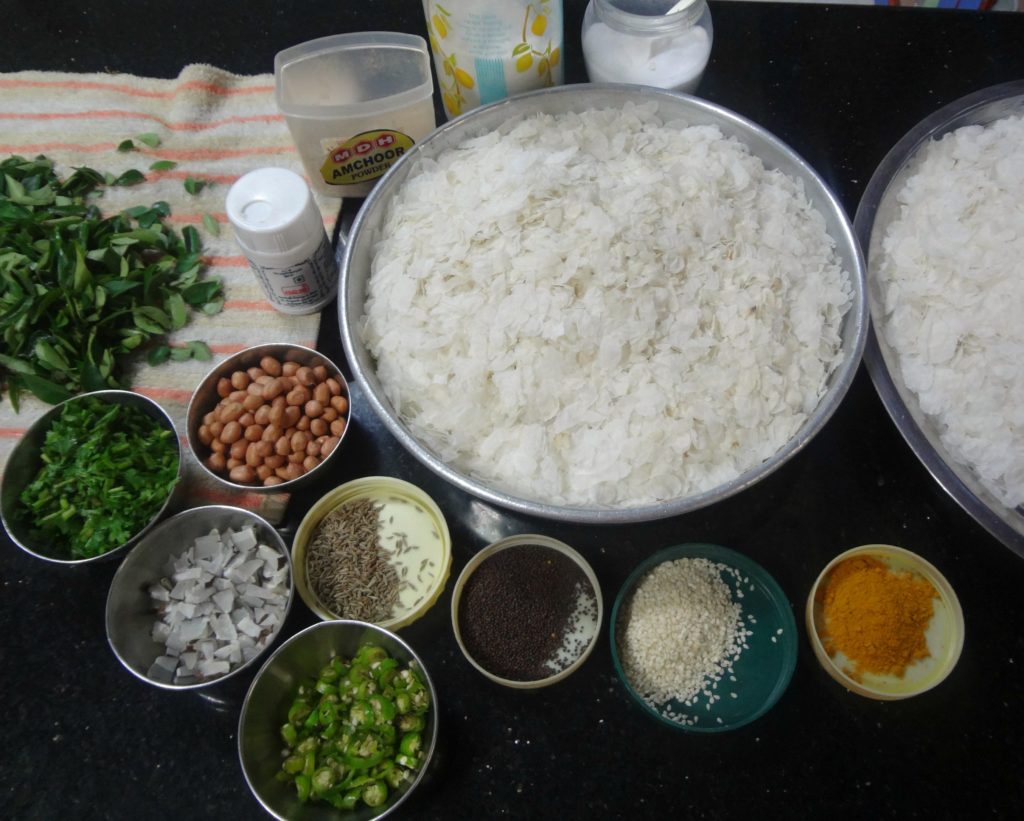
Ingredients:

Nylon Poha /Paper thin poha – 500 Grams

Tamarind powder or Amchur powder – 2 tsp.

Salt – to taste

Sugar powder – to sprinkle.

Seasoning:

Oil – 4 tbl sp

Peanuts – 4 tbl sp

Mustard- 2 tbl sp

Cumin- 1 tbl sp

Hing – 1 tsp

Curry leaves – 7 -8 springs

White sesame seeds – 2 tbl sps

Turmeric powder – 2 tsp

Green chillies – 3 -4 Chopped

Dry Coconut bits –  3 tbl sp

Coriander leaves – 3 tbl sp

Method:

-In the morning keep beaten rice /Poha under the sun by spreading on a thin clean cloth.

chiwda 1

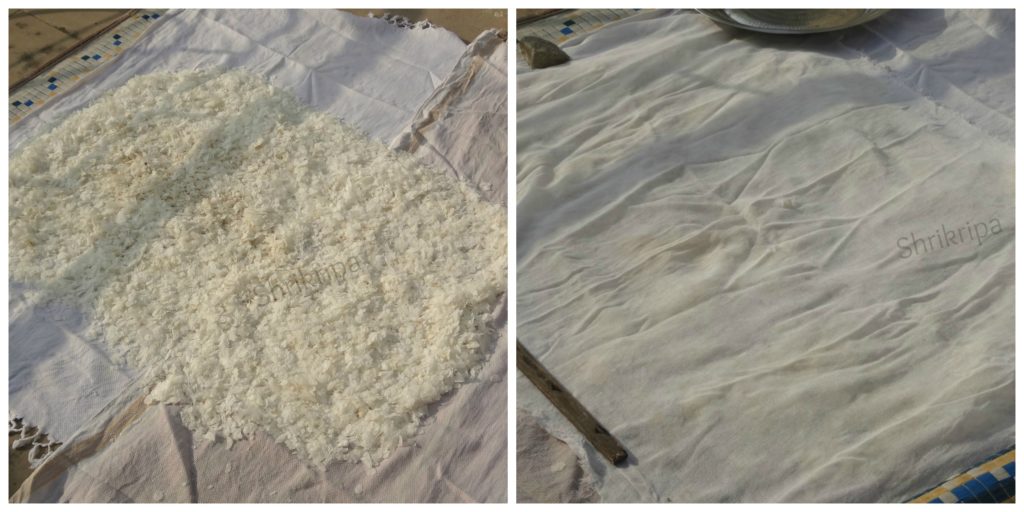
-If you want you can cover this Poha by using another thin cloth to avoid dust accumulation while drying.

-Keep this for two to three hours or until it becomes crunchy.

– When it is ready, remove from outside and keeps everything ready for seasoning.

chiwda 2

– Chop green chillies, curry leaves, coriander leaves.

– Slice coconut and make bite size pieces.

-Make sugar powder and keep aside.

-Now take one big kadai, put oil. When it is hot add peanuts.

chiwda 3

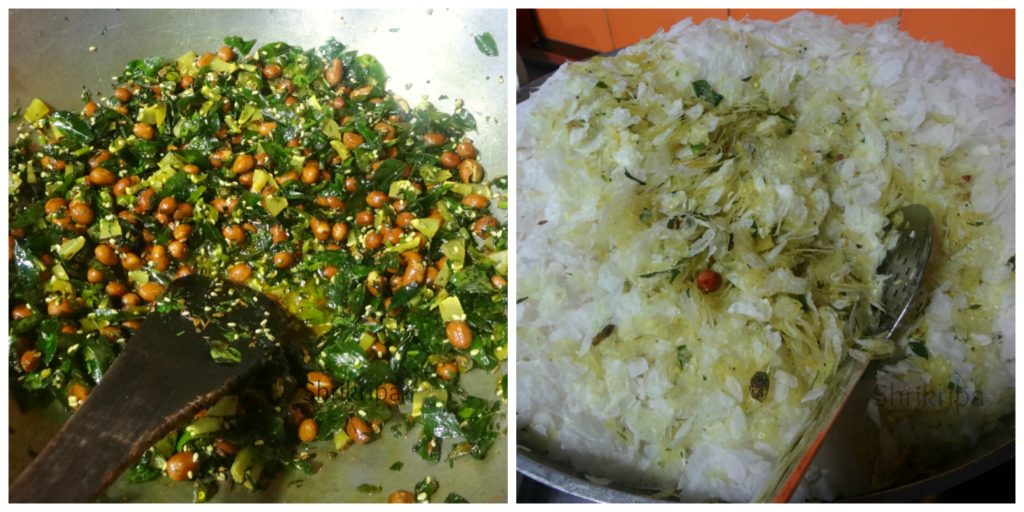
-When it is half done, add mustard. After it splutters go on adding Cumin, hing, curry leaves and green chillies one by one.

-When curry leaves become crisp add coconut bits and fry a little.

-Lastly add chopped coriander leaves and fry nicely until coconut bits becomes brown.

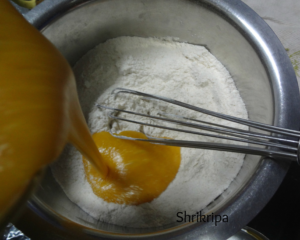
-Now add all the powders- turmeric, salt, tamarind and sugar.

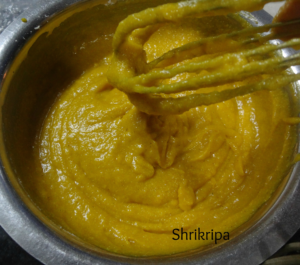
-Switch off the gas, add sun dried Poha and mix thoroughly until it holds all the masalas.

chiwda 4

– Don’t put lot of pressure while mixing, if you do so, crunchy Poha will break and will not hold the shape.

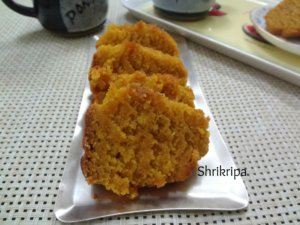
-After mixing, cool and store this in an airtight container. This stays good for one month or more.

Enjoy this with evening tea.

NOTE: If you don’t have access to sunlight, you can roast this in kadai after doing seasoning. Keep it for some time in a low fire and make Poha crispy or use microwave for roasting before seasoning.

Gluten free Masala Bread:

Wanted to experiment with banana flour which I had made at home, in baking bread. So, I tried my hand at this recipe. In the end, I got soft, dill flavoured bread. Which had nutritionally rich dill leaves, seasoned onion, Amaranth flour, homemade banana flour and fine rawa. People who want to try this, can replace the flour and try. One can use only All-purpose flour or whole wheat flour but handle your dough carefully.

bread main

Now we will see how I proceeded –

Ingredient:

Amaranth / Rajgira flour – 1 cup

Banana flour – 1 cup

Fine rawa / semolina – 1 cup (used millet rawa)

Milk – 1 cup (vegans can use any other form of milk)

Water – ¼ cup

Active dry yeast – 2 tea spoons

Sugar – 2 table spoons

Oil – 2 table spoons

For masala:

Dill leaves – 1 small thin bunch

Curry leaves – 1 table spoon

Onion – 1

Green chillies – 2

Cumin – 1 tea spoon

Oil – 1 table spoon

Salt – 1 tea spoon

Turmeric – ½ tea spoon

For Garnishing and other:

Chia seed – 1 tea spoon

Butter – 1 table spoon

Milk – 1 table spoon

Oil – 2 table spoons

Method:

-First, we will arrange for yeast proofing: take Luke warm milk and water, dissolve sugar and add yeast, mix nicely by using spoon and keep aside by closing a lid for 10 minutes.

Ribbet collage 1

– If this has not shown any bubbles even after 10 minutes, discard the solution and prepare once again with fresh yeast.

-At the meantime, prepare for seasoning:

Ribbet collage 2

-Chop onions, green chillies. Heat oil, put cumin, onion and fry for a while. When onion becomes transparent, add curry leaves, dill, turmeric, salt.

-Switch off the gas, when greens wilts.

-Now put all the dry flours in food processor, dry run and mix thoroughly. Add in seasoning, oil and once more mix everything.

-Now pour yeast mixture and knead with the help of kneader. If it is very sticky, adjust the consistency by sprinkling extra flour.

-Ready dough should be little sticky, but not watery.

-Remove this dough from the processor, apply 2 table spoons of oil on this dough all over from the outside and keep it in a bowl covered with wet towel to rise (First rise)

Ribbet collage 3

-It will take anywhere between 1 ½ to 2 hours. (Dough should be doubled)

-After one and a half hours, remove this raised dough and place it over the work table by sprinkling some dry flour over the counter.

Ribbet collage 4

-Spread this dough into rectangular shape by pulling by hand (width should roughly match the bread baking tin)

-After pulling and spreading like a rectangular mat, fold it thrice or four times, like a real folding of the mat.

-Keep this folded roll in a greased baking tin, apply milk on top of the dough to avoid drying. Sprinkle chia seed and keep it for second proofing (rise) by closing it with a wet cloth or bigger vessel.

Ribbet collage 5

-When it rises after an hour, bake this in a pre-heated oven for 20 minutes at 200® C.

-Immediately after taking out from the oven, apply butter all over at the top part and keep it for cooling.

Ribbet collage 6

-After it cools down, de-mould and slice the bread and enjoy with any jam or butter.

Note:

-If you want vegan version, please skip application of milk and butter.


Arrowroot Halwa:

Traditionally we call this Arrowroot halbayi. Which is easy to digest and considered as a very light food during fasting or illness. This should be consumed fresh and the shelf life of any halbayi is only 24 hours.

Arrowroot powder is extracted from the arrowroot plant, which is milky white in colour and powdery like corn starch. It has high nutritional content and is a very good substitute for bleached corn starch as a thickening agent in cooking. It is odourless and works well too.

Arrowroot powder’s “Easy to digest” quality is qualified to make infant food as well as to treat diarrhoea. It is usually consumed in a porridge form in our region. Usually, 1 tablespoon of powder is mixed with little water (according to the consistency) and cooked until it is shiny and glossy. Then with preferred seasonings like salt or jaggery.

Although it is a starch, it contains no gluten, so works well in gluten-free baking or cooking as well.

pic main

Ingredients:

Use a small tumbler to measure arrowroot, milk and jaggery or sugar.

Arrowroot powder – 1 cup 

Coconut milk or milk – 1 cup

Jaggery or sugar – 1 cup (grated)

Ghee – 2 tablespoons

Water – 2 cups

Cashew bits – 2 tablespoons

Cardamom powder – 1 teaspoon

Method:

– Mix arrowroot powder in water and keep aside for one hour.

– After an hour, pour the top/soaked water. Add 2 cups of water, mix nicely and sieve this solution to remove any impurities.

collage 1

– Make jaggery syrup by adding little water, boil and sieve the solution to remove any impurities.

– Grease one steel plate with little ghee and keep it aside. Roast cashew bits with a drop of ghee and keep aside.

– Mix sieved mixture, coconut milk, jaggery syrup in one thick Kadai and heat the mixture by stirring continuously on low fire.

collage 2

– Add ghee in-between, when it is half done add cardamom powder, cashew and stir once.

– When the mixture leaves the sides of the vessel and becomes one mass and non-sticky, pour the mixture to a greased plate.

– Take one flat spoon/ladle, apply some ghee to the back of the ladle and press the mixture to give a uniformly smooth texture and even thickness.

– When it cools down a little, mark and cut this into the desired shape and serve.

– Please note, this halwa/ halbayi stands good only for one day. If you want to enjoy this dish over more days, you should store this in a refrigerator and reheat it before serving.


Guacamole / Mexican Avocado or Butter fruit dip:

I tasted my first fresh and authentic Guacamole which was prepared by a native Mexican couple in Key west during my recent trip. Personally, I had never liked it before. It was by accident that we spotted a cart over there, due to my tiny niece who loves her dose of Guac at any time of the day, and that is the reason why we picked up one.

pic main

We got an opportunity to taste Authentic key lime pie and visited “Peppers of Key west” which is a small pepper bar. We sat at the pepper bar and did a taste test as well. They had more than thousands of varieties of sauces and dips with spice levels ranged or ranked from 0 to 10 and my daughters and sister who enjoyed this tasting session earned their ” I have the Hottest tongue in this island” badge as well.

collage 1

At Mallory square, one will get to see lots of things like Magic shows, tarot reading or some amazing food in different kinds of carts. We browsed a bit and decided to taste Budapest special Chimney cake, Caribbean grilled corn and this Guacamole. After all these experiences and eating sessions, we enjoyed the sunset over there.

pic 8

Now we will see how I tried to replicate their recipe and I want to dedicate this recipe to that couple.

Ingredient:

Avocadoes/ Butter fruit – 2 (small size)

Garlic cloves – 5 to 6

Crystal cooking salt – as needed

Tabasco chilli sauce – 1 tea spoon

Tomato ketch up – 1 teaspoon

Tomato – 1 (big)

Spring onion greens – 2 table spoons

Fresh Lemon juice – as needed

Method:

-Make a paste of garlic, salt and Tabasco sauce by using pestle and mortar.

– it should be like a semi ground paste and it takes little time and energy of yours.

collage 2

-Now cut open the fruit, remove seed and scoop out the flesh and mash this into fine texture.

collage 3

– Mix in tomato ketch up and ground garlic and salt paste.

-Garnish with finely chopped spring onion, tomato and juice of lime .

pic 7

Serve fresh with tortilla chips or with some other choice of yours.


Marakesavu Pathrode:

Pathrode, name itself will make any Mangalorean drool. That too if it is marakesavu leaf, fun is even more. Marakesavu is non-itchy, seasonal colocasia leaves. It is one more classic monsoon special from Mangalore. Pathrode is usually served with coconut oil either plain or pan fried by slicing.

pic main

Marakesavu is commonly known as hitchhiker elephant ear and botanical name of this leaf is Remusatia vivipara. Leaf is large, oval, leathery textured, glossy on both the sides. Foliage disappears in winter and emerges after the first rain during monsoon. Grows widely on big tree trunks or in-between the stones, mainly emerges from the moss bed. The name itself suggests about its habitat. Here, “Mara” is Tree and “Kesavu” is colocasia.

collage 1

We will see the Procedure-

Ingredients:

Dosa rice – 3 cups

Fresh Coconut – 1 ½ cup

Dried red chillies – 12 (Roasted)

Hing – ¼ teaspoon

Salt

Jaggery – 1 table spoon

Tamarind – 1 table spoon (if normal colocasia use little more)

Marakesavu – 3 bundles

Coconut oil – for serving

Method:

Wash the leaves, remove stem and trim.

  Wash and soak rice for 3 hours.

  Fry red chillies by putting very little oil.

collage 2

Grind soaked rice, coconut, tamarind, jaggery, salt, roasted red chillies into smooth paste by adding sufficient water.

  Batter consistency should be like Dosa batter.

  Now, we are ready to make Pathrode.

collage 3

  Take biggest leaf from the lot, place upper glossy part downwards and apply ground batter on back side of the leaf. (pc:step 1)

 After applying on the first leaf, keep second one (slightly smaller than the first one)

Proceed with the application. After applying on second leaf, keep the third leaf then fourth one and proceed.(pc: step 2&3)

collage 4

  Now lift sideways, and fold. Make it like a mat. Apply some batter on these folds as well.

  Roll from the tip and proceed until the end and apply some batter on outer shell and keep this in a water filled idly steamer.

collage 5

  Cook this for 45 minutes to one hour, depending on the quantity of the content inside the vessel, in a low fire.

collage 6

  Serve fresh with coconut oil by slicing these cooked rolls or apply coconut oil and fry these in an iron tawa on both the sides and enjoy as it is for breakfast or with lunch or dinner.

NOTE:

-Tamarind is a key ingredient while making Pathrode.

– If it is Mara Kesavu, it is non-itchy and quantity of the tamarind doesn’t matter.

– If you are using normal colocasia leaves, tamarind plays a very crucial part, in removing the itchiness of the leaves. Use little more quantity than normal.

– You can prepare this same recipe by using big spinach leaves as well.

Millet Choco chip cookie:

Millets are a very good alternative to normal All-purpose flour or whole wheat flour in gluten free baking. You can’t even recognize the core ingredient. It is gluten free as well as high in nutrition too.

When I was trying out some recipes for 2017 Millet calendar, I dished out a couple of recipes, which has turned out super tasty, and at the same time, healthy too.

At first, I tried Chocolate based cookie and it tasted good and here is the recipe-.

pic 1

Ingredients:

 Mixed millet flour -1 cup

Ragi flour – ¾ cup

Cocoa powder – 2 tbl sp.

Salt – ¼ tsp

Baking powder – ¾ tsp

Baking soda – ¾ tsp

Egg -1

Sugar – ¾ cup

Butter – 100 gms

Curd – 2 tbl sp

Vanilla essence – 1 tsp

Choco-chip – 2 tbl sp

Powdered sugar – to roll the dough.

Method:

-Put all the dry ingredients- flours, cocoa powder, salt, baking powder and soda, Choco chip in one bowl, mix nicely and keep aside.

– Take another bowl and put butter and sugar, beat until sugar dissolves and butter becomes smooth.

-Add in egg and beat, add vanilla essence, curd and beat until batter is smooth.

– Now add dry ingredient flour mixture and make cookie dough by mixing like Chapati dough.

– Take one round spoon and make uniformly sized ball, dip in a sugar powder and arrange in a lined baking tray.

– Bake this in a pre- heated oven at 170º C for 12 to 14 minutes or until base becomes light brown.

-When it is done, remove and cool. Store this in an air tight container.

pic 2

Note: This measurement yields around 28 cookies of this size.

Chocolate cake from Ghee Residue:

Ghee residue is a moist, brown coloured by-product formed after preparing ghee from white butter.

Ghee residue is a rich source of essential fatty acids, natural anti-oxidants and proteins.

In olden days, people used this as a natural body scrub. When I was a child, my mum used to rub this on me, before bath and I now feel nostalgic while seeing this brown sediment and so I make it a point to use this without throwing by using either in Atta kneading or in baking.

This time, I had a couple of Pea protein powder packs in my hand, which was given by my lovely co-sister who is a Ayurvedic doctor. So, I included that as well in this brownie kind of chocolatey cake.

pic main

Ingredients:

All-purpose flour – 1 cup

Whole wheat flour – ½ cup

Mixed millet flour – ½ cup

Choco chip – ¼ cup

Protein powder – ½ cup

Milk powder – ¼ cup

Cocoa powder – ¼ cup

Sugar – 1 cup

Ghee Residue – 2 table spoons

Milk – 1 ¼ cups

Vanilla essence- 1 tea spoon

Baking soda – 1 teaspoon

Method:

  • Measure everything and keep it ready. Pre-heat oven at 180 C.
  • Mix all the dry ingredients like, flours, protein powder, milk powder, cocoa powder and sieve couple of times and mix in Choco chip and stir nicely. Keep it aside.
  • If you coat Choco chips with dry flours, it will not sink in the bottom while baking.
  • Now take ghee residue, put milk and heat it. When ghee residue is mixed nicely with milk, switch off the gas.

pic 2      pic 1

  • Add sugar, vanilla essence and baking soda and keep aside for 5 minutes.
  • After 5 minutes, beat this wet mixture thoroughly until mixture forms a bubble at the upper layer.
  • Fold in dry ingredient and make a batter. (don’t beat or over mix in this step)

pic 3     pic 4

  • Bake this in a lined baking dish in a pre-heated oven at 180 C for 30 to 40 minutes or until done (when you insert a tooth pick or knife in the centre of cake, it should come out clean)

pic 5     pic main 1

NOTE:

-You can use only All-purpose flour or mixture of any flour.

-If you don’t have any protein powder in hand, instead of protein powder, use milk powder.

Plantain Upside down Cake:

This is my trial in egg less as well as butter less baking. Here I have used raw flax seed gel as a replace for an egg as well as fat and it worked out just fantastic.

pic 1

Ingredients:

Finger millet flour/Ragi – 1 cup

Whole wheat flour –½ cup

Sugar – ¾ cup

Mashed banana – 1 cup

Flax gel – ½ cup

Baking powder – ¾ tsp

Cooking soda – ¾ tsp

Salt – ½ tsp

Cinnamon powder – one pinch.

Vanilla essence – 1 tsp

Curd – 1/3 cup to ¼ cup (according to requirement)

For Caramelized base:(Optional)

Brown sugar – ½ cup

Butter – 2 table spoon (chilled)

Banana roundels – As needed.

Method:

How to make flax gel: Take 2 tsp of flax seed, make powder. Put this powder in thick bottomed small pan, add one cup of water and boil until it is thick, slimy and reduced to almost half.

pic 3

-Now make banana slices (half inch thick), keep it ready.

– Take one baking tin in which you want to bake this cake. Brush some oil at the base. Spread brown sugar uniformly and take butter, make small cubes and place it here and there.

pic 4

-Place this in a pre-heated oven at 180C for 6 to 8 minutes until the sugar has melted. Remove from the oven, mix this liquid nicely and place banana roundels in regular intervals and keep aside.

– Now Take all dry ingredients like flour, baking powder, baking soda, salt, cinnamon powder and sieve together couple of times or mix using dry wire whisk.

– Now take another bowl, beat all the wet ingredients like, flax gel, vanilla, sugar, mashed banana

-. When it becomes frothy, fold in the dry ingredient mixture. If you feel this batter is too thick, then adjust the consistency by adding curds.

– Pour this ready batter to the cake tin in which you placed banana slices.

-Bake this in a pre-heated ready oven at 180C for 40 to 50 minutes or until done. If you insert knife, it should come out clean.

-Remove once it is done. When it is cool, de-mold and serve.

pic 1

NOTE:- Here I took caramel which was stuck on the base of the baking dish, put it in a microwave cup, re heated it and poured as a sauce to give saucy texture. (You can see that in the picture)

-If you want to make this as a vegan,avoid caramelized base.


Orange – Nutella Swirl cupcakes:

These millet cupcakes are healthy and delicious at the same time,  a very good snack for all the kids who are studying hard for exams.

picture main

Ingredients:

Mixed millet flour- ½ cup

Whole wheat flour- ¼ cup

All-purpose flour – ¾ cup

Ghee – ¼ cup

Egg – 1

Sugar – ¾ cup

Salt – ¼ tsp

Baking powder – ¾ tsp

Baking soda – ¾ tsp

Curd – ¾ cup

Orange zest – 1 tsp

Nutella – as required

Method:

  • Pre-heat oven in 170 C. Line cupcake baking tray with paper liners.

collage 1

  • Mix all the dry ingredients like millet flour, whole wheat flour and all-purpose flour, baking powder and soda, sieve 2 to 3 times or mix with dry whisk.
  • Now take one more bowl or food processer, put egg, curd, sugar, ghee, salt and beat nicely.
  • Grate orange zest from outer surface of the orange (Don’t add any white part) and add this to liquid and beat one more time.
  • Now pour this wet mixture into dry ingredient mixture and fold in and mix everything lightly.
  • Don’t over mix.
  • Pour this mixture into cupcake tray by using the spoon.

collage 2

  • Drop Nutella on the top of each batter filled cupcake mould, swirl a little.
  • Bake this in a pre-heated oven for 15 minutes or until done.

picture main 2

  • Enjoy with evening tea. It is a good option as a snack as well.

Eggless Carrot cake:

This flavourful cake happened by chance. I usually make carrot milkshake paste with almonds in the summer. This year I tried this paste by adding pine nuts instead of almonds and it didn’t go very well with my family. To finish off this paste, I tried this by making cake and it was a super-duper hit and it tastes really moist and soft.

pic 8

Ingredient:

Whole wheat flour – 1 cup

All-purpose flour – ½ cup

Fine rawa- ½ cup

Baking powder – 1 tsp

Baking soda -1 tsp

Sugar – 1 ½ cup

Desiccated coconut – ½ cup

Carrot milkshake paste – 2 cups

Clarified butter/ghee – ½ cup

Cardamom powder – 1 tsp

Salt- ¼ tsp

Method:

-Sieve all-purpose flour, whole wheat flour, fine rawa and baking powder for 2 to three times and keep aside. This is our dry ingredient mixture.

-Beat the wet ingredient like carrot milk shake paste, ghee, sugar.

-Mix in baking soda, salt and desiccated coconut, cardamom powder and beat.

-You will see a frothy texture. This is our ready wet ingredient mixture.

pic 2   pic 3

-Pour wet ingredient to dry ingredient, lightly mix without over doing.

-Bake this in a pre-heated oven at 180 C for 40 to 50 minutes.

pic 6  pic 4

-After checking its doneness, remove from the oven, cool and serve.