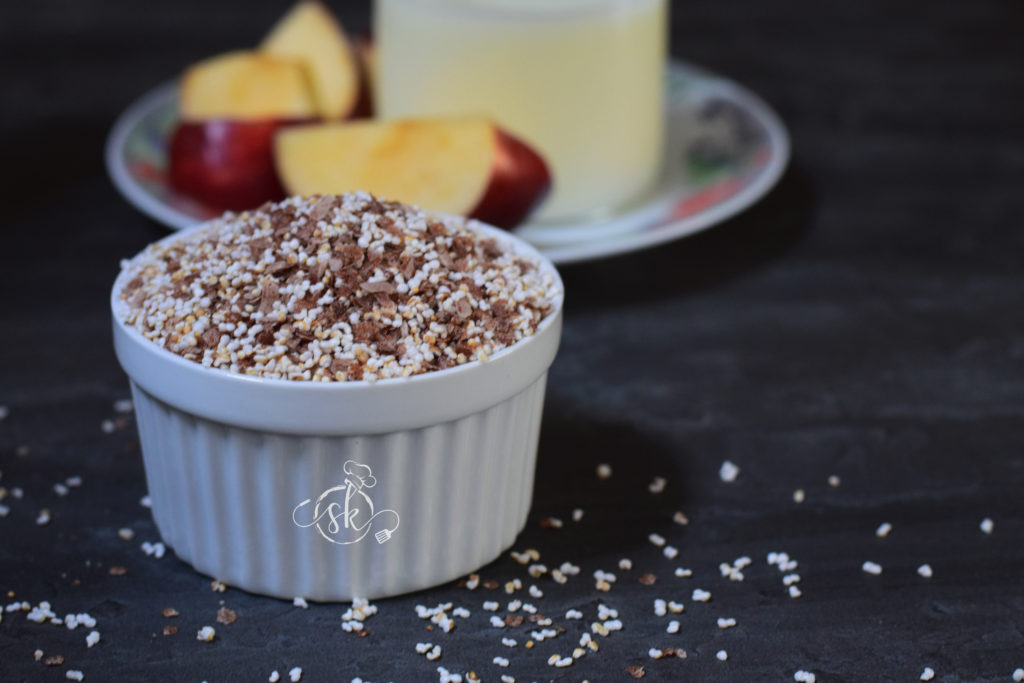
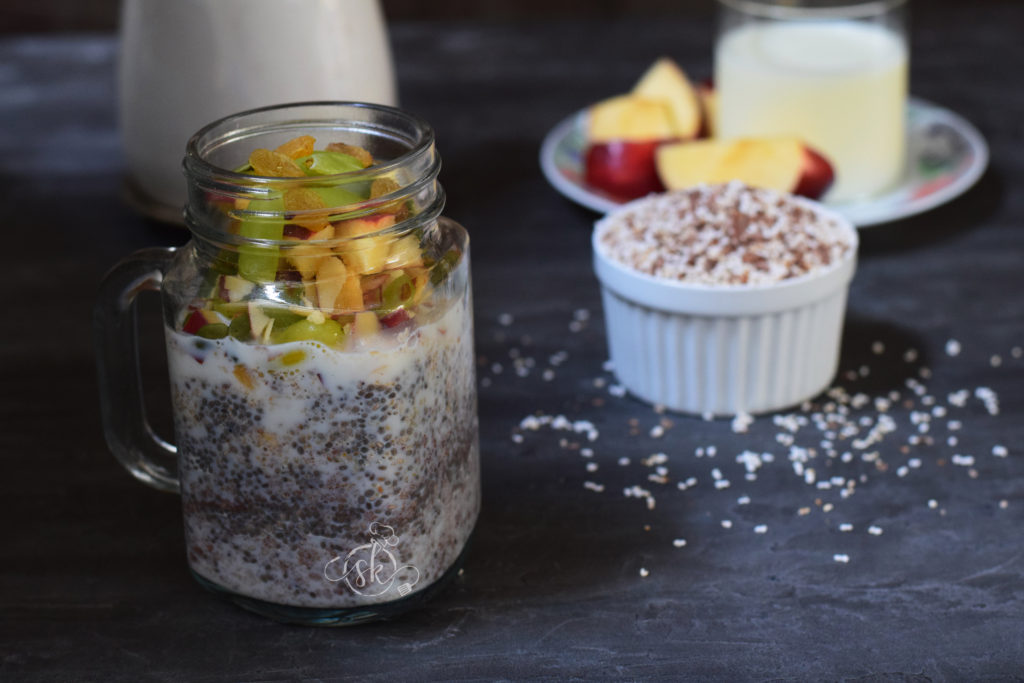
Overnight Poha flakes:

Overnight Poha flakes are our desi version of overnight oats with my personal touch to solve my daughter, who doesn’t like oats but stays in the hostel and prefers a quick breakfast option in busy mornings.

This recipe is forgiving and adaptable to however one wants to have it.

One can use available millet flakes, medium-thick rice flakes white or red or black and can be soaked in plain or vegan /plant-based milk, yoghurt, or mixture. Hence, according to one’s diet restriction, it can be made and consumed.

Let us see how I made them. It is ready to make a flaky overnight mixture as an instant mixture to replace plain oats.

Ingredients:

Medium-thick poha – 1 cup

Ragi poha / flakes – 1 cup

Jowar poha – 1 cup ( optional)

Puffed Amaranth – 1 cup ( optional)

Method:

-Dry grind Red poha ( what I have used) in a small mixer jar using “PULSE” mode.

-Pulsing the rice poha helps reduce the size, and it helps to match the size of other millet poha and puffed Amaranth.

-Now, take one dry bowl, mix everything properly and store it in an air-tight bottle.

As we all know how to make overnight oats, we use this poha flakes mix and proceed.

Take 2 to 4 tbl spoon of the above poha flakes in a glass bottle or bowl. Add chia seed, dry fruits etc

Pour cow’s milk or vegan plant-based milk. Close the lid and keep it overnight inside the fridge.

-Next morning, add chopped fruits and dates with/ without a prefered natural sweetener like honey, jaggery syrup or sugar.


Eggless Chocolate Banana Cake:

After trying my hand in Homemade Pure Cocoa powder, I thought of using Cocoa powder in several recipes; I first wanted to include it in my all-time favourite banana cake. It is an ideal recipe to finish off overripe bananas and the perfect tea time snack for anyone, including small kids. The cake, which has whole wheat flour, natural cocoa, natural vanilla as well as milk. If you want to make it vegan, replace it with vegan milk and proceed to bake.

Let us see how I have done it –

Ingredients:

Whole Wheat flour – 1 1/3 cup ( I took 1 cup of whole wheat flour + 1/3 cup of Emmer wheat flour)

Fresh/Desiccated coconut – 2 tbl sp

Baking soda – 1 tsp

Baking powder – 1 tsp

Salt – ¼ tsp

Milk – ¾ cup

Coffee powder – 1 tsp

Pure Cocoa powder – ½ cup (unsweetened cocoa powder)

Brown Sugar – ½ cup

Oil – 1/3 cup

Vanilla – 1 tsp (I have used pure powdered vanilla)

Bananas – 2 ( ½ to ¾ cup of pulp)

Chocolate chip or Cocoa nibs – 3 tbl sp

Method:

-Mix dry ingredients like flour, baking soda, baking powder, salt, desiccated coconut in a bowl and keep aside.

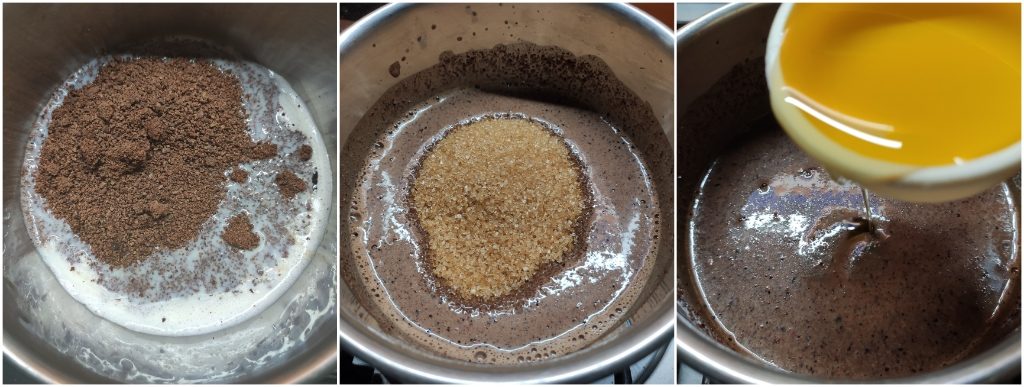
-In a saucepan, heat milk, mix in cocoa, coffee powder and make a concoction. Add in vanilla, Sugar and oil one by one. Beat well.

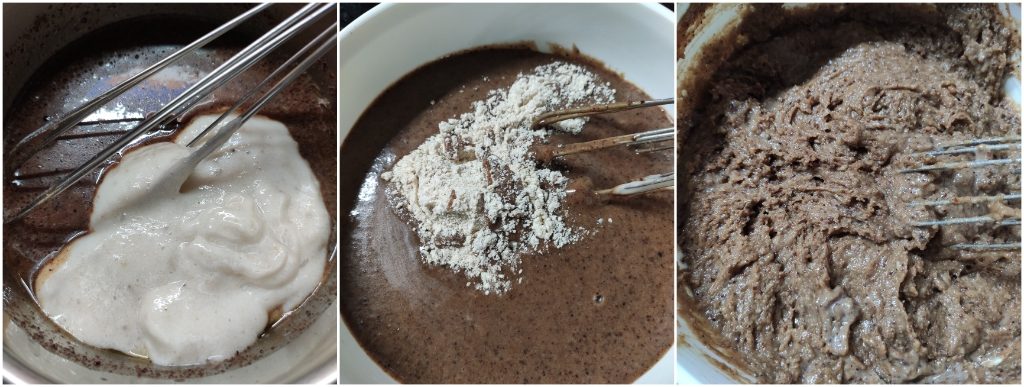
-Next, make a puree of banana and mix in, beat well. Now, the wet ingredient is ready.

-Fold in dry ingredient to wet ingredient. Don’t over mix.

-Pour the mixture into a lined loaf pan, top it with the choco-chip or cocoa nibs and bake at 180°C preheated oven for 40 minutes or until it is done.

-Take out, cool the cake and slice it and enjoy. It stays good for 3 to 4 days under refrigeration.

-Reheat the cake for 30sec in the microwave and enjoy with a cup of coffee or tea.

Passion fruit Gojju:

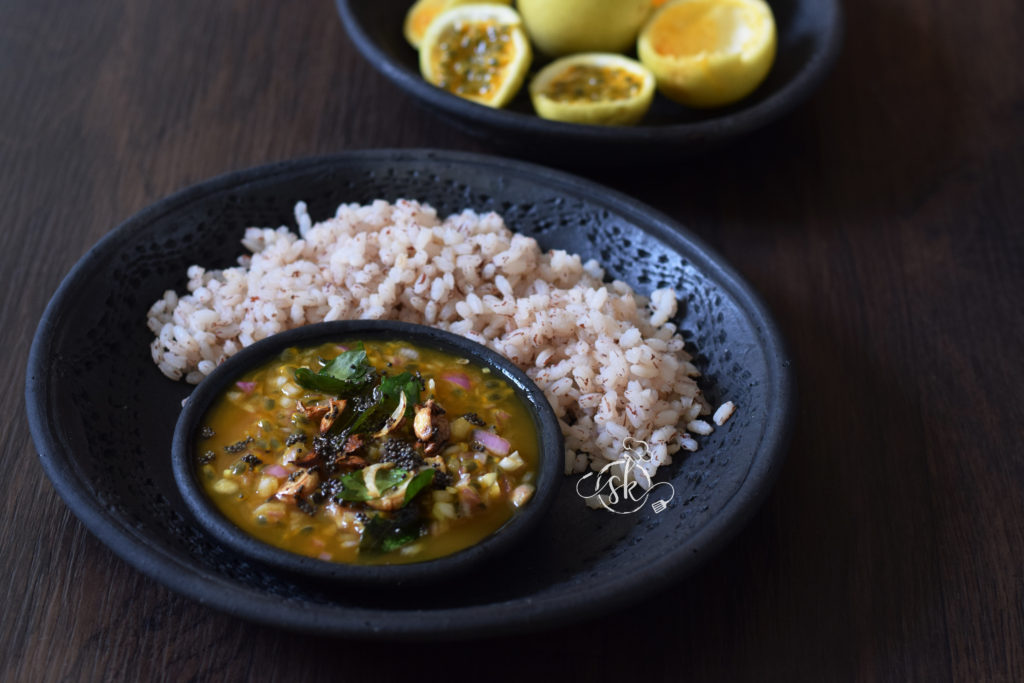
Passion fruits/Passiflora grows in hill stations of India or the colder region during the May -July months. It contains a hard outer shell and pulpy inner core with a lot of black seeds. As my daughters hate the texture, I love it and include it in my juice or lunch.

Passion fruit has a tart mixed sour taste. The fruit has many beneficial nutrients and a low glycemic index; hence, it is ideal for a diabetic condition. It is my way of indulging the sour fruit in its whole raw form. I followed our traditional charred brinjal gojju recipe and tried it. I loved the fresh fruit flavour, crunchy seeds in this gojju and enjoyed it with red parboiled rice.

Ingredients:

Fruit pulp – from 2 fruits

Green chillies -1 – 2

Jaggery – as per taste (grated)

Salt

Onion – 1 (chopped)

Seasoning: Coconut oil – 2 tsp, mustard – 1tsp, crushed garlic cloves – 6 -8, curry leaves – 1 string.

Method:

-Cut passion fruit in half, remove the pulp with those seeds. 

-Add salt, grated jaggery, crush green chilli by using your hand (it emits a lovely aroma to the gojju) and chopped onion. Adjust the consistency by adding little water.

-Season with coconut oil, mustard, crushed garlic. Fry until garlic is brown. Add curry leaves and pour the seasoning on the gojju.

-Enjoy with hot rice or with curd rice. If you like sweet and sour gojju, it is the perfect recipe.

Wild mango Rasam :

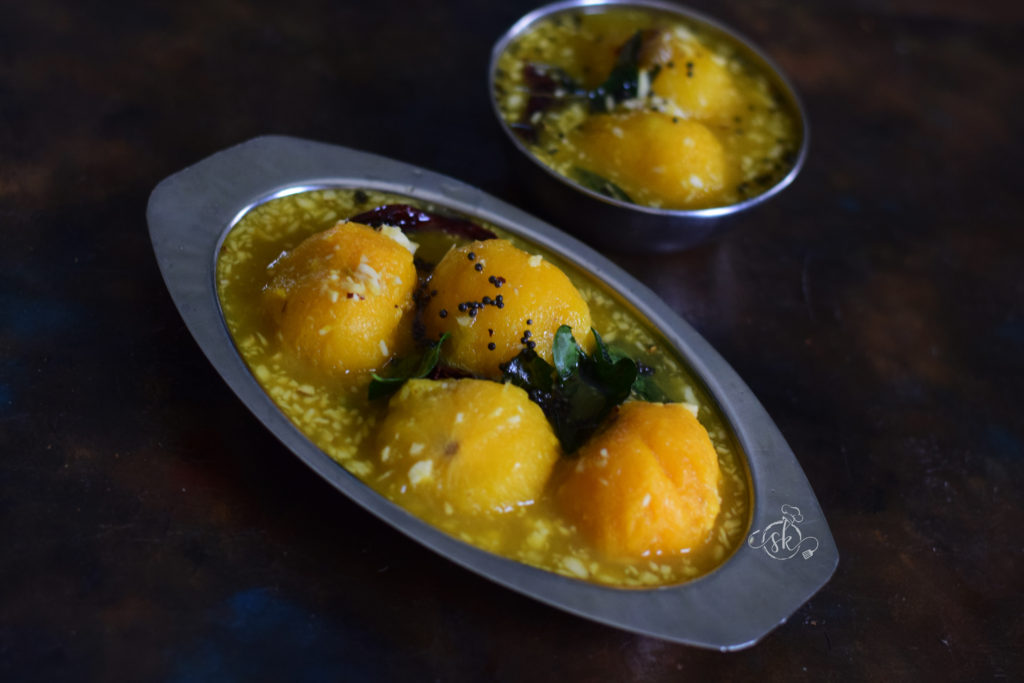
Kadu Mavinahannina saru: is a traditional delicacy of coastal Karnataka, which is a must during mango season. We have several recipes of wild mangoes in the coastal region, and each has its charm and taste. Some varieties are sour and fibrous, and some are sweet and juicy; some mangos do not have much pulp. According to their types, their usage also varies 😉

If tiny wild mangoes are sour, not so sweet, and fibrous, they go into the cooked form of saru / Beyisida gojju.  In this way, we can enhance the taste by adding additional jaggery and enjoy even the sourest mangoes.

Sigh!! These are all nostalgic memories for me. Here, In Bangalore, I do manage to cook all these varieties by using tiny mango, which is also known as Sakkara gutti or Sugar baby 😀

The recipe is simple and goes like this –

Ingredients:

Wild mangos / tiny mangos – 6

Green chillies – 2

Jaggery

Salt

Method:

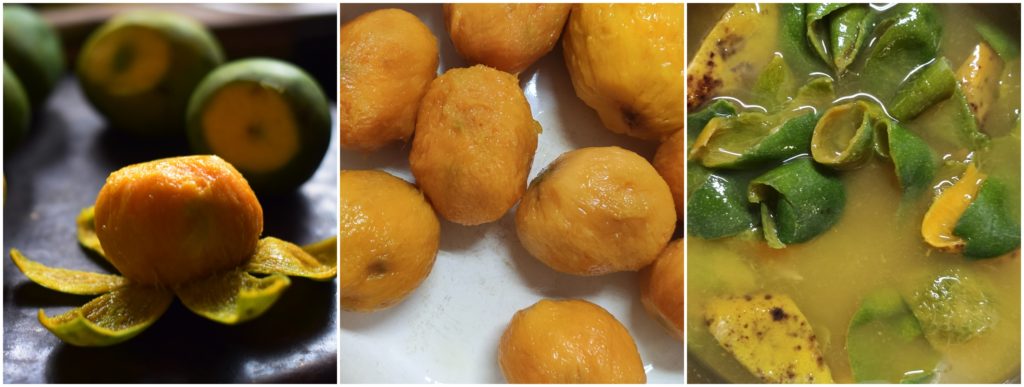
-Clean the mangoes, remove the peel, put it in the vessel containing half a cup of water, squeeze and collect mango pulp; repeat the process until skin sheds all the pulps.

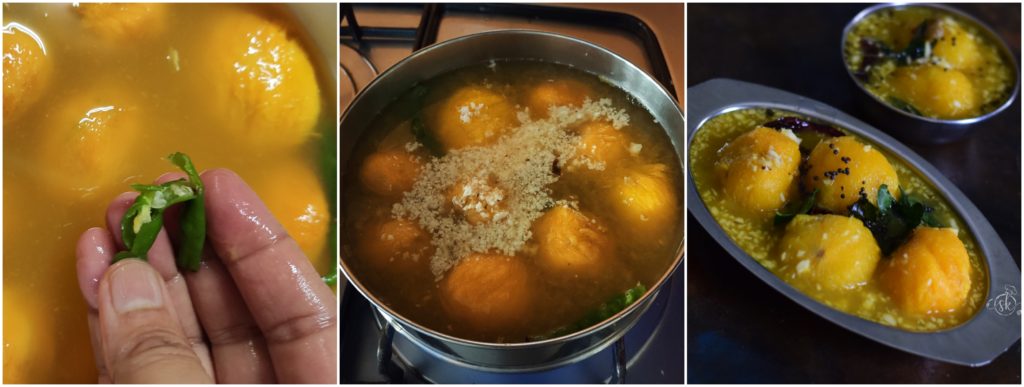
-Now, take mangoes, squeezed the water into a vessel. Add salt, crush two green chillies by using your hand ( it indeed a vital part to enhance the taste), jaggery ( little more),  1 tbsp of grated fresh coconut and boil until mango cooks. 

-Adjust the water content according to your taste. -Season it with Coconut oil, mustard,  red chilli and curry leaves. Serve with hot rice.

Bilimbi Saaru /Tree Sorrel Rasam :

Bimbuli / Beempuli, anyone? Yes! It is our local name to Bilimbi 😀
Averrhoa bilimbi, commonly known as Bilimbi, “Cucumber tree”, “tree sorrel”, is a tiny, tangy, juicy fruit that regularly appears in Coastal Karnataka cuisine.

Bimbuli is what we call it, and it is also known as Tree sorrel. It is a common backyard tree, and you would find it in every house of the coastal region. The beauty of our traditional cuisine is impressive. When we take only Mangalore cuisine, we find at least 6 to 7 varieties of souring agents used for specific purposes according to the ingredient and the recipe. For example, Kokum, tamarind, Monkey jack (known as Unde Huli or Kethe Huli), Hog plum, Bilimbi (beempuli), Raw mango and the list goes on.

Before the lockdown, I found this in my locality during our evening walk and introduced it to my daughter.

We used to eat this watery fruit by dipping it in salt and asked her to eat it with salt. She, who is fond of any khatta/ souring agent, enjoyed and asked for more. Besides eating, I loved pickle, which my paternal aunt used to prepare and get it.

While talking, remembering good old memories, my mother in law mentioned Bimpuli saaru, which her mom-in-law used to prepare. As a curious learner, I started asking her about the recipe? How did she use to make etc.?

As always, she said, what is the recipe? There is nothing in that saru—a little bit of cooked dal, green chilli and hing.

The next day, I made the saru, which I never tasted before, and it was indeed flavourful and delicious and thought of documenting it in my blog for future reference.

 Ingredients:

Bilimbi /Tree sorrel – 6 to 7 or acc to your taste

Cooked toor dal – 1 small Katori

Salt

Jaggery – to taste

Green chillies – 6 to 8 (slit)

Hing – peanut size

Seasoning:

Coconut oil – 1 tbl sp

Mustard – 1 tsp

Red chilli -1

Curry leaves – 1 spring

Method:

-Take a one cooking pot, put Chopped tree sorrel, slit green chillies, salt, jaggery, hing, 2 cups of water as well as cooked, mashed dal.

-When chillies and sliced tree sorrels are cooked, adjust the consistency by adding water, if necessary, salt, jaggery or hing. Boil a couple of minutes more and add seasoning.

-To season, heat oil, splutter mustard, red chilli and curry leaves. Yes! It is so simple and tasty.

-This tasty saru is pairs well with hot rice and papad with any vegetable side dish to accompany.


Little millet Salad

It is a low-calorie lunch or dinner option for weight reduction or diabetic patients- Very filling and at the same time low in calorie and filled with so many nutrients.

Ingredients:

Samai or little millet – ½ cup

Sweet corn kernels – from one cob (boiled)

Sprouted Green gram – ½ to 1 cup

Grated raw mango – ½ mango

Pomegranate – 1

Fresh Coconut – 1 tablespoon

Salt

Coriander leaves.

Seasoning:

Coconut oil – 1 teaspoon

Mustard- ½ teaspoon

Hing- 1 pinch

Curry leaves – 1 spring

Green chilli -1 (chopped)

Method:

-Dry roast little millet for 2 minutes. Wash and cook this in a cooker (one whistle) by adding ¾ cup of water and pinch of salt.

-After cooking, remove the cooker lid and spread the cooked millet in a wide plate and cool.

– When it cools down, mix in boiled corn, sprouted green gram, grated raw mango, pomegranate, fresh Coconut, salt and chopped coriander leaves.

-Do the seasoning by heating coconut oil. Add mustard. When it splutters, add hing, chopped green chilli and curry leaves.

-Add this to salad and mix lightly and enjoy as a meal.

Guava Cake:

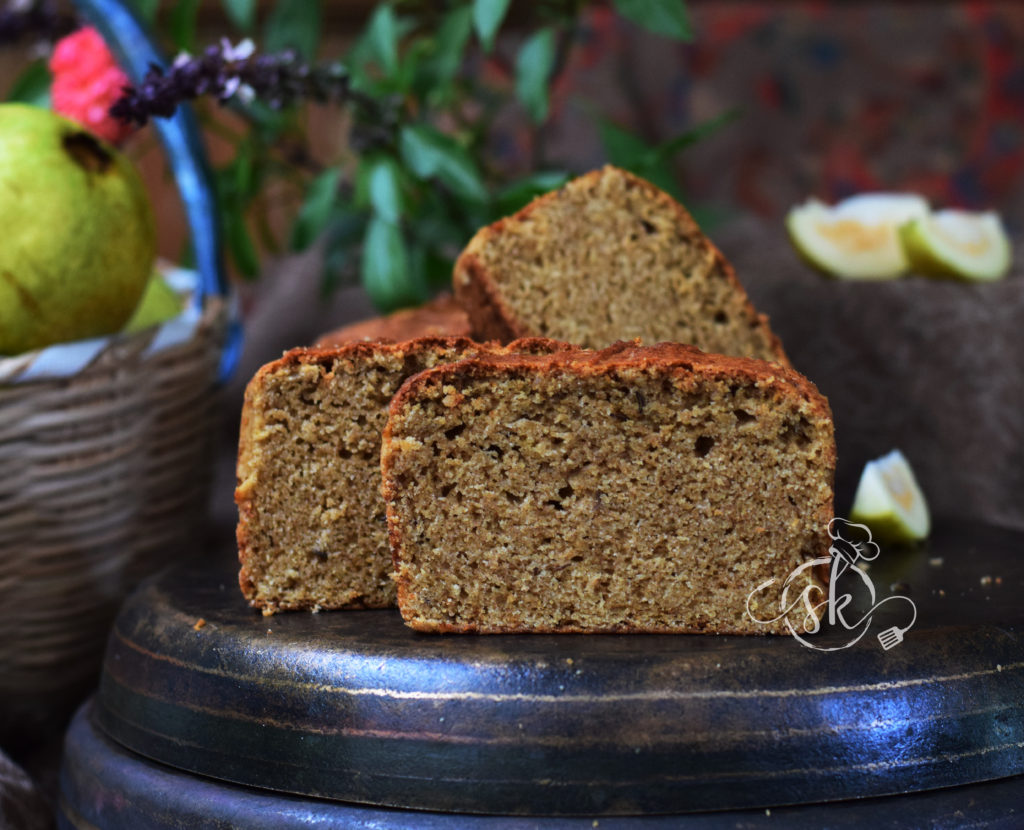
This cake was totally experimental and turned out to be a soft, delicious coffee cake with the mild taste of guava with a sweet tinge. One more thing, I am happy about this cake is the usage of cake seed and 100% whole wheat. Usually, when I attempt a new flavour, I prefer half and half.

Here, cake seed is nothing but Caraway seeds, which has a distinct flavour.

If you need to make eggless, please go ahead with any egg replacer. I usually use flax gel as an egg replacer, and it turns out best and gets an additional nutrition quotient.

For flax gel: -To make flax gel: The necessary ratio is 2 ½ tsp of flaxseed powder and three tablespoons of hot water, and then you whisk in the mixture until it becomes gelatinous to replace one egg.

Ingredients:

Whole wheat flour – 1 ½ cup

Baking powder – ¾ tsp

Baking soda – ¾ tsp

Salt – a pinch

Caraway/Cake seed – 1 tsp

Eggs – 2

Butter – 100 grams

Vanilla – 1 tsp

Sugar – 1 cup (used brown sugar)

Guava puree – ½ cup ( recipe is here)

Milk – 2 to 4 tablespoons (to adjust the consistency)

Method:

-Dry mix all the dry ingredients-whole wheat flour, salt, caraway seed, baking powder and soda, by sieving 2 to 3 times or with a wire whisk.

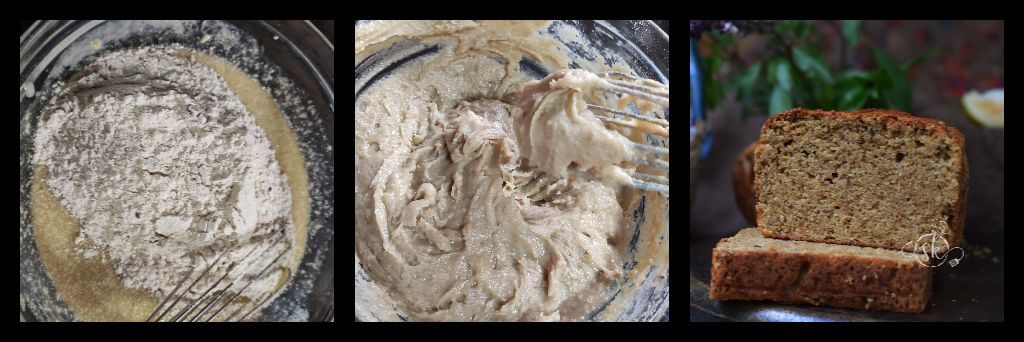
-In another bowl, beat guava puree, butter, eggs by adding one by one. Add sugar, vanilla essence and beat until sugar almost dissolves.

-Fold in dry ingredients, adjust the consistency by adding milk. The batter should be a little stiff.

-Take a loaf pan, line with parchment paper, pour the dough, bake in a preheated oven at 180°C for 40 -50 minutes or until done.

-take out, cool and slice.


Guava Cheese/ Perad/halwa :

When the neighbour comes and hands me a big bag full of substantial sized overripe guavas, I knew, it is going to be a strenuous task. I need to deal with my mindset of ‘no wastage.’ First thing, came to my mind was my favourite Guava cheese.

When I was reading about the guava cheese, its origin, it traces back to Portuguese settlers in Brazil where it’s known as Goiabada. I am guessing that is how this recipe landed with them in Goa and is known as Perad/Peraad.

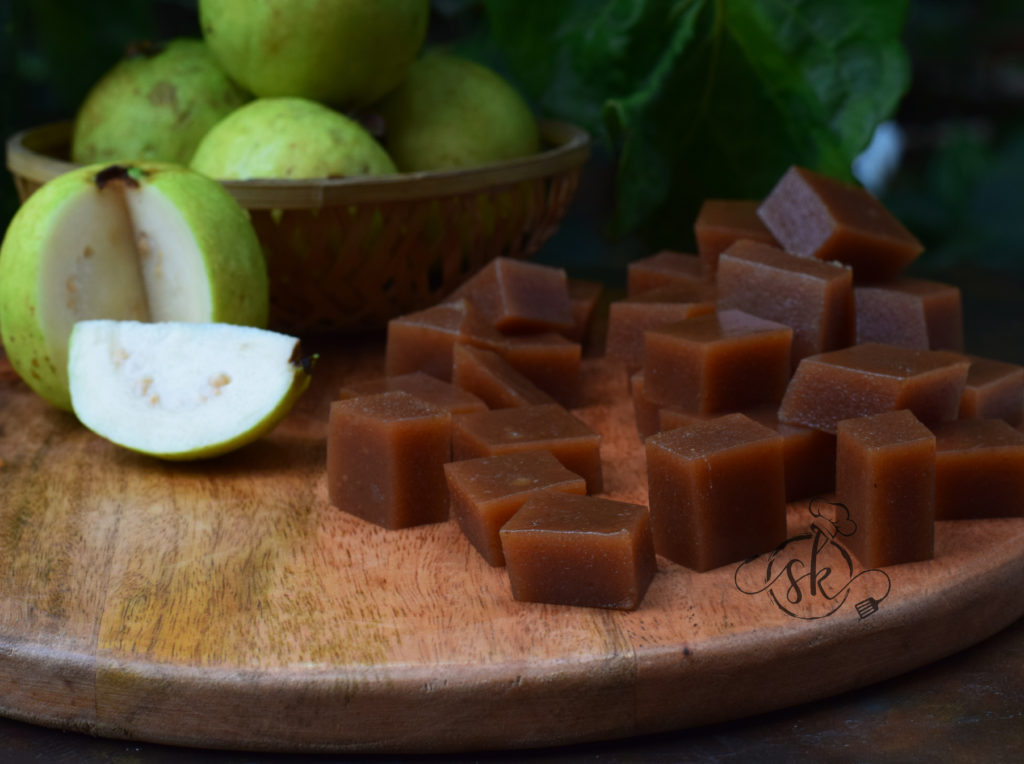
In simple terms, guava cheese is nothing but guava halwa. It doesn’t taste like cheese. Its texture is something you can easily bite into, yet is slightly chewy, somewhat like our Banana halwa, with a grainy texture, of course with added guava taste. Colour of the cheese depends on the variety of the Guava. If it is white, the colour turns our light brown, like mine. I usually mix a half red and half white variety of Guava to get beautiful hue.

Ingredients:

Overripe Guava – 2kgs

Sugar – 800 grams to 1 kg (acc to your palette)

Salt – ½ tsp

Butter – 3 tablespoons

Lemon juice -1 tablespoon 

Method:

-Wash, chop the fruit into quarters—Cook with sufficient water for two whistles, cool.

-Pulse it in a mixer jar along with cooked water, sieve the Puree, separate the seed and its roughage.

-Weigh the pulp. For 2 kgs of pulp, I have taken 800 grams of sugar. You can take up to one kg if you prefer sweeter.

-Take one thick bottomed Kadai, add the pulp and boil for 20 minutes or until it starts boiling. Allow 10 minutes more to boil and add sugar and salt, continue to cook in a low flame.

-When the mixture turns pinkish brown add butter and proceeds to cook further. When it starts leaving the sides, add lemon juice, cook ten more minutes.

-Remove the mixture to the greased plate, leave 4 to 6 hours and then cut.

-Stays good for 3 to 5 months without any problem, at room temperature, stored in an airtight container.


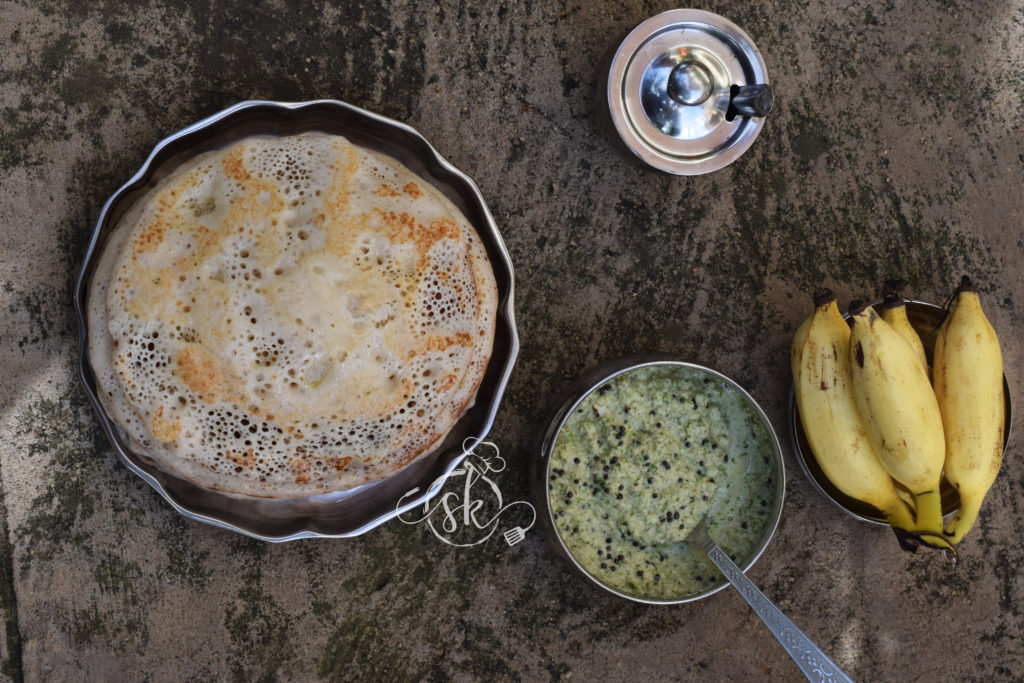
Overripe Banana Dosa/ Bale hannina dosey :

After the festivals or any poojas, over ripe Bananas are everyone’s headache. When skin of the banana turns black, no one prefers to eat. If you have abundant supply of homegrown bananas, it is a constant headache and we normally make Banana Halwa or Banana preserve if it is in large quantities. If it is very less, I normally prefer Dosas ,Mangalore Buns or plantain upside down cake.

Ingredients:

Dosa rice – 3cups

Methi seeds – 2 tablespoons

Overripe Ripe bananas – 6 – 7

Salt

Eno fruit salt – 1 tsp (optional)

Method:

-Wash Rice along with methi seeds. Soak for 3 to 4 hours and grind into smooth batter by adding chopped banana, salt.

-Keep the consistency as well as ferment like normal dosa batter. It takes anywhere between 8 to 12 hours according to the outside temperature.

-Next day, if you want extra soft dosas, add Eno fruit salt, mix nicely and proceed.

Otherwise, mix the fermented batter and make dosas in hot iron griddle by spreading a tsp of ghee or coconut oil before flipping upside down.

-Serve with your choice of chutney.


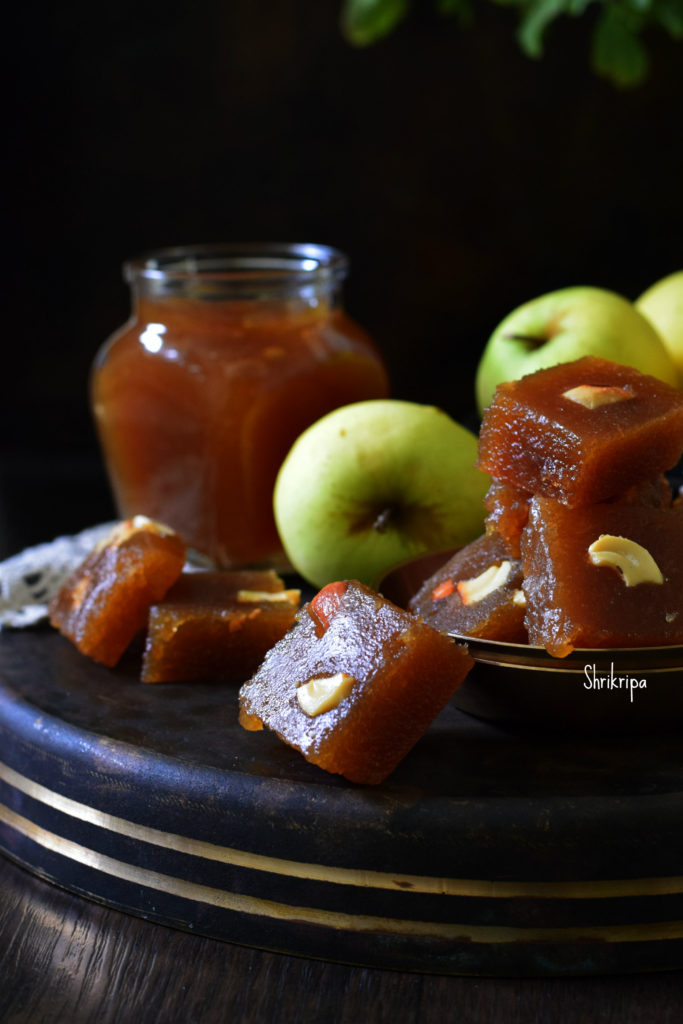
Apple Halwa

Yesterday, while preparing Apple jam, my Research oriented husband came in and asked me what I was doing, I said – Apple jam , planning to finish the stock which we bought couple of weeks back

He said, “why not halwa?” I was like 🙄🤔

Then, I changed my mind and took my share of  jam when it was done. Proceeded to make Halwa with the remaining quantity, by adding little ghee in-between at a regular interval.

Surprisingly, it turned out super delicious and here I am presenting my end result which was experimental.

Here I have used fruit as a whole /with skin. Normally Apple turns out sour when you cook /boil . To avoid the sour taste, normally I bake it until it is done, then grind into a puree, sieved, and proceed to make jam then halwa with the added mild cinnamon flavour. One can add cardamom as well. Sugar can be replaced with an organic jaggery as well. Even though I have not tried with the jaggery, my friend Aruna has tried with the jaggery and result was just amazing, which was deep brown in colour.
Ingredients:

Golden yellow Apple – 1 kg (Any variety would do)

 Sugar – ¾ kg

Ghee – ½ to ¾ cup

Cinnamon or Cardamom – 1 or 2 pinches

Method:

-Wash Apples, dice ,remove seed part and arrange in a baking dish. For Initial preparation, please refer here

-Bake this in a 170°C pre-heated oven for 15 minutes at first.

-Remove, flip those apple pieces, and continue further 15 minutes.

-After 30 minutes, check the doneness. If it is soft, well cooked ,remove it.

-If it is not done, bake for further 5 or 10 minutes.

-When it is cool, add a little water and churn in a juicer by adding 1 or 2 cups of water.

-Sieve ,discard the roughage ( fibre as well as outer skin remains)

-Put this pulp in a thick bottomed kadai, add sugar,  cook until it turns into little thick and turns into mass.

-Add ghee 2 tablespoons at a time in-between while stirring. If you feel that the Apple puree  needs a little more ghee, add up to ¾ cup, some varieties of Apple need very less ghee and some need more.

-Now we will see, how we decide the quantity of ghee. While stirring if you feel that the mixture is a little dry and the bottom part becomes a little brown, keep adding it. If the ghee starts oozing at the sides, it is an indication to stop the addition of ghee.        


-Now we will see how you know the doneness. It is quite simple, keep on stirring until mixture leaves the sides of the kadai and ghee oozes out from the mixture. You can add cashew pieces at this stage or spread those pieces in a greased plate like me.

-After you are done with this, it is almost ready to shift to the plate. Before shifting I prefer to check, by taking one small peanut sized portion of the mixture and rolling it in-between my thumb and forefinger to make a small ball like structure. If it holds a ball like structure and does not stick to your finger, it is ready.

-Now remove from the flame, shift to a greased plate, and pat this mixture evenly by using a flat, greased (apply some ghee) back of the spoon.       


-Keep this aside for two or three hours to cool. Then cut this into the desired shape and store it in an airtight container.

-You can store this Halwa for a really long time (up to a month or two).