Khara Neer Dosey / Savoury Neer dosa :

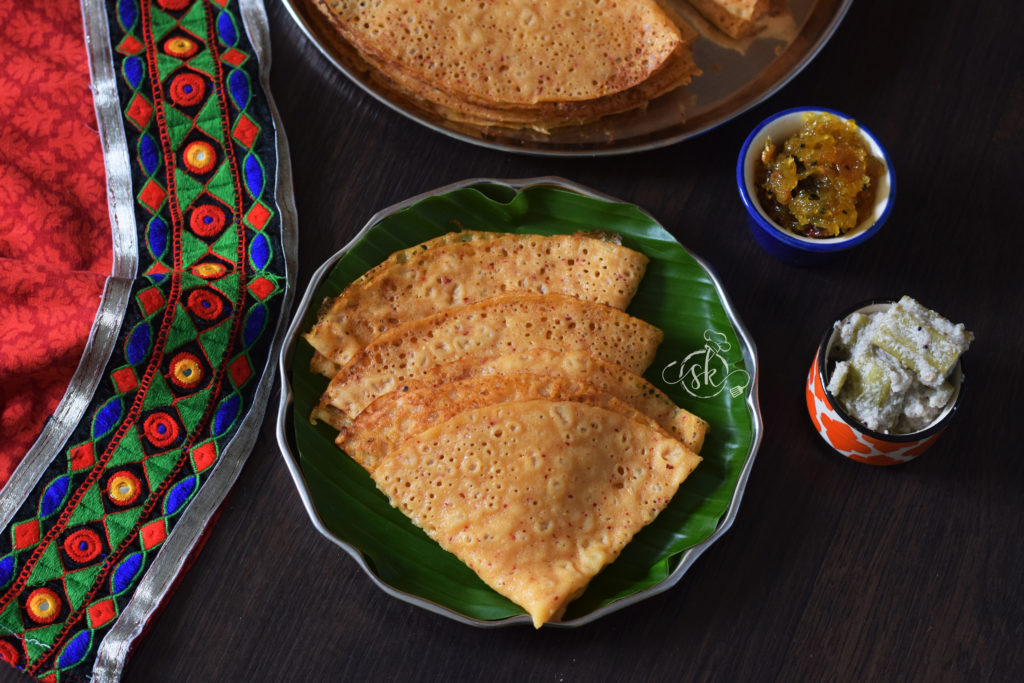
Neer dosey is an integral part of coastal breakfast. I usually prepare Neer dosey or my own version of Healthy neer dosey. Leftover neer dosey would turn into another dish, with sweet seasoning for an evening with a cup of tea. Khara neer dosey is one more variety of dosa from our region. 

Khara neer dosey is also known as Khara Thellavu /savoury neer dosey which is nothing but a spicy version of normal white neer dosey. It is quick, no fermentation is required. Soak the rice, grind, maintain the right consistency, use a well-seasoned cast-iron tawa to get the super-soft, authentic taste.
Ingredients needed:

Dosa rice -2 cups

Red chillies – 4 to 5

Onion – 1 big  Or Coconut – 1 bowl

Coriander seeds – 1 tablespoon (optional)

Cumin – 1 tsp (optional)

Hing – generous pinch

Salt

Iron griddle /tawa.

Method:

-Wash and soak Dosa rice at night or 2 to 3-hour soaking is needed.

-In the morning grind this soaked rice into fine paste by adding chillies, chopped onion OR Coconut, coriander, cumin, salt with water (I use soaking water while grinding, it gives pleasant aroma for the Dosa) and salt as per requirement.

– Make batter into pourable consistency like this and check for the salt.

-Now keep Iron griddle for heat, smear oil and keep it ready. 

-Pour one serving spoon of batter-like how we make Rawa Dosa, you can see it in the picture below.

-Now close the lid by keeping the gas on full flame.

-After two minutes, remove the lid and keep the gas in simmer, the edges of the Dosa rise a little, like this.

-Now flip this Dosa on the plate, leave for 2 minutes, then fold like this.

-Now keep repeating this with the remaining batter and stack one over the other or take one big plate and stalk one opposite another alternately.

-Serve this Dosa with Coconut and grated jaggery mixture or coconut chutney or as you wish.


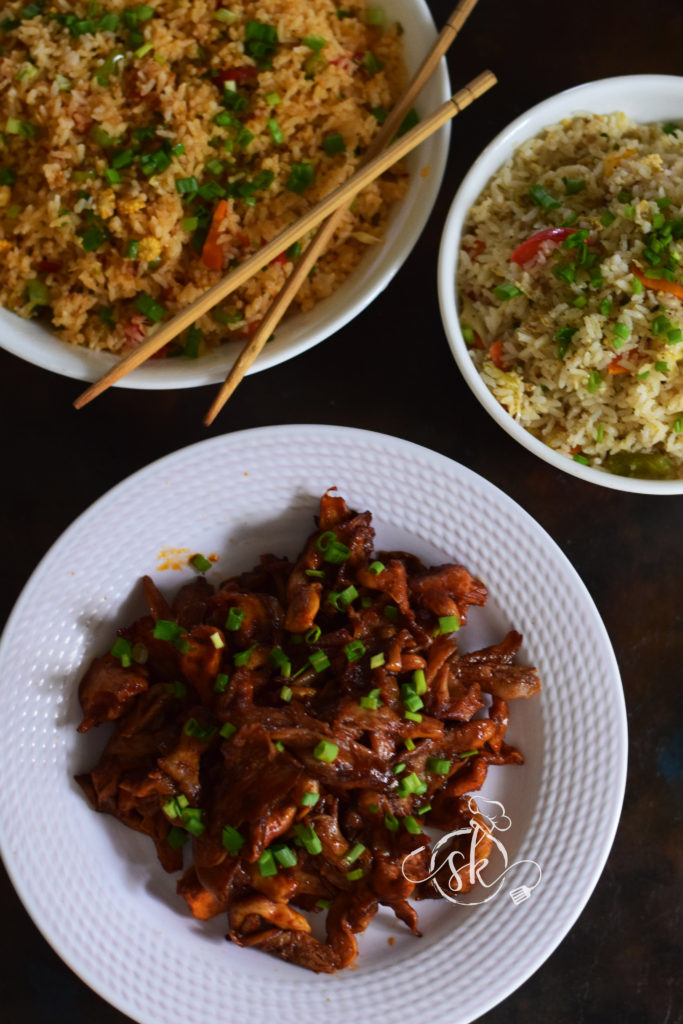
Barbeque Oyster Mushrooms:

Oyster mushrooms are Fan-shaped, soft, with a mild Umami in flavour, when compared to button mushrooms. They appear in different colours starting from white, baby pink, cream, light grey etc. Mushroom is known for its low calorie, rich in protein, low in calorie aspects.

According to my daughters, it tastes much better than the button mushrooms and one of my twins who doesn’t love button mushroom started loving mushrooms by eating a pink variety of Oyster by seeing its cute colour :D. My family prefers simple olive oil, garlic salt and pepper tossed Oyster or Barbecue style (My jugaad style 😉 ) / marinated and baked version as a side dish or salad with fried rice or noodles. 

How I made:

Ingredients:

Oyster Mushroom – 2 packs

Sriracha sauce – 1 tablespoon

Tomato ketchup – 1 tablespoon

Vinegar – 1 tsp

Soy sauce – 1 tsp

Brown sugar or Maple syrup – as needed

Black Pepper powder – ¼ tsp

Olive oil – 1 to 2 tablespoons

Method:

-Clean the mushrooms, drain thoroughly.

-Heat the olive oil, drop Mushrooms, roast it, and remove.

-Prepare the sauce by mixing all the sauces from Sriracha to black pepper. Marinate the roasted mushroom in this sauce for 10 to 20 minutes.

-Bake in a pre-heated oven at 180°C for 10 minutes and serve as you wish.

Note: You can use Iron Tawa to roast, instead of the oven. 


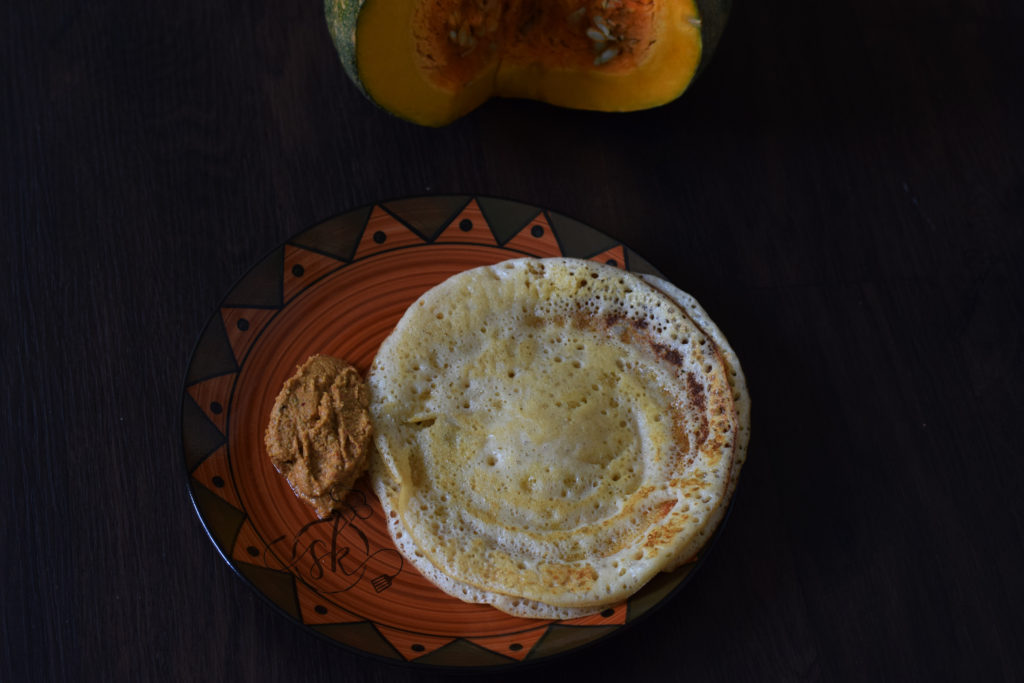
Cheenikayi thirulina dosey/ Pumpkin Core dosa:

Delicious dosa by using nutritionally rich , pulpy pumpkin cores which we usually tend to throw away. Whenever we use pumpkin in larger quantities such as pumpkin puree  , Sambar , kalasu etc, the inner core would be more in quantity and it is an awesome way to utilise in dosa batter. In this way, it can be utilised and turned into a healthy breakfast option.

Let us see how I make this super soft, porous dosa.

Ingredients:

Dosa rice – 2 cups

Urad dal – ¼ cup

Methi seeds – 1 tablespoon

Inner soft core – ¼ cup to ½ cup ( quantity may vary according to the availability)

Salt

Method:

-Wash , soak dosa rice, urad dal, methi in water for 2 to 3 hours.

-Clean the pumpkin core, remove seeds, and keep it ready.

-Grind soaked rice and pumpkin core by adding sufficient salt into smooth paste.

-Ferment overnight or 8 – 10 hours. Next day prepare soft Dosas .

-If you like crisp roasted one, spread as thin as possible on heated iron griddle.

-Serve with coconut chutney or any other curry.

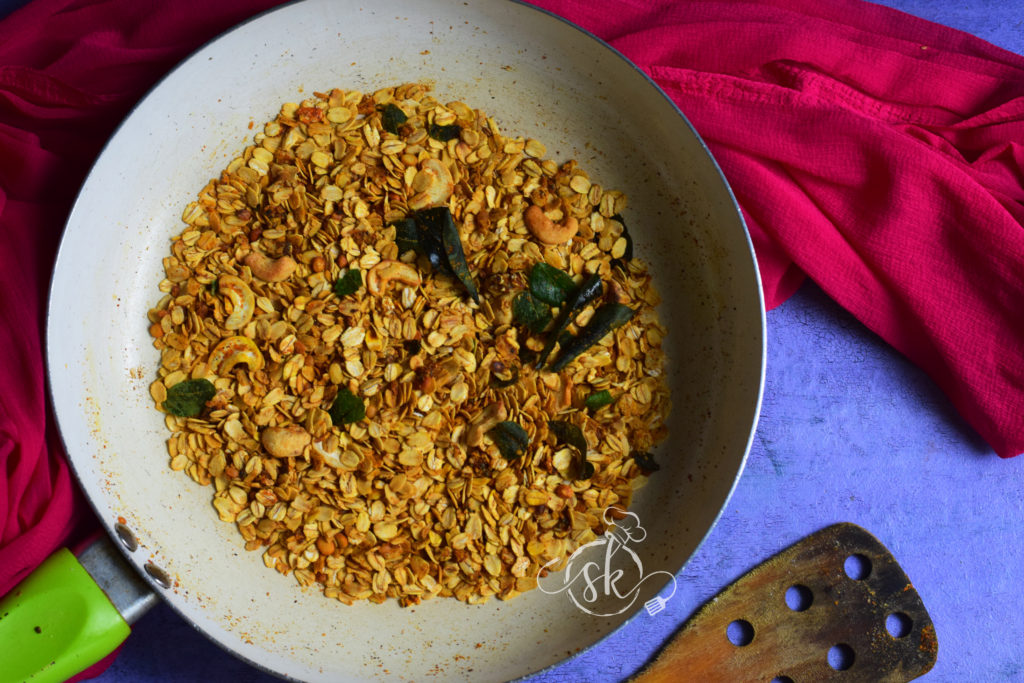
Instant Masala Rolled Oats in Kettle :

If you are living in a hostel, PG or with limited access to the main kitchen, it is an awesome idea to keep some ready mixes with one small kettle, as an alternate choice to mess food.

Here, I have used Rolled oats with south Indian masala to give homely Sambar taste, as well as Rolled oats to give chewy texture, alternate to rice. Rice needs little longer time to cook, when compared to Rolled oats. when you have an instant mix ready, it is really quick, easy, filling, fibre rich and delicious choice of meal. 

Ready mix can be stored at room temperature up to a month.

Cooking time – 5 minutes and standing time :5 minutes.

How I made:

Rolled oats – 1 cup

Ghee/ oil – 1 tablespoon

Mustard – 1tsp

Urad dal – 1 tsp

Chana dal -1 tsp

Cashew pieces – 1 tablespoon

Curry leaves – 1 spring (chopped)

Turmeric – ½ tsp

Sambar powder – 1 tsp (as needed)

Tamarind powder – ½ tsp (as needed)

Salt

Jaggery – 1 tsp (as needed)

Method:

-Take one tawa, heat ghee or oil, splutter mustard, fry urad dal, chana dal, fry until it starts to change colour.

-Add cashew pieces, fry for a while. Next, add chopped curry leaves toss until crispy.

-Now add Rolled oats fry for 2 to 3 minutes in low fire. Add turmeric, sambar powder, tamarind powder, salt, jaggery and mix everything until oats absorbs all the masalas.

-Switch off the gas, cool the mixture and keep it in an airtight container. Stays good for more than one month.

How to Cook:

-Take required amount of oats.

If Masala oats – 1 cup

Water – 1 ¼ cup

Boil water in  a kettle, add oats, cook without the lid, until water absorbs, now close the lid, and leave it for 5 minutes. It is such a simple and delicious choice.


Menthe Idli /Fenugreek sweet idli:

We Indians do not need any introduction for methi. Methi seeds are an integral part of our day to day cooking and has an important role in our cooking, even though it is used in a minuscule portion.

Fenugreek or Methi is a power packed, nutritionally rich and produces heat in our body. Hence, the usage of methi is recommended in winter months to keep our body warm and disease free. Traditionally methi has been used as a seed as well as greens. It plays a main part in post-partum/ after delivery diet of Indian ladies. It is believed that it helps in breast milk production.

Today, I am going to share our age old, traditional recipe, which I used to relish during my childhood.

It is a semi sweet idli and tastes really good with methi flavour and is usually served with coconut – ginger chutney, to give it a bit of a kick.

Ingredients:

Dosa rice – 2 cups

Methi – 1 fistful ( approx. 2 tablespoons)

Jaggery –  2 / 2 block  ( according to the taste)

Poha – ½ cup

turmeric powder – 1/2 tsp (optional)

Method:

-Soak methi and rice separately for 4 hrs , after washing it properly.

-Grind methi into a fine paste, by adding sufficient water.

-Add soaked rice into it, add salt, jaggery and grind, until rice turns into small grainy texture. Like a small rava consistency.

-After grinding, remove the batter, it should be a little watery. Now add turmeric, poha into the batter, mix properly, leave overnight or until it ferments. It takes a little longer in cold regions.

-Next day, mix nicely, make idlies in an idli mould, like a regular idli.

-Serve with coconut – ginger chutney.

Chutney in brief: Fresh coconut, roasted red chillies, fresh ginger, little tamarind, and salt.


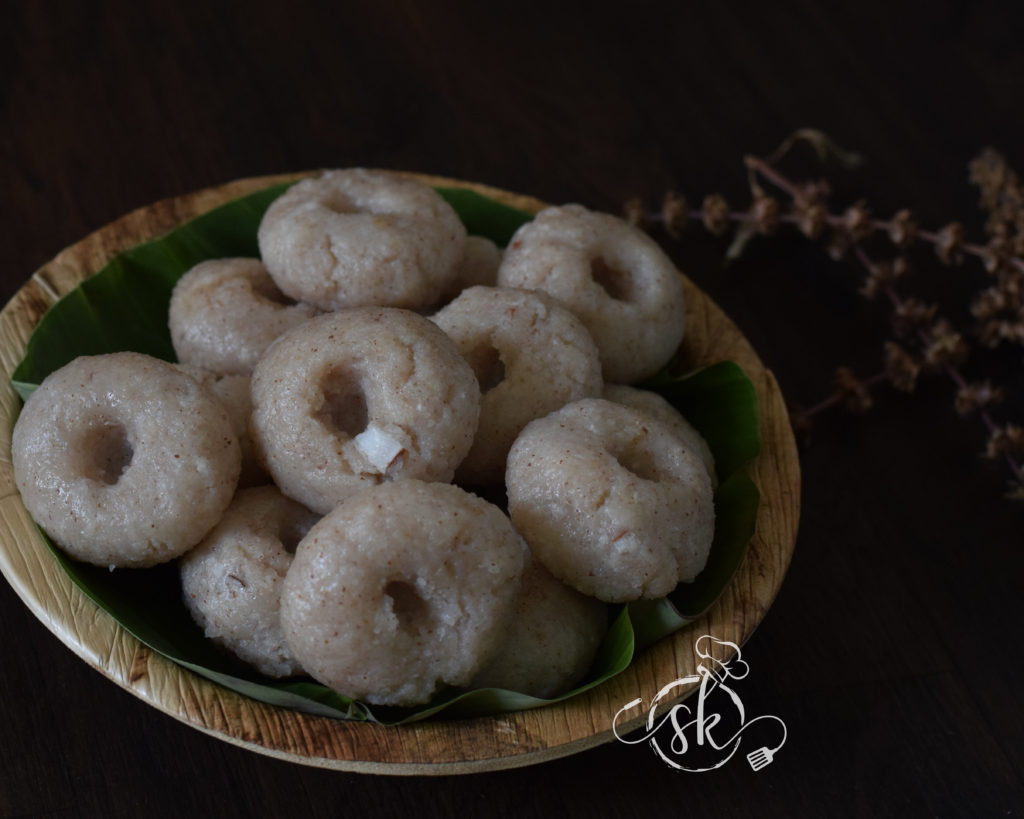
Rajamudi rice Pundi:

Pundi/Unde/mudde is nothing but steamed rice dumpling from south canara/Mangalore region. It is our traditional Breakfast recipe. After steaming, we have two to three options to have this super healthy dish. One is with liquid jaggery combined with ghee, or pundi can be drizzled with coconut oil and dipped in an onion flavoured coconut chutney. Last but not the least, by soaking in a masala gravy, known as Unde bendi.

Traditionally we use Red boiled rice to prepare. Here I have used fragrant Rajamudi variety of red rice, that was earlier grown exclusively for the “Maharajas of Mysore” . It is high in fibre, antioxidants, and Iron. It is unpolished and grains are beautiful with the mix and match of pinkish red lines, which has  a nice aroma and it surely enhances the flavour of the Pundi.

I did this particular trial for Rice Calendar 2019. Unique effort by Save Our Rice Campaign and Sahaja Samrudha to Popularize traditional Rice and Recipes.

Save Our rice campaign is proud to proclaim that it has successfully mainstreamed around 100 different varieties of traditional rice across the country. Each rice variety is unique and differs in its taste, colour, texture, and cooking quality and contains some special properties like being medicinal, scented, sticky and so on.

It is one of the four recipes ,which I have shared with and got to be a part of this project in a very small way.

Ingredients:

Rajamudi rice – 2 cups

Salt

Coconut oil – 1 tablespoon

Coconut – ½ cup (grated)

Method:

-Wash, soak rice for 3 to 4 hours

-Grind rice into little grainy texture by adding salt.

-Put ground batter, oil, coconut in thick kadai, cook this into ball like mass.

-Cool a bit, take little cooked dough at a time, and make roundels.

– Place this in an idli steamer and cook for 20-30  minutes and enjoy with chutney or liquid jaggery mixed with little ghee.

Unde/Pundi Bendi/ dumpling in masala gravy:

Here, we ned to break pundi into big chunks and keep it ready.

For Masala: Take one bowl of grated coconut, roasted red chillies – 2 to 4 , 1 tsp of coriander, ¼ tsp of cumin, 2 cloves of garlic, little tamarind, and grind into smooth paste.

In a wok, heat 2 tsp of coconut oil, splutter mustard,1  broken red chilli and add curry leaves. Add half finely chopped onion and fry until it turns brown.


Now, add ground masala paste into the seasoning and adjust the consistency, add salt, pinch of jaggery and boil.

When it starts to boil, add broken chunks, and further boil for 5 more minutes or until it reaches the thick consistency.

Serve hot and enjoy.


Knol khol leaves and sweetcorn Steamed dumpling/patties:

Desi sweet corn is in season now and we get plenty from local vendors. Indian maize corn isn’t sweet, but when it is cooked and mashed  or ground into paste it has the binding ability due to its starchy texture.

We all enjoy our seasonal roadside  bhutta treat, which is nothing but charcoal roasted corn on the cob, makki Ki atta to make roti or as a popcorn. This cereal is healthy, nutritious and can be utilised in a day to day diet, at least in winter months, when it is in the season. Corn kernels have less fat as well as low in calories.

Here, I have used ground corn on knol khol leaves and steam cooked until done. Basic method of making/steaming is like Pathrode or pathra, but ingredients are different. After steaming those folded parcels, it can be devoured as it is like a pathra or steamed dumpling, drizzled with coconut oil or it can be rolled in dry rava mixture and pan fried and served with ketchup.

So, when corn is mixed with Knol khol leaves not only does its nutrition increase but also, we get added benefit of all the goodness of knol khol leaves as well. It is rich in fibre and leaves are big enough to play around and fold however we want.

Recipe goes like this –

Ingredients:

Fresh Sweet corn – 2 cups

Onion – 2 (medium) chopped

Green chillies – 2 to 4

Fresh coriander – 1 fist full (chopped)

Cumin seeds – 1 tsp (dry roasted)

Salt – as needed

Chilli  powder – 1 tsp

Turmeric powder – ½ tsp

Fresh coconut – 1 cup ( grated)

Fresh Knol khol leaves – as needed (even cabbage leaves would do)

For Tawa roast:

Small size rava – ½ cup ( chiroti rava)

Hing – ¼ tsp

Red chilli – 1 tsp

Coconut Oil – for frying

Method:

-Wash knol khol greens or cabbage greens, drain and keep it ready.

-Make a fine paste of Sweet corn, onion, green chillies, coriander greens, dry roasted cumin, salt, chilli powder, turmeric with coconut.

-Spread the batter evenly on  knol khol leaves, fold the leaves at the two sides, then roll like a mat.

-Finish all the batter, by following this same method, place all those rolls in an idli steamer, cook for 20 minutes.

-After steaming if you want to enjoy hot steamed rolls, smear some coconut oil, and enjoy.

OR

-make a tawa roast by rolling in a rava mix. ( dry mix rava, hing, salt, red chilli powder) :

-Heat iron tawa, place all those steamed dumplings by rolling in rava and pour coconut oil and roast both the sides and serve with tomato ketchup.


Sprouted Ragi Idli:

We all know, Ragi is extremely healthy plant-based grain, which is fibre rich, calcium rich and what not? It is a new age “Super food” which was earlier considered as a staple, poor man’s food, or farmer’s diet.

Ragi also known as finger millet or Nachni. Interesting part is, when we sprout the ragi, its nutritional benefits increases 10 folds.

Soaking and sprouting ragi is easy to digest, high in calcium, protein, low in glycaemic index as well as high in vitamin B12, which is a boon to vegetarians. Ragi has the natural property to balance sugar levels in our body, hence it is an extremely  good option for all the age groups, including diabetics.

 Some people do not like ragi for varied reasons, it may be due to its bland taste or something else. If that is the case, one can try to sneak in Ragi in various forms, combining with the other grains in cooking or while baking.

Here, I have tried to make sprouted Ragi idli with mixing rice. When it is combined with sambar or chutney it tastes delicious and my family likes it a lot.

Preparation goes like this-

Ingredients:

Whole Ragi -1 cup

Idli rice – 2 cups ( you can use normal rice as well)

Urad dal – 1 cup

Poha – 1 cup (loosely packed)

Salt

Method:

-Wash Ragi, soak overnight, drain and keep aside to sprout, In Bangalore weather it takes almost a day or day and a half. After sprouting it swells and becomes 1 ½ cup.

-Next day, wash , soak  Idli rice in one vessel. In another vessel, Urad dal and poha. Soak for 3 to 4 hrs.

-According to your weather, opt the timing to grind. Ragi batter ferments little quick, compared to normal idli batter. SO, keep that in mind as well.

-I normally opt for a wet grinder to make idli or dosa batter.

-While grinding, first grind urad dal into fine batter, then add sprouted ragi, it takes little longer to grind. While halfway through add soaked idli rice, salt and grind the batter into small rava consistency.

-Remove from the wet grinder, adjust the consistency of the batter, mix nicely, and keep aside to ferment.

-Next day morning, steam idlies like a Regular idli and enjoy with little hot coconut chutney or any vegetable sambar.

Buckwheat Dosa:

For some people, eating gluten -free is a necessity due to their sensitive gut or any other medical conditions. They normally prefer whole food without gluten , which is highly nutritious with many health benefits. As a good source of fibre, buck wheat is known for its low Glycemic index, hence it is safe to eat people with diabetic condition as well.

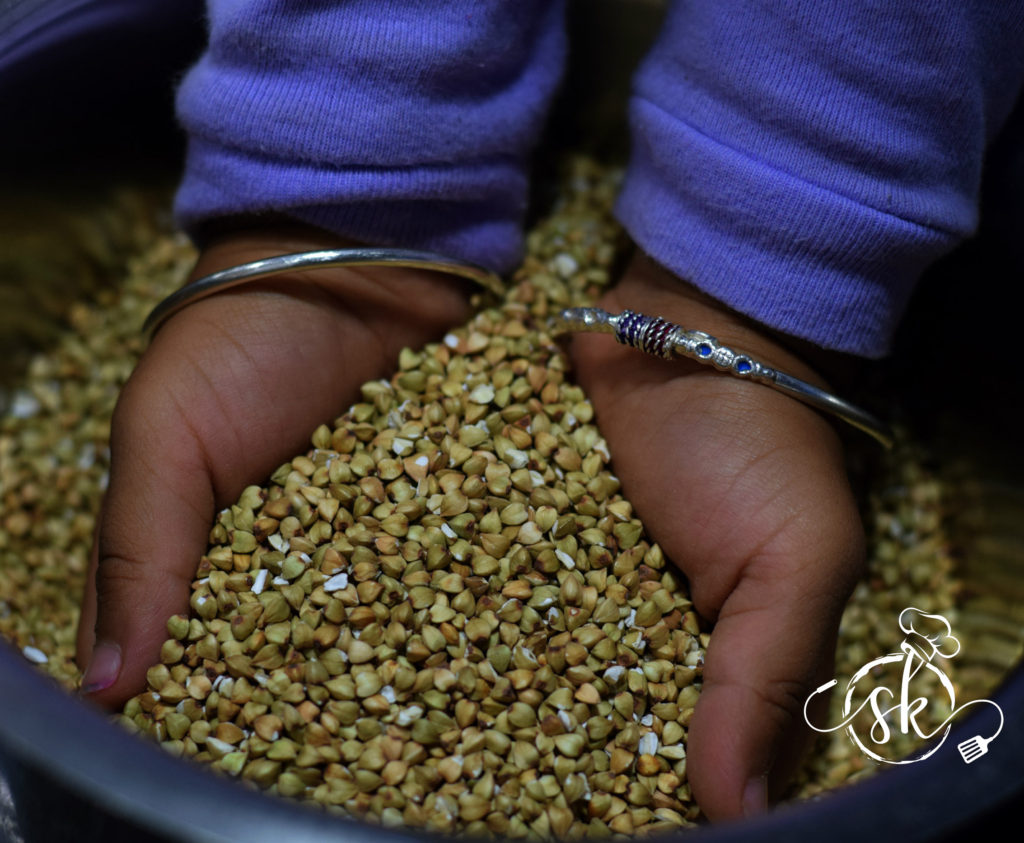
Buckwheat Is one such Super food and earlier I have posted Buck wheat honey Noodle recipe and now it is my experiment with the whole seed, which my sister has carried and got it for me. You must be wondering, why I have written Buckwheat as a seed? Yes! The name buckwheat causes confusion and usually people think that, it is some other form of grain and related to wheat. It is  seed of the flower from the plant, which belong to the same family as Sorrel and Rhubarb. The seeds are in triangular shape. These categories of seeds, which we normally consume as a grain is known as “pseudo cereals” and Amaranth and Quinoa are commonly used other pseudo cereals.

After seeing the seed/grain, I wanted to try our traditional Whole wheat dosa recipe by replacing whole wheat to Buckwheat. It tasted really good and loved the earthy taste and grainy texture, just like whole wheat. It is quick, no fermentation and instant recipe with all the goodness.

How I made:

Ingredients:

Whole Buckwheat – 3 cups

Green chillies – 2

Ginger – ½ inch

Coconut – 1 cup (freshly grated)

Salt

Method:

-Soak Buckwheat after washing for a couple of hours.

-In a mixer grinder, put soaked buckwheat, little water, salt, chilli, ginger , coconut and make a batter.

-Batter should not be very thin and watery. It should be like idli batter consistency.

-Heat iron griddle. When it is hot, spread thin dosas, cook both the sides by pouring little ghee or oil.

-Serve with chutney or sambar.


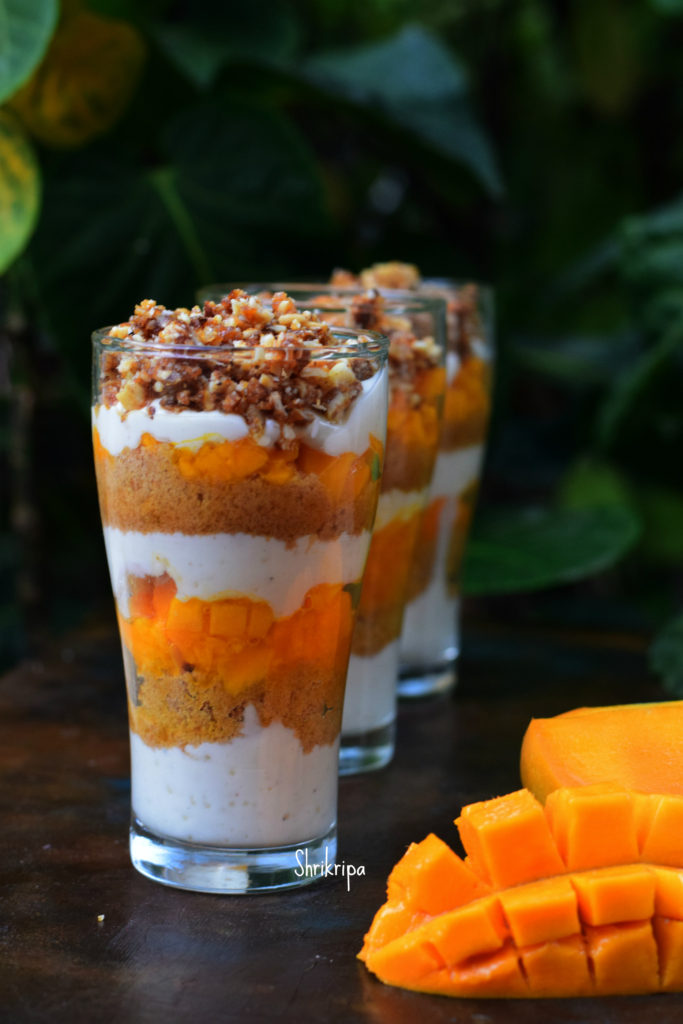
Mango Yogurt Parfait:

Everyone loves mango season and enjoy as much as possible before it vanishes from the fruit carts.

Today, I am sharing my little healthier version of mango parfait, when compared to other versions, which usually has loads of fresh creams.

Here, I normally use digestive biscuit base, hung curd with little fresh cream which is flavoured with fresh cardamom ( I like cardamom with mango 😀 ) , Chopped fresh fruit , lastly garnished with crushed almond praline (chikki).

Let us see the procedure , which suffice for 4 tall glasses –

Ingredients:

For Biscuit base:

Digestive biscuits – 12

Sugar – 1 to 2 tbl sp of brown sugar ( can use normal sugar as well)

Butter – 1 tbl sp

For Fruit base:

Mangoes – 2 (Alphonso works well)

Sugar – 1 tsp

For Cream base:

Hung curd or yogurt – 1 to 1½  cup ( adjust accordingly)

Fresh cream – 50  to 100 grams ( adjust accordingly)

Sugar – 3 to 4 tbl sp ( according to your taste)

Cardamom powder – ½ tsp

For Almond Praline: ( you can use cashew as well)

Brown sugar  – 2 tbl sp ( you can use normal sugar as well )

Slivered almonds – ½  cup

Butter – 1 tbl sp

Method:

-Make Praline by heating sugar until it turns brown liquid form without stirring or disturbing in low flame. When it turns golden, add almond, butter give a stir and spread on kitchen counter.

-When it is cool, take the crunchy block and crush by using pestle . keep aside.

-Now, Chop mangoes into small chunks, add sugar and give a stir and keep it in a fridge.

-Next, Biscuit base. Crush biscuits make a powder. Add sugar, butter, and mix all these by using your hand. It should hold the shape, while pressing in between your palm and fingers.

-Now, for the cream base, take a wire whisk ,beat hung curd, add cream, sugar, cardamom powder and whisk until it is creamy.

Now comes the assembling part:

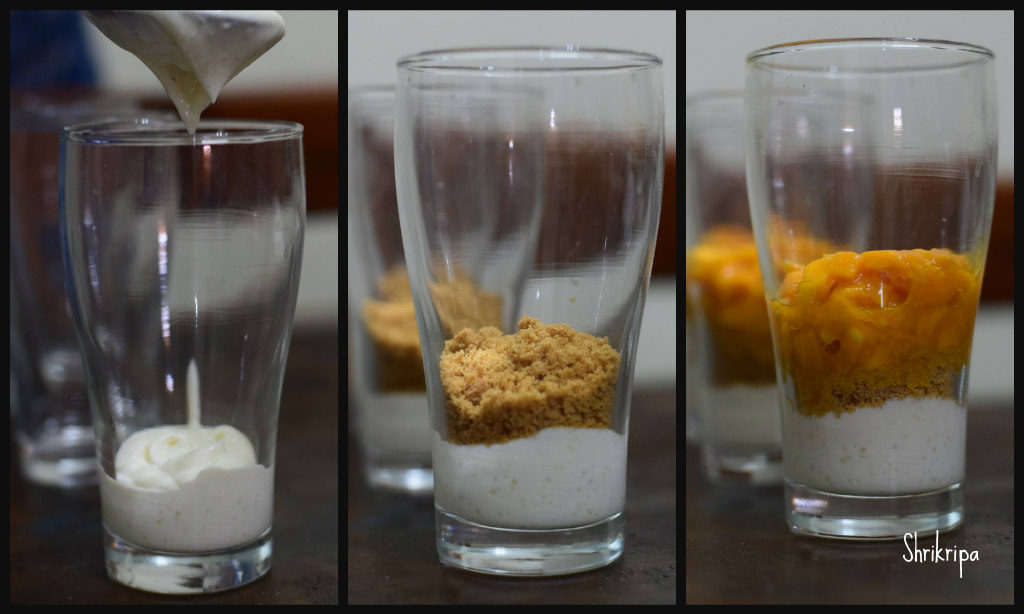
-Take 4 tall glasses. First pour 2 spoons of yogurt mix. Over to that, biscuit crumb, then chopped mangoes.

-Repeat the same sequence: yogurt, crumb , fruit. Lastly divide all the leftover curd equally into 4 glasses at the top and garnish with almond praline and serve, enjoy your treat.