Chayote Squash Gratin :

Chayote squash is nothing but our Seema badane/ chow chow of gourd family.

Au gratin or gratini is a classic French side dish .Which is creamy, cheese filled topped with breadcrumbs and end product will be crusty, brown topped . We just enjoy this as it is or with simple toast.  Usually gratin/ au gratin will be white sauce which is mixed with grated cheese and topped with breadcrumbs. When I saw the usage of squash in one of the recipes of Lisa, I couldn’t resist and tried her super simple recipe. I liked the idea of usage of squash to enhance the nutritional value. It is very apt for gloomy weather to cheer you up as well as to sooth.

Ingredients:

Chow Chow – 2

Onion – 1 (chopped)

Garlic – 2 Or use garlic salt.

Butter – 1 to 2 tablespoons

Whole wheat flour – 2 tablespoons

Milk – 1 to 2 cups

Salt  (if you use garlic salt, don’t use it)

Seasoning of your choice

Grated cheese

Breadcrumbs

Method:

– First, cook Chow Chow in a microwave for 3 min, cool, make a puree and keep aside.

– Take one pan, heat butter, put chopped onion (garlic) and fry.

-Add whole wheat flour fry for a while and add milk, puree ,garlic salt ,choice of seasoning. I have used Hot Jalapeno seasoning. And boil.

-When it is ready, add grated cheese and mix everything. Now sauce is ready to bake.

-Pour this sauce into casserole pot, spread grated cheese, breadcrumbs and bake in a pre-heated oven at  180 °C for 30 minutes or until cheese and crumbs becomes bubbly and light brown.

-Serve as it is or with any kind of bread toast or garlic bread.

Red velvet Cake :

Hey, this is Anushree here and this is my first guest post on my mom’s blog! I have been home from college for a few days now and thought I’d make something special as Christmas is coming up and my sister is coming back from college in 2 days! So, I decided to make a Red velvet cake.

Yes! You heard it right. It is not deep red in colour but filled with healthy ingredients. It is No Artificial colour and No All-purpose flour recipe. And to pull this off, I obviously needed some assistance from an expert in healthy cooking, who happens to be my mom, so that worked out great for me!

In olden days, Red velvet cake was made with All-purpose flour and Beets. Here I have used Mixed healthy flour ( Amaranth , Red rice and Almond flour) with beetroot. So, it is not a white cake with red dye.

While frosting, instead of new age cream cheese, I have opted for an original Ermine icing , which is also known as boiled milk frosting. Here, instead of All-purpose flour I have used mixture of  Almond flour and Arrowroot powder with milk to attain a creamy and flowy texture.

Here is my recipe- Fits for 9” spring foam pan.

Ingredient:

For the Cake:

Beetroot – 1 (small,  to get 3 tablespoons of puree)

Amaranth flour – 1cup

Brown rice flour – 1cup

Almond flour – ½ cup

Cocoa powder – 1 tablespoon

Cooking soda – 1 tsp

Salt – ¼ tsp

Eggs – 2

Brown Sugar – 1 ½ cup

Butter – 200 grams

Vanilla – 1 tsp

Buttermilk – 1 ¼ cup

For the Frosting:

Milk – 1 cup

Almond flour – 5 tablespoons

Arrowroot powder – 1 tablespoon

Butter – 50 grams

Sugar – ½ cup

Vanilla – 1 tsp

Desiccated coconut – as needed

Slivered Almonds – As needed

Method:

To Bake the cake:

-Pre heat oven for 180° C . Line the baking tray and keep it ready.

-Cook Beetroot in a pressure pan for 2 to 3 whistles, peel the skin and grate.

-Measure every ingredient and keep it ready. Melt butter and keep aside.

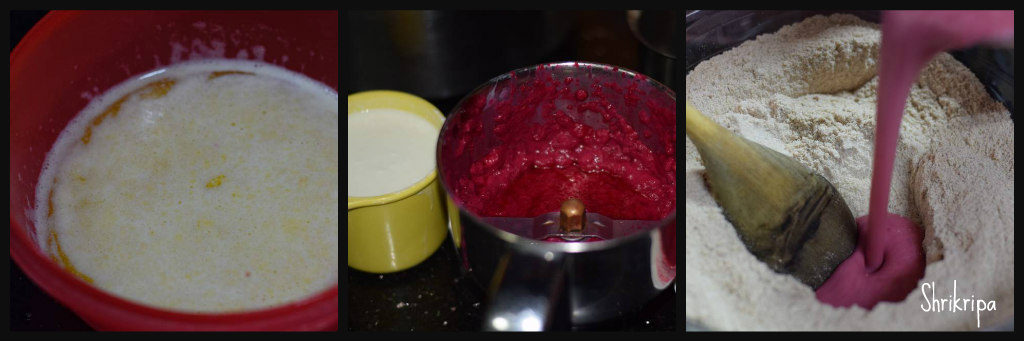
-Take a mixer jar, make a paste of grated beet with ¼ cup of buttermilk ,which we have kept for the batter preparation.

-Take one glass bowl, beat eggs, then sugar, melted butter ,pureed beetroot, vanilla and lastly one cup of buttermilk.

-Beat everything until it is well mixed and keep aside.

-Now take one more bowl, put all the dry ingredients, all the three flours, cocoa powder, salt and cooking soda. Sieve couple of times or dry whisk and keep it ready.

–Pour the previously prepared wet mixture to dry ingredients and fold the batter by using any spatula.

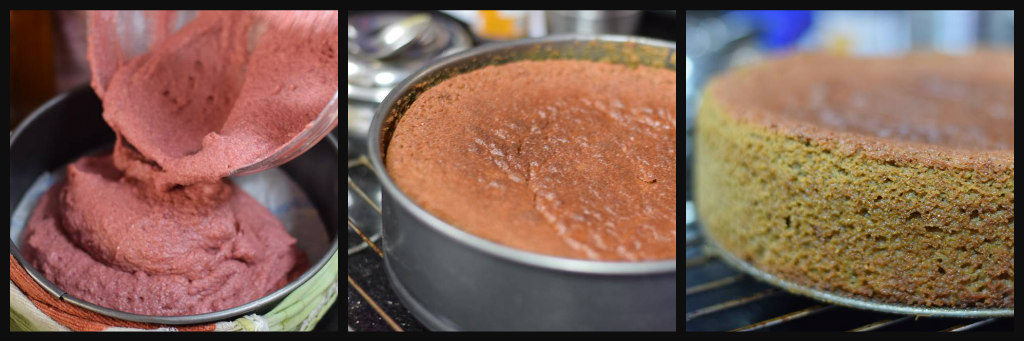
-Pour the batter in lined baking tray and keep this for baking for 40 -50  minutes or until done.

-Before removing, check with a knife by inserting, in the baked cake. It should come out clean.

-Cool the cake completely before doing the frosting part.

Method for Frosting:

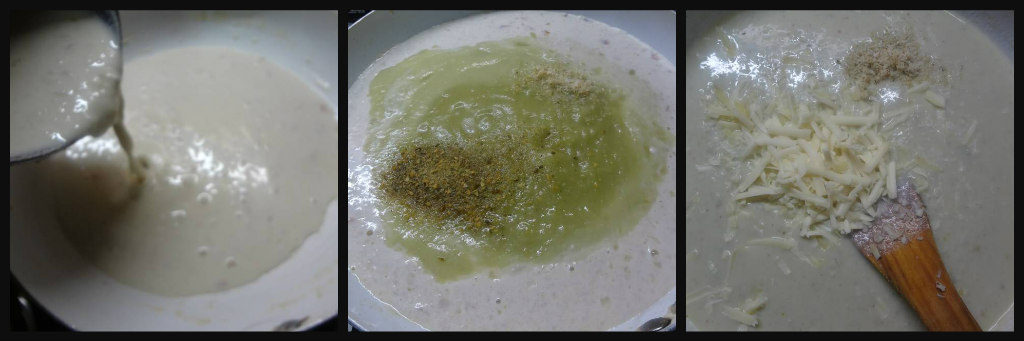
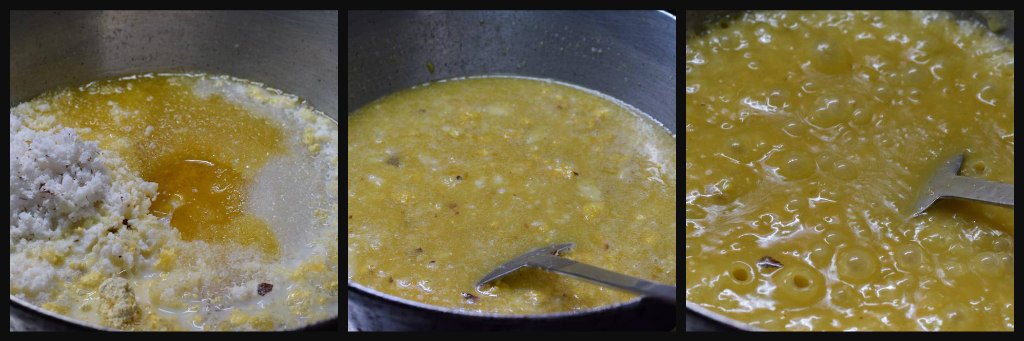
-Take milk ,Almond flour and Arrowroot powder in a saucepan. Boil the mixture until it is cooks and becomes creamy.

-Switch off the flame, add in butter ,sugar and Vanilla, mix well. Cool the mixture and keep it in the fridge to cool further making it more solid. ( I have not kept in the fridge)

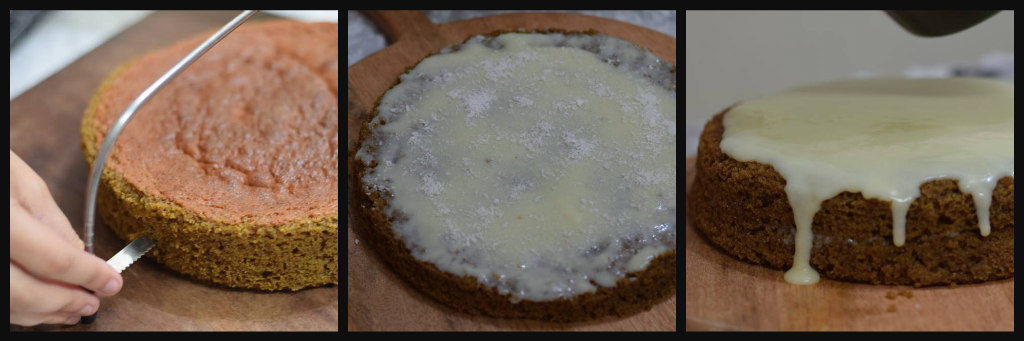
-Now, slice the cake, make a 2-equal slice, Apply the frosting on first layer and cover it with the second slice.

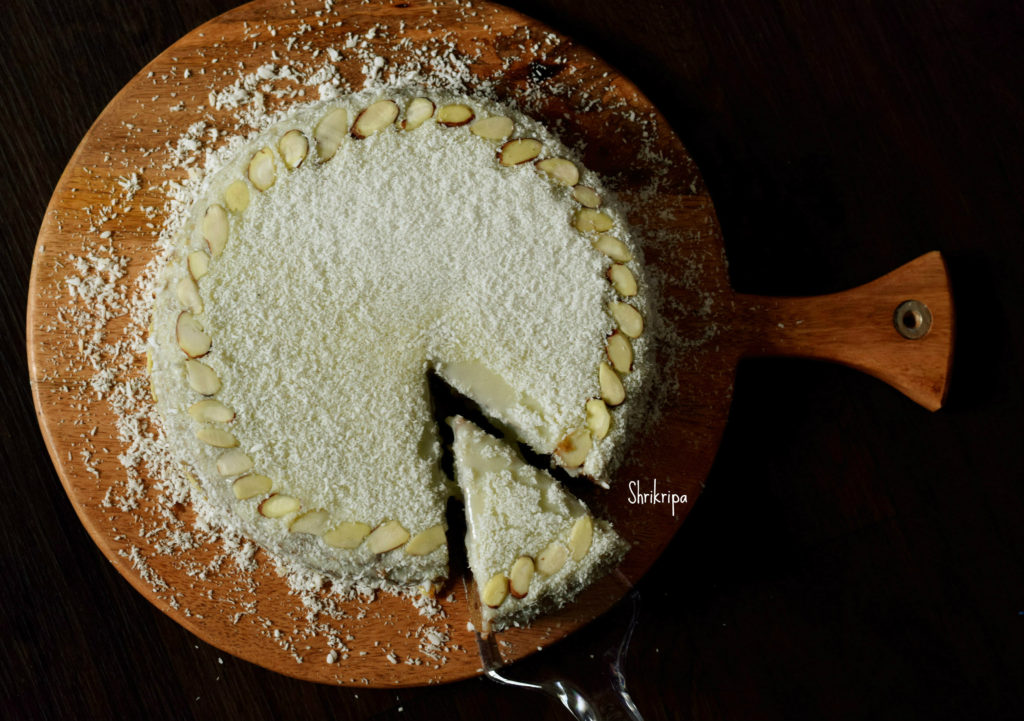
-Now pour frosting on the top, as well as apply at the sides as well. Take desiccated coconut and dust at the top as well as at the sides.

-Decorate the cake with slivered almonds and serve and enjoy with the family <3

Note: 

For Egg less version, please use any egg replacer or 

Flax gel:The basic ratio is 2 ½ tsp of flax seed powder and three tablespoons of  hot water  and then you simply whisk in the mixture until it becomes gelatinous  to replace one egg.

Cranberry and White chocolate cookies:

It is an easy, eggless, one bowl recipe. No baking powder or soda in it. To increase the protein quotient, I have added little moong ( green gram dal) flour as well. These white chocolate cranberry soft, chewy , flavourful cookies are so simple and so addictive! 😀

Cranberries and white chocolate make the best Christmas coloured cookie. You can see one more green gram flour/ gluten free cookie over here .

Ingredients:

All-purpose flour – 3/4cup

Green gram/ Moong dal flour – ¼ cup

Butter – 100 grams

Sugar – ½ cup (powdered)

Dried cranberry – ¼ cup

White chocolate chips – ¼ cup

Method:

-Mix All purpose flour and moong dal flour and keep it ready.

-Beat butter and sugar until fluffy and soft, either by using hand or food processor.

-Now add flour and mix until u gets uniform mass. Add in white chocolate chips and dried cranberries and make a dough.

-Now take one cling film sheet and keep this dough over it, on a flat surface and make squarish or round log, maintain uniform shape and cover with wrapping. Keep it under refrigeration for an hour.

-Now take your baking tray and line with a butter paper.

-After one hour, remove this dough from the fridge and unwrap the Clingfilm cover, make slices of ½” thickness and arrange these pieces in a lined baking tray.

-Bake in a pre-heated oven at 170°C for 14 to 18 minutes.

-Cool this on a wire rack and store this in an airtight container.

-My family just loved it and hope you also like it as much as we did.

Seven cup Burfi :

I am celebrating my blog’s 3rd Anniversary, what more reason do we need to celebrate than this? Presenting  one of the easiest sweets which can be prepared in a jiffy and with a straightforward. It is very easy to follow, no hassles of  making sugar syrup and worrying about its consistency. I must say, it is a beginner’s recipe, which is pretty simple, straight forward and hassle free. Mix everything, start making and at the end, be vigilant while achieving the right consistency and follow the notes, whatever I have listed. Even if you messed up a little, no worries, it would turn out delicious. If it is under done, it would be fudgy and if it is overdone, it would be like sweet granules. 😀

Ingredients:

Besan /Bengal gram four – 1 cup

Milk – 1 cup

Ghee – 1 cup

Fresh grated coconut – 1 cup

Sugar – 3 cups ( I normally put 2 ¾ cup)

Method:

-Take one thick bottomed kadai, add everything from Besan to sugar.

-Switch on the gas. Fire should be kept at low flame and you should continue stirring without removing your hand.

-After 10 to 15 minutes you will see the changes and mixture will become bubbly and shiny.

-Now it is the time to add cardamom powder and be vigilant. It will be ready in any moment from now.

-When it is done, mixture will leave the sides, base and sides of the vessel will become light brown or sometimes we see the ghee separating and oozing out from the bubbles. (these are the indications to remove)

-Now pour this mixture to a greased vessel, don’t touch or press after pouring, leave as it is.

-Cool it for about 5 min and mark the lines by using a sharp knife.

-Once it is completely cooled (it takes anywhere between 2 to 3 hours), invert the plate on another plate or by keeping butter paper. It needs some knocking at the base because air bubbles would restrict the easy exit.

–   Remove gently, break all the pieces and store it in an airtight container.

Your 7 cup Burfi is ready to serve!


Idli soup /Side dish for Idlies :

Idli dunked in hot dhal is known as Idli soup. Which is an ideal breakfast, especially when you are not well and craving for a soothing meal. It is one of our favourites too.

Here dhal is made by mixing Toor as well as Green gram / moong dal.

Ingredients:

Toor dal – ¾ cup

Moong dal – ¼ cup

Turmeric – ½ tsp

Ghee – 1 tablespoon

Mustard – 1 tsp

Cumin – ½ tsp

Hing – ¼ tsp

Curry leaves – 1 spring

Ginger julienne – 1 tsp

Green chillies – 2 to 4

Onion – 1 Small ( chopped )

Tomato – 1 small (chopped)

Lemon – (optional)

Method:

-Wash both the dals, cook by adding turmeric and water, mash and keep aside.

-Do seasoning: Heat ghee, splutter mustard, cumin, hing, curry leaves, green chillies, ginger, onion  and fry for a while.

-Add chopped tomato and fry further. Add mashed dhal, sufficient water ,salt, boil for a while.

-Garnish with coriander as well as little lime juice and serve with idlies .

Note:

-This dhal should be a little thin in consistency.

-Dunk idlies with soup and enjoy.


Nugge soppina Khara dosey/Moringa leaves mini dosa :

Mini dosas are traditionally known as “Sanna Polo” which is the tastiest side dish of Konkani community of our region. Basically, it is a red chilli and hing flavoured rice batter, with added goodness of any greens or chopped cabbage and chopped onion.

Here I have used chopped Moringa/ nugge soppu/ drumstick leaves which is a powerhouse of nutrients. Back in 2016  I had tried a bunch of moringa recipes to publish in Vijaya next kannada daily. Already I have shared Moringa powder and  Chutney recipe with you all and now we will see how to do a mini dosa.

Ingredients:

Dosa rice – 1 ½ cup

Byadagi chilli – 6 to 8 ( roasted)

Tamarind – 1 tbsp

Coconut – 1 cup

Jaggery – 1tsp

Salt – to taste

Turmeric – ½ tsp

Hing – peanut size

Moringa leaves – 1 bowl

Onion – 1 (big)

Method:

-Soak dosa rice for 2 to 3 hours after washing.

-Make a paste of chilli ,coconut, tamarind, salt, jaggery, turmeric, hing. Now add soaked rice and grind into small rava consistency.

-Add chopped onion and moringa leaves. Adjust the consistency by adding extra water.

-Batter consistency should be like idli batter. Start making dosas by heating iron dosa griddle.

-Pour little batter, don’t spread. Keep gas flame in simmer, spread coconut oil ,close the lid and cook.

-When one side is cooked, flip and roast another side. Serve as a side dish with Rasam rice, dhal rice.

Note:

-To get an authentic taste, use a coconut oil.

Apple Jam:

Apple jam is an awesome spread ,which is mild in flavour as well as with soothing colour. Homemade jams are always rich in taste, due to the usage of fruits and natural colour. It is preservative free and non-synthetic . Here I have used fruit as a whole /with skin.

Normally Apple turns out sour when you cook /boil . To avoid the sour taste, first I used baking technique , pureed , sieved and proceeded to make jam with the added mild cinnamon flavour.

It was a real hit and tasted really good and texture also turned out great. Usage of fruit skin gave the pinkish hue to the end product.

How I did –

Ingredients:

Apple – 1 kg

 Sugar – ¾ kg

Cinnamon – 1 or 2 pinches

Lemon –  ½

-Wash Apples, dice ,remove seed part and arrange in a baking dish.

-Bake this in a 170°C pre-heated oven for 15 minutes at first.

-Remove, flip those apple pieces and continue further 15 minutes.

-After 30 minutes, check the doneness. If it is soft, well cooked ,remove it.

-If it is not done, bake for further 5 or 10 minutes.

-When it is cool, add a little water and churn in a juicer by adding 1 or 2 cups of water.

-Sieve ,discard the roughage ( fibre as well as outer skin remains)

-Put this pulp in a thick bottomed kadai, add sugar, cinnamon powder and cook until it is done.

-To check the doneness, take some water in a small bowl, drop the cooked mixture in it, immediately it should form a thick mass. If it dissolves, then you should proceed cooking.

-When it is done, add lemon juice and cook for 2 minutes

-Remove from the fire and cool completely and pour it into a glass bottles to set.

– Store this in a clean, dry bottle and refrigerate.

NOTE:

-If you prefer sweeter jam add 1 kg sugar and adjust the quantity of sugar according to your need.


Baked Cracker by using Ghee Residue:

By now, you would know about my love towards brown sediment which is known as ghee residue. Ghee residue is a moist, brown coloured by-product formed after preparing ghee from white butter.

Ghee residue is a rich source of essential fatty acids, natural antioxidants and proteins.

I have shared my experiments with ghee residue earlier. It all started by trying simple tea cake ,then chocolate cake  then apple -cinnamon cake and by trying chocolate chip cookies.

This time I did try some savoury version, and everyone liked it and it turned out pretty well.

You can use whole wheat flour and oats or a mixture of any flour of your choice.

Ingredients:

Ghee residue – 2 -3  tablespoons

Curd -2 tbl spoons

Water – 4 tbl spoons

Jaggery or sugar – Acc to the taste

Mixed spice powder – 1 tbl spoon (pepper-cinnamon-ginger)

Salt

Whole wheat flour – 1 cup

Powdered Oats – 2 tbl spoons

Rice flour – 2 tbl spoons

Kasuri methi – 1 tbl spoon

Turmeric – 1/2 tsp

White sesame seed – 1 tsp

Method:

 -Take the ghee -residue and all the dry ingredients and mix everything properly. Add curd and sufficient water to make a pliable dough. 

-keep the dough covered, and rest for 30 minutes.

-After 30 minutes, take a small portion, make a ball and roll like thin roti /chapati, cut this by using a cookie cutter or pizza cutter.

-Bake in a pre-heated oven at 170 -180 °C for 20 – 30 minutes.

-After cooling for some time, take out it would turn crispy and enjoy it with a cup of coffee or tea.

-Store it in an airtight container. It stays good for many days, and it is an excellent snack for growing up kids as well.


Pepper flavoured Banana Chips:

Pepper flavoured banana chips can be prepared by using any local varieties of Raw banana or Semi ripe but firm Kerala plantain. Banana I have used is home grown, small variety which we call as Gali bale. One can use Yelakki or any other variety of banana which is Non-ripe, green one.

Colour of the chips is not bright unlike Kerala plantain chips. It is earthy and peppery in flavour.

Now we will proceed towards the recipe-

Ingredients:

Green Banana – 10

Salt – 1 tbl sp

Water – 1 small cup

Coconut oil – To deep fry.

Chips slicer – to slice

Pepper powder – as needed

Method:

  • Apply some oil to your hand. To some extent it will protect your hand from blackening.
  • Take fresh, green plantain, wash properly. Peel the outer skin by using knife at the upper tip, use hand and proceed to peel till the bottom.
  • Immerse these peeled bananas in a bowl of water.
  • Take one small bowl of water and mix salt and keep aside.it is your salted water, which is used while frying chips.
  • Now you can keep coconut oil for heating. When it is very hot, start making chips. To test the hotness of oil, drop one small piece of plantain, if it pops up immediately, it is ready.
  • Take out plantain from water, pat dry and start slicing directly to the hot oil by using slicer.
  • Use one or two plantains at a time.
  • Keep flame at medium. When the slices of plantain cook, the bubbling sound of the oil becomes faint. Now you can add 1 tbl spoon of salted water, and you will hear lot of bubbles and bubbling sound. When the sound reduces, the chips are ready to be removed from the oil.
  • Remove the chips from the oil and keep them on a tissue-laid bowl and sprinkle some black pepper powder and mix by shaking the bowl up and down.
  • After cooling store, it in an airtight container and proceed with the remaining plantain.


Bendekai sambar/ Okra sambar:

Sambar is a very essential part of south Indian meal. In Mangalore region, we normally use freshly roasted and ground coconut masala for vegetables as well as each vegetable has its own suitable masala recipe.

Normally, the main ingredients will be the same and here and there some additional ingredients or frying techniques will be different.

In this particular recipe, we don’t use coconut as it is.  Masala is fried as well as coconut and made into powder form and added. It is very flavourful and tasty.

We normally use heirloom variety of Bendekai/ ladies’ finger /Okra for sambar. This masala tastes very good even with small variety dark green bhindi as well.

Ingredient:

Bendekai/Bhindi /Okra – ½ kg

Toor dal – ½ cup

Tamarind – size of a small lemon

Green chillies – 2

Salt

Jaggery – 1 tsp

Methi – ¼ tsp

Coriander seeds – 1 tablespoon

cumin – 1tsp

Urad dal – 1 ½ tsp

Dried Red chillies – 2 to 3

Curry leaves – 1 spring

Coconut – ½  to ¾ cup

For the seasoning:

Coconut oil – 1 tsp

Mustard – ½ tsp

Red chilli – 1

Curry leaves – 1 spring

Method:

-Cook toor dal and keep aside.

-Soak tamarind, boil with little added water, salt, jaggery, slit green chillies.

-When it starts boiling, add chopped bhindi. Allow to cook in a low flame.

-To avoid sliminess,  don’t close the lid or put a spoon to mix while boiling bhindi.

-In the meantime, prepare masala. Heat coconut oil, fry methi, add coriander, cumin , urad dal, red chillies and fry until all the spices are roasted.

-Next add curry leaves, coconut ,turmeric and fry until you get a nice aroma.

-Cool and make a powder of roasted coconut mix and keep aside.

-When bhindi is cooked, add dhal, masala powder and boil nicely by adding sufficient water to adjust the consistency.

-Do the seasoning and serve with hot rice.