Breadfruit chips:

Breadfruit is commonly known as Jeegujje or Deevi halasu in our native language. It is a staple food in many tropical region and considered as an exotic veggie and wonder food only because of its richness either in its taste, fragrance, its high source of gluten free carbohydrate, protein and minerals.

pic 4

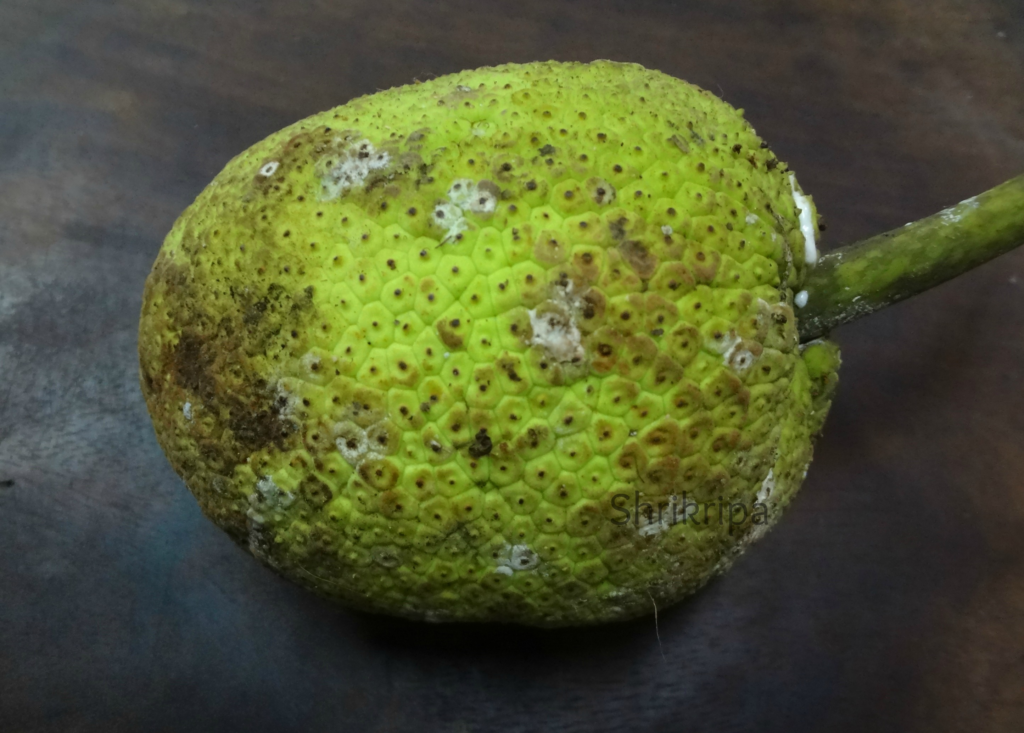
Breadfruit is a seasonal, much-loved veggie in our coastal region of Karnataka. It can be consumed when it is mature, but still firm and can be cooked and eaten in many forms. Today I am going to write about its chips. How we can make this exotic savoury and enjoy the gloomy weather.

I got this fresh Breadfruit from my cousin brother’s farm and got an opportunity to make these chips and had them after ages. Guidance was given by my lovely co sister who prepares this in our native, during every season.

pic 2

Ingredients:

Breadfruit – 2

Salt -1 table spoon

Turmeric – ½ tea spoon (optional)

Water – 1 small cup

Coconut oil – To deep fry

Chips slicer – to slice

Method:

– Apply some oil to your hand. To some extent it will protect your hand from blackening.

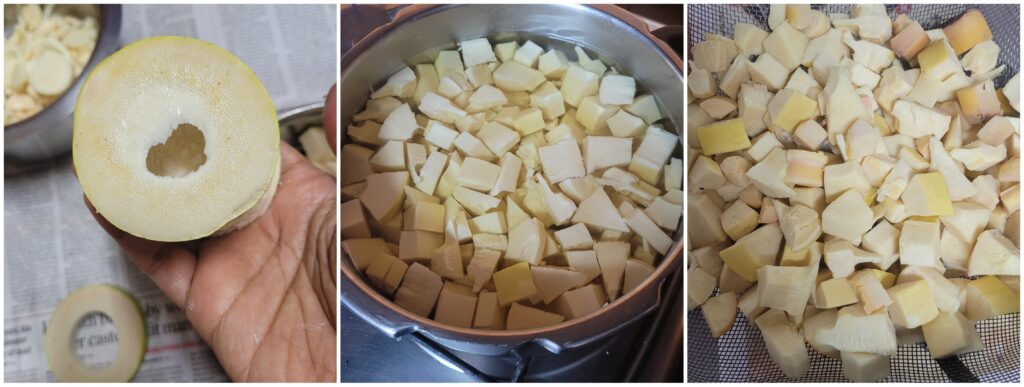
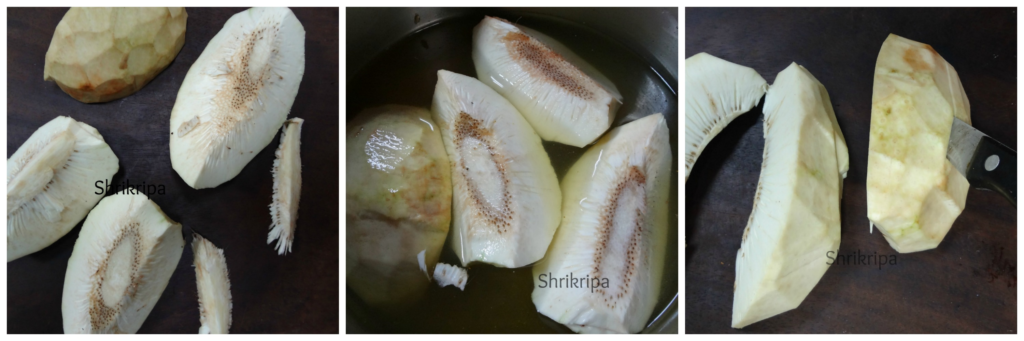
– Take fresh breadfruit, wash properly. Take one sharp knife and remove outer skin as thin as possible.

– Make four longitudinal pieces, remove inner pith (which is slightly harder and rubbery in nature)

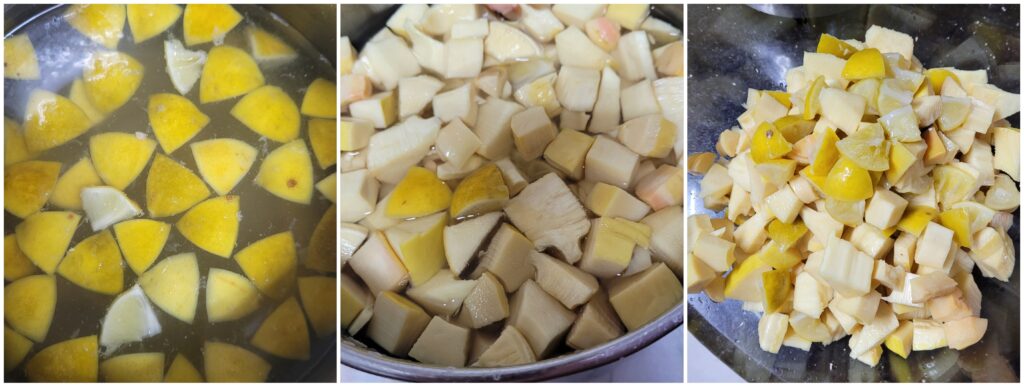
– Immerse these pieces in bowl of water.

collage 1

– Take one small bowl of water and mix salt, turmeric powder and keep aside. It is your salted water, which is used while frying and addition of turmeric will enhance the colour of the chips.

– Now you can keep coconut oil for heating. When it is very hot, start making chips. To test the hotness of oil, drop one small piece of breadfruit, if it pops up immediately, it is ready.

collage 2

– Take out breadfruit from water, remove traces of water by wiping it out. Make each quarter into half and now you will get 8 total pieces from one bread fruit.

– Take each piece and start slicing directly to the hot oil by using slicer. Keep gas flame at medium.

– When the breadfruit slices cook, the bubbling sound of the oil becomes faint. Now you can add 1 to 2 tsp of salted water.

collage 3

– You will hear lot of bubbles and bubbling sound immediately after adding salted water to the hot oil.

– When the sound reduces, the chips are ready to be removed from the oil.

pic 1

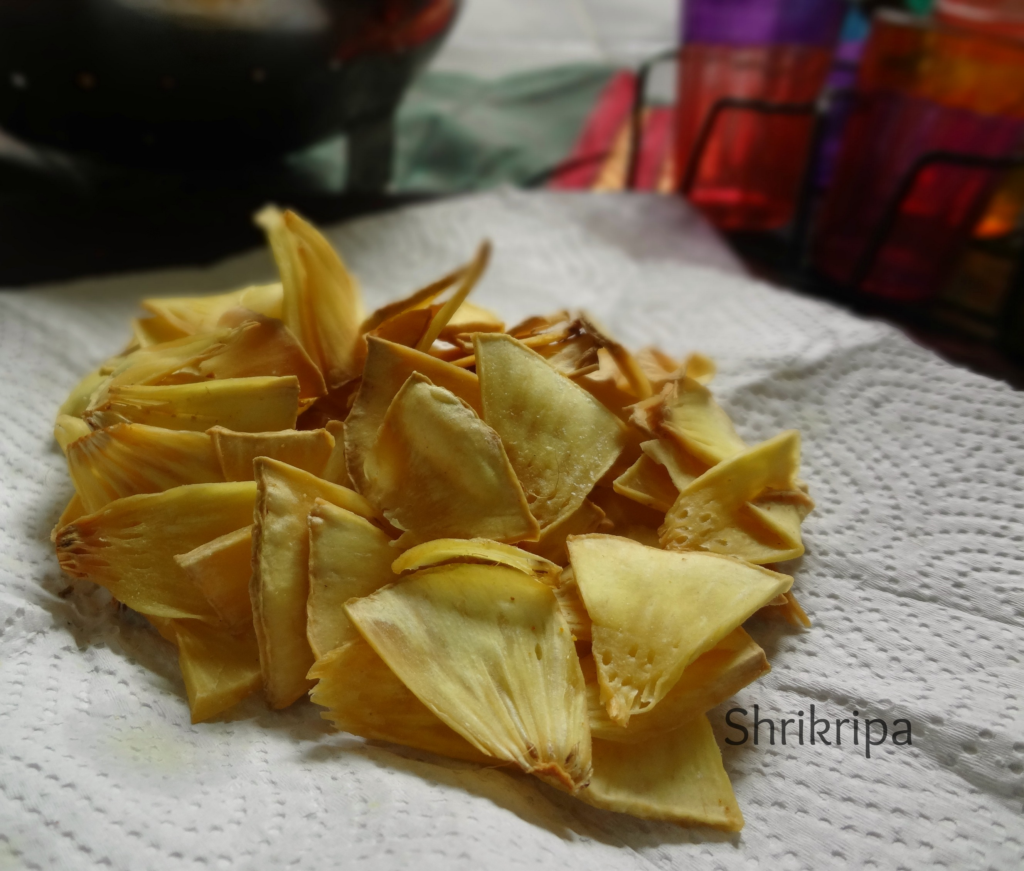
– Remove the chips from the oil and keep them on a tissue paper laid plate.

– After cooling store it in an air tight container and proceed with the remaining bread fruit.

Healthy Chocolate Brownie:

Here healthy refers to ‘No maida’ and personally I prefer to include healthy flours instead of maida and experiment with the same. Today I made this multi millet flour brownie. These brownies turned out to be a soft, fudgy and delicious and no one cribbed about the altogether elimination of all-purpose flour in this bake. It was so delicious, and my dear hubby was all into praise!!! That was the highlight and I don’t get this every day. Yes!!! I need to work hard for it.: D He usually doesn’t prefer to compromise on basic taste. Today I did achieve to get that “classic brownie” taste without any compromising.

This is an excellent,an easy recipe which you can prepare in advance when you are entertaining guests and have many other stuffs to prepare. It is a perfect dessert option along with an ice cream. Re- heat before serving to give an extra zing with cold ice cream.

Ingredient:

Sprouted finger millet/ragi flour – 1 cup

Mix millet flour – 1 cup

Walnuts – 1 cup

Eggs – 2

Cooking Milk chocolate slab – 300 grams

Cocoa powder – 2 table spoons

Butter – 100 grams

Curd – ½ cup

Light brown sugar – 1  cup

Method:

  • Assemble all the materials and keep it ready.
  • Put butter and cooking chocolate in a sauce pan and melt.

  • Add sugar and switch off the gas.
  • Cool this mixture for 2 minutes.
  • Add in beaten eggs and curd. Mix thoroughly.

collage 2

  • This is your wet ingredient and keep it aside.
  • Break walnuts into tiny chunks.
  • Now mix all the dry ingredients, two flours, cocoa powder and walnut chunks in one bowl.

collage 3

  • Dry mix all the dry ingredients and pour wet ingredient mixture into this bowl and fold in.
  • Pre-heat oven at 180 C

collage 4

  • Pour this batter in a greased, butter paper lined baking tin for 40 to 50 minutes or until knife comes out clean while checking the doneness.
  • After it is done, remove from the oven and cool.

 -Serve hot brownies as it is or with vanilla ice cream.

Note: If your cooking chocolate has sugar, please reduce the sugar quantity to ¾ cup.

Kanile Uppinakai/ Bamboo shoot-Lemon Pickle:

As I mentioned earlier in my “How to Chop Bamboo Shoot” Post, usually, while chopping bamboo shoots for any curries, we use Bamboo shoot’s knots or their nodes in pickle making. Usually, pickles require some souring agent to give a balanced taste. So, the Bamboo shoot needs some souring agent to enhance the taste and the shelf life. That is why we use lemon, Houglum or raw mango as an accompaniment. This image has an empty alt attribute; its file name is DSC_0631-blog-1-1-1024x762.jpg  Here, I have used Lemon with bamboo shoots. Bamboo shoot – 1 bowl (chunks from the 4 to5 nodes) Lemon -12 Water -1 lit Salt- 250 grams Byadagi Red chilli -100 grams (around 56) 25 grams of mustard 1.5 tsp – methi 1.5 tsp – turmeric powder 1/4 tsp – hing Method: -At First, Cook Bamboo shoots chunks in adequate water for one whistle in a cooker. Discard that water; air dry those bamboo shoot chunks.
-Wash lemons, wipe and quarter lemon, remove seeds and keep it ready. -In the meantime, Boil water and salt until you find a crystal-like, white, shiny surface. -Now, put lemon pieces into hot, salted water and allow to cool. When the saltwater turns cool, the lemon peel becomes pale in colour. This image has an empty alt attribute; its file name is Picsart_24-09-05_13-35-40-332-1024x387.jpg -Add cooled, drained bamboo shoot pieces to lemon and salt water. Allow to soak and marinate overnight. -Next day, prepare masala. Dry roast methi until dark brown and allow it to cool. -Dry roast mustard, remove it and allow it to cool. -Add a little oil and roast red chillies in the same kadai. When red chilli is puffed and roasted, switch it off, add turmeric powder, and mix well. pic 33 -When everything becomes cool, make a powder in a mixer jar, add a pickle masala powder. -Drain the salt water,from the marinated lemon and bamboo shoot, and mix the pickle masala and required amount of drained salt water and mix everything well. This image has an empty alt attribute; its file name is Picsart_24-09-05_13-34-56-437-1024x387.jpg -Close the lid and allow them to absorb all the flavours for at least a day. Then, mix this pickle again, bottle it in a clean, dry bottle, and store it under refrigeration. It stays good for 6 to 8 months under refrigeration.

Bendekayi/Okra Palya:

Bendekai/lady’s finger/okra/bhindi- so many names for this simple, high fibre, low calorie vegetable. Some people just avoid this slimy vegetable without knowing how to cook. It is just simple, if you know the right technique.

We normally don’t use any onion, garlic or tomato in festive cooking. In Mangalore, we prefer this simple coconut based side dishes for any weddings or festivities.

Here we use tamarind base to cook Bendekai to remove its slime. To avoid sliminess , you should remember 2 to 3 things. First thing, drops the veggie, only after tamarind water starts boiling. secondly, don’t over mix the veggie, while cooking. Thirdly, don’t cover the lid, while cooking lady’s finger. These are all the tricks I learnt from my elder’s while learning cooking from over the years.

You can use any varieties of lady’s finger for this recipe. Here I have used local variety from Mangalore which I have grown and harvested from my terrace garden. It is Red Okra and after cooking, it becomes like any other okra.

pic 1

Ingredients:

Ladies’ finger – ½ kg

Tamarind – 1 tsp

Salt

Jaggery

Red chilli powder – ½ tsp

To grind:

Fresh Coconut – 1 small cup

Red chillies – 2 to 3

Mustard – ½ tsp

Hing – very little

Seasoning:

Coconut oil – 1 tbl sp

Mustard – 1tsp

Urad dal – 1 tsp

Red chilli – 1

Curry leaves – 1 string

Method:

-Wash and cut the bhindi into half inch pieces.

collage 2

-soak tamarind in one cup of water.

-Roast red chillies and hing in a drop of coconut oil.

-Dry grind coconut, roasted red chillies, hing, mustard and keep it aside.

– Take one tawa, do the seasoning by putting oil, mustard seeds, urad dal, red chilli.

collage 3

-When mustard starts spluttering, add curry leaves and pour tamarind water (squeeze soaked tamarind in water and use)

-Add required amount of salt, jaggery and red chilli powder.

-When it starts boiling, add chopped Bendekai and cook this in a low flame.

-when water drains or Bendekai cooks, add ground coconut mixture and mix thoroughly and keep this in a simmer for couple of minutes.

pic 3

-serve this as a side dish with hot rice or Chapati.

Homemade Vegetable stock /Broth:

Vegetable stock is always handy while preparing clear soups or any other soups, as a base and is one of the main key ingredients for any Chinese gravy and one pot meal etc.  I especially like my vegetable stock in soups and Chinese gravy. It gives a depth and enhances the flavour of the dish in any sorts of cooking. Making this at a home is very easy job and not at all time consuming. It can be stored in the fridge for up to one week.

vegetable stock main

Here comes my recipe – Take a cooker, add roughly chopped veggies and herbs like Lemon grass, leek outer leaves and leaf tops (you can use fresh ones in a leek soup), carrot, tomato, beans, cabbage, cauliflower stalk or couple of heads, Coriander stalk (stalk gives very nice aroma) celery stalk -2, pepper corns -5 and garlic cloves -4.      

stock      

Add water (till veggies immerse in water) pressure cook for two whistles, when pressure releases, strain it and collect the stock, keep it in handy for soup making or cooking.

Note:

-You can add or delete any of the ingredients. I personally like lemon grass flavour and try to incorporate it every time.


Vegetarian Thai Noodles: Gluten free and Vegan

This time when I had visited my sister, who stays in America, I got an opportunity to experiment with some new ingredients, veggies etc and I bought a couple of new items back home as well. This gluten free, Brown rice & millet ramen noodle is one of them.

When we were shopping, my eyes went to this noodle pack. I love to work with new ingredients and wanted to pick it up. After trying a couple of recipes, my daughter told me, how it should be. She asked me to prepare this as a little wet, soup kind. She said, regular kind of preparations tastes bland and it needs some flavoured soup to enhance the taste of this kind of sticky noodles and she was right. Ramen is a Japanese dish, consisting of a clear broth containing thin white noodles and sometimes vegetables, meat etc.

Finally, I came up with this, and got a green signal from my super-efficient critic!!! She said, hmmm yummy, go ahead and post: D

pic 10

Ingredients:

Noodles – 3 cakes

Shallots – 10

Baby corn -4

Carrot-1

Broccoli- couple of small florets

Ginger garlic paste – ½ tsp

Tomato sauce – 1tbl sp

Thai sweet chilli sauce – 1tbl sp

Sriracha sauce -1 tbl sp

Soy sauce -1 tbl sp

Cooked broth – 1 small cup

Salt

Sesame oil – 2 tbl sp

Basil leaves – 5 to 6

Roasted peanut halves – 1 table spoon

Method:

-Boil water with one spoon of salt and oil. Put noodle, cook until al dente (it should cook and texture should be firm)

collage 1

-Drain the water, rinse the noodle in cold tap water.

-Collect one small cup of drained water and keep aside for next use.

– Chop vegetables according to your taste.

collage 2

– wash basil and roast peanuts, remove skin and make halves and keep aside.

– Mix all the sauces in one small bowl and keep it ready

-Take one wide kadai, add sesame oil. When it is hot, add chopped shallots and fry for a while.

-Next, drop in all the veggies and fry for a while.

collage 3

-Add ginger garlic paste, fry until veggies are fried.

-Add all the sauce mixture and fry vigorously to avoid this to burn.

-Add reserved cooked and drained water of noodles. Check for the salt. If needed add and adjust.

collage 4

-When it starts boiling, add noodles and mix.

-Garnish with torn basil leaves and sprinkle roasted peanuts and serve.

pic 11

Note:

-You can use any noodles instead of gluten free noodle.

Patholi / Sweet rice dumpling, steamed in turmeric leaves:

Patholi is an offering which we make on the day of “Nagara Panchami”, or the snake festival in our house hold. Monsoon is the season in which we get lot of greens in abundance.     Maybe that is the reason this dish is made in turmeric leaves.

Patholi is coconut and jaggery filled steamed kadubu or steamed rice cake, usually folded and steam cooked in turmeric leaves. Turmeric leaf gives beautiful aroma and good taste and this pleasantly aromatic dish is favoured by everyone in our family.

pic main 2

Ingredients:

Dosa rice /white rice – 2 cups

Grated coconut – 1 ½ cup

Grated Jaggery – ½ cup (to taste).

Ghee/ Clarified butter – 4 tsp.

Salt to taste

Turmeric leaves – 8 to 10

Method:

– Wash rice and soak it for 2 to 3 hours.

– Wash turmeric leaves and keep it aside.

collage 1

– Grind this soaked rice in to smooth paste by adding ½ cup of coconut, water and salt and little jaggery.

– Now keep thick bottomed kadai, pour this ground batter and add some water to make thin consistency. Now add 2 tsp of ghee and start heating this mixture by continuous stirring. When it becomes little thick and forms a mass, switch off the gas and keep it aside to cool to handle it further.

patholi 1

– In the meantime, make sweet coconut-jaggery mixture. In thick bottomed vessel add jaggery and ½ cup of water and heat. If you find some impurities in jaggery syrup, sieve this liquid and heat further and add fresh grated coconut and cook until it is sticky and forms mass. Add remaining ghee to this and mix. Now stuffing is ready.

– Method to make Patholi:

– Take little water in a bowl to dip your hand in between, while applying rice batter over turmeric leaf.

– Now take lemon sized rice batter ball, apply as thin as possible by using your hand by dipping your hand in bowl of water in between.

collage 2

– After applying ,spread coconut –jaggery mixture to half of every leaf in which batter is spread (please refer pictures)

– Now fold this in to half and keep this in a idly steamer and cook for 20 to 30 minutes or until done.

patholi 3

– Serve with ghee.

Marakesavu Pathrode:

Pathrode, name itself will make any Mangalorean drool. That too if it is marakesavu leaf, fun is even more. Marakesavu is non-itchy, seasonal colocasia leaves. It is one more classic monsoon special from Mangalore. Pathrode is usually served with coconut oil either plain or pan fried by slicing.

pic main

Marakesavu is commonly known as hitchhiker elephant ear and botanical name of this leaf is Remusatia vivipara. Leaf is large, oval, leathery textured, glossy on both the sides. Foliage disappears in winter and emerges after the first rain during monsoon. Grows widely on big tree trunks or in-between the stones, mainly emerges from the moss bed. The name itself suggests about its habitat. Here, “Mara” is Tree and “Kesavu” is colocasia.

collage 1

We will see the Procedure-

Ingredients:

Dosa rice – 3 cups

Fresh Coconut – 1 ½ cup

Dried red chillies – 12 (Roasted)

Hing – ¼ teaspoon

Salt

Jaggery – 1 table spoon

Tamarind – 1 table spoon (if normal colocasia use little more)

Marakesavu – 3 bundles

Coconut oil – for serving

Method:

Wash the leaves, remove stem and trim.

  Wash and soak rice for 3 hours.

  Fry red chillies by putting very little oil.

collage 2

Grind soaked rice, coconut, tamarind, jaggery, salt, roasted red chillies into smooth paste by adding sufficient water.

  Batter consistency should be like Dosa batter.

  Now, we are ready to make Pathrode.

collage 3

  Take biggest leaf from the lot, place upper glossy part downwards and apply ground batter on back side of the leaf. (pc:step 1)

 After applying on the first leaf, keep second one (slightly smaller than the first one)

Proceed with the application. After applying on second leaf, keep the third leaf then fourth one and proceed.(pc: step 2&3)

collage 4

  Now lift sideways, and fold. Make it like a mat. Apply some batter on these folds as well.

  Roll from the tip and proceed until the end and apply some batter on outer shell and keep this in a water filled idly steamer.

collage 5

  Cook this for 45 minutes to one hour, depending on the quantity of the content inside the vessel, in a low fire.

collage 6

  Serve fresh with coconut oil by slicing these cooked rolls or apply coconut oil and fry these in an iron tawa on both the sides and enjoy as it is for breakfast or with lunch or dinner.

NOTE:

-Tamarind is a key ingredient while making Pathrode.

– If it is Mara Kesavu, it is non-itchy and quantity of the tamarind doesn’t matter.

– If you are using normal colocasia leaves, tamarind plays a very crucial part, in removing the itchiness of the leaves. Use little more quantity than normal.

– You can prepare this same recipe by using big spinach leaves as well.

Tadka dal- Seasoned lentil :

Tadka dal is a simple, nutritious side dish from northern India. Tadka dhal is a blend of a couple of lentils, cooked and seasoned with ghee as well as butter. It is a very good side dish and goes very well either with roti, plain rice, jeera rice or Kashmiri Pulav.

pic 1 Ingredients:

Toor dal/ Pigeon peas – ½ cup

Masoor dal/Red lentil – ½ cup

Ghee – 1 tbl sp

Cumin – 1tsp

Turmeric – ½ tsp

Onion – 1 small

Garlic – 4 to 5 cloves

Ginger – ½ inch

Tomato – 1 big

Coriander powder – 1 tsp

Cumin powder – 1 tsp

Red chilli powder – 1 tsp

Salt

To Garnish – Chopped coriander, sliced garlic – 3 cloves, butter – ½ tbl sp

 Method: 

-Wash both the dals, cook with sufficient water.

– Take chopped onion, garlic and ginger in a small mixer jar and make rough paste and keep aside.

– grind tomato as well and keep aside.

-Now take one kadai, put ghee. When it is hot add Cumin then ground onion mixture, turmeric and fry until it is light brown.

-Now add ground tomato and fry this until raw smell vanishes and add Coriander, Cumin and Red chilli powders.

– Add cooked dal, salt and sufficient water. Boil.

-Garnish with chopped coriander leaves.

-Fry chopped garlic in little butter and add this into dal.

pic 2

 Enjoy this Dal with Kashmiri Pulav, plain rice or roti.

Kashmiri Pulav:

The Kashmiri Pulav what we see in restaurants have so many fresh fruits and dry fruits and are sweetish in taste as well. But in 2011, when we went to Kashmir, the care taker of our boat house made this wonderful Pulav which he served with tadka dal. That Pulav neither had fresh fruits nor so many dry fruits and it was not that sweet. It had raw yellow fresh dates, coconut chunks, cashew and raisins. My family liked this very much and wanted to note down the recipe to try it out. When I asked for the same.

pic 4

Our care taker Mahdha kaka was very happy to share his recipe and I want to dedicate this blogpost of mine to this humble man. 

SONY DSC

here we go for detailed account – 

Ingredients:

Basmati rice – 3 cups

Ghee – 150 Gms

Onion – 2 (sliced)

Ginger garlic paste – 1 tbl sp

Shahi jeera- 1 tsp

Bay leaf – 1

Salt

Saffron – 7 -8 strings

Hot milk – ¼ cup

Yellow dates, Raisins, cashew and dry coconut bits – as you wish.

 Method:

    At first wash rice, soak for 10 min and drain the water and keep aside.

   Soak saffron in hot milk and keep aside. Slice dates, coconut etc.

   Now take one thick bottomed pan, put little ghee, fry cashew, raisin, coconut slices and dates one by one and keep aside.

   Now fry half of the onion in to dark brown and keep aside.

   Pour remaining ghee, put Shahi jeera, bay leaf then remaining sliced onion and fry for a while.

– When it becomes brown add ginger garlic paste and fry until raw smell vanishes.

   Add drained rice, fry for a while.

   Now add 6 cups of water, salt and cook this rice by closing the lid and keeping it in a simmer.

  When rice is almost done, add soaked saffron with milk, fried onion, dates, raisins and cashew.

   Mix everything and keep it in a fire for little more time until all the water evaporates or until rice is done.

pic 7

         Enjoy this Kashmiri Pulav with Tadka dal.