Barley water/Juice:

Barley is an ancient grain and a very popular grain as a healing or soothing food. In olden days, people used to have Barley water or ganji (porridge) to heal vomiting, diarrhoea or Urinary tract infection naturally. People never used to have medicines or chemicals.

It is a wonderful healing, easily digestible food, even during recuperating from any surgery.

Sipping on barley water with a pinch of salt is an excellent remedy to overcome nausea.

Other than all this goodness, barley water when combined with a dash of lime, is recommended for kidney stones.

So, all in all it has several health benefits starting from cooling down our body temperature, detoxifying by flushing toxins from the body and keeping you hydrated, to improve immunity level, to maintain gut health by high fibre content, rich in Vit B as well as E.

This year summer is very harsh, and it is our responsibility to stay hydrated and provide natural supplements to our body according to the situation or season. It is very simple to make Barley water or juice at home. Soak cook and strain. Cooked grains can be used as it is or can be used in making salads by draining.

Ingredients:

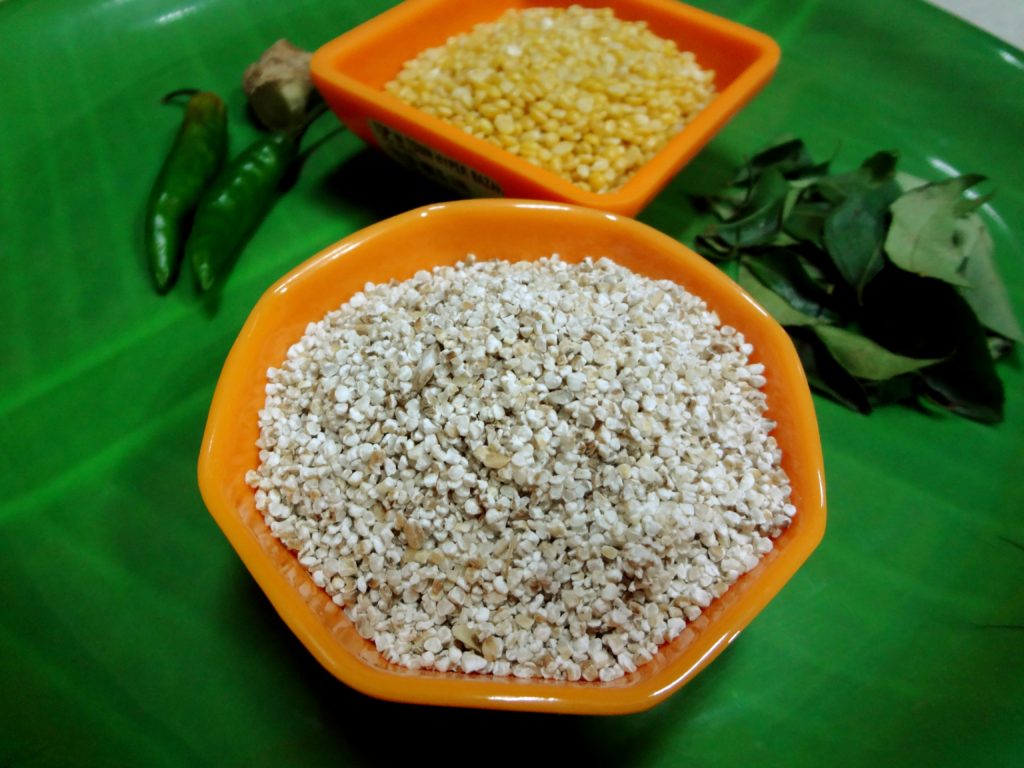
Whole barley – 2 to 3 table spoons

Method:

-Wash, soak barley in a cup of water for overnight.

-Next day, cook this in a pressure cooker by adding very little salt for 2 to 3 whistles. When pressure releases add required amount of water. (approximately 3 big glass)

-Boil for 5 to 10 min in a low flame and switch off.

-Stain and use as plain barley water for sipping throughout the day, instead of plain water.

-OR

Make lemonade by adding lemon juice, sugar or any other natural sweetener according to your preference.

-You can add chopped Pudina or mint leaves or a tsp of ginger juice.

-OR

Mix buttermilk and can have as a low-calorie drink. In this way, diabetics or weight watchers can have. One can add pudina and grated ginger to this as well.


Steel cut Oats and lentil Dosa:

It is a no rice urad dal Dosa. I have used Steel cut oats  or broken Oats instead of rice and avoided rice fully in this batter. These oats are considered as cut pieces of original grain. It is healthy compared to quick cooking oats. It takes much longer time to cook but when it is soaked and ground, almost tastes like rice and you can’t figure out the difference. This is Gluten free, high in fibre, protein and iron. It is low in glycaemic index.

I have bought Kosh broken oats to try out my experiment and it is whole oat grains cut into smaller pieces. It looks like broken wheat. When it is cooked, tastes like our broken wheat with outer thick skin with nutty taste. Loaded with insoluble fibre which helps in our gut health as well. Because of its low glycaemic property, it is a very good option for diabetic people and its fibre level will help to keep them full for longer hours.

I have used my regular plain Dosa batter recipe. I simply avoided rice and added broken oats.

Ingredients:

Steel cut Oats – 2 cups

Urad dal – ½ cup

Methi – 1 tea spoon

Chana dal – 2 table spoons

Poha – 1 fist full (optional)

Salt

Method:

-Wash oats, urad dal, methi, chana dal twice and soak this with poha (if you are using) for 3 to 4 hours.

-Grind this soaked ingredient by adding soaked water little by little with added salt.

-Ferment this batter over night or 8 to 10 hours according to the climatic condition.

-When it is ready, mix nicely, adjust the consistency of the batter and start making dosas by heating iron griddle.

-Take one ladle spoon of batter, spread into thin Dosa, pour oil or ghee and roast on one side, then flip and cook the other side, remove and serve with chutney or sambar.

Healthy “Brown” Neer Dosa:

Usually Neer dosa is made from using only white Dosa rice and it contains only carbohydrate and recipe is already shared and it is here

Couple of years back, when I was thinking of including millets in our regular neerdosa to make a healthier version, dosa used to turn out hard and crispy and I was not at all satisfied with the result. After couple of trial and errors, addition and deletion of ingredients, I got this soft and smooth textured neer dosa like the regular white one and henceforth it is one of our regular breakfast items and we named this as “Brown Neer Dosa”.

How I included these many items? As I mentioned above, I wanted to make soft neerdosa without any compromise on taste. Usually when we add millet in Dosa batter, Dosa becomes little hard and brittle. So, I thought of adding Whole Ragi to give softness with Fox tail millet.

Here I have added Ragi, Organic red unpolished rice with normal white rice to enhance the value, and fox tail millet. Instead of fox tail millet, one can use any other millet as well.

It is an excellent breakfast option for Toddler’s, weight watchers, diabetic diet or low carb diet as well as tiffin box options. It is very soft, easy to chew, digestible and at the same time filled with nutrients and fibre apart from carbohydrates. It doesn’t need any fermentation or planning. Soak in the night, grind and make it in the morning in a jiffy.

Recipe goes like this-

Ingredients:

White Dosa rice – 1 cup

Whole Ragi / finger millet – ½ cup

Red organic unpolished rice – ½ cup

Fox tail millet -1 cup

Salt

Method:

-Measure everything and put it in one bowl, wash twice and soak this in water for 2 to 3 hours or during the previous night like me.

-Next morning, grind this soaked rice into fine paste with water (I use soaked water while grinding, it gives nice aroma for the Dosa) and salt as per requirement.

-Make batter into pourable consistency like this (refer a picture) and check for the salt.

-Now keep Iron griddle for heat.

-When it is ready, apply oil like this.

-Pour one serving spoon of batter like how we make Rawa Dosa, you can see it in the picture below.

-Now close the lid by keeping the gas on full flame.

-After two minutes, remove the lid and keep the gas in simmer the edges of the Dosa rise a little, like this.

-Now flip this Dosa on the plate, leave for 2 minutes, then fold like this.

– Now keep repeating this with the remaining batter and stack one over the other or take one big plate and stalk one opposite another alternately.

-Serve these Dosa with coconut and grated jaggery mixture or coconut chutney.


Instant Stuffed Brinjal:

Tiny brinjals are very delicious in dry curries as well as in gravies. When I have plenty of home grown organic brinjals, I normally make this quick dish, which can be handy as well as tasty when you are super lazy to cook. If chutney powder (any chutney powder will do) is around, within no time you will be able to make this delicious dish. It can be relished as a starter, side dish or with curd rice.

Ingredients:

Tiny Brinjals – 12

Garlic Chutney powder – 2 to 3 table spoons

Hucchellu/ gurellu or Nigella seed powder – 1 tea spoon (optional)

Red chilli powder – 1 tea spoon

Amchur powder – ½ tea spoon

Salt

Turmeric – ½ tea spoon

Cooking oil – 2 tea spoons

Method:

-Hucchellu powder is purely optional. If you have roasted Hucchellu powder, use it.

-Take one bowl, mix chutney powder, gurellu powder, salt, turmeric, red chilli powder, amchur powder, salt.

-Wash brinjal, make 2 slits (+ shape) and fill this mixture and keep aside. If any mixture is remaining, keep aside.

-Take one kadai, add oil. When oil becomes hot, add masala filled brinjals and toss for couple of minutes.

-Sprinkle little (1 table spoon) water and close the lid and cook in a low flame.

-Once again sprinkle water in between and cook until brinjal shrinks and cooks properly.

-Lastly, sprinkle remaining masala mixture, give one stir and serve as you wish.


Barley Pongal:

Come Summer, our ancestors used to drink Barley water to keep their body cool. Otherwise Barley gruel or water is used mainly during illness- diarrhoea, urinary tract infection. As it is a natural diuretic, it increases urination and helps to flush out any toxins or infection causing bacteria from the body. Here I have used this super cool grain in making Pongal, south Indian breakfast dish.

Barley has two varieties, one is with outer cover which is called hulled barley and other one is more processed, without outer cover and is called De hulled or pearl barley. Compared to hulled, pearl is little less in fibre but cooks faster and is ideal for our day to day cooking.

Barley is known for its low glycaemic index, which makes it an excellent option for diabetics. Over all it is good for all and we can include it in our day to day cooking in one form or the other and take a benefit from this age-old grain for sure.

Although Barley is very good for health, it contains gluten and people who have sensitive digestive system or are allergic to gluten should avoid this grain.

Recipe is like this-

Ingredients:

Barley Rawa/ grits – 2 cups

Green gram/moong dal – 1 cup

Green chillies – 2

Ginger – ½ inch

Grated coconut – 3 table spoons

Ghee – (to serve)

Seasoning:

Ghee – 1 table spoon

Mustard – 1 tea spoon

Cumin – ½ tea spoon

Hing – ¼ tea spoon

Curry leaves – 1 spring

Method:

-Dry roast moong dal for 2 to 3 minutes.

-Wash moong and barley grits together and keep aside for a while.

-In the meantime, prepare for the seasoning.

-Take one cooker vessel, do seasoning, heat ghee, splutter mustard, add cumin, hing, curry leaves, chopped green chillies, chopped ginger (slivered) and fry for two min.

-Add water (around 8 to 9 cups) and boil. Add salt, coconut gratings and keep it for boiling.

-Add soaked dal and barley mixture and close the cooker lid.

-Cook for 3 whistles and switch off the gas.

-When pressure releases, open the cooker lid, give a stir and adjust the consistency.

-Pour a couple of spoons of ghee to enhance the taste or you can completely skip the ghee if you are into low calorie diet.

-Serve with coconut-ginger flavoured chutney.


Fresh muskmelon seed and Watermelon smoothie:

If you are calorie conscious or under restricted diet, this smoothie is especially for you. It is nutty flavoured, rich, creamy and at the same time, No sugar and Less in Calories. It is a “No guilt” smoothie for scorching heat.With Summer at its peak, we are one happy family who consumes lots of musk melon and water melon on every day basis. I usually feel very bad to discard power packed melon seeds into dustbin.

Muskmelon has lot to offer, fruit itself is fibre rich, vitamin rich and seeds which you usually throw it away is even more nutritious. Seeds are high in fibre, plant-based protein, minerals, calcium and Omega-3 and when you add this to prepare smoothies, it gives very smooth, creamy texture without adding any high calorie substance. It is very ideal for diabetic, weight loss or even for children.

Here I have added inner core (flesh and seed part) of one musk melon fruit to give thick texture as well as nutty taste and water melon chunks to give sweetish taste.

DSC_0049_Fotor

Ingredients:

Muskmelon inner core – from one muskmelon

Watermelon – one cup

Sea salt – ¼ tea spoon

Pepper powder – ¼ tea spoon

Method:

-Peel outer skin from one muskmelon, collect inner core with seed and proceed.

Ribbet collage

-I have not used fruit part. It can be consumed as you wish.

-Take water melon chunks.

-Take your juicer jar, put inner core of musk melon, water melon chunks, sea salt, pepper powder and churn.

– Sieve this liquid and discard the roughage and serve smoothie by adding a couple of ice cubes to beat the heat.


Bell fruit –carrot and Bottle gourd juice:

Star apple, bell fruit, Jambi, water apple, what not? So many names for this tropical fruit. This abundantly grows in a hot climate and is loved by all.

I had mixed this tropical fruit with grated carrots and bottle gourd to make an early morning dose of nutrients.

juice_Fotor

Ingredient:

Bell fruit – 4 to 5

Bottle gourd – ¼ cup (grated)

Carrot – 1 (Grated)

Ginger powder – ½ tsp.

Water – 1 cup

Salt – ¼ tsp.

Any Sweetener – (if u need) I am using very little sugar free natura.

Method:

-Clean and slice the bell fruit.

-Blend bell fruit, grated carrot and bottle gourd, water, ginger powder, and salt. If needed, add any form of sugar and churn nicely.

-Sieve this mixture and collect juice. Your nutrition rich, power packed juice is ready, to kick start your day.


Plantain / Banana Flower Chutney:

We call Coconut tree as a Kalpavriksha. In my opinion Banana plant also should come under this category, because almost every part of the banana plant is used in some way or the other.

The leaves, flowers, fruits, stem, stem fibre etc. Nothing is wasted over here, and it is very useful in many ways.

The male banana flower is purple coloured, dome shaped, and can be seen hanging at the bottom of every fruit bunch. In banana plant, female flowers appear first and appear as a hand like structure in clusters. These female flowers will develop as the real fruit, which we normally eat, and male flowers will remain intact in layers of purplish outer bracts.

After fruit matures, we harvest the fruit and use the male flower that we see at the end of the fruit bunch in cooking. It is loaded with fibre, anti-oxidants, iron, potassium, calcium, vitamins and all other minerals. Flower is used mainly to treat constipation and anaemia in villages of our native in and around Mangalore.

This Chutney recipe is handed down to me by my amma (mother), and I used to relish this from my childhood. It is a perfect combination with hot rice, topped with fresh home-made ghee. We can feed this to small toddlers as well.

DSC04353_Fotor main

Ingredients:

Banana flower – 1

Cumin – 1 tea spoon

Pepper – 1 tea spoon

Tamarind – ½ tea spoon

Salt

Water – 1 bowl

Curd – 1 serving spoon

Grated coconut – 1 cup

For Seasoning:

Ghee – 1 table spoon

Cumin – ½ teaspoon

Curry leaves – 1 spring

Method:

-Wash banana flower from outside and remove outer purple bract (remove 2 layers) and discard.

Ribbet collage 1

-Now take one bowl of water with 1 serving spoon of curd and mix and keep it ready. (This water will avoid decolouration of the chopping’s)

-Start chopping banana flower from the tip (refer picture)

Ribbet collage 2

-Keep on adding chopped part to curd water.

-While chopping, whenever outer shell opens by itself, discard that and proceed chopping.

– After chopping is done, drain the curd water and collect the banana flower chopping’s.

-Take one vessel, add chopping’s, salt, pepper, cumin, tamarind, 1 cup water and cook.

Ribbet collage 3

-When it is done, remove from the fire and cool.

-Add coconut, required amount of water and grind the content.

-Now take one tawa, add ghee, cumin, curry leaves and pour the ground mixture and boil.

DSC04355_Fotor main 1

-This chutney will stay good for a couple of days under refrigeration and can be served either with hot rotis or with rice.


Mixed millet Masala Cookies:

Millets are a very good alternative to normal All-purpose flour or whole wheat flour in gluten free baking. You can’t even recognize the core ingredient. It is gluten free as well as high in nutritional value too.

When I was trying out some recipes for the 2017 Millet calendar, I dished out a couple of recipes, which had turned out super tasty, and at the same time, healthy, filling and as an alternate snack for kid’s tiffin boxes as well.

I tried pizza based seasoning in this cookie recipe and it tasted super delicious.

pic main

Ingredients:

Mixed Millet flour – 1 cup

Butter – 50 grams

Sugar – 2 table spoons

Salt – ½ teaspoon

Baking powder – ½ teaspoon

Baking soda – ½ teaspoon

Curd – 2 table spoons

Pizza seasoning or Oregano – 1 tea spoon

Chilli flakes – 1 tea spoon

Cumin – 1 tea spoon

Grated cheese – to decorate.

Method:

  • Mix flour, salt, baking powder, baking soda, pizza seasoning, chilli flakes and cumin and keep aside.
  • Now beat butter and sugar until it becomes fluffy and creamy. Add in curd and beat once again.
  • Mix in flour mixture and bind all the ingredients together, the resultant dough will be like Chapati dough.

Ribbet collage 1

  • Take dough little by little, roll it into half inch thickness and take a cookie cutter and cut.
  • Arrange this in a lined baking tray.
  • Sprinkle grated cheese on top.
  • Bake this in a pre-heated oven at 170 ºC for 10 to 12 minutes.

pic 2

Note:

  • Here mixed millet flour is store bought pre- mixed flour.
  • Alternately one can mix two to three millet flours and make their own flour or use all purpose flour as well.


Gluten free Masala Bread:

Wanted to experiment with banana flour which I had made at home, in baking bread. So, I tried my hand at this recipe. In the end, I got soft, dill flavoured bread. Which had nutritionally rich dill leaves, seasoned onion, Amaranth flour, homemade banana flour and fine rawa. People who want to try this, can replace the flour and try. One can use only All-purpose flour or whole wheat flour but handle your dough carefully.

bread main

Now we will see how I proceeded –

Ingredient:

Amaranth / Rajgira flour – 1 cup

Banana flour – 1 cup

Fine rawa / semolina – 1 cup (used millet rawa)

Milk – 1 cup (vegans can use any other form of milk)

Water – ¼ cup

Active dry yeast – 2 tea spoons

Sugar – 2 table spoons

Oil – 2 table spoons

For masala:

Dill leaves – 1 small thin bunch

Curry leaves – 1 table spoon

Onion – 1

Green chillies – 2

Cumin – 1 tea spoon

Oil – 1 table spoon

Salt – 1 tea spoon

Turmeric – ½ tea spoon

For Garnishing and other:

Chia seed – 1 tea spoon

Butter – 1 table spoon

Milk – 1 table spoon

Oil – 2 table spoons

Method:

-First, we will arrange for yeast proofing: take Luke warm milk and water, dissolve sugar and add yeast, mix nicely by using spoon and keep aside by closing a lid for 10 minutes.

Ribbet collage 1

– If this has not shown any bubbles even after 10 minutes, discard the solution and prepare once again with fresh yeast.

-At the meantime, prepare for seasoning:

Ribbet collage 2

-Chop onions, green chillies. Heat oil, put cumin, onion and fry for a while. When onion becomes transparent, add curry leaves, dill, turmeric, salt.

-Switch off the gas, when greens wilts.

-Now put all the dry flours in food processor, dry run and mix thoroughly. Add in seasoning, oil and once more mix everything.

-Now pour yeast mixture and knead with the help of kneader. If it is very sticky, adjust the consistency by sprinkling extra flour.

-Ready dough should be little sticky, but not watery.

-Remove this dough from the processor, apply 2 table spoons of oil on this dough all over from the outside and keep it in a bowl covered with wet towel to rise (First rise)

Ribbet collage 3

-It will take anywhere between 1 ½ to 2 hours. (Dough should be doubled)

-After one and a half hours, remove this raised dough and place it over the work table by sprinkling some dry flour over the counter.

Ribbet collage 4

-Spread this dough into rectangular shape by pulling by hand (width should roughly match the bread baking tin)

-After pulling and spreading like a rectangular mat, fold it thrice or four times, like a real folding of the mat.

-Keep this folded roll in a greased baking tin, apply milk on top of the dough to avoid drying. Sprinkle chia seed and keep it for second proofing (rise) by closing it with a wet cloth or bigger vessel.

Ribbet collage 5

-When it rises after an hour, bake this in a pre-heated oven for 20 minutes at 200® C.

-Immediately after taking out from the oven, apply butter all over at the top part and keep it for cooling.

Ribbet collage 6

-After it cools down, de-mould and slice the bread and enjoy with any jam or butter.

Note:

-If you want vegan version, please skip application of milk and butter.