Garlic Chutney Powder:

Basically, it is a very simple garlic flavoured dry coconut chutney. One of the most loved condiments of my kitchen. It works wonders when you sprinkle it on Dosa or onion uthappam while making. When you are lazy to prepare fresh coconut chutney, take this chutney powder and drizzle some coconut oil and relish with any south Indian breakfast items. It works just fine with North Indian Parata as plain or mix it with sweetened curds and relish. It tastes yummy with hot rice as well with ghee. Sometimes I even use this chutney powder as a stuffing for some veggies as well 😉. So, overall it is a multi-dimensional ingredient.

Garlic is intensely high on aroma as well as flavour. When you roast it and use it, aroma increases even more. It is considered as very good for human health. Garlic is widely used in medicinal purpose to combat many illnesses.

As we grow coconut in our coastal area, chutney powder will be made by adding dried coconut and because of its no moisture content, shelf life of the powder increases, and health benefit of dry coconut can be included by this way as well. Health benefit of dry coconut is many, and it contains many essential nutrients, dietary fibres and some important minerals as well.

I use Urad dal for its nutritional benefit as well as for its aroma with added benefits from the Chillies and curry leaves as well as sharing one more version of  chutney powder with added neem  flower at the end of this post.   

Now I will jump into the procedure –

Ingredients:

Dry coconut / Copra – 2

Dry red chillies – 20 to 25 (Byadagi)

Urad dal – 1 to 2 table spoons

Garlic – 2 (whole)

Curry leaves – 10 – 15 strings

Tamarind – 1 tea spoon

Salt – as needed

Sugar or jaggery powder – as needed.

-At first, slice coconut into thin chips.

-I usually air dry these slices for one or two days in open air (optional)

-Wash curry leaves and spread this to air dry.

-Dry coconut has high degree of oil content and while roasting and powdering, it tends to leave oil and becomes wet. When I tried to make after air drying, it never becomes wet and powdering becomes very easy.

-After air drying, make powder by using mixer grinder. This step will help in equal roasting.

-Take one kadai, dry roast urad dal until it becomes light brown.

-Dry roast garlic (I usually clean only loose skin of garlic clove and leave inner skin intact).

-Dry roast air dried curry leaves until crisp.

-Roast Red chillies by sprinkling some coconut oil.

-Dry roast coconut powder.

-Spread everything and cool.

-Take one mixer grinder, powder urad dal, red chillies at first. Then add curry leaves and powder.

-To this add garlic and use “PULSE” option and churn for a short interval.

-Now you will see a mass of masala.

-Take out all this and mix with roasted and cooled coconut.

-Now add salt, sugar or jaggery, tamarind and mix.

-Now take this mixture little by little and “pulse” in a mixer grinder to attain powder form.

-After completing the procedure, use dry hand and mix a whole lot of chutney powder nicely in one vessel.

-Check for salt, sugar, chilli.

-If needed add red chilli powder, salt or sugar and adjust.

-After it cools down, store it in a dry container. It stays good for 3 to 4 months in normal temperature or without any refrigeration.

Garlic Chutney powder with Neem Flower: Perfect for winter months.

Same recipe to follow and If you want to add Neem flowers in this chutney recipe, you can use dried neem flowers with all the other ingredients of garlic chutney powder.

Dry roast sun dried flowers for a couple of minutes, cool and add with other ingredients while dry grinding the powder and enhance the nutrition value during winter months.

It equally tastes great like regular garlic chutney powder.


Mangalore Cucumber curry:

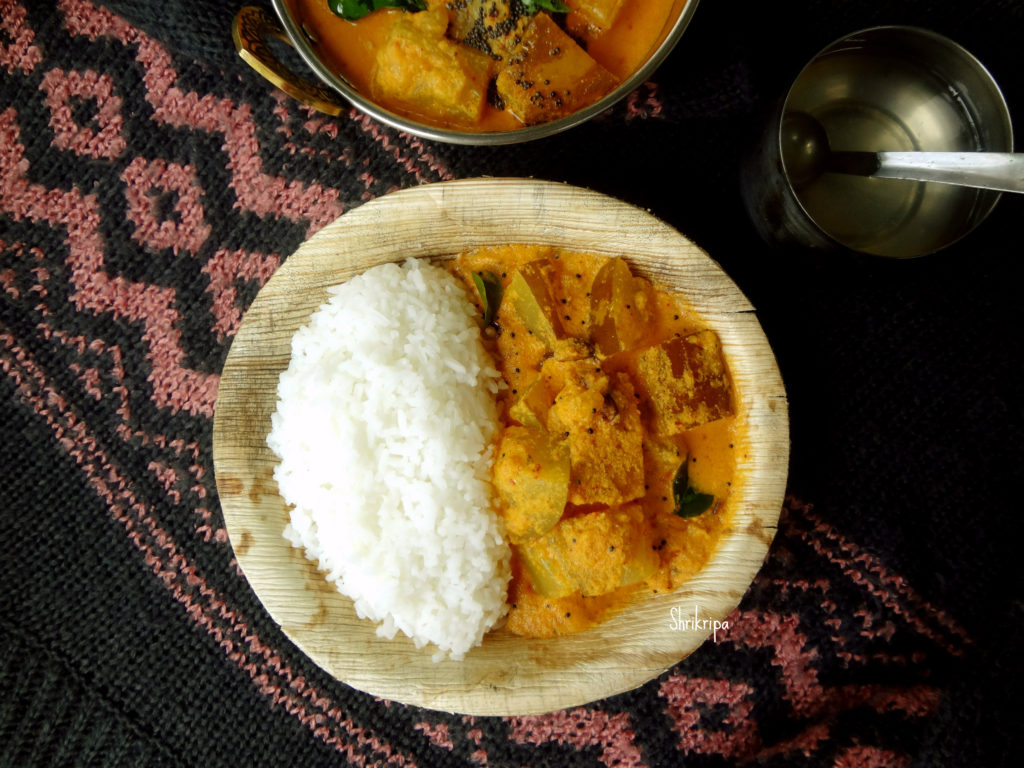
Traditionally we call this Sauthe kai Huli menasina Kodilu/Koddel. The literal translation of this is, Sauthe kai means sambar cucumber, Huli is tamarind, menasu is chilli, koddel is sambar or curry. It is sambar cucumber or coloured cucumber curry with a raw masala of fresh coconut flavoured with non-roasted masala.

Here we only use fresh coconut, Byadagi red chillies, tamarind as the main ingredient, and after boiling, seasoned with curry leaves, roasted garlic by using coconut oil.

To get an authentic taste, one should use coconut oil and freshly grated coconut for this curry.

DSC03963_Fotor

Now we will see the recipe part.

Ingredients:

Coloured cucumber – 1

Salt

Red chilli powder – 1 teaspoon

Fresh coconut – 1 bowl

Red Byadagi chillies – 2 to 3

Tamarind – gooseberry size

Turmeric powder – ½ teaspoon

For seasoning:

Coconut oil – 1 tablespoon

Mustard – 1 teaspoon

Red chilli – 1

Curry leaves – 2 springs

Garlic – 10 cloves (crushed)

Method:

-Wash Mangalore/Coloured/sambar cucumber.

Chop off two ends, slice into four pieces, remove the inner core (seed part), and chop into bite-sized pieces.

Ribbet collage 1

-Check now for the taste. If it is bitter, soak the pieces in plain water for 5 minutes.

-Discard the water and proceed. If cucumber tastes good, there is no need to soak in water, and you can directly proceed with cooking.

-Cook these pieces in a sufficient amount of water. Add salt and red chilli powder as well.

Ribbet collage 2

-In the meantime, grind masala by putting coconut, tamarind, red chillies and turmeric.

-When cucumber cooks well, add ground masala, adjust the consistency and boil.

-When the mixture boils nicely, switch off the gas.

-Prepare seasoning, heat oil, splutter mustard, add garlic, red chilli, curry leaves.

Ribbet collage 3

-When garlic becomes deep brown, add the seasoning over boiled gravy.

-Keep this closed for a while before serving to absorb all the flavours.

-Serve with hot rice.

One more variation of this curry is by adding –Turkey berry.

To know about the Turkey berry, you can click the link HERE.  

The method is straightforward. Crush those washed turkey berries/ Kudane, put them in water, rinse them a couple of times, and remove the seeds as much as possible; in this way, the tartness of the berries vanishes. Keep as it is and follow the above procedure to make Cucumber curry.

-When cucumber cooks partially, add those washed and cleaned berries and cook further. Then, add freshly ground masala and curry by following the above description.

Note:

To maintain authentic taste,

-use fresh coconut, Coconut oil.

-Retain the outer skin of garlic and crush.

-Inner core or seed is used in a couple of recipes.

-One is Chutney, and the other one is Rasam. I will update ASAP.


Radish Thepla/Paratha:

Thepla is a Guajarati word. It is an easy form of paratha. Enjoyment without much work 😉 Yes!!! There is no need to prepare stuffing separately. Put everything together, knead and make.

Radish is not liked by many, let alone be in their list of favourite vegetables. But it ranks very high in nutrition and health benefits. You can make raw salads, sambar or add them in any veggie recipes. If you don’t like the pungent taste, add couple of carrots, tone down the taste and enjoy.

Winter is the time when we get fresh juicy radishes in India. When It is home grown, the joy doubles. I wish to use every edible part without any wastage and without any usage of pesticide. Thus, it is healthy as well.

DSC09149_Fotor

Ingredients:

Radish and its greens – one small bunch

Coriander – 1 tea spoon

Cumin – ½ tea spoon

Carom seeds – ½ tea spoon

Garlic – 3-4 cloves

Green chilli – 1

Coriander leaves – 1 table spoon (chopped)

Curd – 2 table spoons

Salt- to taste

Whole wheat powder – as required

Oil – to cook

Method:

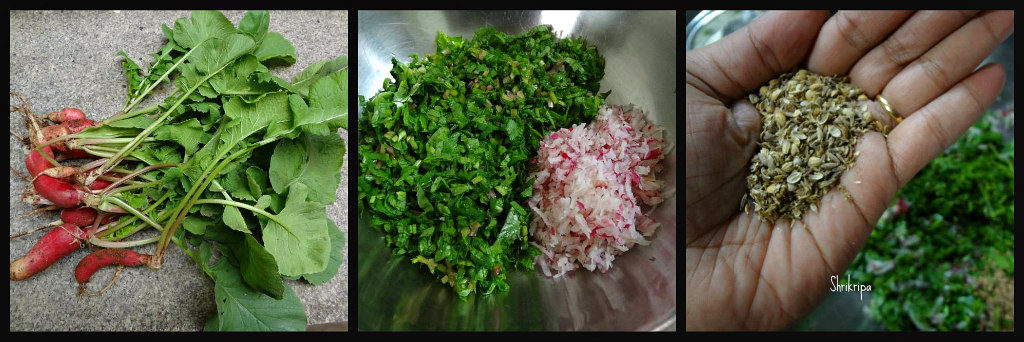
-Wash radish as well as green leaves.

-Grate the radish and chop the greens. Sprinkle salt.

Ribbet collage 1

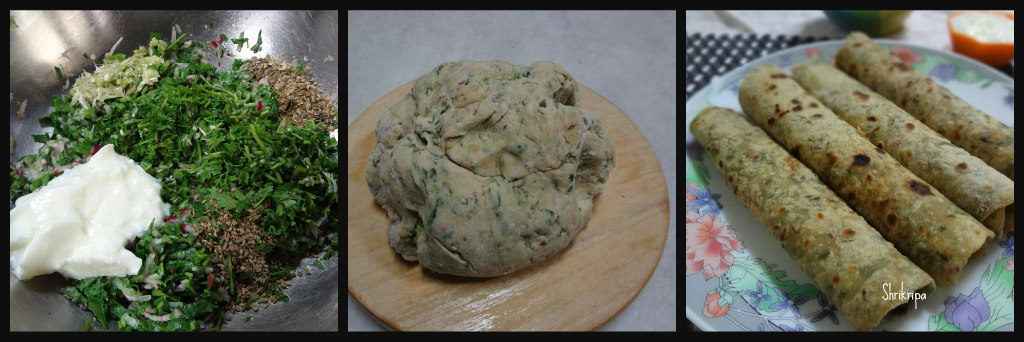
-Crush coriander and cumin, add.

-Dry grind green chilli and garlic, add.

-Add carom seeds, chopped coriander and curd as well.

-Mix everything, make a firm dough by using required amount of whole wheat flour.

Ribbet collage 2

-Now take lemon sized chapati dough in hand, roll this ball by using a roller, like regular chapati.

-Cook both the sides by using either oil, ghee or butter.

-Serve with sweetened curd or pickle.

Onion Garlic Kulambu / Poondu – Vengaya Kulambu:

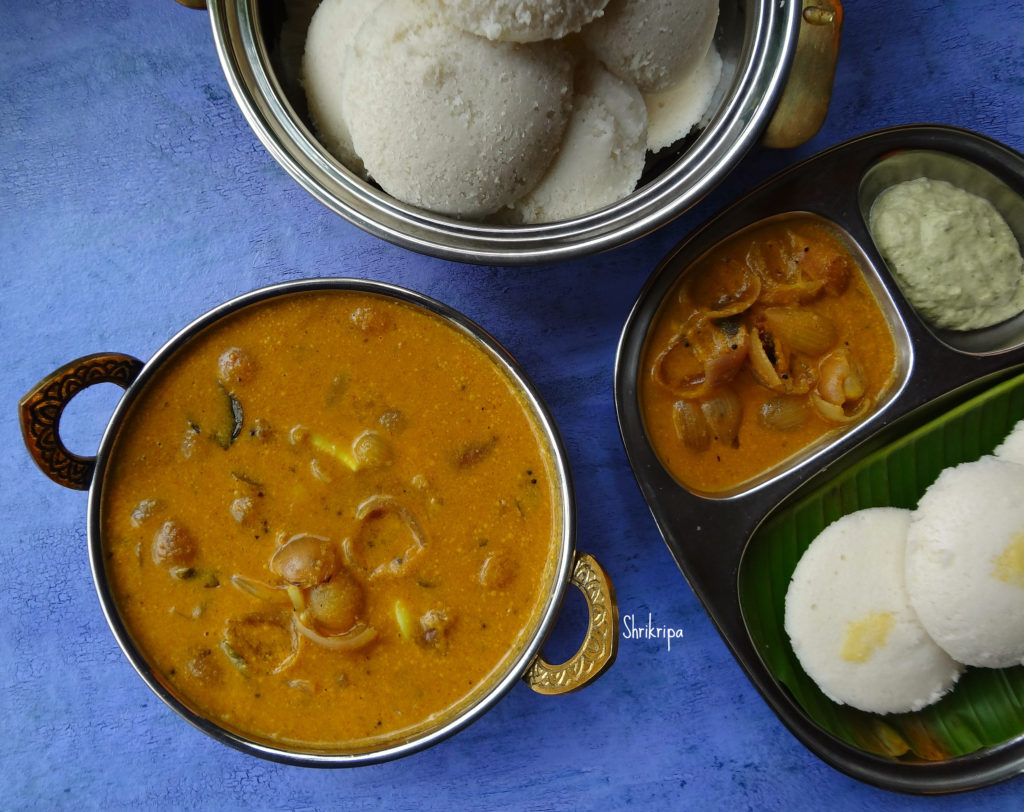
As I said in earlier post of Tamilnadu style Idli, Kulambu is a very good side dish for idli, if you like sweet and sour kind of taste. We all enjoyed this flavourful curry with idli and I had promised to post this recipe in my earlier post. Basically, it is a simple curry with tamarind base, which has shallots and garlic as the main veggies in it. Once again, all thanks to Senguttuvan Subburathina and his wife, Jayanthi Senguttuvan for this amazing recipe. I have made some changes to suit our requirement.

pic main

Ingredient:

Peeled garlic – 20

Shallots /sambar onions – 20

Tamarind – small lemon size.

Salt

Jaggery – as needed.

Red chilli powder – 1 tea spoon

Sambar powder – 1 tea spoon

Hing – pea size

Turmeric – ½ tea spoon

Coconut – ¼ cup

Rice flour – 1 tea spoon

Seasoning: Gingelly oil – 1 tea spoon, refined oil – 1 tea spoon, fenugreek seeds – ½ tea spoon, mustard – 1 tea spoon, curry leaves – 1 spring.

Method:

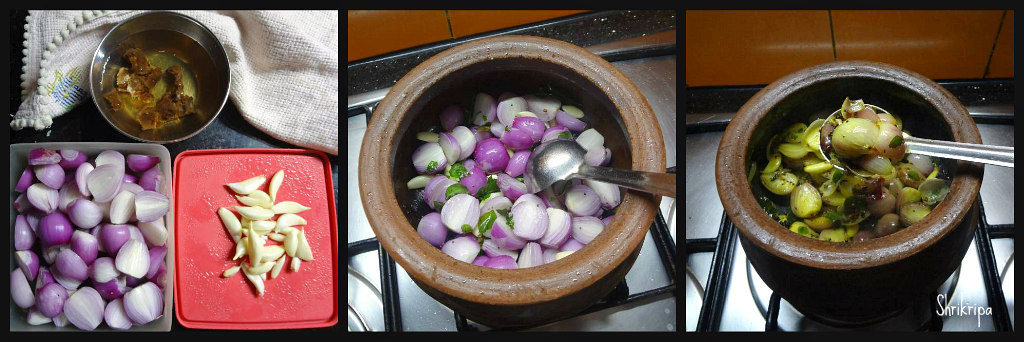
-Remove outer skin of shallots and garlic. If shallots are big, make couple of pieces.

-Soak tamarind in one cup of water.

-Take a vessel, do seasoning by pouring both the oils, when it is hot, add fenugreek, when it is light brown, add mustard. When it crackles, add curry leaves.

Ribbet collage 1

-Add garlic and shallots and fry for a while. Meanwhile add turmeric, hing and toss for a while.

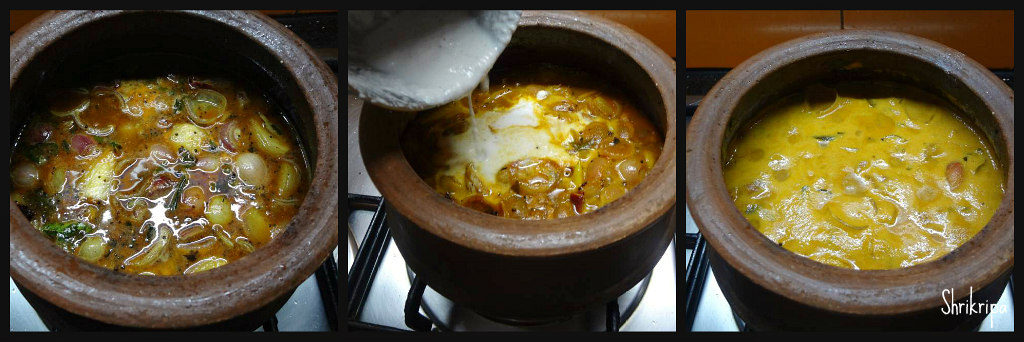
-Add tamarind water, red chilli powder, sambar powder, salt, jaggery and cook onions and garlic.

-Grind coconut and rice flour into smooth paste and add the paste to cooked onion.

Ribbet collage 2

-Adjust the consistency by adding some water, check the seasoning like salt, sweet and hot. If needed add and adjust the taste.

– Boil this for 5 minutes, so that rice flour and coconut paste also cooks and becomes little thick.

-When it is ready, enjoy with hot idlies.

Note:

-Original recipe is a little hot, hence I reduced the quantity of chilli and sambar powder.

-Usage of gingelly oil gives the authentic taste. If you are not accustomed to its taste, mix half of any vegetable oil.

-Usage of coconut paste is optional.

-We like little thick texture Kolumbu, so I added rice flour as well. It gives a little creamy texture and is also tasty.


Mint- Coconut chutney:

In Mangalore, we have one very famous ice cream parlour called Pabba’s and they serve not only ice creams, but also really tasty snacks as well. Beauty of the Cutlet that they serve is mainly because of this coconut chutney which goes really well with their mixed vegetable cutlet, this recipe which I have posted earlier.

chutney3

Ingredients:

Coconut – 1 cup

Green chillies – 3to 4

Pudina/mint leaves – little

Coriander leaves – little

Garlic – 4 to 5 cloves

Salt

Oil – 1 table spoon

Tamarind – peanut size

Seasoning: – oil – 1 teaspoon, mustard – ½ Tsp, curry leaves – 1spring.

Method:

-Wash; chop Pudina, coriander and chillies.

-Take one small kadai; fry these chopped items and garlic, by putting a little oil until it wilts, put grated coconut and fry for 2 minutes. Then switch off the gas.

-When it cools down, add tamarind, salt and grind this into a smooth paste by putting required amount of water.

-If you want, add seasoning with mustard and curry leaves.

cutlet10

-Serve this with mix vegetable cutlet and enjoy your snack.

Chana Saarupkari /Chickpea Rasam:

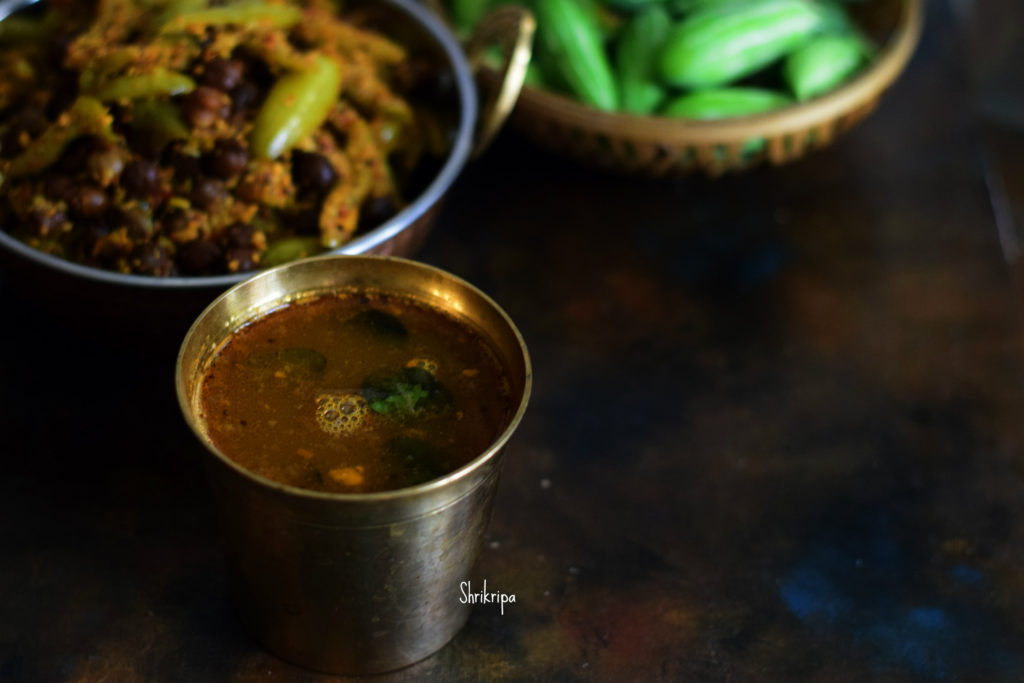
In last post we did chana and ivy gourd dry curry and I promised you to post the Rasam which utilizes the drained water of cooked chana or chick pea. This is very nutritious and tasty too.

What we need-

Ingredient:

Drained water of cooked chickpea – whatever you get.

Cooked tor dal – 1/4 cup 

Green chillies -2

Salt

Jaggery – 1/2  tsp

Hing – ¼ tsp

Seasoning:

Coconut oil – 1 tbl sp

Mustard – 1tsp

Red chilli – 1

Curry leaves – 1 spring

Crushed garlic – 6

Method:

-Drain water from the cooked chana or chick pea while making any curries.

-Boil this drained water by adding 1 cup of water, cooked toor dal, salt (if needed) ,jaggery, hing, green chillies.

-Cook until green chillies are cooked and flavour  is released to water.

-Add seasoning by heating coconut oil. When it is hot, add mustard. When it splutters add  red chilli, curry leaves, crushed garlic.

-Fry till garlics are brown and add this seasoning to Rasam.

Enjoy this Rasam with hot rice and any side dishes, like chickpea dry curry and papad.


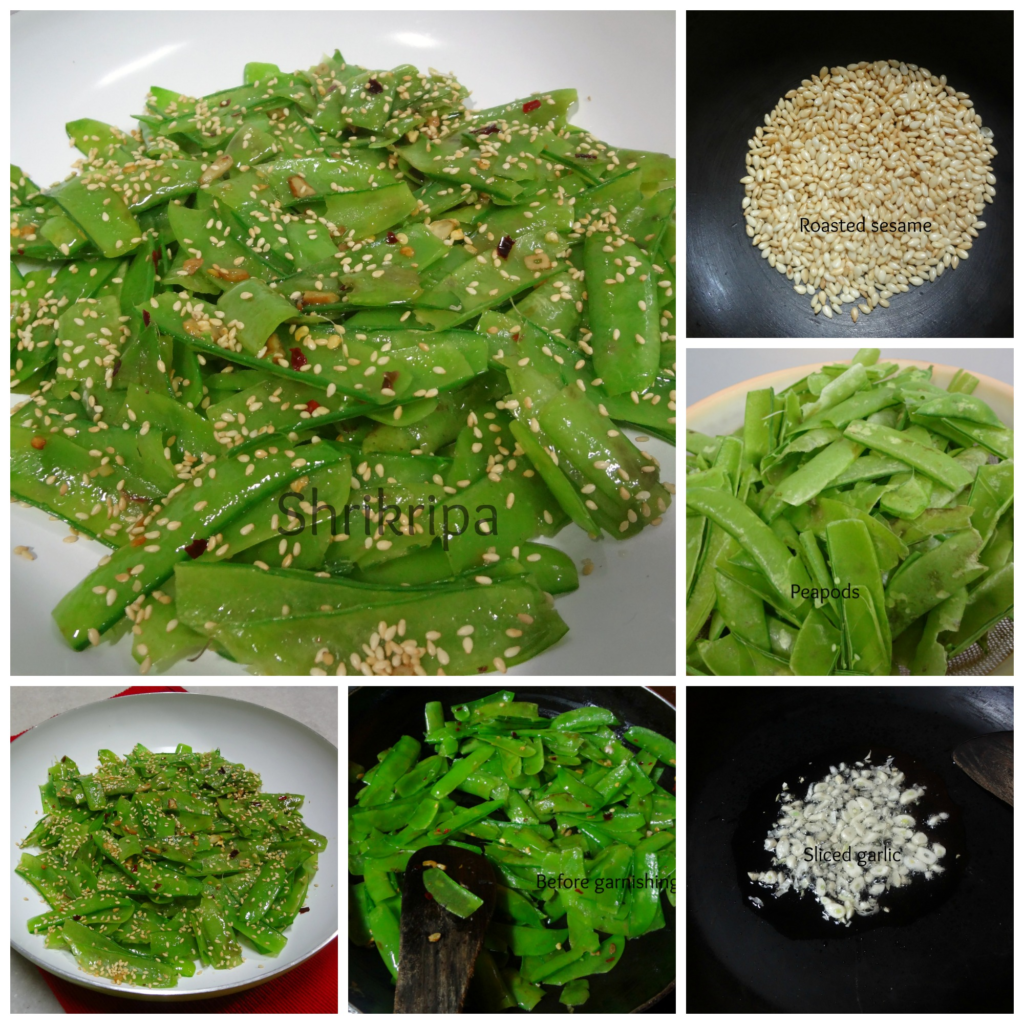
Pea pod salad:

After peapod pakoda, I wanted to try some more with peapod. Peapods are so rich in flavour as well as taste. So, I tried a salad and it turned out so tasty and healthy. Here’s the recipe.

collage-1

Ingredients:

Peapods –as required

Olive oil – 1 to 2 teaspoon

Garlic – 7 -8 flakes

Salt

Red chilli flakes – ½ – 1 teaspoon

White sesame – 1 teaspoon

Method:

  • Separate fresh and green peels (pods) while opening, to collect green peas.
  • After this, peel off the inner membrane (which will not cook and it is fibrous too)
  • How to remove inner membrane: If you want to see a pictorial guide, click here
  • You basically have to take one of the ends, fold in and pinch inwards, slide your thumb beneath and remove the glossy membrane and separate. If membrane breaks in-between, try from the other side.
  • Discard inner membrane and use outer green cover to make salad.
  • Wash these peels and drain, keep aside.
  • Slice garlic and keep aside.
  • Dry roast sesame and keep aside.

collage

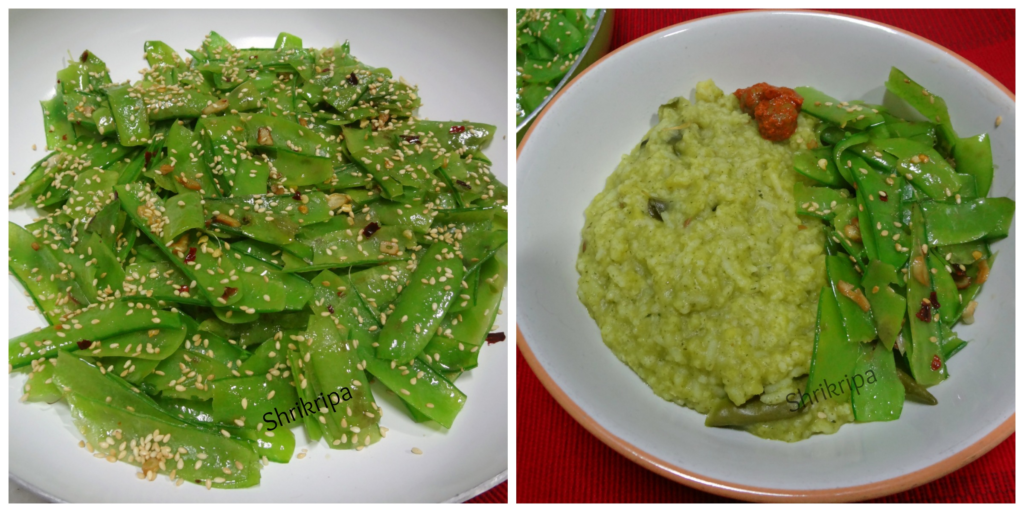
  • Take one tawa, add oil .When oil becomes hot, add garlic slices and fry until it is brown.
  • Add in washed and drained peapods, fry for a while. Sprinkle salt and red chilli flakes.
  • Garnish with toasted sesame seeds and serve.
  • I served this with Spinach Khichdi. Click here to see the recipe.