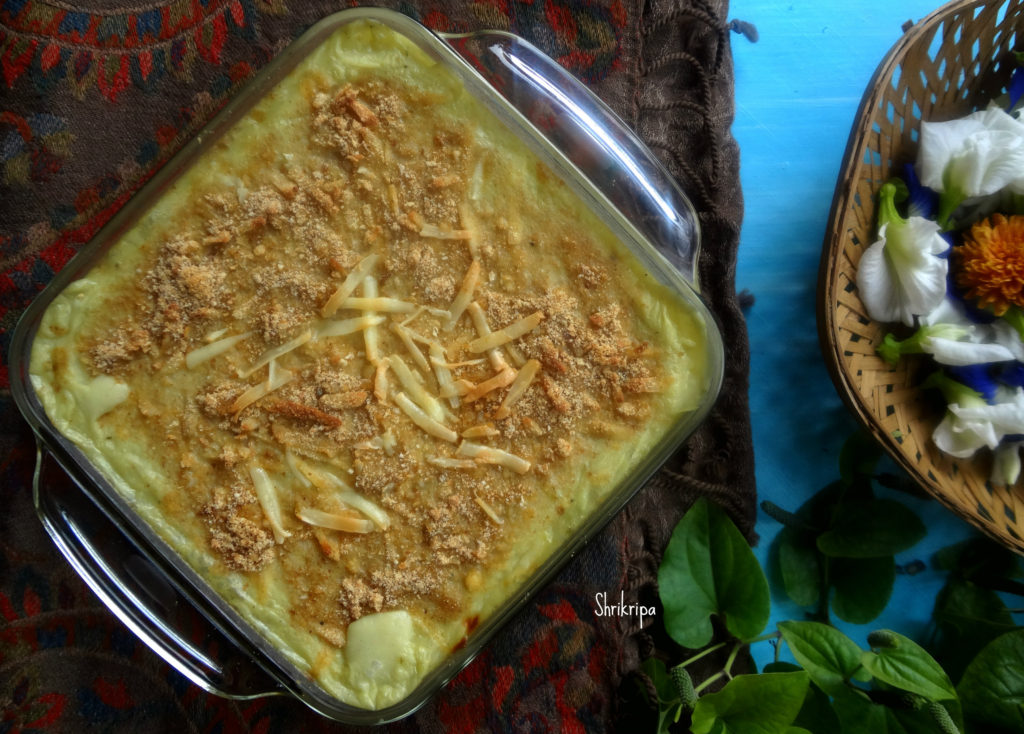
Chayote Squash Gratin :

Chayote squash is nothing but our Seema badane/ chow chow of gourd family.

Au gratin or gratini is a classic French side dish .Which is creamy, cheese filled topped with breadcrumbs and end product will be crusty, brown topped . We just enjoy this as it is or with simple toast.  Usually gratin/ au gratin will be white sauce which is mixed with grated cheese and topped with breadcrumbs. When I saw the usage of squash in one of the recipes of Lisa, I couldn’t resist and tried her super simple recipe. I liked the idea of usage of squash to enhance the nutritional value. It is very apt for gloomy weather to cheer you up as well as to sooth.

Ingredients:

Chow Chow – 2

Onion – 1 (chopped)

Garlic – 2 Or use garlic salt.

Butter – 1 to 2 tablespoons

Whole wheat flour – 2 tablespoons

Milk – 1 to 2 cups

Salt  (if you use garlic salt, don’t use it)

Seasoning of your choice

Grated cheese

Breadcrumbs

Method:

– First, cook Chow Chow in a microwave for 3 min, cool, make a puree and keep aside.

– Take one pan, heat butter, put chopped onion (garlic) and fry.

-Add whole wheat flour fry for a while and add milk, puree ,garlic salt ,choice of seasoning. I have used Hot Jalapeno seasoning. And boil.

-When it is ready, add grated cheese and mix everything. Now sauce is ready to bake.

-Pour this sauce into casserole pot, spread grated cheese, breadcrumbs and bake in a pre-heated oven at  180 °C for 30 minutes or until cheese and crumbs becomes bubbly and light brown.

-Serve as it is or with any kind of bread toast or garlic bread.

Red velvet Cake :

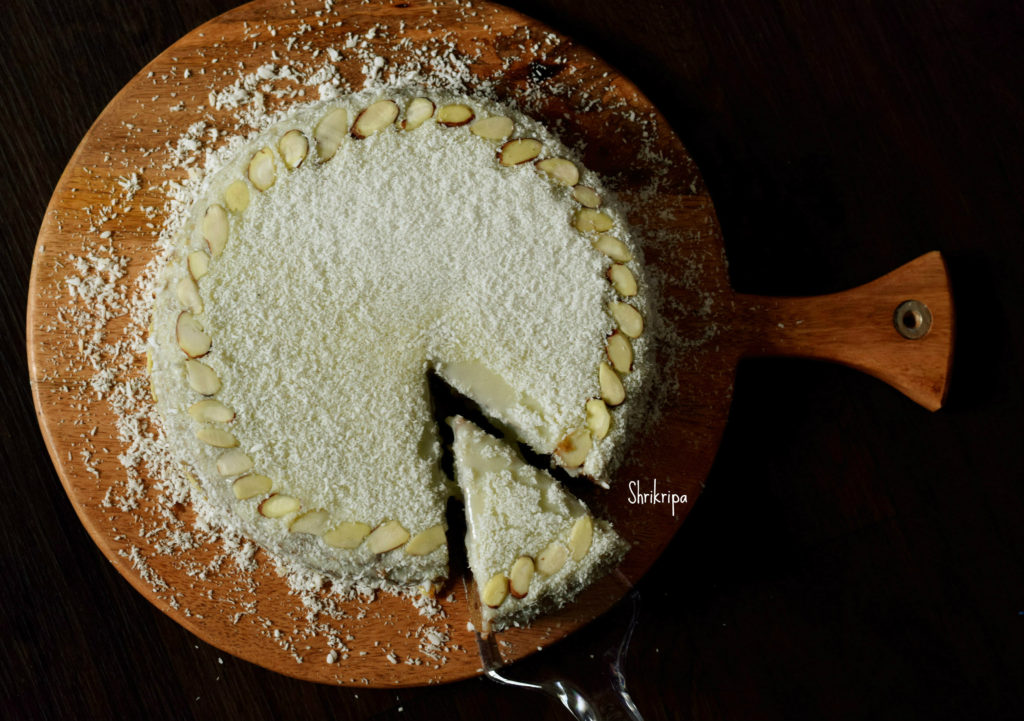
Hey, this is Anushree here and this is my first guest post on my mom’s blog! I have been home from college for a few days now and thought I’d make something special as Christmas is coming up and my sister is coming back from college in 2 days! So, I decided to make a Red velvet cake.

Yes! You heard it right. It is not deep red in colour but filled with healthy ingredients. It is No Artificial colour and No All-purpose flour recipe. And to pull this off, I obviously needed some assistance from an expert in healthy cooking, who happens to be my mom, so that worked out great for me!

In olden days, Red velvet cake was made with All-purpose flour and Beets. Here I have used Mixed healthy flour ( Amaranth , Red rice and Almond flour) with beetroot. So, it is not a white cake with red dye.

While frosting, instead of new age cream cheese, I have opted for an original Ermine icing , which is also known as boiled milk frosting. Here, instead of All-purpose flour I have used mixture of  Almond flour and Arrowroot powder with milk to attain a creamy and flowy texture.

Here is my recipe- Fits for 9” spring foam pan.
Ingredient:

For the Cake:

Beetroot – 1 (small,  to get 3 tablespoons of puree)

Amaranth flour – 1cup

Brown rice flour – 1cup

Almond flour – ½ cup

Cocoa powder – 1 tablespoon

Cooking soda – 1 tsp

Salt – ¼ tsp

Eggs – 2

Brown Sugar – 1 ½ cup

Butter – 200 grams

Vanilla – 1 tsp

Buttermilk – 1 ¼ cup

For the Frosting:

Milk – 1 cup

Almond flour – 5 tablespoons

Arrowroot powder – 1 tablespoon

Butter – 50 grams

Sugar – ½ cup

Vanilla – 1 tsp

Desiccated coconut – as needed

Slivered Almonds – As needed

Method:

To Bake the cake:

-Pre heat oven for 180° C . Line the baking tray and keep it ready.

-Cook Beetroot in a pressure pan for 2 to 3 whistles, peel the skin and grate.

-Measure every ingredient and keep it ready. Melt butter and keep aside.

-Take a mixer jar, make a paste of grated beet with ¼ cup of buttermilk ,which we have kept for the batter preparation.

-Take one glass bowl, beat eggs, then sugar, melted butter ,pureed beetroot, vanilla and lastly one cup of buttermilk.

-Beat everything until it is well mixed and keep aside.

-Now take one more bowl, put all the dry ingredients, all the three flours, cocoa powder, salt and cooking soda. Sieve couple of times or dry whisk and keep it ready.

–Pour the previously prepared wet mixture to dry ingredients and fold the batter by using any spatula.

-Pour the batter in lined baking tray and keep this for baking for 40 -50  minutes or until done.

-Before removing, check with a knife by inserting, in the baked cake. It should come out clean.

-Cool the cake completely before doing the frosting part.

Method for Frosting:

-Take milk ,Almond flour and Arrowroot powder in a saucepan. Boil the mixture until it is cooks and becomes creamy.

-Switch off the flame, add in butter ,sugar and Vanilla, mix well. Cool the mixture and keep it in the fridge to cool further making it more solid. ( I have not kept in the fridge)

-Now, slice the cake, make a 2-equal slice, Apply the frosting on first layer and cover it with the second slice.

-Now pour frosting on the top, as well as apply at the sides as well. Take desiccated coconut and dust at the top as well as at the sides.

-Decorate the cake with slivered almonds and serve and enjoy with the family <3

Note: 

For Egg less version, please use any egg replacer or 

Flax gel:The basic ratio is 2 ½ tsp of flax seed powder and three tablespoons of  hot water  and then you simply whisk in the mixture until it becomes gelatinous  to replace one egg.
Cranberry and White chocolate cookies:

It is an easy, eggless, one bowl recipe. No baking powder or soda in it. To increase the protein quotient, I have added little moong ( green gram dal) flour as well. These white chocolate cranberry soft, chewy , flavourful cookies are so simple and so addictive! 😀

Cranberries and white chocolate make the best Christmas coloured cookie. You can see one more green gram flour/ gluten free cookie over here .

Ingredients:

All-purpose flour – 3/4cup

Green gram/ Moong dal flour – ¼ cup

Butter – 100 grams

Sugar – ½ cup (powdered)

Dried cranberry – ¼ cup

White chocolate chips – ¼ cup

Method:

-Mix All purpose flour and moong dal flour and keep it ready.

-Beat butter and sugar until fluffy and soft, either by using hand or food processor.

-Now add flour and mix until u gets uniform mass. Add in white chocolate chips and dried cranberries and make a dough.

-Now take one cling film sheet and keep this dough over it, on a flat surface and make squarish or round log, maintain uniform shape and cover with wrapping. Keep it under refrigeration for an hour.

-Now take your baking tray and line with a butter paper.

-After one hour, remove this dough from the fridge and unwrap the Clingfilm cover, make slices of ½” thickness and arrange these pieces in a lined baking tray.

-Bake in a pre-heated oven at 170°C for 14 to 18 minutes.

-Cool this on a wire rack and store this in an airtight container.

-My family just loved it and hope you also like it as much as we did.

Whole wheat Jaggery Tea Cake:

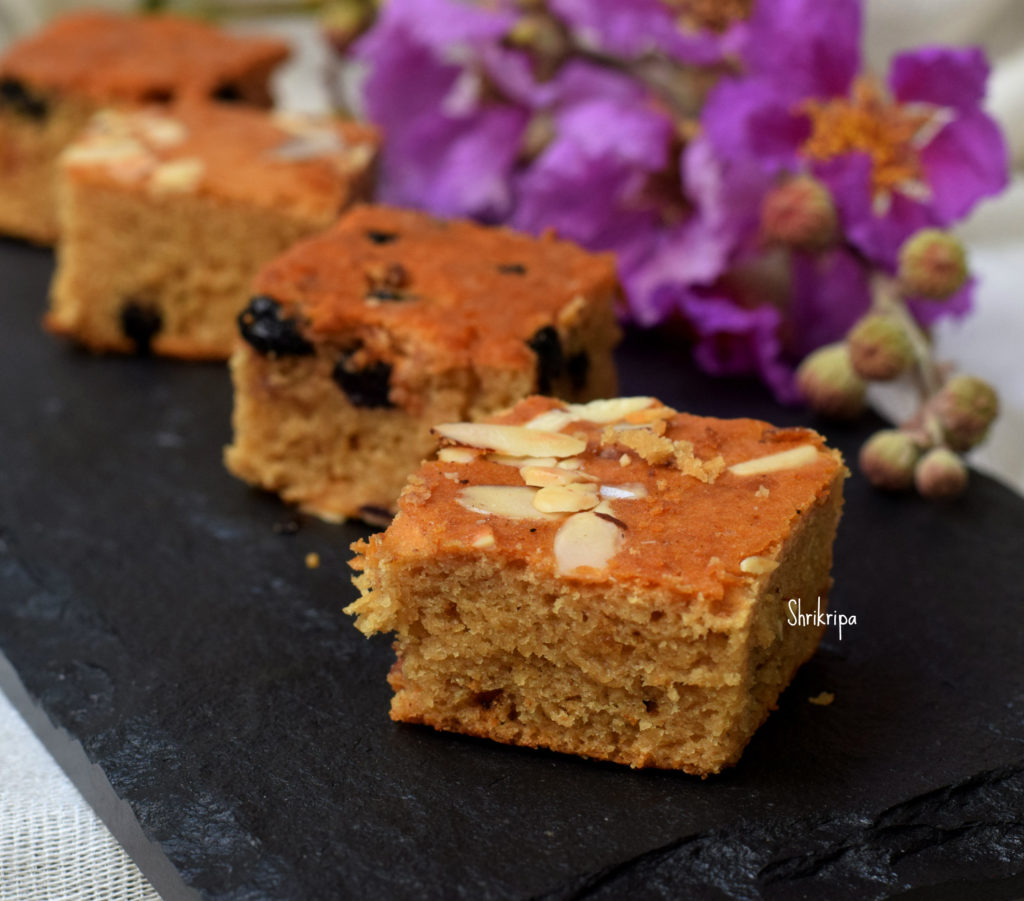
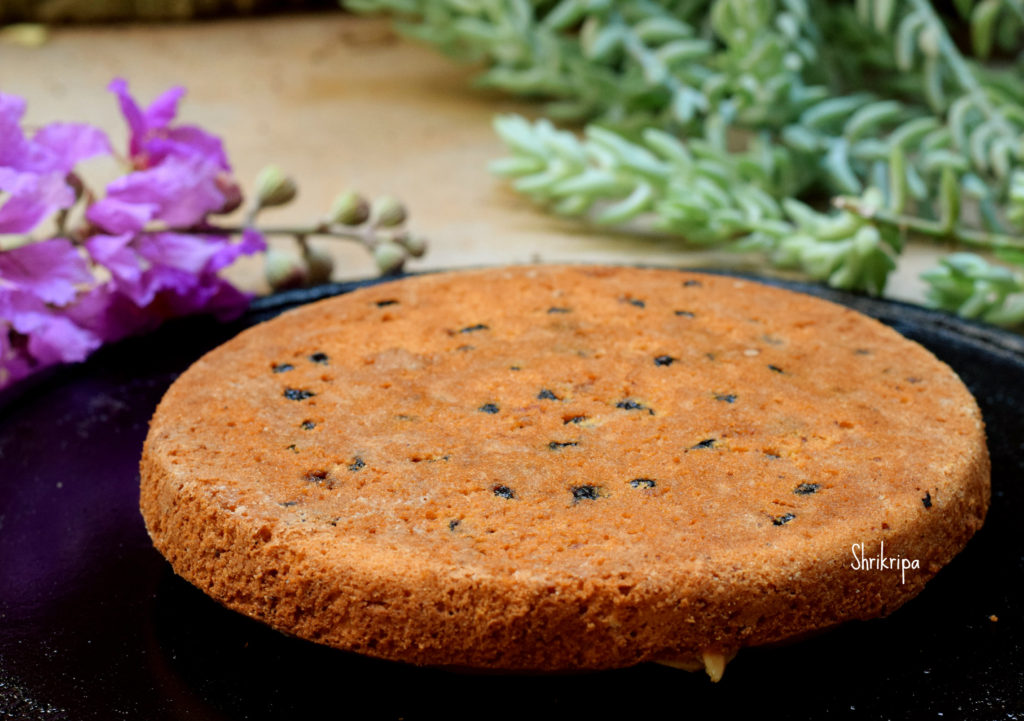
It is a “Hot milk cake” which I have tried by adding Whole wheat, Jaggery powder, dried blackberries (optional) with added cardamom flavour. It turned out to be really soft, mild in sweet and was perfect with a hot cup of coffee or tea. It is a perfect choice for kids snack boxes or as a healthy eggless bake.

How I made-

Ingredients:

Whole wheat flour – 1 cup

Cardamom powder – ½ tsp

Baking powder – 1 tsp

Salt – ¼ tsp

Dried Black currant – 2 tablespoons (optional)

Milk – ½ litre

Jaggery powder – ¾ to 1 cup ( I have added ¾ cup)

Butter – 50 grams

Method:

-Heat milk and reduce into almost half by boiling it in a low flame.

-When it is done, remove from the flame, add in butter.

-When butter melts, add in jaggery powder and mix thoroughly and keep aside. It is our wet mixture.

-Now, take one dry bowl, mix all the dry ingredients- whole wheat flour, salt, baking powder, cardamom powder, and dry whisk by using whisker or sieve couple of times.

-To this dry flour, add in dried black berries and mix. Add this dry ingredient to wet mixture and fold everything well and bake in a pre-heated oven at 180°C for 30 to 40 minutes or until done.


Spinach, Corn and Cheese Sandwich:

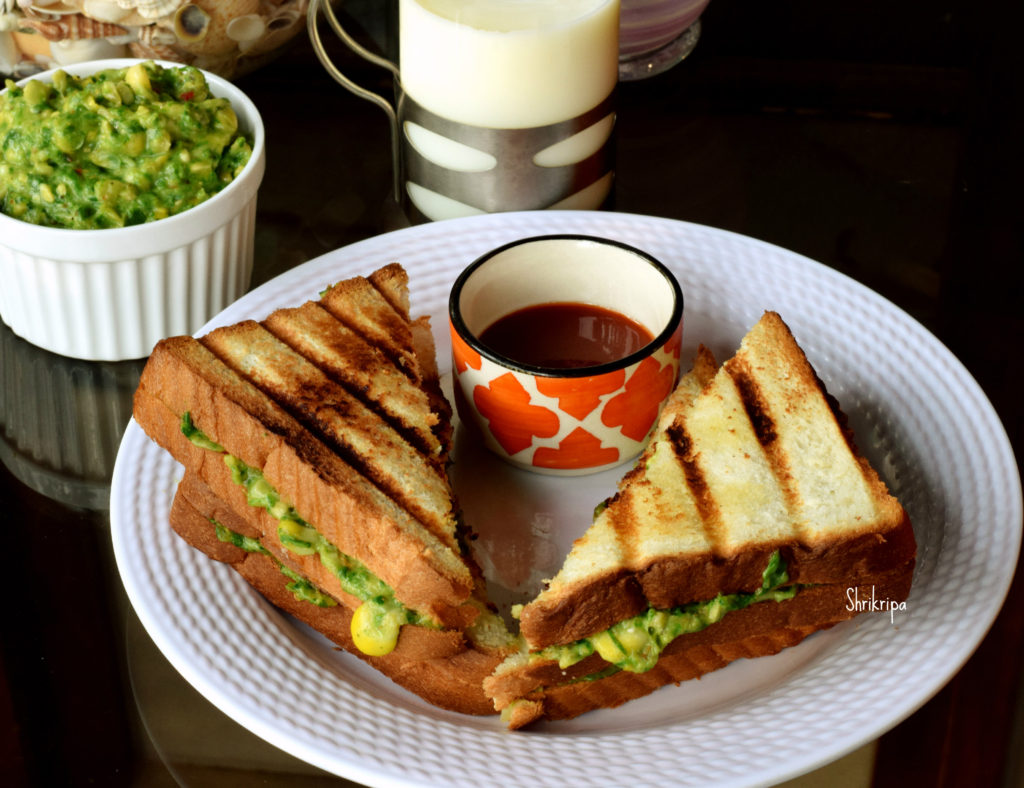
When I hear the name of spinach and corn sandwich or while making, my memory normally goes back in time. We got introduced to this sandwich in Indigo flight long ago. My daughters used to just love the sight of it and used to enjoy their flight travel, mainly because of spinach and corn sandwich. Because of their fondness towards the sandwich, I used to make this at home and today once again I made it for them and decided to write, my version of recipe.

Ingredients:

Bread slices

Cooked corn – 1 cup

Bunch of spinach – washed and chopped

Whole wheat flour – 2 table spoons

Milk – 1 cup

Butter – 1 table spoon

Chopped garlic – 4

Salt

Pizza Seasoning or oregano – 1 tsp

Chilli flakes – 1 tsp

Grated cheese – as needed

Method:

-Dry roast whole wheat flour, take out, mix with hot milk and make a paste and keep aside.

-In the same kadai, add butter, toss garlic, chopped spinach and cook.

-Add in roughly churned cooked corn, flour added milk paste, boil.


– When mixture becomes thick, add seasoning of your choice, grated cheese and mix.

-It is our sandwich filling.

-For sandwich preparation, apply this mixture, over one slice, cover with another slice of bread.

-Apply butter on the outer surface and place it in a sandwich maker and roast.

-Enjoy with ketch up.


Lemon Bread Roll:

Homemade lemon curd is pretty much going with anything. It is perfect for cookies, tarts, bread or bun, or topping with any dessert.

These sweet lemon rolls are packed with delicious flavours with a lemony tinge that pairs well with tea or coffee as a snack option.

If you are a lemon fan like me, this is for you. It is an alternative to the cinnamon roll, a lemon roll!!

The recipe which I follow is easy to make.

To make 8- 10 rolls

For the Dough:

Milk – 1 cup ( I usually take skimmed milk)

Butter – ¼ cup ( 50 grams)

Sugar – ¼ cup

Active dry yeast – ¾  tsp

Flour – 2 ½ cup ( I took a mixture of oats flour + brown rice flour + whole wheat flour, and All-purpose little flour )

Baking powder – ½ tsp

Salt – 1 tsp

Lemon cream cheese filling:

cream cheese or paneer – 1/3 cup

sugar – 2 tbl spoons

hung curd – 2 tbl spoons

fresh lemon juice – 1tsp

all-purpose flour /fine semolina – 2 tbl spoons

homemade lemon curd – 1/4 cup

Method:

First: Bloom the yeast:  In a large glass bowl, add warm milk, sugar, melted butter, and mix. Sprinkle yeast, stir well, close the lid, set aside for 10 minutes or until yeast starts to bloom. (Milk should barely be warm while touching. Otherwise, the yeast would not bloom; instead, it will die)

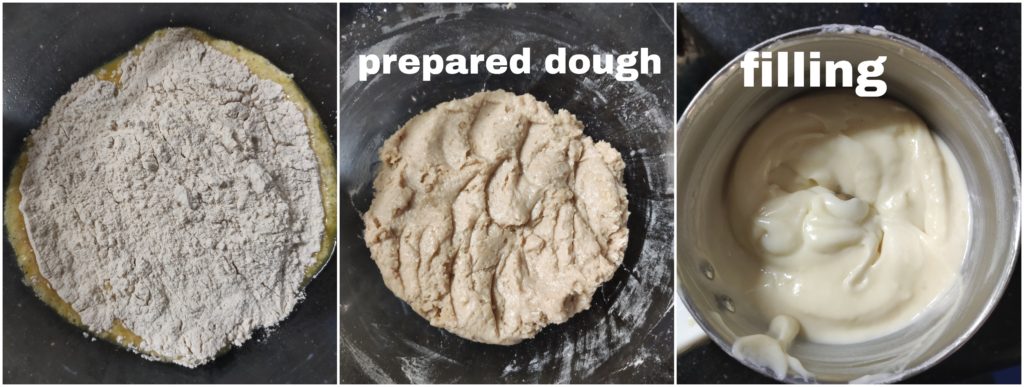
Second: Prepare a dough: Take whatever flour you are using, combine everything, add to the bloomed yeast and milk mixture. Fold everything together, keep it covered, let it rise in a warm place for another one hr or more until it nearly doubled in size.

Third: Prepare the filling: In a small mixer jar, at first, churn paneer pieces, sugar, hung curd, then add the remaining ingredients and, whip once or twice and keep it ready.

Line your baking tray or grease your muffin tray and keep it ready.

Fourth: Kneading the dough for good 10 minutes: Dust the clean kitchen counter with the flour, Remove the dough from the bowl, start kneading. If needed, add little flour, and adjust the consistency. Until dough does not stick to your hand or surface. Now start kneading the dough by hand until it reaches a silky smooth texture and springs back when poked.

Fifth: Now it is ready to Roll: Roll the dough into a large rectangle using the hand and the roller. It should be around ½ inch in thickness, roughly 12” by 16” long. Fix the shape of all the corners.

Sixth: Spreading: Drop the filling here and there over the rectangle, spread evenly using a spatula or spoon.

Seventh: Make a log: Start rolling from one end ( longest side); roll up the dough slowly by sealing correctly and tightly. At the other end, seal the edge correctly, place seam side down.

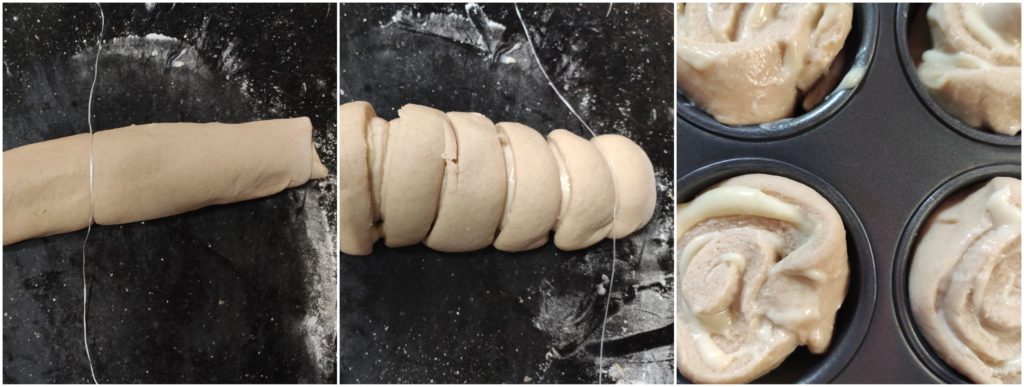
Eighth: Cutting: Cut the log into even pieces using dental floss, twine, or knife. Take a long enough string, keep it at the bottom of the rolled log and pull upwards to get uniform pieces. Place all these pieces in a baking tray. Close the tray with the kitchen towel and leave it to rise. ( mine took hardly 5 minutes)

Ninth: Baking: Preheat the oven to 180°C; if it has risen/ second proof, apply the milk wash and keep it in the pre-heated range. ( I have baked in a mid rack of my oven ) It took me around 35 minutes. Keep an eye after 30 minutes, and when its upper surface turns brown, remove it from the oven.

After taking it out, apply butter over hot rolls to retain moisture. After it cools down, break one by one and serve. I have not used any glaze or cream cheese. It was delicious as it is.


Lemon thumb print cookies:

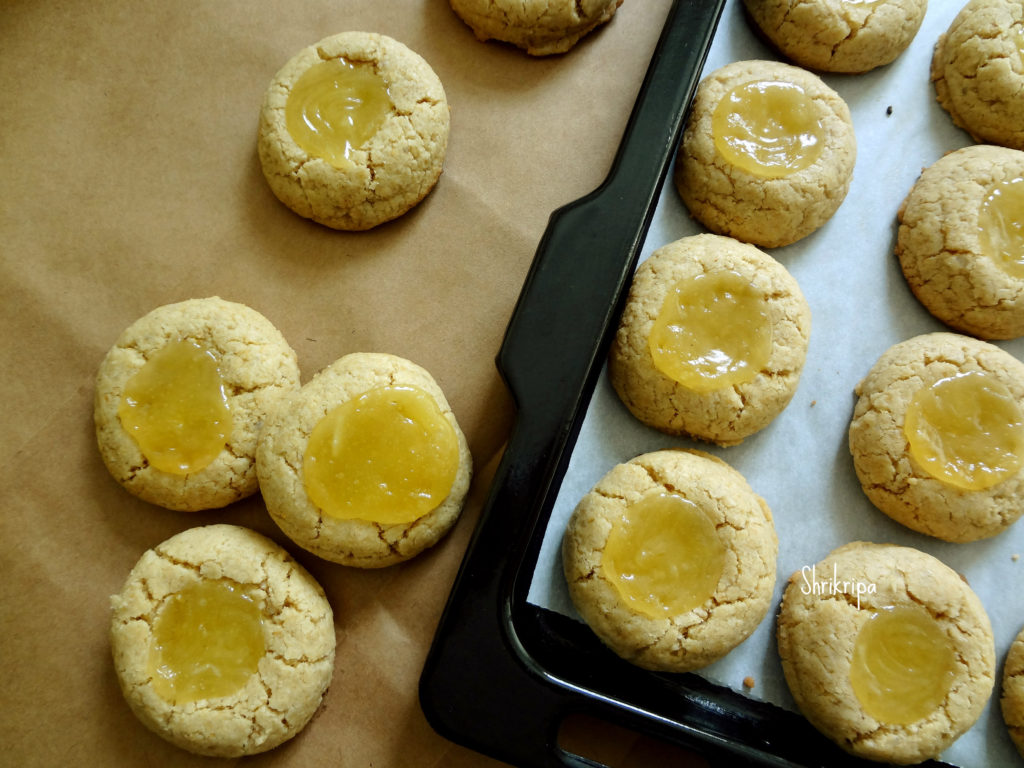
When I have homemade lemon curd, I use it in my baking and enjoy the tangy taste. Usually I make lemon thumb print cookies by using All-purpose flour and now a days, due to my healthy baking concept wanted to use healthy flour. I thought of using my Oats cookies recipe as a base and proceeded. It worked out and I am sharing the procedure of thumb print cookies using lemon curd.  I have already shared my home-made lemon curd recipe as well as oats cookies recipe separately in my blog. Link will be open, if you enter the highlighted words.

Now we will see how I made this.

Ingredients:

Whole wheat flour -1 cup

Powdered oats – 1 cup

Sugar -1 cup

Baking soda -1 tsp.

Vanilla essence – 1 tsp.

Ghee /Clarified butter – ½ cup

Milk – 2 table sp to 3 tbl sp (to bind)

Lemon curd to fill the indent.

Method:

-In a mixer jar, powder oats, measure and keep aside.

-powder sugar and keep aside.

-Now take one mixing bowl, take all the dry ingredients like whole wheat flour, oats powder, sugar powder, baking soda, vanilla essence and mix it thoroughly by using hand ,so that flavor will spread uniformly.                

-Now mix in melted ghee and bind it together. If it is a little dry, add one to two table spoons of milk, if it binds and holds a shape well and good. Otherwise add one more table spoon of milk and make a ball like Chapati dough.               

-Now pre-heat your oven in 170°C. Line the baking tray with butter paper.

-Line your cookie tray with butter paper or aluminium foil and keep it ready.

-Take one small cookie scoop or a Table spoon to shape the dough into semi-circle balls and place at a lined tray.

-Make an indent at the centre, by pressing your index finger.

-Fill the indent with lemon curd.

-Bake 12 to 15 minutes or until base becomes light brown in colour and seeing some cracks around the edges.                  

-Now don’t disturb these beauties and allow them to cool completely. Then you can store this in an airtight container.


DATE CAKE:

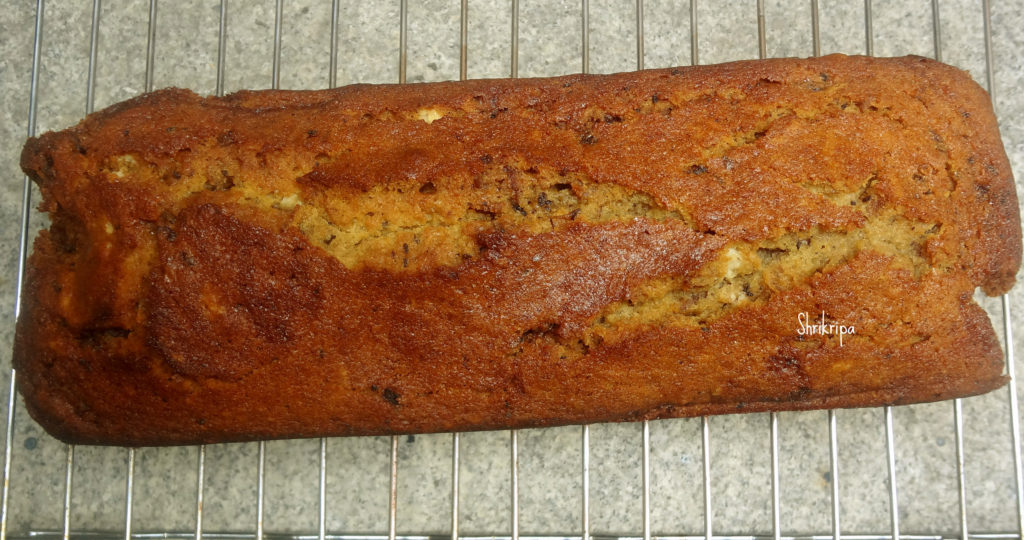
I must say, this cake is my Signature dish and very close to my heart. When I was trying my hand in baking, I experienced a lot of failures, but this recipe has uplifted my faith in trying and achieving my goal.

Whenever I made this, everyone liked it for its soft, moist texture. As a little treat to help you relax and settle into Christmas mood, I will share my very easy Date cake recipe with very minimal ingredients. If anyone wants to try their hand at baking, this is just the recipe for you. Just go ahead and try this, you will never regret it.

Now we will see how to make this,

Ingredients:

Dates – 1 cup

Butter /oil – 1 cup

Sugar – 1 cup

All purpose flour – 2 cups (you can mix whole wheat and all purpose too)

Eggs –  2 (beaten)

Water – 1 cup

Cooking soda – 1 tsp or little less.

Method:

– De-seed the dates and chop it either by using food processor or knife, keep aside.

-Grease the baking tray (you can use bread tin as well). Line this with butter paper, keep it ready.

– Take water in a small bowl and boil. When it starts boiling switch off the gas, add chopped dates, butter, sugar, and cooking soda to boiled water and keep aside at least for 20 min.

– After it cools, add beaten eggs and mix nicely.                          

-Now fold in All-purpose flour, mix gently and pour this batter to greased and lined baking vessel.                                              

-Bake this in a pre- heated oven for 35 -40 min or until done at 180 C.

-If you want to check its doneness, use tooth pick or knife. Insert this, if it comes out clean, remove the tin, keep it outside.

-After some time, remove butter paper and cool further.                  

-When it reaches room temperature, you can slice it or cut according to your wish and enjoy with cup of coffee or tea.

Note: For the Eggless Version, use 1/2 cup of flax gel and you can refer my earlier post for the preparation.


Peek a Boo “Baked Gulab Jamun cheese cake”:

Long ago, I mean in and around 2015 I tried the No bake cheese cake with hidden Jamun inside on the event of my hubby’s birthday. I was wondering what to make, and I thought, why not a mix of what he likes? He loves Badam milk and Gulab jamun; so, I thought of combining these two flavours and made a jamun cheese cake and he did wonder about the flavour. The upper layer of almond milk flavour went well with the Gulab jamun and the cheese cake was a very big hit! At that time, my recipes used to publish on Readoo and you can see it over here.

Today, we are celebrating our 20th year of marriage as well as 2nd year of my blogging. So, I thought of improvising my idea and went ahead with the same flavour but baked version as well as non-baked top layer.

To mark the occasion, I made my signature cheese cake flavour with a little additional twist and here is the recipe-

Ingredients:

For the first layer (Crust):

Choice of any crackers biscuits – 1 ½ cup to 2 cups (powdered)

Sugar – 5 to 6 table spoons

Melted butter – 1/3 cup

Gulab Jamuns – Dried (sugar syrup removed)

Method:

-Pre- heat oven at 165°C

-Combine all the ingredients from biscuits powder, sugar and melted butter. It becomes like a wet crumb.

-Take a 9 to 10” spring-form baking dish, press this crumb at the base by using any one of your measuring cups.

-Crumb should be slightly above the base at the edges.

-Before heading towards the second layer, arrange all the Gulab jamuns according to your wish.

For the second layer (Filling):

Cream cheese – 3 tubs (238 grams or 250 grams)

Sugar – 1 ½ cup

Eggs – 4 (separated)

Lemon juice – 1 table spoon

Vanilla extract – 1 tea spoon

Method:

-Mix together Cream cheese, sugar, 4 egg yolks, lemon juice and vanilla.

-In another bowl, beat 4 egg whites until frothy and little stiff as well as creamy.

-Fold egg white with cream cheese and pour the mixture over the first layer/Gulab jamun layer.

-Bake for 45 minutes to 1 hour or until done, in a preheated oven at 165°C.

-When it is done, you will find a raised dome like a structure and 2 to 3 slits at the centre. After switching off the oven, leave the cake inside the oven at least for an hour with the oven door closed.

-After an hour, remove it and chill in the refrigerator by enclosing it in cling wrap, if you are not adding the 3rd layer immediately or proceed for a third layer.

For the 3rd Layer (Glaze):

Milk – 1 ¼ cup

-Veg gelatin -1 tsp

Badam milk – 4 tsps

Custard powder – 1 tsp (vanilla flavour)

Saffron strands – generous amount

Method:

-Dissolve gelatin in ¼ cup of milk.

-Dissolve custard powder, Badam milk powder and add saffron to one cup of milk and start heating.

-When it is hot, add in gelatin added milk and boil for 2 minutes.

-Pour the mixture over the ready cooled cake. When it is set and becomes cool, cover the cling wrap and keep it a refrigerator to cool.

-It needs at least an overnight or 8 hours of cooling. I kept it for 20 hours. It tasted as I was expecting and loved the outcome and it surely made my special day a memorable one.


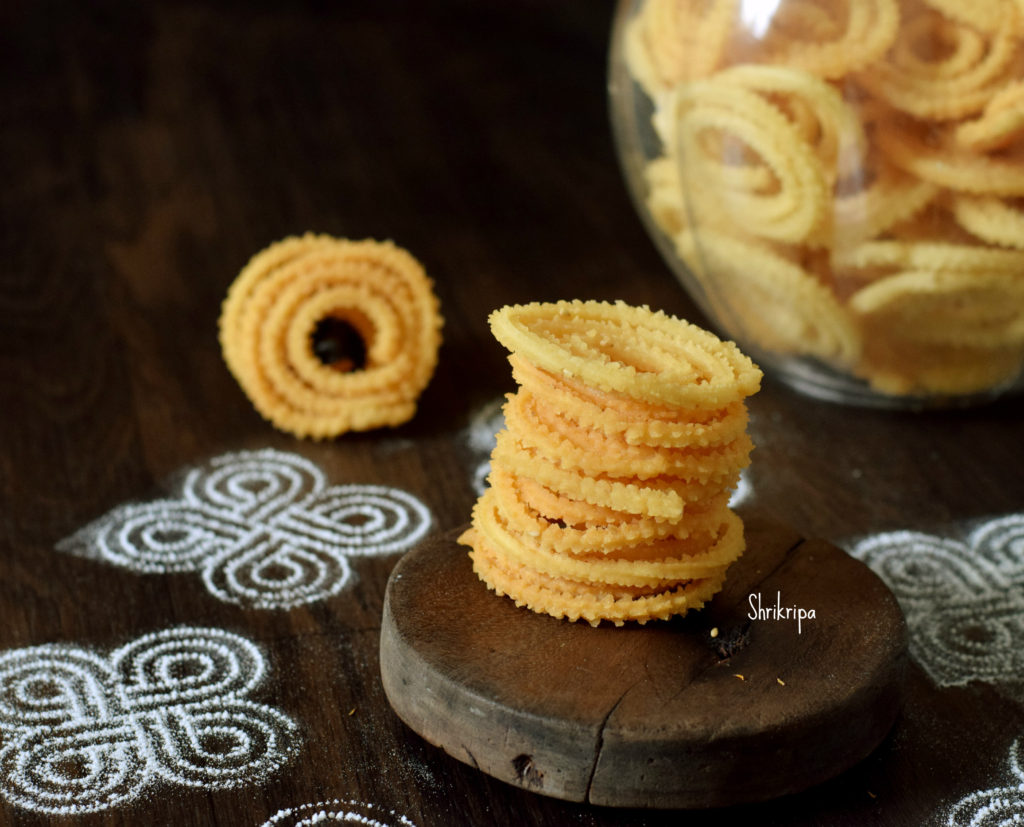
Chakkuli / Chakli:( Traditional Way)

Chakli is a default and very important savory in Ganesh Chaturthi offerings. This chakli is the one, I have learnt from my close family friend which she prepares during the Krishnashtami / Janmashtami festival which is very important in their Iyengari community.

She usually prepares Chakkuli flour little ahead of the festival. This can be stored in room temperature for up to 6 months. If ready chakli flour is in hand, you can make these super soft butter chaklis in no time and can relish whenever you want.

First, I would explain how to prepare the powder and then we will move towards chakli making.

For Chakli Flour:

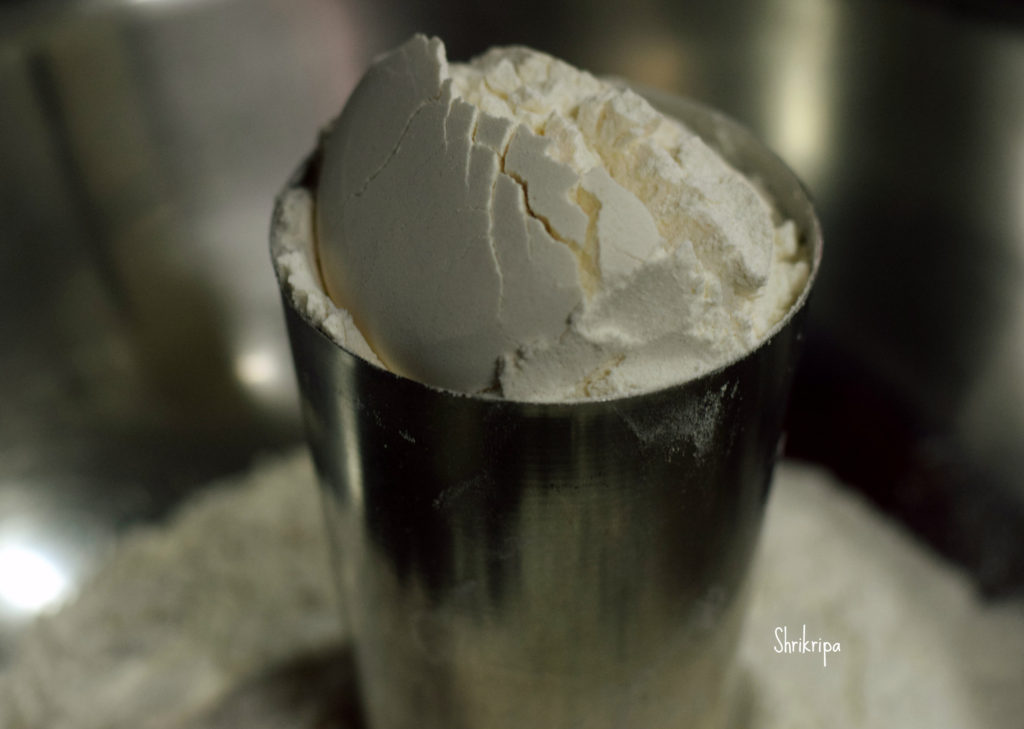
Use One glass for measurement.

Ingredients :

Sona masuri or Dosa rice – 4 cups

Urad dal – 1 cup

Method:

-Wash Rice and Urad dal separately, couple of times.

-Drain water, keep this in a strainer for some time.

-Then spread this on a clean towel and dry this for couple of hours by keeping it indoors.

-When it is dry, if you feel little cold while touching, it is ok.

– Keep one kadai, when it is hot, pour rice little by little and heat a little in batches. You should fry only for 2 minutes.

-Spread this on a towel or paper and cool.

-Next Dry roast washed and dried Urad dal until it is light brown and emits nice fragrance.

-Cool these two ingredients and give it to nearby flour mill and make powder.

-After powdering, mix everything nicely or sieve couple of times and keep it in a cool dry place. It is your Basic Chakli flour.

For Chakli:

Ingredients:

Chakli flour – 1 cup

Butter – 2 table spoons (small lemon sized ball)

Salt

Hing – ½ tea spoon

White sesame seeds – 1 tea spoon

Water – to bind the dough

Oil – For frying

Method:

-Take one wide bowl, put flour, salt, hing, sesame, butter and rub everything nicely.

-Pour water little by little and bind to make a dough. It should be soft and non-sticky.

-Set aside this dough for 5 to 10 minutes or until oil heats.

-Take oil in a kadai, when it is hot, start making chakli on a piece of paper or butter paper, by using chakli press.

-Drop these chaklis in hot oil and fry in a low flame.

-When it is done, remove and drain the excess oil and cool.

-Store these chaklis in an air tight container.

NOTE:

-When you drop the chaklis, initially you will hear bubbly noise and gradually noise becomes less and stops. That is the time, you should remove the ready, fried chaklis.