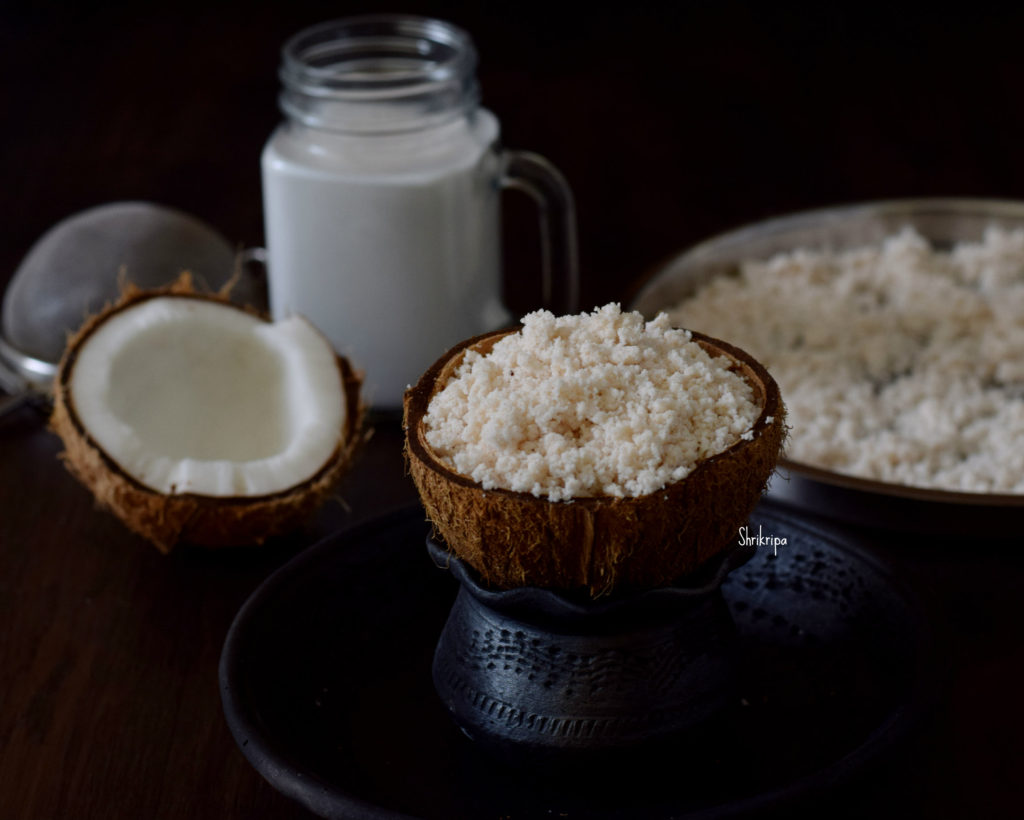
Kendathadya/ Baked Cucumber-Rice cake:

Every adult has a nostalgic dish from their childhood. I have a “secret” love for this dish because of fond memories of my maternal Ajji (grandmother), who used to pamper me to the core and prepare many such dishes by using the fresh produce that she grew in her kitchen garden.

Kendathadya is a traditional recipe of our Coastal Karnataka region, a special baked dish made by putting “Kenda” (hot burning firewood) on top and at the bottom of the earthen pot or thick metal vessel. Creating an oven affects burning firewood at the top and bottom of the closed vessel containing the batter.

Here, Cucumber used is our heirloom (local) variety, known as Mullu southe, which is light in colour, watery, and flavourful. Soaked rice is mixed with grated Cucumber, jaggery syrup, and fresh coconut to make a flavorful cake with homemade ghee. 

In modern life, we don’t have access to traditional firewood chulha. So, I make this age-old recipe in my OTG and satisfy my craving year after year and relive my childhood while having it.

Ingredient:

Raw Rice/Dosa rice – 1 cup

Cooked rice – 1 serving spoon. ( Red boiled rice or white rice)

Well grown Cucumber – 2 cups (grated)

Coconut – ½ cup (fresh, grated)

Jaggery – ¾ cup (grated)

Cardamom powder – 1 tsp

Ghee –2 to 3 tbl spoons

Salt – as needed

Eno or Cooking soda – 1 tsp

Method:

-Wash and soak the rice for 3 to 4 hours.

-Make jaggery syrup by adding ¼ cup of water to the grated jaggery, boil until its raw smell goes away, strain the liquid and keep it ready.

-Peel the outer skin, make halves, remove the seeded inner core. Grate it. Mix salt and allow the Cucumber to release its water.

-Drain the water from the soaked rice and discard.

-Collect water from grated Cucumber by sieving it in a strainer and using it for grinding as needed.
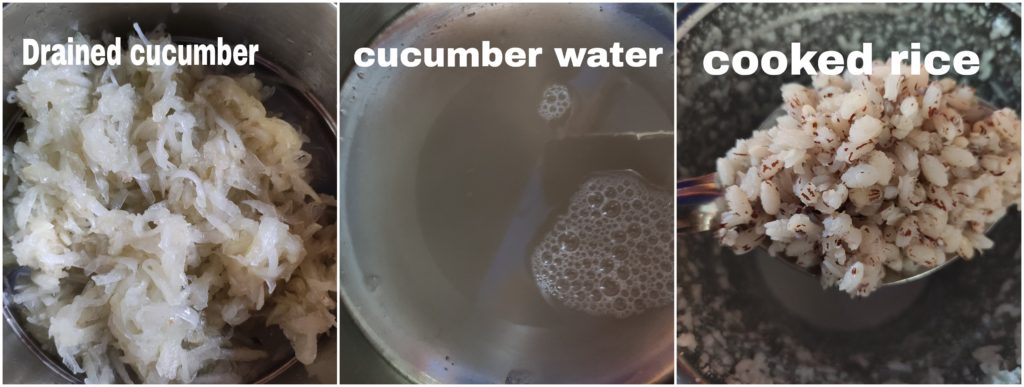
-Grind drained rice into a slightly coarse paste by adding collected water from the Cucumber, cooked rice, grated coconut, jaggery syrup.

-At the last round, add grated Cucumber and whip once and remove. Add ghee, Eno fruit salt and give a nice whip. The batter should not be too runny or too thick.
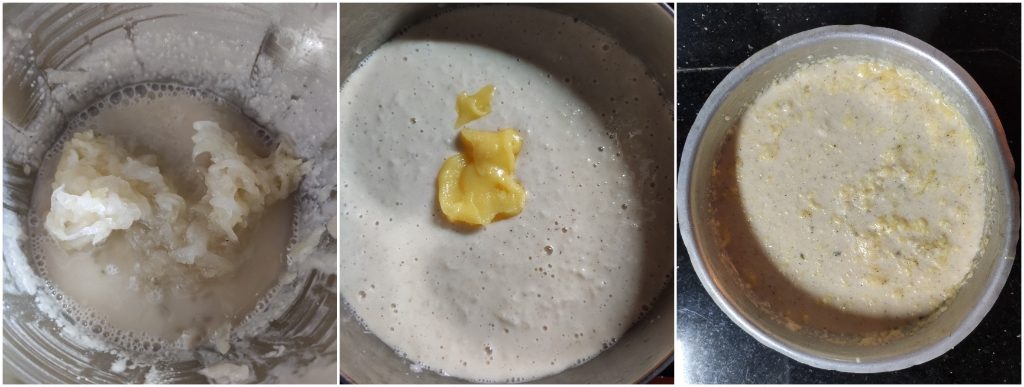
-Pour this into greased, lined baking tin and bake this in a pre-heated oven at 180C for 40 to 50 minutes, and a knife comes out clean when you insert it into the baking cake.

-Serve Hot with a drop of ghee.

Note:

– Addition of Eno fruit salt is optional. If you wish for a softer and lighter cake, add Eno or cooking soda.

-Without Eno, it turns out to be a firm and dense cake. I sometimes don’t add Eno and enjoy my dense cake to relive my memories of Ajji.

Rava idli with Oats/ Semolina idli with Oats:

I normally used to make plain Oats idli, earlier. It is our favourite breakfast item and I wanted to make a slight change while preparing and used my Rava idli making method with oats added in it and served with Potato Sagu as how I serve normal Rava idli. It tasted good and we started liking this method instead of making plain Rava idli. This is one more instant and handy recipe for me and works just fine even in kid’s lunch box as well. Addition of oats increases the nutritional value of the dish. So, whenever excess curd is there, this is one more recipe to indulge in that too without any grinding and prior planning.

I normally prepare the dry mixture the previous night and keep it ready to cut short my early morning job. It works very well. Dry mix consists of seasoning and roasting part.

How I make –

Ingredients:

Normal Rava / Semolina – 2 cups

Oats – 2 cups

Curds – 2 cups

Water – 3 cups

Eno fruit salt – 1 tea spoon

Salt

Coriander leaves – ¼ cup (chopped)

Seasoning:

Ghee or oil – 2 table spoons

Mustard – 1 tea spoon

Urad dal – 1tea spoon

Chana dal – 1 tea spoon

Hing – ¼ tea spoon

Cumin – 1 tea spoon

Cashew bits – 2 table spoons (optional)

Curry leaves – 2 springs (Shredded)

Method:

-Take one kadai, do seasoning part. Heat ghee, splutter mustard, then add urad and chana dal.

-When dals become red, add cashew, hing, cumin, curry leaves and fry for 1 minute.

-Add Rava and roast for a while (until it is grainy) and add oats and proceed the roasting process for some more time. (May be 2 minutes more).

– Add in chopped coriander and mix until it distributes evenly and wilts a little.

-Switch off the gas and leave this mixture to cool. (I usually prepare this much in the previous night and keep it ready)

-Next comes the batter preparation. Use room temperature mixture. Don’t use hot Rava mixture to make idli batter.

-Take one big bowl, pour in curd and water (here I normally take one cup of liquid to each cup of oats and 1 ½ cup of liquid to each cup of rawa) It is a very simple calculation 😊

-Add salt and Eno fruit salt (you can use cooking soda as well) beat a little to attain frothy texture.

-Add seasoned Rava and oats mixture to this and mix.

-Now comes the idli steaming part.

-Take one cooker, pour one cup of water at the base and heat.

-Rinse idli mould by using fresh water. (it is an alternate to greasing the mould)

-Pour ready batter to idli mould, keep it in a steamer and steam cook for 10 minutes.

-Remove, cool, de mould and serve with chutney or potato Sagu.


Mango Trifle:

Trifle, name itself brings a smile on my face. I started my non-Indian dessert preparation journey from this recipe and it has come a long long way. It has been almost 20 years now. When I was in my native, exposure to the outside world was minimal and our day to day preparations were all traditional and prepared with locally available ingredients or seasonal vegetables. After my wedding, my opportunities got widened as well as the encouragement. It was not an internet era. My sources were library books and my notebook and pen. I used to read about the different cuisines, uses and ingredients. In the meantime, I tried to implicate all of that knowledge in my cooking.

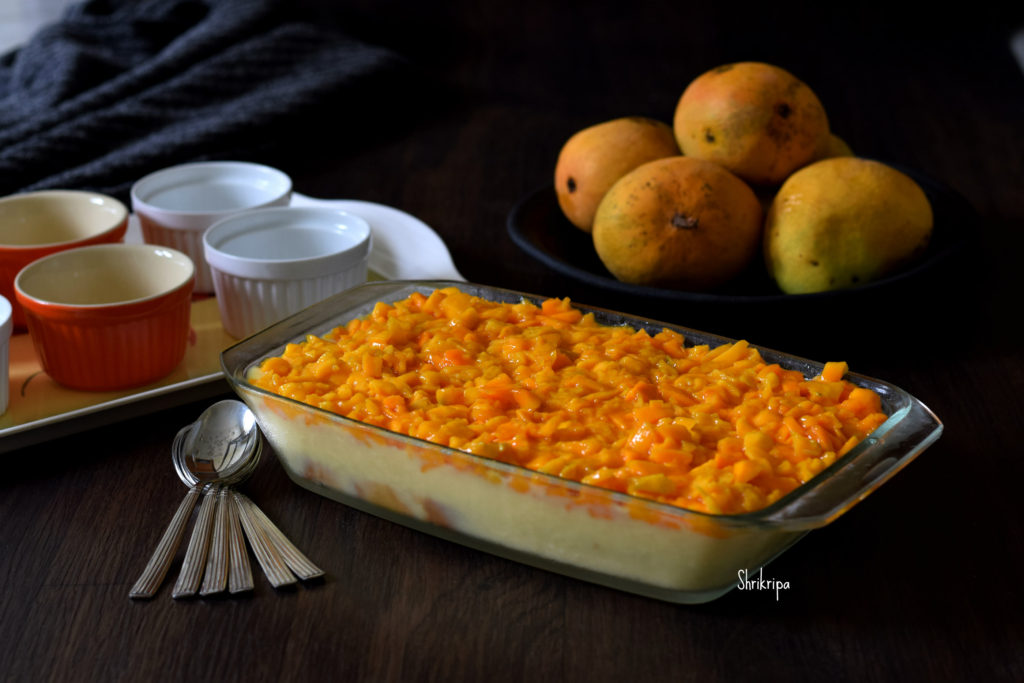
Trifle is an English dessert, which is cold and creamy, that contains 3 layers. Here I usually use Sponge cake at the base, then vanilla milk custard which is topped with any seasonal fruits. Mostly Mango or strawberries. Here sponge cake will be soaked with hot custard and will swell like a thick foam. It is cooled under refrigeration and while serving, last layer will be added. It is a party pleaser and a very good idea for a large gathering and usually is loved by all. Prepared this easy dessert to celebrate 6th Anniversary of our Foodie group in  Facebook.

Ingredients:

Sponge cake – ½ kg

Custard powder – 4 table spoons

Milk – 1 litre

Sugar – ½ to ¾ cup (I usually prefer light sweet)

Mango fruits – 3 to 4

Method:

-Take one flat, rectangular or square glass dish or baking dish.

-Place the first layer.  Slice the sponge cake and place flat at the bottom of the dish.

-Prepare custard first:

-Pour milk to the vessel, remove half cup of milk from this vessel, mix in custard powder and make a paste and keep it ready.

-When milk starts boiling, add the custard paste and boil for some more time (2 to 3 minutes)

-Mix in sugar and stir nicely.

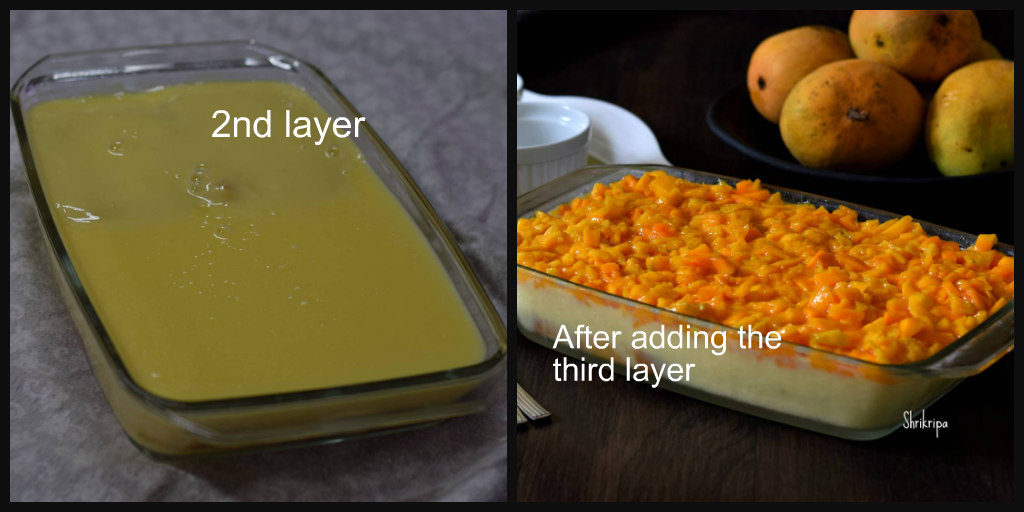
-Pour this hot custard over the first layer (over the sponge cake)

-Sometimes sponge cake pops up, while pouring the custard. It is ok. After some time, you will be able to press it back.

-Now cool it completely, cover with the cling wrap and keep it under refrigeration to cool.

-It takes almost 4 to 6 hours or overnight is also fine.

-Next is Fruit layer: Chop the fruits into small chunks. Remove all the pulps which is attached to the inner seed as well.

-Mix in couple of spoons of sugar and keep it in the fridge.

-Before serving, remove cling wrap and spread the fruit all over the custard.

-Take one serving spoon, dig it up to the bottom, take out all three layers, while serving and enjoy.

-If you are making this for a larger crowd, you can prepare this in advance and serve.

Simple Bele saaru /Rasam:

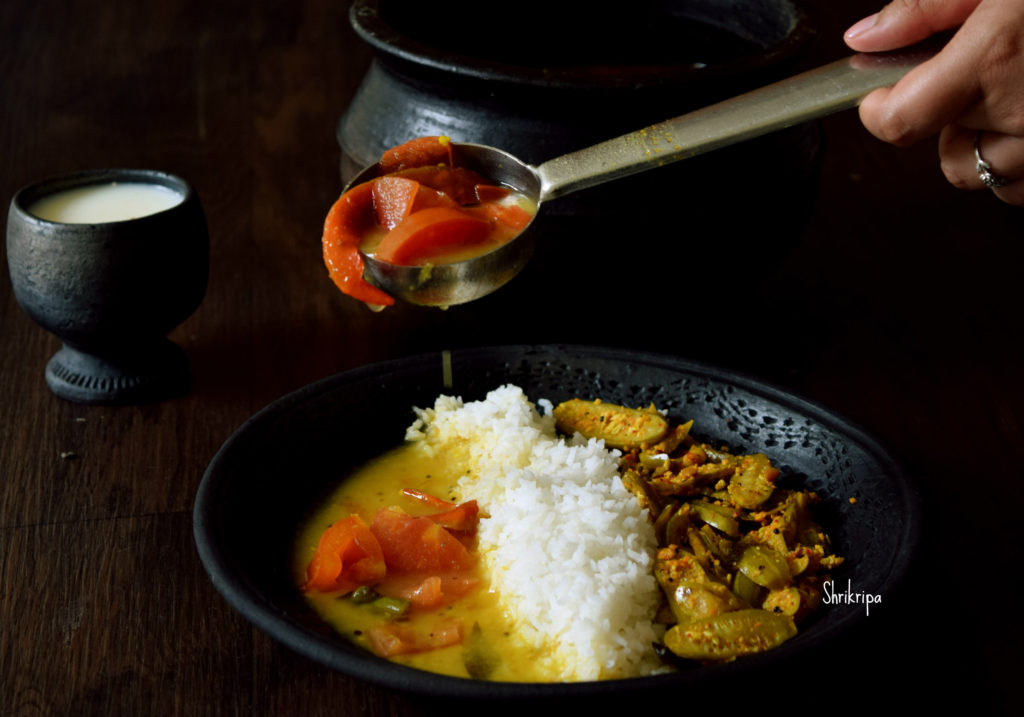
This Rasam is a very good option, if one has to cook no onion and no garlic meal. Usually it is an option for us during any festivity or “No mood to cook” meal. Olden days usage of onion or garlic was a taboo in our community and our grand moms used to prepare this kind of Rasam, which we call as saaru in local language. My hubby has fond memories attached to this Rasam, which he used to relish as a small child in his grand mom’s place and he usually asks for it and calls this Rasam as Doddajji saaru (grandma’s saaru) to signify. It is a plain Rasam, with ginger and hing flavour. In our region, we see this Rasam in some of the temple meals as well. If it is ginger flavoured one, no Rasam powder will be used and Rasam will be yellow in colour, due to the addition of turmeric and dhal.

DSC_0002_Fotor

Ingredients:

Toor dal – 1 cup

Tomatoes – 3 to 4

Green chillies – 4 to 6

Hing – peanut sized

Ginger – ½ inch (slivered)

Curry leaves – 2 springs

Salt

Jaggery – ½ to 1 tea spoon

Turmeric – ½ tea spoon

Tamarind – 1 tea spoon

Coriander leaves – little (optional)

Seasoning:

Coconut oil or ghee – 1 table spoon

Mustard – 1 tea spoon

Red chilli – 1

Curry leaves – 1 spring

Method:

-Wash and cook toor dal in a pressure cooker, mash a little and keep aside.

-Soak tamarind, chop tomatoes, green chillies and ginger.

Ribbet collage

-Take one Rasam pot (I normally use clay pot) and take 3 to 4 cups of water, tomato, green chillies, ginger, hing, curry leaves, turmeric, salt and jaggery.

-Cook this until everything cooks properly.

-Now add toor dal and mashed soaked tamarind.

-Boil this and adjust the consistency and check for salt, ginger and green chilli. If needed adjust by adding extra.

-When it is boiled, add chopped coriander leaves.

Ribbet collage 1

-Season with oil or ghee by spluttering mustard, red chilli and curry leaves.

-Serve with hot rice .


Fresh muskmelon seed and Watermelon smoothie:

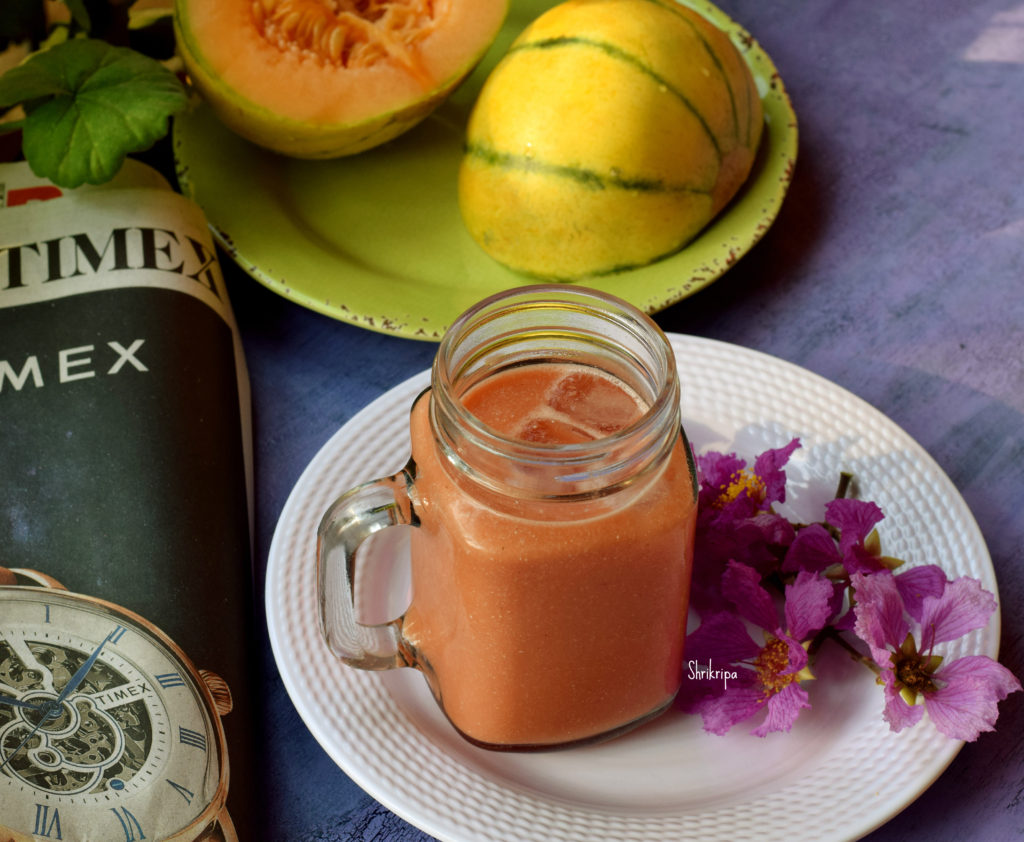
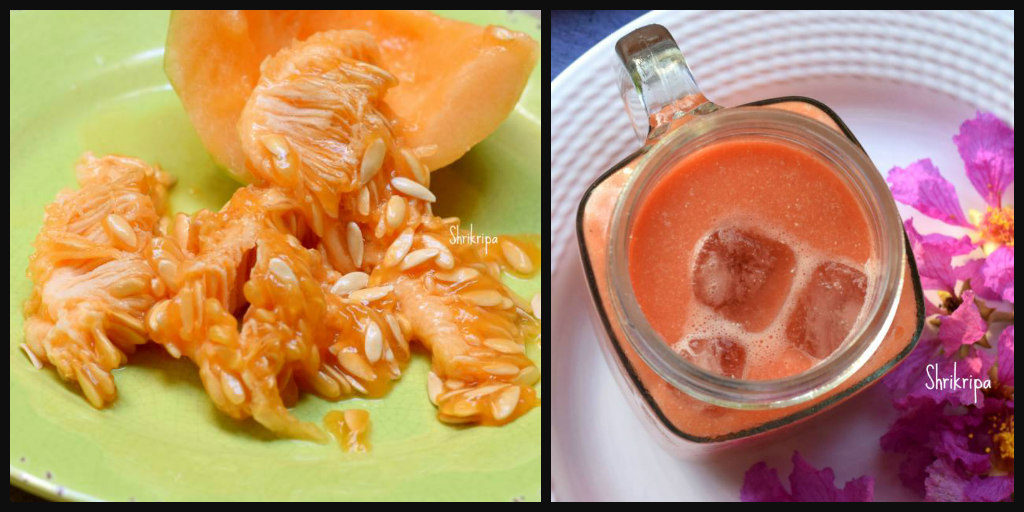
If you are calorie conscious or under restricted diet, this smoothie is especially for you. It is nutty flavoured, rich, creamy and at the same time, No sugar and Less in Calories. It is a “No guilt” smoothie for scorching heat.With Summer at its peak, we are one happy family who consumes lots of musk melon and water melon on every day basis. I usually feel very bad to discard power packed melon seeds into dustbin.

Muskmelon has lot to offer, fruit itself is fibre rich, vitamin rich and seeds which you usually throw it away is even more nutritious. Seeds are high in fibre, plant-based protein, minerals, calcium and Omega-3 and when you add this to prepare smoothies, it gives very smooth, creamy texture without adding any high calorie substance. It is very ideal for diabetic, weight loss or even for children.

Here I have added inner core (flesh and seed part) of one musk melon fruit to give thick texture as well as nutty taste and water melon chunks to give sweetish taste.

DSC_0049_Fotor

Ingredients:

Muskmelon inner core – from one muskmelon

Watermelon – one cup

Sea salt – ¼ tea spoon

Pepper powder – ¼ tea spoon

Method:

-Peel outer skin from one muskmelon, collect inner core with seed and proceed.

Ribbet collage

-I have not used fruit part. It can be consumed as you wish.

-Take water melon chunks.

-Take your juicer jar, put inner core of musk melon, water melon chunks, sea salt, pepper powder and churn.

– Sieve this liquid and discard the roughage and serve smoothie by adding a couple of ice cubes to beat the heat.


Bell fruit –carrot and Bottle gourd juice:

Star apple, bell fruit, Jambi, water apple, what not? So many names for this tropical fruit. This abundantly grows in a hot climate and is loved by all.

I had mixed this tropical fruit with grated carrots and bottle gourd to make an early morning dose of nutrients.

juice_Fotor

Ingredient:

Bell fruit – 4 to 5

Bottle gourd – ¼ cup (grated)

Carrot – 1 (Grated)

Ginger powder – ½ tsp.

Water – 1 cup

Salt – ¼ tsp.

Any Sweetener – (if u need) I am using very little sugar free natura.

Method:

-Clean and slice the bell fruit.

-Blend bell fruit, grated carrot and bottle gourd, water, ginger powder, and salt. If needed, add any form of sugar and churn nicely.

-Sieve this mixture and collect juice. Your nutrition rich, power packed juice is ready, to kick start your day.


Mug Pasta or One Bowl Pasta:

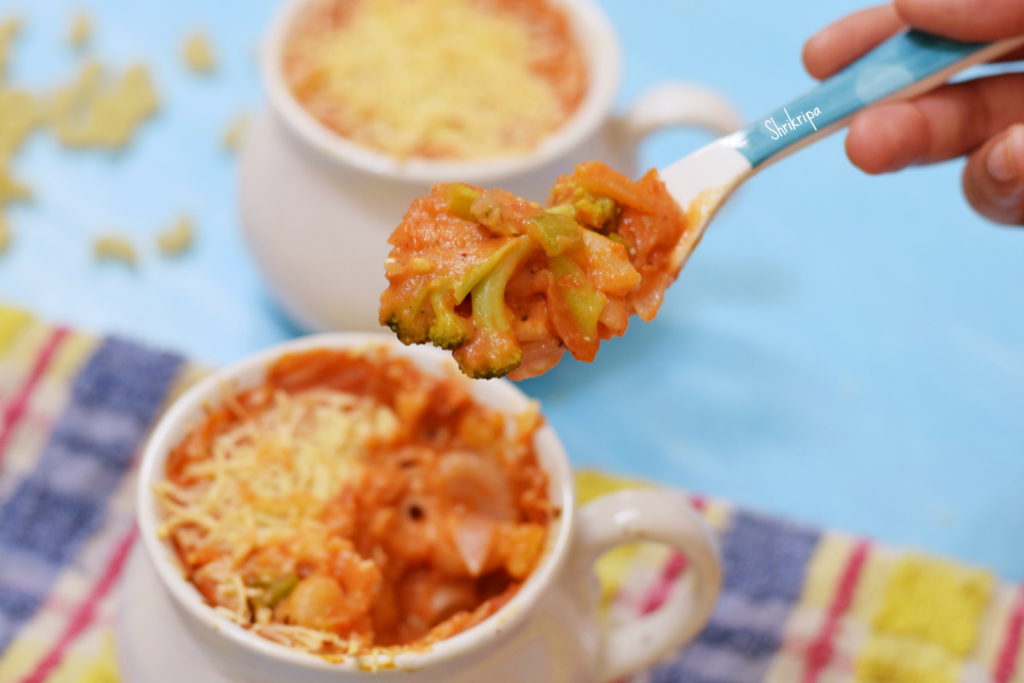
When my daughter had a holiday in between her exams, she has demanded for this treat for an afternoon lunch. She was alone on that day and I prepared it only for her and she was happy with the result. Today, I made it once again for my twins and I wanted to share the recipe with all my readers.

If you have seen my earlier posts of pastas I normally add any flavours to the white sauce. One of my daughters doesn’t like the bland taste, and here I thought of using tomato to give a little tangy taste.

I have used cooked elbow macaroni pasta. You are free to use any kind of pastas.

My daughter wanted Broccoli, capsicum and onion as veggie filling.

Then comes, grated cheese. I have used mozzarella cheese.

Here I am going to give for 2 big cups (meal for 2 kids)

DSC_4781_Fotor

Ingredients:

Macaroon – 1 cup

Broccoli – ½ cup

Capsicum – 1

Onion – 1

Olive oil or butter – 2 tsp

Tomato – 2

Whole wheat flour – 2 tea spoons

Milk – ½ cup

Seasonings – of your choice

Garlic salt – as needed

Mozzarella cheese – as needed

Method:

-At first, cook tomato in a sauce pan by adding half a cup of water. Remove and cool.

Ribbet collage

-In the same saucepan, blanch broccoli in boiling water and drain. It will help to remove any pesticide traces.

-In the same sauce pan, add required amount of water, little oil, salt and boil. Add pasta and cook into al Dante. Drain and keep aside.

-Chop onion, capsicum.

-Take one tawa, add 1 tea spoon of butter, toss all the three veggies (onion, broccoli and capsicum) by adding garlic salt, pizza seasoning, red chilli flakes or any other seasoning of your choice.

-Now tossed vegetable is ready and kept aside.

-Now we will make a pasta sauce.

-Fry whole wheat flour with butter or olive oil.

Ribbet collage 2

-Take one blender, mix fried whole wheat, milk and cooked tomato with water in which it has cooked.

-Churn and make a paste.

-Cook this paste in a sauce pan by adding garlic salt, any seasoning. I have added crushed rosemary, jalapeno pepper and garlic salt seasoning.

-When it starts boiling and becomes shiny and thick, switch off the gas.

-Now comes the assembling part.

Ribbet collage 3

-Take 2 Big ceramic mugs, if it is not available, use any baking dish.

-At first, pour couple of spoons of the prepared pasta sauce. Add grated cheese according to your wish.

-Add half of cooked pasta as a layer. Then half of veggie mix. Over to this, pour half the quantity of pasta sauce.

Ribbet collage 4

-Once again repeat the action. Empty all the remaining pasta, then veggies, pasta sauce.

Ribbet collage 5

-It will reach till the rim. Take one thick kitchen towel and place the mug and tap a little.

-All the sauce will settle,  sprinkle grated cheese on top.

Ribbet collage 6

-Bake these ready mugs in a pre-heated oven at 180C for 10 to 15 minutes or until cheese melts or becomes light brown.

-Serve with Love 😊


How to make Coconut Milk and Flour at Home:

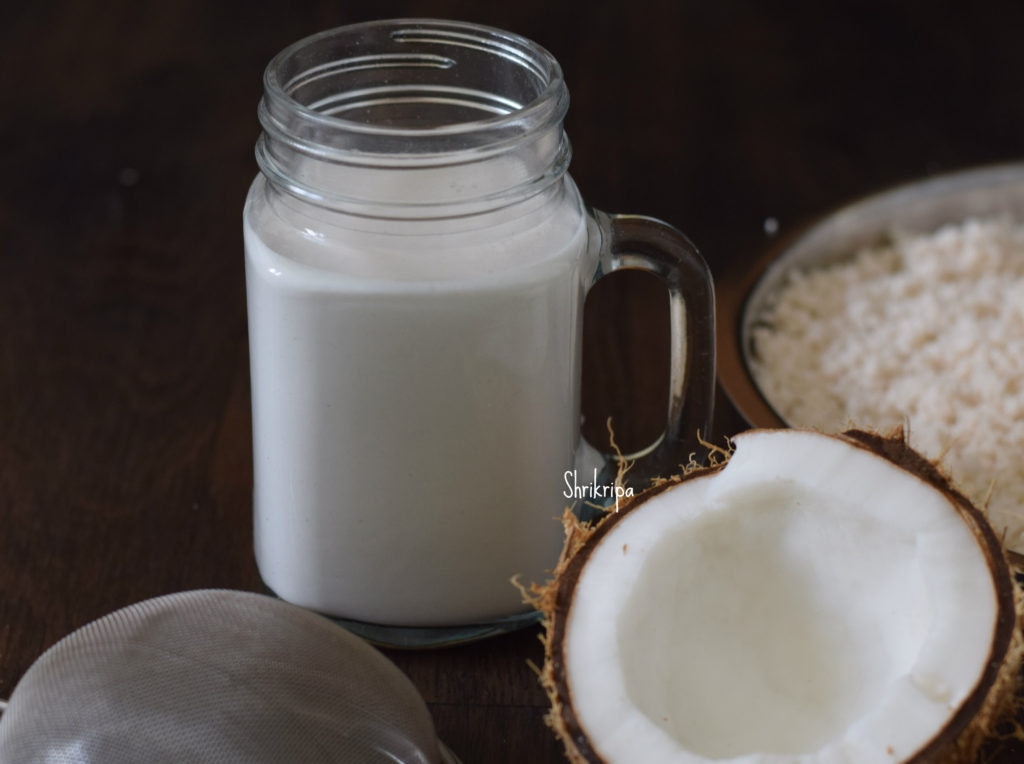
If you are a person, who extracts coconut milk for kheer/ payasam like me, it is best suited for you.

Coconut flour is rich in fibre, low in calorie as well as carbohydrate, gluten free and very popular in flour less or grain free baking.

From past two years I am experimenting with various home made healthy flours and last week when I extracted milk from couple of fresh coconuts, I wanted to try this and proceeded.

Method:

First, we will see the Procedure for Coconut Milk Extraction:

DSC_4524_Fotor

Ingredients:

Fresh coconut– 1 or 2

Water – 3 cups

Strainer – to extract the milk.

Procedure:

-Grate the coconut and collect the gratings. (If you are using some frozen fresh gratings, you can thaw and proceed).

-Next is a coconut milk extraction:

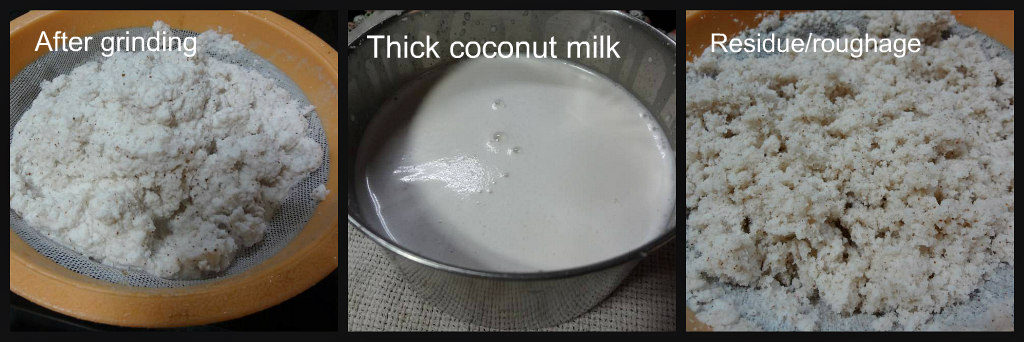
-Take fresh gratings, put one cup of water and grind into smooth paste and extract milk through sieve. This milk is a thick milk.

Ribbet collage 2

-Now once again take roughage of the coconut, put one more cup of water and grind, sieve the paste and it is our second extraction of milk.

-Repeat the process and take out a third extraction as well and Collect the roughage and it is the Raw material what we need to make coconut flour.


Now we will see how to make coconut Flour:

DSC_4523_Fotor

Now you will know, what is coconut flour?

It is nothing but dried form of this roughage that we have, after the extraction of coconut milk.

Take a dry towel, spread this roughage and air dry in a shaded place for a couple of days. That is it.

DSC_4553_Fotor

Your coconut flour is ready to use. When it has dried, it will be very dry and airy. It will appear like small beads.


Neeru mavinakai Gojju/ Brined mango curd curry:

Neeru Mavinakai” is what we call brined mango, which is basically a firm fully grown, matured but un-ripened mango which is preserved in salt water. We usually relish this in the rainy season or in the off season by preparing some of our traditional dishes. I have shared how to preserve mangoes in my earlier post.  Today I am going to share one of our favourite simple curd curry, which we used to relish even in our childhood days. It is a simple curd curry, seasoned with curd chillies (known as majige menasu), curry leaves and garnished with chopped onions to give the extra zing.

DSC_4350_Fotor

Ingredients:

Preserved raw mangoes – 2

Curd – 1 cup

Coconut milk – 2 table spoons

Green chilli – 1 (chopped)

Onion – 1 (chopped)

For Seasoning;

Coconut oil – 1 table spoon

Mustard – 1 tea spoon

Curd chillies – 1 to 2 (chopped)

Urad dal – 1 tea spoon

Hing – ¼ tea spoon

Curry leaves – 1 spring

Method:

-Remove required number of mangoes from the brine water.

-Immerse these mangoes in fresh water for some time to reduce its salt content.

-Sometimes brined mangoes will be soft or hard. If it is soft, mash it and use.

Ribbet collage

-If it is very hard, cook for a couple of whistles in a cooker by adding little water and try to mash or grate.

-What I had was very hard, and I used it by grating.

-After this is done, mix in curd and coconut milk.

-If you don’t have coconut milk, you can use maggi or some other brand of coconut milk powder as well. (addition of coconut milk will reduce the tartness)

-Mix in chopped onion, green chilli.

-Do seasoning, heat coconut oil, put in mustard. When mustard starts to splutter, add in urad dal, Hing, chopped curd chillies and fry until chillies turns out dark brown.

– Add curry leaves to this hot mixture and add the seasoning over Gojju.

-Traditionally we enjoy this Gojju either with Boiled rice ganji (gruel) or with curd rice as an accompaniment.


Coloured Cucumber Seeds Rasam:

Coloured or Mangalore cucumber has fleshy interior centre part, which has jelly like watery fleshy part with edible seeds. Which are rich minerals and rich in nutrition. Traditionally we call this Rasam as Sauthe kai beeja da saaru. Literal translation of this is, sauthe kai beeja means cucumber seed, saaru is Rasam, which is watery in texture and consumed as an appetizer or with hot rice during summer season to maintain our body temperature.

Before using the core, check the fleshy part for bitterness. If it has bitterness, discard and don’t use in cooking. If you find core part to be flavourful or without bitterness, go ahead and use it in your cooking to enrich your body, like our elders did.

DSC03506_Fotor

How to make this traditional goodness –

Ingredients:

Fleshy seeded part – of one coloured cucumber

Coriander seeds – 1 table spoon

Cumin seeds – 1 tea spoon

Hing – peanut size

Fenugreek seeds – ¼ tea spoon

Red chillies – 4 t0 5

Turmeric – ½ tea spoon

Coconut – ½ cup (grated)

Tamarind – ½ to 1 tea spoon

Coconut oil – 1 tea spoon

Salt – as needed

Jaggery – ½ tea spoon (optional)

For Seasoning:

Coconut oil – 1 tea spoon

Mustard – 1 tea spoon

Red chilli – 1

Curry leaves – 1 spring

Method:

-Collect seed coated flesh part of one coloured cucumber.

-Cook this in a small cooker for one whistle (cooking will help in extracting the pulp) and cool.

Ribbet collage 1

-Grind cooked pulp by adding one cup of water and tamarind and collect the liquid by sieving.

-Grind the roughage one more time, by adding one more cup of water and sieve once more.

Ribbet collage 2

-Discard the remaining roughage if any.

-Now prepare masala by heating oil. Add fenugreek at first.

-When it becomes light brown, add coriander, cumin, hing, red chillies and fry until fenugreek becomes dark and coriander becomes light brown.

-Add coconut, turmeric and fry for two minutes or until you get nice aroma.

-Cool this roasted masala and grind into smooth paste by adding sufficient water.

-Add the masala to extracted cucumber seed water.

-Adjust the consistency, add salt, jaggery and boil the Rasam.

-Add seasoning, heat oil, add mustard, red chilli.

-When mustard starts spluttering, add curry leaves and add the seasoning to boiled Rasam and close the lid.

-Serve this as an appetiser or with hot rice with a couple of papads.